Веб-серверы Nginx и Apache мало похожи друг на друга, и их отличия касаются не только особенностей подключения пользователей, но и обработки URL на сервере. Очень часто новые пользователи Nginx получают ошибку 404 для URL, которые, по сути, должны были бы работать.
В этой статье рассмотрим, почему возникает ошибка «404 not found Nginx», а также способы её устранения и отладки.Мы не будем разбираться с ситуацией, когда файла действительно нет на сервере — это решение, не требующее пояснений. Мы рассмотрим проблему обработки location в Nginx.
Давайте сначала разберёмся, как обрабатываются URL в Nginx. Когда веб-сервер определил, к какому блоку server (сайту) нужно передать запрос пользователя, просматриваются все префиксные блоки location и выбирается тот, который подходит лучше всего. Например, рассмотрим стандартную конфигурацию для WordPress. Здесь префиксные location отмечены зелёным, а с регулярным выражением — оранжевым:
location / {
index index.html index.php;
}
location /favicon.ico {
access_log off;
}
location ~* \.(gif|jpg|png)$ {
expires 30d;
}
location ~ \.php$ {
fastcgi_pass localhost:9000;
fastcgi_param SCRIPT_FILENAME
$document_root$fastcgi_script_name;
include fastcgi_params;
}
Префиксные локейшены всегда начинаются с символа /. Регулярные же содержат символы регулярных выражений: ~ $ ^ * и так далее. Если пользователь запрашивает favicon.ico, то будет выбран второй location, так как он лучше всего соответствует запросу, при любом другом запросе будет выбран location /, так как он соответствует всем запросам, а других префиксных location у нас нет. Это просто, а дальше начинается магия. После того, как был найден нужный location, Nginx начинает проверять все регулярные выражения в порядке их следования в конфигурационном файле.
При первом же совпадении Nginx останавливает поиск и передаёт управление этому location. Или, если совпадений не было найдено, используется ранее обнаруженный префиксный location. Например, если запрос заканчивается на .php, то первый location будет проигнорирован, а управление передастся четвёртому (~ \.php$)
Таким образом, любое неверно составленное регулярное выражение в любой части конфигурационного файла может полностью всё сломать. Поэтому разработчики рекомендуют по минимум использовать регулярные выражения. Что касается вложенных location, то обрабатываются они так же как и основные, только уже после передачи управления в нужный location. Путём чтения конфигурационного файла понять, какой location вызывает 404 сложно, поэтому, чтобы исправить ошибку, нам понадобиться режим отладки Nginx.
Как включить режим отладки Nginx?
Сначала нам необходимо установить версию Nginx с поддержкой отладки. Чтобы проверить, поддерживает ли ваша текущая версия этот режим, наберите:
nginx -V
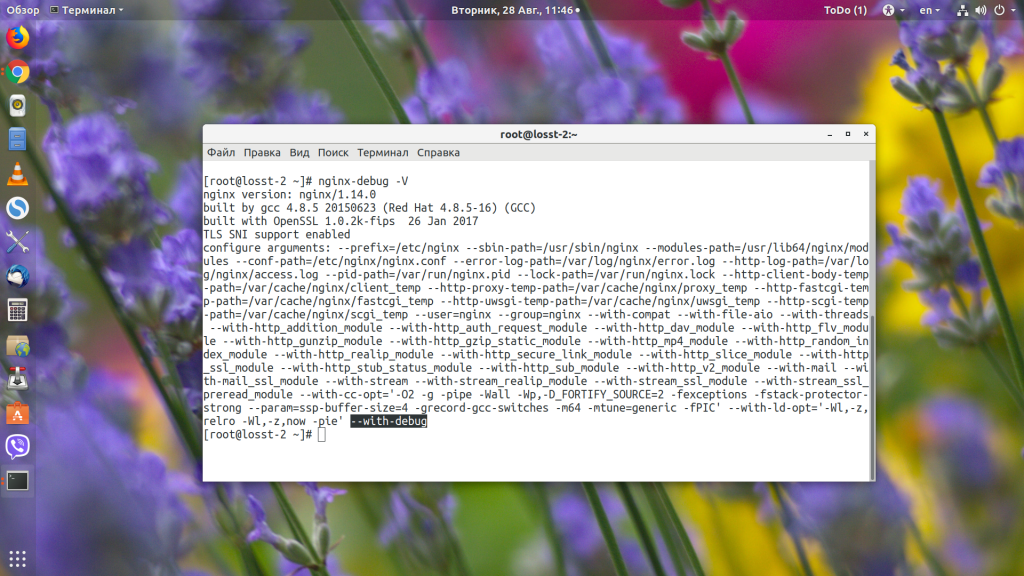
В выводе должна быть строчка «—with-debug». Если её нет, значит отладка не поддерживается, и надо установить версию с поддержкой. В CentOS такой пакет называется nginx-debug. Для его установки наберите:
sudo yum install nginx-debug
Теперь появился ещё один исполняемый файл, и он собран уже с поддержкой отладки:
nginx-debug -V
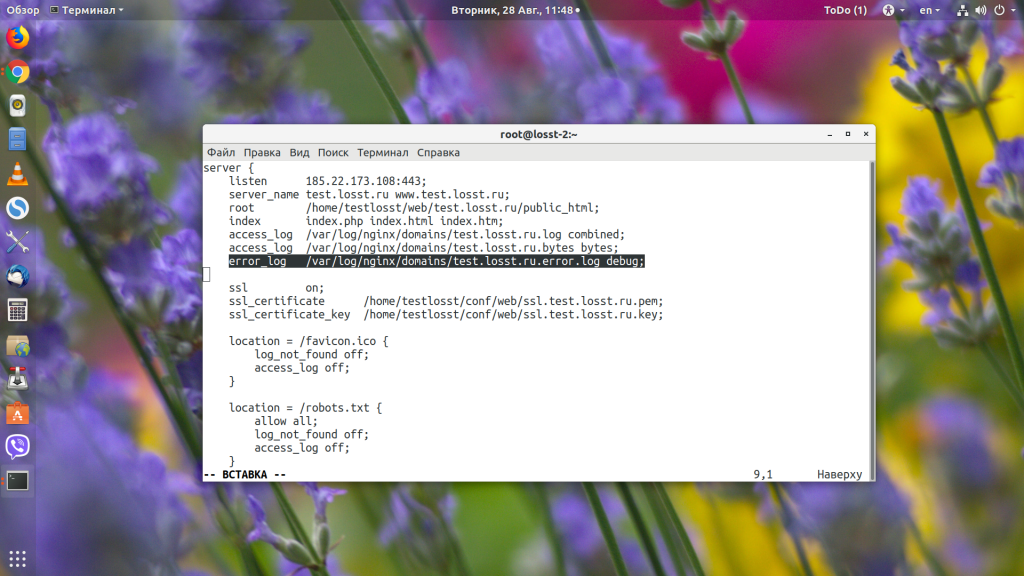
Откройте конфигурационный файл вашего сайта или глобальный конфигурационный файл, если вы не задавали настройки логов отдельно для каждого сайта, и в конце стоки error_log замените error на debug:
error_log /var/log/nginx/domains/test.losst.pro.error.log debug
Останавливаем обычную версию и запускаем версию с отладкой:
systemctl stop nginx
systemctl start nginx-debug
Как исправить «404 Not Found Nginx»?
1. Регулярные выражения
Как я уже сказал выше, самой частой проблемой, которая вызывает 404, являются регулярные выражения. Смотрим, что происходит в лог файле:
tail -f /var/log/nginx/domains/test.losst.pro.error.log
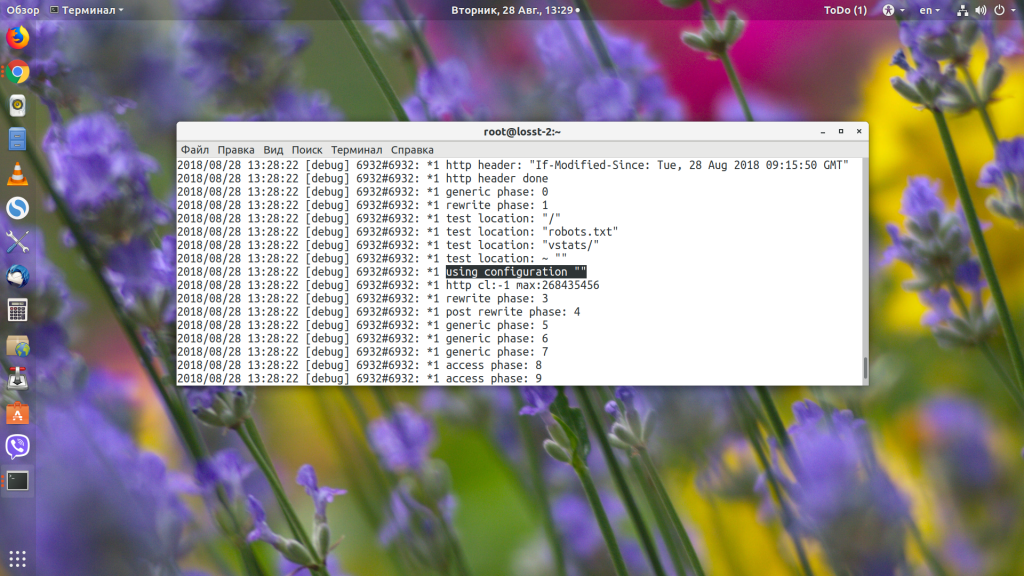
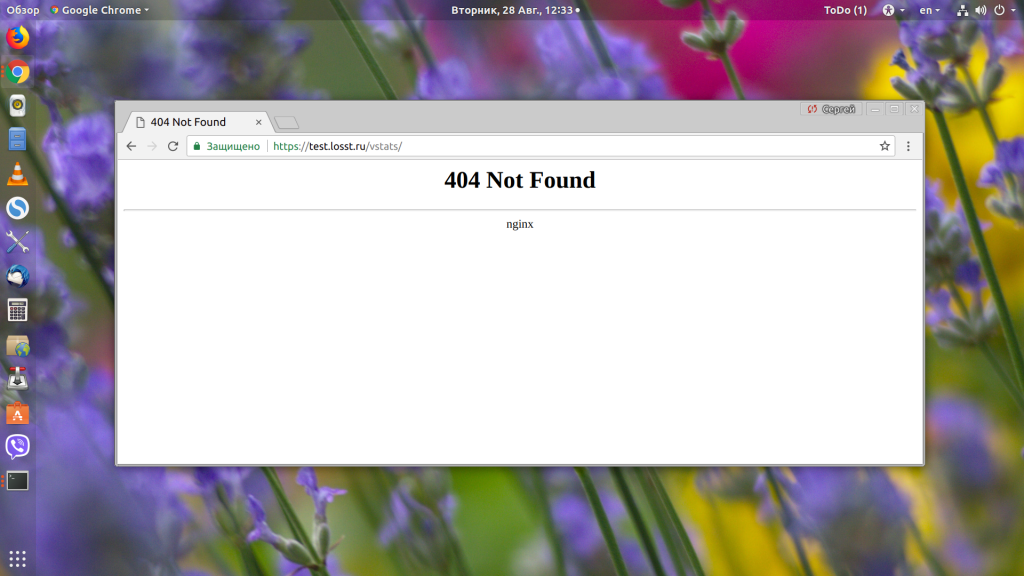
Видим, что серверу пришёл запрос /vstats. Дальше он проверяет location: /, /robots.txt, /vatsts/, /site-control/. Здесь уже можем понять, в чём проблема — промазали на один слеш. Дальше проверяются все регулярные выражения, и, так как в них ничего найдено не было, выбирается location /.
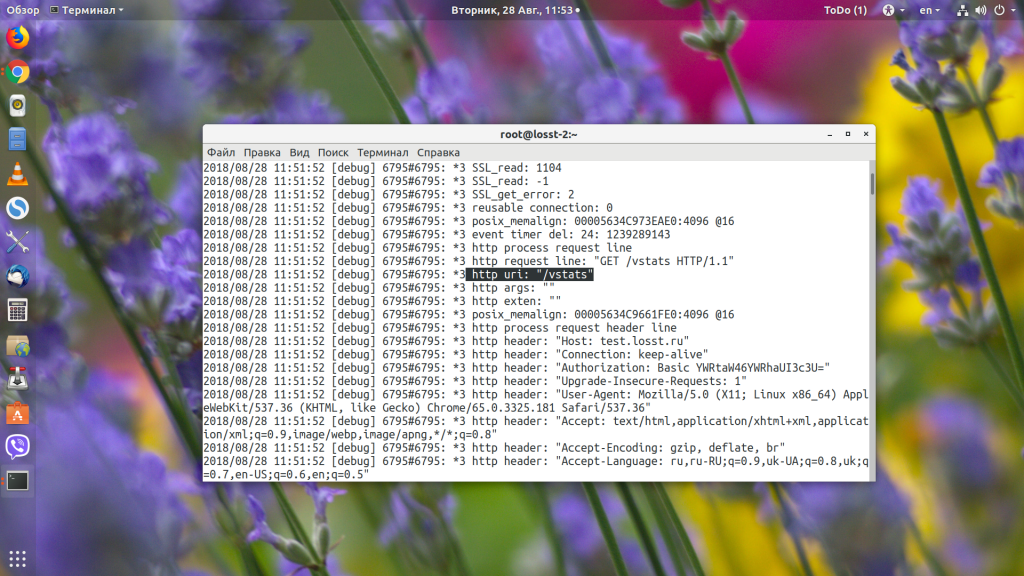
Далее директива try_files пытается найти файл /vstats, не находит и ищет index.php, который, в свою очередь, возвращает 404.
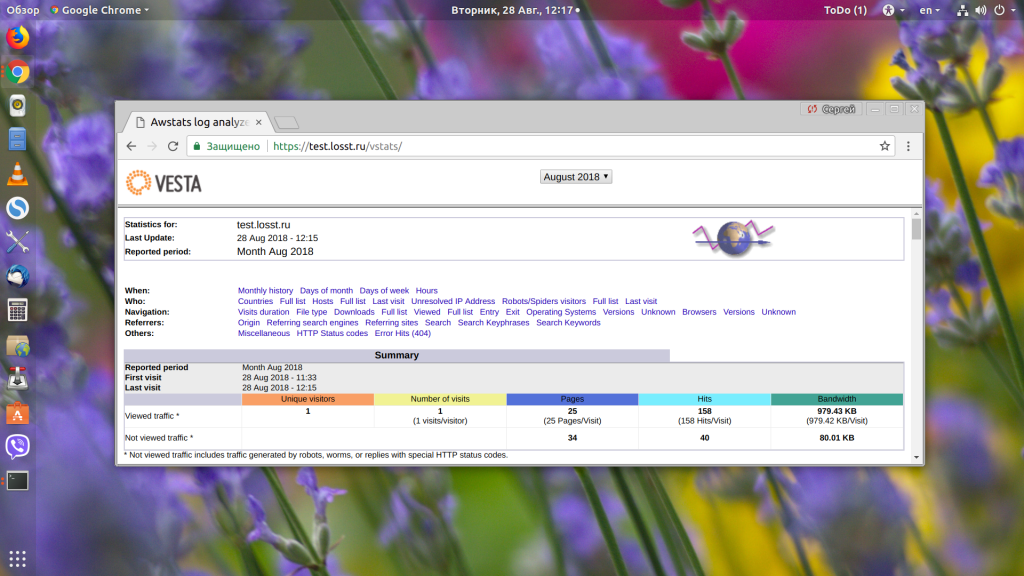
Если мы наберём, то что ожидает видеть Nginx — /vstats/, то откроется наша страница статистики.
Если мы добавим к конфигурационному файлу ещё один location с регулярным выражением, например:
location ~* {

try_files $uri $uri/ =404;

}
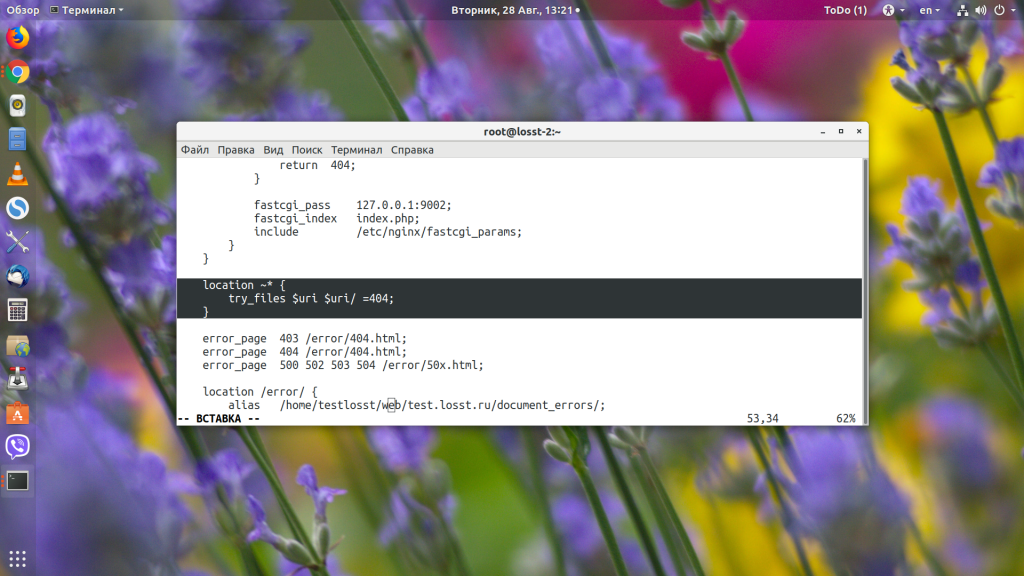
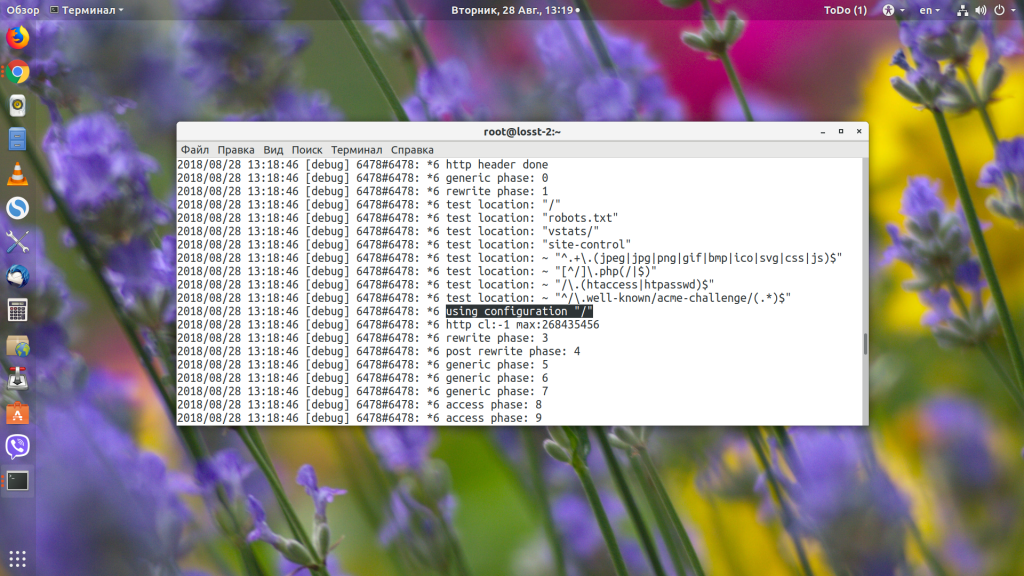
То абсолютно все запросы будут обрабатываться именно этим регулярным выражением и, естественно, что ничего работать не будет. Видим, что приходит запрос /vstats/:
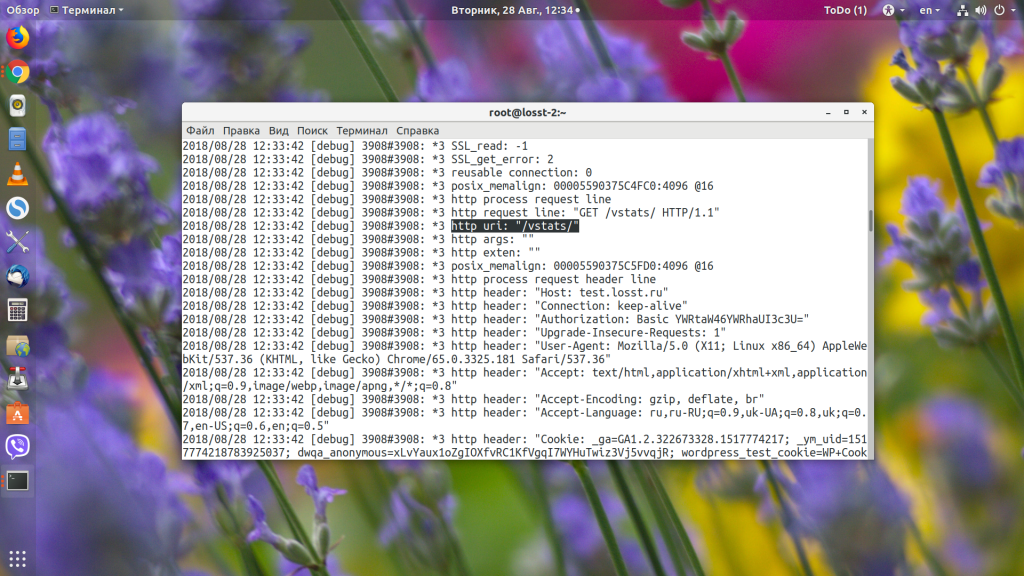
Он совпадает с префиксным location, но потом Nginx видит наше регулярное выражение и передаёт управление ему.
Поэтому будьте очень осторожны с регулярными выражениями, если они вам нужны, то размещайте их только внутри префиксных location, чтобы ограничить их область действия этим location, иначе может возникнуть ошибка 404 nginx.
2. Недостаточно памяти
Если php-скрипту не хватило оперативной памяти для выполнения, и его процесс был убит операционной системой, то Nginx тоже может вернуть ошибку 404. Такое поведение вы будете наблюдать, когда скрипт очень долго выполняется, а потом появляется «404 Not Found» или страница ошибки вашего движка. Обычно эта неисправность тоже видна в отладочном логе.
Решить такую проблему можно, освободив память на сервере, часто такое может возникать из-за утечек памяти в php, когда процессы php-fpm занимают почти всю память на сервере. Поэтому перезапуск php-fpm решает проблему:
systemctl restart php-fpm
Чтобы избежать этой проблемы в будущем, можно настроить автоматический перезапуск процессов после обработки определённого количества запросов. Например каждые 200 запросов:
vi /etc/php-fpm.d/www.conf
pm.max_requests = 200
3. Не найден index
Если вы запрашиваете URL вида /vstats/, но в настройках Nginx не указан файл index, который нужно использовать для этой ссылки, то у вас ничего не выйдет, и вы получите 404. Вы можете добавить директиву index в ваш location:
location / {

index index.php index.html index.htm;

}
Или сразу в server, в Nginx все location наследуют директивы, установленные в server.
4. Другие проблемы
Подобных проблем, вызывающих 404 в Nginx, может быть очень много, но все они решаемы, и всё, что нужно для их решения, есть в отладочном логе Nginx. Просто анализируйте лог и на основе этого вносите исправления.
Выводы
В этой статье мы рассмотрели основные причины, из-за которых может возникнуть ошибка 404 not found Nginx. Как видите, может быть много проблем, но всё достаточно просто решается. А с какими проблемами, вызывающими эту ошибку, вы сталкивались? Как их решали? Напишите в комментариях!
Обнаружили ошибку в тексте? Сообщите мне об этом. Выделите текст с ошибкой и нажмите Ctrl+Enter.

Статья распространяется под лицензией Creative Commons ShareAlike 4.0 при копировании материала ссылка на источник обязательна .
Nginx returns an HTTP
404 NOT FOUND error when it cannot find the requested resource. How should you handle Nginx
404 Not Found errors?
How to fix an HTTP 404 error in Nginx?
To be able to fix an HTTP 404 error in Nginx it is important to look at the Nginx error log:
[error] 31#31: *1 "/etc/nginx/html/index.html" is not found (2: No such file or directory), client: 172.17.0.1, server: , request: "GET / HTTP/1.1", host: "localhost:8080"
Check the path to the file. If it doesn’t exist, either move the files to that directory or
change your Nginx config to point to the right directory.
But if the file exists, it might be that one of the following issues causes a 404 error:
- Incorrect file permissions
- Filename case sensitivity
- Wrong root directory in nginx.conf
- No matching location directive in nginx.conf
- You use root instead of alias (or vice-versa)

Incorrect file permissions
Nginx returns a 404 error if it has no permission to read the requested file. If the files
are stored in
/etc/nginx/html/mywebsite, check that Nginx user (usually you name
this user www-data or nginx) has read
permissions.
ls -l /etc/nginx/html/mywebsiteTo check if the Nginx user can access one of your html files use:
su <nginx-user> -s /bin/bash -c 'if [ -r <path-to-html-file> ]; then echo "Readable"; else echo "Invalid permissions"; fi'
Depending on your situation, change ownership of the files or adjust the permissions such
that the Nginx user has permission to read the file.
Filename case sensitivity
An easy to overlook issue is case sensitivity. Double check your filenames if they have the
correct casing!
Wrong root directory in nginx.conf
A simple Nginx configuration file might look like this:
/etc/nginx/nginx.conf
events {
    worker_connections  1024;
}

http {
    index index.html index.htm;

    server {
        listen       80;

        root /usr/share/nginx/html; # Pay attention to this

        location / {
        }
    }
}
The root directive tells Nginx in which directory it must look for files to serve to the
client. Make sure the directory exists and contains the files you want to serve.
No matching location directive in nginx.conf
Location directives specify configuration that applies when a URL matches a specific
pattern. This is used for example to match a context path or file extension. Let’s look at
an nginx.conf:
/etc/nginx/nginx.conf
events {
    worker_connections  1024;
}

http {
    index    index.html index.htm;

    server {
        listen       80;

        location /context-path {
            root /usr/share/nginx/html;
        }
    }
}
Suppose there is a file index.html in /usr/share/nginx/html. If you now request the https://[server-url]/index.html, you will
get a 404 Not Found error.
To fix this you can either:
- add a
locationdirective or -
move the
rootdirective fromlocationto
the
serverdirective.
Use of root instead of alias (or vice-versa)
Suppose the files we want to serve are in /usr/share/nginx/html/. We
want to serve them at http:localhost:8080/context-path/.
In this case, you might want to use alias over root:
/etc/nginx/nginx.conf
events {
    worker_connections  1024;
}

http {
    index    index.html;

    server {
        listen       80;

        location /context-path {
            alias /usr/share/nginx/html/; # Don't use root here
        }
    }
}
The difference between alias and root is
that:
roottakes the full context-path (/context-path) and puts that after theroot. Nginx will look for files in:/usr/share/nginx/html/context-path/aliastakes the part after thelocation
directive and puts that after theroot. Nginx will look for files
in:/usr/share/nginx/html/
How to prevent 404 Not Found for Nginx?
Test your website with a broken link checker. A broken link test that sends you
notifications can help detect 404 Not Found errors early.
Test your website now with the free broken link test:
Как настроить Nginx так, чтобы посты и страницы при включённых ЧПУ открывались корректно.
В WordPress можно использовать человеко-понятные url (ЧПУ), чтобы из адреса страниц и людям, и поисковым системам сразу становилось понятно, о чём содержимое. Например, взглянув на tx8.ru/kak-podruzhit-tt-rss-i-fail2ban/, видно, что на странице информация про настройку fail2ban. ЧПУ включаются в админке сайта, раздел «Настройки постоянных ссылок».

Настройки постоянных ссылок в WordPress
Так вот, любой режим именования ссылок, кроме простого (простой — это не ЧПУ), в стандартной конфигурации веб-сервера Nginx не работает. Все страницы, кроме главной, будут выдавать ошибку с кодом 404.

Ошибка 404 — такой страницы нет
Решение простое. Нужно настроить Nginx так, чтобы все запросы к страницам обрабатывались через index.php. Найдите файл конфигурации сайта (скорее всего, это будет nginx.conf или какой-то другой *.conf в каталоге /etc/nginx) и поищите такой блок:
location / {
try_files $uri $uri/ =404;
}
Замените его на:
location / {
try_files $uri $uri/ /index.php?q=$uri$args;
}
Строки «try_files $uri $uri/ =404;» и/или блока «location / { }» может не быть (отсутствие второго маловероятно, без него сайт вообще не должен работать), тогда просто добавьте правильный вариант.
После перезапустите службу nginx, чтобы настройки вступили в силу, затем зайдите в админку сайта — Настройки — Постоянные ссылки и нажмите «Сохранить». Готово, страницы должны открываться корректно!
Совет: когда нужно быстро запустить сайт на WordPress с работающим ЧПУ, я использую такой шаблон:
server {
listen ip_сервера:80;
server_name доменное_имя_сайта;
root "путь_до_корневого_каталога_сайта";
index index.php;
location ~ \.php$ {
try_files $uri =404;
}
location / {
try_files $uri $uri/ /index.php?q=$uri$args;
}
}
Для работы на «постоянке» не рекомендую, так как не указано хранение логов и нет никаких настроек безопасности, но если намудрили с настройкой Nginx, можете начать с него.

When you’re running a website on an Nginx web server, encountering a 404 Not Found error can be frustrating. This error typically means that while the server itself is reachable, the specific page you’re trying to access isn’t. In this article, we’ll guide you through some troubleshooting steps to resolve this issue.
To troubleshoot a 404 Not Found error on an Nginx web server, you should first check the Nginx configuration to ensure that the server block is properly set up with the correct root directory and index file. Next, verify the file permissions and make sure they are readable by the Nginx user. If your website uses HTTPS, check the SSL configuration as well. Restart Nginx after making any changes. If the issue persists, check the Nginx error log for more specific information.
- Understanding the 404 Error
- Check the Nginx Configuration
- Verify Server Block Configuration
- Check File Permissions
- Check the SSL Configuration
- Restart Nginx
- Check the Nginx Error Log
- Conclusion
Understanding the 404 Error
The 404 Not Found error is an HTTP status code that means the server couldn’t find the requested resource. In the context of a web server like Nginx, this usually means that there’s no match for the URL you’re trying to access in the server’s configuration or the file doesn’t exist in the site’s root directory.
Check the Nginx Configuration
The first step in troubleshooting is to check your Nginx configuration. The configuration files for Nginx are typically located in the /etc/nginx/ directory.
Verify Server Block Configuration
The server block (also known as a virtual host) configurations are located in the /etc/nginx/sites-available/ directory. Each website hosted on your server should have its own configuration file here.
Here’s an example of what a server block might look like:
server {
 listen 80;
 server_name test.com www.test.com;
 root /var/www/test.com/html;
 index index.html index.htm;
}
In this example, listen 80; is telling Nginx to listen on port 80, which is the standard HTTP port. The server_name directive should be set to your website’s domain name. The root directive specifies the root directory of your website, where your index file is located. The index directive lists the names of files that Nginx should try to serve as the default page if a specific one isn’t requested.
Make sure that the root directive points to the correct directory and that an index file exists there.
Check File Permissions
Next, check the permissions of the files and directories of your website. They should be readable by the user that Nginx runs as, which is usually www-data.
You can check the current permissions with the ls -l command:
ls -l /var/www/test.com/htmlThe output will show the permissions, owner, group, and name of the files and directories in the specified directory. The permissions are displayed in the form rwxrwxrwx, which represents the permissions for the owner, group, and others, respectively. The r stands for read, w for write, and x for execute.
If the permissions are incorrect, you can change them with the chmod command, and you can change the owner with the chown command:
sudo chown -R www-data:www-data /var/www/test.com/html
sudo chmod -R 755 /var/www/test.com/html
In the chown command, -R means to apply the change recursively to the directory and its contents. www-data:www-data is the user and group that you’re changing the owner to.
In the chmod command, 755 sets the permissions to read, write, and execute for the owner, and read and execute for the group and others.
Check the SSL Configuration
If your website uses HTTPS, you also need to check the SSL configuration in the Nginx server block. It should look something like this:
server {
 listen 443 ssl;
 server_name test.com www.test.com;
 root /var/www/test.com/html;
 index index.html index.htm;

 ssl_certificate /etc/letsencrypt/live/test.com/fullchain.pem;
 ssl_certificate_key /etc/letsencrypt/live/test.com/privkey.pem;
}
The listen 443 ssl; directive tells Nginx to listen on port 443, which is the standard HTTPS port, and to enable SSL. The ssl_certificate and ssl_certificate_key directives specify the locations of the SSL certificate and private key files, respectively.
Make sure that the paths to the SSL certificate and private key files are correct and that the files are readable by the www-data user.
Restart Nginx
After making any changes to the Nginx configuration, you need to restart the service for the changes to take effect. You can do this with the following command:
sudo service nginx restartCheck the Nginx Error Log
If you’re still encountering the 404 error after following the above steps, the next place to look is the Nginx error log. By default, it’s located at /var/log/nginx/error.log.
You can view the most recent entries in the log with the tail command:
sudo tail /var/log/nginx/error.logThe error log can provide more specific information about what’s causing the 404 error.
Conclusion
Troubleshooting a 404 Not Found error on an Nginx web server involves checking the server block configuration, file permissions, and SSL configuration, and examining the Nginx error log. By following these steps, you should be able to identify and resolve the issue.
If you encounter a 404 Not Found error on your Nginx web server, you should first check your Nginx configuration. Verify the server block configuration to ensure that the root directory and index file are correctly specified. Also, check the file permissions to ensure that they are readable by the Nginx user (www-data). If your website uses HTTPS, make sure to check the SSL configuration as well. After making any changes to the configuration, restart Nginx for the changes to take effect. If the issue persists, check the Nginx error log for more specific information about the error.
The Nginx configuration files are typically located in the /etc/nginx/ directory. The server block configurations for each website hosted on your server can be found in the /etc/nginx/sites-available/ directory.
When you visit an Nginx-configured website, your browser sends a request to the web server. After that, your web server responds with the data having an HTTP header. HTTP status codes are included in that HTTP header to explain how the request is responded.
When your requests are handled successfully, the HTTP status code is not displayed on your browser. However, if anything goes wrong, your web browser will typically display a message with the HTTP status code to tell you the problem with the request. The error messages such as 504, 500, 503, 502, including the “Error 404 not found” message, are part of that process.
Essentially, the “404 error” indicates that your or your visitor’s web browser was connected successfully to the website server or the host. However, it was unable to locate the requested resource, such as filename or any specific URL.
For instance, If someone attempts to reach “yourwebsite.com/anypostname” and does not have any content linked with “anypostname“, in such a case, you will receive a 404 error on your browser as the resource requested does not exist. In other words, we can say that when a requested asset such as JavaScript, image, or CSS file is missing, your operational browser will generate a “404” error.
How to fix 404 error in Nginx
If you are getting a “404 Not Found” Nginx error and you have checked that the requested asset exists on your server, then your configuration file may be triggering the error. To fix the “404 Not Found”, open up your terminal by pressing “CTRL+ALT+T” and execute the below-given command for opening the Nginx configuration file:
$ sudo nano /etc/nginx/nginx.conf

Your Nginx configuration file will look like this:
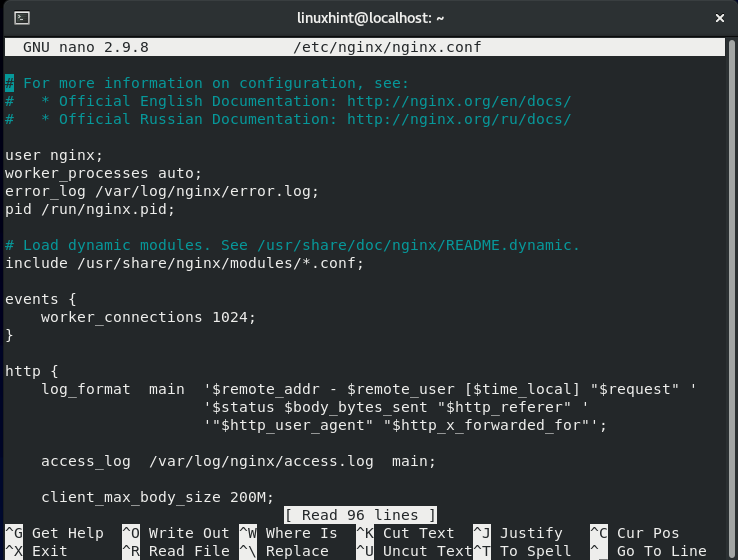
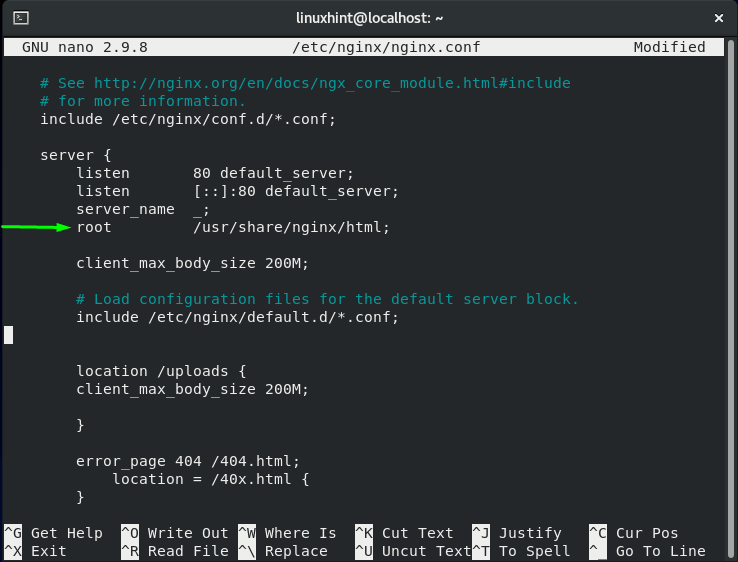
If the path added in the Nginx configuration file is incorrect, it will result in a “404 Not Found” Ngnix error. So, verify your path leading towards the asset directory:
root /usr/share/nginx/html;
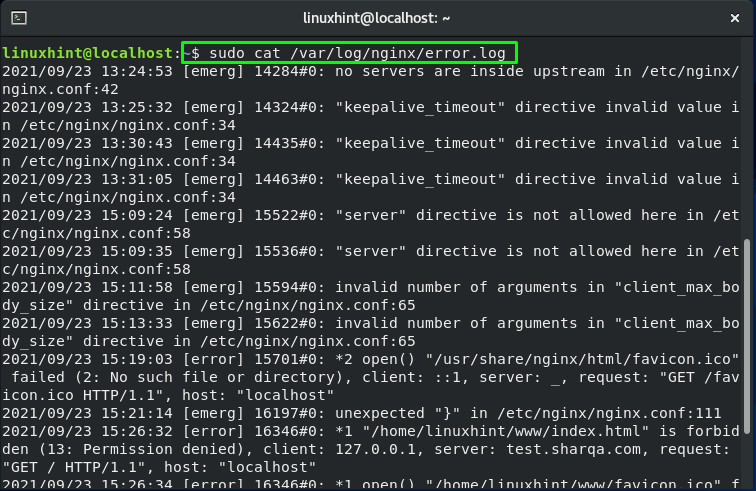
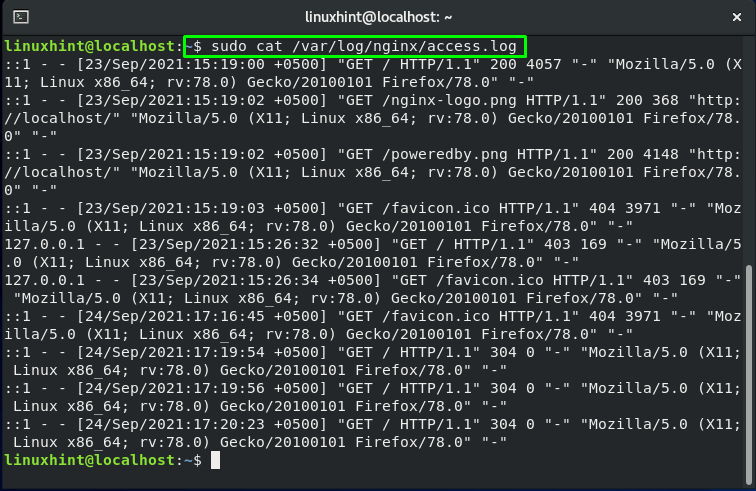
It will also be helpful to review your errors and access logs in Nginx. To do so, utilize the below-given “cat” command for extracting the content of the error_log present in the “/var/log/nginx/error.log” file:
$ sudo cat /var/log/nginx/error.log

To check the content of the access_log, write out this command in your terminal:
$ sudo cat /var/log/nginx/access.log
How to fix 404 Nginx error using online tools
The “404 Nginx error” is also linked with the external resources, and it occurs when those resources are removed or modified. That’s why it is crucial to run the 404 error checks frequently to ensure that your website links are not broken. A regular check-up and fixing the broken links will assist you in making sure that the user experience of your website visitor is at a stable level. The following are some of the tools that you can utilize for checking the “404 Not Found” errors:
W3C Check Link
In the W3C Link Checker online tool, you have to enter your website URL, and it will scan all of your web pages for 404 Not Found and other issues. When the scan is over, it will return all of the broken URLs along with other results:

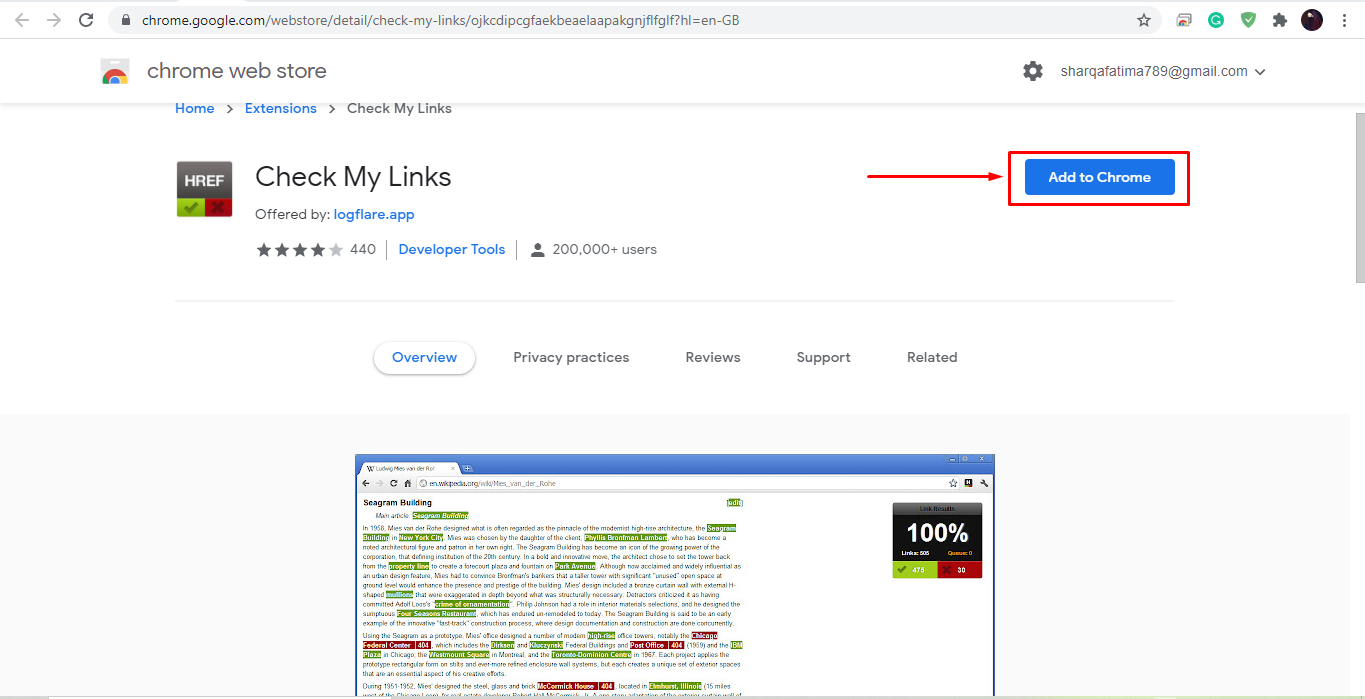
Check My Links
Check My Links is a basic Chrome plugin that permits you to check the links on the current web page. When this plugin is activated, the extension will determine if the links on the current page are valid or broken:
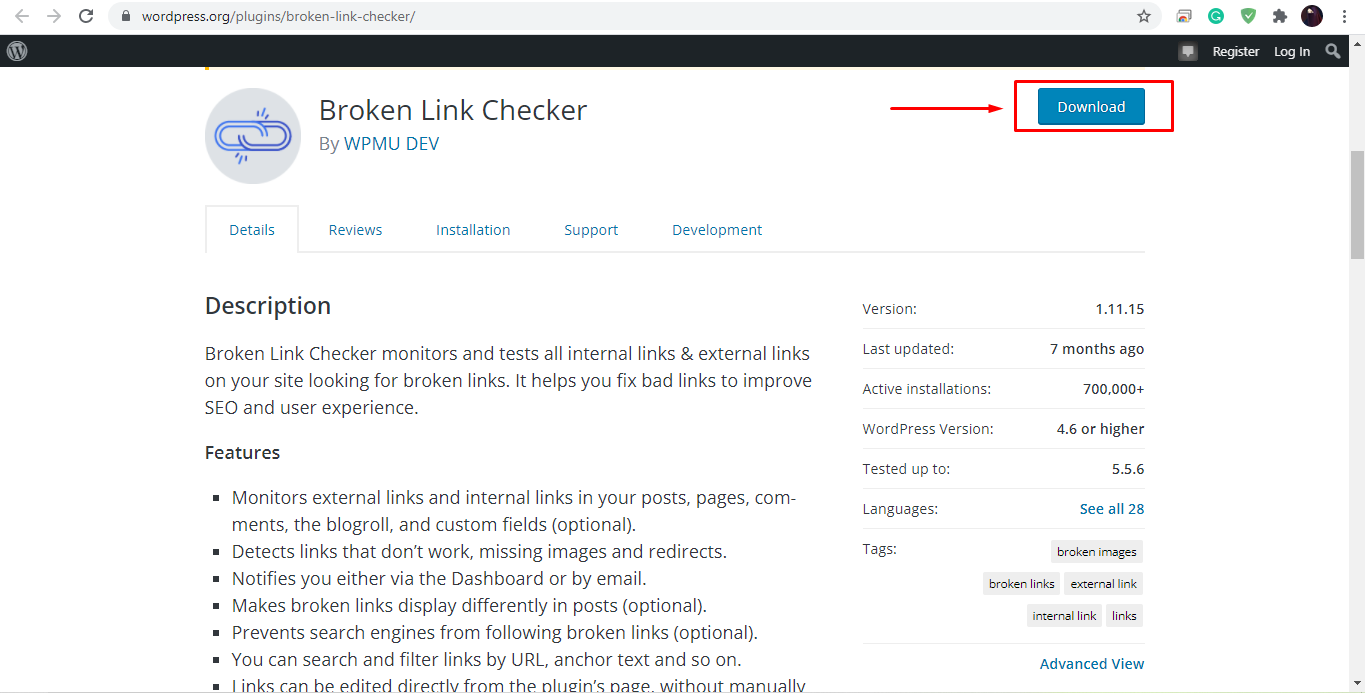
Broken Link Checker
Broken Link Checker is another useful plugin that offers various methods for checking the broken links of your website. A time period can be set that instructs this plugin to check for broken links every “X” hour. You can choose whether the plugin should send an email report comprising all of the broken links or the site portion which is successfully scanned:
If you face a “404 Not Found” Nginx error or want to ensure that your website links are not broken or monitor your site, then utilize the above methods to fix it.
Conclusion
The “404 Not Found Error” on the web page is an HTTP response status code that declares your requested resource was not found. It can be difficult for you to figure out the reason behind the “404 not Found Error“. In this post, we have explained what the “404 Not Found Error” is. We also provided you the methods to fix the “404 Not Found Error” by utilizing the Nginx configuration file and the other online tools such as Check My Links, W3C Check Link, and the Broken Link Checker.
About the author

I am a Linux enthusiast, I love to read Every Linux blog on the internet. I hold masters degree in computer science and am passionate about learning and teaching.