Overview[edit]
Joomla logging gives you the ability to log messages to files and to the screen (within the Joomla! Debug Console at the bottom of the web page) and the main Joomla class which underpins this is JLog. In the new naming convention this is the Log class within the namespace Joomla\CMS\Log\Log.
The logging can be controlled dynamically through the Joomla Global Configuration and by configuring the System – Debug plugin (which is shipped with Joomla). Overall these facilities allow you to:
- switch DEBUG logging on or off – so that ordinarily you don’t consume resources needlessly, but you have the logging information to assist troubleshooting when there are issues, for example on a live site which has your extension installed.
- route log messages to a specific log file for your own extension.
- view log messages in the Debug Console – you can select the group of users to which log messages should be displayed, so that on a live site developers can see the messages while other users are unaffected.
- filter Debug Console messages by priority (i.e. INFO, DEBUG, WARNING and so on) and by category. (You are free to define your own categories.)
In addition, the log messages can be translatable into different languages.
The main configuration options relating to logging are shown below.
Switching on debug and display of the Joomla Debug Console is controlled through the global configuration options.

Logging to the general log file is controlled via the Logging tab of the configuration of the Joomla System — Debug plugin. (In the administrator menu, click on Extensions / Plugins, find the System — Debug plugin. Click on it to edit its configurable options).

And the options within the Plugin tab control display on the Joomla Debug Console.

Basic File Logging[edit]
To log a message you use the JLog::add() function. For example:
JLog::add('my error message', JLog::ERROR, 'my-error-category');
Using the new class naming convention use instead:
use Joomla\CMS\Log\Log;
Log::add('my error message', Log::ERROR, 'my-error-category');
The parameters are
- A message string. You can use translation with these. (For example, JText::_(‘MY_EXTENSION_ERR_MSG’) You can also display the values of variables, provided you convert them into a string format. (For example, using __toString() if the type of the variable supports that.)
- A priority, which can be one of JLog::EMERGENCY, JLog::ALERT, JLog::CRITICAL, JLog::ERROR, JLog::WARNING, JLog::NOTICE, JLog::INFO, JLog::DEBUG (based on the standard syslog / RFC 5424 severity levels – see wikipedia article on syslog).
- A category, which is just a text string. You can define whatever categories you like, but it is best to define them to avoid possible clashes with those of other extensions.
It can be very helpful with troubleshooting problems if you include diagnostic debug messages in your extension. In this case, enclose your log message within a check for JDEBUG:
if (JDEBUG)
{
    JLog::add('my debug message', JLog::DEBUG, 'my-debug-category');
}
Basic Logging Sample Code[edit]
Below is the code for a simple Joomla module which you can install and run to demonstrate use of the logging functionality. If you are unsure about development and installing a Joomla module then following the tutorial at Creating a simple module will help.
In a folder mod_sample_log create the following 2 files:
mod_sample_log.xml
<?xml version="1.0" encoding="utf-8"?>
<extension type="module" version="3.1" client="site" method="upgrade">
    <name>Joomla Log demo</name>
    <version>1.0.1</version>
    <description>Code demonstrating use of Joomla Log class to log messages</description>
    <files>
        <filename module="mod_sample_log">mod_sample_log.php</filename>
    </files>
</extension>
mod_sample_log.php
<?php
defined('_JEXEC') or die('Restricted Access');

use Joomla\CMS\Log\Log;

Log::add('my error message', Log::ERROR, 'my-error-category');

JLog::add('my old error message', JLog::WARNING, 'my-old-error-category');

echo "Error message logged";
Zip up the mod_sample_log directory to create mod_sample_log.zip.
Within your Joomla administrator go to Install Extensions and via the Upload Package File tab select this zip file to install this sample log module.
Make this module visible by editing it (click on it within the Modules page) then:
- making its status Published
- selecting a position on the page for it to be shown
- on the menu assignment tab specify the pages it should appear on
Check the configuration of the settings shown at the top of this web page. In particular, ensure that the System – Debug plugin is enabled and that Log Almost Everything is set to Yes. Also note where the folder where your log files are stored.
Display your Joomla site and you should then see the sample log module appearing. In your log file folder you should find your error messages in the everything.php file.
Also switch on the debug console and confirm that you can see the error messages in its Log Messages section.
Logging to a Specific Log File[edit]
You can use JLog::addLogger() to set up logging to an additional log file, filtering the log messages to be sent there by priority (the ‘severity level’) and/or category. The parameters of JLog::addLogger() are:
- an array with configuration details – including the name of the log file.
- the severity levels to be logged in that file.
- an array of the categories to be logged in that file. (If parameter 4 is set to true, this array defines the categories which are NOT to be logged in the file.)
- (often omitted) a boolean specifying whether parameter 3 is an include list. (The default, P4 = false) or an exclude list (P4 = true.)
For example, if you have developed a com_helloworld extension you could use the following:
JLog::addLogger(
    array(
         // Sets file name
         'text_file' => 'com_helloworld.log.php'
    ),
    // Sets messages of all log levels to be sent to the file.
    JLog::ALL,
    // The log category/categories which should be recorded in this file.
    // In this case, it's just the one category from our extension.
    // We still need to put it inside an array.
    array('com_helloworld')
);
Then when you log a message, specify the category as com_helloworld, as in the example below
JLog::add(JText::_('COM_HELLOWORLD_ERROR_MESSAGE_123'), JLog::ERROR, 'com_helloworld');
This will result in your log message being written to com_helloworld.log.php. If the System – Debug plugin settings have «Log Almost Everything» set to Yes, the message will appear in the common everything.php log file as well.
Note: You may wish to combine this with the Display error messages and notices section to display visible error notifications to users.
You can also add an additional logger to capture only critical and emergency log notifications:
JLog::addLogger(
    array(
         // Sets file name.
         'text_file' => 'com_helloworld.critical_emergency.php'
    ),
    // Sets critical and emergency log level messages to be sent to the file.
    JLog::CRITICAL + JLog::EMERGENCY,
    // The log category which should be recorded in this file.
    array('com_helloworld')
);
You can also exclude a specific priority level from being included. For example, to log all but DEBUG messages:
JLog::addLogger(
    array(
         // Sets file name.
         'text_file' => 'com_helloworld.all_but_debug.php'
    ),
    // Sets all but DEBUG log level messages to be sent to the file.
    JLog::ALL & ~JLog::DEBUG,
    // The log category which should be recorded in this file.
    array('com_helloworld')
);
The JLog priority levels are implemented as separate bits of an integer, so you can use bitwise operations (bitwise AND, &; and bitwise NOT, ~) to calculate the appropriate log levels. JLog::All is a constant integer which has all the relevant bits set, so that all the Joomla priority levels are included.
Formatting the Log File[edit]
The first parameter to addLogger can have a few optional additional settings in addition to the text_file entry.
There is, for example, the entry text_entry_format, specifying the format of each line in your log file.
The default format is:
'{DATETIME} {PRIORITY} {CATEGORY} {MESSAGE}'
Here is an example of a different format which shows how to omit the category:
JLog::addLogger(
    array(
         // Sets file name.
         'text_file' => 'com_helloworld.critical_emergency.php',
         // Sets the format of each line.
         'text_entry_format' => '{DATETIME} {PRIORITY} {MESSAGE}'
    ),
    // Sets all but DEBUG log level messages to be sent to the file.
    JLog::ALL & ~JLog::DEBUG,
    // The log category which should be recorded in this file.
    array('com_helloworld')
);
In addition to the placeholders shown above in the default string, the following values are available:
   {CLIENTIP}      (this is the IP address of the client)
   {TIME}
   {DATE}
There is an additional optional boolean parameter text_file_no_php, which specifies whether the log file is prepended with the usual prefix of:
   #
   #<?php die('Forbidden.');?>
Note: Usually you should not set this setting to false. Log files should not be readable from the outside. They can provide valuable information about your system for attackers.
Only dabble with this if you know what you’re doing!
Furthermore, if you want to store the log file somewhere other than the logging path configured in the Joomla! settings, there is the text_file_path setting.
Logging to Other Places[edit]
As well as logging to files, you can log to other places as well, such as
- the Joomla message area (where the message is shown if you call
JFactory::getApplication()->enqueueMessage()). - a database table.
- just a simple echo statement.
Of these, probably the most useful is the logging to the message bar, which you can set up via:
JLog::addLogger(array('logger' => 'messagequeue'), JLog::ALL, array('msg-error-cat'));
Then when you do:
JLog::add('an error to display', JLog::ERROR, 'msg-error-cat');
you will get the message copied to the message bar.
Note that Joomla core code sets up logging to the messagequeue for category ‘jerror’, so that if you use this category in your log messages, you will get the message displayed on the message bar. For example:
JLog::add('error copied to message bar', JLog::Error, 'jerror');
will result in the message being shown in the Joomla message area, even though you haven’t explicitly set up a logger to log there.
PSR-3 Logger[edit]
Since version 3.8 Joomla incorporates a logger which adheres to the PSR-3 Logger Interface. This enables libraries which follow this standard recommendation to integrate with the Joomla logging system. To use this, first do:
use Joomla\CMS\Log\Log;
$psr3Logger = Log::createDelegatedLogger();
This returns an object on which you have available the methods of the PSR-3 LoggerInterface, for example:
$psr3Logger->critical("critical error text", array("category" => "my-critical-category"));
The default Joomla loggers process only the «category» and «date» elements of the context associative array (parameter 2), mapping the values of these elements to the corresponding column in your log file.
Exceptions[edit]
JLog::add() will throw an exception if it can’t write to the log file. To avoid this, you’d have to either wrap the call in another function, or implement your own logger class and then include it with:
JLog::addLogger(
    array(
         // Use mycustomlogger.
         'logger' => 'mycustomlogger',
         'text_file' => 'com_helloworld.errors.php'
    ),
    JLog::ALL,
    array('com_helloworld')
);
Further Reading[edit]
Joomla logging should be used in tandem with PHP exceptions, not as a replacement. See J2.5:Exceptions_and_Logging_in_Joomla_Platform_11.1_and_Joomla_2.5 for backstory on this class and how it arose from the old Joomla PHP4 compatible error classes.
0 Пользователей и 1 Гость просматривают эту тему.
- 3 Ответов
- 3449 Просмотров


И снова здравствуйте!  )
)
Застрял с псевдо-проблемой. В разрабатываемый модуль добавил логирование некоторых некритичных ситуаций, возникающих в процессе его работы. Логирование реализовал посредством:
JLog::add("сообщение", 1, 'module_name', date ('d-m-Y h:i:s'));Всё работает без ошибок, но вот куда сохраняются эти сообщения не нахожу. Посмотрел error_log апача, там нет. В директории Джумлы тоже ничего не нашел. Подскажите, пожалуйста, куда сохраняются созданные записи?
Joomla хранит логи в разных местах: в файле, в БД, в системном журнале…В вашем случае, скорее всего, логи сохраняются в /logs/error.php или /administrator/logs/error.php.
Записан
Не будь паразитом, сделай что-нибудь самостоятельно!
robert, спасибо за ответ. В /administrator/logs/error.php нет логируемых ошибок, а папки /logs в моей Joomla нет вовсе. В БД тоже ничего похожего не нашел.
/administrator/index.php?option=com_config — Система — Путь к каталогу логов
Записан
Тут дарят бакс просто за регистрацию! Успей получить!
Все советы на форуме раздаю бесплатно, то есть даром. Индивидуально бесплатно консультирую только по вопросам стоимости индивидуальных консультаций
When you’re having trouble with your Joomla site, there’s a good chance that you’re looking in the wrong place. The error log is a valuable source of information, but it’s not always easy to find.
Here’s a guide to finding the Joomla error log and some tips for using it.
Logging In
The first step is to log in to your Joomla site. This is usually easy to do, but there are a few different ways to do it.
You can login using your web browser, your email address, or your username and password.
If you’re using your web browser, you can find the login form on the main page of your site. Just enter your username and password and you’re ready to go.
If you’re using your email address, you can find the login form on the main page of your site. Just enter your email address and you’re ready to go.
If you’re using your username and password, you can find the login form on the main page of your site.
Logging Out
Once you’re logged in, you can log out by clicking the “Log Out” link on the main page of your site.
Finding the Error Log
Once you’re logged in, the first thing you need to do is find the error log. To do this, go to the “Front Page” menu item on your site.
Under “Pages,” select “Error Log.”.
The error log will show you all the errors that occurred on your site during the past day or so. It will also show you any information about the errors, such as the URL that was visited when the error occurred.
If you’re having trouble with a specific page or file on your site, you can use the error log to find out which page or file is causing the problem. Just enter the URL of the page or file that you’re having trouble with and the error will show you what happened.
Using the Error Log
The error log is a valuable source of information, but it’s not always easy to find. Here are some tips for using the error log:
1. Make sure you’re logged in to your site.
The error log is only available to logged-in users.
2. Make sure you’re using the most up-to-date version of Joomla.
The error log is updated every day, but the version of Joomla that you’re using may be older.
3. Make sure you’re using the correct URL.
The error log is only available for URLs that are visited on your site.
PRO TIP: If you are having difficulty finding the Joomla error log, it is most likely because it has been disabled. To enable the error log, go to the Global Configuration page and set the Error Reporting value to “Maximum”. You will then be able to find the error log at /administrator/error_log.php.
4. Make sure your site is up-to-date.
The error log is only available for sites that are up-to-date.
5. Make sure you’re using the correct browser.
The error log is only available for browsers that are supported by Joomla.
6. Make sure you’re using the correct version of Joomla.
The error log is only available for Joomla versions that are supported by Joomla.
7. Make sure you’re using the correct version of your browser.
8. Make sure you’re using the correct version of your Joomla site.
The error log is only available for Joomla sites that are supported by Joomla.
9. Make sure you’re using the correct version of your web browser.
10. Make sure you’re using the correct version of your computer.
The error log is only available for computers that are supported by Joomla.
11. Make sure you’re using the correct version of the Internet.
The error log is only available for sites that are connected to the Internet.
12. Make sure you’re using the correct version of your computer system.
The error log is only available for systems that are supported by Joomla.
13. Make sure you’re using the correct version of your operating system.
14.
15.
16.
17. Make sure you’re using the.
Найти ошибку, которая привела к некорректной или фатальной ошибки Joomla одна из самых трудных задач при работе с системой. Пожалуй, невозможно перечислить все вероятные ошибки, которые вы можете теоретически встретить при общении с Joomla. Более правильным будет указать пути, по которым нужно двигаться в поиске ошибок и их отладки.
Основные языки программирования, на которых написана CMS Joomla это два сценарных языка PHP и JavaScript. При этом сценарный язык (анг.scripting language) PHP является основным языком Joomla и, как правило, ошибки, возникающие при работе с Joomla это результат его неправильной (некорректной) работы.
В этой статье я сформулирую первые действия, что сделать сначала, чтобы осуществить правильный поиск ошибок и после найти отладку (способ исправления) «неправильного» скрипта вашей Joomla.
Прежде всего, ошибку нужно увидеть. Речь идет не о результатах ошибки (пропадании сайта и т.п.). Речь идет, как увидеть причину ошибки, если хотите определить диагноз ошибки. От этого зависит дальнейшая отладка системы и исправление ошибки.
Видимость ошибок в браузере
Первое место, где вы видите сообщение о возникшей серьезной ошибке, это ваш рабочий браузер. Вы наверняка встречали при открытии сайтов, вместо страниц сайта пустое окно браузера и в нем цифровая (кодовая) ошибка. И речь не идет об ошибках класса 4×× (Ошибки со стороны клиента), например, ошибка 403-Ничего не найдено. Речь о более серьезных ошибок, начинающихся с цифры «5». Это класса ошибок 5×× (Ошибки со стороны сервера).
Ошибка 500
Ошибка 500 это любая ошибка со стороны сервера, которая не расшифрована в остальных кодах 501-510. Это наиболее часто встречающаяся ошибка, связанная с ошибками в коде системы. Если при работе с системой Joomla вы в браузере видите сообщение об ошибке 500 , эта ошибка выдается сервером Apache и ее причину нужно смотреть в логе ошибок вашего веб-сервера. (О логах ошибок веб-сервера читать ТУТ).
Как правило, из лога ошибок, будет понятно, какой файл системы привел к ошибке. После этого нужно переходить к этому конкретному файлу и решать конкретную, уже локализованную причину ошибки. Но это не всегда так просто. Из журнала лога ошибок, бывает не понятно, какие конкретные действия приводят к ошибке и какой PHP -код ее сформировал.
Вообще говоря, интерпретатор PHP всегда определяет возникающие ошибки. И показ ошибок Вам, изначально, зависит от настроек конкретного сервера. Сервер должен быть настроен так, чтобы интерпретатор PHP имел возможность сообщить об ошибке, а вы могли увидеть это сообщение. Причем интерпретатору должен быть указан вид вывода сообщения об ошибке. Это или окно браузера, или запись в журнале ошибок или и то и другое по выбору.
Настройка вывода ошибок зависит от вашего хостинга.
Вывод ошибок на рабочем сервере
На рабочем сервере (коммерческом хостинге) включение вывода ошибок ищите в настройках хостинга. Как правило, вывод ошибок по-умолчанию включен, и вывод ошибок настроен как вывод сообщений в журнал ошибок. Убедитесь, что эта функция сервера включена. Опять-таки, по — умолчанию, не имеет смысла включать на рабочем сервере вывод ошибок на экран. Эти ошибки будут видеть все гости сайта и это лишнее. Однако в критических, аварийных ситуациях, можно воспользоваться временно, выводом ошибок на экран. Об этом чуть ниже.
Вывод ошибок на локальном сервере
На локальном (домашнем) сервере, у вас есть все права на любые настройки сервера и вывод ошибок вы можете настроить сами. Наверное, все готовые платформы локального сервера (OpenServers, Денвер, Xmapp и т.д.) уже настроены на вывод ошибок в журнал и/или на экран. Но в том, то и прелесть локального сервера, вы всегда можете изменить любые его настройки.

Пример настроек php.ini для вывода ошибок, сервер OpenServers — Poisk-oshibok-php-6
Настроить вывод ошибок на локальном сервере нужно в файле php.ini.
Для разрешения вывода ошибок в файле php.ini должна быть строка:
error_reporting(E_ALL ^ E_NOTICE);// Добавлять сообщения обо всех ошибках, кроме ошибок NOTICE
// Это значение включено по умолчанию в php.ini
Примечание: NOTICE ошибки это возможные, но не явные ошибки. Например, опечатка, предупреждение о плохом стиле, и.т.п.
error_reporting = E_ALL //Вывод всех ошибок//
Для вывода ошибок в журнал, должна быть строка:
log_errors = On
Для вывода ошибок на экран в файле php.ini должна быть строка:
display_errors = On
Вывод ошибок на экран, во время старта PHP
display_startup_errors=On
Понятно, что замена «on» на «off» все это отключит.
Повторюсь, интерпретатор PHP сам выводит сообщения об ошибках, нужно только разрешить и дать ему возможность (настроить) эти сообщения выводить в журнал на сервере, а при необходимости показывать их на экране.
Но вернемся к рабочим серверам и CMS Joomla. В Joomla есть функция в административной панели сайта, включив которую вы можете выводить ошибки системы на экран.
В CMS Joomla предусмотрено включение режима отладки системы, при которой все, подчеркну ВСЕ, ошибки будут выводиться на экран вместе их возникновения и в режиме реального времени.
Вывод ошибок, режим отладка Joomla 2,5
Административная панель сайта ->Меню ->Сайт->Общие настройки->Система
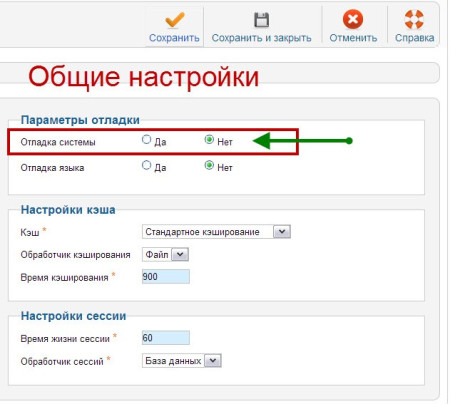
Poisk-oshibok-php-1
Вывод ошибок, режим отладка Joomla 3,x
Административная панель сайта-> Меню ->Сайт->Общие настройки->Система
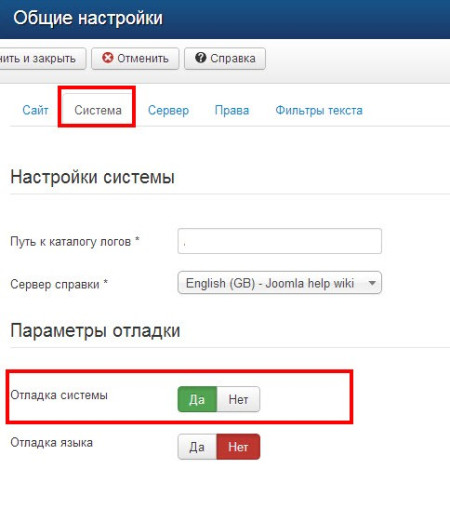
Poisk-oshibok-php-3
В обоих версиях можно настроить, какой режим вывода ошибок во время отладки должен быть.
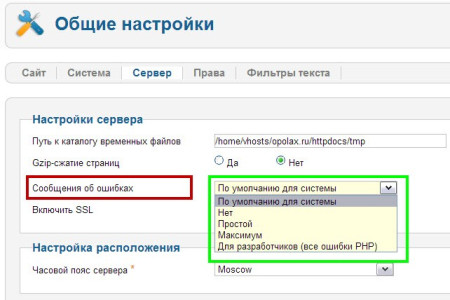
Poisk-oshibok-php-2
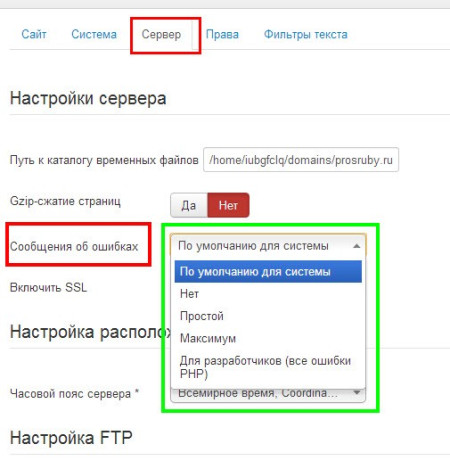
Poisk-oshibok-php-4
Включение режима отладки системы Joomla из панели сайта, может не сработать. Это может произойти, если на вашем хостинге такой режим не включен (в файле php.ini). Если у вас нет доступа к файлу php.ini, а потребность включить режим отладки есть, то просто напишите в support вашего хостинга и попросите временно включить режим вывода ошибок. ( Я так и делаю). После устранения ошибки, верните все в исходное состояние, иначе гости вашего сайта будут видеть все ошибки на экране.
Но и из этой ситуации, есть выход. Есть плагин Joomla, который выводит ошибки системы во всплывающем окне и с видимостью только для вас. Это плагин j!Dump.
Плагин j!Dump Joomla
Poisk-oshibok-php-5
Это плагин для отладки системы Joomla в реальном времени, с выводом ошибок на экран только для вас. Плагин работает на версиях Joomla 2.5 и 3.х. Устанавливается плагин стандартным способом. В настройках понятен и, по отзывам, вполне работоспособен. На сайте extensions.jоomla.com этот плагин есть.
Итоги статьи
- Итак, при работе с Joomla у вас «выскакивают» ошибки на стороне сервера приводящие к некорректной работе системы или ее отключении (Error). Что делать?
- Если вы не программист и не находитесь в процессе разработки и к этому у вас рабочий (не локальный сервер), то прямиком «идете» на сервер и смотрите журнал ошибок (лог ошибок);
- Если журнал ошибок отсутствует, то в настройках сервера ищите и включаете запись ошибок в журнал;
- Если из журнала не удалось понять причину ошибки, включаете режим «Отладка системы» в административной панели сайта;
- Если режим отладки не включается, обращаетесь в support сервера с просьбой такой режим временно включить. Включается он в файле php.ini;
- Если вы работаете на локальном (домашнем) сервере, то самостоятельно проверьте настройки возможности интерпретатора PHP для вывода, показа и записи PHP ошибок, возникающих при работе. Опять-таки, файл php.ini.
Это все, что хотелось сказать про Поиск и вывод PHP ошибок Joomla!
©Joomla-abc.ru
Другие статьи

Что такое логи сайта
Что такое логи сайта
Логи это специальные текстовые файлы с записями всех обращений к сайту. Каж…
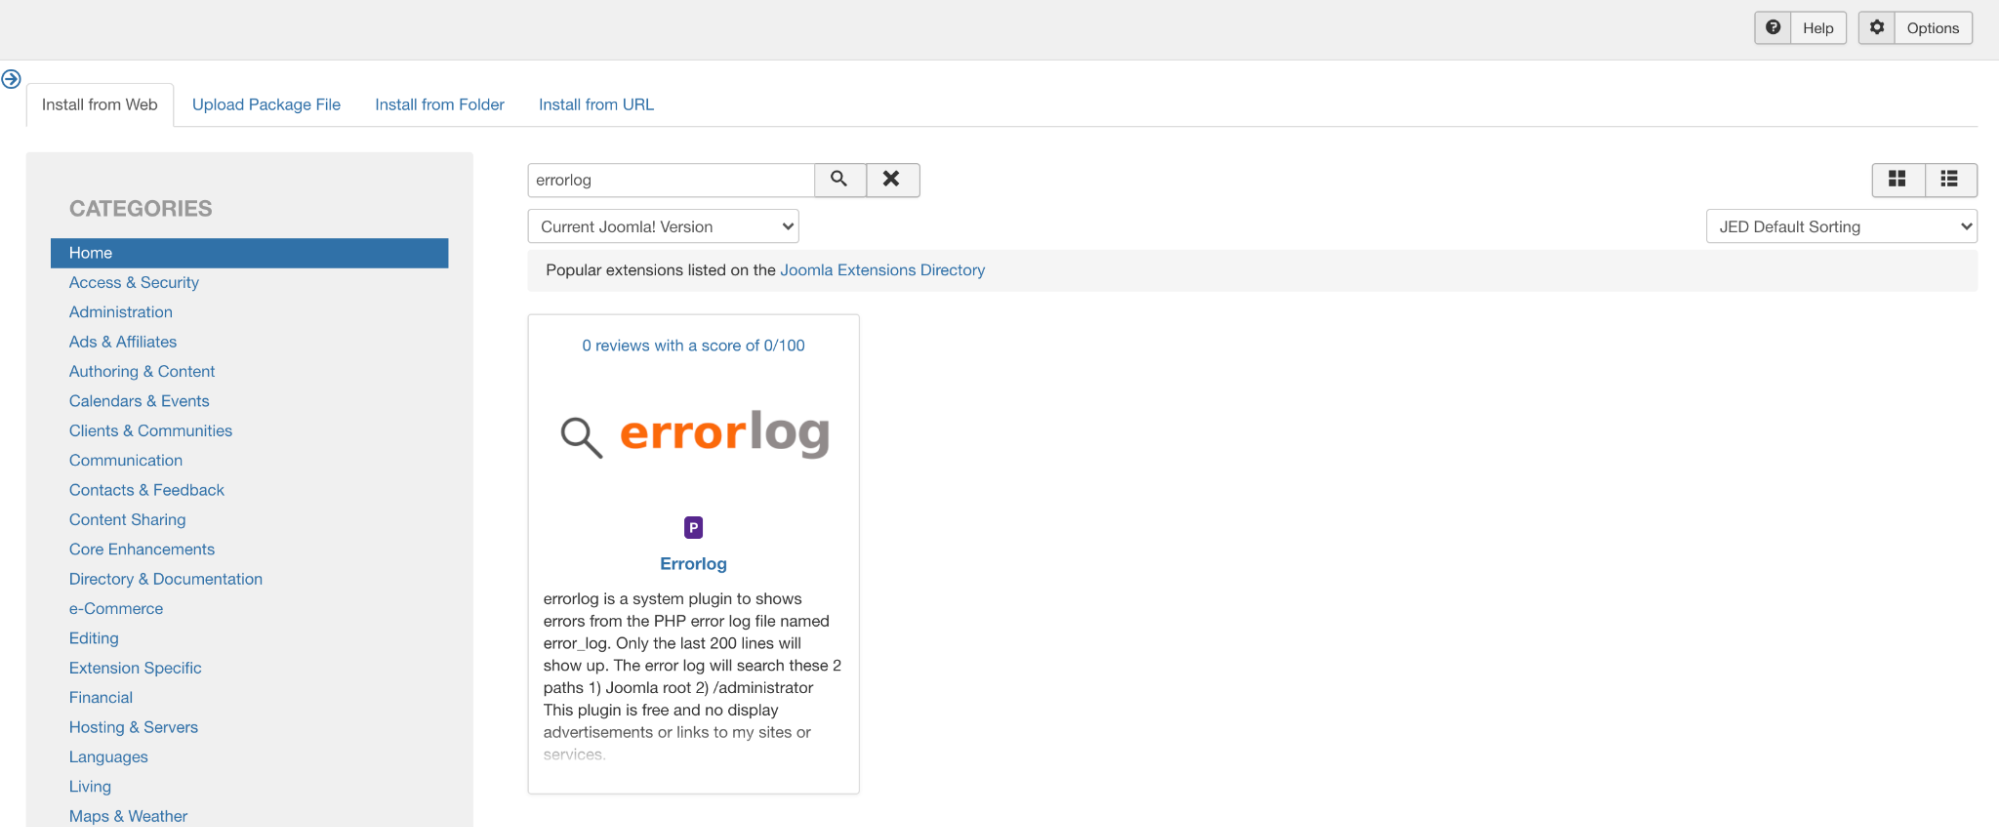
Errorlog is a system plugin that pulls out the last 200 lines of errors from the PHP error log file(error_log). The error log scans two paths, Joomla root and /administrator, for errors frequently used for debugging or tracing the website errors. With the Errorlog plugin, you can view report errors to the technical team faster and get your Joomla site error in a shorter time.
Installing and configuring Errorlog plugin for Joomla
- Log in to your Joomla site with an administrator account.
- On the top menu bar, click Extensions, click Manage, and then click Install.
- Select Install from Web tab, search for “Errorlog:
-
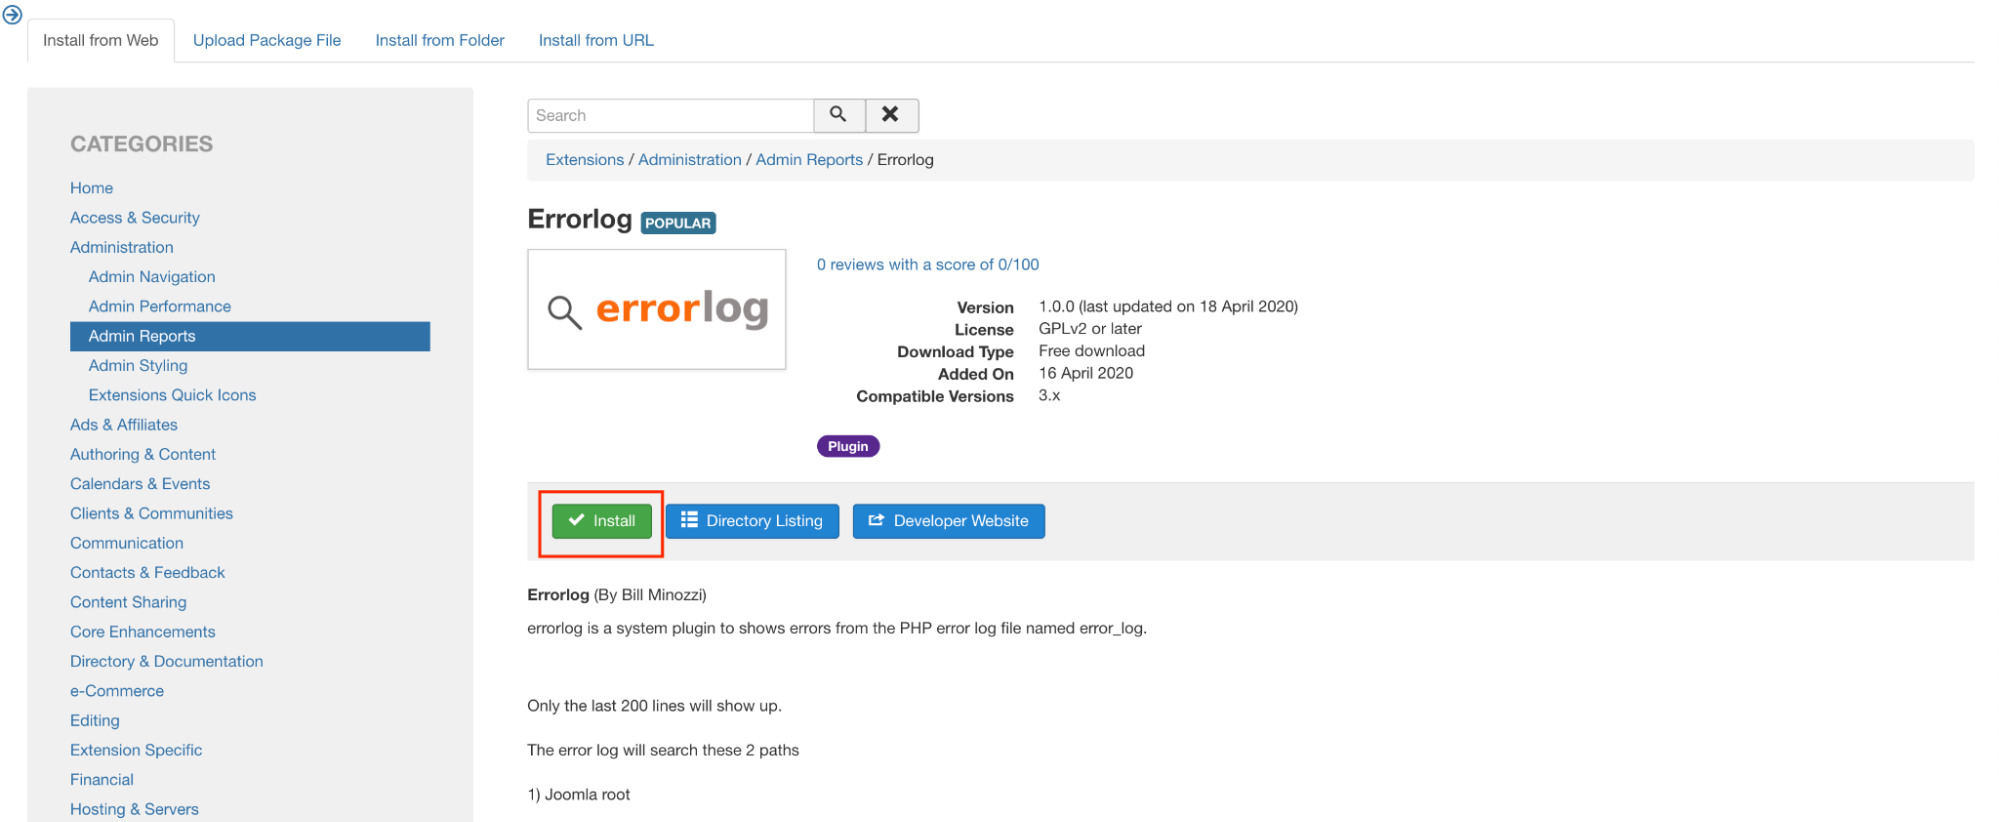
Click on Install to install the module:
-
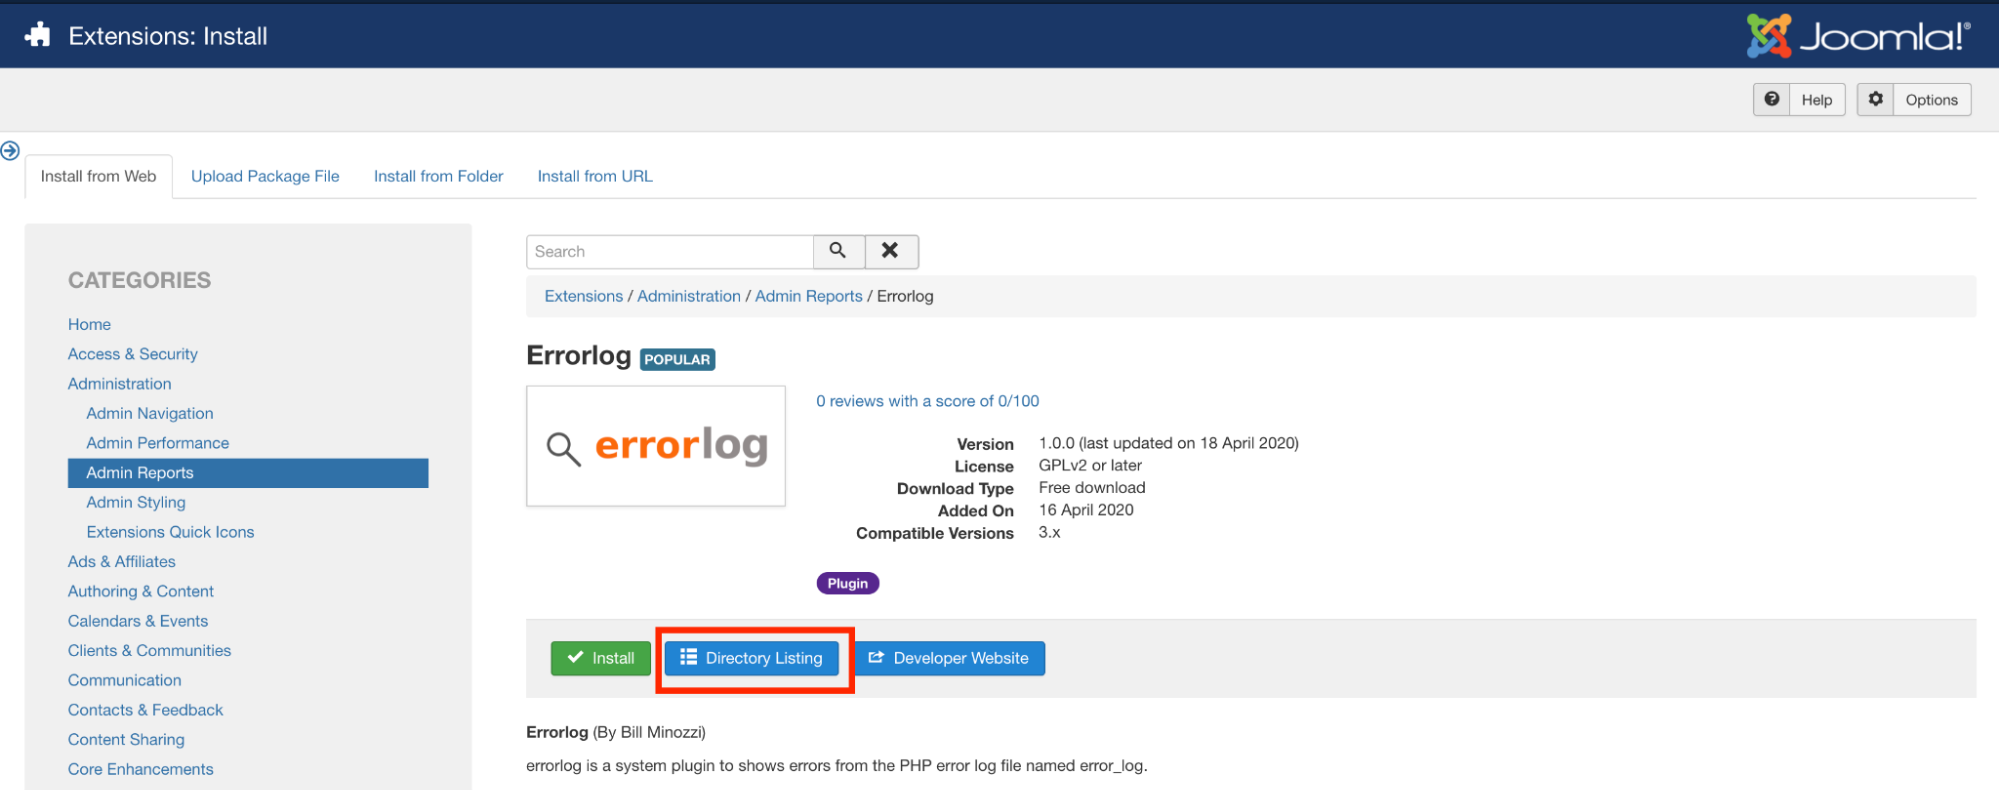
If the Install option on the module does not work, click Directory Listing. This will take you to the module page. Download the extension to your computer. Then click the Upload Package File tab. Upload the extension file from your drive. This will upload and install the module:
-
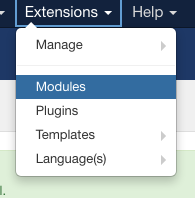
On the top menu bar, click Extensions, and then click Modules:
-
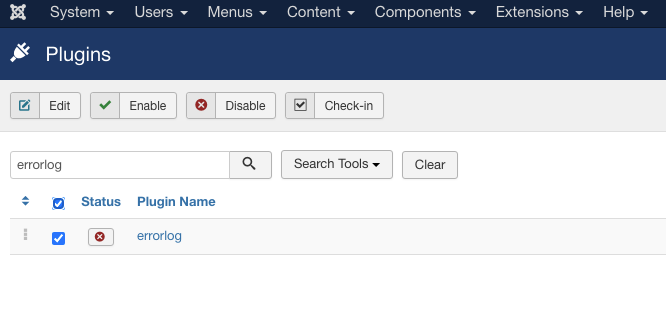
Select the “errorlog “ to edit the module:
-
Change the status to “ Enabled”. When an error is generated, it will be displayed in the logs tab:

More Information
For more information about the Errorlog Plugin, please visit https://extensions.joomla.org/extension/errorlog/