[Цвет] картридж кончился
Замените картридж.
Мало чернил в [цвет] картридже
Убедитесь в том, что у вас в запасе имеется новый картридж такого же цвета.
Очень мало чернил в [цвет] картридже
Убедитесь в том, что у вас в запасе имеется новый картридж такого же цвета.
Для продолжения процесса печати следует заменить опустевший картридж
При необходимости замените картриджи.
Ошибка системы струйной печати
Обратитесь в службу поддержки HP.
Возникла неполадка с принтером или системой подачи чернил. Выключите принтер и снова включите его. Если проблема остается, обратитесь в компанию HP.
Возникла неполадка с принтером или системой подачи чернил. Выключите принтер и снова включите его. Если проблема остается, обратитесь в компанию HP.
Рекомендуется провести ТО 1
Обратитесь в службу поддержки HP.
Рекомендуется провести ТО 2
Обратитесь в службу поддержки HP.
Рекомендуется провести ТО 3
Обратитесь в службу поддержки HP.
Один или несколько картриджей отсутствуют или повреждены
При необходимости вставьте картриджи нужного цвета.
Замятие бумаги
Замятие рулона бумаги.
Ширина бумаги меньше, чем минимальный формат, поддерживаемый выбранным источником бумаги. Загрузка отменена.
Удалите бумагу и загрузите бумагу правильного размера.
Загруженная бумага слишком широкая. Требуется ручная загрузка.
Вручную удалите бумагу и загрузите бумагу правильного размера.
Бумага находится слишком далеко от боковой линии загрузки. Пожалуйста, повторите попытку.
Удалите и заново загрузите бумагу. Убедитесь, что носители загружены следующим образом:
-
Носители загружены прямо, не перекошены.
-
Носитель хорошо выравнены. Выровняйте носители во избежание зазоров между карем носителей и черной отметкой на шпинделе.
Если чернила пролились в области печати, сотрите их тканью. Отражение от чернил может нарушить работу функции определения границы носителя в принтере.
Вручную удалите рулон бумаги и повторите попытку.
Отмотайте рулон вручную.
Лист загружен со слишком большим перекосом. Нажмите кнопку «Извлечь», чтобы выгрузить бумагу.
Удалите и заново загрузите бумагу.
Текущее задание было отменено потому, что закончилась бумага в рулоне. Загрузите рулон и запустите задание заново.
Загрузите новый рулон.
Вы печатаете многолистовое задание. Загрузите другой лист, чтобы продолжить печать или отмените задание.
Загрузите еще один лист.
Кончилась бумага в лотке подачи бумаги. Загрузите бумагу в лоток подачи бумаги и нажмите OK, чтобы продолжить печать или отмените задание.
Загрузите бумагу в лоток подачи бумаги.
Достигнут конец рулона. Невозможно загрузить рулон.
Загрузите новый рулон.
Печатающая головка отсутствует или неисправна.
Извлеките и вновь вставьте печатающую головку или попробуйте очистить электрические контакты. При необходимости вставьте новую печатающую головку.
Примечание.
Сообщение об ошибке не позволяет вернуться на главный экран, чтобы начать замену печатающей головки. Вместо этого нажмите Показать больше.
Обнаружен пустой или повторно заполненный картридж
Проверьте картридж.
В старых картриджах может быть недостаточно чернил для выполнения запуска. Откройте дверцу отсека, чтобы заменить картриджи.
Новая печатающая головка была установлена без нового комплекта картриджей с чернилами. Замените картриджи, не помеченные как новые.
Неверный формат файла.
Формат файла неверный или не поддерживается. Принтер не может обработать задание, и оно будет отменено.
Переполнение памяти.
Принтер не может выполнить задание. Повторите задание, выбрав в драйвере Отправить на печать в виде растрового изображения: перейдите на вкладку Дополнительно, затем нажмите Параметры документа > Свойства принтера.
Системные ошибки плоттеров HP DesignJet T120 | T125 | T130 | T520 | T525 | T530
Сообщения об ошибках на экране плоттера информируют вас об отказе устройства. Некоторые из этих сообщений можно удалить, нажав кнопку питания, чтобы выключить принтер, а затем снова нажав ее, чтобы снова включить принтер. Если ошибка сохранилась после перезагрузки, то требуется вмешательство специалиста.
|
Системная ошибка |
Компонент/Система |
|
01.1:10 |
Ошибка главной платы MPCA |
|
01.1:19 |
Неправильно установлена главная плата |
|
01.3:10 |
Ошибка соединительной платы |
|
02:10 |
Ошибка платы каретки |
|
03.1:10 |
Разрядилась батарейка в главной плате |
|
08:10 |
Не отвечает передняя панель |
|
21:10 |
Ошибка сервисной станции |
|
21.1:10 |
Ошибка насоса давления |
|
26:10 |
Ошибка системы чернил |
|
27:10 |
Ошибка печатающей головки |
|
41:10 |
Ошибка привода носителя |
|
Ошибка загрузки носителя |
Проблема датчика каретки |
|
41.1:10 |
Ошибка механизма зубчатых передач |
|
41.2:10 |
Ошибка мотора подачи бумаги |
|
42:10 |
Ошибка привода каретки |
|
42.1:10 |
Ошибка мотора привода каретки |
|
45:10 |
Ошибка мотора намотки рулона |
|
51:10 |
Неисправность датчика верхней крышки |
|
51.1:10 |
Неисправность датчика крышки картриджей |
|
53.1:10 |
Ошибка датчика OOP |
|
53.2:10 |
Неисправность датчика выходного лотка |
|
55:10 |
Ошибка линейного датчика каретки |
|
59.1:19 |
Главная плата и датчик крышки картриджей были заменены одновременно |
|
59.2:19 |
Установлена неподдерживаемая или повторно используемая деталь |
|
79:03 |
Общая Ошибка Принтера |
|
79:04 |
Общая Ошибка Принтера |
|
85.1:10 |
Отказ датчика индекса подачи |
|
85.2:10 |
Ошибка датчика энкодера |
|
87:10 |
Ошибка ленты энкодера |
|
BA7E710E, B87E7120, B87E3780, B884B238 |
Ошибка «Синий экран» — ошибка прошивки |
|
Проблема с принтером или системой печати |
Проблема с принтером или системой печати. Выключите и снова включите принтер |
|
Каретка не двигается |
Проблема может быть связана с несколькими узлами: лента позиционирования, ремень привода каретки, натяжитель ремня, а также плата каретки. Точная диагностика даст полный ответ. |
|
Один или несколько картриджей повреждены в плоттерах HP DesignJet T120 | T125 | T130 | T520 | T525 | T530 |
Если плоттер выдал эту ошибку, значит у Вас проблема с печатающей головкой |
Если Вы не нашли искомую ошибку в таблице, напишите нам на электронный адрес, чат на сайте либо просто позвоните. Мы постараемся найти решение.
Skip to content
Email: sales@wideimagesolutions.com Phone Number: +1 (214) 727 6289 WhatsApp Number: +1 (214) 727-6289
Email: sales@wideimagesolutions.com Phone Number: +1 (405) 927-8129 WhatsApp Number: +1 (214) 727-6289

- Code: 01.1:10
- Description:Equal to 1 long beep during startup sequence. Communication with Main PCA (MPCA) failed. WiFi module, Trailing Cable, Bundle PCA FFC cable, cables kit
-
Remedy:Remote troubleshooting (call agent) 1. This error never appears in the Front Panel, it’s only logged into the Error History and is equivalent to 1 long beep during printer startup. It happens when the MPCA communication fails. 2. To troubleshoot this error, see The Front Panel is blank (the printer does not start). 3. If a service engineer visit should be arranged to replace the Main PCA, take into account the model of the printer (the Main PCA is different for Pro and Basic models).
Onsite troubleshooting and solution (service engineer) 1. Remove covers and check that all the cables in the MPCA are correctly connected, and that none of them are damaged. If any cable is disconnected then reconnect it, and power on the printer again to check if the error message has disappeared. Important note: If any cable is damaged replace the cable: • Cables Sk • CQ890-67021 2. Replace Main PCA (MPCA), see Main PCA). • Main PCA Basic: CQ891-67003 • Main PCA Pro: CQ890-67023 NOTE: We recommend updating the printerfs firmware after this procedure. See Update the firmware. NOTE: If printer was connected to the Internet before repair, we recommend performing Web Services Setup. See the user’s guide.
- Code: 01.1:19
- Description:Incorrect Main PCA installed
- Remedy:1. This system error happens if a Main PCA Basic is assembled in a Pro printer. To solve the issue, install the correct Main PCA Pro in the printer. • Main PCA Basic: CQ891-67003 • Main PCA Pro: CQ890-67023 See Main PCA for the installation instructions.
- Code: 01.3:10
- Description:Bundle board communication failure. Bundle FFC, Main PCA
-
Remedy:Remote troubleshooting (call agent) 1. Switch the power off and disconnect the power cord. Reconnect the power cord and power on the printer. 2. The call agent should arrange a service engineer visit to change the Bundle PCA and follow steps below on Onsite Troubleshooting: • Bundle Board • CQ890-67022 3. If a different system error is displayed then the call agent should perform the applicable troubleshooting procedure.
Onsite troubleshooting and solution (service engineer) 1. Remove covers and check that all the cables in the Bundle PCA and associated parts are correctly connected, and that none of them is damaged. If any cable is disconnected then reconnect it, and power on the printer again to check whether the system error has disappeared. Important note: If any cable is damaged then order a Cable Service Kit: • Cables Sk • CQ890-67021 2. Replace the Bundle PCA, see Bundle Board. • Bundle Board • CQ890-67022 3. Replace the Bundle FFC cable, see Bundle Board FFC cable. 4. Replace the Main PCA (MPCA See Main PCA) • Main PCA Basic: CQ891-67003 • Main PCA Pro: CQ890-67023
- Code: 02:10
- Description:Carriage PCA communication failure. Trailing Cables, Printhead, Encoder Strip
- Remedy:1. Remove covers and check that the Trailing cables are connected from the Main PCA or from the Carriage PCA. If any cable is disconnected then reconnect it, and power on the printer again to check whether the error message has disappeared. 2. Go to Support Menu, see Entering the Extended Support Menu for service engineers and perform 2.1 Carriage Servo, see 2.1 Carriage servo to check that the error has disappeared. 3. Replace the Encoder Strip, see Encoder Strip and run the Carriage Servo diagnostics to see if the error has disappeared. 4. Replace the Carriage, see Carriage and Belt. • Carriage assembly w/belt (24) • CQ890-67002 • Carriage assembly w/belt (36) • CQ893-67011 5. No calibrations needed, but the PMK 1 should be reset, see 3.4 PMK1. 6. Replace the Main PCA, see Main PCA. • Main PCA Basic: CQ891-67003 • Main PCA Pro: CQ890-67023
- Code: 03.1:10
- Description:Real Time Clock (RTC) Battery ran down.
-
Remedy:Remote troubleshooting (call agent) 1. The call agent asks the customer to go to the Support Menu by pressing the Power key continuously for 15 seconds. 2. Go to the Diagnostics Menu and select RTC Battery Status to check whether the RTC Battery has actually expired, see 2.11 RTC battery status. 3. If yes, the call agent should arrange a service engineer visit to replace the RTC battery by replacing the Main PCA, see Main PCA. • Main PCA Basic: CQ891-67003 • Main PCA Pro: CQ890-67023
Onsite troubleshooting and solution (service engineer) 1. Replace the Main PCA, see Main PCA. 2. Switch on the printer and go to Extended Support Menu. Select RTC Battery Expired option from the Reset Menu in order to reset the RTC battery expired flag. 3. Go back and select Set Date and Time from the Service Menu. Set the correct date and time.
- Code: 08:10
- Description:Equals to 3 beeps during start up sequence. Front Panel does not respond
- Remedy:Remote troubleshooting (call agent) 1. This error never appears in the Front Panel, it is only logged into the Error History, and is equivalent to the 3 beeps during printer startup. 2. It happens when there is no communication between the Front Panel and the Main PCA, see The Front Panel is blank (the printer does not start).
- Code: 21.1:10
- Description:Prime Pump does not work. Bundle PCA
-
Remedy:Remote troubleshooting (call agent) 1. Switch the power off and disconnect the power cord. Reconnect the power cord and power on the printer. 2. The call agent should ask the customer to go to the Support Menu, by pressing the power key continuously for 15 seconds. 3. Go to Diagnostics menu and perform the 2.8 Pump diagnostic procedure, see 2.8 Pump. 4. The call agent should arrange a service engineer visit to change the Pump, and to follow the Onsite troubleshooting below. • Prime pump • CQ890-67030 5. If a different system error is displayed then the call agent should perform the applicable troubleshooting procedure.
Onsite troubleshooting and solution (service engineer) 1. Go to the Support Menu (see Entering the support menus) and perform the diagnostic procedure 2.8 Pump, see 2.8 Pump. 2. Remove the covers and check that the cable of the Prime Pump is connected to the Pump and Bundle PCA and it is not damaged. Important note: If the cable is not connected then reconnect it, and power on the printer again to check whether the error has disappeared. Important note: If the cable is damaged then order a Cable Service Kit: • Cables Sk • CQ890-67021 3. Check also that the tubes are well connected and not damaged. You can run the Pump diagnostic again to check for damaged tubes. 4. Replace the Pump motor, see Prime Pump. • Prime pump • CQ890-67030 5. Replace Bundle PCA, see Bundle Board. • CQ890-67022
- Code: 21:10
- Description:Service Station does not work properly or communication lost. Bundle PCA
-
Remedy:Remote troubleshooting (call agent) 1. Switch the power off and disconnect the power cord. Reconnect the power cord and power on the printer. 2. The call agent should arrange a service engineer visit to change the Service Station, and follow the Onsite troubleshooting below: • Service station assy • CQ890-67045 3. If a different system error is displayed then the call agent should perform the applicable troubleshooting procedure.
Onsite troubleshooting and solution (service engineer) 1. Remove covers and check that the cables from the Service Station to the Bundle PCA are correctly connected and not damaged. Important note: If any cable is disconnected then reconnect it, and power on the printer again to check whether the system error has disappeared. If any cable is damaged then order a Cable Service Kit. • Cables Sk • CQ890-67021 2. Make sure that the Service Station path is clear. Remove any visible obstacles (screws, plastic parts, etc.) restricting the movement of the Service Station. 3. Go to Support Menu, see Entering the support menus and run 2.12 Service Station, see 2.12 Service Station to check whether the system error has disappeared. 4. Replace the Service Station, see Service Station. • Service station assy • CQ890-67045 5. Replace the Bundle Board, see Bundle Board. • Bundle board • CQ890-67022
- Code: 26:10
- Description:Ink System Failure. PHA, Service Station, Carriage PCA, Trailing Cables
- Remedy:Remote troubleshooting (call agent) 1. This error never appears in the Front Panel, it is only logged into the Error History and it is equivalent to the message: There is a problem with the printer or ink system. Turn printer off, then on. If the problem persists, contact HP. 2. See Ink system hardware troubleshooting.
- Code: 27:10
- Description:Generic Printer Error. Carriage PCA, Trailing Cables
- Remedy:Remote troubleshooting (call agent) 1. This error occurs only when the printhead is detected as faulty during first printer installation (Out Of the Box Experience). If it happens, follow printhead troubleshooting: see Printhead troubleshooting.
- Code: 41.1:10
- Description:Right Rear gear train failure. Bundle PCA, Multi-Sheet Tray
-
Remedy:Remote troubleshooting (call agent) 1. Switch the power off and disconnect the power cord. Reconnect the power cord and power on the printer. 2. The call agent should arrange a service engineer visit to change the Right Rear Gear Train, and follow the onsite troubleshooting below • Right rear gear train • CQ890-67041 3. If a different system error is displayed then the call agent should perform the applicable troubleshooting procedure.
Onsite troubleshooting and solution (service engineer) 1. Remove the Multi-Sheet Tray, see Multi-Sheet Tray Assembly and check that there is no paper jam or anything in the gear of the tray preventing the movement. 2. Remove covers and check that the cables from the Right Rear gear train to the Bundle PCA are correctly connected and not damaged. If any cable is disconnected then reconnect it, and power on the printer again to check whether the system error has disappeared. Important note: If any cable is damaged then order a Cable Service Kit. • Cables Sk • CQ890-67021 3. Replace the Right Rear Gear Train, see Right Gear Train Module. • Right Rear Gear Train • CQ890-67041 4. Replace the Bundle Board, see Bundle Board. • Bundle Board • CQ890-67022 5. Replace the Multi-Sheet Tray assembly, refer Multi-Sheet Tray Assembly • Multi-Sheet Tray assembly • CQ890-67007
- Code: 41:10
- Description:Paper Servo error. Feed Encoder Sensor PCA, Feed Index Sensor PCA, Feed Encoder Disk
-
Remedy:Remote troubleshooting (call agent) 1. Switch the power off and disconnect the power cord. Reconnect the power cord and power on the printer. 2. The call agent asks the customer to go to Support Menu by pressing the Power key continuously for 15 seconds. 3. Go to 2 Diagnostics menu and run Paper Servo diagnostic, see 2.2 Paper servo. 4. After running the diagnostic the printer will show one of these system errors: • 41.2:10 arrange a service engineer to replace Paper/Feed motor and follow the Onsite Troubleshooting explained below, see Paper Motor. œ Paper Motor • CQ890-67036 • 85.2:10: need to replace Feed encoder sensor PCA and follow Onsite Troubleshooting explained on the 85.2:10 error • 5. The call agent should arrange a service engineer visit to replace the right part depending on the system error.
Onsite troubleshooting and solution (service engineer) 1. Go to the Support Menu (see Entering the support menus) and run diagnostic 2.2 Paper Servo, see 2.2 Paper servo. If the system error continues, remove covers and check that all the cables are well connected to the Main PCA, specially the paper motor cable, and none of them are damaged. If any cable is not connected then reconnect it, and power on the printer again to check whether the system error has disappeared. Important note: If any cable is damaged then order a Cable Service Kit. • Cables Sk • CQ890-67021 2. If the 41.2:10 error continues then the Paper/Feed motor should be replaced. See Paper Motor. Paper Motor • CQ890-67036 3. Replace the Main PCA, see Main PCA. • Main PCA Basic • CQ891-67003 • Main PCA Pro • CQ890-67023
- Code: 42:10
- Description:Carriage servo problem. Trailing Cables, Carriage Board, Carriage Motor, Carriage Belt, Encoder Strip
- Remedy:Remote troubleshooting (call agent) 1. Switch the power off and disconnect the power cord. Reconnect the power cord and power on the printer. 2. The call agent asks the customer to go to Support Menu by pressing the Power key continuously for 15 seconds. 3. Go to 2 Diagnostics menu and run 2.1 Carriage Servo diagnostic, see 2.1 Carriage servo. 4. After running this diagnostic the printer will show one of these system errors: • 42.1:10 Replace the Carriage motor and follow the Onsite Troubleshooting described below, see Carriage Motor. œ Carriage Motor • CQ890-67006 • 02:10: Replace the Carriage Assembly and follow the Onsite Troubleshooting described below Carriage and Belt œ Carriage assembly w/belt (24) • CQ890-67002 œ Carriage assembly w/belt (36) • CQ893-67011 5. The call agent should arrange a service engineer visit to replace the right part depending on the system error.
- Code: 42:1:10
- Description:Carriage motor failure. Carriage Belt, Main PCA
- Remedy:Onsite troubleshooting and solution (service engineer) 1. Go to the Support Menu (see Entering the support menus) and run the diagnostic 2.1 Carriage Servo, see 2.1 Carriage servo. 2. Remove the covers and check that all the cables are well connected to the Main PCA, especially the Carriage motor cable, and that none of them are damaged. If a cable is not connected then reconnect it, and power on the printer again to check whether the system error has disappeared. Important note: If any cable is damaged then order a Cable Service Kit. • Cables Sk • CQ890-67021 3. Check that the Carriage Motor belt is not broken or out of place. If the belt is OK then the Carriage Motor should be replaced, see Carriage Motor. • Carriage Motor • CQ890-67006 4. If the belt was damaged, it should be changed. Order the belt service kit, see Carriage Belt. • Belt (24) • CQ890-67059 • Belt (36) • CQ893-67016
- Code: 45:10
- Description:Rewinder motor failure. Main PCA
-
Remedy:Remote troubleshooting (call agent) 1. Switch off the printer, and disconnect the power cord. Reconnect the power cord and power on the printer. 2. The call agent should arrange a service engineer visit to change the Rewinder module, and follow the Onsite troubleshooting below. • Left Roll Support Pro • CQ890-67037 • Left Roll Support Basic • CQ890-67051 3. If a different system error is displayed then the call agent should perform the applicable troubleshooting procedure.
Onsite troubleshooting and solution (service engineer) 1. Remove the covers and check that the cables of the rewinder module are correctly connected to the Main PCA, and that none of them is damaged. If any cable is disconnected then reconnect it, and power on the printer again to check whether the system error has disappeared. Important note: If any cable is damaged then order a Cable Service Kit: • Cables Sk • CQ890-67021 2. Replace the Left Roll Support, see Left Roll Support. • Left Roll Support Pro • CQ890-67037 • Left Roll Support Basic • CQ890-67051 3. Replace the Main PCA, see Main PCA. • Main PCA Pro • CQ890-67023 • Main PCA Basic • CQ891-67003
- Code: 51.1:10
- Description:Ink Cartridge Cover sensor failure. Main PCA
-
Remedy:Remote troubleshooting (call agent) 1. Switch off the printer, and disconnect the power cord. Reconnect the power cord and power on the printer. 2. The call agent should arrange a service engineer visit to change the Ink Cartridge Cover Sensor PCA, and follow the Onsite troubleshooting below. • Ink Cartridge Cover Sensor • CQ890-67028 3. If a different system error is displayed then the call agent should perform the applicable troubleshooting procedure.
Onsite troubleshooting and solution (service engineer) 1. Replace the Ink Cartridge Cover Sensor PCA, see Ink Cartridge Cover PCA Assembly. • Ink Cartridge Cover Sensor • CQ890-67028 2. Check that the cable of the Ink Cartridge Cover sensor is connected to Main PCA and is undamaged. If the cable is not connected then reconnect it, and power on the printer again to check that the error has disappeared. Important note: If the cable is damaged then order a Cable Service Kit. • Cables Sk • CQ890-67021 3. Replace the Main PCA, see Main PCA. • Main PCA Pro • CQ890-67023 • Main PCA Basic • CQ891-67003
- Code: 51:10
- Description:Top Cover sensor failure. Main PCA
-
Remedy:Remote troubleshooting (call agent) 1. Switch off the printer, and disconnect the power cord. Reconnect the power cord and power on the printer. 2. The call agent asks the customer to go to Support Menu by pressing the Power key continuously for 15 seconds. 3. Go to 2 Diagnostics menu and run 2.4 Top Cover Sensor diagnostic, see 2.4 Top Cover Sensor. 4. The call agent should arrange a service engineer visit to change the Ink Cartridge Cover Sensor PCA; follow the onsite troubleshooting below. • Ink Cartridge Cover Sensor • CQ890-67028 5. If a different system error is displayed then the call agent should perform the applicable troubleshooting procedure.
Onsite troubleshooting and solution (service engineer) 1. Go to Support Menu (see Entering the support menus) and run 2.4 Top Cover Sensor diagnostic, see 2.4 Top Cover Sensor. 2. Replace the Top Cover Sensor PCA. 3. Remove the covers and check that the cable of the Top Cover sensor is connected to the Main PCA and is undamaged. If the cable is not connected then reconnect it, and power on the printer again to check that the error has disappeared. Important note: If the cable is damaged then order a Cable Service Kit. • Cables Sk • CQ890-67021 4. Replace the Main PCA, see Main PCA. • Main PCA Pro • CQ890-67023 • Main PCA Basic • CQ891-67003
- Code: 53.1:10
- Description:OOP (Out-Of-Paper) Sensor failure. Bundle PCA, Bundle FFC, Main PCA
-
Remedy:Remote troubleshooting (call agent) 1. Switch off the printer, and disconnect the power cord. Reconnect the power cord and power on the printer. 2. The call agent will ask the customer to go to Support Menu by pressing the Power key continuously during 15 seconds 3. Go to Diagnostics and run 2.5 OOP Sensor diagnostic, see 2.5 Out-Of-Paper Sensor. 4. The call agent should recommend the customer to power off the printer, remove the Multitray sheet module, and check that there is no paper behind it, then power on the printer to see whether the error continues. If yes, send the customer an OOP Sensor module (CSR B part). • OOP Sensor flag • CQ890-67032 5. If a different system error is displayed then the call agent should perform the applicable troubleshooting procedure. 6. If, after the customer replaces the OOP Sensor, the failure still continues, the failure may be due to the OOP Sensor cable, so the call agent should order an onsite engineer with the cables kit: • Cables Sk • CQ890-67021 • OOP Sensor flag • CQ890-67032
Onsite troubleshooting and solution (service engineer) 1. Go to the Support Menu (see Entering the support menus) and run 2.5 OOP Sensor diagnostic see 2.5 Out-Of-Paper Sensor. 2. Remove the Multi-Sheet Tray at the back of the printer, see Multi-Sheet Tray Assembly, and check that there is no paper jammed in the OOP sensor; check also that the sensor is assembled correctly. 3. Replace the OOP Sensor assembly, see Out-Of-Paper Sensor. • OOP Sensor flag • CQ890-67032 4. Remove the covers and check that the cable of the OOP sensor is connected to Bundle PCA and is not damaged. If the cable is not connected then reconnect it, and power on the printer again to check whether the system error has disappeared. Important note: If the cable is damaged then order a Cable Service Kit. • Cables Sk • CQ890-67021 5. Replace the Bundle PCA, see Bundle Board. • Bundle Board • CQ890-67022 6. Replace the Bundle FFC cable, see Bundle Board FFC cable. 7. Replace the Main PCA, see Main PCA. • Main PCA Pro • CQ890-67023 • Main PCA Basic • CQ891-67003
- Code: 53.2:10
- Description:Output Tray sensor failure. Main PCA, Output tray
-
Remedy:Remote troubleshooting (call agent) 1. Switch off the printer, and disconnect the power cord. Reconnect the power cord and power on the printer. 2. The call agent asks the customer to go to Support Menu by pressing the Power key continuously for 15 seconds. 3. Go to Diagnostics menu and run 2.6 Output Tray Sensor diagnostic, see 2.6 Output Tray Sensor. 4. The call agent should send to the customer the Output Tray Sensor, which is a CSR part. • Output Tray Sensor Assembly • CQ890-90015 NOTE: If, after the customer repair, the issue still continues, we recommend sending an onsite engineer with Cables Kit and Output Tray Sensor PCA. Follow the steps below on onsite troubleshooting. • Cables Sk • CQ890-67021 • Output Tray Sensor PCA • CQ890-90015. 5. If a different system error is displayed then the call agent should perform the applicable troubleshooting procedure.
Onsite troubleshooting and solution (service engineer) 1. Go to the Support Menu (see Entering the support menus) and run 2.6 Output Tray Sensor diagnostic, see 2.6 Output Tray Sensor. Check that the Output Tray is not damaged. 2. If the Output Tray is OK and the problem continues then replace the Output Tray Sensor PCA. • Output Tray Sensor PCA • CQ890-90015 3. Remove the covers and check that the cable of the Output Tray Sensor is connected to the Main PCA and is not damaged. If the cable is not connected then reconnect it, and power on the printer again to check whether the system error has disappeared. Important note: If the cable is damaged then order a Cable Service Kit (add part number and name of Cable Service Kit) and change the Output Tray sensor cable: see Output Tray Extender Sensor Cable. • Output Tray Sensor Assembly • CQ890-90015 4. Replace the Main PCA, see Main PCA. • Main PCA Pro • CQ890-67023 • Main PCA Basic • CQ891-67003
- Code: 55:10
- Description:Line sensor failure. Carriage PCA, Trailing Cable, Main PCA
-
Remedy:Remote troubleshooting (call agent) 1. Switch off the printer, and disconnect the power cord. Reconnect the power cord and power on the printer. 2. The call agent asks the customer to go to the Support Menu by pressing the Power key continuously for 15 seconds. 3. Go to the Diagnostics menu and run 2.7 Line Sensor diagnostic, see 2.7 Line Sensor. 4. The call agent should arrange a service engineer visit to change the Line Sensor assembly; follow the onsite troubleshooting below. • Line Sensor • CQ890-67001 5. If a different system error is displayed then the call agent should perform the applicable troubleshooting procedure.
Onsite troubleshooting and solution (service engineer) 1. Go to the Support Menu (see Entering the support menus) and run 2.7 Line Sensor diagnostic, see 2.7 Line Sensor. 2. Remove the covers and check that the cable of the line sensor is connected to the Carriage PCA and it is not damaged. If the cable is not connected then reconnect it, and power on the printer again to check whether the error has disappeared. Important note: If the cable is damaged then replace the Line Sensor, see Carriage Line Sensor. • Line Sensor • CQ890-67001 3. Clean the Line Sensor and try again, see Clean the Carriage Line Sensor. 4. Replace the Carriage Assembly, see Carriage and Belt. • Carriage assembly w/belt (24) • CQ890-67002 • Carriage assembly w/belt (36) • CQ893-67011 5. Replace the Main PCA, see Main PCA • Main PCA Pro • CQ890-67023 • Main PCA Basic • CQ891-67003
- Code: 59.1:19
- Description:Main PCA and Ink Cartridge Sensor PCA replaced at the same time
- Remedy:Onsite troubleshooting and solution (service engineer) 1. The error appears if, during a service operation, the Main PCA and the Ink Cartridge Cover Sensor PCA are replaced at the same time. 2. To recover, do the repair by changing first one component (use the old component for this printer); after powering the printer off and on, change the other.
- Code: 59.2:19
- Description:An unsupported or reused part has been installed
- Remedy:Onsite troubleshooting and solution (service engineer) 1. The error appears if, during a service operation, the Main PCA or the Ink Cartridge Cover Sensor PCA are replaced by a reused part (not a new spare part). 2. To recover, do the repair using HP genuine new spare parts.
- Code: 79:XX
- Description:Generic Printer Error
- Remedy:Turn the printer off and on again.
- Code: 85.1:10
- Description:Feed index encoder sensor does not work properly. Main PCA, Feed Encoder Disk
-
Remedy:Remote troubleshooting (call agent) 1. Switch off the printer, and disconnect the power cord. Reconnect the power cord and power on the printer. 2. The call agent should arrange a service engineer visit to change the Feed Index PCA and follow onsite troubleshooting below. • Feed Index encoder sensor PCA • CQ890-67020 3. If a different system error is displayed then the call agent should perform the applicable troubleshooting procedure.
Onsite troubleshooting and solution (service engineer) 1. Remove the covers and check that all the cables are well connected to the Main PCA, and none of them are damaged. If any cable is not connected then reconnect it, and power on the printer again to check whether the system error has disappeared. Important note: If any cable is damaged then order a Cable Service Kit. • Cables Sk • CQ890-67021 2. Replace the Feed Index Encoder Sensor PCA, see Encoder PCA and Index • Feed Index encoder sensor PCA • CQ890-67020 3. Check that the Encoder Disk is not dirty or damaged. If the Encoder Disk is damaged, it should be replaced, see Encoder Disk. • Encoder Disk. CQ890-67033
- Code: 85.2:10
- Description:Feed encoder sensor does not work properly. Main PCA, Feed encoder Disk
-
Remedy:Remote troubleshooting (call agent) 1. Switch off the printer, and disconnect the power cord. Reconnect the power cord and power on the printer. 2. The call agent should arrange a service engineer visit to change the Feed encoder sensor PCA. • Feed Encoder Sensor PCA • CQ890-67020 3. If a different system error is displayed then the call agent should perform the applicable troubleshooting procedure.
Onsite troubleshooting and solution (service engineer) 1. Remove the covers and check that all the cables are well connected to the Main PCA, and none of them are damaged. If any cable is not connected then reconnect it, and power on the printer again to check whether the system error has disappeared. Important note: If any cable is damaged then order a Cable Service Kit. • Cables Sk • CQ890-67021 2. Replace the Feed Encoder Sensor PCA , see Encoder PCA and Index. • Feed Encoder Sensor PCA • CQ890-67020 3. Check that the Encoder Disk is not dirty or damaged. If the Encoder Disk is damaged it should be replaced, see Encoder Disk. • Encoder Disk • CQ890-67033
- Code: 87:10
- Description:Encoder Strip failure
-
Remedy:Remote troubleshooting (call agent) 1. Switch off the printer, and disconnect the power cord. Reconnect the power cord and power on the printer. 2. The call agent should arrange a service engineer visit to change the Encoder Strip and follow onsite troubleshooting below. • Encoder Strip (24) • CQ890-67003 • Encoder Strip (36) • CQ890-67004 3. If a different system error is displayed then the call agent should perform the applicable troubleshooting procedure.
Onsite troubleshooting and solution (service engineer) 1. Remove the covers and check that Encoder Strip is not broken or dirty. • Cables Sk • CQ890-67021 2. If the Encoder Strip is dirty, follow the procedure in this manual to clean it, see Clean the Encoder Strip. 3. If the Encoder Disk is damaged or does not work, it should be replaced, see Encoder Disk. • Encoder Disk • CQ890-67033
Системные ошибки плоттеров HP DesignJet T120 | T125 | T130 | T520 | T525 | T530
Сообщения об ошибках на экране плоттера информируют вас об отказе устройства. Некоторые из этих сообщений можно удалить, нажав кнопку питания, чтобы выключить принтер, а затем снова нажав ее, чтобы снова включить принтер. Если ошибка сохранилась после перезагрузки, то требуется вмешательство специалиста.
|
Системная ошибка |
Компонент/Система |
|
01.1:10 |
Ошибка главной платы MPCA |
|
01.1:19 |
Неправильно установлена главная плата |
|
01.3:10 |
Ошибка соединительной платы |
|
02:10 |
Ошибка платы каретки |
|
03.1:10 |
Разрядилась батарейка в главной плате |
|
08:10 |
Не отвечает передняя панель |
|
21:10 |
Ошибка сервисной станции |
|
21.1:10 |
Ошибка насоса давления |
|
26:10 |
Ошибка системы чернил |
|
27:10 |
Ошибка печатающей головки |
|
41:10 |
Ошибка привода носителя |
|
Ошибка загрузки носителя |
Проблема датчика каретки |
|
41.1:10 |
Ошибка механизма зубчатых передач |
|
41.2:10 |
Ошибка мотора подачи бумаги |
|
42:10 |
Ошибка привода каретки |
|
42.1:10 |
Ошибка мотора привода каретки |
|
45:10 |
Ошибка мотора намотки рулона |
|
51:10 |
Неисправность датчика верхней крышки |
|
51.1:10 |
Неисправность датчика крышки картриджей |
|
53.1:10 |
Ошибка датчика OOP |
|
53.2:10 |
Неисправность датчика выходного лотка |
|
55:10 |
Ошибка линейного датчика каретки |
|
59.1:19 |
Главная плата и датчик крышки картриджей были заменены одновременно |
|
59.2:19 |
Установлена неподдерживаемая или повторно используемая деталь |
|
79:03 |
Общая Ошибка Принтера |
|
79:04 |
Общая Ошибка Принтера |
|
85.1:10 |
Отказ датчика индекса подачи |
|
85.2:10 |
Ошибка датчика энкодера |
|
87:10 |
Ошибка ленты энкодера |
|
BA7E710E, B87E7120, B87E3780, B884B238 |
Ошибка «Синий экран» — ошибка прошивки |
|
Проблема с принтером или системой печати |
Проблема с принтером или системой печати. Выключите и снова включите принтер |
|
Каретка не двигается |
Проблема может быть связана с несколькими узлами: лента позиционирования, ремень привода каретки, натяжитель ремня, а также плата каретки. Точная диагностика даст полный ответ. |
|
Один или несколько картриджей повреждены в плоттерах HP DesignJet T120 | T125 | T130 | T520 | T525 | T530 |
Если плоттер выдал эту ошибку, значит у Вас проблема с печатающей головкой |
Если Вы не нашли искомую ошибку в таблице, напишите нам на электронный адрес, чат на сайте либо просто позвоните. Мы постараемся найти решение.
HP Designjet T520 «ошибка принтера» или «сбой системы печати»
Нажимаем кнопку включения и держим 15 сек.
Заходим в сервисное меню и набираем «3746»
Находим « RESET » вводим « HARD RESET » и «ОК»
Если до установки совместимых расходников допустить полное опустошение оригинальных картриджей HP 711, 913, 932, 933, 951, 950 или 953, печатное устройство выдаст ошибку с требованием заменить пустые картриджи.
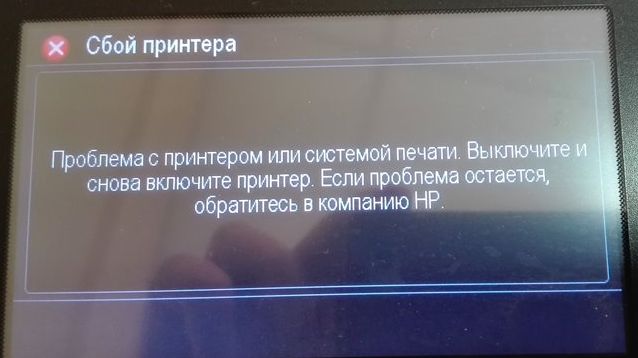
При установке неоригинальных картриджей, ПЗК или СНПЧ данная ошибка часто не исчезает, а лишь меняет текст на «Неисправность системы печати, выключите и включите принтер», «Проблема с принтером или системой печати, выключите и снова включите принтер. При повторном появлении данного сообщения обратитесь в техническую поддержку компании HP» (возможны другие формулировки). Это значит, что сработал датчик в печатающей голове при установленных неоригиналах.
Чтобы ошибка не возникала, следите за уровнем чернил в оригинальных картриджах и не допускайте их полного опустошения. Если всё же ошибка возникла, решается она по этой инструкции.

Добрый день! Возникла данная ошибка. Плоттер печатает 1-2 листа. Потом каретка уезжает в зону парковке, производит звуки, как при очистке головки. После этого возникает данная ошибка.
Плоттер t520, подключена СНПЧ, купленная у вас (максимальная).
Пробовал откачать воздух. Ничего не изменилось. Чернила используются купленные у Вас, срок годности не прошёл.
Ошибка пропадает сама собой после выключения плоттера (не всегда) и возникает опять через печать пары листов. При этом качество печати хорошее.
Что можно предпринять?

Если уже не помогают никакие манипуляции с картриджами, то последним выходом из данной проблемы будет следующее:
1. Посмотреть какой картридж не определяется принтером и требуется его замена: «Y» , «M», «C» или «K».
2. Извлечь все картриджи и саму печатную головку из принтера.


6. В обратной последовательности собрать печатную головку (приложить плату, привернуть ее саморезами, вставить шлейф в разъем) и установить в принтер. Вставить картриджи и закрыть крышку.
После процесса инициализации (определения) картриджей (как и после обычной замены картриджей) принтер начнет печатать.
. После установки перемычки или нескольких перемычек на контакты разных картриджей, принтер не будет оповещать об уровне чернил этих картриджей. Необходимо периодически вручную проверять данные картриджи и своевременно дозаправлять их чернилами, или менять на любые другие, чтобы не допустить завоздушивание печатной головки.

17 Сообщения об ошибках на передней
панели
Время от времени на экране передней панели может появляться одно из перечисленных ниже
сообщений. В этом случае следуйте инструкциям в столбце «Рекомендации».
Если вы видите сообщение об ошибке, которое не указано здесь, и не знаете, как реагировать,
или если рекомендованное действие не решает проблему, свяжитесь со службой поддержки
HP. См. раздел
Обращение в службу поддержки HP на стр. 140
.
Таблица 17-1
Текстовые сообщения
Сообщение
Рекомендации
[Цвет] картридж: срок истек
Замените картридж. См. раздел
Замена картриджа
на стр. 77
.
[Цвет] картридж заканчивается
Убедитесь, что используется правильный тип картриджа
(номер модели).
[Цвет] картридж заканчивается
Убедитесь, что используется правильный тип картриджа
(номер модели).
Для возобновления печати необходимо заменить пустые
картриджи.
Заменяйте картриджи по мере необходимости. См.
раздел
Замена картриджа на стр. 77
.
Сбой системы чернил
Обратитесь в службу поддержки HP. См. раздел
Обращение в службу поддержки HP на стр. 140
.
Используйте документ № 1 для обслуживания
Обратитесь в службу поддержки HP. См. раздел
Обращение в службу поддержки HP на стр. 140
.
Используйте документ № 2 для обслуживания
Обратитесь в службу поддержки HP. См. раздел
Обращение в службу поддержки HP на стр. 140
.
Используйте документ № 3 для обслуживания
Обратитесь в службу поддержки HP. См. раздел
Обращение в службу поддержки HP на стр. 140
.
Один или несколько картриджей отсутствуют или
повреждены.
При необходимости вставьте картриджи надлежащего
цвета. См. раздел
Замена картриджа на стр. 77
.
Замятие бумаги
См. раздел
Замятие рулона на стр. 101
или
Замятие в
многолистовом лотке на стр. 103
.
Ширина бумаги меньше, чем минимальный размер,
поддерживаемый выбранным источником бумаги.
Загрузка отменена.
Извлеките бумагу и загрузите бумагу подходящего
размера.
Формат загруженной бумаги слишком широк.
Необходимо извлечь вручную.
Извлеките бумагу вручную и загрузите бумагу
подходящего размера.
Бумага слишком отдалена от горизонтальной линии
загрузки Пожалуйста, повторите попытку.
Извлеките и снова загрузите бумагу.
Вручную извлеките рулон бумаги и повторите попытку.
Перемотайте рулон вручную.
134 Глава 17 Сообщения об ошибках на передней панели
RUWW
В данной статье мы поговорим об общем положении ошибок. Все системные ошибки можно посмотреть в сервисном мануале вашего плоттера. Опытные мастера без проблем определяют причину возникновения той или иной ошибки и устраняют их в большинстве случаев на территории заказчика. Большинство ошибок плоттера не имеют прямую связь с кодом ошибки и не могут быть исправлены описанными действиями, но тем не менее существуют и не критические ошибки, которые устраняются действиями рядового пользователя. В таких случаях компания HP рекомендует вызывать квалифицированных инженеров.
При некоторых ошибках можно продолжать работу, нажав кнопку Enter на передней панели; при других ошибках продолжать работу нельзя — попробуйте выключить и включить принтер, если ошибка не исчезла, то требуется квалифицированное вмешательство.
Код ошибки состоит из четырех цифр; в таблице 1 приведены расшифровки первых двух цифр, в таблице 2 — последних двух. Чтоб открыть таблицу нажмите на кнопку Показать/Скрыть
Таблица 1: первые две цифры кода ошибки
Таблица 2: последние две цифры кода ошибки
Утилита просмотра лог-файла ошибок
Подробное описание кодов ошибок плоттеров HP
Если Вы умный, смелый, ловкий и умелый, желаете работать в дружном коллективе и зарабатывать достойную заработную плату, то просто позвоните нам,…
Для юридических лиц мы рекомендуем заключить договор на сервисное техническое обслуживание. В случае, если Вы заключите договор во время покупки…
Модераторы: KOT, Женька 116

Если у одного человека есть воображаемый друг, то он — ненормальный. Если же у кучи людей есть воображаемый друг, то это религия.
с 01.03.2017 свалил в Польшу до ~~~
-

svzhuk
- Засыпщик
-

- Персональный альбом

![]()
![]() мастерчип » Вт дек 08, 2015 5:15 pm
мастерчип » Вт дек 08, 2015 5:15 pm


 попробуй зайти в Support Menu удерживая кнопу Питания 15 сек. стр. 102
дальше смотри, и проверь блок питания …на выходные напружения подключенным к плоттеру и без.
Добавлено спустя 21 час 41 минуту 20 секунд:
svzhuk писал(а):дд!
есть плоттер в ошибке «b87e7106» …
как успехи? не томи колись )
«Доподлинно известно, что вся техника работает на дыме, и как только дым выходит из техники, она перестает работать ..»
-

мастерчип
- Собрал картридж
-
- Сайт
- Персональный альбом

![]()
![]() svzhuk » Пн фев 08, 2016 11:26 am
svzhuk » Пн фев 08, 2016 11:26 am
Если у одного человека есть воображаемый друг, то он — ненормальный. Если же у кучи людей есть воображаемый друг, то это религия.
с 01.03.2017 свалил в Польшу до ~~~
-
svzhuk
- Засыпщик
-
- Персональный альбом
![]()
![]() butch11 » Чт апр 07, 2016 4:24 pm
butch11 » Чт апр 07, 2016 4:24 pm
Две недели ковырялся с ним. Считал SPI снял образы с USB-flash сравнивал блоки между собой и с обновлением с оф. сайта есть похожие блоки менял местами, стирал , что то правил толку нет, иногда другие ошибки выскакивают. Снял лог с помощью дебага отправил в HP, там сказали ничего пояснить не могут и по поводу таких ошибок есть официальное решение от НР это ЗАМЕНА ГЛАВНОЙ ПЛАТЫ + БАНДЛБОАРД + ШЛЕЙФЫ.
Я сдался!
Как вариант попробовать снять образы с рабочего T120/520 и залить в труп, может клон получится, но есть вопрос по платке банделбоард может у нее какой-то ИД есть или она неисправна.
Привожу начальную часть лога я так понял проц типа ARM есть же здесь на форуме Кулибины и Келдыши посмотрите пожалуйста скажите что нибудь![Boot] ******************************************************
[Boot] Firmware build timestamp: Thu May 30, 2013 08:01:21PM
[Boot] ASIC ID (Shemp RevA .3 fab0 Marvel)
[BOOT] Unique ID 0x647eb63d 0x1ae8c410 0x0020060c 0x0038000c
[Boot] Nominal Part (0 steps)
[Boot] Entering NOS_HW_MCASIC_init
[Boot] Board Support (ROM) : 0x05010507 (bytepacked)
[Boot] Unmapped Board ID (Compiled in): 0x503f (bitpacked) M:0x05 F:0x01 N:0x1f
[Boot] Unmapped Board ID (from NVM) : 0x5027 (bitpacked) M:0x05 F:0x01 N:0x07
[Boot] Remapped Board ID (table) : 0x5027 (bitpacked) M:0x05 F:0x01 N:0x07
[nos_ui] mcu is Cypress, code ver. 0x07; LeMans #0x38; AUO 4.3; Raw ADC: 0x0000
[Boot] NVM powerdown state = 0x00000002
[FPMCU] _powerup_buttons (raw value->button ID): 0x00->0x2000, 0x00->0x2000
[Boot] Load mode = 0x00000004
[Boot] Invalid Bitmap Header[Boot] SPI Device 0 : W25Q32 (4 Megabytes) (ID:0x00ef4016)
[Boot] SPI Device 1 : No ROM found (ID:0x00000000)
[Boot] SPI Device 2 : No ROM found (ID:0x00000000)
[Boot] SPI Device 3 : No ROM found (ID:0x00000000)
[Boot] Invalid Bitmap Header[Boot] calling (*0x10160a49)()
-

butch11
- Осматривается
-
![]()
![]() butch11 » Чт апр 07, 2016 4:26 pm
butch11 » Чт апр 07, 2016 4:26 pm
И конец
*** ASSERT: 0xb3ff398e
*** type of assert: ASSERT_TYPE_MEM
*** file: .
*** at address: 0x2eff398e
*** Error sub-type: 0x03
-
butch11
- Осматривается
-
![]()
![]() 4rom » Сб июл 02, 2016 5:02 am
4rom » Сб июл 02, 2016 5:02 am
Прошу прощения, что поднял довольно старую тему, но…
Принесли недавно плоттер HP T120.. Вроде как ситуация похожая на ту, которую описывал топикстартер… Тоже моргнул свет и… при загрузке плоттера — зеленый экран и цифры 1 2 3 4 5.
Определяется аппарат как PSC Boot. Как раз стоял на ремонте клиентский T520. Взял с него флэшку, (которая в USB-разъем воткнута в «мать»), скопировал посекторно и влил инфу на флэшку «больного». Микруху SPI на плате не трогал. Пациент полностью завелся, серийники и прочие настройки не изменились. Так что — на флэшке, видимо, хранится просто операционка с загрузчиком, все номера и данные, видимо, на SPI. И.. T120 и 520 — полностью взаимозаменяемы по мозгам (по крайней мере — флэшки).
- За это сообщение автора 4rom поблагодарили: 3
- Practic, rfinfyrf, svzhuk
-
4rom
- Испачкался тонером
-
- Сайт
- ICQ
- Персональный альбом
![]()
Вернуться в Плоттеры
Кто сейчас на форуме
Сейчас этот форум просматривают: нет зарегистрированных пользователей и гости: 4