Прежде чем начать, вы должны знать, что если вы достигли точки, в которой вы получили любую из этих ошибок, вы сильно рискуете, что данные на диске будут потеряны навсегда, поскольку эти ошибки указывают на то, что что-то плохое происходит с жесткий диск, так как POST не смог его инициализировать. Первая рекомендация, конечно, заключается в том, что вы идете покупать новое устройство, но давайте посмотрим, что с этим можно сделать.

Эти ошибки могут появиться при запуске компьютера во время POST, после чего компьютер проверяет оборудование. Это конкретные ошибки жесткого диска и, в частности, механического жесткого диска ( они не появляются в SSD ), которые указывают на то, что он начинает выходить из строя или что он скончался и вам необходимо его заменить. Идеальным вариантом является именно замена отказавшего диска на новый, но есть некоторые вещи, которые вы можете сделать, чтобы попытаться восстановить диск, и которые иногда могут помочь вам защитить данные, которые у вас есть на нем.
Бывают случаи, когда эти ошибки также могут появляться при запуске диагностических инструментов, таких как сам BIOS.
Точно так же ошибки 305, 303 и 301 жесткого диска могут даже появляться в сторонних программных инструментах, которые проверяют целостность жесткого диска; Дело в том, что где бы ни возникли некоторые из этих ошибок, вам следует подготовиться, потому что они довольно серьезны, и с этого момента мы говорим вам, что если вам удастся их исправить, вы должны почувствовать себя очень удачливыми.
Что делать, если вы получили любую из этих ошибок?
Первое, что вам следует сделать, это, как мы уже упоминали ранее, не рисковать и купить новый жесткий диск заменить тот, который вызывает проблемы, хотя, как мы расскажем ниже, все еще есть возможность «спасти» устройство, несмотря на то, что вам удастся это исправить, есть хороший шанс что вы рано или поздно столкнетесь с ошибкой снова, потому что этот жесткий диск не работает должным образом.
При этом есть несколько способов исправить эти ошибки Quick 303 и Full 305, но будут ли они работать или нет, будет зависеть от фактического состояния диска, потому что бывают случаи, когда он полностью выходит из строя и повреждение необратимо. Давай увидим это.
Диск восстановления — это ключ
Обычно, несмотря на то, что вы получаете эти ошибки, компьютер может продолжать загружаться, хотя это правда, что у вас может быть несколько синих экранов (BSOD) и что система работает очень и очень медленно. В любом случае вы также можете перейти на другой компьютер (например, к семье или другу) и подключить жесткий диск, который вызывает у вас проблемы.
Первое, что вам нужно сделать, это создать диск восстановления, для которого вам также понадобится USB-накопитель или внешний жесткий диск объемом не менее 16 ГБ емкость. Нажмите кнопку «Пуск» в Windows и введите «Диск восстановления», чтобы получить доступ к инструменту, и на первом экране убедитесь, что отмечена опция создания резервной копии системных файлов на диске восстановления.
Нажмите «Далее» и подождите несколько секунд (или минут, в зависимости от производительности диска), пока приложение не соберет необходимую информацию из системы. На следующем этапе вы должны подключить USB-накопитель и выбрать его (имейте в виду, что все его содержимое будет удалено при этом, и на самом деле после выбора диска и нажатия кнопки «Далее» появится предупреждающее сообщение).
На следующем шаге нажмите «Создать» и дождитесь, пока автоматический процесс обо всем позаботится.
По завершении перезагрузите систему и загрузитесь с только что созданного диска восстановления. Выберите Дополнительные параметры и Командную строку, откуда вы должны выполнить следующую команду:
чкдск / ф / р
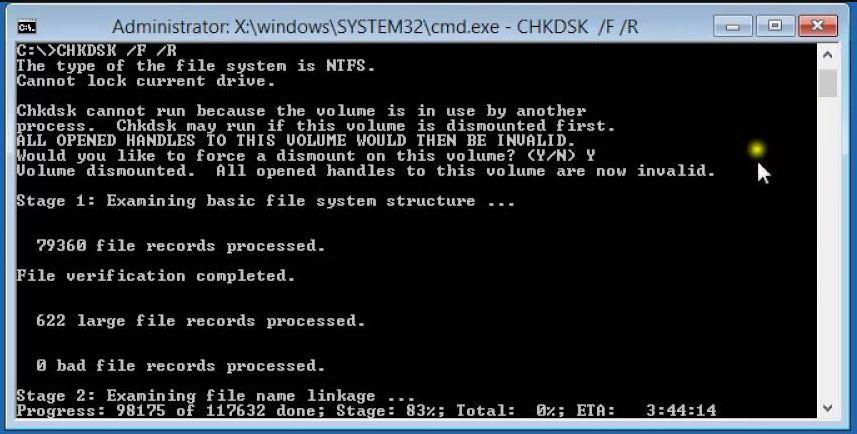
Это тщательно проверит состояние жесткого диска и устранит все возможные проблемы.
Между тем, как мы рекомендовали ранее, вам следует заменить неисправный жесткий диск и восстановить систему до того состояния, в котором она была до того, как мы создали диск восстановления (в дополнение к запуску CHKDSK на предыдущем шаге), чтобы он пора снова перезагрузиться и перезагрузить систему с USB-накопителя, который мы создали ранее.
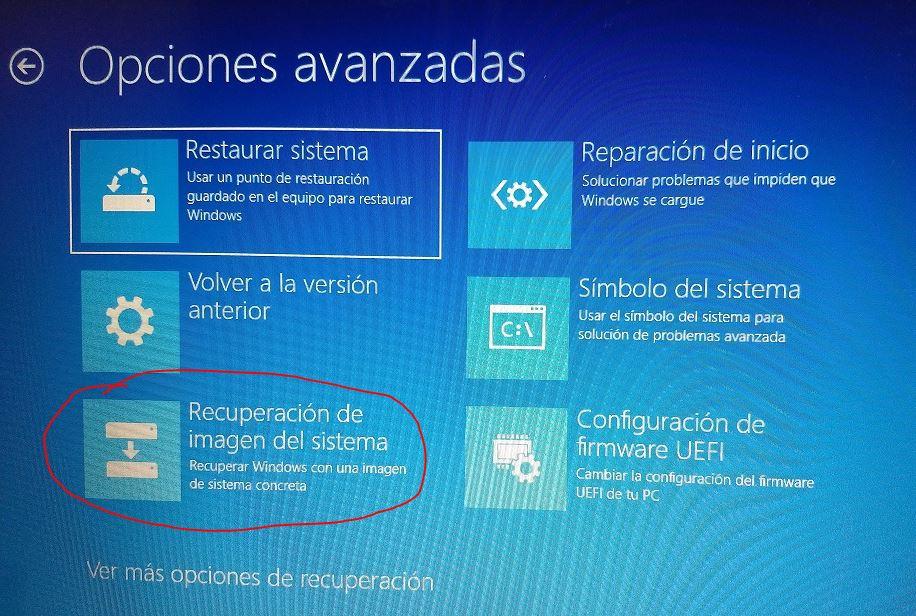
В этом случае вам нужно будет выбрать в меню опцию Диагностика / Дополнительные настройки / Восстановление образа системы и просто продолжить процесс, следуя инструкциям мастера (в основном, это все время нажимать Далее со значением по умолчанию. опции). Остальное сделает вся программа восстановления автоматически.
Как только это будет сделано, и если все пойдет хорошо, ваша система будет такой же, как у вас была с точки зрения документов, файлов и настроек, но вы должны иметь в виду, что программы и игры, которые вы установили, придется переустановить заново. , поскольку они не передаются во время создания диска с системным образом, только настройки и документы (в противном случае вам понадобится довольно большой блок, размер которого будет зависеть от количества программ и других, которые вы установили).
Короче говоря, в этой статье мы рассказали вам, как защитить и восстановить ваши файлы и настройки, когда диск выходит из строя с ошибками Quick 303 и Full 305, но в итоге все это так, что этот жесткий диск мертв или вот-вот умрет. и вам придется безвозвратно заменить его на новый.

Create an account on the HP Community to personalize your profile and ask a question
Your account also allows you to connect with HP support faster, access a personal dashboard to manage all of your devices in one place, view warranty information, case status and more.

06-10-2013
06:32 PM
— edited
06-10-2013
07:27 PM

HP Recommended
- Mark as New
- Bookmark
- Subscribe
- Permalink
- Flag Post
Hello everyone and thank you for reading this.
So I own an HP Pavillion DV6(EDIT: I believe its a dv6 6145dx) and it is NOT starting up. EDIT: Windows 7 Home Edition(I believe) 64 bit.
What I mean is that it doesnt get pass the Windows loading screen after I hit «start up windows normally».
So I tried to figure out what the error was and I went into the bios and did a Hard Disk test. When I first did this it ended on the short test and said Hard Disk is Full Error 305.
I left it like that for a while(maybe 3 weeks) before I finally got around to fixing it.
To fix it I got Linux onto a disc (Ubuntu to be exact) and started my computer up through the OS on the disc. I then cleared and deleted some files (music,old games) that I didnt need anymore in hopes that it would fix the error.
So I tried to boot it up again and it got the same problem as before, it couldnt get past the Windows loading screen.
I then went back into the bios and did the Hard Disk scan again. This time it got past the short test but did NOT pass the long test. The error message I got was Hard Disk Error 305.
Ive done a bit of searching(how I found this site actually) and I cant find a fix. Is my hard drive toast? Is there any easy fix? Should I reinstall Windows?
Thanks for reading and I would really appreciate any help.
Have a nice day.
1 ACCEPTED SOLUTION

DavidPK
49,520
17,277
9,832
23,926
Level 18
06-12-2013
04:22 AM
HP Recommended
- Mark as New
- Bookmark
- Subscribe
- Permalink
- Flag Post
Hi,
You’re welcome 
The fact that you can access data on the HDD via Ubuntu is pretty much what I would expect as the drive isn’t having to run Windows, so you’ve greatly reduced the read/write load it’s under — particularly if the fault is mechanical, this gives you a much better chance of just pulling off your data.
If you know your HDD manufacturer, visit their website as you should find a download to create a diagnostic disc/usb to further test the drive.
As for replacing the HDD, you’re not restricted to any particular manufacturer, so as an example, the drive on the following link would be fine — ( One important aspect to note is not to replace the drive with one of a smaller capacity than the original, as this often causes problems when using Recovery Discs to reinstall the OS ).
750Gb 2.5″ Sata II Hard Drive.
The replacement procedure can be found starting on Page 70 of your Maintenance & Service Guide.
Regards,
DP-K
—————————————————————————
****Click the White thumb to say thanks****
****Please mark Accept As Solution if it solves your problem****
****I don’t work for HP****

Windows Insider MVP
Was this reply helpful?
Yes
No
6 REPLIES 6
DavidPK
49,520
17,277
9,832
23,942
Level 18
06-11-2013
02:59 AM
HP Recommended
- Mark as New
- Bookmark
- Subscribe
- Permalink
- Flag Post
Hi,
The 305 error code is a litle misleading, but it refers to a failure of the comprehensive ( Full ) Disk Self Test and would indicate that the Hard Drive is failing and needs to be replaced. This is also consistent with the start-up issue.
If your notebook is still under warranty, contact HP and arrange to have the drive replaced — you can check your warranty status Here.
If you live in the US, contact HP Here.
If you are in another part of the world, start Here.
If you are out of warranty and would like a guide on replacing the Hard Drive yourself, please let me know.
Regards,
DP-K
—————————————————————————
****Click the White thumb to say thanks****
****Please mark Accept As Solution if it solves your problem****
****I don’t work for HP****
Windows Insider MVP
Was this reply helpful?
Yes
No
06-11-2013
08:26 PM
HP Recommended
- Mark as New
- Bookmark
- Subscribe
- Permalink
- Flag Post
Hey thanks for the reply, DavidPK it is much appreciated.
So does being able to use my computer through Linux on a CD mean nothing then? I just find it weird that I can start it and access the supposed errored hard drive on Linux but not on Windows. Is that consistent with other people who have the problem?
Changing the hard drive shouldnt be too much of an issue so I am not worried.
How much will that cost for my machine?
Was this reply helpful?
Yes
No
DavidPK
49,520
17,277
9,832
23,927
Level 18
06-12-2013
04:22 AM
HP Recommended
- Mark as New
- Bookmark
- Subscribe
- Permalink
- Flag Post
Hi,
You’re welcome
The fact that you can access data on the HDD via Ubuntu is pretty much what I would expect as the drive isn’t having to run Windows, so you’ve greatly reduced the read/write load it’s under — particularly if the fault is mechanical, this gives you a much better chance of just pulling off your data.
If you know your HDD manufacturer, visit their website as you should find a download to create a diagnostic disc/usb to further test the drive.
As for replacing the HDD, you’re not restricted to any particular manufacturer, so as an example, the drive on the following link would be fine — ( One important aspect to note is not to replace the drive with one of a smaller capacity than the original, as this often causes problems when using Recovery Discs to reinstall the OS ).
750Gb 2.5″ Sata II Hard Drive.
The replacement procedure can be found starting on Page 70 of your Maintenance & Service Guide.
Regards,
DP-K
—————————————————————————
****Click the White thumb to say thanks****
****Please mark Accept As Solution if it solves your problem****
****I don’t work for HP****
Windows Insider MVP
Was this reply helpful?
Yes
No
06-12-2013
06:22 PM
HP Recommended
- Mark as New
- Bookmark
- Subscribe
- Permalink
- Flag Post
Well thats some bad news then. Oh well. At least I can get my files off.
Im going to try reinstalling Windows to see if that does anything(I dont think it will but it will save me some money).
Thanks for all your help, I really appreciate it.
Was this reply helpful?
Yes
No

tmac2
12
0
0
13,803
Level 1
06-24-2016
06:29 AM
HP Recommended
- Mark as New
- Bookmark
- Subscribe
- Permalink
- Flag Post
I have the exact same problem.I bought a brand new hard drive(same size) reinstalled OS and the problem is still there on the new HD. I flashed the BIOs and still nothing????????
Was this reply helpful?
Yes
No
08-26-2016
06:30 AM
HP Recommended
- Mark as New
- Bookmark
- Subscribe
- Permalink
- Flag Post
I have hp pavilion g6 notebook…i can start my laptop and operate my all data that is available in but my laptop lot of hanging even sometime is it freezes and all task shows not responding error … recently i have deleted all data which is present in my hard drive but still this problem continue when i performed diagnosis test i got 301 and 305 hard disk error ..haw can fix it??
Was this reply helpful?
Yes
No
![]()
Be alert for scammers posting fake support phone numbers and/or email addresses on the community.
If you think you have received a fake HP Support message, please report it to us by clicking on «Flag Post».
† The opinions expressed above are the personal opinions of the authors, not of HP. By using this site, you accept the Terms of Use and Rules of Participation.

-
English
Open Menu

† The opinions expressed above are the personal opinions of the authors, not of HP. By using this site, you accept the <a href=»https://www8.hp.com/us/en/terms-of-use.html» class=»udrlinesmall»>Terms of Use</a> and <a href=»/t5/custom/page/page-id/hp.rulespage» class=»udrlinesmall»> Rules of Participation</a>.
What does hard disk error 303 and 305 Mean
Hard drive disk error 303 and 305 are diagnostic error codes. Hard disk 1 quick 303, sometimes hard disk 1 full 305 are the specific error messages that indicate the hard drive failed, dead, and needs to be replacing immediately.
So, if you’re seeing such errors on your PC with the exact information in the following displayed on the machine’s screen, go to back up the failing hard drive immediately and opt for the best solution to upgrade the hard disk with a new HDD or SSD.
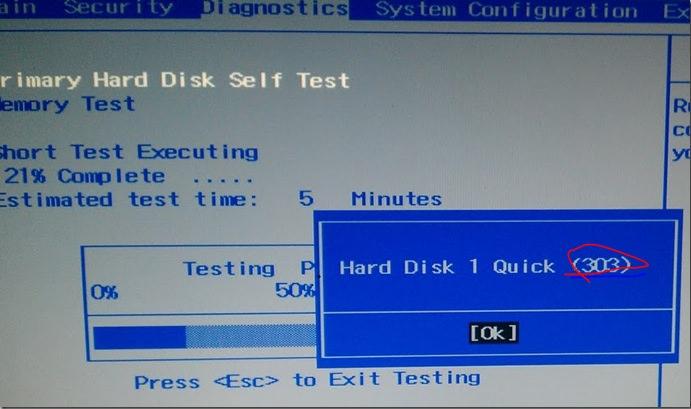
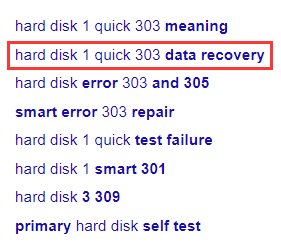
«Start up test failed
Hard disk smart 301
Hard disk 1 Quick 303″
How to back up data on hard disk with 303 or 305 error
Again, when a hard drive is given 303 or 305 error, its life is coming to an end, only a brand new hard drive will solve the problem. The question is, most of the time you need to use a recovery disc to boot into the computer in order to use the backup and recovery software to create a backup image of files, photos, videos, and more data on the hard drive because when a hard drive failed with 303 or 305 error had the system on it, it can hardly boot.
What if you don’t have a recovery CD at hand? How can you troubleshoot the issue in an emergency? Don’t be afraid, here, the EaseUS Todo Backup utility can reduce your worry. Simply take out the failed hard drive and connect it to another normal computer, download EaseUS data backup software, and create a bootable rescue media.
To make a bootable disk of EaseUS Todo Backup, follow the instruction carefully.
Step 1. Prepare a USB drive which can be written and read.
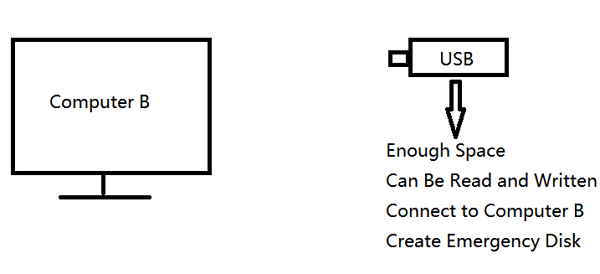
Step 2. Launch and install EaseUS Todo Backup on the Computer B.
Step 3. Find and click «Tools» and choose «Create Emergency Disk«.

Step 4. Choose the Boot disk location. You can create an ISO file, a bootable USB or CD/DVD disc.

Step 5. Then click «Create» to start.
After successfully booting into Windows, now you can continue with the hard drive and partition backup with EaseUS Todo Backup software.
Done with the necessary backup? Now you can shut down the computer and replace the failed hard drive with the prepared new one. To restore the backup you just created, launch EaseUS Todo Backup again, select the image file and click «Recovery». The hard disk data will come back.
Have you received the error “hard disk 1 quick 303” in the HP PC startup self test? Sometimes you also see the errors like hard disk 1 full 305 or hard disk 1 SMART 301. In this post, we will walk you through what you should do to fix the HP hard disk error.
Hard Disk Error 303 and 305
HP computers include a diagnostic tool that tests your computer’s hardware for errors. As the computer boots, press the ESC key when the HP Splash Screen appears. When the Startup menu appears, you can press F2 to enter System Diagnostics. Then, this tool will show you system information, and perform start-up test, run-in test & hard disk test.
However, when you start your HP computer, it may fail to boot successfully and redirect to the System Diagnostics. After running Primary Hard Disk Self Test, the screen gives you the error “hard disk quick (303)”. Sometimes, the errors like “hard disk 1 full (305)” or “hard disk 1 SMART (301)” may appear.
What is hard disk 1 quick 303 meaning? That means your hard drive may have failed and needs to be replaced immediately.
What to Do in Case of SMART Error 303
1. If your computer is covered under warranty, you should contact HP support for further assistance.
2. If not, you can search for SMART error 303 repair or hard disk 1 quick 303 fix on the internet.
- You need to prepare a recovery disc, boot the computer from it to the recovery environment by clicking Repair your computer.
- Run Command Prompt and type the command line chkdsk /r to check for disk errors and shield bad sectors if it finds some.
3. You had better back up the important data on the hard drive before the hard drive gets worse and then purchase a new hard drive like HDD or SSD to replace the damaged one by yourself.
4. Recover data from damaged hard drive.
In the following parts, we will show you details on data backup and data recovery.
Back up Data on Failing Hard Drive with 303, 305 or 301 Error
Again, when a hard drive is given 303, 305 or 301 errors, its life is coming to an end, and only a new hard drive will solve the problem.
The question is, the system can hardly boot when a hard drive is failing with the SMART test failed error code 303, 305 or 301, how can you back up data including files, photos, videos, and more on the damaged hard drive?
Take it easy! Here, MiniTool ShadowMaker, professional data backup software, can reduce your worry.
Tip:
1. You can choose to simply take out the failed hard drive and connect it to another normal computer for data backup on the desktop with this tool.
2. Or use the bootable rescue media created by MiniTool ShadowMaker to boot your computer that has the error hard disk 1 quick 303, full 305 or SMART 301 and then start to back up files.
Right now, free get MiniTool ShadowMaker Trial Edition for 30-day use and install it on Windows 10/8/7. Next, start the backup by following these steps (using bootable media is the example).
MiniTool ShadowMaker TrialClick to Download100%Clean & Safe
Move 1: Create Bootable Media In Case of SMART Error 303, 305 or 301
Step 1: Launch MiniTool ShadowMaker in a Working PC
- Install this freeware on a normal computer.
- Double-click the .exe program to open it.
Step 2: Choose the Feature to Create Bootable Media
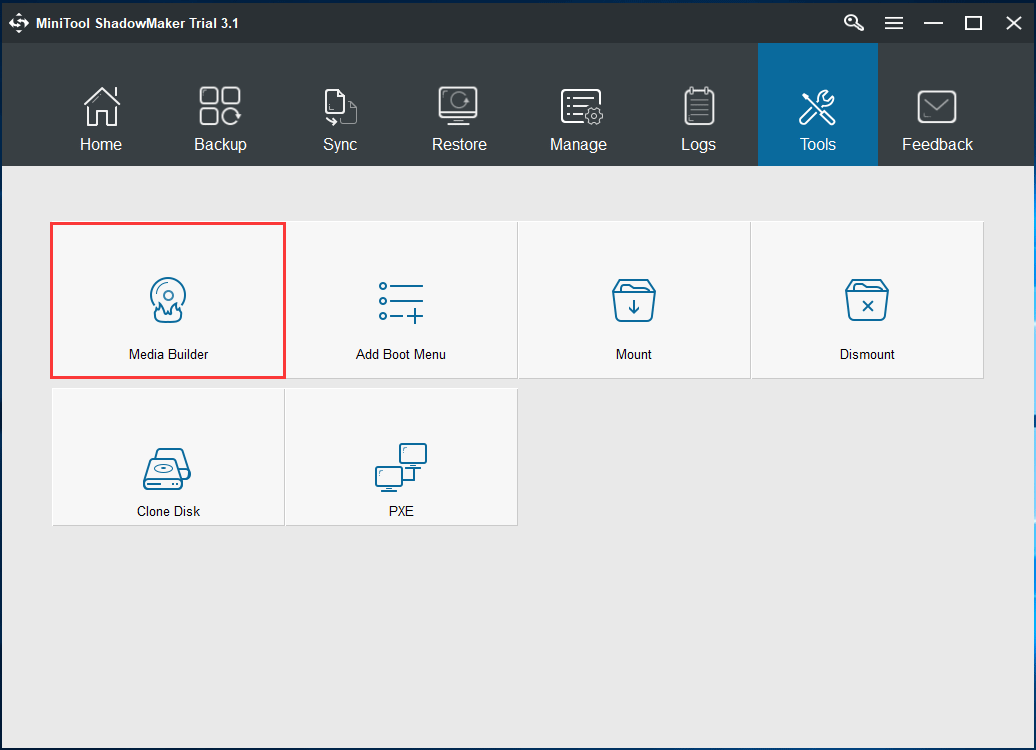
- Navigate to the Tools window.
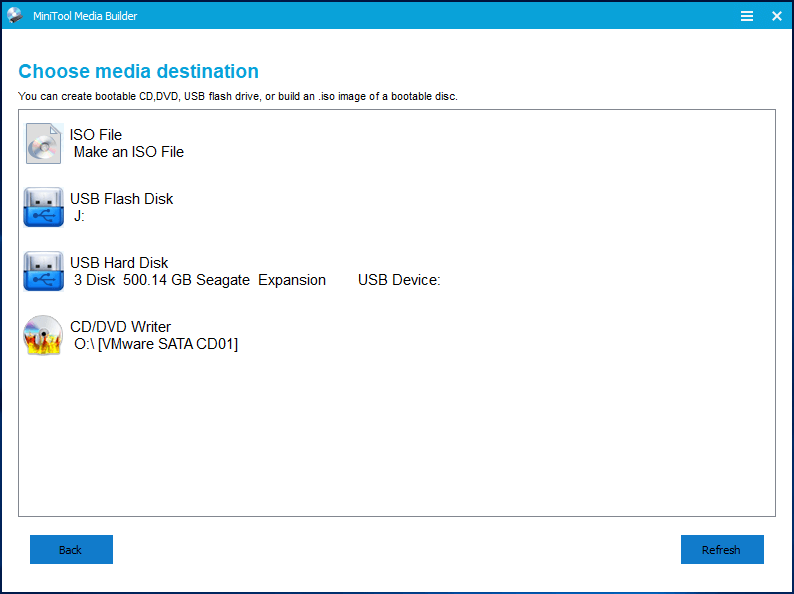
- Click the Media Builder feature.
Step 3: Start to Create Bootable Media
- In the pop-up window, click WinPE-based media with MiniTool plug-in to go on.
- Plug in your USB flash drive, USB hard disk or CD/DVD disc.
- MiniTool Media Builder will start to create a bootable drive.
After you finish creating a bootable disc or drive, change the boot order in BIOS of the computer that has hard disk 1 quick 303 or error code 301/305 to boot it from the device. The post – How to Boot from Burned MiniTool Bootable CD/DVD Discs or USB Flash Drive might be the one you are finding.
Move 2: Back up Data on Disk with Hard Disk Error 303 and 305 (or 301)
Step 1: Boot the PC to MiniTool Recovery Environment
- After running your computer from the created media, make the choices of whether to change screen resolution and whether to load MiniTool Software.
- If you don’t load this software, click the first option in the MiniTool PE Loader interface to run it.

Step 2: Choose Backup Source and Destination
By default, you see this freeware has selected system drives as the backup source. Here, your aim is not system backup and you need to decide what to back up when SMART error 303, 305 or 301 happens.
- Go to the Source section.
- Select the type: Disk and Partitions or Folders and Files. If you have many important files on your disk, we recommend you to back up the partitions that include much data.

Tip: If you want to back up certain files or folders, select another type for file backup. Read this post – How to Backup Files on Windows 10? Try These Top 4 Ways to know more.
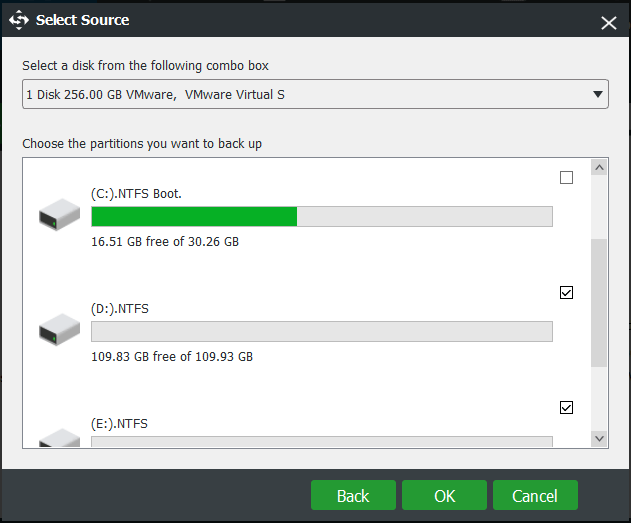
- Click the Disk and Partitions type.
- Select the system disk from the combo box.
- Tick the partitions that have data you want to back up.
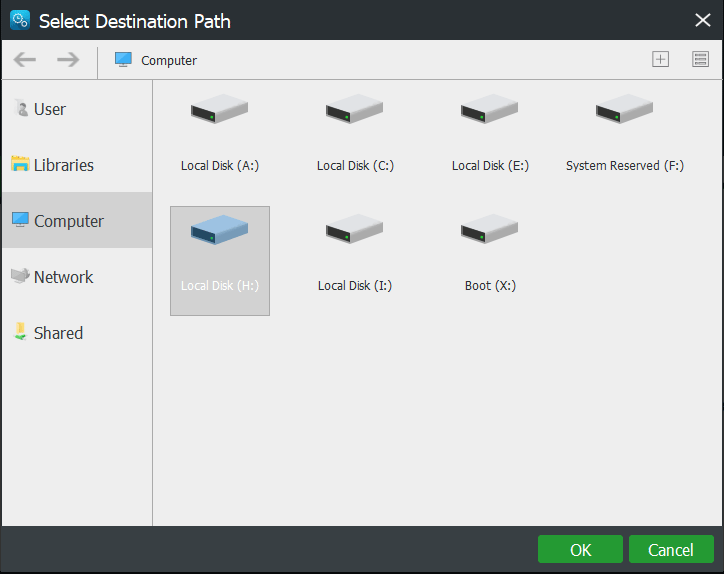
Next, choose a destination path based on your actual needs. MiniTool ShadowMaker allows backing up to an external hard drive, USB flash drive, NAS, ect.
Step 3: Start Sector-by-Sector Backup
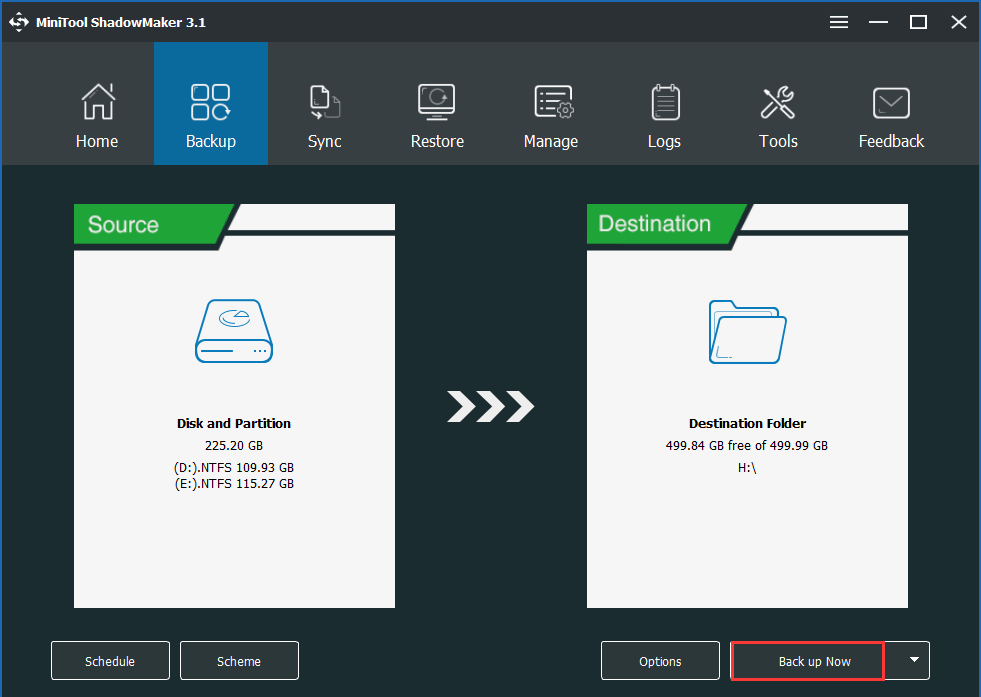
1. Return to the main interface and click the Options feature.
2. Choose the Sector by sector backup option under the Image Creation Mode tab.
3. Click OK.

4. Go back to the Backup page, click Back up Now to run the data backup immediately.
After the backup is finished, you could shut down your computer and replace the failed disk with a new one. Then, install an operating system to this new disk and your Windows should start up without receiving the hard disk 1 quick 303, full 305 or SMART 301 error.
To restore the backup you just created, install MiniTool ShadowMaker and launch it again, click Restore and select the image file to perform a recovery. After that, the hard disk data will come back.
Tip: Of course, you can also back up the entire system disk to rescue the data. After that, replace the failing disk with a new one. Then, do not install OS, directly restore the hard drive image to that disk and your Windows will run normally without SMART test failed error code 303, 305 or 301.
Related article: How Can You Do Windows Backup Restore to Different Computer?
“Windows gave me hard disk error 303 and 305. Thanks to MiniTool ShadowMaker, I backed up my data, and replaced the damaged disk with a new one.”Click to Tweet
Hard Disk 1 Quick 303 Data Recovery
Additionally, some of you may want to do data recovery instead of data backup when you are given the SMART error 303. When searching for this topic, you will find a related result: hard disk 1 quick 303 data recovery.
To do that job, a piece of professional and reliable data recovery software will be helpful. Here, MiniTool Power Data Recovery is worthy of being recommended since it is designed to recover files under various situations including failing hard drives, lost partitions, RAW drives, formatted partitions, etc.
When Windows shows you the hard disk 1 quick test failure issue, it won’t be able to boot properly. In this case, you also need to use MiniTool Power Data Recovery to create a bootable disc or drive to boot the PC from it and then perform data recovery in MiniTool Recovery Environment.
Right now, get the Personal Edition or an advanced edition from MiniTool Store for SMART test failed error code 303 data recovery.
Related article: How to Build Boot CD/DVD Discs and Boot Flash Drive with Bootable Media Builder?
Now, we will show you how to recover data from damaged hard drive.
Step 1: Boot Your PC to MiniTool Power Data Recovery Bootable Edition
- Configure to boot the PC from the created bootable media.
- Go to the MiniTool PE Loader interface.
- Launch MiniTool Power Data Recovery.
Step 2: Choose a Recovery Module to Scan
1. If there are multiple data partitions on the damage disk with hard disk 1 quick 303 error (hard disk 1 full 305 or hard disk SMART 301), you can choose Hard Disk Drive.
2. If there is only one data partition or you want to only recover data from a certain drive, use This PC.
- Here, we take this feature as an example.
- Choose the target drive and click the Scan button to continue.

Step 3: Perform a Full Scan
This data recovery program is scanning the selected drive. To get the best recovery result, it is recommended to wait until the full scan finishes.

Step 4: Perform Data Recovery
- After a full scan, tick all the items that you need.
- Click the Save button to restore them to a new disk.

- To quick find needed files, you can take full advantage of these features including Type, Find, and Filter.
- MiniTool Power Data Recovery allows you to preview 70 types of files with each file not larger than 100MB.
After finishing data recovery, you can replace the damaged disk with a new one, install an OS to it and boot the PC without receiving HP hard disk error 303 and 305 (or 301).
“I want to do hard disk 1 quick 303 data recovery. Thankfully, MiniTool Power Data Recovery helps to quickly and effectively recover my data from damaged disk.”Click to Tweet
Other SMART Hard Disk Errors
As you know, SMART, short for Self monitoring, Analysis and Reporting Technology, is a monitoring system integrated into the PC hard drives. It is used to monitor the disk health, detect and report the indicators of drive reliablity. If it anticipates imminent hardware failures, it will tell you so that you can take action to rescue your data.
There are many SMART hard disk errors. Besides the above errors like hard disk 1 quick 303, hard disk 1 full 305 or hard disk 1 SMART 301, you can meet these error messages:
- M.A.R.T. Capable and Status BAD…Pri Master Hard Disk: S.M.A.R.T. Status BAD, Backup and Replace Press F1 to Resume
- SMART Hard Disk Error.The SMART hard disk check has detected an imminent failure. To ensure not data loss, please backup the content immediately and run the Hard Disk Test in System Diagnostics. Hard disk 1 (301) …
- SMART Failure Predicted on Hard Disk… WARNING: Immediately back-up your data and replace your hard disk drive. A failure may be imminent. Press F1 to Continue
- More…
If you meet any one of these errors, remember to back up important data or recover files from the failing hard drive before it gets worse, as mentioned above. To sum up, data is the first.
Verdict
Is Windows giving you the SMART test failed error 303, 305 or 301? Try to repair it by following the fixes that are told in this post.
Furthermore, if you have any question related to MiniTool software, please let us know by leaving an idea in the Comment section or contacting [email protected]. Also, any suggestion of HP failure code 303/301/305 during SMART test are welcome here.
Contents
- What Are Hard Disk 1 Quick 303 and Full 305?
- What Are the Causes of Hard Disk Errors?
- How to Fix Hard Disk Errors 303 and 305 on Windows PC
- Fix 1: Backup Your Data
- Fix 2: Check Disk Cables and Connections
- Fix 3: Perform a Disk Check
- Fix 4: Update Device Drivers
- Fix 5: Run System Diagnostics
- Fix 6: Replace Your Hard Disk Drive
- What Is SMART Hard Disk Error 301?
- How to Fix SMART Error 301?
- Fix 1: Try a System Hard Reboot
- Fix 2: Check for Drive Errors
- Fix 3: Recover Your Data
- Conclusion
- FAQ
- How to Fix 303 Error?
- How to Disable SMART Hard Disk Error 301?
- What Is Error 305?
- Can I Fix a SMART Hard Disk Error 301 on My Own?

Experiencing a hard disk error can be worrisome since it’s where you store all your valuable data. When you encounter the S.M.A.R.T. hard disk error 301 or the equally dreaded Error Code 305, you can be left wondering what to do.
These hard disk errors are common in HP laptops but the good news is that they are simple to rectify with a little guidance and the right tools.
In our comprehensive guide, we provide practical solutions on how to fix hard disk 1 quick 303 and hard disk 1 full 305. We also share how to fix S.M.A.R.T. hard disk error and restore your drive’s health.
Let’s get started!
What Are Hard Disk 1 Quick 303 and Full 305?
When your computer displays the Hard Disk 1 Quick 303 and Hard Disk 1 Full 305 error codes, it means that the life of your hard drive has come to an end. It is no longer functional and needs to be replaced at once with a new HDD or SDD.
This error appears when trying to boot your system but it fails and redirects you to the System Diagnostics. After it runs the Primary Hard Disk Self-Test, it throws you the error Hard Disk Quick Error (303) or SMART Hard Disk Error 301. Sometimes, errors like Hard Disk 1 Quick (303) or Hard Disk 1 Full (305) may appear.
What Are the Causes of Hard Disk Errors?
Understanding the underlying causes of hard disk errors can help you address the issues more effectively. Here are some of the common factors that can lead to hard disk errors like 303 Error Code or Error Code 305:
- Physical damage, such as dropping your computer or something heavy falling on it.
- Overheating, where your laptop or computer is exposed to excessive heat that damages the hard disk and other components.
- Power surges or voltage fluctuations.
- Malware and virus attacks
- Loose connection
How to Fix Hard Disk Errors 303 and 305 on Windows PC
When the ‘Hard Disk 1 Quick 303’ or ‘Full 305’ errors appear, it means your hard drive is failing. You’ll need to act fast to avoid losing your important data.
Here is what you should do:
Fix 1: Backup Your Data
The first step to protecting your data is to back it up to an external storage device or cloud-based service.
You can follow the procedure below to back up the data on your damaged hard drive:
- Go to the Start menu and click on the Settings icon. You can also press the Windows + I keyboard combination to open the Settings app without going to the Start menu.
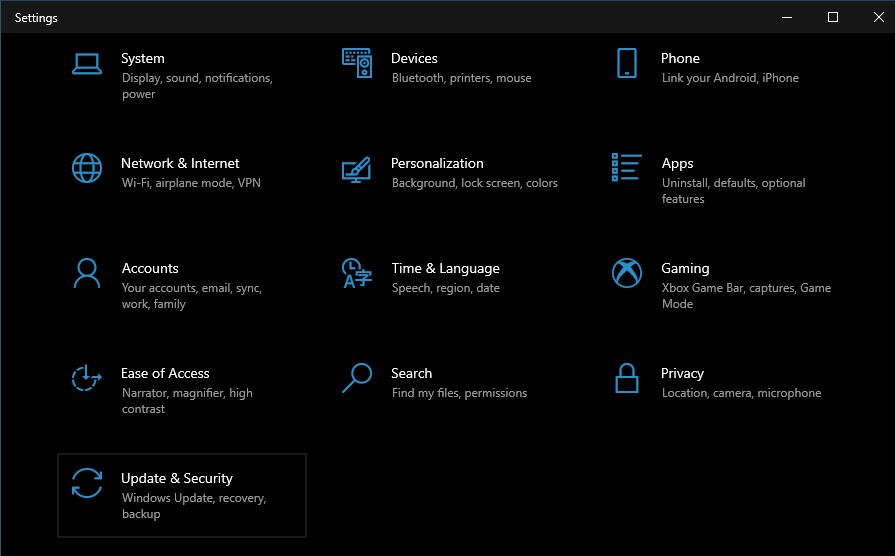
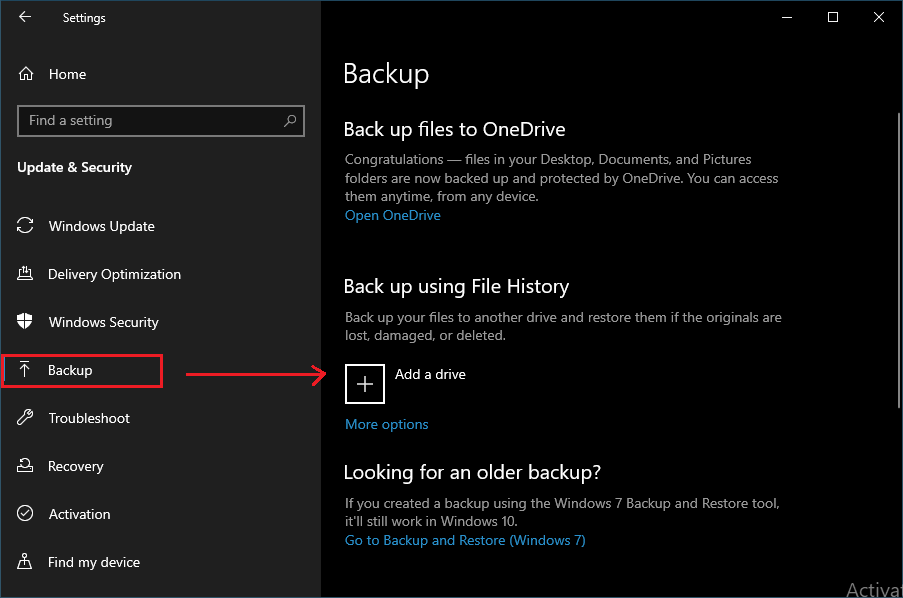
- Click on Update and Security. Then, click on Backup from the left pane of the new page.
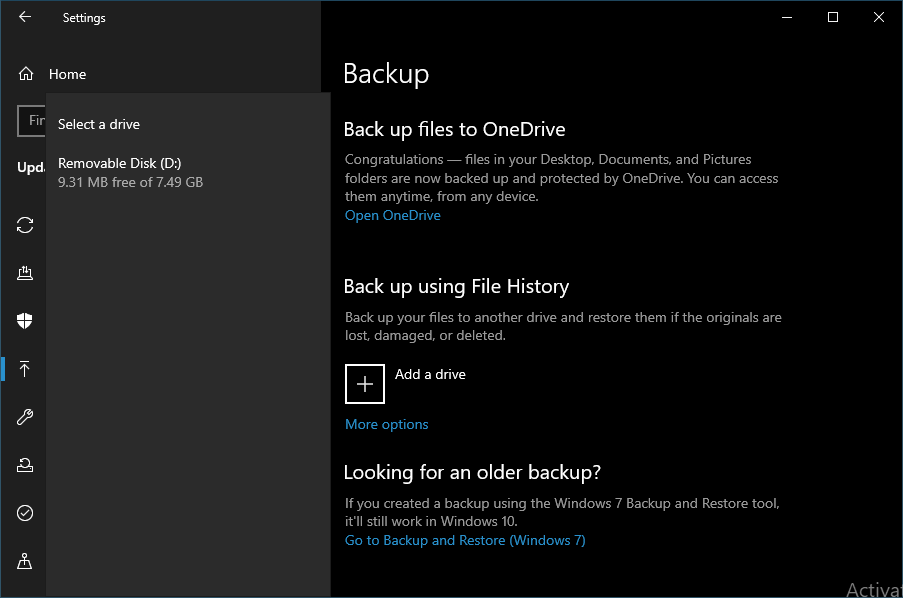
- Click on Add a Drive and select an external drive to where your data will be sent to. You can also use a network location for your backup.
- Select the drive you want to use for the backup.
If you’re a Windows 11 user, follow the steps below:
- Connect your external storage device to the computer that contains the files you want to back up.
- Hit the Windows Key and type Control Panel, then select it from the list.
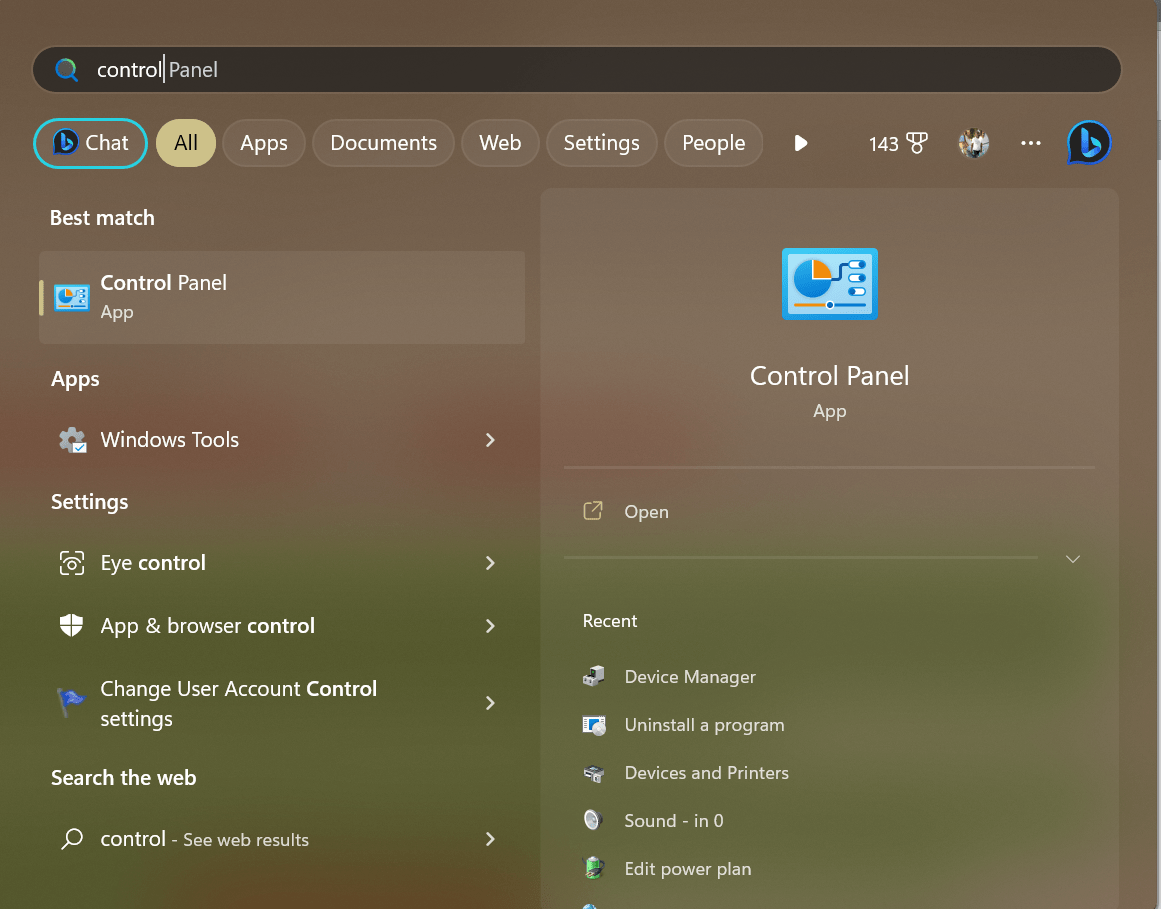
- Type File History in the Control Panel’s search box, then select Save backup copies of your files with File History.
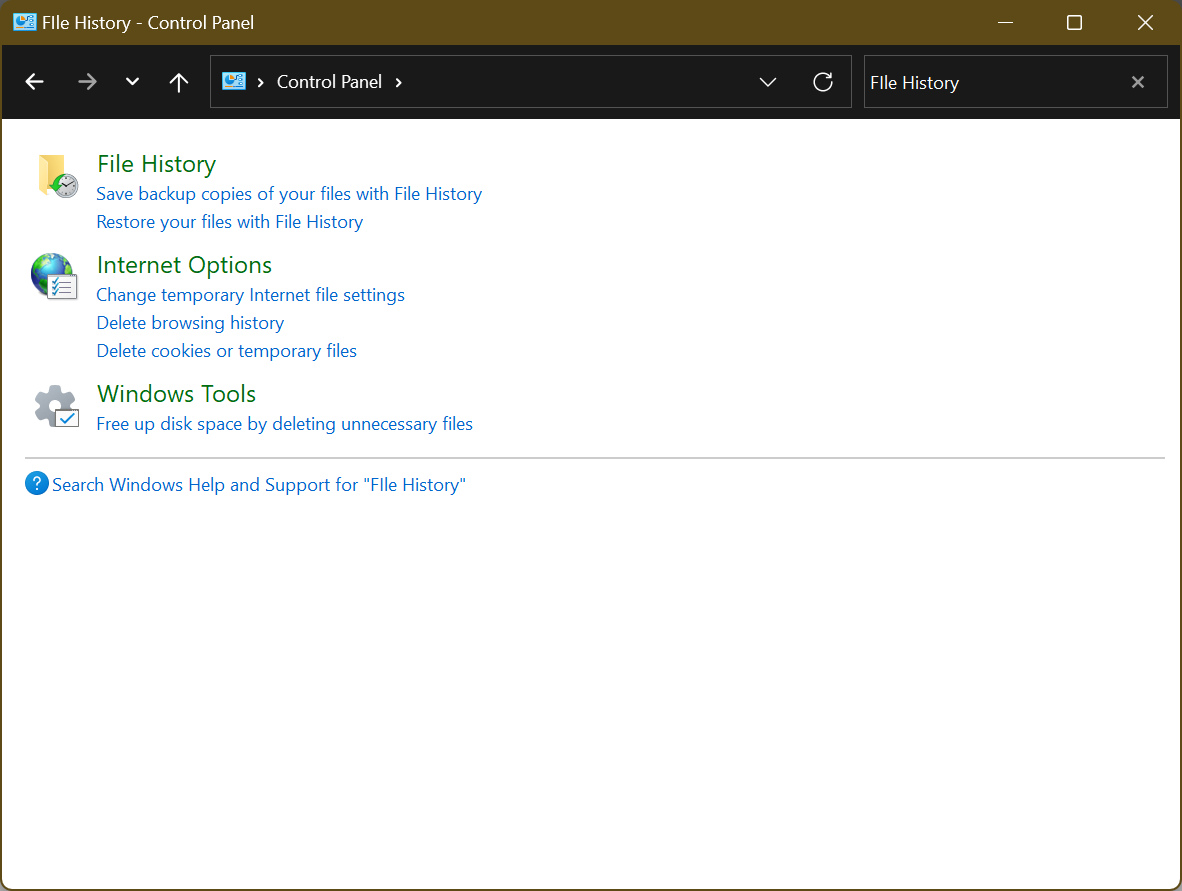
- Turn on File History to commence the operation.
After the backup is complete, you can restore your files and folders anytime you want using the Backup and Restore tool. Here is how to do so:
- Type “Restore files” (no quotes) in the search menu and select ‘Restore your files with File History.’
- Search for the file you want to restore. You can see all the available versions of the file. Select the version you want to restore and click on Restore. Doing so will save the file to its original location. However, if you’re going to save it in a different place, then click on Restore To.
Bonus Tip: If you recently upgraded to Windows 10, it might be helpful to note that you can access your old files if you used Backup and Restore to secure them before your upgrade. The System image backups you created in your previous version of Windows are available to you:
- Open the Run command (Press the Windows + R keyboard combination) and type “Control Panel” (no quotes) in the text box. Then, hit Enter.
- Click on System and Security > Backup and Restore.
- Follow the on-screen instructions to complete the process.
If you’ve upgraded to Windows 11 and you turned sync on, your synced settings will automatically be restored on your new PC when you sign in with your Microsoft account.
Related: How to Download and Install Windows 11
Fix 2: Check Disk Cables and Connections
Loose disk cables and connections can contribute to Error Code 305 and 303 Error Code by disrupting communication between your hard disk and the PC. When the cables are not securely connected or are partially disconnected, it can lead to intermittent data transmission or complete data loss, which could result in those error codes.
For that reason, you need to ensure the disk cables are connected properly. To do so:
- Power off the PC and unplug it from the power source.
- Open the computer case to access the hard drive.
- Check the cables and ensure the SATA or IDE cables, as well as the power cables, are firmly connected to the hard drive and corresponding ports on the motherboard and power supply. If the cables are damaged, replace them with new ones.
- Once done, close the PC case and check if the 303 error has been resolved.
Fix 3: Perform a Disk Check
When you encounter a hard disk error like error code 305, you can use the Windows built-in Check Disk tool to try to resolve it. Here’s how to proceed:
- Launch File Explorer using the Win + E keyboard shortcut, and select This PC.
- Right-click the hard drive giving you the SMART hard disk error, under the Device and drives, and open its Properties.
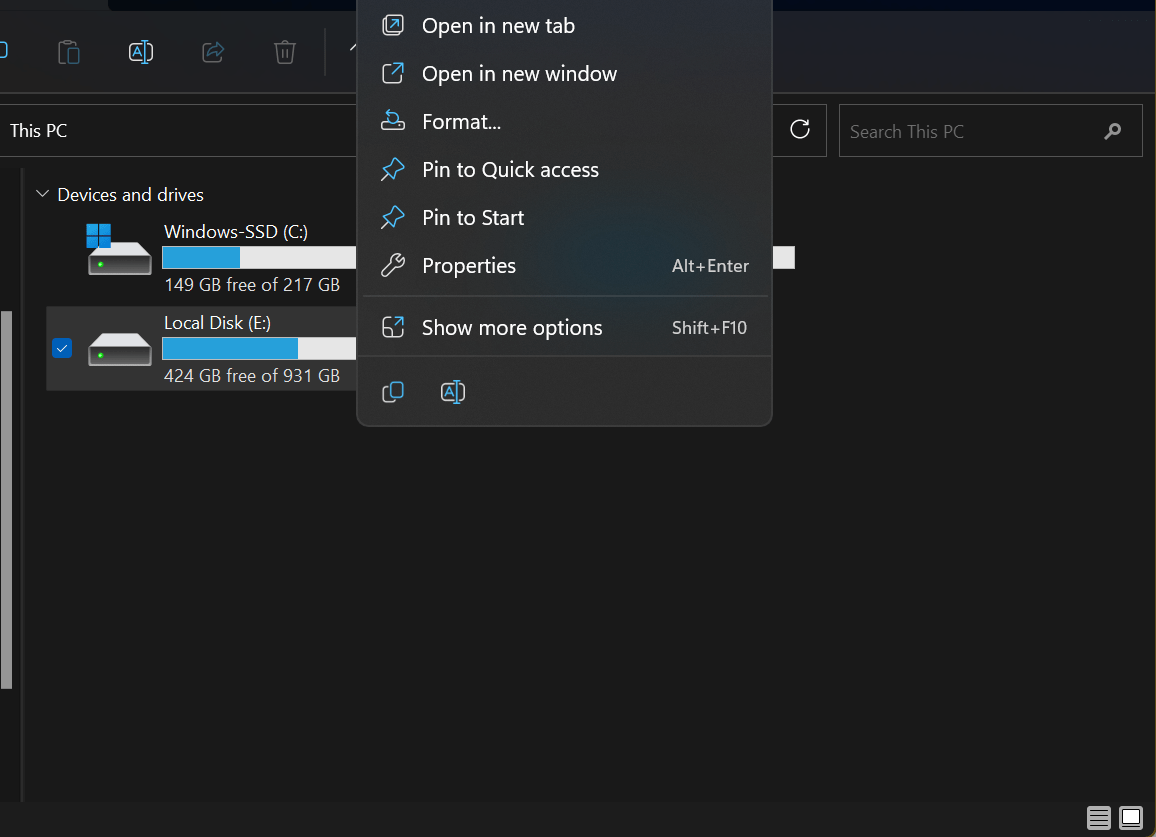
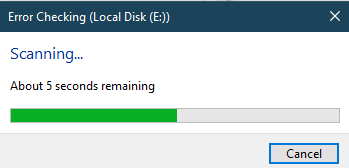
- Switch to the Tools tab, then click on the Check button under the Error checking section.
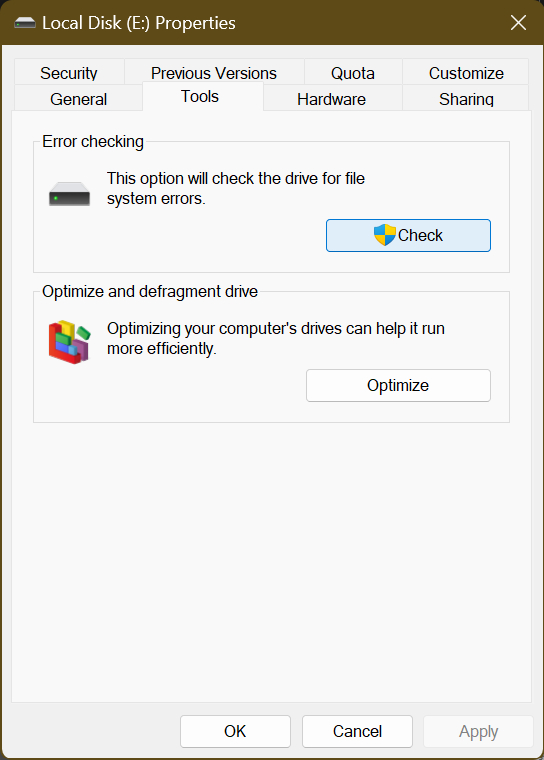
- You’ll get the notification “You don’t need to scan this drive.” Ignore it and click on Scan drive. This will initiate the scan of your entire drive.
Alternatively, you can run the CHKDSK tool to diagnose your hard drive for file system issues and correct them. Here’s how:
- Run the Command Prompt as the admin. To do so, press the Win + R keys or right-click Start and select Run. Type CMD in the Run dialog box and press Shift + Ctrl + Enter simultaneously
- Select Yes to grant user access.
- Type the command chkdsk and hit Enter to execute. This command will only tell you if there are any errors on your hard disk drive but won’t fix them. If your hard drive doesn’t have any problems, you’ll see the notification “Windows has scanned the file system and found no problems. No further action is required.” In that case, you can proceed to the next method below.
If it finds errors, execute the command chkdsk /f to perform a thorough scan and fix any issues discovered. Use the command chkdsk /r to repair faulty hard drive sectors that could be causing the Hard Disk 1 Quick 303 or Hard D
Fix 4: Update Device Drivers
Keeping your device drivers up to date is a crucial maintenance task that can enhance the performance, stability, and compatibility of your hardware components with the operating system.
Learn more: [EASY GUIDE] How to Update Device Drivers on a Windows 10 PC?
Fix 5: Run System Diagnostics
A System Diagnostics report provides a detailed look at the hardware, software configurations, system response times, and much more. Essentially, it provides information on all aspects of your system.
To create a System Diagnostics report, follow these steps:
- Press the Win + R keys on your keyboard to launch the Run dialog box.
- Type perfmon /report and hit the Enter key.
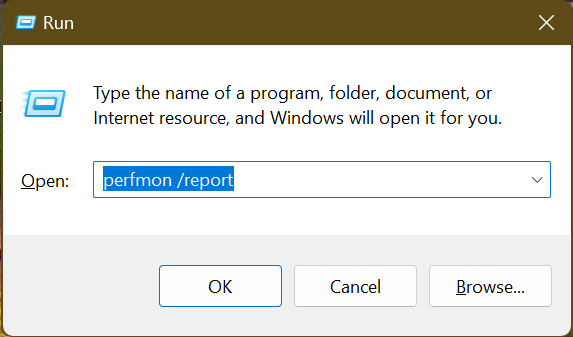
- The Resource and Performance Monitor window will appear and the diagnostic test will start running. The process takes 60 seconds to complete.
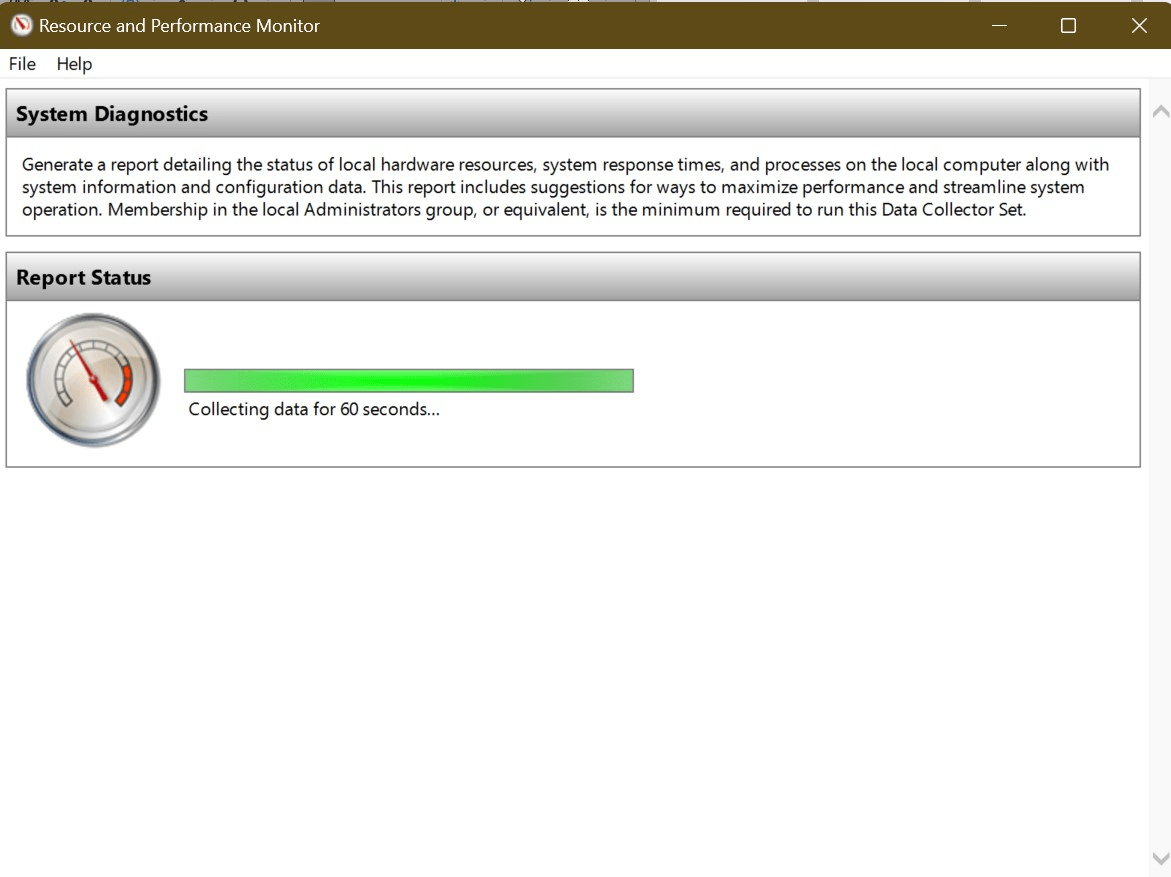
- Once it finishes, you’ll see a summary of your overall system’s health along with results for various components. You’ll see data on components like Memory, CPU, Network, and software configuration diagnostics.
- Expand each category (specifically the Hardware Configuration category) to view the details of what might have caused the hard disk errors 303 and 305.
Fix 6: Replace Your Hard Disk Drive
If all else fails, you might be left with only the option of replacing your hard drive with a new one. As mentioned earlier in the article, the error codes 303 and 305 may indicate that your hard drive has failed and it’s likely you won’t be able to restore its health.
Therefore, research the best hard disk drives you can purchase or better still, upgrade to an SSD (solid state drive), which is faster and more effective.
You can also contact HP Support if your PC is still under warranty.
Related: SSD vs HDD: What’s the Difference and What to Choose?
What Is SMART Hard Disk Error 301?
SMART or Self-Monitoring Analysis and Reporting Technology hard disk error 301 is an alert generated by your system’s BIOS (Basic Input/Output System) during the startup process on HP laptops.
Also Read: What is BIOS on a Computer: Everything You Need to Know
The error signifies that the system has detected a potential issue with your hard disk’s health status. The error is typically associated with the hard drive’s imminent failure or other critical issues that need immediate attention.
How to Fix SMART Error 301?
Before we begin, be sure to backup all important data and files if you can access them. Here are some solutions you can perform to fix the SMART hard disk error 301:
Fix 1: Try a System Hard Reboot
Usually, it’s advisable to restart the system if you encounter any problems. However, in the case of the SMART hard disk error, a simple restart might not be enough. That’s where a hard reboot comes in.
To perform a hard reboot:
- Turn off your computer and disconnect the power cable.
- Remove the battery (if it’s a laptop with a removable battery).
- Press and hold the power button for around 15 seconds. This discharges every bit of current left in the motherboard.
- Wait a few minutes and repeat the process.
- Replace the battery and power cable and switch the PC on.
Hopefully, this solution works. If it doesn’t, try the next method.
Fix 2: Check for Drive Errors
Your HP PC comes with a built-in Hardware Diagnostics Tool to help you determine whether your PC’s hardware is functioning correctly. The tool can quickly diagnose hardware failures and memory issues.
To run it:
- Press the Windows Key and type HP PC Hardware Diagnostics Windows. If you can’t find the HP PC Hardware Diagnostics Windows tool, download it on HP’s Support page.
- Select Run as administrator and click Yes when prompted by the UAC.
- Select System Tests > Fast Test > Run. This operation will check your computer hardware.
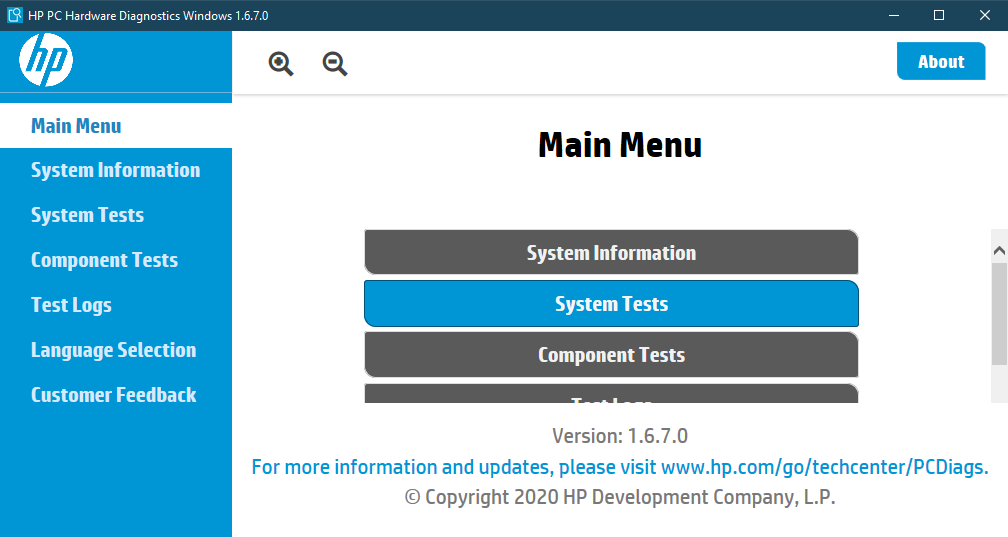
- If the System Tests do not identify hard drive issues, run Component Tests to try to identify the source of the errors. Select Storage from the list and choose your devices, then click Run. This test determines if your HDD or SSD is functioning properly.
- If a test fails, it will be displayed once the test completes. Select Troubleshoot to try to resolve it.
Alternative Method:
You can run a hard drive error check without downloading the HP PC Hardware Diagnostics Windows. Here’s how:
- Switch off your PC.
- Press the power button and immediately hit the Esc key several times to open Startup Menu.
- Press F2 to launch System Diagnostics.
- Use the arrow keys to select Hard Drive Check and hit Enter.
- Select Quick Check and press Enter.
- The tool will perform a SMART Check and Short DST. This test might take a while. If the results show PASSED, hit Enter to go back to the main menu.
- Select Extensive Check and press Enter. This test might take up to an hour or longer to complete.
Fix 3: Recover Your Data
The above methods should fix the SMART hard disk error 301. However, sometimes the hard disk might be severely damaged or corrupt, and therefore, beyond saving. In such a case, you can try to recover the data using the procedures below:
Set Up a Recovery Drive
To prepare a recovery drive, follow the procedure as shown below:
- Open the Start menu on your computer. To do so, press the Windows button on the lower-left corner of your screen or press the Windows Key on your keyboard.
- Type “Create a recovery drive” (no quotes) in the search box and click on the search results matching entry.
- Enter your admin password if the system prompts you.
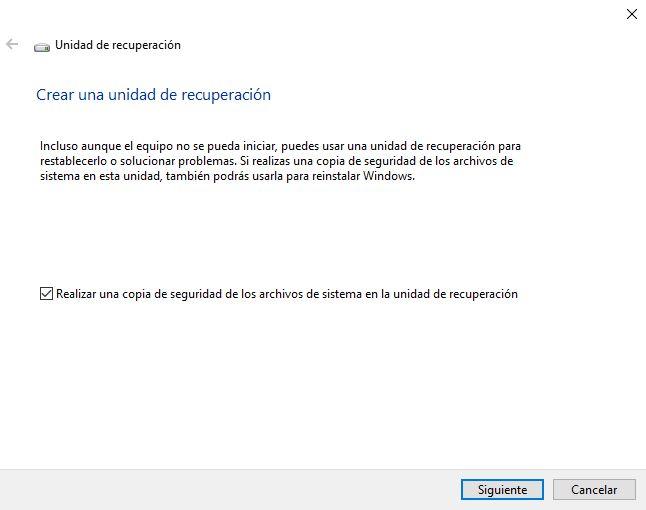
- When the recovery tool opens, see that the ‘Backup system files to the recovery drive’ option is selected. Then, click Next.
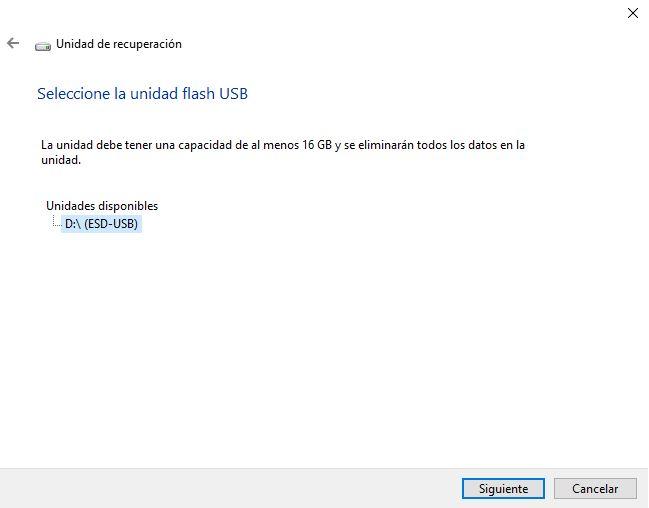
- Get an empty USB drive with at least 16 gigabytes of storage capacity. A USB drive with more than 16 gigabytes of storage space is preferable.
- Plug the USB drive into your computer. It will appear on the recovery tool window. Select the drive and click Next.
Note: As already stated, make sure that you use an empty USB drive. The recovery process will wipe any existing data on the drive.
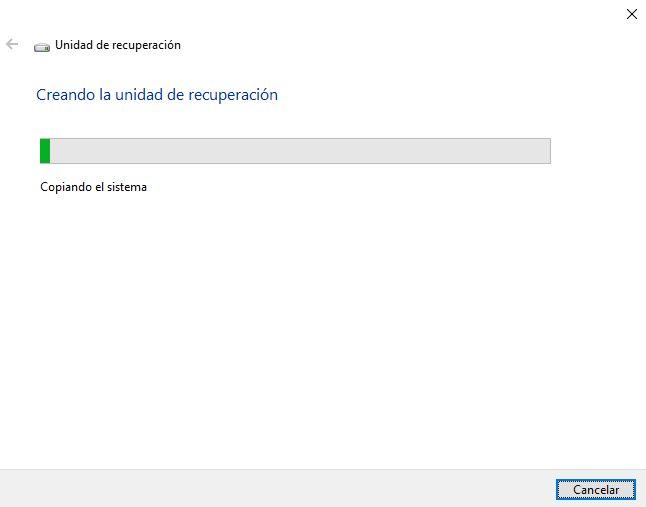
- Click Create.
The process will take a fair amount of time to complete since many files will be copied to the recovery drive.
Perform Data Recovery from the Recovery Drive
Note that the below procedure for recovering files from an external drive using CMD works for any external storage media, including USB, HDD, and SD card.
Let us see how it is done:
Warning: Exercise caution when using for data recovery. If you make a mistake when entering the commands, you will create a new problem.
- Plug your storage media into your computer.
-
- Go to the Start menu and type “Command prompt” or “CMD” (no quotes) in the search bar. When the option appears in the results list, right-click on it and select Run as Administrator.
- Click Yes when the UAC (User Account Control) dialog prompts you to confirm your action.
- Once the Command Prompt (Admin) window opens, type in the following line and hit Enter to run it:
- attrib -h -r -s /s /d drive letter:\*.*”
Note: Enter the appropriate drive letter when typing the command. For example, attrib -h -r -s /s /d H:\*.*” where ‘H:’ is the letter of the drive you want to recover.
When you get to Step 4, you can use a different command:
- Type “chkdsk H/f” (no quotation marks) and hit Enter. Note that H is the letter of the drive you want to recover. If the letter is different in your case, then use the appropriate one.
- Press Y.
- Type in the drive letter (That is, H) and hit Enter.
- Type (or copy and paste)the line below:
[H : \ >attrib –h –r –s /s /d *.*]
- Hit enter to execute the command. When the process is complete, it will retrieve all the files on your drive.
Solutions shown above will help you keep the data on your failed hard drive. Sometimes, the Hard Drive Errors may prevent you from booting into your computer. You will have to use a recovery CD to boot into your computer before using the backup and recovery tool.
If the procedures seem too much for you to handle, you can use a specialized third-party data recovery software like Auslogics File Recovery to create a backup image of your files (including photos, videos, documents, and other data). All you have to do is remove the failed drive and connect it to another computer. Then download and run the third-party tool.
Conclusion
When you encounter SMART hard disk error 301, it’s a strong indication that your hard disk drive is dead. While you may apply the solutions we’ve shared in this article, you might want to think about replacing the faulty disk with a new one as soon as possible.
Regularly performing drive error checks on your PC can help prevent data loss and ensure the longevity of your storage device. Since we can easily forget to perform these checks on a regular basis, we recommend installing Auslogics BoostSpeed. This PC optimization software comes loaded with more than a dozen tools to help you carry out maintenance checks on your entire system.
From disk defragmentation to driver updates to cleaning your registry and removing junk files from your system, you can trust BoostSpeed to safely keep your system lean and working optimally.
FAQ
How to Fix 303 Error?
Here are the steps to resolve error 303:
- Check for loose disk cables and connections.
- Run a disk check.
- Update your device drivers.
- Perform system diagnostics.
- Replace your hard drive if none of this works.
How to Disable SMART Hard Disk Error 301?
- Restart your computer and press the appropriate key to enter the BIOS setup. This key varies depending on your system’s manufacturer, but it’s often F2, F10, F12, or the Delete key.
- Once you’re in the BIOS setup, navigate to the ‘Advanced’ or ‘Diagnostics’ tab. The exact name may vary depending on your BIOS version.
- Look for an option that says ‘SMART Monitoring’, ‘SMART Detection’, or something similar.
- Change this setting to ‘Disabled’ or ‘Off’.
- Save your changes and exit the BIOS setup. Your computer should restart normally.
Remember, this is a temporary fix. If you’re consistently seeing the SMART hard disk error 301, it’s a sign that your hard drive may be failing. It’s recommended to back up your data and consider replacing the hard drive to prevent data loss.
What Is Error 305?
When your hard drive encounters issues like bad sectors, corrupted data, or mechanical problems, SMART will trigger an error code to alert you to the problem. SMART stands for Self-Monitoring, Analysis, and Reporting Technology. It’s a feature built into most modern hard drives that detects and reports on various indicators of drive health.
Can I Fix a SMART Hard Disk Error 301 on My Own?
While some SMART Hard Disk Error 301 issues can be resolved by following the steps mentioned in this guide, it is always recommended to consult a professional technician if you are unsure or uncomfortable performing the troubleshooting steps yourself.