
Диагностические коды системы управления электродвигателем
12
313155U
E21: отсутствует датчик
компонента A
1.
Проверьте подключение датчика A к разъему J3 на
плате управления электродвигателем (см. стр. 34)
и очистите контакты.
2.
Поменяйте местами соединения датчиков А и В. Если
та же ошибка возникнет в связи с датчиком B (Е22),
замените датчик A (см. стр. 36). Если ошибка в связи
с другим датчиком не возникнет, замените плату
управления электродвигателем (см. стр. 34).
E22: отсутствует датчик
компонента B
1.
Проверьте подключение датчика B к разъему J8 на
плате управления электродвигателем (см. стр. 35)
и очистите контакты.
2.
Поменяйте местами соединения датчиков А и В. Если
та же ошибка возникнет в связи с датчиком A (Е21),
замените датчик B (см. стр. 36). Если ошибка в связи
с другим датчиком не возникнет, замените плату
управления электродвигателем (см. стр. 34).
E23: высокое давление
жидкости
1.
Сбросьте давление. С помощью аналогового
манометра убедитесь в том, что давление снято.
Выключите (OFF)
и снова включите (ON)
главный выключатель. Если ошибку не
удается устранить, выполните следующие действия.
2.
Проверьте перемычки и разводку проводов.
Проверьте перемычки на плате управления
электродвигателем на разъеме J10 äëÿ E20 è E-XP1
или на разъеме J7 äëÿ E30 è E-XP2, контакты 7–10
(см. стр. 34).
3.
Отсоедините, очистите и вновь подсоедините
выводы датчика.
Если перемычки и проводка находятся в рабочем
состоянии, а ошибка все еще имеет место, необходимо
заменить датчики давления А и B.
4.
Чтобы выяснить, какой именно датчик требуется
заменить (A èëè B), следует проверить оборудование
с помощью заведомо исправного датчика давления
для дозатора Reactor. Проверка не требует удаления
установленных датчиков давления из коллектора
для жидкости.
a.
Отключите датчик A от платы управления
электродвигателем (см. (стр. 36) и замените
его заведомо исправным датчиком.
b.
Включите подачу сетевого электропитания
дозатора Reactor.
•
Если ошибка будет устранена, выключите
главный выключатель дозатора Reactor,
отключите заведомо исправный датчик
и установите обратно датчик A.
•
Если ошибку не удается устранить, отключите
заведомо исправный датчик от гнезда A
и включите в это гнездо датчик давления A.
Повторите процедуру проверки на стороне B.
5.
Если ошибку не удается устранить, и проверка не
дала результатов, замените плату управления
электродвигателем (см. стр. 34).
E24: дисбаланс давления
Ошибки быстрого срабатывания Е24
Ошибки быстрого срабатывания Е24 появляются
в следующих случаях:
•
в течение 10 секунд после включения насосов;
•
при приведении пистолета в действие.
Причины ошибок быстрого
срабатывания E24
•
Одна сторона пистолета закупорена.
•
Отказал датчик давления.
•
Повреждены уплотнения насоса или обратный
клапан.
•
Отсутствует давление подачи; бак пуст.
•
Засорен нагреватель.
•
Засорен шланг.
•
Засорен коллектор.
•
Один из клапанов PRESSURE RELIEF/SPRAY
(«Сброс давления или распыление») протекает
или находится в положении PRESSURE
RELIEF/CIRCULATION («Сброс давления или
циркуляция») .
Если разность давлений в компонентах A è B
превышает 3,5 МПа (35 бар, 500 фунтов/кв. дюйм),
возникает ошибка E24. Заданное по умолчанию
значение разности давлений можно изменять
(см. инструкцию по эксплуатации оборудования).
По усмотрению оператора ошибка E24 может
представлять собой либо аварийный сигнал,
либо предупреждение. Положение миниатюрного
переключателя на плате управления
электродвигателем ON («Вкл.») соответствует
аварийному сигналу, OFF («Выкл.»)–
предупреждению. См. стр. 34.

To avoid serious injury follow all warnings and instructions in the manual. Wear appropriate personal protective equipment.
- On the current units without the over pressure switches Check the jumpers and the wiring.

- Check to see if one of the pressure switches failed.
- Remove the plug J10 (E20/E-XP1) or plug J7 (E30/E-XP2).
- Measure the resistance between pins 7 and 8, and between 9 and 10. Measurement should be @ 1 ohm.
- If the resistance in steps 2 & 3 is not @ 1 ohm, jumper pins 7 to 10. order repair kit 246961.
- If the error persists after connecting pin 7 to pin 10 with jumper, replace the motor control board, along with kit 246961

- Clean the plug and socket of transducer connection by unplugging and spraying commercially available contact cleaner and reconnecting.
- If the wire jumper and the wiring are in good working condition and you still have the error, then you will need to check the “A” & “B” pressure transducers. (See transducer check procedure under E24 section.)
- To determine if it’s the “A” or the “B” transducer, you may need a known good Reactor pressure transducer 24K999 to use as a “test” transducer. The test is going to be done without removing the existing pressure transducers from the fluid manifold.
- Unplug the “A” transducer from the Motor control board socket J3, (E-20/E-XP1) or J5, (E-30/E-XP2) and plug in the “Test” pressure transducer in its place.
- Turn on the Reactor main disconnect and see if the error has went away.
- If the error goes away turn off the Reactor main power and remove & replace the “A” pressure transducer.
- If the error didn’t go away, unplug the “test” transducer from the “A” socket, and reinstall the “A” pressure transducer back into the “A” socket, and repeat this test procedure on the “B” side J8, (E-20/E-XP1) or J3, (E-30/E-XP2).
! If the error persists and no root cause is found through the above testing, replace the motor control board.
- Not in all cases will an E31 error code appear. Another symptom of a motor drive failure is that the motor will immediately turn on when input power is applied to the Reactor, running away with no motor control. This is due to the control being shorted sending full vdc to the motor. If the motor runs as soon as power is applied to the machine, replace the motor control board after verifying input voltage
- Verify feed supply pumps or ball valves are not off.
- That the material drums are not empty.
- That the filter strainers are not restricted.
- That the Reactor pumps are working properly.
(See “If the gauges are not reading equal” section under E24)
- Heater modules failed to turn off any heat zone, causing a run-a-way condition. See section under E01.
- Jumper terminal 7 to 10 with kit 246961
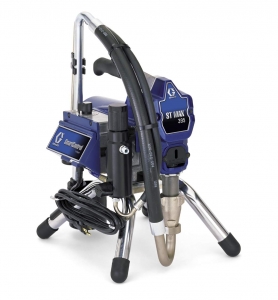
Таблица диагностики платы управления мотора окрасочных аппаратов
Graco ST MAX 395/495/595
Коды ошибок системы смарт-контроля распылителей Graco (Грако) ST Max 395/495/595
* Только Ultra, Ultimate Nova, Super Nova и ST Max 395/495/595.
** Только Ultra Max II, Ultimate MX II и ST Max II 490/495/595.
|
ДИСПЛЕЙ |
МИГАНИЯ ИНДИКАТОРА |
СОСТОЯНИЕ РАСПЫЛИТЕЛЯ |
УКАЗЫВАЕТ |
НЕОБХОДИМЫЕ ДЕЙСТВИЯ |
| Сообщения отсутствуют | Никогда не мигает |
Распылитель останавливается. Питание не подается. Распылитель должен быть герметизирован. |
Потеря мощности | Проверьте источник питания. Перед ремонтом или демонтажем сбросьте давление. |
|
PSI / бар /МПа |
Один раз |
Распылитель находится под давлением. Питание подается. (Давление зависит от размера наконечника и установки регулятора давления). |
Нормальная эксплуатация |
Никаких действий |
|
E = 02 |
Два раза многократно |
Распылитель может работать дальше. Питание подается. |
|
Замените плату или датчик давления. |
|
E=03 |
Три раза многократно |
Распылитель выключается и индикатор |
|
Проверьте подключение датчика. Откройте дренажный клапан. Замените датчик давления распылителя новым. Если распылитель заработает, замените датчик. |
|
E=04* |
Четыре раза многократно |
|
Слишком высокое напряжение в сети. |
Убедитесь в отсутствии проблем в сети питания. |
|
E=05 |
Пять раз многократно |
Распылитель не выключается или |
Неисправность мотора. | Проверьте, не заблокирован ли ротор, нет ли короткого замыкания обмотки или отсоединившегося провода мотора. Отремонтируйте или замените неисправные детали. |
|
E = 06 |
Шесть раз, |
Распылитель выключается и индикатор мигает шесть раз многократно. Питание подается. |
Мотор слишком горячий или наличие неисправности в устройстве тепловой защиты. |
Дайте распылителю остыть. При нормальной работе в холодном состоянии проверьте работу вентилятора мотора и поток воздуха.Размещайте распылитель в холодном месте. Если распылитель не работает в холодном состоянии и индикатор мигает шесть раз многократно, замените мотор. |
|
— |
Напряжение питания подается | Давление менее 200 PSI (14 бар / 1,4 МПа). | При необходимости увеличьте давление. Дренажный клапан должен быть открыт. | |
| EMPTY* | Распылитель останавливается. Питание подается. | Пустая емкость для краски. Потеря давления. |
Заполните емкость для краски. Убедитесь в отсутствии утечек или забиваний на входе насоса. Повторите процедуру запуска. |
|
|
E = 10 ** |
Неоднократно мигает 10 раз | Распылитель не выключается или не включается и индикатор продолжает мигать 10 раз многократно. Питание подается. | Высокая температура платы управления. |
Убедитесь, что канал забора воздуха для мотора не забит.
Убедитесь, что плата управления правильно подключена к задней пластине и что на силовых компонентах используется теплопроводящая паста. |
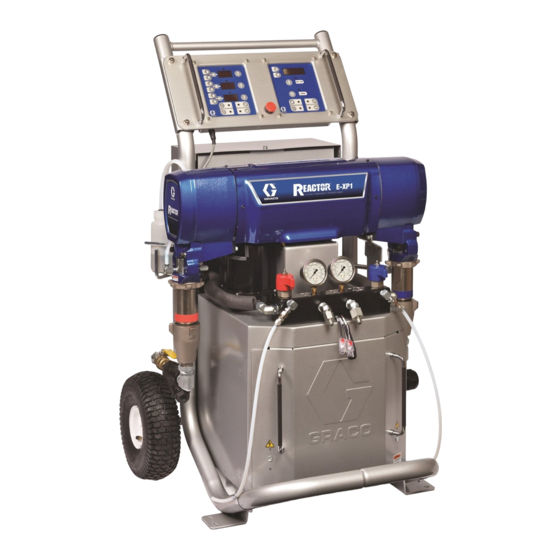
Страница 15: Электродвигателя, Напорной линии или высокая скорость цикла, Ошибки медленного срабатывания е24, Причины ошибок медленного срабатывания e24, Причины ошибок e27 в инструкции по эксплуатации Graco Reactor_repair
Диагностические коды системы управления электродвигателем
312435P
4.Если ошибка быстрого срабатывания Е24 возникла снова а показания аналоговых манометров не очень близки выполните следующие действия.
Проверьте и очистите впускные сетки пистолета.
Проверьте и очистите отверстия смесительной камеры и центральное отверстие пистолета См инструкцию по эксплуатации пистолета.
Ошибки медленного срабатывания Е24
Ошибки медленного срабатывания Е24 появляются постепенно Значения давления уравновешены когда начинается распыление но постепенно становятся неуравновешенными в результате чего возникает ошибка Е24.
Причины ошибок медленного срабатывания E24
Одна сторона пистолета частично закупорена.
Отказал дозаторный насос А или В.
Отказал насос подачи А или В.
В насосе подачи A èëè B установлено слишком высокое давление.
Засорен фильтр на входе в дозаторный насос А или В.
Шланг не нагревается должным образом.
Шланг подачи перекручен.
Дно барабана повреждено в результате чего впускное отверстие насоса подачи заблокировано.
Барабан не вентилируется.
E27: Повышенная температура электродвигателя
Причины ошибок E27
Температура электродвигателя слишком высока Понизьте давление уменьшите размер наконечника пистолета-распылителя или переместите дозатор Дозатор Reactor в более прохладное место Дайте ему остыть в течение одного часа.
Убедитесь в отсутствии препятствий для нагнетания воздушного потока Проверьте установлен ли на двигатель и вентилятор соответствующий кожух.
Проверьте включен ли провод системы контроля перегрева двигателя в разъем J9 на плате управления двигателем (см стр 34).
Если в результате проведенных проверок неполадка не была устранена выполните следующие действия.
1.Переведите главный выключатель питания в положение OFF («Выкл.»)
Дождитесь полного охлаждения двигателя Проверьте целостность соединения между контактами 1 и 2 в разъеме J9 платы управления двигателем (см стр 33) Если сопротивление бесконечно большое это означает что тепловой переключатель двигателя или монтажный жгут неисправны Проверьте разводку измерьте целостность теплового переключателя на двигателе и замените поврежденные детали.
3.Отключите двигатель от разъема J9 на плате управления двигателем Установите перемычку между контактами 1 и 2 на плате Если неполадка продолжает возникать замените плату управления двигателем.
4.Если ошибка Е27 продолжает появляться это свидетельствует о неисправности платы управления двигателем.
E30: Кратковременный обрыв соединения
Если связь между дисплеем и платой управления электродвигателем потеряна на дисплее как правило отображается ошибка Е99 Плата управления двигателем регистрирует ошибку E30 (красный светодиод мигает 30 раз) После восстановления связи на дисплее на короткое время (не более 2 секунд) может появиться код Е30 Если код Е30 остается на дисплее это свидетельствует о нарушении связи в результате которого соединение между дисплеем и платой периодически теряется и восстанавливается.
E31: Отказ реверсивного переключателя на напорной линии или высокая скорость цикла
Отказ переключателя или механизма переключателя на напорной линии может стать причиной повышения скорости цикла что ведет к возникновению ошибки Е31. Замените переключатель или механизм переключателя См раздел Насосы не работают в обратном направлении на стр 27.
Ошибка Е31 может появиться в том случае если в систему внесены изменения для обеспечения более высокого расхода.
Некоторые смесительные камеры имеют глухие отверстия для ударного смешивания и требуют св¸рл двух размеров для полной очистки.
-
Bookmarks
Quick Links
Reactor Error Code Trouble Shooting Guide
Rev 2.6 (02/2014)
Page 1
Related Manuals for Graco Reactor E-XP1
Summary of Contents for Graco Reactor E-XP1
-
Page 1
Reactor Error Code Trouble Shooting Guide Rev 2.6 (02/2014) Page 1… -
Page 2
Read, understand and follow all instruction manuals and warning labels supplied with all equipment. Only trained and qualified personnel should perform repairs on the equipment. To access the latest manuals in your preferred language go to “www.graco.com” and use the “Search” function. -
Page 3
Reactor Error Code Trouble Shooting Guide Rev 2.6 (02/2014) Page 3… -
Page 4
Reactor Error Code Trouble Shooting Guide Table of Contents HEAT CONTROL ERROR LIST E01 — High Fluid temperature E02 — High Current E03 — No current E04 — Missing t/c thermocouple E05 — Power module over temperature E06 — Control module to power module communications error E09 — Missing display E99 — Display communications error MOTOR CONTROL ERROR LIST — E and H Series… -
Page 5
Reactor Error Code Trouble Shooting Guide (Return to Table Of Contents) E01: High Fluid temperature Note: The display that is showing the E01 error is the zone that is seeing the error. Check to see if you really do have high a temperature, by using an external temperature-sensing device. -
Page 6
Reactor Error Code Trouble Shooting Guide One of the over temperature switches (Ref # 308) picked up a high fluid temp greater than 230° F (110°C). At 190° F (88°C) the contacts close again. Check continuity of the over temperature switches by removing the J1/SENSOR B connector from the temperature control module socket. -
Page 7
Reactor Error Code Trouble Shooting Guide Primary Heaters / Heater Elements 6.0 kW – 1500w (30-35 ohms) x 2 each per side = 15–17.5 ohms combined. 10.2 kW – 2550w (18-21 ohms) x 2 each per side = 9-10.5 ohms combined. 8.0 kW –… -
Page 8
Reactor Error Code Trouble Shooting Guide Rev 2.6 (02/2014) Page 8… -
Page 9
Reactor Error Code Trouble Shooting Guide Heater modules failed to turn off any heat zone, causing a run-away condition. Exchange zone module with another one. Turn zone on and check for error. If error moves to another zone, replace the faulty module. (When there is a high current error, the LED on that zone’s module will turn red while the error is displayed. -
Page 10
Reactor Error Code Trouble Shooting Guide One of the over temperature switches failed in the “open” position. Open circuit in the over temperature wiring harness, or switch “B” jumper is loose or open on a dual zone heater systems. … -
Page 11
Reactor Error Code Trouble Shooting Guide (Return to Table Of Contents) E02: High Current Note: The display that is showing the E02 error is the zone that is seeing the error. Causes: Electrical short in the heater module. o Hold down actual temperature key for each zone to view current output when the heat module is on. -
Page 12
Reactor Error Code Trouble Shooting Guide current error, the LED on that zone’s module will turn red while the error is displayed. 2) For Hose zone, electrical short in the hose heat transformer o Check continuity of transformer windings, and if shorted to ground. o Perform the hose heat transformer primary and secondary check. -
Page 13
Reactor Error Code Trouble Shooting Guide (Return to Table Of Contents) E03: No Zone Current Note: The display that is showing the E03 error is the zone that is seeing the error. Causes: Tripped circuit breaker in the electrical cabinet. o For HOSE, check 183CB HOSE, and 178 CB HOSE. -
Page 14
Reactor Error Code Trouble Shooting Guide 3) Hose heat transformer not functioning. Set Hose Zone target key below current actual temperature and turn on the Hose Zone only. (not “A” or “B”) o Perform transformer secondary check. Measure 90 – 100 VAC between T1 on183CB-HOSE and T2 on POD HOSE of Hose Heater Module. -
Page 15
Reactor Error Code Trouble Shooting Guide 238CR 5) Single phasing in a three phase system o Verify line voltage between all 3 legs of power. L1 to L2, L2 to L3, and L1 to L3. Note: If the customers incoming power has a Wild Leg/High Leg it must be installed on the L3 terminal. -
Page 16
Reactor Error Code Trouble Shooting Guide E04: Fluid Temperature Sensor (FTS), or “A” or “B” (Return to Table Of Contents) Thermocouple not Connected. Note: The display that is showing the E04 error is the zone that is seeing the error. Causes: 1) E04 on the “A”… -
Page 17
Reactor Error Code Trouble Shooting Guide 2) E04 on the hose heat display = While the unit was powered on, the Fluid Temperature Sensor (FTS) lost communication with the temperature control module. Check the electrical connections at the temperature control module. o Looking at plug J1/ SENSOR B on the temperature control module, check and see if pins 10, 11 &… -
Page 18
Reactor Error Code Trouble Shooting Guide Check the FTS with an ohmmeter. o Locate the FTS. o With the main power off, unplug the FTS and measure the pins on the FTS. Pins 1 to 2 10 Ohms … -
Page 19
Reactor Error Code Trouble Shooting Guide (Return to Table Of Contents) E05: Control Module Over Temperature Cause: o The control module has an on-board temperature sensor. Heat is turned off if the module temperature exceeds 185°F (85°C) to prevent damage to the circuit board. (See also High Motor Temp section under E27). -
Page 20
Reactor Error Code Trouble Shooting Guide E09: Heater and Display Communication Malfunction (Return to Table Of Contents) Cause: Communications between the heater control module and the display is not functioning. When communication is lost, the display will show E09. Check all wiring between the display and the heater control module. o Pay close attention to the wire crimping on plug J5/DISPLAY C of temperature control module. -
Page 21
Reactor Error Code Trouble Shooting Guide (Return to Table Of Contents) E21: No Component A Transducer Causes: 1) Faulty pressure transducer 24K999. 2) Faulty connection on J3/J5 of motor control board. Rev 2.6 (02/2014) Page 21… -
Page 22
Reactor Error Code Trouble Shooting Guide 3) Checking for a E21 error o Check transducer A connection at J3, (E-20/E-XP1, H-series) or J5, (E-30/E-XP2) on motor control board. o Clean the plug and socket of transducer connection by unplugging and spraying commercially available contact cleaner and reconnecting. -
Page 23
Reactor Error Code Trouble Shooting Guide (Return to Table Of Contents) E22: No Component B Transducer Causes: 1) Faulty pressure transducer 24K999. 2) Faulty connection on J8/J3 of motor control board. 3) Checking for a E22 error o Check transducer B connection at J8, (E-20/E-XP1, H-series) or J3, (E-30/E- XP2), on motor control board. -
Page 24
Reactor Error Code Trouble Shooting Guide E23: High Pressure (Return to Table Of Contents) Causes: 1) Jumper wire on plug J10 (E-20/E-XP1) or J7 (E-30/E-XP2) pin 7 to pin 10 on the motor control board is loose or has become disconnected. o On the current units without the over pressure switches Check the jumpers and the wiring. -
Page 25
Reactor Error Code Trouble Shooting Guide 2) The Reactor motor control board is receiving a signal from the “A” or “B” pressure transducer that is above 3000 psi for (E-20, E-30, H-25, H-40, H-50), or above 4500 psi for (E-XP1, E-XP2, H-XP2, H-XP3). o Clean the plug and socket of transducer connection by unplugging and spraying commercially available contact cleaner and reconnecting. -
Page 26
Reactor Error Code Trouble Shooting Guide 4) Material cavitation A or B side. Verify feed supply pumps or ball valves are not off. That the material drums are not empty. That the filter strainers are not restricted. … -
Page 27
Reactor Error Code Trouble Shooting Guide (Return to Table Of Contents) E24: Pressure Imbalance There is a pressure imbalance between the “A” and “B” fluids that is higher than allowed by the motor control board. Available control settings are between 100 – 999 psi, or 7 –… -
Page 28
Reactor Error Code Trouble Shooting Guide 1a) One of the pressure transducers has failed. o The digital display on a Reactor always shows the higher of the two pressures. As soon as the higher analog pressure drops below the lower analog pressure the digital display will switch to the new highest reading. -
Page 29
Reactor Error Code Trouble Shooting Guide Run the unit to build up pressure (1000 – 1200 psi) with the motor ON key. When the machine then stalls at set pressure, press the motor OFF key to clear the E24 warning, but don’t depressurize the unit. Rev 2.6 (02/2014) Page 29… -
Page 30
Reactor Error Code Trouble Shooting Guide Check the analog gauges to see which pressure is higher. And then check and see if the pump display pressure matches. If it does, that would indicate that the motor control board is “Seeing” that transducer. … -
Page 31
Reactor Error Code Trouble Shooting Guide The last test is to determine if the pressure transducer has failed or if the socket on the pressure control board has gone bad. Swap the transducer plug-ins on the motor control board. (J3 & J8 for the E-20 &… -
Page 32
Reactor Error Code Trouble Shooting Guide o If we can determine what chemical “A” or “B” is coming out of the gun, then we can focus on the missing chemical side. This will immediately save us time by checking the side that is lacking chemical or is the cause of our problem. -
Page 33
Reactor Error Code Trouble Shooting Guide 2c) If “B” (RESIN) side is lacking at the gun, and “B” side fluid gauge reading is higher than the “A” side, this is an indication of restriction on the “B” side, anywhere from the gun mix chamber back to the fluid outlet manifold. -
Page 34
Reactor Error Code Trouble Shooting Guide (Return to Table Of Contents) E25: High Line Voltage Cause: 1) Supply voltage too high. Check voltage requirements in technical data section of the manual. Verify input voltage is correct to motor control board for your system. (Return to Table Of Contents) E26: Low Line Voltage Cause:… -
Page 35
Reactor Error Code Trouble Shooting Guide E27: High Motor Temperature (Return to Table Of Contents) Causes: 1) Motor temperature too high. o Reduce fluid pressure, gun mix chamber size, or move the Reactor to a cooler location. Allow one hour for cooling before re-setting. 2) Cooling fan is not operating properly. -
Page 36
Reactor Error Code Trouble Shooting Guide Motor Control Board, H-Series The E27 error should be gone. o If the E27 error is gone and the motor is truly not overheated then the problem is likely in the motor/motor wire harness assembly. You can verify this by measuring the resistance between the 2 yellow wires that go to pins 1 &… -
Page 37
Reactor Error Code Trouble Shooting Guide (Return to Table Of Contents) E28: High Motor Current (E-Series Only) Causes: 1) Failed motor or motor electrical component. 2) Something in the drive system broken (locked up pump, broken gear, etc.) not allowing the motor to rotate, causing high current. 3) Possible short in the motor control board. -
Page 38
Reactor Error Code Trouble Shooting Guide (Return to Table Of Contents) E29: Brush Wear (E-Series Only) Causes: 1) Normal brush wear, causing the brush sensor to come in contact with the motor commutator. o Replace the brushes p/n-234037. 2) The spade plug inside the motor housing is twisted and making contact with the commutator side of the brush sensor assembly, causing a false alarm. -
Page 39
Reactor Error Code Trouble Shooting Guide (Return to Table Of Contents) E30: Momentary Loss of Communication Causes: o Communications between the display and the motor control board or the motor control board has been momentarily lost. Normally, when communication is lost, the corresponding display will show E99. The corresponding control board will register E30 (The red LED will flash 30 times). -
Page 40
Reactor Error Code Trouble Shooting Guide Capacitor check procedure o Remove the Reactor from power source and wait 15 minutes to allow the capacitor to drain the stored energy through the motor circuit. Locate the large blue capacitor in the lower cabinet, upper right hand corner. Perform a general inspection of the capacitor for shape distortion, cracks, or leakage. -
Page 41
Reactor Error Code Trouble Shooting Guide (Return to Table Of Contents) E31: Reversing Switch Failure/High Cycle Rate H-Series Only) Exceeded 65 cpm H-40, H-50, H-XP3 Exceeded 30 cpm H-25, H-XP2 Causes: Too large a flow rate o mix chamber too large for system selected o Fluid pressure too high for mix chamber and system selected. -
Page 42
Reactor Error Code Trouble Shooting Guide (Return to Table Of Contents) E99: Loss of Communication Causes: 1) Communications between the display and the motor control board or the temperature control board has been lost. When communication is lost, the corresponding display will show E99. … -
Page 43
Reactor Error Code Trouble Shooting Guide (Return to Table Of Contents) Recommend Start-up Technician Tool Set 1. Extech AC/DC True RMS Clamp Meter P/N EX830 or equivalent. 2. Pocket Thermometer 3. Craftsman Tool Set P/N 37154 or equivalent. 4. Craftsman Plier Set P/N 45419 or equivalent. 5. -
Page 44
Reactor Error Code Trouble Shooting Guide 6. Chain Wrench 12” 7. Strap Wrench 8. Adjustable Wrenches 6 – 10 – 12” 9. Pipe Wrench 10 – 18” 10. Wire Strippers 11. Ball Peen Hammer 4 – 12 oz 12. Dead Blow Hammer (soft face) Rev 2.6 (02/2014) Page 44…