Accu-Chek Instant Error Codes
Error Messages
NOTE
The error code and Err will alternate on the display for all coded error messages (E-1 through E 14).
If any of the error messages below appear on the display at any time, refer immediately to the Error Messages section in the User’s Manual.
Accu-Chek Instant Error E-1
The test strip may be damaged, not properly inserted, or was previously used. Remove and reinsert the test strip, or replace it if damaged or previously used.
Accu-Chek Instant Error E-3
A meter or test strip error has occurred. Repeat the blood glucose test. If a second E-3 code appears, perform a control test with the control solution and a new test strip.
- If the control result is within the acceptable range, review the proper testing procedure and repeat the blood glucose test with a new test strip.
In rare cases, an E-3 error code may indicate that your blood glucose is extremely high and above the system’s measuring range. If you do not feel like your blood glucose is extremely high, repeat the blood glucose test. If the E-3 code still appears for your blood glucose test, contact your healthcare professional immediately.
Accu-Chek Instant Error E-4
Not enough blood or control solution was drawn into the test strip for measurement or was applied after the test had started. Discard the test strip and repeat the blood glucose or control test.
Accu-Chek Instant Error E-6
Blood or control solution was applied to the test strip before the flashing drop symbol appeared on the display. Discard the test strip and repeat the blood glucose or control test.
Accu-Chek Instant Error E-7
An electronic error occurred. Remove the batteries, press and hold the meter button for at least 2 seconds, and reinsert the batteries. Perform a blood glucose or control test.
Accu-Chek Instant Error E-8
The temperature is above or below the proper range for the system. Refer to the test strip package insert for system operating conditions. Move to an area with the appropriate conditions and repeat the blood glucose or control test. Do not artificially heat or cool the meter.
Accu-Chek Instant Error E-9
The batteries are almost out of power. Change the batteries now. If the message reappears after the batteries have been replaced, remove the batteries again, press and hold the meter button for at least 2 seconds, then reinsert the batteries.
Accu-Chek Instant Error E-10
The meter’s internal clock may need to be reset. Press the meter button. If the time and date were set, you will need to reset them.
Accu-Chek Instant Error E-11
The test strip may be damaged. Repeat the blood glucose or control test with a new test strip.
Accu-Chek Instant Error E-12
Your blood sample may contain a high level of ascorbate. Contact your healthcare professional.
Accu-Chek Instant Error E-13
Fluid or foreign material may be present in the test strip slot. Remove and reinsert the test strip or repeat the blood glucose or control test with a new test strip. If the error persists, contact Roche.
Accu-Chek Instant Error E-14
An electronic error has occurred. Contact Roche.
NOTE
Contact Roche if the error message continues.

Documents / Resources
Download manual
Here you can download full pdf version of manual, it may contain additional safety instructions, warranty information, FCC rules, etc.
Download Accu-Chek Instant Error Codes
Коды и символы ошибок:
ИЗОБРАЖЕНИЕ
Батарея разряжена.
Недопустимая
температура.
Заполнения
тест-полоски
недостаточно
для точного
тестирования.
•
Возможно, Вы
несколько раз
нанесли кровь на
одну полоску.
•
Закупорен
заборный кончик.
•
Капля крови
слишком мала.
Прибор обнаружил
использованную
тест-полоску.
24
Для получения помощи воспользуйтесь бесплатным номером: 8 800 200 44 43
81656517_CntrTS_UG_EN_RU_FpBp_v2.indd RU_24-RU_25
81656517_CntrTS_UG_EN_RU_FpBp_v2.indd RU_24-RU_25
ОПИСАНИЕ
ДЕЙСТВИЯ
Как можно быстрее замените
батарею (см. стр. 28).
Перейдите в место, в котором
температура соответствует
рабочему диапазону прибора:
5°C – 45°C. Перед началом
тестирования измерительный
прибор и тест-полоски
должны находиться при этой
температуре не менее 20 минут.
Замените тест-полоску на
новую и повторите тест.
•
Не выполняйте несколько
заборов крови с помощью
одной и той же полоски.
•
Не прижимайте полоску к
коже во время взятия пробы.
•
См. информацию о
рекомендуемом размере
капли на стр. 12.
Замените тест-полоску на
новую и повторите тест.
Перед взятием пробы крови
дождитесь отображения на
экране мигающей капли крови.
ИЗОБРАЖЕНИЕ
ОПИСАНИЕ
Тест-полоска
вставлена
неправильно.
E5
E10
Возможная ошибка
программного
E6
E12
обеспечения или
E8
E13
оборудования.
E9
Неправильная
тест-полоска.
•
Во время
обратного отсчета
полоска была
повреждена.
•
Полоска
испортилась,
так как долго
находилась вне
флакона.
•
Вставлена
использованная
тест-полоска.
www.bayerhealthcare.ru
ДЕЙСТВИЯ
Извлеките тест-полоску и
вставьте ее правильно (см.
стр. 11).
Замените тест-полоску на
новую и повторите тест. Если
проблемы не устранены,
обратитесь в службу
поддержки клиентов.
Замените эту тест-полоску
на тест-полоску C
TS
ONTOUR
[К
ТС] и повторите тест.
ОНТУР
Замените тест-полоску
на новую и повторите
тест. Тщательно следуйте
инструкциям из руководства
пользователя.
Если проблемы не устранены,
обратитесь в службу
поддержки клиентов.
25
12/10/13 12:06 PM
12/10/13 12:06 PM
Прибор для определения уровня сахара в крови должен быть у каждого диабетика. Это не только позволит контролировать свое состояние, не выходя из дома, но и поможет вовремя предотвратить развитие серьезных осложнений.
Многие пациенты знают, что существует на глюкометр Контур ТС акция: получить бесплатно его можно позвонив на Горячую линию 8-800-200-44-43 (звонок бесплатный). Какими характеристиками обладает этот анализатор, и как им правильно пользоваться – давайте разбираться.

Простой и надежный помощник
О компании
Глюкометр нового поколения Contour TS производятся немецкой корпорацией Bayer. Это инновационная компания, берущая свое начало в далеком 1863 году. Успешно применяя новейшие достижения науки и техники, она предлагает решение важнейших глобальных задач в области медицины.

Байер – немецкое качество
Ценностями компании являются:
- лидерство;
- честность;
- гибкость;
- эффективность.
Классификация продукции
Компания Байер производит два прибора для оценки уровня гликемии:
- Контур плюс глюкометр: официальный сайт — http://contour.plus/;
- Контур ТС.
Глюкометр Байер Контур ТС (аббревиатура названия Total Simplicity переводится с английского как «проще некуда») – надежный прибор для самоконтроля нарушений углеводного обмена. Его отличает высокая эффективность, быстродействие, стильный дизайн и компактность. Еще одно важное преимущество устройства – работа без кодирования тест-полосок.
Позже в продажу поступил глюкометр Контур Плюс: отличие от Контур ТС его заключается в:
- еще более высокой точности благодаря использованию новой мультиимпульсной технологии измерения;
- улучшенной работе с низкими показателями глюкозы;
- возможности доносить каплю крови в полоску в случаях, если первоначально взято недостаточное количество образца;
- наличии расширенного режима, который представляет еще больше возможностей для анализа результатов;
- сокращении времени ожидания результатов с 8 до 5 с.

Contour Plus – более современная модель
Обратите внимание! Несмотря на то, что по многим параметрам Countur Plus превосходит глюкометр «Контур ТС», последний также отвечает всем требованиям для анализаторов уровня глюкозы.
Характеристика
Глюкометр Контур TS — Contour TS – существует на рынке с 2008 года. Конечно, на сегодняшний день существуют более современные модели, но все необходимые функции этот прибор с легкостью выполняет.
Ознакомимся с его основными техническими характеристиками в таблице ниже.
Таблица: Характеристика анализатора капиллярной крови Contour TS:
| Метод измерения | Электро-химический |
| Время ожидания результатов | 8 с |
| Необходимый объем капли крови | 0,6 мкл |
| Диапазон результатов | 0,6-33,3 ммоль/л |
| Кодирование тест-полосок | Не требуется |
| Объем памяти | На 250 результатов |
| Возможность получения усредненных показателей | Да, за 14 суток |
| Возможность соединения с ПК | + |
| Питание | Батарейка типа CR2032 (таблетка) |
| Ресурс элемента питания | ≈1000 измерений |
| Размеры | 60*70*15 мм |
| Вес | 57 г |
| Гарантия | 5 лет |

Вводить код не нужно
Комплектация и стоимость
В стандартную комплектацию устройства входит:
- собственно аппарат;
- краткая и подробная инструкция;
- ручка-прокалыватель Микролет;
- ланцеты – 10 шт.;
- контактный футляр.

Комплектация довольно простая: расходный материал придется покупать отдельно
Важно! Тест полоски в комплект не входят. Их нужно приобретать отдельно.
Средняя цена глюкометра в аптеках составляет 800 р. 50 тест-полосок можно купить еще за 780 р., 25 – за 440 р.
Преимущества
Контур ТС – это оптимальное сочетание удобства использования и эффективности.
Среди его преимуществ:
- Функциональность. Ручная кодировка тест-полосок не требуется и производится автоматически: это делает эксплуатацию устройства проще и надежнее.
- Вариабельность. Кровь для исследования можно брать не только из кончика пальца, но и из ладони/предплечья.
- Быстродействие. Результат можно получить уже через 8 с.
- Простота. Навигация осуществляется двумя крупными кнопками. Установка тест-полосок в гнездо происходит без каких-либо затруднений.

Многие пациенты отзываются о приборе положительно
Важно! Работа прибора основана на оценке концентрации глюкозы по плазме (сыворотке) крови. Полученные результаты могут оказаться на 9-15% выше по сравнению с методами, анализирующими цельную кровь.
Правила использования
Приобретая прибор для определения уровня сахара в крови, пациент должен ознакомиться и информацией, как пользоваться этим устройством.
После покупки
Перед первым применением обязательно ознакомьтесь с руководством пользователя (скачать можно здесь: https://www.medmag.ru/file/Files/contourts.pdf).
Затем проверьте свой прибор, проведя тест с использованием контрольного раствора. Он позволяет убедиться в работоспособности анализатора и полосок.
Контрольный раствор не входит в комплект поставки и приобретается отдельно. Существуют растворы с низкой, обычной и высокой концентрацией глюкозы.

Этот маленький пузырек поможет проверить ваше устройство
Важно! Используйте растворы только Contur TS. В противном случае результаты тестирования могут быть неверными.
Также после первого включения прибора рекомендуется установить дату, время и звуковой сигнал. Как это сделать, подробнее расскажет инструкция.
Измеряем сахар правильно: пошаговое руководство
Приступаем к измерению уровня сахара.
На самом деле, это простая процедура, однако она требует четкого соблюдения алгоритма:
- Подготовьте все необходимое заранее.
- Вымойте и обсушите руки.
- Подготовьте скарификатор Microlet:
- снимите наконечник;
- не снимая, поверните защитный колпачок на ¼ оборота;
- вставьте ланцет до упора;
- открутите колпачок иголки.
- Достаньте одну тест-полоску и сразу же завинтите крышку флакона.
- Вставьте серый конец полоски в оранжевое гнездо глюкометра.
- Дождитесь включения и появления на экране изображения полоски с мигающей каплей крови.
- Проколите кончик пальца (или ладонь, или предплечье). Дождитесь формирования капли крови.
- Сразу после этого прикоснитесь к капле заборным концом тест-полоски. Удерживайте до звукового сигнала. Кровь втянется автоматически.
- После сигнала на экране начнется обратный отсчет от 8 до 0. Затем вы увидите результат тестирования, который автоматически сохранится в памяти устройства вместе с датой и временем.
- Извлеките и утилизируйте использованную тест-полоску.
Возможные ошибки
Во время использования глюкометра могут возникать различные ошибки. Рассмотрим их в таблице ниже.
Таблица: Возможные ошибки и пути их решения:
| Изображение на экране | Что означает | Как исправить |
| Батарея в верхнем правом углу | Элемент питания разряжен | Замените батарейку |
| Е1. Градусник в верхнем правом углу | Недопустимая температура | Перенесите прибор в место, температура которого находится в диапазоне 5-45° С. Перед началом измерений устройство должно находится там не менее 20 минут. |
| Е2. Тест-полоска в верхнем левом углу | Недостаточное заполнение тест-полоски при:
|
Возьмите новую тест-полоску и повторите тест, следуя алгоритму. |
| Е3. Тест-полоска в верхнем левом углу | Использованная тест-полоска | Замените тест-полоску на новую |
| Е4 | Тест-полоска вставлена неправильно | Изучите руководство пользователя и повторите попытку |
| Е7 | Неподходящая тест-полоска | Используйте для исследования только полоски Contour TS |
| Е11 | Повреждение тест-полоски | Повторите анализ с новой тест-полоской |
| HI | Полученный результат выше 33,3 ммоль/л | Повторите исследование. Если результат сохраняется, срочно обратитесь за медицинской помощью |
| LO | Полученный результат ниже 0,6 ммоль/л | |
| Е5
Е6 Е8 Е9 Е10 Е12 Е13 |
Ошибка программного обеспечения | Обратитесь в сервисный центр |
Меры предосторожности
При использовании прибора следует помнить о мерах предосторожности:
- Глюкометр, если он используется несколькими лицами, является объектом, потенциально переносящим вирусные заболевания. Пользуйтесь только одноразовыми расходными материалами (ланцетами, тест-полосками) и регулярно совершайте гигиеническую обработку устройства.
- Полученные результаты не являются поводом для самостоятельного назначения или, напротив, отмены терапии. Если значения необычно низкие или высокие, обязательно обратитесь к врачу.
- Соблюдайте все правила, указанные в инструкции. Пренебрежение ими может стать причиной недостоверных результатов.

Обязательно обсудите вопросы, касающиеся использования прибора, с вашим лечащим врачом
Контур ТС – это надежный и проверенный временем глюкометр, который прослужит долго. Соблюдение правил его использования и мер предосторожности позволят контролировать свой сахар, а значит, избежать развития серьезных осложнений диабета.
Вопросы врачу
Выбор тест-полосок
Здравствуйте! У меня глюкометр Контроль ТС. Какие тест полоски подходят для него? Дорого ли они стоят?
Здравствуйте! Скорее всего, ваш измеритель называется Контур ТС. С ним используются только одноименные тест-полоски Contour TS, которые можно купить в аптеке или заказать в интернет-магазинах. 50 штук будут стоить в среднем 800 р. Учитывая, что при сахарном диабете желательно производить измерения 2-3 раза в сутки, вам их хватит на 3-4 недели.
Глюкометры без прокалывания кожи
Здравствуйте! Слышала от подруги новые глюкометры – бесконтактные. Правда, что при их использовании не нужно колоть кожу?
Здравствуйте! Действительно, сравнительно недавно на рынке медицинского оборудования было представлено несколько инновационных моделей, в том числе и бесконтактный прибор для проверки сахара в крови.
Что такое глюкометр бесконтактный? Прибор отличается неинвазивностью, точностью и мгновенным получением результата. Его действие основано на излучении особых световых волн. Они отражаются от кожи (предплечья, кончика пальца и т.д.) и попадают на датчик. Затем происходит передача волн на компьютер, обработка и выведение на экран.
Вариант отражения потока зависит от частоты колебания биологических жидкостей в организме. Как известно, на этот показатель, сильно влияет содержание глюкозы в крови.
Но несмотря на массу преимуществ у таких глюкометров имеются и недостатки. Это и довольно внушительные размеры с портативный ноутбук, и высокая цена. Самая бюджетная модель Омелон A Star обойдется покупателю в 7 тысяч рублей.
Сравнение моделей
Здравствуйте! Сейчас у меня глюкометр Диаконт. Узнала об акции на получение бесплатно Контура ТС. Стоит ли менять? Какой из этих приборов лучше?
Добрый день! В целом эти устройства идентичны. Если сравнить Контур ТС и глюкометр Диаконт: инструкция последнего предусматривает время измерения 6 с, требуемый объем крови 0,7 мкл, достаточно широкий диапазон измерений (1,1-33,3 ммоль/л). Методом измерения, как и в Контуре, является электрохимический. Поэтому если вас устраивает ваш глюкометр, менять его я бы не стала.
I Обеспечивающие точность:
1. Система использует в тест-полоске современный фермент, который практически не имеет взаимодействия с лекарствами, что обеспечивает точные измерения при приеме, например, парацетамола, аскорбиновой кислоты/витамина С
2. Глюкометр выполняет автоматическую коррекцию результатов измерений при гематокрите от 0 до 70% — это позволяет получать высокую точность измерений при широком диапазоне гематокрита, который может быть понижен или повышен в результате различных заболеваний
3. Прибор обеспечивает надежность в широких климатических условиях:
— рабочий диапазон температур 5°C — 45°
— влажность 10 – 93% отн. влажности
— высота над уровнем моря – до 3048 м.
4. Не требует кодирования — код вручную вводить не нужно
II Обеспечивающие удобство:
1. Маленький размер капли крови – всего 0,6 мкл, функция детекции «недозаполнения»
2. Система проводит измерение всего за 5 секунд, обеспечивая быстрое получение результатов 3. Память – сохранение последних 250 результатов
4. Память на 250 результатов — хранение данных для анализа результатов за 4 месяца*5. Технология «капиллярного забора» крови тест-полоской
6. Возможность взятия крови из альтернативных мест (ладонь, плечо)
7. Возможность использования всех видов крови (артериальная, венозная, капиллярная)
8. Срок годности тест-полосок (указан на упаковке) не зависит от момента открытия флакона с тест-полосками ,
9. Легко заметный оранжевый порт для тест-полосок
10. Крупный экран (38 мм x 28 мм)
11. Автоматическая маркировка значений, полученных при измерениях, проведенных с контрольным раствором — эти значения также исключены из расчета средних показателей
12. Порт для переноса данных в PC
13. Диапазон измерений 0.6 — 33.3 ммоль/л
14. Принцип измерения — элетрохимический
15. Калибровка по плазме крови
16. Батарея: одна 3-вольтовая литиевая батарея, емкость 225мАч (DL2032 или CR2032), рассчитана примерно на 1000 измерений
17. Габариты (размеры) — 71 x 60 x 19 мм (высота х ширина х толщина)
18. Вес 56,7 г
19. Бессрочная гарантия от производителя
*При среднем измерении 4 раза в день
-
Page 1
Blood Glucose Monitoring System User Guide For Use With ™ TS Blood Glucose Meter ONTOUR and C ™ TS Test Strips ONTOUR… -
Page 2
Welcome to Accuracy and Convenience The C TS Meter balances science and simplicity for ease and ONTOUR accuracy you can depend on. We’re proud to be your partner in helping you manage your diabetes. Unlike many meters, the C TS Meter does not require you to enter ONTOUR a numeric code or put in a coding chip;… -
Page 3: Table Of Contents
Table of Contents Your C TS System ONTOUR TS Meter Display ONTOUR Meter Features System Information Symptoms of High or Low Blood Sugar Important Things to Know Before You Begin Preparing the Lancing Device Inserting the Test Strip Getting the Blood Drop Testing Your Blood Alternative Site Testing Viewing Stored Test Results…
-
Page 4: Your Contour Ts System
Your C TS Meter: ONTOUR Display Button Button (Scroll) (On/Off, Memory Recall, Enter) Orange Test Strip Port Gray Electrode End: This end (with the gray end facing up) is in- Your C ONTOUR serted into the orange test strip port on the meter. Test Strip: Sample Tip: end of the test strip…
-
Page 5: Contour Ts Meter Display
TS Meter Display: ONTOUR A full display, as shown below, indicates that all characters in the display are working properly. You will briefl y see this display each time you turn the meter on. You can see the complete display when the meter is off by pressing and holding the button.
-
Page 6: Meter Features
Meter Features Your New C TS Monitoring System is the ONTOUR Perfect Balance of Science and Simplicity ™ The C TS Blood Glucose Monitoring System from ONTOUR Bayer Diabetes Care is designed to make testing your blood glucose levels easier. Essential Features for Testing The C TS System requires No Coding…
-
Page 7: System Information
System Information Intended Use TS Test Strips are intended for self-testing by people ONTOUR with diabetes and by healthcare professionals to monitor glu- cose concentrations in whole blood. CAUTION • For in vitro diagnostic use only. External use, do not swallow.
-
Page 8
Limitations Preservatives: Blood may be collected by healthcare pro- fessionals into test tubes containing heparin. Do not use other anticoagulants or preservatives. Altitude: Up to 3048 meters does not signifi cantly affect results. Lipemic Specimen: Cholesterol concentrations >13.0 mmol/L or triglyceride concentrations >33.9 mmol/L may produce elevated readings. -
Page 9: Symptoms Of High Or Low Blood Sugar
Symptoms of High or Low Blood Sugar: You can better understand your test results by being aware of the symptoms of high or low blood sugar; this will also help you decide what to do if your results seem unusual. Some of the most common symptoms are: High blood sugar Low blood sugar…
-
Page 10: Important Things To Know
Important Things to Know: Your C TS Blood Glucose Meter is specifi c for ONTOUR glucose and has been referenced to plasma/serum values. Methods calibrated to plasma/serum can be 9 to 15% high- er than the results of whole blood glucose assay methods. •…
-
Page 11: Before You Begin
Before You Begin: Have all the materials you will need ready before you begin testing. This includes your C TS Meter, the ONTOUR ® ® TS Test Strips, and the Ascensia Lancing ONTOUR ICROLET Device with Ascensia M Lancets. You may also need ICROLET TS Control Solution to run a quality control check.
-
Page 12: Preparing The Lancing Device
The following steps (pages 10–14) are shown in the proper order for performing a blood glucose test. Preparing the Lancing Device: Read the Ascensia M Lancing Device insert for ICROLET complete instructions. If your lancing device does not look like the one pictured, follow the instructions that came with your device.
-
Page 13: Inserting The Test Strip
Inserting the Test Strip: Remove a test strip from the bottle and fi rmly snap the lid closed. Never store test strips outside the bottle! NOTE: Check the expiration and discard date. Make sure the test strip does not appear torn or damaged. Hold the test strip with the gray end facing up.
-
Page 14: Getting The Blood Drop
Getting the Blood Drop: With the gray endcap on your Ascensia M Lancing Device, ICROLET select the puncture depth by rotating the dial on the endcap to a smaller drop for shallower puncture or larger drop for deeper puncture. Adjusting the amount of pressure applied to the punc- ture site will also affect puncture depth.
-
Page 15: Testing Your Blood
Testing Your Blood: Hold the meter with the orange test strip port pointing down or toward you. This will ensure your meter is oriented correctly for reading your test result. Immediately touch the tip of the test strip to the drop of blood. The blood is drawn into the test strip through the tip.
-
Page 16: Expected Values
Expected Values: Blood glucose values will vary depending on food intake, medication dosages, health, stress or exer- cise. Consult your healthcare professional for the target value that is appropriate for you. Standard medical practice goals for a typical non-pregnant individual with diabetes are: •…
-
Page 17: Alternative Site Testing
Alternative Site Testing Blood samples for glucose testing may be taken from sites other than your fi ngertips. Read the instructions with your lanc- ing device. Alternative site testing using blood from the forearm or palm Palm may give glucose results that signifi…
-
Page 18: Viewing Stored Test Results
Viewing Stored Test Results: With the meter off, press and release on the meter to view stored test results. The 14 day average will appear on the display with the average of test results taken over the last 14 days. Press to review previous test results.
-
Page 19: Testing With A Control Solution
Testing with a Control Solution: Use C TS Control ONTOUR Solutions to practice using the system or to run a qual- ity control test to make sure the meter and the test strips are working properly. Low, Normal and High Control So- lutions are available.
-
Page 20
Gently rock the control bottle before opening to ensure it is mixed well. Squeeze a small drop of control solution on a clean non- absorbent surface, such as a piece of wax paper. Do not apply control solution to the test strip directly from the bottle. -
Page 21
The meter will automatically rec- ognize and mark ( ) the control result for you. NOTE: does not indi- cate the control test result is within the specifi ed range. Compare your control test result with the Normal Control Range printed on the test strip bottle label or on the bottom of the test strip box. -
Page 22: Setting The Date, Time And Sound
Setting the Date, Time and Sound: You can set your meter to dis- play different options. To get into setup mode, press and hold for three sec- onds. The complete display will briefl y appear, then go to a display with the time. NOTE: You may turn the meter off at any time during…
-
Page 23: Setting The Date
Setting the Date: The date will now appear on the display. The year will be fl ashing. Press to reach the current year. Press to set. The month will now fl ash. Press to reach the current month. Press to set. The day will now fl…
-
Page 24
Setting the Sound: The fl ashing bell symbol will now appear on the display. This option controls whether you want to hear the “beeps” during testing. Press to choose whether to turn the beeper on or off . Press to set. Setting the 12 or 24 Hour Clock: 24H will now fl… -
Page 25
Setting the Month and Day Format: d.m will now fl ash on the display. Press to choose how you want the date to appear, as month/ day (m/d) or day.month (d.m). Press to set. When you have reached the end of setup, your meter will show you all of the current settings and turn off automatically. -
Page 26: Error Codes And Symbols
Error Codes and Symbols: WHAT YOU SEE WHAT IT MEANS WHAT YOU SHOULD DO Low Battery. Replace the battery as soon as possible (see page 28). Temperature Move to an area that is within out-of-range. the operating range for the meter: 5°C–45°C.
-
Page 27
WHAT YOU SEE WHAT IT MEANS WHAT YOU SHOULD DO Test strip not inserted Remove the test strip and insert correctly. it properly (see page 11). Potential software or Remove the test strip and retest hardware issue. using a new test strip. If you continue to have problems, contact Customer Service. -
Page 28
If you do not resolve the problem, contact your WHAT YOU SEE WHAT IT MEANS WHAT YOU SHOULD DO Test result is above • Wash your hands and the test 33.3 mmol/L. site. Repeat the test using a new test strip. •… -
Page 29
local Bayer Diabetes Care Customer Service. WHAT YOU SEE WHAT IT MEANS WHAT YOU SHOULD DO Some display seg- Possible meter Press and hold while the electronics failure. meter is off. Compare meter dis- ments do not appear play with the picture on page 3. when the meter If the display is still not correct, initially turns on. -
Page 30: Replacing The Battery
Replacing the Battery: The battery should be replaced when the meter continually displays or does not turn on. Your C TS Meter uses one ONTOUR 3-volt lithium battery (DL2032 or CR2032). Press fi rmly on the battery cover and slide in the direction of the arrow.
-
Page 31: Caring For The System
WARNING: Keep batteries away from children. Lithium batteries are poisonous. If swallowed, immediately contact your physician or poison control center. Discard batteries according to your local environmental regulations. Caring for the System: • Store meter in the carrying case provided whenever possible.
-
Page 32: Transferring Results To A Computer
Transferring Results to a Computer: You can transfer test results from the C TS Meter to ONTOUR a computer, where they can be summarized in a report with graphs and tables. To make use of this feature, you need Bayer Diabetes Care diabetes manage- ment software and a Bayer Data Cable.
-
Page 33: Specifi Cations
Specifi cations: Test Sample: Whole blood Test Result: Referenced to plasma/serum glucose Sample Volume: 0.6 µL Measuring Range: 0.6–33.3 mmol/L Measuring Time: 8 seconds Memory Feature: Stores most recent 250 test results Battery Type: One 3-volt (DL2032 or CR2032) lithium battery Battery Life: Approximately 1000 Tests (1 yr.
-
Page 34: Symbols Used
Symbols Used: The following symbols are used throughout the product labeling for the C TS Blood Glucose Monitoring System (meter ONTOUR packaging and labeling, test strip packaging and labeling and control solution packaging and labeling). Expiry date (use by last day of month) Batch code Temperature limitations Consult instructions for use…
-
Page 35: Service Information
Service Information: If you have a problem and none of the problem solving steps in the user guide help, call your local Bayer Diabetes Care Customer Service. We have trained specialists to help you. Important: Speak to a Bayer Diabetes Care Representative before returning your meter for any reason.
-
Page 36: Warranty
Warranty: Manufacturer’s Warranty: Bayer Diabetes Care warrants to the original purchaser that this instrument will be free from defects in materials and workmanship for 5 years from the date of original purchase (except as noted below). During the stated 5-year period, Bayer Diabetes Care shall, at no charge, replace a unit found to be defective with an equivalent or current version of the owner’s model.
-
Page 37
BAYER DIABETES CARE MAKES NO OTHER EXPRESS WARRANTY FOR THIS PRODUCT. THE OPTION OF REPLACEMENT, DESCRIBED ABOVE, IS BAYER DIABETES CARE’S ONLY OBLIGATION UNDER THIS WARRANTY. IN NO EVENT SHALL BAYER DIABETES CARE BE LIABLE FOR INDIRECT, SPECIAL OR CONSEQUENTIAL DAMAGES, EVEN IF BAYER DIABETES CARE HAS BEEN ADVISED OF THE POSSIBILITY OF SUCH DAMAGES. -
Page 38: Supplies
Supplies: When calling or writing for supplies be sure to include the number with the name of the replacement part or accessory item. REPLACEMENT PARTS Part Number* Item 40030030 One 3-volt (DL2032 or CR2032) Lithium Battery 99918069 TS User Guide ONTOUR *Part numbers are subject to change without notice.
-
Page 39
Intermedical d.o.o. MEDINIC d.o.o. Branilaca Sarajeva 20 Daničareva 57 71000 Sarajevo 11000 Beograd Bosna i Hercegovina Srbija Tel: +387 33 202 183 Tel. +381 11 3047744 Fax. +381 11 2837009 Bayer (PTY) Ltd Healthcare Division 27 Wrench Road Islando 1600 South Africa Tel 0 860 102 672 Bayer Consumer Care AG…

Предупреждения и ошибки
167
10.2.10 Ошибка E11: НАБОР НЕ ЗАПОЛН.
Предупреждение
Не выполняйте заполнение инфузионного набора, пока он
присоединен к телу. При этом существует риск неуправляемой
подачи инсулина. При использовании отсоединяемых инфузион-
ных наборов перед их заполнением необходимо убедиться в
отсоединении катетера от места введения инсулина. Всегда
следуйте инструкциям по работе с инфузионным набором.
Если картридж и инфузионный набор были заменены, но инфузионный набор не
был заполнен, сообщение об ошибке E11: НАБОР НЕ ЗАПОЛН. появляется при
попытке перевода инсулиновой помпы в режим ПУСК.
Дважды нажмите клавишу f, чтобы отключить
и подтвердить ошибку.
Отсоедините или извлеките инфузионный набор из
места введения инсулина.
Заполните инфузионный набор.
Повторно присоедините инфузионный набор (катетер)
к месту введения инсулина или вставьте новый
инфузионный набор.
Затем переведите инсулиновую помпу в режим ПУСК.

Сахарный диабет (сахарный диабет), также известный среди людей как диабет, представляет собой заболевание, характеризующееся повышением уровня глюкозы в крови выше нормы (гипергликемия). Сахарный диабет в переводе с греческого означает сахарная моча. Это потому, что слишком много сахара в крови попадает в мочу. Хотя диабет чаще встречается в обществах, где отсутствует культура здорового питания, он распространен во всем мире. Поскольку он может вызывать множество различных заболеваний, он стал угрозой для человечества. Это нужно держать под постоянным контролем. Для этого используются измерители сахара (глюкозы) в крови. Roche Accu-Chek Performa Nano — одно из самых доступных устройств на рынке. Он зарекомендовал себя своим качеством и точностью измерений. Во время использования или в случае неисправности на экране устройства появляются некоторые индикаторы. Это могут быть коды ошибок и предупреждающие символы. Устройство предупреждает пользователя звуковыми и визуальными сигналами. На эти предупреждения необходимо обратить внимание для правильного использования устройства.
Черный экран
Если при включении устройства на экране не появляется текст или значок:
- Батареи могут разрядиться, нужно вставить новую батарею и попробовать.
- Устройство может находиться в очень жаркой среде, вам следует попробовать его в более прохладном месте.
- Экран может работать неправильно.
- Возможно, устройство неисправно.

Марка батареи
Если на экране не отображается ничего, кроме значка батареи, возможно, батарея разряжена. В устройство можно вставить новую батарею и использовать ее.

Настроить
На экране установить Если отображается значок, необходимо выполнить и подтвердить такие настройки, как время и дата. Как выполнять эти операции, описано в руководстве пользователя. Устройство можно использовать даже без настройки.

Метка тестовой палочки
Если значок тест-полоски мигает, устройство готово к установке тест-полоски.

Знак капельки
Если тест-полоска правильно вставлена в устройство, на экране появится значок в виде капли. Появление значка в виде капли свидетельствует о том, что прибор готов к измерению. После этой отметки на тест-полоску можно капнуть мерный раствор или кровь. Измерение начнется автоматически после завершения операций.

HI
Если после измерения на экране появляется значок HI, это означает, что результат теста превышает пределы устройства. В случае неправильной работы измерение можно повторить сначала с новой тест-полоской. Если будет получен тот же результат, его можно попробовать с другим устройством или обратиться в ближайшее медицинское учреждение.

LO
Если после измерения на экране появляется значок LO, это означает, что результат теста ниже пределов устройства. В случае неправильной работы измерение можно повторить сначала с новой тест-полоской. Если будет получен тот же результат, его можно попробовать с другим устройством или обратиться в ближайшее медицинское учреждение.

Восклицательный знак
Если после измерения на экране появляется восклицательный знак, это означает, что уровень сахара в крови ниже определенного уровня гипогликемии (низкого уровня сахара в крови). Глюкоза, сахар в крови, является источником энергии для организма. Гипогликемия — это состояние, при котором у человека уровень глюкозы ниже нормы. Это может произойти во время лечения диабета.

CodeExp
Только на черном экране при использовании белого чипа активации код exp может отображаться предупреждение. Когда появляется это предупреждение, подразумевается, что срок годности тест-полосок истечет в конце текущего месяца. Тест-полоски с истекшим сроком годности могут давать ошибочные результаты. По этой причине белый чип активации и тест-полоски следует выбросить в конце месяца, а существующие датированные должны быть приобретены и использованы. Также убедитесь, что на устройстве установлены правильные время и дата.

Код:
На экране код Появление предупреждения свидетельствует об отсутствии чипа активации. Устройство должно быть выключено, чип активации вставлен и устройство снова включено.

E-1
Код E-1, отображаемый на экране, указывает на то, что измерительная линейка может быть повреждена или неправильно прикреплена к прибору. Зонд необходимо вынуть из устройства и снова вставить. Если шток поврежден, его необходимо заменить на новый.

E-2
Код E-2, появляющийся на экране, указывает на то, что в чипе активации может быть ошибка. Устройство необходимо выключить и снова включить после установки нового чипа активации.

E-3
Код E-3, отображаемый на экране, указывает на то, что измеренное значение глюкозы в крови может быть слишком высоким или возникла проблема с тест-полоской. Если вы ошиблись, с новой тестовой палочкой измерение можно повторить с самого начала. Если будет получен тот же результат, его можно попробовать с другим устройством или обратиться в ближайшее медицинское учреждение.

E-4
Код E-4 и символ капли, появляющиеся на экране, указывают на то, что на тест-полоску было закапано недостаточно крови или измерительного раствора. В случае неправильной работы измерение можно повторить сначала с новой тест-полоской.

E-5
появляется на экране E-5 и предупреждение об истечении срока действия кода Указывает, что используются тест-полоски с истекшим сроком годности. Тест-полоски с истекшим сроком годности могут давать ошибочные результаты. По этой причине следует приобретать и использовать те, у которых есть текущие даты. Кроме того, убедитесь, что на устройстве установлены правильные время и дата.

E-6
Если кровь или контрольный раствор капают на тест-полоску до того, как устройство будет включено и готово, на экране появится ошибка E-6. С новой тест-полоской измерение можно повторить с самого начала.

E-7
Код ошибки E-7, который появляется на экране, указывает на то, что в устройстве произошла электронная ошибка или что использованная измерительная линейка могла быть повторно вставлена в устройство. Чтобы решить эту проблему, устройство необходимо выключить, а затем снова включить. Если проблема не устранена, устройство следует выключить, вынуть батареи и, подождав 5-10 секунд, снова вставить батареи и включить устройство. Затем измерение можно повторить с самого начала с новой тест-полоской.

E-8
Код E-8, отображаемый на экране, указывает на то, что температура окружающей среды не подходит для использования устройства. В таком случае устройство следует выключить, поместить в подходящую среду и использовать через 5-10 минут. Подходящие условия для работы устройства указаны в руководстве пользователя. Искусственное нагревание или охлаждение устройства может привести к неисправности.

E-9
Когда батареи, используемые в устройстве, вот-вот разряжаются, на экране появляется предупреждение E-9. Батарейки необходимо заменить новыми. Если после замены устройство по-прежнему имеет ту же ошибку, его необходимо сбросить. Для этого батарейный отсек выдвигается из устройства, и при нажатии любой клавиши батарейный отсек возвращается на место, и устройство запускается.

E-10
В случаях, когда настройки времени и даты неверны, устройство может выдать ошибку E-10. В таком случае необходимо заново выполнить настройки устройства, а затем выключить и снова включить его.
Günceleme: 01/11/2021 16:26

222
6.6 Список ошибок
Пример экрана ошибок
Выключите гл-метр,
замените кодовую
пластинку и полоску
E-55 Истек срок
кодовой пласт.
Меню
Ошибка
Заголовок ошибки
Текст ошибки
Символ ошибки
Меню
Этот параметр доступен не
для всех ошибок.
i
ПРИМЕЧАНИЕ:
Прибор выдает звуковой сигнал при выводе ошибки, даже если сигнал выключен.
Глава 5. Техобслуживание, поиск и устранение неисправностей
Техобслуживание, поиск и устранение неисправностей
Техобслуживание глюкометра
При каждом включении глюкометр автоматически выполняет самотестирование и при обнаружении
сбоев или неисправностей выдает соответствующие сообщения. Смотрите главу 5, Сообщения
отображаемые на дисплее или сообщения об ошибках.
Если вы уронили глюкометр или же сомневаетесь в точности результатов, обратитесь в
Информационный центр.
Замена батарейки
1
Откройте крышку отсека
Извлеките старую
для батарейки на задней
батарейку.
панели глюкометра,
Вставьте новую
нажав на выступ
батарейку, соблюдая
фиксатора в
полярность: знаком
направлении стрелки и
плюс (+) вниз.
приподняв крышку.
ИНФОРМАЦИЯ
• Глюкометр работает от одной плоской круглой литиевой батарейки (3 В, тип CR2032). Это
обычные батарейки, которые можно приобрести в большинстве магазинов. Рекомендуется
заранее приобрести запасную батарейку и держать ее наготове.
• Все результаты остаются сохраненными в памяти.
53352_07054327001_02_RU.indb 31
2
3
Установите в прежнее
положение и защелкните
крышку отсека для
батарейки.
Version RO
5
31
2/27/15 2:20 PM

- Manuals
- Brands
- Accu-Chek Manuals
- Blood Glucose Meter
- Performa Connect
- Operator’s manual
-
Contents
-
Table of Contents
-
Troubleshooting
-
Bookmarks
Quick Links
Performa
BLOOD GLUCOSE METER
Operator’s Manual
Related Manuals for Accu-Chek Performa
Summary of Contents for Accu-Chek Performa
-
Page 1
Performa BLOOD GLUCOSE METER Operator’s Manual… -
Page 3: Intended Use
For use only with the Accu‑Chek Inform II Test Strips and Accu‑Chek Performa Control Solutions. Suitable for self‑testing Note: The Accu‑Chek Performa Meter with the Accu‑Chek Inform II Test Strip was found to be safe and accurate for use in a hyperbaric chamber.
-
Page 4
The system includes: • Accu‑Chek Performa Meter with Battery • Accu‑Chek Inform II Test Strips and Code Chip • Accu‑Chek Performa Control Solutions Any object coming into contact with human blood is a potential source of infection (see: Clinical and Laboratory Standards Institute: Protection of Laboratory Workers from Occupationally Acquired Infections;… -
Page 5: Table Of Contents
Contents Chapter 1: Introduction ……………………..5 The Accu‑Chek Performa Meter ……………………5 Coding the Meter ……………………….. 7 Adjusting the Time and Date – First Time Use ………………..9 Using the Accu‑Chek Performa System ………………….11 Chapter 2: Patient Testing for Healthcare Professionals …………..13 Sample Handling……………………….13…
-
Page 6
Setting the Hypoglycaemic (Hypo) Alert ………………….41 Transferring Data Directly to a Computer or PDA Using Specialised Software and Infrared Cable ….43 Chapter 5: Maintenance and Troubleshooting ………………45 Changing the Battery ………………………..45 Cleaning the Meter ……………………….46 Maintenance and Troubleshooting …………………….47 Display Messages and Troubleshooting ………………….48 Chapter 6: Technical Information ………………….55 Product Limitations ……………………….55 Specifications …………………………55… -
Page 7: Chapter 1: Introduction
Chapter 1: Introduction The Accu‑Chek Performa Meter Infrared (IR) Window – Display – Transfers data from the Shows results, messages, and meter to a computer or PDA. results stored in memory. Power/Set Button – Right and Left Turns the meter on or off Arrow Buttons –…
-
Page 8
Golden End – Insert this end of the test strip into the meter. Yellow Window – Touch blood drop or control solution here. Test Strip Control Solution Test Strip Container Bottle (example) Code Chip Battery – Power/Set Infrared (IR) Top View (example) Button Window… -
Page 9: Coding The Meter
Coding the Meter 1. Make sure the meter is off. 2. Turn over the meter. 3. Remove the old code chip (if there is one in the meter) and discard it. Change the code chip every time a new box of test strips is opened!
-
Page 10
4. Turn over the code chip so the code number 5. Leave the code chip in the meter until a new faces away from you. Push the code chip into box of test strips is opened. Change the code the code chip slot until it stops. chip each time a new box of test strips is opened. -
Page 11: Adjusting The Time And Date — First Time Use
Adjusting the Time and Date – First Time Use The meter is preset with the time and date which may need to be adjusted to the local time zone. Setting the correct time and date in the meter is important to review the results in memory or to download the results to a computer.
-
Page 12
4. Repeat steps 2 and 3 to set the minutes, day, 5. Once the year is set, press and hold until the month, and year. The flashing field is the one that flashing test strip symbol appears. The time and is being changed. -
Page 13: Using The Accu-Chek Performa System
Using the Accu‑Chek Performa System • Only use Accu‑Chek Inform II Test Strips. • Replace the code chip every time a new box of test strips is opened. • Refer to the test strip package insert for test strip storage and system operating conditions.
-
Page 15: Chapter 2: Patient Testing For Healthcare Professionals
Chapter 2: Patient Testing for Healthcare Professionals Sample Handling Always wear gloves and follow your facility’s infection control procedures when handling blood‑contaminated items. Always adhere to the recognised procedures for handling objects that are potentially contaminated with human material. Follow the hygiene and safety policy of your laboratory or institution. Prepare the selected blood collection site per facility policy.
-
Page 16
Patients and healthcare workers are potentially at risk of becoming infected when the same blood glucose meter is used to test blood glucose in several patients. Any patient with an infection or suffering from an infectious disease and any patient who is a carrier of a multi‑resistant organism must be assigned his/her own meter. -
Page 17: Performing A Blood Glucose Test
Performing a Blood Glucose Test Before performing a blood glucose test on patients, set up the meter correctly. The meter, a test strip, and a disposable, single‑use lancet or blood collection device are required. 1. Wear protective gloves. 2. Wash or disinfect the patient’s finger and allow it to dry thoroughly. The blood drop does not spread so easily over dry skin.
-
Page 18
7. Make sure the code number on the meter display 10. Immediately after the blood drop has formed, matches the code number on the test strip touch the drop to the front edge of the yellow container. window of the test strip (do not put blood on top of the test strip). -
Page 19
12. When you see flash, you have enough blood 13. The result appears on the display. in the test strip. 14. Remove and discard the used test strip. -
Page 20: Flagging Test Results
Flagging Test Results It is possible to flag a test result with an asterisk ( ) for a special result. When the results in memory are reviewed, this flag is a reminder of a special result. 1. Perform a test. 2.
-
Page 21: Unusual Test Results
Unusual Test Results Follow facility policy for reporting or treating blood glucose results. If the blood glucose result does not reflect the patient’s clinical symptoms, or seems unusually high or low, perform a control test. If the control test confirms that the system is working properly, repeat the blood glucose test.
-
Page 22
6. Check if the code number on the meter display If they do not match, insert the correct code chip matches the code number on the test strip into the meter and test again. container. 7. If the problem does not resolve … Repeat the test with a new test strip and perform a control test. -
Page 23: Disinfecting The Meter
Disinfecting the Meter The Accu‑Chek Performa Meter may be disinfected. Disinfection is performed according to the degree of soiling (see “When to Disinfect”). What to Disinfect In the unlikely event that the meter becomes contaminated, the following parts of the meter may be disinfected: •…
-
Page 24: When To Disinfect
When to Disinfect • Each time after you have tested a patient’s blood glucose, wipe the area around the test strip slot. If you find blood on the cloth, wipe also the test strip slot itself and the display. • If there is blood on the meter, wipe the meter.
-
Page 25: Chapter 3: Control Testing For Healthcare Professionals
Chapter 3: Control Testing for Healthcare Professionals Introduction Testing control solutions with known glucose levels establishes that the operator and the system are performing acceptably. Control results must be within the defined acceptable ranges before valid patient testing is allowed. Testing Intervals Follow your facility’s policy for control testing intervals.
-
Page 26: About The Control Solutions
• Only use Accu‑Chek Performa Control Solutions. • The meter automatically recognises the Accu‑Chek Performa Control Solution. • Write the date the bottle was opened on the bottle label. The control solution is stable for 3 months from that date or until the use by date on the bottle label, whichever comes first.
-
Page 27: Performing A Control Test
Performing a Control Test The meter, a test strip, and control solution are needed. (example) 1. Insert the test strip into the 2. Make sure the code number 3. Select the control solution to meter in the direction of the on the display matches the be tested.
-
Page 28
4. Put the meter on a flat surface, 5. Remove the control bottle cap. 6. Squeeze the bottle until a tiny such as a table. Wipe the tip of the bottle with drop forms at the tip. Touch a lint‑free wipe. the drop to the front edge of the yellow window of the test strip. -
Page 29
(example) (example) (example) 7. The result appears on the 9.“OK” and the control result 8. Press and release to set the display, along with the control alternate on the display if the control level in the meter. bottle symbol and flashing “L.” result is in range. -
Page 30: Understanding Out-Of-Range Control Test Results
Understanding Out‑of‑Range Control Test Results The label on the test strip container shows the acceptable ranges for the Level 1 and Level 2 control solutions. Control results must be within the designated range on the test strip container label, or as defined by the facility, before being considered acceptable.
-
Page 31: Chapter 4: Meter Memory, Set-Up, And Downloading
Chapter 4: Meter Memory, Set‑up, and Downloading Memory Storing Control and Blood Glucose Results The meter automatically stores up to 500 blood glucose test results with the time and date of the test. Results can be reviewed at any time. They are stored from the newest to the oldest, so set the time and date correctly in the meter.
-
Page 32: Viewing Test Results
Viewing Test Results 1. Press and release either to enter memory. The most recent result appears. 2. Press and release to view previous results in order. 3. OR, press and release to look at 7‑, 14‑, or 30‑day averages in that order.
-
Page 33: Meter Set-Up
Meter Set‑up Using the Set‑up Mode The following features can be adjusted as required. Time and Date – set the time and date. Beeper – select “On” or “OFF.” Test reminder – select “On” or “OFF.” If “On” is chosen, select 1 to 4 test reminders per day. Hypo alert –…
-
Page 34: Setting The Time And Date
You are here TIME / DATE BEEPER TEST REMINDERS HYPO ALERT (hrs, min, day, (on/off) (A‑1, A‑2, A‑3, A‑4) (off, on, level) month, year) Setting the Time and Date decrease increase 1. Press and release to turn on 2. Press and hold for about 3.
-
Page 35
4. Press and release to set 5. Repeat steps 2 and 3 to set 6. To set up more options, press the hour. The minutes flash. the minutes, day, month, and and release . To exit, press and hold year. The flashing field is the until the flashing one that is being changed. -
Page 36: Setting The Beeper On/Off
You are here TIME / DATE BEEPER TEST REMINDERS HYPO ALERT (hrs, min, day, (on/off) (A‑1, A‑2, A‑3, A‑4) (off, on, level) month, year) Setting the Beeper On/Off The meter beeper is preset to “On.” Setting the beeper to “OFF” does not affect test results. The beeper prompts the operator: •…
-
Page 37
1. Press and release to turn 2. Press and hold for about 3. Press and release on the meter. The flashing 4 seconds to enter the set‑up repeatedly until the flashing test strip symbol appears. mode. “Set‑up” and the hour beeper symbol and “On”… -
Page 38
4. Press and release to switch between 5. To set up more options, press and release . To “On” or “OFF.” exit, press and hold until the flashing test strip symbol appears on the display. -
Page 39: Setting Test Reminders
You are here TIME / DATE BEEPER TEST REMINDERS HYPO ALERT (hrs, min, day, (on/off) (A‑1, A‑2, A‑3, A‑4) (off, on, level) month, year) Setting Test Reminders One to four test reminders can be set per day. The meter beeps every 2 minutes – up to 3 times. Turn off the test reminder by inserting a test strip or pressing any button.
-
Page 40
When setting the time for the test reminder function, the bell symbol remains on the display and “set‑up” flashes continuously. 2. Press and hold 1. Press and release to turn on for about 3. Press and release the meter. The flashing test 4 seconds to enter the set‑up repeatedly until the bell strip symbol appears. -
Page 41
4. Press and release 5. If “On” is selected, the hour 6. Press and release to switch between “On” and flashes. “A‑1” and the bell to select the hour. Press and “OFF.” Press and release symbol remain on the display. release to set the hour. -
Page 42
7. The minutes flash. Press and 8. Press and release to set the 9. The next reminder “A‑2” and release to select 00, minutes. “set‑up” flash on the display 15, 30, or 45. These are the with “OFF” and the bell only choices. -
Page 43: Setting The Hypoglycaemic (Hypo) Alert
You are here TIME / DATE BEEPER TEST REMINDERS HYPO ALERT (hrs, min, day, (on/off) (A‑1, A‑2, A‑3, A‑4) (off, on, level) month, year) Setting the Hypoglycaemic (Hypo) Alert The meter hypoglycaemic alert is preset to “OFF.” The alert level can be set from 3.3–4.4 mmol/L. Healthcare professionals: The hypoglycaemic level may vary from person to person.
-
Page 44
4. Press and release 5. If “On” is selected, “set‑up” 7. To exit, press and hold until switch between “On” and flash. The display the flashing test strip symbol “OFF.” Press and release shows 3.9 mmol/L (first use) appears on the display. set the option. -
Page 45: Transferring Data Directly To A Computer Or Pda Using Specialised Software And Infrared Cable
Transferring Data Directly to a Computer or PDA Using Specialised Software and Infrared Cable Downloading data is not recommended for healthcare facilities since there is no means to identify patient results. 1. Install the software according to the instructions. To transfer the results to a computer, connect the infrared meter cable according to the instructions.
-
Page 46
4. Locate the infrared (IR) window on the top of the meter. 5. Locate the IR window on either the infrared cable (computer) or PDA. Infrared (IR) Window 6. Put the meter on a flat surface. Point the two IR windows toward each other. They should be 3–10 cm apart. -
Page 47: Chapter 5: Maintenance And Troubleshooting
Chapter 5: Maintenance and Troubleshooting Changing the Battery 1. Open the battery door on the back of the meter by pushing Notes: the tab in the direction of the arrow and pulling the door up. • The meter uses one 3‑volt Remove the old battery.
-
Page 48: Cleaning The Meter
Cleaning the Meter Follow these instructions to clean or disinfect the meter: • Make sure the meter is off • Gently wipe the meter’s surface with a soft cloth slightly dampened (wring out any excess) with one of these cleaning solutions: •…
-
Page 49: Maintenance And Troubleshooting
Maintenance and Troubleshooting The meter needs little or no maintenance with normal use. It automatically tests its own systems every time it is turned on and prompts the operator for any errors. See Chapter 5, “Display Messages and Troubleshooting.” If the meter is dropped or the accuracy is in question, contact Roche. To check the display, turn off the meter, then press and hold to see the complete display.
-
Page 50: Display Messages And Troubleshooting
Display Messages and Troubleshooting Never make treatment decisions based on an error message. If you have any concerns, contact Roche. The meter will not turn on or the display is blank. Battery power is low. Change the • Battery is dead – battery soon.
-
Page 51
The meter is ready for you to insert a Blood glucose may be lower than the test strip. measuring range of the system. The meter is ready for a drop of This test result was flagged. See blood or control solution. Chapter 2 “Flagging Test Results”… -
Page 52
The meter is not coded or the code The test strip is damaged. Remove chip is not inserted. Turn off the the test strip and reinsert it or meter and recode it. replace it if damaged. Or the code chip is incorrect. Turn off the meter and insert a new code chip. -
Page 53
The blood glucose may be extremely Not enough blood or control solution high or a meter or test strip error was drawn into the test strip for has occurred. If this confirms measurement or was applied after symptoms, follow your facility the test had started. -
Page 54
The code chip is from an expired lot An electronic error occurred or, in of test strips. Ensure the code chip rare cases, a used test strip was number matches the code number removed and reinserted. Turn the on the test strip container. Make sure meter off and on, or take the battery the time and date in the meter are out for 20 seconds and reinsert it. -
Page 55
The battery is almost out of power. Change the battery now. The time and date settings may be Note: incorrect. Make sure the time and If you see any other error display, please contact date are correct and adjust if Roche. -
Page 57: Chapter 6: Technical Information
Chapter 6: Technical Information Product Limitations Please read the literature packaged with the test strips and control solutions to find the latest information on product specifications and limitations. Specifications Blood volume Refer to the test strip package insert. Sample type Refer to the test strip package insert.
-
Page 58: Electromagnetic Compatibility
Protection class Meter type The Accu‑Chek Performa Meter is suitable for continuous operation. Control solution storage conditions Refer to the control solution package insert. Electromagnetic Compatibility This meter meets the electromagnetic immunity requirements as per EN ISO 15197 Annex A. The chosen basis for electrostatic discharge immunity testing was basic standard IEC 61000‑4‑2.
-
Page 59: Product Safety Information
Product Safety Information Strong electromagnetic fields may interfere with the proper operation of the meter. Do not use this meter close to sources of strong electromagnetic radiation. To avoid electrostatic discharge, do not use the meter in a very dry environment, especially one in which synthetic materials are present. Disposing of the Meter and Batteries During blood glucose measurement the meter itself may come into contact with blood.
-
Page 60: Explanation Of Symbols
Explanation of Symbols You may encounter the following symbols on packaging, on the type plate, and in the instructions for the Accu‑Chek Performa Meter, shown here with their meaning. Consult instructions for use Caution (refer to accompanying documents)! Please refer to safety‑related notes in the instructions for use accompanying this instrument.
-
Page 61: Guarantee
The statutory provisions on rights in consumer goods sales in the country of purchase shall apply. Additional Supplies The following supplies and accessories are available from authorised Roche Diabetes Healthcare Centres, pharmacies, or medical/surgical supply dealers: Test Strips Accu‑Chek Inform II Test Strips Control Solutions Accu‑Chek Performa Control Solutions Linearity Kits Accu‑Chek Linearity Kit…
-
Page 63: Index
Index battery, error messages, 50–53 changing, 45 installing, 45 flagging test results, 18 type, 45, 55 beeper, setting, 34 blood glucose, testing, 15 guarantee, 59 button, power/set, 5–6 hyperglycaemia, 19–20 code chip, 6–7 hypoglycaemia, 19–20 computer, connecting the meter to, 43 hypoglycaemic alert, setting, 41 control solution, 24 control test, performing, 25…
-
Page 64
sample handling, 13 settings, meter, 31 supplies, 59 symbols, 58 technical information, 55 test reminders, setting, 37 test results, unusual, 19–20 test strips, Accu‑Chek Inform II, 6, 11 time and date, setting, 32 troubleshooting, 47–53 use by date, 11, 24… -
Page 67
Roche Diagnostics Limited Charles Avenue, Burgess Hill West Sussex, RH15 9RY United Kingdom Accu‑Chek Customer Careline UK Freephone number: 0800 701 000 ROI Freephone number: 1 800 709 600 calls may be recorded for training purposes www.accu‑chek.co.uk LAST UPDATE: 2010‑05… -
Page 68
Roche Diagnostics GmbH Sandhofer Strasse 116 68305 Mannheim, Germany www.accu‑chek.com ACCU‑CHEK, ACCU‑CHEK PERFORMA, ACCU‑CHEK INFORM, and SAFE‑T‑PRO are trademarks of Roche. ©2010 Roche Diagnostics. All rights reserved. 05796806001(02)‑0710…
 10:52
10:52
Замена системы в помпе AccuCheck Spirit Combo. Часть 1
 11:50
11:50
Меню помпы Accu-chek combo spirit
 18:59
18:59
Обзор инсулиновой помпы Accu-Chek Spirit Combo
 27:39
27:39
Итоги работы инсулиновой помпы.
 22:16
22:16
Получаю инсулиновую помпу Accu-Chek spirit Combo в мониках БЕСПЛАТНО!!!
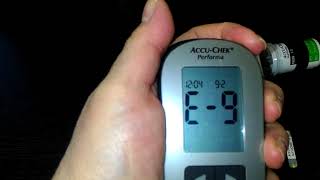 06:31
06:31
Глюкометр Accu-Chek Performa , как правильно снять показания сахара в крови
 06:27
06:27
Акку Чек Перформа — Использование прибора
 07:43
07:43
Как Пользоваться Системой Accu-Chek® Performa
Глюкометр Стандартное Pуководство пользователя…
Стандартное pуководство пользователя, Глюкометр
- Изображение
- Текст
00048010876/A-1109
Roche USA – 46452
V6/1 –
00048010876/A
– Schwarz –
Roche USA – 46452
V6/2 –
00048010876/A
– Cyan –
Roche USA – 46452
V6/3 –
00048010876/A
– Magenta –
Roche USA – 46452
V6/4 –
00048010876/A
– Yellow –
Roche USA – 46452
V6/5 –
00048010876/A
– PMS 287 –
Roche USA – 46452
V6/6 –
00048010876/A
– Cool Gray –
Глюкометр
Стандартное Pуководство
пользователя
©2009 Roche Diagnostics. Все права защищены.
Roche Diagnostics GmbH
Sandhofer Strasse 116
68305 Mannheim, Germany
www.accu-chek.com
ACCU-CHEK, ACCU-CHEK PERFORMA, PERFORMA COMBO и ACCU-CHEK SPIRIT COMBO —
товарные знаки фирмы Рош.
Bluetooth
®
текстовый символ и логотип являются зарегистрированными товарными
знаками компании Bluetooth SIG, Inc. и любое использование этих знаков компанией
Рош осуществляется по лицензии. Все другие товарные знаки и торговые марки
являются собственностью их владельцев.
Расчет болюса
Помпа
Мои данные
Настройки
Измерение ГК
10:02
2 фев 08
Расчет болюса
Помпа
Мои данные
Настройки
Измерение ГК
10:02
2 фев 08

ПОСЛЕДНЯЯ РЕДАКЦИЯ: 2009-11
107031 Москва,
Трубная площадь, д. 2
ЗАО «Рош-Москва».
Информационный центр:
8-800-200-88-99 (звонок бесплатный для всех регионов России)
info@accu-chek.ru
www.roche.ru

1
Содержание
Введение
7
Система Акку-Чек Перформа Комбо
8
1 Знакомство с Вашей новой системой
11
1.1 Обзор
12
1.2 Обзор глюкометра Акку-Чек Перформа Комбо
13
1.3 Обзор инсулиновой помпы Акку-Чек Спирит Комбо
18
1.4 Обзор настроек
19
1.5 Содержимое экрана и навигация
29
2 Проведение измерения уровня глюкозы крови
37
2.1 Обзор
38
2.2 Кодирование глюкометра
39
2.3 Использование системы Акку-Чек Перформа Комбо
41
2.4 Процедура проведения измерения уровня глюкозы крови
42
2.5 Детальные результаты измерения уровня глюкозы крови
51
2.6 Чтение результатов измерения уровня глюкозы крови
55
Roche USA – 46452
V4/1 –
00048010876/A
– Schwarz –
Roche USA – 46452
V4/2 –
00048010876/A
– Cyan –
Roche USA – 46452
V4/3 –
00048010876/A
– Magenta –
Roche USA – 46452
V4/4 –
00048010876/A
– Yellow –

2
2.7 Необычные результаты измерения
59
2.8 Симптомы высокого или низкого уровня глюкозы крови
60
3 Контрольные измерения
61
3.1 Обзор
62
3.2 Зачем нужны контрольные измерения
63
3.3 О контрольных растворах
64
3.4 Процедура проведения контрольного измерения
65
3.5 Что означают результаты контрольного измерения
71
4 Работа с Вашими данными
77
4.1 Обзор
78
4.2 Просмотр и изменение Ваших данных
81
4.3 Добавление новых данных
90
4.4 Составление отчетов
93
4.5 Загрузка данных на компьютер
132

3
5 Изменение настроек прибора
135
5.1 Обзор
136
5.2 Настройка напоминаний измерить ГК: После высокой ГК, После низкой ГК, После еды 137
5.3 Установка напоминаний по будильнику: Измерение ГК, Иное
142
5.4 Настройка напоминаний даты: Визит к врачу, Лабораторный анализ, Заменить
инфузионный набор
145
5.5 Первичная настройка расчета болюса
150
5.6 Установка блоков времени, состояний здоровья, дополнительных факторов для
расчета: Настройка расчета болюса
161
5.7 Настройка границ предупреждения: гипер, гипо
170
5.8 Включение и выключение блокировки клавиш
173
5.9 Настройка языка
176
5.10 Настройка единиц: Углеводы
179
5.11 Включение и выключение беспроводной технологии Bluetooth®
182
5.12 Сопряжение глюкометра и помпы
184
5.13 Настройка сигнала, вибрации, звука клавиш
185
5.14 Установка формата времени, времени, даты
188
5.15 Установка блоков времени: расчет болюса не настроен
191
5.16 Настройки подсветки
199

4
6 Символы, напоминания, предупреждения и ошибки
201
6.1 Обзор
202
6.2 Список символов
203
6.3 Подтверждение напоминания, предупреждения или ошибки
205
6.4 Список напоминаний
206
6.5 Список предупреждений
216
6.6 Список ошибок
222
7 Уход и техобслуживание
225
7.1 Обзор
226
7.2 Замена батареек
227
7.3 Советы по энергосбережению
230
7.4 Чистка глюкометра
231
7.5 Техобслуживание и проверка
232
8 Поиск и устранение неисправностей
233
8.1 Обзор
234
8.2 Устранение неисправностей глюкометра Акку-Чек Перформа Комбо
235

5
9 Техническая информация
253
9.1 Обзор
254
9.2 Ограничения по использованию изделия
255
9.3 Технические характеристики
256
9.4 Информация о безопасности изделия
258
9.5 Утилизация глюкометрa
261
9.6 Гарантия
262
9.7 Дополнительные принадлежности
263
9.8 Информация для медицинских работников
264
Приложения
267
Приложение A: Сокращения
267
Приложение Б: Углеводные единицы
270
Приложение В: Расшифровка символов
271
Приложение Г: Настройки глюкометра и границы диапазона
272
Глоссарий
281
Указатель
291

6

7
К Вашему новому глюкометру прилагаются три
брошюры:
• Инструкция «Первые шаги»:
Используйте эту брошюру для настройки
глюкометра.
• Стандартное Руководство пользователя:
Это Руководство поможет Вам разобраться в
стандартных функциях глюкометра.
• Полное Руководство пользователя:
Это Руководство поможет Вам разобраться в
расширенных функциях глюкометра.
По всем возникающим вопросам просим
обращаться в Информационный центр. Их
перечень приведен в конце данной брошюры.
Данная инструкция освещает следующие
аспекты:
• Знакомство с Вашей новой системой Акку-Чек
Перформа Комбо
• Кодирование глюкометра
• Проведение измерения уровня глюкозы крови
• Контрольные измерения
• Работа с Вашими данными
• Изменение настроек прибора
• Значение символов, напоминаний,
предупреждений и ошибок
• Уход и техобслуживание
• Поиск и устранение неисправностей
• Техническая информация
Введение
Независимо от того, пользовались ли Вы раньше глюкометрами или Акку-Чек Перформа Комбо
является Вашим первым глюкометром, просим Вас перед применением внимательно ознакомиться
с Инструкцией «Первые шаги», Стандартным Руководством пользователя и Полным Руководством
пользователя. Чтобы пользоваться прибором правильно и получать достоверные результаты, Вам
необходимо точно понимать как он работает, что означают символы, появляющиеся на дисплее, и
для чего необходимы индивидуальные функции.

8
Система Акку‑Чек Перформа Комбо
Глюкометр Акку-Чек Перформа Комбо предназначен для определения уровня глюкозы крови при
помощи тест-полосок Акку-Чек Перформа. Прибор имеет множество функций, в том числе:
• Управление помпой Акку-Чек Спирит Комбо
• Введение болюса
• Расчет болюса
• Ежедневные блоки времени, настраиваемые под Ваши потребности
• Управление данными
• Передача данных
• Напоминания даты
• Напоминания измерить ГК: по будильнику, целевые уровни ГК и состояния здоровья
• Электронный дневник позволяет вводить время еды, количество углеводов, состояние здоровья и
информацию о болюсе вместе с результатами измерения уровня глюкозы крови
Для получения детальной информации о функциях глюкометра см. главу 1 «Знакомство с Вашей
новой системой».
