- Remove From My Forums
-
Вопрос
-
Имеется SQL Server 2012 (под управлением Windows Server 2012) или SQL Server 2016 (под управлением Windows Server 2016). При каждой перезагрузке сервера в журнале событий появляется ошибка:
Источник: ESENT
ID: 490
sqlservr (2628) Не удалось открыть файл «C:\Windows\system32\LogFiles\Sum\Api.log» для чтения и записи, системная ошибка 5 (0x00000005): «Отказано в доступе. «. Операция открытия файла не будет выполнена, ошибка: -1032 (0xfffffbf8).
Что это за проблема?
-
Изменено
28 августа 2017 г. 13:37
-
Изменено
Ответы
Some Windows users are reporting that they discovered a lot of ESENT 490 errors inside Event Viewer. In most cases, this issue is reported to occur after Windows 10 was updated to version 18362.86.
After investigating this issue, it turns out that there are several different underlying causes that are known to produce this error code. Here’s a list of methods that are known to cause this error code on Windows 10:
- Windows 10 hotfix is not installed – Keep in mind that Microsoft is already aware of this issue with build 18362.86and has already released a fix that will take this particular issue. TO enforce it, you’ll simply need to install every pending update from the Windows Updates screen.
- The referenced path is not complete – As it turns out, you can expect to see this error code occurring if the Event is triggered because an incomplete path is referenced by a registry key. In this case, you can manually repair the problematic path.
- Corrupted Windows Update / Windows Store component – According to some affected users, this particular issue can also occur due to some kind of system file corruption that affects either Windows Update or Windows Store on Windows 10. In this case, you can resolve the issue by resetting each component.
- System file corruption – It’s not uncommon to see this error caused by some type of system file corruption that is affecting certain OS files. In this case, you should start by running CHKDSK, SFC and DISM scans in quick succession or deploy a clean install or repair install if this issue is not effective.
Now that you are intimately familiar with every method that has the potential of causing this particular error code, here’s a list of methods that other affected users have successfully used to resolve this issue:
Method 1: Installing the Windows 10 Hotfix (if applicable)
If you started experiencing this issue immediately after you updated your Windows 10 version to build 18362.86 (or you suspect this might be the main cause of the issue ) you should start this troubleshooting guide by installing the hotfix that Microsoft has released for this particular issue.
Some users that were dealing with the same issue have confirmed that no new instances of the ESENT Errors have been created inside the Event Viewer after they installed every pending Windows 10 update and restarted their computer.
If you’re looking for specific instructions on how to install the hotfix on Windows 10, follow the steps below to use the Windows Update tab inside the Settings app to install every pending Windows 10 update:
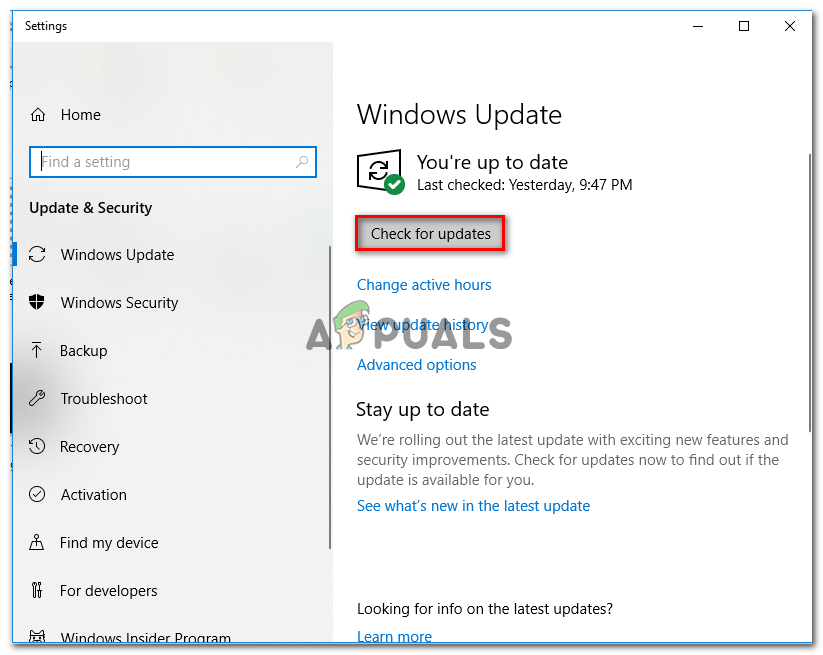
- Start by pressing Windows key + R to open up a Run dialog box. Next, type ”ms-settings:windowsupdate’ and press Enter to open up the Windows Update tab of the Settings app.

Opening the Windows Update screen - After you’re inside the Windows update screen, go ahead and click on Check for updates. Next, follow the on-screen prompts to install every Windows update that is currently pending.

Installing every pending Windows Update - Keep in mind that if you have a lot of pending updates, you will be prompted to restart before every update is installed. In this case, restart as instructed, but make sure to return to this screen at the next startup and finish the installation of the rest of the updates.
- Once every pending update is installed, reboot your computer again and see check the Event Viewer to see if the new instances of the ESENT 490 errors have stopped occurring.

In case the same kind of issue is still occurring, move down to the next potential fix below.
Method 2: Complete the Corrected Path
As it turns out, in most documented instances you’ll encounter this issue due to a bad path that doesn’t exist in reality. if you don’t want to resolve this issue by utilizing a more comprehensive cleansing tool, one non-damaging operation would be to manually create the path expected by your OS as per the error displayed by Event Viewer.
If you want to give this potential fix a try, go ahead and look at the error inside Event Viewer and see if there’s some kind of mention of a broken location. Something like:
C:\WINDOWS\system32\config\systemprofile\AppData\Local\TileDataLayer\Database\EDB.log.

Once you manage to locate the location that is signaled out by the Event Error, open File Explorer and try to naturally navigate through the location. If any folders are missing from the list, correct the path and create a blank file so the scan can reach it.
After you do so, restart your computer and see if new instances of the same kind of ESENT 490 errors are still appearing.
Additionally, you can do this directly from an elevated CMD prompt:
- Press Windows key + R to open up a Run dialog box. Next, type ‘cmd’ inside the Run dialog box and press Ctrl + Shift + Enter to open up an elevated Command Prompt. If you’re prompted by the UAC (User Account Control), click Yes to grant admin access.
Accessing the elevated Command Prompt - Once you’re inside the elevated command prompt, enter the commands below (one at the time) and press Enter after each command to initiate a series of commands to ensure that the path to TileDataLayer is complete:
cd config\systemprofile\AppData\Local
mkdir TileDataLayer
cd TileDataLayer
mkdir Database
- Once the command was processed successfully, restart your computer and see if the issue is fixed once the next startup is complete.

If the issue is still not resolved and you’re still seeing new Event Viewer entrances related to ESENT 490, move down to the next potential fix below.
Method 3: Performing CHKDSK, SFC, and DISM scans
Since this issue is most likely related to some kind of system file corruption, your next attempt at fixing the ESENT 490 should be by running a couple of utilities that are designed to tackle corrupted Windows files.
Fortunately, every recent Windows version is equipped with CHKDSK (Check Disk utility) ( SFC (System File Checker) and DISM (Deployment Image Servicing and Management).
Our recommendation is to run all three utilities in quick succession (as per the instructions below) via the Recovery Menu in order to maximize your chances of fixing the corrupted files without having to clean install your Windows installation.
Follow the step-by-step instructions below for instructions on how to
- Insert a compatible installation media, start your computer normally and press any key when you get asked if you want to boot from the installation media.

Boot from Compatible Windows installation media - After you get to the initial Windows installation screen, click on Repair your computer to open up the Recovery Menu.

Repair computer via installation media Note: Keep in mind that even if you don’t have access to compatible installation media, you can still force the Recovery menu by forcing 3 unexpected shutdowns while your PC is booting up. Additionally, you can create your own installation media that’s compatible with your Windows installation.
- After you arrive inside the Recovery Menu, click on Troubleshoot from the list of available options, then click on Command Prompt from the list of available options.

Open the command prompt via the recovery menu - Inside the elevated Command Prompt, type the following command and initiate a CHKDSK scan:
CHKDSK X:
Note: X is just a placeholder for the driver that currently stores your Windows installation. Make sure to replace the letter with the drive that contains your Windows installation (C: in most cases)
- After the operation is complete restart your computer as instructed, then follow steps 1 to 3 above all over again to open another elevated CMD prompt via the Recovery menu.
- In case the issue is still not resolved, type the following command and press Enter to initiate an SFC scan:
sfc /scannow
Note: Keep in mind that this utility might freeze during random times. When this happens, don’t interrupt the operation as you run the risk of creating additional logical errors.
- Once the operation is complete, reboot your computer and see if you are able to boot normally. In case you still run into the same kind of issues, follow steps 1 to 3 once again to open another elevated Command Prompt.
- Finally, type the following command and press Enter to run a DISM scan:
DISM.exe /Online /Cleanup-Image /RestoreHealth /Source:C:\RepairSource\Windows /LimitAccess
Note: Before you initiate the DISM scan, ensure that you have a stable connection to the internet. This is important because DISM uses a sub-component of Windows Update to download healthy copies in order to replace corrupted system files
- Once the DISM scan is finished, restart your computer one final time and see if you are able to boot normally.


In case you boot back up and you see the same kind of ESENT errors inside the Event Viewer utility, move down to the next potential fix below.
Method 4: Resetting every Windows Update & Windows Store
According to some affected users, you can expect to see this issue occurring due to some type of system file corruption that is affecting either Windows Update or Windows Firewall and ends up creating a lot of different listings inside Event Viewer.
As it turns out, most of these occurrences are created because one of the services mentioned above is stuck in a limbo state (they’re neither opened nor closed).
If this scenario is applicable you should be able to fix the issue swiftly either by resetting Windows Update or Windows Store, depending on the program that is causing this problem.
Since there is no way of checking which component is causing this issue, our recommendation is to reset both in order to eliminate 2 potential culprits of the list.
Follow the first sub-guide below and then the next one after to reset both Windows Update and Windows Store on your Windows 10 operating system:
A. Resetting Windows Store
- Start by opening up a Run dialog box by pressing Windows key + R. Next, type ‘cmd’ inside the text box and press Ctrl + Shift + Enter to open up an elevated Command Prompt window. When you see the User Account Control (UAC) prompt, click Yes to grant admin access.

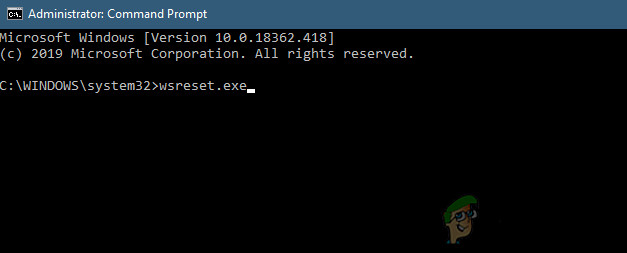
Running Command Prompt - Once you’re inside the elevated Command Prompt, type the following command and press Enter to initiate a complete Windows Store reset (and also clear any associated dependencies):
wsreset.exe

Running a wsreset operation from CMD - After the operation is complete, attempt to install the app update once again and see if the problem is now fixed.
B. Resetting Windows Update
- Start by pressing Windows key + R to open up a Run dialog box. Next, type ‘cmd’ and press Ctrl + Shift + Enter to open up an elevated Command Prompt window.
Accessing a CMD prompt Note: Once you are prompted by the UAC (User Account Control), click Yes to grant admin access.
- Once you’re inside an elevated CMD window, type the following commands in whichever order and press Enter after each one:
net stop wuauserv
net stop cryptSvc
net stop bits
net stop msiserver
Note: Just so you understand what these commands will do to your system – These commands will stop all the relevant Windows Update services from running: BITS service, Cryptographic service, MSI Installer service, Windows update service (main).
- Next, after you manage to stop every relevant service, run the following commands in order to clear and rename two vital WU folders (SoftwareDistribution and Catroot2):
ren C:\Windows\SoftwareDistribution SoftwareDistribution.old
ren C:\Windows\System32\catroot2 Catroot2.old
Note: SoftwareDistribution and Catroot are the two main folders responsible for holding and maintaining Windows Update files. You won’t be able to delete them conventionally, so the best way to ensure that they don’t have any corrupted files that might contribute to this error is to rename them in order to force your OS to create new and healthy equivalents.
- After the two folders have been renamed, run the following commands in order to re-enable the services that you previously disabled (at step 2):
net start wuauserv
net start cryptSvc
net start bits
net start msiserver

Once every relevant service has been restarted, repeat the WU action that was previously triggering the Event Errors and see if the new events have stopped occurring.
Method 5: Reset every Windows Component
In case none of the methods above have allowed you to stop the apparition of new instances of the ESENT 490 event errors, you should seriously take into consideration that you might be dealing a case of system file corruption.
If you find yourself in a scenario like this, the only thing you can do at this point is to reset every relevant Windows component and eliminate every potentially corrupted element – When it comes to doing this, you have two ways forward:
- Clean Install – Use this method if you’re looking for a quick fix that can be deployed without the need of using compatible Windows installation media. You can deploy a clean install procedure directly from the GUI menu of your Windows installation. However, unless you back up your data in advance, you will lose any personal data that’s currently stored on the OS drive.
- Repair Install – If you have any important information on the OS drive that you plan on keeping, a repair install should be the way to go for you, even if the procedure is a bit tedious. You are forced to use compatible installation media, but you will be able to keep your personal files, installed applications, games, and even some user preferences rooted on the OS drive.

Kevin Arrows
Kevin Arrows is a highly experienced and knowledgeable technology specialist with over a decade of industry experience. He holds a Microsoft Certified Technology Specialist (MCTS) certification and has a deep passion for staying up-to-date on the latest tech developments. Kevin has written extensively on a wide range of tech-related topics, showcasing his expertise and knowledge in areas such as software development, cybersecurity, and cloud computing. His contributions to the tech field have been widely recognized and respected by his peers, and he is highly regarded for his ability to explain complex technical concepts in a clear and concise manner.
The issue is that the service or process and his service account (specified in services.msc) does not have sufficient privileges to the specified files or folders. To resolve these issues, read and write (R&W) permissions need to be granted to the service or process and his service account on the root folder that contains the specified files.
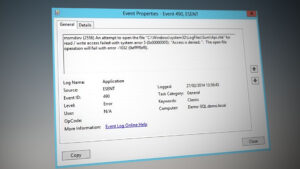
On every restart of a new Windows Server 2012 R2 Essentials or Windows Server 2012 machine, we could get several instances of the following errors in the Application event log:
Log Name:      Application
Source:        ESENT
Event ID:      490
Level:         Error
Description: svchost (3536) An attempt to open the file "C:\Windows\system32\LogFiles\Sum\Api.chk" for read / write access failed with system error 5 (0x00000005): "Access is denied. ".  The open file operation will fail with error -1032 (0xfffffbf8).


Log Name:      Application
Source:        ESENT
Event ID:      490
Level:         Error
Description: svchost (3536) An attempt to open the file "C:\Windows\system32\LogFiles\Sum\SystemIdentity.mdb" for read / write access failed with system error 5 (0x00000005): "Access is denied. ".  The open file operation will fail with error -1032 (0xfffffbf8).
Using Sysinternals Process Explorer, we learned that this PID is actually hosting the Remote Desktop Gateway service. We confirmed this by stopping and starting that service; the errors repeated.

Workaround
The Remote Desktop Gateway service runs using the Network Service system account. Once we gave that account Modify permissions on:
C:\Windows\system32\LogFiles\Sum
The ESENT 490 errors stopped. Instead, we get, correctly, these messages when starting the Remote Desktop Gateway service:
Log Name:      Application
Source:        ESENT
Event ID:      326
Level:         Information
Description:
svchost (7704) The database engine attached a database (1, C:\Windows\system32\LogFiles\Sum\SystemIdentity.mdb). (Time=0 seconds)


Log Name:      Application
Source:        ESENT
Event ID:      327
Level:         Information
Description:
svchost (7704) The database engine detached a database (1, C:\Windows\system32\LogFiles\Sum\SystemIdentity.mdb). (Time=0 seconds)
|
|
|


Hi,
My enviroment : Windows 7 x 32 SP1 & NOD32 10.0.390.0.
In the windows application register i found 10′ events like this:
- Nome registro: Application
- Origine: ESENT
- Data: 11/02/2018 17.33.02
- ID evento: 490
- Categoria attività:Generale
- Livello: Errore
- Parole chiave: Classico
- Utente: N/D
- Computer: Casa
- Descrizione:
- taskhost (4076) WebCacheLocal: Tentativo di apertura del file «C:\Users\Administrator\AppData\Local\Microsoft\Windows\WebCache\WebCacheV01.dat» per accesso lettura e scrittura non riuscito con errore di sistema 32 (0x00000020): «Impossibile accedere al file. Il file è utilizzato da un altro processo. «. L’operazione di apertura file non verrà effettuata con errore -1032 (0xfffffbf8).
I try to translate the description:
The file «C:\Users\Administrator\AppData\Local\Microsoft\Windows\WebCache\WebCacheV01.dat» for read & write access can’t open due error sistema 32 (0x00000020): «The file is loked from other process «. The file open is broken with error -1032 (0xfffffbf8).
Some suggestions ?
Thanks !!
Некоторые пользователи Windows сообщают, что обнаружили много ESENT 490 ошибок внутри Просмотрщик событий. В большинстве случаев эта проблема возникает после обновления Windows 10 до версии. 18362.86.

После изучения этой проблемы выясняется, что существует несколько различных основных причин, которые, как известно, вызывают этот код ошибки. Вот список методов, которые, как известно, вызывают этот код ошибки в Windows 10:
- Исправление Windows 10 не установлено — Имейте в виду, что Microsoft уже знает об этой проблеме в сборке 18362.86 и уже выпустила исправление, которое устраняет эту конкретную проблему. Чтобы обеспечить его соблюдение, вам просто нужно установить все ожидающие обновления с экрана Windows Updates.
- Указанный путь не является полным — Как оказалось, вы можете ожидать появления этого кода ошибки, если событие запускается из-за того, что ключ реестра ссылается на неполный путь. В этом случае вы можете вручную исправить проблемный путь.
- Поврежденный компонент Центра обновления Windows / Магазина Windows. — По словам некоторых затронутых пользователей, эта конкретная проблема также может возникать из-за какого-либо повреждения системного файла, которое влияет на Центр обновления Windows или Магазин Windows в Windows 10. В этом случае вы можете решить проблему, сбросив каждый компонент.
- Повреждение системного файла — Нередко эта ошибка вызвана каким-либо типом повреждения системных файлов, влияющим на определенные файлы ОС. В этом случае вам следует начать с быстрого последовательного выполнения сканирований CHKDSK, SFC и DISM или развернуть чистую установку или восстановить установку, если эта проблема не помогает.
Теперь, когда вы хорошо знакомы со всеми методами, которые могут вызвать этот конкретный код ошибки, вот список методов, которые другие затронутые пользователи успешно использовали для решения этой проблемы:
Метод 1. Установка исправления Windows 10 (если применимо)
Если у вас возникла эта проблема сразу после обновления версии Windows 10 для сборки 18362.86 (или вы подозреваете, что это может быть основной причиной проблемы), вам следует начать это руководство по устранению неполадок, установив исправление, выпущенное Microsoft для этой конкретной проблемы.
Некоторые пользователи, столкнувшиеся с той же проблемой, подтвердили, что новые экземпляры ошибок ESENT не создавались в средстве просмотра событий после установки каждого ожидающего обновления Windows 10 и перезапуска компьютера.
Если вам нужны конкретные инструкции по установке исправления в Windows 10, выполните следующие действия, чтобы использовать вкладку Центра обновления Windows в приложении «Настройки» для установки всех ожидающих обновлений Windows 10:
-
Начните с нажатия Клавиша Windows + R открыться Запустить чат. Затем введите ms-settings: windowsupdate ’ и нажмите Входить открыть Центр обновления Windows вкладка Настройки приложение.

Image -
После того, как вы окажетесь на экране обновления Windows, нажмите Проверить обновления. Затем следуйте инструкциям на экране, чтобы установить все обновления Windows, которые в настоящее время ожидают рассмотрения.
Image - Имейте в виду, что если у вас много ожидающих обновлений, вам будет предлагаться перезагрузка перед установкой каждого обновления. В этом случае перезапустите в соответствии с инструкциями, но обязательно вернитесь к этому экрану при следующем запуске и завершите установку остальных обновлений.
- После установки всех ожидающих обновлений перезагрузите компьютер еще раз и проверьте в средстве просмотра событий, есть ли новые экземпляры ESENT 490 ошибок перестали происходить.


Если такая же проблема все еще возникает, перейдите к следующему потенциальному исправлению ниже.
Метод 2: пройдите по исправленному пути
Как оказалось, в большинстве задокументированных случаев вы столкнетесь с этой проблемой из-за неправильного пути, которого в действительности не существует. если вы не хотите решать эту проблему с помощью более комплексного инструмента очистки, одна операция без ущерба будет состоять в том, чтобы вручную создать путь, ожидаемый вашей ОС в соответствии с ошибкой, отображаемой Просмотрщик событий.
Если вы хотите попробовать это потенциальное исправление, посмотрите на ошибку внутри Просмотрщик событий и посмотрите, есть ли упоминание о сломанном месте. Что-то вроде:
C: / WINDOWS / system32 / config / systemprofile / AppData / Local \TileDataLayer / База данных / EDB.log.

Как только вам удастся найти место, на которое указывает ошибка события, откройте проводник и попробуйте естественным образом перемещаться по местоположению. Если какие-либо папки отсутствуют в списке, исправьте путь и создайте пустой файл, чтобы сканирование могло его достичь.
После этого перезагрузите компьютер и посмотрите, не появятся ли новые экземпляры того же типа. ESENT 490 ошибок все еще появляются.
Кроме того, вы можете сделать это прямо из командной строки CMD с повышенными привилегиями:
-
Нажмите Клавиша Windows + R открыться Запустить чат. Затем введите ‘Cmd’ внутри Запустить диалоговое окно и нажмите Ctrl + Shift + Enter, чтобы открыть командную строку с повышенными привилегиями. Если вам будет предложено UAC (Контроль учетных записей пользователей) нажмите да чтобы предоставить доступ администратора.
Image -
Как только вы окажетесь в командной строке с повышенными привилегиями, введите команды ниже (по одной) и нажимайте Enter после каждой команды, чтобы инициировать серию команд, чтобы убедиться, что путь к TileDataLayer завершено:
cd config / systemprofile / AppData / Local mkdir TileDataLayer cd TileDataLayer mkdir Database
- После успешной обработки команды перезагрузите компьютер и посмотрите, будет ли проблема устранена после завершения следующего запуска.

Если проблема все еще не решена, и вы по-прежнему видите новые входы в Средство просмотра событий, связанные с ESENT 490 перейдите к следующему потенциальному исправлению ниже.
Метод 3: выполнение сканирования CHKDSK, SFC и DISM
Поскольку эта проблема, скорее всего, связана с каким-либо повреждением системных файлов, ваша следующая попытка исправить ESENT 490 следует запустить несколько утилит, предназначенных для работы с поврежденными файлами Windows.
К счастью, каждая последняя версия Windows оснащена CHKDSK (утилита проверки диска) (SFC (проверка системных файлов) а также DISM (обслуживание образов развертывания и управление ими).
Мы рекомендуем запускать все три утилиты в быстрой последовательности (в соответствии с приведенными ниже инструкциями) через меню восстановления, чтобы максимизировать ваши шансы на исправление поврежденных файлов без необходимости чистой установки Windows.
Следуйте пошаговым инструкциям ниже, чтобы узнать, как
-
Вставьте совместимый установочный носитель, запустите компьютер в обычном режиме и нажмите любую клавишу, когда вас спросят, хотите ли вы загрузиться с установочного носителя.
Image -
После того, как вы перейдете к начальному экрану установки Windows, нажмите Почини свой компьютер открыть Меню восстановления.
Image Примечание: Имейте в виду, что даже если у вас нет доступа к совместимому установочному носителю, вы все равно можете принудительно открыть меню «Восстановление», вызвав 3 неожиданных завершения работы, пока ваш компьютер загружается. Кроме того, вы можете создайте свой собственный установочный носитель совместимый с вашей установкой Windows.
-
После того, как вы войдете внутрь Меню восстановления, нажмите на Устранение неполадок из списка доступных опций, затем нажмите Командная строка из списка доступных опций.
Image -
В командной строке с повышенными привилегиями введите следующую команду и запустите CHKDSK сканирование:
CHKDSK Икс
Примечание: X это просто заполнитель для драйвера, который в настоящее время хранит вашу установку Windows. Обязательно замените букву на диск, на котором находится ваша установка Windows (в большинстве случаев C:)
- После завершения операции перезагрузите компьютер в соответствии с инструкциями, затем снова выполните шаги с 1 по 3, чтобы открыть другое окно CMD с повышенными привилегиями. Меню восстановления.
-
Если проблема все еще не решена, введите следующую команду и нажмите Входить инициировать SFC сканирование:
sfc / scannow
Примечание: Имейте в виду, что эта утилита может зависать в случайное время. В этом случае не прерывайте операцию, так как вы рискуете создать дополнительные логические ошибки.
- После завершения операции перезагрузите компьютер и посмотрите, сможете ли вы нормально загрузиться. Если вы все еще сталкиваетесь с такими же проблемами, выполните шаги с 1 по 3 еще раз, чтобы открыть другую командную строку с повышенными привилегиями.
-
Наконец, введите следующую команду и нажмите Входить для запуска сканирования DISM:
DISM.exe / Online / Cleanup-Image / RestoreHealth / Источник: C: / RepairSource / Windows / LimitAccess
Примечание: Прежде чем запускать сканирование DISM, убедитесь, что у вас стабильное подключение к Интернету. Это важно, потому что DISM использует подкомпонент Центра обновления Windows для загрузки исправных копий с целью замены поврежденных системных файлов.
- После завершения сканирования DISM перезагрузите компьютер в последний раз и посмотрите, сможете ли вы нормально загрузиться.


Если вы загрузитесь и увидите такие же ошибки ESENT внутри Просмотрщик событий утилита, перейдите к следующему потенциальному исправлению ниже.
Метод 4: сброс всех обновлений Windows и Магазина Windows
По словам некоторых затронутых пользователей, вы можете ожидать появления этой проблемы из-за какого-либо типа повреждения системных файлов, которое влияет на Центр обновления Windows или брандмауэр Windows и приводит к созданию множества разных списков в средстве просмотра событий.
Как выясняется, большинство этих вхождений создается из-за того, что одна из упомянутых выше служб застряла в состоянии неопределенности (они не открыты и не закрыты).
Если этот сценарий применим, вы сможете быстро решить проблему, сбросив Центр обновления Windows или Магазин Windows, в зависимости от программы, вызывающей эту проблему.
Поскольку нет возможности проверить, какой компонент вызывает эту проблему, мы рекомендуем сбросить оба параметра, чтобы устранить 2 потенциальных виновника в списке.
Следуйте первому подруководству ниже, а затем следующему за ним, чтобы сбросить как Центр обновления Windows, так и Магазин Windows в вашей операционной системе Windows 10:
A. Сброс Магазина Windows
-
Начни с открытия Запустить диалоговое окно, нажав Клавиша Windows + R. Затем введите ‘Cmd’ внутри текстового поля и нажмите Ctrl + Shift + Enter открыть возвышенный Командная строка окно. Когда вы видите Контроль учетных записей пользователей (UAC) подсказка, нажмите да чтобы предоставить доступ администратора.
Image -
Как только вы окажетесь в командной строке с повышенными привилегиями, введите следующую команду и нажмите Входить инициировать полный Сброс Магазина Windows (а также очистите все связанные зависимости):
wsreset.exe
Image - После завершения операции попробуйте еще раз установить обновление приложения и посмотрите, устранена ли проблема.


Б. Сброс Центра обновления Windows
-
Начните с нажатия Клавиша Windows + R открыться Запустить чат. Затем введите ‘Cmd’ и нажмите Ctrl + Shift + Enter, чтобы открыть окно командной строки с повышенными правами.
Image Примечание: Как только вам будет предложено UAC (Контроль учетных записей пользователей) нажмите да чтобы предоставить доступ администратора.
-
Как только вы окажетесь внутри окна CMD с повышенными правами, введите следующие команды в любом порядке и нажмите Входить после каждого:
net stop wuauserv net stop cryptSvc чистые стоповые биты net stop msiserver
Примечание: Просто чтобы вы понимали, что эти команды сделают с вашей системой — эти команды остановят работу всех соответствующих служб Windows Update: службы BITS, службы криптографии, службы установщика MSI, службы обновления Windows (основной).
-
Затем, когда вам удастся остановить все соответствующие службы, выполните следующие команды, чтобы очистить и переименовать две важные папки WU. (Распространение программного обеспечения и Catroot2):
ren C: / Windows / SoftwareDistribution SoftwareDistribution.old ren C: / Windows / System32 / catroot2 Catroot2.old
Примечание: SoftwareDistribution а также Catroot это две основные папки, отвечающие за хранение и обслуживание файлов Центра обновления Windows. Вы не сможете удалить их обычным способом, поэтому лучший способ убедиться, что в них нет поврежденных файлов, которые могут способствовать возникновению этой ошибки, — это переименовать их, чтобы заставить вашу ОС создавать новые и исправные эквиваленты.
-
После переименования двух папок выполните следующие команды, чтобы повторно включить службы, которые вы ранее отключили (на шаге 2):
net start wuauserv net start cryptSvc чистые стартовые биты net start msiserver

После перезапуска каждой соответствующей службы повторите действие WU, которое ранее вызывало ошибки событий, и посмотрите, перестали ли возникать новые события.
Метод 5: сбросить все компоненты Windows
Если ни один из вышеперечисленных методов не позволил вам остановить появление новых экземпляров ESENT 490 ошибок событий, вам следует серьезно принять во внимание, что вы можете иметь дело с повреждением системных файлов.
Если вы оказались в подобном сценарии, единственное, что вы можете сделать на этом этапе, — это сбросить все соответствующие компоненты Windows и удалить все потенциально поврежденные элементы. Когда дело доходит до этого, у вас есть два пути вперед:
- Чистая установка — Используйте этот метод, если вам нужно быстрое решение, которое можно развернуть без использования совместимого установочного носителя Windows. Вы можете развернуть процедуру чистой установки прямо из меню графического интерфейса вашей установки Windows. Однако, если вы не сделаете резервную копию своего аванса, вы потеряете все личные данные, которые в настоящее время хранятся на диске ОС.
- Ремонт Установить — Если у вас есть какая-либо важная информация о диске с ОС, который вы планируете сохранить, восстановительная установка должна быть подходящим вариантом для вас, даже если процедура немного утомительна. Вы вынуждены использовать совместимый установочный носитель, но вы сможете сохранить свои личные файлы, установленные приложения, игры и даже некоторые пользовательские настройки на диске ОС.