На чтение 3 мин Просмотров 1.2к. Опубликовано
Epson – японская компания по производству электроники, которая является одним из крупнейших производителей и дистрибьюторов принтеров и оборудования для обработки изображений. Компания, хотя и базируется в Сува в Японии, имеет дочерние предприятия по всему миру и производит струйные, матричные и лазерные принтеры. Помимо этого, он также производит и распространяет сканеры, кассовые аппараты, ноутбуки, роботов и много другого электронного оборудования. 
Несмотря на то, что компания производит так много электронного оборудования, они в основном известны своими безупречными принтерами и довольно популярными среди обычных потребителей благодаря своему высокому качеству и отличной поддержке клиентов. Однако совсем недавно на их принтерах появилось много сообщений о « Error Code 0xf1 ». В этой статье мы обсудим некоторые причины, из-за которых возникает эта ошибка, и предоставим жизнеспособные решения для ее полного устранения.
Содержание
- Что вызывает «код ошибки 0xf1» на принтерах Epson?
- Решение 1. Устранение заедания шестерен подачи
- Решение 2. Перемещение узла головки принтера
- Решение 3. Проверка на застревание бумаги
Что вызывает «код ошибки 0xf1» на принтерах Epson?
Получив многочисленные отчеты от нескольких пользователей, мы решили изучить проблему и разработали набор решений, чтобы полностью ее устранить. Кроме того, мы изучили причины, из-за которых возникает эта ошибка, и перечислили их ниже:
- Застрявшие механизмы подачи: Один пользователь сообщил, что кусок пластика, отколовшийся от части принтера, застрял в механизмах подачи и заклинивает их, из-за чего возникает ошибка.
- Застревание бумаги: в большинстве случаев ошибка возникает из-за замятия бумаги во время процесса печати. Некоторые пользователи сообщали, что внутри принтера произошло замятие бумаги, из-за которого возникла ошибка.
- Грязный картридж: Возможно, там был грязный картридж. картридж, который необходимо заменить и который препятствует процессу печати из-за замятия бумаги во время печати.
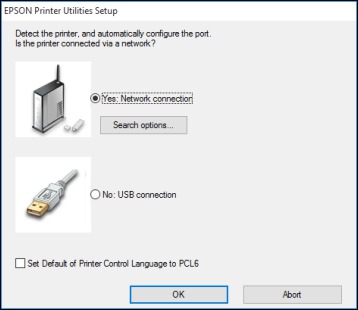
- Неправильная установка: в некоторых случаях принтер может не установлен на компьютер должным образом, из-за чего может возникать эта ошибка.
Теперь, когда у вас есть общее представление о природе проблемы, мы перейдем к к решениям. Обязательно выполняйте их в определенном порядке, в котором они представлены, чтобы избежать конфликтов.
Решение 1. Устранение заедания шестерен подачи
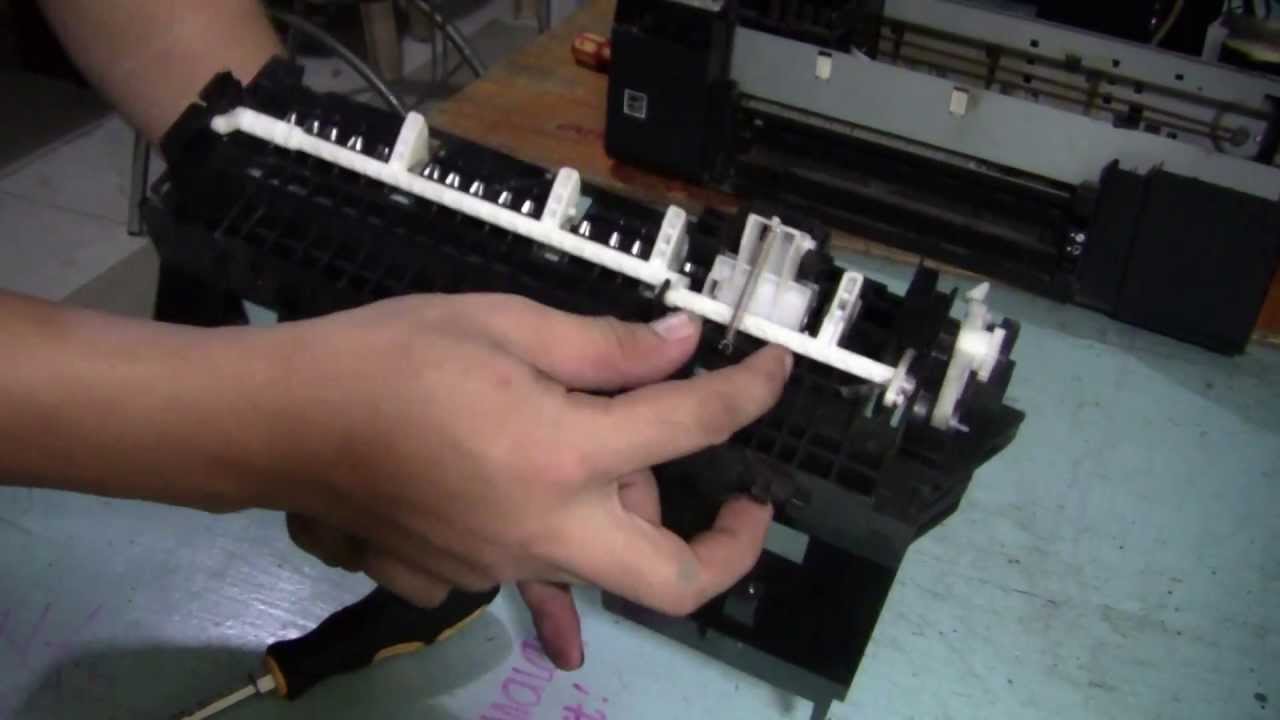
Если какой-то кусок пластика застрял в механизмах подачи и мешает им вращаться должным образом, может возникнуть ошибка. Поэтому рекомендуется попытаться разблокировать шестерни , приложив усилие к шестерням вручную и вытащив из них пластик, или физически. снимите деталь с шестерен, открыв переднюю панель принтера. Проверьте, сохраняется ли проблема после этого..

Решение 2. Перемещение узла головки принтера
В некоторых случаях ошибка устраняется простым перемещением узла головки принтера определенным образом. Поэтому на этом этапе мы отключим питание принтера и переместим сборку. Для этого:
- Отключите принтер от розетки, чтобы выключить его.
- Поднимите крышку принтера и переместите узел головки принтера до упора влево .

- Переместите узел головки принтера назад до упора вправо.
- Включите принтер и проверьте, сохраняется ли проблема.
- Повторите этот процесс 4–5 раз, прежде чем продолжить.


Решение 3. Проверка на застревание бумаги
В некоторых случаях внутри принтера может быть замятие бумаги, из-за которого возникает эта ошибка. Поэтому на этом этапе мы извлечем картридж и проверим, не замялась ли бумага. Для этого:
- Полностью выключите принтер.
- Возьмите картридж из задней части принтера.
- Проверьте , не застряла ли там какая-либо бумага .
- Если есть, удалите его и вставьте картридж обратно в.
- Подключите принтер обратно и проверьте , сохраняется ли проблема.
- Если ошибка исчезла, но принтер не печатает, выньте картридж и очистите его.
- Заправьте его чернилами и вставьте его обратно.
- Проверьте , печатает ли принтер.

by Matthew Adams
Matthew is a freelancer who has produced a variety of articles on various topics related to technology. His main focus is the Windows OS and all the things… read more
Updated on
- The printer errors 0xf1/ 0xf2/ 0xf3/ 0xf4 can be results of hardware or software issues.
- To easily fix the Epson error 0xf1, reset the printer to its manufacturer’s settings.
- Updating the printer driver manually and automatically will also fix the 0xf1 printer error.
- Open up your Epson device, check its ink, and make sure it is not jammed.

Some Epson printer users have posted on the Microsoft forum about a 0xf1 error. While there are 4 similar errors, specifically 0xf1/ 0xf2/ 0xf3/ 0xf4, they all can be solved with the same steps. One user stated:
When I switch on my Epson XP-435, I get a message: Printer error, turn power off and on again. Error code 0xf1.
Consequently, users can’t print when that error arises on Windows 10 PCs. To fix that issue, check out some of the potential resolutions below.
How can I fix the Epson printer error 0xf?
1. Reset the printer
- First, try resetting the printer as the 0xf1 error message suggests. Turn off the printer.
- Unplug the printer’s USB power cable from both wall and printer.
- Turn off your desktop or laptop, if it’s on, as well.
- Wait for about 10 minutes.
- Then plug the printer back in.
- Turn the printer on.
2. Update the printer’s driver
Use Device Manager to manually update your drivers
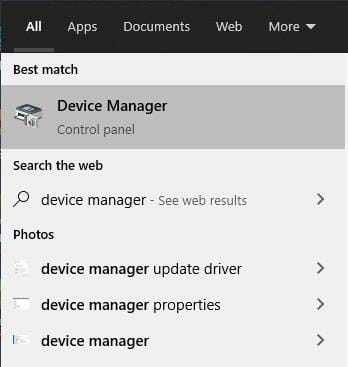
- Go to the Search bar and type device manager.

- Click and open Device Manager.
- You’ll be opening a list of devices where you must click on Print Queues.
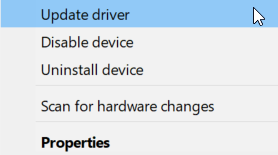
- Select your printer device, and right-click on it.
- Select Update driver.

The 0xf1 error might also be due to an incompatible or antiquated printer driver.
You can manually update your drivers from Device Manager, but you can simplify your work by updating your drivers with the help of a driver updater software.
Update you drivers automatically with a third-party driver updater tool
Updating the drivers may not be your favorite easiest activity. That’s why a professional driver updater tool is one of the most efficient options to take into consideration in order to install the latest drivers on your Windows 10 PC.
You can save time, stress, and causing even more problems to your PC by choosing to update the drivers automatically with specialized software.
Often, your computer system might not be able to update the generic drivers for your hardware and peripherals correctly. There are vital differences between a generic driver and a manufacturer’s driver. Finding the correct driver versions for every hardware component can become tiresome.That’s why a dependable updater can help you find and update your drivers automatically. We strongly suggest the Outbyte Driver Updater, and here’s how to do it:
- Download and install the Outbyte Driver Updater app.
- Launch the software and wait for the app to detect all incompatible drivers.
- Now, it will show you a list of all outdated drivers to select the ones to Update or Ignore.
- Click on Update & Apply Selected to download and install the latest versions.
- Restart your PC to ensure the applied changes.


Outbyte Driver Updater
Maintain your device healthy by letting OutByte Driver Updater find the latest driver options.
Disclaimer: You may need to upgrade the app from the free version to perform specific actions.
3. Remove jammed printer
- Turn off the printer first.
- Remove all the paper from the paper feed tray.
- Open the printer’s scanner unit to check if there’s any jammed paper from inside.
- Remove any jammed sheets you find.
- Close the printer.
- Then remove the duplexer at the rear of the printer.
- Remove any jammed paper from the duplexer.

- Place the duplexer back in the printer.

The 0xf1 error can often be due to a printer paper jam.
4. Remove debris from the paper feed
Some users have said they’ve fixed the 0xf1 error by removing debris, such as paperclips, from their printers’ paper feeds.
So, turn off your printer; and then check if there is any debris stuck in the paper feed. If so, remove the debris from the paper feed.
5. Move the Printer Head Assembly to the left
- Trn off the printer.
- Then unplug the printer’s USB cable.
- Next, open up the printer.
- Carefully move the Printer Head Assembly to the far left. Don’t force the Printer Head Assembly if it doesn’t easily move.
- Then move the Printer Head Assembly to the right to restore it to the original position.
- Plug the printer back in, and turn it on.
- Repeat the steps above three to four times if required.

Moving the Printer Head Assembly might resolve the 0xf1 error for some users
6. Run the Printer troubleshooter
- To open that troubleshooter, click the Type here to search button.
- Input the keyword troubleshoot in Windows 10’s search box.
- Click Troubleshoot settings to open the Troubleshoot tab in Settings.

- Select the Printer troubleshooter.
- Press the Run the troubleshooter button to open the Printer troubleshooter.
- Select the printer to fix the 0xf1 error for.
- Then click Next to go through the troubleshooter.

Windows 10’s Printer troubleshooter might also come in handy for fixing error 0xf1.
If, however, other fixes are needed, check the warranty period for your printer to see if you can return it to Epson for repairs without additional charges.
For any other questions or suggestions, don’t hesitate to reach for the comments section below.
![]()
Обновлено сентябрь 2023: перестаньте получать сообщения об ошибках и замедлите работу вашей системы с помощью нашего инструмента оптимизации. Получить сейчас в эту ссылку
- Скачайте и установите инструмент для ремонта здесь.
- Пусть он просканирует ваш компьютер.
- Затем инструмент почини свой компьютер.
Как это может раздражать, что любимый принтер Epson не помогает, когда вам нужна бумажная копия. Вместо этого отображается код ошибки «0xf1».
Это одна из критических ошибок, с которыми вы можете столкнуться, и обычно она вызвана повреждением записи реестра в вашей компьютерной системе. Если ваш принтер Epson обнаружил «код ошибки Epson 0xf1», печатающая головка не может читать при запуске или наклоняется слева направо.
Эта ошибка может быть связана с аппаратными или программными проблемами вашего принтера и / или ПК, либо с обоими. Самый важный шаг, который вы можете сделать, — это отсоединить шнур питания от принтера, извлечь картридж, а затем снова подключить его. Если проблема связана с оборудованием, это может решить проблему, и вы сможете использовать его как обычно.
Исправить ошибку будет намного проще, если вы сначала узнаете, что ее вызывает. Итак, мы перечислили здесь некоторые факторы. Посмотрите на это:
- Замятие бумаги в принтере
- Устаревший или поврежденный драйвер
- Поврежденные записи реестра
По всем этим причинам эта проблема может также возникнуть, если принтер не установлен по умолчанию. Теперь, когда ты знаешь что вызвало проблему с вашим принтером Epson, вот несколько способов, которыми мы хотели бы поделиться с вами.
Сбросить настройки принтера
Первое, что нужно сделать, это перезагрузить принтер. Сначала выключите принтер. Затем отключите принтер от устройства и электрической розетки. Затем выключите компьютер или ноутбук и маршрутизатор. Оставьте устройства на 5-10 минут. Затем включите принтер и компьютер.
Когда вы закончите, сделайте образец печати и посмотрите, решена ли проблема, или запишите ее.
Обновление за сентябрь 2023 г .:
Теперь вы можете предотвратить проблемы с ПК с помощью этого инструмента, например, защитить вас от потери файлов и вредоносных программ. Кроме того, это отличный способ оптимизировать ваш компьютер для достижения максимальной производительности. Программа с легкостью исправляет типичные ошибки, которые могут возникнуть в системах Windows — нет необходимости часами искать и устранять неполадки, если у вас под рукой есть идеальное решение:
- Шаг 1: Скачать PC Repair & Optimizer Tool (Windows 10, 8, 7, XP, Vista — Microsoft Gold Certified).
- Шаг 2: Нажмите «Начать сканирование”, Чтобы найти проблемы реестра Windows, которые могут вызывать проблемы с ПК.
- Шаг 3: Нажмите «Починить все», Чтобы исправить все проблемы.

Проверьте бумагу. Если он застрял, немедленно удалите его.
Код ошибки Epson 0xf1 может возникнуть из-за замятия бумаги. Поэтому, если бумага застряла или застряла в принтере, сначала проверьте бумагу и немедленно удалите ее. Таким образом, такой проблемной работе обязательно придет конец. Чтобы выполнить эту задачу, выполните следующие действия:
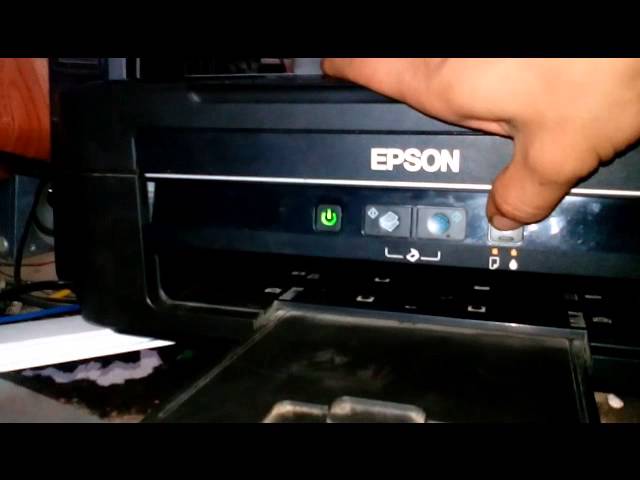
- Рекомендуется сначала выключить компьютер, а затем нажать кнопку бумаги, чтобы удалить застрявшую бумагу.
- Если в принтере остались куски бумаги, откройте крышку принтера и удалите все поврежденные детали.
- Теперь снова загрузите бумагу в податчик листов и нажмите кнопку бумаги. Попробуйте распечатать задание и посмотрите, решена ли проблема.
Переустановите драйвер принтера Epson
Если вы используете для печати устаревший драйвер принтера, есть большая вероятность, что вы получите этот код ошибки. Поэтому убедитесь, что вы обновили драйвер. В противном случае переустановите обновленный драйвер принтера, следуя приведенным ниже инструкциям:
- Зайдите в «Устройства и принтеры» на вашем компьютере.
- Теперь щелкните правой кнопкой мыши значок «Epson Printer» и выберите параметр «Удалить».
- После этого перезагрузите компьютер и попробуйте добавить принтер Epson в предыдущее меню.
Обратитесь в службу поддержки Epson Printer для немедленного решения
Если вы все еще сталкиваетесь с кодом ошибки 0xf1 при печати с принтера Epson, не теряйте время! Будьте готовы к самой надежной и полезной поддержке для ваших принтеров Epson. Это реально, и команда, которая здесь работает, особенно талантлива и хорошо подготовлена. Они предложат вам практическое решение в кратчайшие сроки.
Совет эксперта: Этот инструмент восстановления сканирует репозитории и заменяет поврежденные или отсутствующие файлы, если ни один из этих методов не сработал. Это хорошо работает в большинстве случаев, когда проблема связана с повреждением системы. Этот инструмент также оптимизирует вашу систему, чтобы максимизировать производительность. Его можно скачать по Щелчок Здесь

CCNA, веб-разработчик, ПК для устранения неполадок
Я компьютерный энтузиаст и практикующий ИТ-специалист. У меня за плечами многолетний опыт работы в области компьютерного программирования, устранения неисправностей и ремонта оборудования. Я специализируюсь на веб-разработке и дизайне баз данных. У меня также есть сертификат CCNA для проектирования сетей и устранения неполадок.
Сообщение Просмотров: 3,802
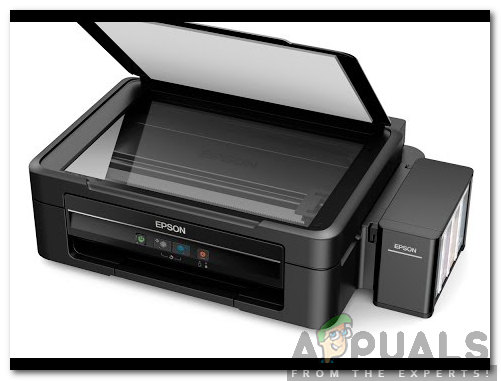
Epson printers are known for their reliability and quality, but like any piece of technology, they can experience errors and issues that can be frustrating to deal with. One of the most common errors that Epson printer users may encounter is the 0xF1 error code. This error code can appear on various models of Epson printers, including the ET-2550, L575, and others, and can cause the printer to stop working or become unresponsive. In this article, we’ll take a closer look at the Epson error 0xF1, what it means, and how to fix it.
What is Epson Error 0xF1?
Epson Error 0xF1 is a common error code that can appear on Epson printers. It indicates a problem with the print head, which can cause the printer to stop working or become unresponsive. This error can occur due to various reasons, including a corrupted system file, a dirty print head, or a software conflict.
How to Fix Epson Printer Error Code 0xF1?
There are several ways to fix the Epson error 0xF1. Here are some of the most effective methods:
- Restart the Printer
One of the simplest solutions to fix the Epson error 0xF1 is to restart the printer. Turn off the printer, unplug the power cord, and wait for a few minutes. Then, plug the power cord back in and turn on the printer. This can help reset the printer and clear any temporary issues that may be causing the error.
- Clean the Print Head
Another common cause of the Epson error 0xF1 is a dirty print head. Over time, the print head can accumulate dirt, ink, and other debris that can cause it to malfunction. To clean the print head, follow these steps:
- Turn off the printer and unplug the power cord.
- Open the printer cover and remove the ink cartridges.
- Use a soft, lint-free cloth to clean the print head and surrounding areas.
- Reinsert the ink cartridges and close the printer cover.
- Turn on the printer and check if the error has been resolved.
- Update or Reinstall the Printer Driver
Outdated or corrupted printer drivers can also cause the Epson error 0xF1. To update or reinstall the printer driver, follow these steps:
- Press the Windows key + R on your keyboard to open the Run dialog box.
- Type «devmgmt.msc» and press Enter to open the Device Manager.
- Expand the Printers category and locate your Epson printer.
- Right-click on the printer and select Update driver or Uninstall device.
- If you choose to update the driver, select Search automatically for updated driver software and follow the prompts.
- If you choose to uninstall the device, restart your computer, and reinstall the printer driver from the official Epson website.
- Check for Software Conflicts
Sometimes, software conflicts can cause the Epson error 0xF1. To check for software conflicts, follow these steps:
- Press the Windows key + R on your keyboard to open the Run dialog box.
- Type «msconfig» and press Enter to open the System Configuration window.
- Click on the Services tab and check the Hide all Microsoft services checkbox.
- Disable all the remaining services and click Apply and then OK.
- Restart your computer and check if the error has been resolved.
- If the error is resolved, open the System Configuration window again and enable the services one by one until you find the one causing the conflict.
May 3rd 2023 Jee Comendador
Epson is a Japanese Electronics company which is one of the largest manufacturer and distributor of Printers and imaging related equipment. The company although based in Suwa in Japan, has subsidiaries in the whole world and produces inkjet, dot matrix, and laser printers. Not only this, but it also produces and distributes Scanners, cash registers, laptops, robots, and a lot of other electronic equipment.
Although the company produces so much electronic equipment, they are mostly known for their printers which are flawless and quite popular among general consumers due to their sturdy quality and great customer support. However, quite recently, a lot of reports have been coming in of an “Error Code 0xf1” on their printers. In this article, we will discuss some of the reasons due to which this error is triggered and provide viable solutions to rectify it completely.
What Causes the “Error Code 0xf1” on Epson Printers?
After receiving numerous reports from multiple users, we decided to investigate the issue and devised a set of solutions to fix it completely. Also, we looked into the reasons due to which this error is triggered and listed them below:
- Jammed Feed Gears: One user reported that a piece of plastic broken off from a part of the printer had gotten stuck in the feed gears and was jamming them due to which the error was being triggered.
- Paper Jam: In most cases, the error is caused due to a paper jam during the printing process. Some users reported that the paper was jammed inside the printer due to which the error was being triggered.
- Dirty Cartridge: It is possible that there might be a dirty cartridge that needs to be replaced and is preventing the printing process by jamming the papers while they are being printed.
- Improper Installation: In some cases, the printer might not be properly installed to the computer due to which this error might be triggered.
Now that you have a basic understanding of the nature of the problem, we will move on towards the solutions. Make sure to implement these in the specific order in which they are presented to avoid conflicts.
Solution 1: Unjamming Feed Gears
If a certain piece of plastic is stuck in the Feed Gears and is preventing them from turning properly, the error might be triggered. Therefore, it is recommended to try and unjam the Gears by providing manual force to the gears and getting the plastic out of them or physically removing the piece from the gears by opening the front panel of the printer. Check to see if the issue persists after doing so.
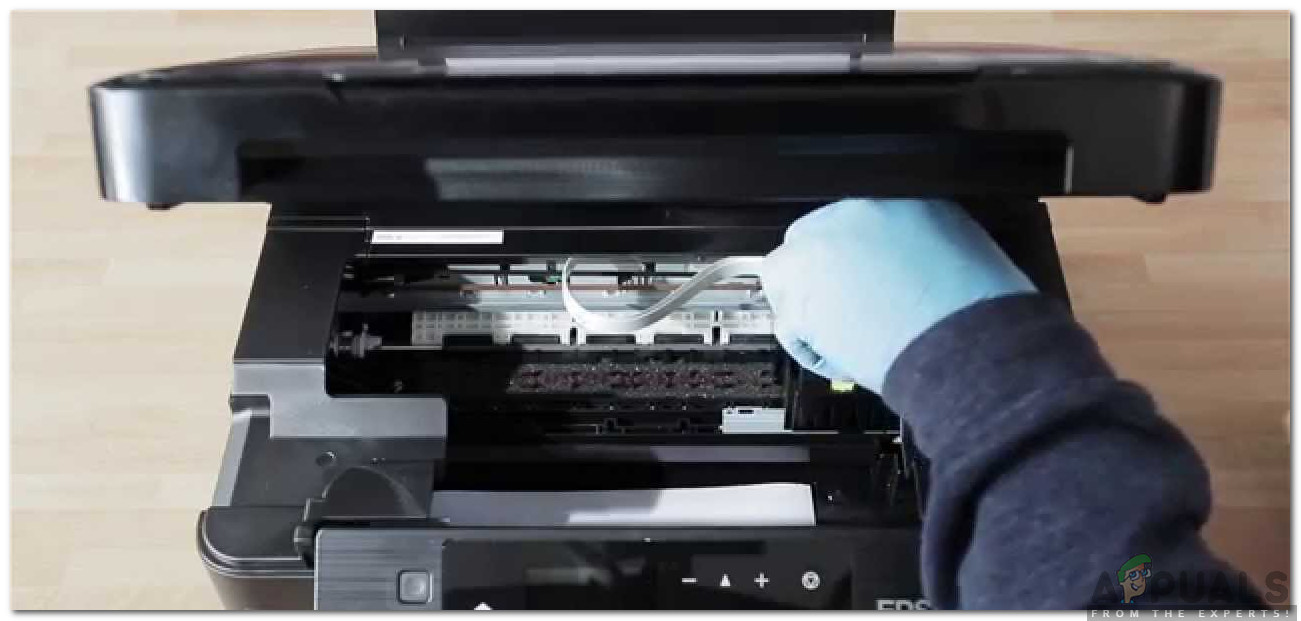
Solution 2: Moving Printer Head Assembly
In some cases, the error is fixed simply by moving the Printer Head Assembly in a particular fashion. Therefore, in this step, we will be powering down the printer and moving the Assembly. For that:
- Unplug the printer from the socket to turn it off.
- Raise the hood of the printer and Move the Printer Head Assembly all the way to the left.

Raising the hood epson printer - Move the Printer Head Assembly back all the way to the right.

Moving the printer assembly head - Turn the printer back on and check to see if the issue persists
- Repeat this process for 4 to 5 times before moving on.
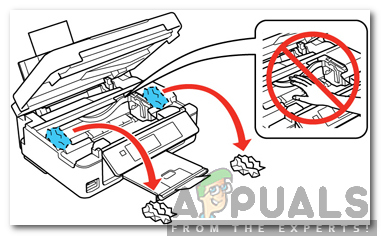
Solution 3: Checking for Paper Jam
In some cases, there might be a paper jam inside the printer due to which this error is being triggered. Therefore, in this step, we will be taking the cartridge out and checking for any paper jams. For that:
- Power the printer off completely.
- Take the cartridge out of the printer’s back.
- Check to see if there is any paper jammed there.
- If there is remove it and put the cartridge back in.

Removing Paper Jam - Plug the printer back in and check to see if the issue persists.
- If the error disappears but the printer doesn’t print, take the cartridge out and clean it.
- Refill it with ink and put it back in.
- Check to see if the printer prints.

Kevin Arrows
Kevin Arrows is a highly experienced and knowledgeable technology specialist with over a decade of industry experience. He holds a Microsoft Certified Technology Specialist (MCTS) certification and has a deep passion for staying up-to-date on the latest tech developments. Kevin has written extensively on a wide range of tech-related topics, showcasing his expertise and knowledge in areas such as software development, cybersecurity, and cloud computing. His contributions to the tech field have been widely recognized and respected by his peers, and he is highly regarded for his ability to explain complex technical concepts in a clear and concise manner.