0xE8 и более поздние коды 0xEA
Внутри есть синяя лента, которую нужно удалить — как только я это сделал, все заработало нормально.
…
У меня была та же проблема: 0xE8 и более поздние коды 0xEA. Я мог видеть, что это был белый движущийся зажим под держателем резервуара чернил, когда в дальнем правом углу это ловило это. ЕДИНСТВЕННАЯ вещь, которая исправила это, была: как только он издал шум и допустил ошибку, я нехотя толкнул держатель танка влево, пока танки не протолкнулись мимо белого зажима и полностью влево ..
Тогда больше не было ошибок.
Исходные коды 0xE8 и позже 0xEA
520 ФАТАЛЬНЫЙ КОД:0xF1 EPSON Рабочая сила
Это связано с тем, что печатающая головка не может полностью пройти слева направо во время запуска. У меня была пластиковая каретка на одной стороне, которая застряла в положении, которое мешает каретке совершать полный оборот из стороны в сторону. Когда я нажал на пластиковую каретку, и она защелкнулась, ошибка прекратилась, и принтер запустился нормально без кодов.
Если во время запуска печатающая головка не перемещается полностью слева направо, это может привести к появлению кода. Будет трудно увидеть, не заблокирована ли печатающая головка, если вы не снимаете боковые стороны.
Источник 520 ФАТАЛЬНЫЙ КОД:0xF1 EPSON Рабочая сила
Ошибка печати Code0xE3 и 0xEA
Мы увидели некоторый успех с этой проблемой, следуя этим инструкциям. Пожалуйста, попробуйте эту процедуру еще раз, используя инструкции ниже.
- Выключите принтер, затем отсоедините кабель питания и интерфейсный кабель. Откройте крышку и проверьте на наличие порванной или замятой бумаги и удалите ее.
- Подсоедините кабель питания и снова включите принтер.
- Нажмите кнопку «Копировать» и посмотрите, отвечает ли устройство.
Примечание. Также убедитесь, что чернильные картриджи и крышки полностью сдвинуты.
Если проблема не устранена, само оборудование работает со сбоями и требует обслуживания
Ошибка исходной печати Code0xE3 и 0xEA
Хоть принтеры Epson и считаются одними из самых надежных печатающих машин, они все равно, как и любая техника, время от времени могут давать сбои. Иногда пользователь не может понять, что именно пошло не так. На экране компьютера и/или на встроенном ЖК-дисплее принтера в этот момент отображается лишь номер ошибки. Рассмотрим основные ошибки современных МФУ (многофункциональных устройств) Epson и пути их устранения.
Общие ошибки, связанные с работой принтера
В случае с МФУ Epson код ошибки представляет собой латинскую букву (E, W или I), за которой через дефис следует одна или набор цифр.
E-01
Код, сообщающий о возникновении ошибки функции принтера. Причин здесь может быть несколько:
- Сбои/зависания в работе встроенного программного обеспечения.
- Заклинивание одного из подвижных механизмов вследствие замятия бумаги или попадание в лоток постороннего предмета.
- Возникновение несерьезного сбоя с электропитанием (например, кратковременно упало напряжение в сети) и т.д.
В большинстве случаев устранение этой ошибки производится путем перезагрузки принтера, для чего устройство нужно отключить от сети на 10-15 секунд, а затем включить его снова. Также следует проверить лоток приема бумаги на факт ее замятия или застревания постороннего предмета.

E-02
Данный код отображается при ошибке функционирования сканера МФУ. Здесь также может помочь перезагрузка принтера. Если это не помогает, возможно, что имеет место серьезная аппаратная неисправность сканера, для устранения которой следует обращаться к специалистам.
E-11
Ошибка, сообщающая о заполнении впитывающей чернила прокладки. В профессиональном кругу данная деталь именуется «памперсом». Ее основное предназначение — впитывание излишка чернил, что остается на поверхности печатающей головки после завершения очередного цикла печати. Кроме того, «памперс» впитывает краску при запуске функции очистки головки, когда та печатает «вхолостую».
Существует два способа устранения этой ошибки — временный и полный. Первый способ заключается в том, чтобы «заставить» принтер работать дальше, несмотря на заполнение впитывающей прокладки. В таком режиме работы велика вероятность засорения печатающей головки, а также — резкое снижение качества печати (возможны разводы). Если необходимо в срочном порядке распечатать несколько листов, данный способ решения проблемы будет кстати.
Чтобы «убедить» принтер в том, что впитывающая прокладка еще не заполнена до конца, нужно выполнить следующие шаги:
- Скачать в интернете утилиту «SSC Service Utility» (обратите внимание, данная программа является продуктом Epson).
- После установки программы на рабочем столе появится соответствующий ярлык. Нужно зайти в него и перейти в раздел настроек. Утилитой будет предложено выбрать производителя и модель принтера. В нашем случае требуется выбрать «Epson», а затем подходящую модель. После выбора окно программы можно закрыть.
- В трее (в правом нижнем углу) проводника Windows также появится значок. Нужно вызвать контекстное меню путем нажатия на него правой кнопкой мыши.
- В контекстном меню отобразятся несколько разделов. Здесь нужно найти пункт «Сброс счетчиков».
- Откроется подменю, где нужно найти и кликнуть по пункту «Сбросить счетчик отработки».
- Программа спросит, производилась ли замена «памперса», на что следует ответить «Да». При успешном сбросе счетчика печать может быть продолжена.
Для полного устранения ошибки «E-11» впитывающую прокладку придется заменить или хотя бы очистить. Однако это потребует полного разбора принтера, т.к. «памперс» расположен там, куда отправляется печатающая головка после окончания печати. Поэтому, если отсутствуют навыки в ремонте оргтехники, эту задачу лучше доверить специалистам.

W-01
Данная ошибка сигнализирует о факте застревании (замятии) бумаги в валике протяжки или ином механизме принтера. Решение простое — нужно извлечь застрявшую бумагу, а затем перезагрузить оборудование.
W-11
Это, скорее, не ошибка, а предупреждение о том, что срок службы «памперса» подходит к концу, т.е. впитывающая прокладка почти заполнилась. Для возобновления печати достаточно нажать на LCD-диплее принтера кнопку в виде ромба с вертикальной чертой внутри (изображение кнопки зависит от модели принтера).

W-12
Это одна из самых распространенных ошибок, возникающих после заправки/замены картриджей. Ее возникновение означает, что чернильницы установлены неправильно. Например:
- Один из картриджей не до конца вставлен в отсек для чернильниц, т.е. отсутствует полноценный электрический контакт.
- Между картриджем и контактной площадкой принтера застрял мелкий предмет, блокирующий электрический контакт.
Ошибка устраняется путем извлечения, удаления застрявшего предмета (если имеется) и обратной установки картриджа (или всех) на свое место.
W-13
Ошибка, возникающая при использовании неоригинальных (сторонний производитель или подделка) или несовместимых с конкретной моделью принтера картриджей. Все, что здесь можно сделать — приобрести оригинальные чернильницы производства компании Epson. Проверить, какие именно использовать картриджи на имеющемся принтере, можно на официальном сайте производителя (epson.ru) в разделе «Расходные материалы» основного каталога продукции.

Общие ошибки, возникающие при работе с принтером по сети
Почти в каждом офисе используется один или несколько сетевых принтеров (устройство, которым могут пользоваться все участники с сети — офисные сотрудники). Существует ряд ошибок, возникающих при отправке документа на печать через проводное или беспроводное соединение с печатающей машиной. Причем данные ошибки не всегда выводятся на экран компьютера или даже на ЖК-дисплей принтера.
Если принтер внезапно перестал реагировать на сетевые команды, о причине возникновения неисправности можно узнать из отчета сетевого соединения. Отчет распечатывается при использовании соответствующей функции печатающей машин, которая запускается из главного меню LCD-экрана устройства. Для этого следует поочередно войти: «Установка», «Параметры сети», «Распечатать статус сети». Принтер распечатает отчет, в котором нужно найти пункт «Error Code» — это и есть код сетевой ошибки.
Коды ошибок, связанные с Wi-Fi-соединением при использовании функции WPS
Пользователи, использующие принтеры Epson с поддержкой технологии WPS (автоматическая настройка Wi-Fi-соединения между роутером и подключаемым оборудованием), могут столкнуться со следующими кодами ошибок:
- I-22. Данный код сигнализирует о разрыве Wi-Fi-соединения с роутером либо возникновении ошибки при попытке подключения к беспроводной сети с использованием функции WPS.
- I-23. Ошибка, возникающая при неверном вводе PIN-кода в точке доступа Wi-Fi либо на компьютере (также при использовании функции WPS).
- I-31. Ошибка возникает при попытке установки с принтером связи по беспроводной сети с компьютера, на котором не установлено специальное программное обеспечение.
- I-41. Данная ошибка возникает только при попытке печати на принтере через iOS-устройства (iPhone, iPad) с помощью функции «AirPrint». Неполадки вызываются при неактивном параметре «Конфигурация бумаги» в настройках принтера. Задействование данного параметра устраняет ошибку.
Все ошибки, связанные с подключением к принтеру удаленно через беспроводную связь, устраняются путем настройки/перенастройки Wi-Fi-роутера и/или настроек самого МФУ.

E-1
Ошибка, сигнализирующая об отсутствии физического соединения по локальной сети (не подключен сетевой кабель либо сетевое устройство выключено) с роутером или компьютером. Для устранения ошибки нужно проверить кабель либо включить устройство связи.
E-2, E-3, E-7
Одна из этих ошибок возникает в различных ситуациях. Вот наиболее распространенные:
- Выключена Wi-Fi точка доступа или слишком слабый сигнал. Решение — включить роутер либо переместить его поближе к принтеру.
- Если при настройке принтера имя (SSID) беспроводной сети вводилось вручную, возможно, допущена опечатка. Для устранения ошибки нужно ввести правильный идентификатор SSID.
- В принтер введен неправильный пароль от Wi-Fi-сети либо пароль был изменен на роутере. Решение — ввести правильный пароль.
E-5
Ошибка возникает при попытке подключения принтера к Wi-Fi-роутеру, защищенному методом шифрования (типом защиты), который не поддерживается печатающей машиной. Поддерживается ли выбранный в роутере метод шифрования или нет, зависит от конкретной модели принтера Epson. Однако все современные печатающие машины поддерживают тип защиты WPA PSK (он же — WPA Personal) и WPA2 PSK (WPA2 Personal). Решение проблемы — установка одного из этих методов шифрования в настройках роутера.
E-6
Данная ошибка означает, что принтер не может подключиться к беспроводной сети из-за блокировки устройством связи его MAC-адреса. Решение — выключить функцию фильтрации по MAC-адресу либо удаление из списка блокируемых адресов действующего MAC-адреса принтера.
E-8, E-10, E-11, E-12, E-13
Возникает ошибка в случае, если принтер не может получить персональный IP-адрес для возможности работы в сети, неверно указана маска подсети и/или основной шлюз, имеется конфликт IP-адресов.
Если в сетевых настройках устройства включен параметр «Получить IP-адрес автоматически», на роутере или компьютере нужно также включить функцию автоматического назначения IP (т.е. DHCP-сервер).
Если же адрес, маска подсети и шлюз принтеру назначается вручную, возможно, была допущена ошибка в одном из этих параметров либо возник конфликт IP-адресов (когда два сетевых устройства имеют одинаковые адреса). Решение — ввод правильных сетевых параметров в настройках принтера:
- IP-адрес принтера и сетевого устройства должны быть идентичными по первым трем цифрам, по последней — различаться. Пример: IP-адрес роутера — «192.168.1.1», принтеру нужно присвоить адрес — «192.168.1.10». При вводе последней цифры следует убедиться, что она не совпадает ни с одним другим IP-адресом в сети.
- Маска подсети должна быть одинаковой и у принтера, и у роутера. Как правило, это «255.255.255.0».
- Основной шлюз должен соответствовать IP-адресу сетевого устройства, с которым соединяется принтер. Т.е. сюда следует прописать действующий сетевой IP-адрес роутера или компьютера.
by Matthew Adams
Matthew is a freelancer who has produced a variety of articles on various topics related to technology. His main focus is the Windows OS and all the things… read more
Updated on March 1, 2022
XINSTALL BY CLICKING THE DOWNLOAD FILE
This software will repair common computer errors, protect you from file loss, malware, hardware failure and optimize your PC for maximum performance. Fix PC issues and remove viruses now in 3 easy steps:
- Download Restoro PC Repair Tool that comes with Patented Technologies (patent available here).
- Click Start Scan to find Windows issues that could be causing PC problems.
- Click Repair All to fix issues affecting your computer’s security and performance
- Restoro has been downloaded by 0 readers this month.
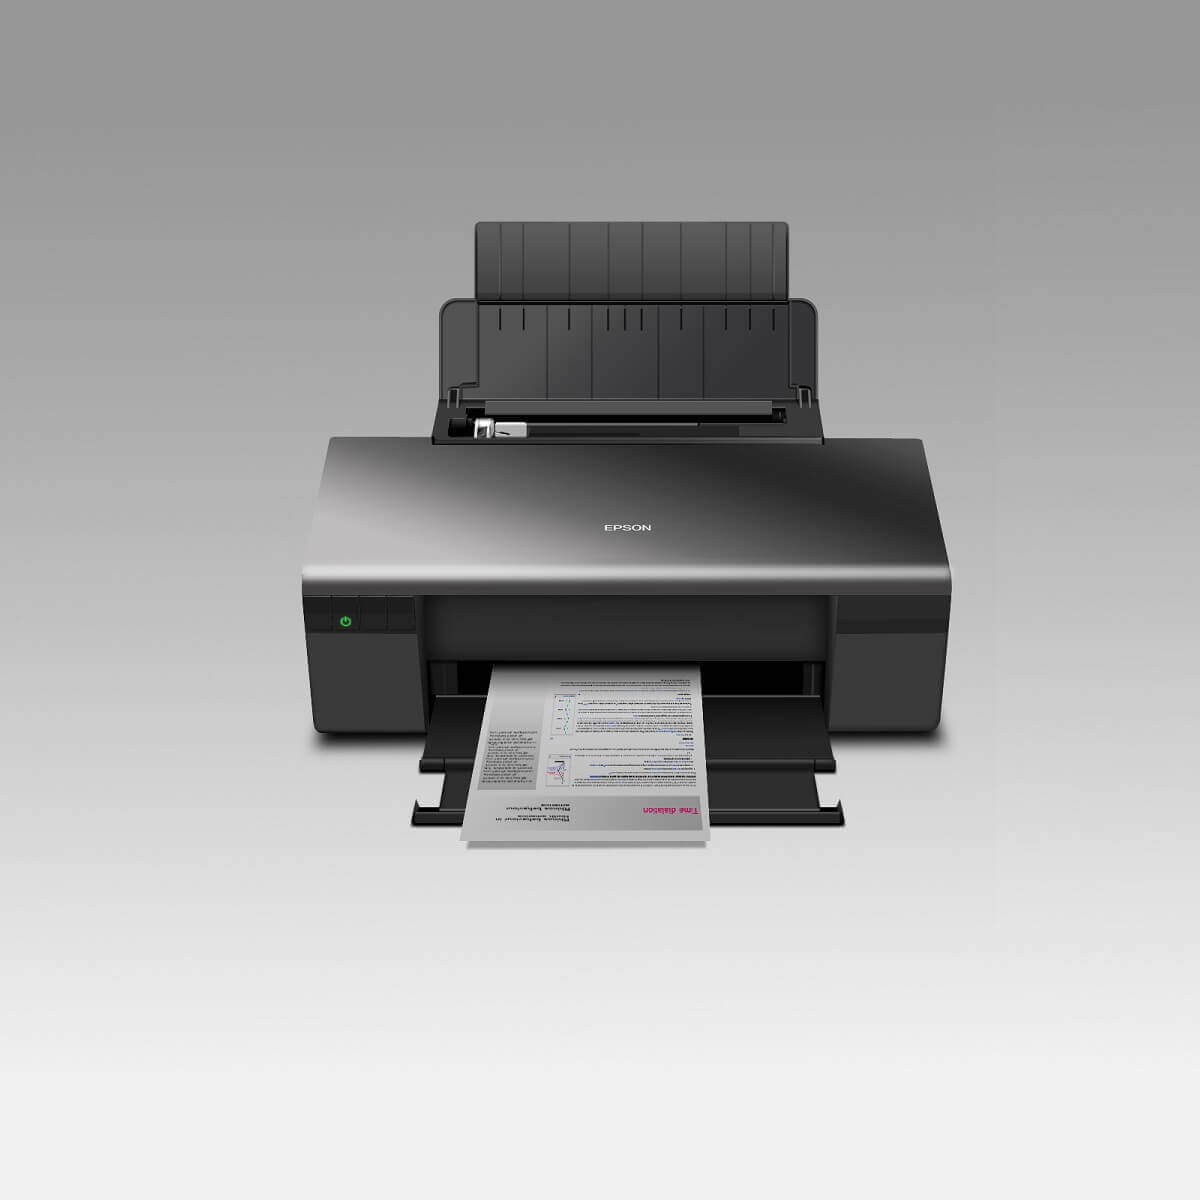
Some Epson printer users might encounter 0xE errors when they try to print. Those printer errors can have 0xE1, 0xE3, 0xE5, oxE8 and 0xE9 error codes, which the Epson printers show on their own displays.
The fixes for those 0xE errors are often much the same. These are some of the potential resolutions for fixing Epson printer 0xE errors.
How can I fix a 0xE error on my Epson printer?
1. Check if any paper is jammed in the printer
The 0xE errors are often due to printer paper jams. Thus, removing the paper stuck in the printer can often resolve those errors. If the printer has a removable paper tray, remove it to have a peek inside. Open the lid on the printer to check if there is any jammed paper.
If you see paper jammed in the printer, turn the printer off and unplug it. You can often pull stuck paper out from Epson printers by removing their duplexers. Press the tabs to detach the duplexer from the printer. Then remove the jammed paper from the duplexer.
2. Reset the printer’s ink cartridges
- Some users might need to reseat their printers’ ink cartridges to fix 0xE errors. First, turn on your printer.
- To reseat the cartridge for an Epson XP printer, press the home button on it.
- Select the Setup, Maintenance, and Ink Cartridge Replacement options on the printer’s display.
- Press the OK and Start buttons.
- Lift the printer’s scanner unit up when the display shows a replace ink cartridge message.
- Squeeze the tabs on each cartridge to remove them.
- Then reinsert the ink cartridges one at a time. Make sure they click back into place.
- Close the printer’s scanner unit after reseating the cartridges.
3. Clean inside the printer
- The 0xE errors can arise due to debris and dirt within the printer. To clean inside the printer, turn off and unplug it first.
- Then open the top cover on the printer. Look for and remove any debris, such as small scraps of paper, foam blocks, or paperclips.
- Next, wipe away dust inside the printer with a soft, clean cloth. If there’s a lot of dust, you can dampen the cloth with a detergent for more thorough cleaning.
- Wipe the encoder strip that runs along the printer just behind the carriage to clean it.
- Close the top of the printer.
- Then plug the printer back in and turn it on.
4. Scan for malware
The 0xE errors can also be due to malware. For this reason, scanning your PC with a powerful antivirus software is highly recommended.
We suggest you to use a third-party antivirus with multiple layers of protection because these are typically able to detect threats quickly and accurately.
Make sure to run a thorough, full system scan and allow your security tool to remove or quarantine all threats found. Then restart your PC and see if you still experience the error.
5. Replace incompatible ink cartridges
Some users might need to replace incompatible ink cartridges. Have a look through your printer’s manual for further details about cartridge compatibility to check if the cartridges might need changing.
If an ink reference card came with the printer, have a look at that. If replacements are required, replace them with official Epson cartridges for the printer.
So, that’s how you can fix 0xE errors for Epson printers. If the printer is still within warranty, you can also return it to Epson for repairs (or a replacement model if needed). However, try fixing the 0xE issue with some of the potential resolutions above first.
For any other questions or suggestions, don’t hesitate to reach in the comments section below.
![]()
Newsletter
Epson printer Error Code 0xe8 is defined as an error which occurs while Windows operating system becomes dangerously corrupted. As per as study by our Epson printer support professionals, opening of the programs will result in much slower response and as a result, times will lag behind. It is often seen that when there are multiple applications running on the PC device, users may experience huge crashes and freezes. On the other hand, there can be numerous of causes for this error such as excessive startup entries, registry errors, hardware/RAM decline issues, huge number of fragmented files, unnecessary or redundant usage of program installations and more other such issues are on rise.
Steps to fix Epson 0XE8 printer Errors
- Carrying out of all the necessary steps in a proper manner is essential for users to effectively get rid of their Epson printer 0xe8 issues.
- Next, a user is required to carefully download the “Reimage Repair Tool” from any of the trusted links.
- Saving of all the files to the Desktop for secure purpose is an essential task to easily get access to the file easily.
- Clicking on the “Reimage Repair Tool Download Link” is essential which can be done by simply right-clicking on this mentioned URL above and save it to the desktop
- After you have fairly downloaded the tool, navigating to the file location and double-clicking on it is recommended to users to complete the process. This process will further start the installation procedure smoothly.
- Next, as suggested by a professional Epson printer technical support team members, “User Account Control” section should be accessed which will further prompt a user whether they want to run the program or not. This particular program can be executed by simply clicking on the “Yes” button to continue.
- It will be clearly visible to users that on initial launch of the program, a welcome screenwill be displayed. Here, a user has to leave the checkbox as “un-ticked” to easily allow the repair tool to go ahead with an automatic scan process.
- A user is supposed to click on the “Install” button further to start the installation procedure.
- Reimage will now easily proceed ahead with the process of installation itself on the user’s PC. In the next step, the tool will download all the necessary updates needed by users provided that they do have access to the internet connection at this point of time.
- The tool will routinely start a first round of scanning process of the machine to help users in determining the health of their PC closely.
- Once the scanning process is complete then “Reimage Repair Tool” will tell users about certain areas of the PC that are damaged and if a repair process is needed. If it is so, then he/she is required to click on the “Start Repair” button which can be found in the bottom right corner of the screen.
- After the Reimage has finished, it’s now time for users to easily repair their PC should to be able to be fixed carefully.
- A user may need to restart their PC device to complete the process smoothly.
If you still have doubts about Epson printer issues, then get in touch with our professionals right now
Our Epson printer repair service is delivered to users via various communication modes to help resolve their issues on instant basis. Our Epson printer customer Support professionals are available 24 hours 365 days which can be reached at our Epson printer support toll-free number +855-534-1508 anytime to get access to our online help at their doorstep. Our support services are delivered to customers by expert technicians with full safety as well as privacy while repairing the printer to smoothly restore its functionality in original state. We charge our users that are nominal in nature and surely are competitive from other top brands.
We make sure that each of our customers is receiving a well customized solution for his critical printer technical snags. The issues with printers are definitely solved by our top Epson printer customer Support experts with extreme and deep care to avoid further damage to the device. Precautions to ensure for an effective solution as per the customer’s requirements are taken into consideration.
See video For How To Solve Epson Printer L210 Red Light Blinking Issue?
https://www.youtube.com/watch?v=FT6byMlPCfQ&feature=youtu.be
0xE8 и более поздние коды 0xEA
Внутри есть синяя лента, которую нужно удалить — как только я это сделал, все заработало нормально.
…
У меня была та же проблема: 0xE8 и более поздние коды 0xEA. Я мог видеть, что это был белый движущийся зажим под держателем резервуара чернил, когда в дальнем правом углу это ловило это. ЕДИНСТВЕННАЯ вещь, которая исправила это, была: как только он издал шум и допустил ошибку, я нехотя толкнул держатель танка влево, пока танки не протолкнулись мимо белого зажима и полностью влево ..
Тогда больше не было ошибок.
Исходные коды 0xE8 и позже 0xEA
520 ФАТАЛЬНЫЙ КОД:0xF1 EPSON Рабочая сила
Это связано с тем, что печатающая головка не может полностью пройти слева направо во время запуска. У меня была пластиковая каретка на одной стороне, которая застряла в положении, которое мешает каретке совершать полный оборот из стороны в сторону. Когда я нажал на пластиковую каретку, и она защелкнулась, ошибка прекратилась, и принтер запустился нормально без кодов.
Если во время запуска печатающая головка не перемещается полностью слева направо, это может привести к появлению кода. Будет трудно увидеть, не заблокирована ли печатающая головка, если вы не снимаете боковые стороны.
Источник 520 ФАТАЛЬНЫЙ КОД:0xF1 EPSON Рабочая сила
Ошибка печати Code0xE3 и 0xEA
Мы увидели некоторый успех с этой проблемой, следуя этим инструкциям. Пожалуйста, попробуйте эту процедуру еще раз, используя инструкции ниже.
- Выключите принтер, затем отсоедините кабель питания и интерфейсный кабель. Откройте крышку и проверьте на наличие порванной или замятой бумаги и удалите ее.
- Подсоедините кабель питания и снова включите принтер.
- Нажмите кнопку «Копировать» и посмотрите, отвечает ли устройство.
Примечание. Также убедитесь, что чернильные картриджи и крышки полностью сдвинуты.
Если проблема не устранена, само оборудование работает со сбоями и требует обслуживания
Ошибка исходной печати Code0xE3 и 0xEA
Epson is one of the most reputed companies in the world which provides world-class features and technology. The company manufactures printer devices that sometimes face errors such as Epson error 0xe8 in but no need to worry because this is not a very big or complex error, it can be resolved.
Causes of Epson error 0xe8:
- The software or application which is installed on your windows system is no more suitable with the printer. Either there is an update provided by the company or some drivers are missing from the system because of which there is no response from the system.
- There are some unused or malicious applications present in the system which slow down the performance of the system and do not let tasks happen smoothly between the devices. This causes hindrance in the process.
- There is some virus attack or intrusion of privacy by any hacker in the software of the system because of which the performance slows down or tasks do not happen.
- There are many tasks going on in the system at a particular time because of which the tasks are not properly managed and the speed slows down.
- Incomplete installation of some required or necessary files in the system due to which some files are missing.
- Any physical damage is being caused to the system or the system is shut down without proper procedure too quickly. This in the long run might cause a slowing down of performance.
Basic check-ups to solve the Epson error 0xe8:
Open the print head and clean it, if there are some bits of paper or any other dust particles accumulated in the system you can clean it using a piece of cloth. Now check the cartridges if they are empty or low level. If they are dirty you can clean and reinstall them and if they are empty then either refill them or install the new one.
Also, check for faulty or damaged wires and replace them immediately. Also, make sure that the power switches you are using are getting proper voltage and current.
Main steps to solve the Epson error 0xe8:
1.) First of all you can try the manual updating procedure where you need to go to system settings and in the search bar type “system restore”. Next in the dialog box under system protection, you need to click on “system restore”. Follow the on-screen steps and perform necessary settings and do not forget to tick the checkbox saying “show more restore points”.
2.) The Second method is to type device manager in the search box and open it. Now open the printer category and right-click on the option. You will see the update driver software option. When you click on it, the update will thereby start downloading automatically.
3.) Open your browser in the system and over there search for the Epson website. Look for the Epson repair tool and download that. After downloading, open the application and click on the scan button. The processing will take some time and automatically keep looking for errors and thereafter the problem will be scanned. After knowing the problem you can click on fix the error and restart the system.
Downloading this application will also make sure that your system has the necessary drivers installed for smooth functioning.
Following all these steps will help you get solved with Epson error 0xe8 but still, if you face any query you can have a look at the Epson user manual or you can contact the customer care of the company and they will provide a solution to you.
Read More
- [Solved] Update error code 0x8007000d in Windows 10
- [Fixed] Windows 10 Store Error code 0x803F8001
- How to fix Error 0x800704cf in Windows 10?
Related posts:
Epson printer ranks among the top-class brands in the world. But, it is not flawless and users keep on encountering technical errors while working with it. Epson error code 0xe8 is one of such errors. This error primarily happens due to damaged Windows system files. It affects the working of your printer and all your issues get resolved.
Causes Of Epson Error Code 0xe8
This runtime error occurs because of the following reasons as discussed below:
- Corrupted system file entries can cause this issue.
- Incomplete installation or incompatible printer drivers can lead to Epson printer error code 0xe8.
- Improper installation of applications or programs may cause this error.
- You can get this error code if you have recently recovered your PC from a virus, adware or spyware attack.
- Epson error code 0xe8 occasionally occurs due to an accidental shutdown of your PC.
- Your computer can display this error due to a corrupted Windows Operating System.
- Excessive startup entries is another source of this Epson printer error code 0xe8.
- Issues in the hardware or RAM can cause this error code.
- The problem can occur when there is a considerable number of fragmented files on your PC.
- Outdated or corrupted printer drivers can also be responsible for this issue.
- Sometimes paper jam or a foreign object in the printhead or printer nozzle cause this issue.
Methods To Fix Epson Error Code 0xe8
We are jotting down the methods to remove this error from your PC.
Method 1
Start your computer and log in by using the registered system password. Now go to ‘Programs’ and select ‘Accessories.’ Then click on ‘System Tools’ and choose ‘System Restore.’ Now find a system restore point and click ‘Next.’ A confirmation Window appears where you need to click the ‘Next’ button to continue. After your computer finishes the restoration, restart your system. Then check the status of your computer to ensure that you are no longer receiving Epson error code 0xe8.
Method 2
You can let our experts look into the matter to repair corrupted system file entries. Moreover, you need a specialized software specialist to restore corrupted Windows Operating System. Otherwise, it can have adverse effects on your computer. Besides this, you will require technical guidance to fix hardware or RAM issues.
Method 3
At first, uninstall the printer driver from your computer. Then search automatically or manually for a compatible driver. After that, download and install the driver on your PC. If there was an accidental shutdown of your PC, then close all the running applications and restart your system. You may have made an improper installation of some applications on your system. In that case, uninstall those applications temporarily. Then install them correctly on your computer and make a print test. If the error repeats, then move on to the next method.
Method 4
Remove the excessive startup entries from your PC. Delete the number of fragmented files from your computer. Inspect your printer to check whether a piece of paper is stuck at the paper tray of your printer. If you find foreign particles in the printhead or printer nozzle, then use a soft cloth to remove them.
Get Expert Opinion For Additional Queries
Contact us if you find that the solutions on which the article thrusts upon are not sufficient to fix Epson error code 0xe8. You must be aware that technical issues need professional assistance to get it resolved. Hence, if your system is facing these issues, then reach the techies of our support team. To make a service request, call us at Epson Support Number [ +1-844-828-5593 ]. Instead of placing a call, you can drop a mail at our Email ID and obtain instant suggestions from experts.
In this digital era, among all other devices, printers are one of the major devices. It is essential to keep a hard documentation of soft copy of any vital document. Moreover, be it for personal home use or the professional office use Printer can be the solution to many hurdles. This device helps the user to print, scan as well as a photocopy. But to avail that facility the machine must be in a proper state. The Epson printer error code 0xe8 report shows up in the device when there is either a connection issue or the device has some inbuilt error with the motherboard. Further, this error ultimately freezes the machine, and then later the device gets infected via viruses as well as via malware.
The problem becomes annoying at times, that the device refuses to print whenever there’s an urgent requirement. The error might affect the system in a bad way that eventually, the system may collapse. If you are also going through the same mistake, then read this article and get the best-in-class solutions to all your Printer related issues.
Extensive Solutions To Resolve Epson Printer Error Code 0xe8
Go through the various methods given here and avail the solutions to your problem.
Process1: Reattach The Printer’s Wireworks
If any error occurs in the connection of the printer and the device, then this error code 0xe8 might affect the system. The proper connection is the most basic requirement for the printer to work smoothly. Hence, to start with, first, check all the parts of the printer.
To start with this method, first of all, switch off the printer and along with it turn off the computer as well. Once the process complete, disconnect all the secured wires connected to printer and machine. Provide the device about 20 to 30 seconds and then again attach the cords to it. Later restart both the printer and computer. Now try to start the printing process. Check if any error exists. If you face any issue try the next procedure.
Process 2: Operate Troubleshooting Device
The Windows Operating System has its inbuilt system troubleshooter. By running the same it is possible to scan the device quickly and resolve all the glitches on the go. Also, it will eliminate any secondary problems associated with the system. You can resolve the Epson printer error code 0xe8 by using the system troubleshooter.
To start the procedure, go to the left corner of the computer screen and then click on the Start menu. In the search bar, type Troubleshoot. When the tool appears, click on it to open the troubleshooter and start the scanning procedure. After the process ends, tick the Fix key. This operation will automatically repair the errors. Now start the device again and check whether the problem persists or not.
Process 3: Identify Malware And Virus Effect
At times the operator related to the printer propagates and begin to corrupt by the effect of several malware and viruses. The degraded operators generate this problem. To solve the error, first, install the antivirus software in your device and then go for a full scanning of the system. As the scan finishes, then clear out all the threats that appear in the Scan result. Try to eliminate the problems and after that restart the device.
Process 4: Upgrade The Printer Operators
If the user is working with the old printer and the configuration of the printer is not matching with the computer, then at this point you can expect this error message. The outdated printer driver does not include adequately record details about the printer. Thus it’s essential to use the updated drivers for swift functioning.
To begin this process open the control panel and then select the Device drivers. Now go to the Printer option and click on the Update. This process will begin automatically. After the process finishes, restart the system.
Process 5: Uninstall And Then Reinstall Software
First, the error can be triggered due to corrupted files in the software. The damaged system affects the working of the printer and eventually hampers the functions of the computer it is attached to. You can fix this error by uninstalling the software. Moreover, the uninstallation process can be temporary as well. After uninstalling the system software, scan the system and eliminate mistakes. Finally download the application again and reinstall the driver. Reboot the machine and check if any error still exists.
Process 6: The Print Head Might Contain Dust
Most of the time the errors occur because the dirt particles stuck on the printer head. Thus clearing the printer head, might do the trick to eliminate the error. To start with the process, switch off the printer and then remove the cords as well as remove the printer head and wipe it with the clean cloth or wet tissue. Make sure the parts do not get any contact with water as this can create serious damage. Attach the cords as well as the printer head and restart the device.
Process 6: Elementary Method
Start the device first, and then select the Start icon from the lower left side of the screen. From that list choose the Restart button and then click on it. Make sure you have disconnected all the external devices, for example, the memory cards or the USB drive. Provide the mechanism to relaunch itself completely and then approximately after 60 seconds check if the device is working. Moreover, do not lose the password of the accounts attached to it.
Process 7: Review And Then Unplug & Plug-in
Check whenever the issue pops up on the screen, gather the data about it. First of all, switch on/off the power key and then unplug the machine. Cut loose all the added wires. Along with that, disconnect the USB flash drives as well. Detach the printer and along with that disconnect the other operators. Once the process ends, then clear the outstanding issue of the printer. Immediately plug in the coils and the USB flash operator. Again start the device and check for the printer cartridges process and then again switch on the Power. Register if the issue popup message appears on the display screen. If the problem persists, then continue with the subsequent process.
Process 8: Check For The Printer Online Option
Start the computer and then hold and press the Windows key and along with that simultaneously press the X key from the keyboard. Open the control panel in the system and then select the Devices and printers option. Later choose the Printer alternative and then scroll and navigate until you find the Offline mode there in the display. Choose the option and tick on it. Shortly after that tick on the Ready option and succeeding that select the, Fix the online printer option from the list. As the method finishes, then save the modifications in the operation and after that restart the machine. Give the device about 10 to 15 seconds to relaunch itself and after that check for the error.
Epson printer Error Code 0xe8 is defined as an error which occurs while Windows operating system becomes dangerously corrupted. As per as study by our Epson printer support professionals, opening of the programs will result in much slower response and as a result, times will lag behind. It is often seen that when there are multiple applications running on the PC device, users may experience huge crashes and freezes. On the other hand, there can be numerous of causes for this error such as excessive startup entries, registry errors, hardware/RAM decline issues, huge number of fragmented files, unnecessary or redundant usage of program installations and more other such issues are on rise.
Table of Contents
Steps to fix Epson 0XE8 printer Errors
- Carrying out of all the necessary steps in a proper manner is essential for users to effectively get rid of their Epson printer 0xe8 issues.
- Next, a user is required to carefully download the “Reimage Repair Tool” from any of the trusted links.
- Saving of all the files to the Desktop for secure purpose is an essential task to easily get access to the file easily.
- Clicking on the “Reimage Repair Tool Download Link” is essential which can be done by simply right-clicking on this mentioned URL above and save it to the desktop
- After you have fairly downloaded the tool, navigating to the file location and double-clicking on it is recommended to users to complete the process. This process will further start the installation procedure smoothly.
- Next, as suggested by a professional Epson printer technical support team members, “User Account Control” section should be accessed which will further prompt a user whether they want to run the program or not. This particular program can be executed by simply clicking on the “Yes” button to continue.
- It will be clearly visible to users that on initial launch of the program, a welcome screenwill be displayed. Here, a user has to leave the checkbox as “un-ticked” to easily allow the repair tool to go ahead with an automatic scan process.
- A user is supposed to click on the “Install” button further to start the installation procedure.
- Reimage will now easily proceed ahead with the process of installation itself on the user’s PC. In the next step, the tool will download all the necessary updates needed by users provided that they do have access to the internet connection at this point of time.
- The tool will routinely start a first round of scanning process of the machine to help users in determining the health of their PC closely.
- Once the scanning process is complete then “Reimage Repair Tool” will tell users about certain areas of the PC that are damaged and if a repair process is needed. If it is so, then he/she is required to click on the “Start Repair” button which can be found in the bottom right corner of the screen.
- After the Reimage has finished, it’s now time for users to easily repair their PC should to be able to be fixed carefully.
- A user may need to restart their PC device to complete the process smoothly.
If you still have doubts about Epson printer issues, then get in touch with our professionals right now
Our Epson printer repair service is delivered to users via various communication modes to help resolve their issues on instant basis. Our Epson printer customer Support professionals are available 24 hours 365 days which can be reached at our Epson printer support toll-free number +855-534-1508 anytime to get access to our online help at their doorstep. Our support services are delivered to customers by expert technicians with full safety as well as privacy while repairing the printer to smoothly restore its functionality in original state. We charge our users that are nominal in nature and surely are competitive from other top brands.
We make sure that each of our customers is receiving a well customized solution for his critical printer technical snags. The issues with printers are definitely solved by our top Epson printer customer Support experts with extreme and deep care to avoid further damage to the device. Precautions to ensure for an effective solution as per the customer’s requirements are taken into consideration.
See video For How To Solve Epson Printer L210 Red Light Blinking Issue?
https://www.youtube.com/watch?v=FT6byMlPCfQ&feature=youtu.be
0xE8 и более поздние коды 0xEA
Внутри есть синяя лента, которую нужно удалить — как только я это сделал, все заработало нормально.
…
У меня была та же проблема: 0xE8 и более поздние коды 0xEA. Я мог видеть, что это был белый движущийся зажим под держателем резервуара чернил, когда в дальнем правом углу это ловило это. ЕДИНСТВЕННАЯ вещь, которая исправила это, была: как только он издал шум и допустил ошибку, я нехотя толкнул держатель танка влево, пока танки не протолкнулись мимо белого зажима и полностью влево ..
Тогда больше не было ошибок.
Исходные коды 0xE8 и позже 0xEA
520 ФАТАЛЬНЫЙ КОД:0xF1 EPSON Рабочая сила
Это связано с тем, что печатающая головка не может полностью пройти слева направо во время запуска. У меня была пластиковая каретка на одной стороне, которая застряла в положении, которое мешает каретке совершать полный оборот из стороны в сторону. Когда я нажал на пластиковую каретку, и она защелкнулась, ошибка прекратилась, и принтер запустился нормально без кодов.
Если во время запуска печатающая головка не перемещается полностью слева направо, это может привести к появлению кода. Будет трудно увидеть, не заблокирована ли печатающая головка, если вы не снимаете боковые стороны.
Источник 520 ФАТАЛЬНЫЙ КОД:0xF1 EPSON Рабочая сила
Ошибка печати Code0xE3 и 0xEA
Мы увидели некоторый успех с этой проблемой, следуя этим инструкциям. Пожалуйста, попробуйте эту процедуру еще раз, используя инструкции ниже.
- Выключите принтер, затем отсоедините кабель питания и интерфейсный кабель. Откройте крышку и проверьте на наличие порванной или замятой бумаги и удалите ее.
- Подсоедините кабель питания и снова включите принтер.
- Нажмите кнопку «Копировать» и посмотрите, отвечает ли устройство.
Примечание. Также убедитесь, что чернильные картриджи и крышки полностью сдвинуты.
Если проблема не устранена, само оборудование работает со сбоями и требует обслуживания
Ошибка исходной печати Code0xE3 и 0xEA