Server OS
Windows 2000
*
Windows XP
Windows XP x64, Server 2003, or
*
Server 2003 x64
Windows Vista, Vista x64
*
The additional driver for Windows XP x64 and Server 2003 x64 can be used on Windows XP Service Pack 2, Windows
2003 Service Pack 1, or later.
You can check the printer status from combinations and patterns of the error lights on the control
panel. For information on the location of the lights, see «Control panel» on page 22.
Note:
You can check the printer status and error easily on the computer by using EPSON Status Monitor. For
details about EPSON Status Monitor, for Windows see «Using EPSON Status Monitor» on page 114, for
Macintosh see «Using EPSON Status Monitor» on page 135.
The status of the lights are illustrated below.
light on
blink rapidly (every 0.3 seconds)
blink slowly (every 0.6 seconds)
blink very slowly (turn on for 0.6 seconds, off for 2.4 seconds)
Light off
Note:
How the lights change depends on an error type. Ignore this mark.
Client OS
Windows XP or 2000 clients
Windows XP or 2000 clients
Windows XP x64 clients
Windows XP or 2000 clients
Windows XP x64 clients
Windows Vista, XP, 2000 or Server
2003 clients
Windows Vista x64, XP x64 or Server
2003 x64 clients
Additional Driver
Intel Windows 2000
Intel Windows 2000 or XP
x64 Windows XP
x86 Windows 2000, Windows XP
and Windows Server 2003
x64 Windows XP and Windows
Server 2003
x86 Type 3 — User Mode
x64 Type 3 — User Mode
Troubleshooting
100
Модератор: vetal


 Добрый день!
Столкнулся с проблемой, как на видео. Что делать? Куда копать? В мануалах, вроде бы, указывается на то, что это ошибка памяти, т.е. нужно менять плату. Но, возможно, есть ещё проблемы, которые вызывают эту ошибку? Что можно проверить?
Заранее спасибо за ответы.
-

Kuzansky
- Осматривается
-

- Персональный альбом

![]()
![]() Goldwater » Ср дек 12, 2018 8:12 pm
Goldwater » Ср дек 12, 2018 8:12 pm
Kuzansky писал(а):Если бы вы внимательно прочитали моё первое сообщение, то заметили бы, что я перевёл «их мигания в человеческие слова». И, собственно, задал вопрос — может ли быть проблема вызвана чем-либо ещё, кроме памяти. На этот вопрос, вы, к сожалению, ответить так и не смогли.
Подробно для совсем малахольных.
1. Ролик на ютубе НЕ ваш. В связи с этим есть сильное сомнение в том, что индикация ТОЧНО совпадает с вашим случаем. Но вы НЕ желаете давать СВОЕ описание. В таком случае решайте проблему сами.
2. Ошибок, соответствующих индикации в видеоролике, у данного аппарата НЕТ. Можете убедиться, изучив сами сервис-мануал.
3. На какие ваши эро-фантазии тут еще осталось отвечать?
-

Goldwater
- Избран тонером
-

![]()
![]() Kuzansky » Чт дек 13, 2018 2:30 pm
Kuzansky » Чт дек 13, 2018 2:30 pm
Хочу дополнить описание проблемы и произошедшие изменения.
При включении принтера двигатель не крутится. После загрузки сразу вылетает в ошибку памяти (или ещё чего, в общем, как на видео). Без картриджа ситуация не меняется. На нажатие кнопок не реагирует. ПК аппарат определяет.
На плате форматера микросхема памяти (24c64wp) стояла неправильно. Поставил как надо, теперь ошибка памяти сменилась на ошибку бумаги. Двигатель по прежнему молчит. Может дело в прошивке или принтер заблокировался? Кто-нибудь сталкивался? Что посоветуете? Буду благодарен за помощь.
-
Kuzansky
- Осматривается
-
- Персональный альбом
![]()
![]() Kuzansky » Чт дек 13, 2018 7:56 pm
Kuzansky » Чт дек 13, 2018 7:56 pm
24с64 — не память, а EEPROM.
«Ошибки бумаги»(aka «paper error») — у этого аппарата НЕТ. Индикацию — в студию! Или не мешайте работать своими фантазиями.
Прошивку? Себе сначала поменяйте.
Надеюсь, что никаких политических или технических причин для того, чтобы не смотреть приложенные фото у тебя нет.
Ты сам себе враг. Хочешь работать — не заходи на форум.
Индикаторы моргают поочерёдно, сначала, как на первом фото, потом, как на втором.
- Вложения
-
 Просмотров: 4168")
-
-
Kuzansky
- Осматривается
-
- Персональный альбом
![]()
![]() ALIEN777 » Пт янв 11, 2019 11:23 am
ALIEN777 » Пт янв 11, 2019 11:23 am
Kuzansky писал(а):Хочу дополнить описание проблемы и произошедшие изменения.
На плате форматера микросхема памяти (24c64wp) стояла неправильно. Поставил как надо, теперь ошибка памяти сменилась на ошибку бумаги.
А как именно процесс поставки микросхемы происходил, перепаяли или что то другое?
-
ALIEN777
- Заправил чернильницу
-
- Персональный альбом
![]()
Вернуться в Принтеры, МФУ, факсы, копиры формата A4
Кто сейчас на форуме
Сейчас этот форум просматривают: нет зарегистрированных пользователей и гости: 47
Epson AcuLaser M2000 list error codes with quick guides
– Compatible Printer model: Epson AcuLaser M2000
– Epson AcuLaser M2000 Error Codes with quick guides:
- Code: E001
- Image:
- Description: Main Board EEPROM error
The EEPROM (U800) on the Main Board Assy. is inaccessible. - Causes: Mounting failure of the EEPROM (U800). The Main Board Assy. is faulty. EEPROM (U800) is faulty.

- Code: E002
- Image:
- Description: Main motor error
The main motor ready signal could not be detected within 2 seconds after the motor becomes ON. - Causes: Poor connection between the main motor (CN1) and the Main Board Assy. (YC805). There is some problem in the main motor drive transmission path. The main motor is faulty. The Main Board Assy. is faulty.

- Code: E004
- Image:
- Description: Polygon motor error
The polygon motor ready signal could not be detected within 6 seconds after the motor becomes ON. - Causes: Poor connection between the polygon motor (laser scanner unit) and the Main Board Assy. (YC819). The laser scanner unit is faulty. The Main Board Assy. is faulty.

- Code: E005
- Image:
- Description: Horizontal synchronization signal error
The controller could not detect the horizontal synchronization signal within the specified time period. - Causes: The laser scanner unit is faulty.

- Code: E008
- Image:
- Description: Fuser heater cable disconnection
The fuser heater lamp was turned ON, but the fuser temperature did not rise. - Causes: Poor connection of the fuser thermistor. Poor connection of the fuser heater lamp connector. Mounting failure of the fuser thermistor. Fuser thermal cut-out has been activated. Mounting failure of the fuser heater lamp. The fuser heater lamp has breaks.

- Code: E009
- Image:
- Description: Abnormally high fuser heater temperature
The fuser thermistor detected abnormal high temperature. - Causes: The fuser thermistor shorted out. The Main Board Assy. is faulty.

- Code: E010
- Image:
- Description: Fuser thermistor short-circuit
The A/D value input from the fuser thermistor is “0” (zero). - Causes: Poor connection of the fuser thermistor. The fuser thermistor has breaks. Mounting failure of the fuser thermistor. Fuser thermal cut-out has been activated. Mounting failure of the fuser heater lamp. The fuser heater lamp has breaks.

- Code: E011
- Image:
- Description: Zero cross signal error
The Main Board Assy. did not receive the zero cross signal during a specified time period. - Causes: Poor connection between the HVPS (YC202) and the Main Board Assy. (YC811). Poor connection between the LVPS (YC103) and the HVPS (YC201). The LVPS is faulty. The Main Board Assy. is faulty.

- Code: E016
- Image:
- Description: Option cassette unit communication error
The communication between the Main Board Assy. and the PF main board of the option cassette unit cannot be established. - Causes: Mounting failure of the option cassette unit. Poor connection between the Main Board Assy. (YC818) and the PF interface connector. The Main Board Assy. is faulty. Poor connection between the PF main board (YC5) and the PF interface connector. The PF main board is faulty.

- Code: E998
- Image:
- Description: Engine communication error
Communication error between the controller on the Main Board Assy. and the engine controller. - Causes: The firmware of the engine controller is faulty. The Main Board Assy. is faulty.


Solve Epson AcuLaser M2000 Error codes
– Get more error code list with quick guide to fix printer product, click here
– About get help with reseting Epson inkpad or others, click here
– Get more information about Epson XP 15000 troubleshooting, click here
– Shop on my shop, click here
Contact us to get support with Epson AcuLaser M2000 Error case
Telegram: https://t.me/hyperaktiv
Facebook: https://www.facebook.com/dngnm/
Or click here to get more ways.
Bài viết liên quan

Repair Canon MF9220Cdn Printer Error Codes Canon Servie Tool
Repair Canon MF8380Cdw Printer Error Codes Canon Servie Tool
Repair Canon MF8350Cdn Printer Error Codes Canon Servie Tool

About dangnam69
Information Security, Web Design, Computer Science, Printer Technician
Previous Post: « Samsung CLX3185W model and fix error codes list
Next Post: Samsung CLX3305 model and fix error codes list »
Reader Interactions
Leave a Reply
You must be logged in to post a comment.
- Manuals
- Brands
- Epson Manuals
- Printer
- Aculaser M2000 series
- User manual
-
Contents
-
Table of Contents
-
Troubleshooting
-
Bookmarks
Quick Links
Related Manuals for Epson Aculaser M2000 series
Summary of Contents for Epson Aculaser M2000 series
-
Page 1
User’s Guide NPD3240-00… -
Page 2: Table Of Contents
Contents Copyright and Trademarks Operating System Versions Safety Instructions Safety …………….12 Warnings, Cautions, and Notes.
-
Page 3
Custom paper size …………32 Cancelling a Print Job. -
Page 4
For short distances …………75 Chapter 6 Troubleshooting Clearing Jammed Paper. -
Page 5
Accessing EPSON Status Monitor…….. -
Page 6
Accessing EPSON Status Monitor…….. -
Page 7
Before Contacting Epson …….. -
Page 8
Help for Users in Vietnam ……….. 162 Help for Users in Indonesia . -
Page 9: Copyright And Trademarks
Seiko Epson Corporation and its affiliates shall not be liable against any damages or problems arising from the use of any options or any consumable products other than those designated as Original Epson Products or Epson Approved Products by Seiko Epson Corporation.
-
Page 10
General Notice: Other product names used herein are for identification purposes only and may be trademarks of their respective owners. Epson disclaims any and all rights in those marks. Copyright © 2008 Seiko Epson Corporation. All rights reserved. Copyright and Trademarks… -
Page 11: Operating System Versions
Operating System Versions In this manual, the following abbreviations are used. Windows refers to Windows Vista, XP, Vista x64, XP x64, 2000, Server 2003, and Server 2003 x64. ❏ Windows Vista refers to Windows Vista Ultimate Edition, Windows Vista Home Premium Edition, Windows Vista Home Basic Edition, Windows Vista Enterprise Edition and Windows Vista Business Edition.
-
Page 12: Safety Instructions
Safety Instructions Safety Warnings, Cautions, and Notes Warnings must be followed carefully to avoid bodily injury. Cautions must be observed to avoid damage to your equipment. Notes contain important information and useful tips on the operation of your printer. Safety precautions Be sure to follow the precautions carefully to ensure safe, efficient operation: ❏…
-
Page 13
❏ Be careful not to touch the fuser, which is marked CAUTION HOT SURFACE or the surrounding areas. If the printer has been in use, the fuser and the surrounding areas may be very hot. If you must touch one of these areas, wait 30 minutes to allow the heat to subside before doing so. -
Page 14: Important Safety Instructions
❏ Be careful not to scratch the surface of the drum. When you remove the photoconductor unit from the printer, always place it on a clean, smooth surface. Avoid touching the drum, since oil from your skin can permanently damage its surface and affect print quality. ❏…
-
Page 15
❏ When connecting this product to a computer or other device with a cable, ensure the correct orientation of the connectors. Each connector has only one correct orientation. Inserting a connector in the wrong orientation may damage both devices connected by the cable. ❏… -
Page 16: Safety Information
Safety Information Power cord Caution: ❏ Be sure the AC power cord meets the relevant local safety standards. Use only the power cord that comes with this product. Use of the another cord may result in fire or electric shock. This product’s power cord is for use with this product only.
-
Page 17: Power On/Off Cautions
The recommended exposure limit for ozone is 0.1 parts per million (ppm) expressed as an average time-weighted concentration over an eight (8) hour period. The Epson laser printer generates less than 0.1 ppm for eight (8) hours of continuous printing. Minimize the risk To minimize the risk of exposure to ozone, you should avoid the following conditions: ❏…
-
Page 18: Chapter 1 Getting To Know Your Printer
Chapter 1 Getting to Know Your Printer Where to Find Information Setup Guide Provides you with information on assembling the printer and installing the printer software. User’s Guide (this manual) Provides you with detailed information on the printer’s functions, optional products, maintenance, troubleshooting, and technical specifications.
-
Page 19: Printer Parts
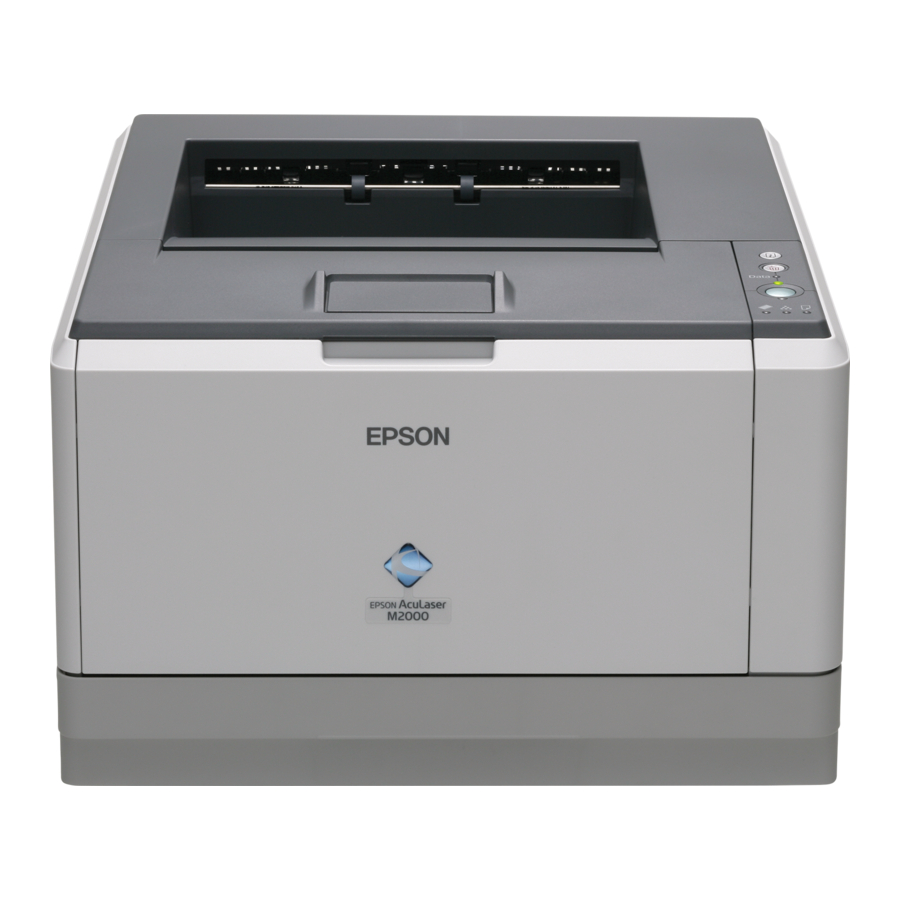
Printer Parts Front view a. top cover (cover A) b. control panel c. standard lower paper cassette d. MP tray (Multi-Purpose tray) e. subtray f. stopper Rear view D model Getting to Know Your Printer…
-
Page 20
DN model a. rear cover b. AC inlet c. power switch d. option cover e. parallel interface connector (only for the D model) f. USB interface connector g. network interface connector (only for the DN model) Note: This manual uses D model as an example of the rear view illustrations. Getting to Know Your Printer… -
Page 21: Inside The Printer
Inside the printer a. fuser unit b. photoconductor unit c. toner cartridge d. developer unit Getting to Know Your Printer…
-
Page 22: Control Panel
Control panel Information button Prints status sheets when the Error light is off and no warning is indicated. Prints a status sheet when pressed once. If your printer is a DN model, pressing this button for more than two seconds prints a network status sheet.
-
Page 23: Options And Consumable Products
DN models) by adding one additional 64, 128 or 256MB 90 pin SDRAM DIMM. Note: Make sure that the DIMM you purchase is compatible with EPSON products. For details, contact the store where you purchased this printer or an EPSON qualified service representative.
-
Page 24
❏ Return toner cartridges are not sold in some areas. Getting to Know Your Printer… -
Page 25: Chapter 2 Printing Tasks
Chapter 2 Printing Tasks Loading Paper into Your Printer This section describes how to load paper. If you use special media such as transparencies or envelopes, see also “Selecting and Using Print Media” on page 29. For specifications or details about the paper types and sizes, see “Paper”…
-
Page 26
2. Slide the paper guides outward to accommodate the paper you are loading. 3. Load a stack of the desired paper on the center of the paper tray with the printable surface facing up. Then adjust the paper guide to the size of the paper. Note: ❏… -
Page 27: Lower Paper Cassette Unit
a. limit tab 4. Raise the stopper. Note: When you use the paper that is longer than A4 size, do not raise the stopper. To prevent printouts from being stacked and pushed out of the output tray, every time the printer ejects a couple of the printouts, remove them from the tray.
-
Page 28
2. Pinch the tab and slide the paper guides to the size of paper. 3. Load a stack of the desired paper on the center of the paper cassette with the printable surface facing down. Note: ❏ Make sure that you do not load paper beyond the limit mark. a. -
Page 29: Selecting And Using Print Media
4. Insert the loaded paper cassette back into the unit. 5. Raise the stopper. Note: When you use the paper that is longer than A4 size, do not raise the stopper. To prevent printouts from being stacked and pushed out of the output tray, every time the printer ejects a couple of the printouts, remove them from the tray.
-
Page 30: Labels
Since the quality of any particular brand or type of media may be changed by the manufacturer at any time, EPSON cannot guarantee the quality of any type of media. Always test samples of media stock before purchasing large quantities or printing large jobs.
-
Page 31: Thick Paper
Available paper source: ❏ MP tray Printer driver settings: Paper Size: MON, C10, DL, C5, C6, IB5 Paper Source: MP tray Note: ❏ Set the envelope with the printable surface facing up. ❏ Depending on the quality of envelopes, the printing environment, or the printing procedure, envelopes might be wrinkled.
-
Page 32: Semi-Thick Paper
Semi-thick paper Available paper source: ❏ MP tray ❏ Standard lower paper cassette ❏ Optional paper cassette Printer driver settings: Paper Size: A4, A5, B5, LT, EXE Paper Source: Auto Selection Paper Type: Semi-Thick (91 to 120 g/m² paper) Transparencies Available paper source: ❏…
-
Page 33: Cancelling A Print Job
Paper Size: User Defined Size Paper Source: MP tray Paper Type: Normal, Semi-Thick, or Thick Note: Depending on the quality of the non-standard size paper, the printing environment, or the printing procedure, the paper might skew. Make a trial print run before you print on a lot of non-standard size paper. Note: ❏…
-
Page 34: From The Computer
From the computer For Windows users Double-click your printer’s icon on the taskbar. Select the job in the list, then click Cancel from the Document menu. For Mac OS X users Open Printer Setup Utility (for Mac OS X 10.3 and 10.4) or Print Center (for Mac OS X 10.2) and double-click your printer from the print queue.
-
Page 35
2. Select Automatic, then choose desired printing quality. 3. Click OK. For Mac OS X users 1. Open the Print dialog box. 2. Select Printer Settings from the drop-down list, and select the Basic Settings tab. Printing Tasks… -
Page 36: Using The Advanced Setting
3. Select Automatic, then choose the resolution from the drop-down list. Using the Advanced setting For Windows users 1. Click the Basic Settings tab. Printing Tasks…
-
Page 37
2. Select Advanced. Then select the most appropriate setting from the list according to the type of document or image you want to print. When you choose a predefined setting, other settings such as Print Quality and Screen are set automatically. -
Page 38: Customizing Print Settings
3. Select Advanced, then click More Settings. 4. Set the appropriate setting in the Advanced dialog box. When you choose a predefined setting, other settings such as Print Quality and Screen are set automatically. Changes are shown in the Summary drop-down list in the Print dialog box. Customizing print settings If you need to change detailed settings, make the settings manually.
-
Page 39
2. Select Printer Settings from the drop-down list, and select Basic Settings tab. 3. Select Advanced, then click More Settings. 4. Make appropriate settings. For details about each setting, click the button. 5. Click OK. Saving your settings You can save your custom settings. Note: ❏… -
Page 40: Toner Save Mode
2. Click Save or Save As in the Presets. 3. Type a name for your custom settings in the Name box, then click OK. Your settings will appear in the Presets drop-down list. Note: ❏ To delete a custom setting, select the setting, then select Delete in the presets drop-down list. ❏…
-
Page 41
2. Select the Duplex check box, then select Left, Top, or Right as the binding position. 3. If you want to make detailed settings, click Duplex Settings to open the Duplex Settings dialog box. 4. Make appropriate settings. For details about each setting, see online help. 5. -
Page 42: Modifying The Print Layout
3. Select the Duplex check box, then select Left, Top, or Right as the binding position. 4. If you want to make detailed settings, click Duplex Settings to open the Duplex Settings dialog box. 5. Make appropriate settings. For details about each setting, see online help. 6.
-
Page 43
3. If you want to make detailed settings, click More Settings. The Print Layout Settings dialog box appears. 4. Make appropriate settings. For details about each setting, see online help. 5. Click OK. For Mac OS X users 1. Open the Print dialog box. 2. -
Page 44: Resizing Printouts
4. Click Print. Note: The Layout settings are a standard feature of Mac OS X. Resizing printouts This function allows you to enlarge or reduce your document. For Windows users 1. Click the Advanced Layout tab. 2. Select the Zoom Options check box. 3.
-
Page 45: Printing Watermarks
5. Click OK. For Mac OS X users Note: ❏ The enlarging or reducing rate is automatically specified according to the paper size you select. ❏ This function is not available with Mac OS X 10.2 and 10.3. 1. Open the Print dialog box. 2.
-
Page 46
2. Select a watermark that you want to use from the Watermark drop-down list. 3. If you want to make detailed settings, click Watermark Settings, and make appropriate settings. For details about each setting, see online help. 4. Click OK. For Mac OS X users 1. -
Page 47
3. Click Stamp Function. 4. Select the Watermark check box, then click Watermark Settings. 5. Select a watermark from the Watermark drop-down list. 6. Make appropriate settings. For details about each setting, see online help. 7. Click OK. Making a new watermark For Windows users 1. -
Page 48
❏ To remove the saved watermark, select it from the List box, then click Delete. After removing it, be sure to click OK to close the dialog box. 7. Click OK. Note: ❏ You can register up to 10 custom watermarks. ❏… -
Page 49: Printing Headers And Footers
7. If you select Add Text, type the watermark text, select the Font and Style, then click OK on the Edit Text dialog box. If you select Add Image, select an image file (PDF, PNG, or JPG), then click Open. Note: To type the watermark text, open the Text Input dialog box by clicking the text box.
-
Page 50
2. Select the Header/Footer check box, then click Header/Footer Settings. 3. Select the items from the drop-down list. Note: If you select Collate Number, the number of copies is printed. 4. Click OK. For Mac OS X users 1. Open the Print dialog box. 2. -
Page 51: Printing With An Overlay
3. Click Stamp Function. 4. Select the Header/Footer check box, then click Header/Footer Settings. 5. Select the items from the drop-down list. Note: If you select Collate Number, the number of copies is printed. 6. Click OK. Printing with an overlay This function allows you to print a standard form or letterhead onto the original document.
-
Page 52
3. Click the Advanced Layout tab. 4. Select the Form Overlay check box. 5. Select Create Overlay Data, then click More Settings. The Create Form dialog box appears. 6. Type the form name in the Form Name box and its description in the Description box. 7. -
Page 53
Printing an overlaid document You can select the registered form data from the Paper Source drop-down list on the Basic Settings tab. For registering form data in the Paper Source, see step 8 in “Creating an overlay” on page 51. If overlay form data is not registered in the Paper Source or if you want to make detailed settings, follow the steps below. -
Page 54: Printing Web Pages To Fit Your Paper Size
Printing Web Pages to Fit Your Paper Size This function allows you to make Web pages fit to your paper size when printing. Install EPSON Web-To-Page from the printer software CD-ROM. Note: This software is for Windows only. After you install EPSON Web-To-Page, the menu bar is displayed on the Microsoft Internet Explorer Toolbar.
-
Page 55: Chapter 3 Installing Options
Chapter 3 Installing Options Optional Paper Cassette Unit For details about the paper types and sizes that you can use with the optional paper cassette unit, see “Lower Paper Cassette Unit” on page 27. For specifications, see “Optional paper cassette unit” on page 158.
-
Page 56
D model DN model * OFF Caution: Make sure to unplug the power cord from the printer to prevent getting an electrical shock. 2. Carefully remove the optional paper cassette unit from its carton and place it where you intend to set up the printer. -
Page 57
3. Carefully, grasp the printer at the position indicated below and lift it carefully. 4. Align the corners of the printer and the unit, then lower the printer gently onto the unit so that the connector and two pins on the top of the unit fit into the terminal and the holes on the bottom of the printer respectively. -
Page 58
5. Pull the paper cassette out from the unit. 6. Turn the lever to the position as shown below to lock the optional paper cassette unit. 7. Insert the paper cassette back into the unit. 8. Reconnect all the interface cables and the power cord. Installing Options… -
Page 59: Removing The Optional Paper Cassette Unit
To confirm that the option is installed correctly, print a Status Sheet. See “Printing a Status Sheet” on page 90. Note for Windows users: If EPSON Status Monitor is not installed, you have to make settings manually in the printer driver. See “Making Optional Settings” on page 113. Note for Macintosh users: When you have attached or removed printer options, you need to delete the printer using Print Setup Utility (for Mac OS X 10.3 and 10.4) or Print Center (for Mac OS X 10.2), and then re-register the printer.
-
Page 60
1. Turn the printer off and unplug the power cord. * OFF Caution: Make sure to unplug the power cord from the printer to prevent getting an electrical shock. 2. Remove the screw on the option cover on the back of the printer using the screw driver. Installing Options… -
Page 61
3. Remove the option cover. 4. Identify the memory slot. The position is shown below. a. memory slot 5. Push a white stopper until it stops. Installing Options… -
Page 62
6. Insert the memory module into the memory slot until it stops. 7. Slide the white stopper back toward you to lock the memory module. Caution: ❏ Do not apply too much force. ❏ Be sure to insert the memory facing the correct way. ❏… -
Page 63: Removing A Memory Module
Note for Windows users: If EPSON Status Monitor is not installed, you have to make settings manually in the printer driver. See “Making Optional Settings” on page 113. Note for Macintosh users: When you have attached or removed printer options, you need to delete the printer using Print Setup Utility (for Mac OS X 10.3 and 10.4), Print Center (for Mac OS X 10.2), and then re-register the printer.
-
Page 64: Chapter 4 Replacing Consumable Products
When the Toner light and the Error light are on, the printer has run out of toner. If the indicator lights light up in this manner, or if a message is displayed on the EPSON Status Monitor screen, replace the toner cartridge.
-
Page 65
❏ The toner cartridge is not an independent unit that you install directly into the printer. The cartridge needs to be inserted into the developer unit’s casing and then installed into the printer. Warning: ❏ Do not touch the toner. Always keep toner away from your eyes. If toner gets on your skin or clothes, wash it off with soap and water immediately. -
Page 66
Caution: ❏ You must completely open the printer cover when replacing the toner cartridge; otherwise, you may damage the printer. ❏ Never touch the developing roller that is exposed after removing the protective cover; otherwise, print quality may decline. ❏ When you replace the toner cartridge, wipe paper dust and marks from the metal roller inside the printer with a dry and soft cloth as shown below. -
Page 67: Chapter 5 Cleaning And Transporting The Printer
Chapter 5 Cleaning and Transporting the Printer Cleaning the Printer The printer needs only minimal cleaning. If the printer’s outer case is dirty or dusty, turn off the printer and clean it with a soft, clean cloth moistened with a mild detergent. Caution: Never use alcohol or paint thinner to clean the printer cover.
-
Page 68
2. Pull the paper cassette unit out and remove the papers. 3. Gently wipe the rubber parts of the pickup roller inside the printer with a well-wrung wet cloth. 4. Load the papers back on the paper cassette unit and reinstall the cassette. Cleaning and Transporting the Printer… -
Page 69: Cleaning Inside The Printer
Cleaning inside the printer 1. Open the top cover and MP tray. 2. Remove the developer unit containing the toner cartridge. 3. Put your finger into the hole of the outer green knob on each side of the photoconductor unit. Then, pull the photoconductor unit towards you.
-
Page 70
Warning: Be careful not to touch the fuser, which is marked CAUTION HOT SURFACE, or the surrounding areas. If the printer has been in use, the fuser and the surrounding areas may be very hot. If you must touch one of these areas, wait 30 minutes to allow the heat to subside before doing Caution: ❏… -
Page 71
4. Wipe paper dust and marks from the metal roller inside the printer with a dry and soft cloth as shown below. * metal roller 5. Move the green cleaning lever of the photoconductor wire back and forth slowly several times from one end to the other. -
Page 72
6. Insert the photoconductor unit slowly all the way in. 7. Insert the developer unit containing the toner cartridge slowly all the way in. 8. Close the top cover and MP tray. Cleaning and Transporting the Printer… -
Page 73: Transporting The Printer
Transporting the Printer Finding a place for the printer When relocating the printer, always choose a location that has adequate space for easy operation and maintenance. Use the following illustration as a guide for the amount of space required around the printer to ensure smooth operation.
-
Page 74: For Long Distances
❏ Keep the entire computer and printer system away from potential sources of interference, such as loudspeakers or the base units of cordless telephones. ❏ Avoid using an electrical outlet that is controlled by wall switches or automatic timers. Accidental disruption of power can erase valuable information in your computer’s and printer’s memory.
-
Page 75: For Short Distances
For short distances Always pay attention to the following handling precautions when you need to move the printer for short distances. 1. Turn off the printer and remove the following items: ❏ Power cord ❏ Interface cables ❏ Loaded Paper ❏…
-
Page 76: Chapter 6 Troubleshooting
Chapter 6 Troubleshooting Clearing Jammed Paper If paper becomes jammed in the printer, the EPSON Status Monitor provides alert messages. Precautions for clearing jammed paper Be sure to observe the following points when you clear jammed paper. ❏ Do not remove jammed paper by force. Torn paper can be difficult to remove and might cause other paper jams.
-
Page 77: Paper Jam Around The Standard Lower Cassette
Paper Jam around the standard lower cassette 1. Remove the standard paper cassette, gently pull any sheets of paper out, and reinstall the paper cassette. Paper Jam around the 250-sheet Paper Cassette Unit 1. Remove the optional paper cassette, gently pull any sheets of paper out, and reinstall the paper cassette.
-
Page 78: Paper Jam In The 250-Sheet Paper Cassette Unit
2. Remove the standard paper cassette, gently pull any sheets of paper out, and reinstall the paper cassette. Paper Jam in the 250-sheet Paper Cassette Unit 1. Remove the optional paper cassettes from the bottom one, then gently pull any sheets of paper out.
-
Page 79: Paper Jam Inside The Printer
2. Reinstall the paper cassettes. Paper Jam inside the printer 1. Open the top cover and MP tray. 2. Remove the developer unit containing the toner cartridge. Troubleshooting…
-
Page 80
3. Put your finger into the hole of the outer green knob on each side of the photoconductor unit. Then, pull the photoconductor unit towards you. Warning: Be careful not to touch the fuser, which is marked CAUTION HOT SURFACE, or the surrounding areas. -
Page 81
Caution: ❏ Never touch the developing roller that is exposed after removing the protecting cover; otherwise, print quality may decline. ❏ Do not expose the photoconductor unit to room light any longer than necessary. ❏ Never touch the photoconductor unit’s light-sensitive drum; otherwise, print quality may decline. -
Page 82
5. Insert the photoconductor unit slowly all the way in. 6. Insert the developer unit containing the toner cartridge slowly all the way in. Note: If you cannot insert the developer unit all the way in, remove and insert the photoconductor unit, then insert the developer unit again. -
Page 83: Paper Jam Around The Mp Tray
Paper Jam around the MP tray 1. Remove the paper on the subtray, then bring the subtray back into the MP tray. Caution: Even if you see any jammed paper when you perform this step, do not pull it out. Otherwise, the printer may be damaged.
-
Page 84
3. Remove the developer unit containing the toner cartridge. 4. Put your finger into the hole of the outer green knob on each side of the photoconductor unit. Then, pull the photoconductor unit towards you. Warning: Be careful not to touch the fuser, which is marked CAUTION HOT SURFACE, or the surrounding areas. -
Page 85
Caution: ❏ Never touch the developing roller that is exposed after removing the protecting cover; otherwise, print quality may decline. ❏ Do not expose the photoconductor unit to room light any longer than necessary. ❏ Never touch the photoconductor unit’s light-sensitive drum; otherwise, print quality may decline. -
Page 86
6. Insert the photoconductor unit slowly all the way in. 7. Insert the developer unit containing the toner cartridge slowly all the way in. Note: If you cannot insert the developer unit all the way in, remove and insert the photoconductor unit, then insert the developer unit again. -
Page 87: Paper Jam Around The Rear Cover
Note: For details about loading papers, see “MP tray” on page 25. Paper Jam around the rear cover 1. Open the rear cover. 2. Pull the green labeled lever down and gently pull any sheets of paper out. Troubleshooting…
-
Page 88: Paper Jam Around The Dm Tray
3. Close the rear cover. 4. Open and close the top cover. Paper Jam around the DM tray 1. Remove the standard paper cassette. Troubleshooting…
-
Page 89
2. From the rear view, push the DM tray and gently pull any sheets of paper out. Note: Do not touch any metal part except the green lever on the DM tray. 3. From the front view, push the DM tray and gently pull any sheets of paper out. 4. -
Page 90: Printing A Status Sheet
Printing a Status Sheet To confirm the current status of the printer, and that the options are installed correctly, print a status sheet using the printer’s control panel or the printer driver. To print a status sheet from the printer’s control panel, see “Control panel” on page 22. To print a status sheet from the printer driver, for Windows, see “Printing a status sheet”…
-
Page 91: The Optional Product Is Not Available
113. For Macintosh users: When you have attached or removed options from the printer, you need to start EPSON Status Monitor, or delete and re-register the printer. To delete the printer, use Print Setup Utility (for Mac OS X 10.3 and 10.4) or Print Center (for Mac OS X 10.2).
-
Page 92: Printout Is Garbled
For Windows users, you may use the printer fonts In the printer driver, choose the Print TrueType fonts as bitmap substituted for specified TrueType fonts. check box in the Extended Settings dialog box. The selected font is not supported by your printer. Make sure that you have installed the correct font.
-
Page 93: Print Quality Problems
Do not store paper in a humid or damp environment. The toner cartridge may be near the end of its service If the message in EPSON Status Monitor indicates that the life. toner cartridge is near the end of its service life, replace it. See “Precautions for Replacing the Toner Cartridge”…
-
Page 94: Toner Smudges
Toner smudges Cause What to do Your paper may be moist or damp. Do not store your paper in a humid or damp environment. You may not be using the correct type of paper for Smooth, high-quality copier paper is recommended for best your printer.
-
Page 95: The Printed Image Is Light Or Faint
The toner cartridge may be near the end of its service If the message in EPSON Status Monitor indicates that the life. toner cartridge is near the end of its service life, replace it. See “Precautions for Replacing the Toner Cartridge” on page 64.
-
Page 96: Memory Problems
Memory Problems Insufficient memory for current task Cause What to do The printer has insufficient memory for current task. Add more memory for a permanent solution or lower print quality temporarily in the printer driver. Insufficient memory to print all copies Cause What to do The printer does not have sufficient memory to…
-
Page 97: Problems Using Options
“Making Optional Settings” on page 113. For Macintosh users: When you have attached or removed options from the printer, you need to start EPSON Status Monitor, or delete and re-register the printer. To delete the printer, use Print Setup Utility (for Mac OS X 10.3 and 10.4) or Print Center (for Mac OS X 10.2).
-
Page 98: Usb Connections
USB connections USB cables or connections can sometimes be the source of USB problems. For best results, you should connect the printer directly to the computer’s USB port. If you must use multiple USB hubs, we recommend that you connect the printer to the first-tier hub. Windows operating system Your computer must be a model pre-installed with Windows Vista, Vista x64, XP, XP x64, 2000, Server 2003, or Server 2003 x64, or a model that was pre-installed with Windows 2000, Server 2003,…
-
Page 99: Network Connection Problems (Only For The Dn Model)
Note: For Windows 2000, if the Digital Signature Not Found dialog box appears during the installation process, click Yes. If you click No, you will have to install the printer software again. For Windows Vista, Vista x64, XP, XP x64, Server 2003, or Server 2003 x64, if the Software Installation dialog box appears during the installation process, click Continue Anyway.
-
Page 100: Status And Error Lights
For information on the location of the lights, see “Control panel” on page 22. Note: You can check the printer status and error easily on the computer by using EPSON Status Monitor. For details about EPSON Status Monitor, for Windows see “Using EPSON Status Monitor” on page 114, for Macintosh see “Using EPSON Status Monitor”…
-
Page 101: Troubleshooting
Reset Explanation: The printer’s current interface has been reset and the buffer has been cleared. However, other interfaces are still active and retain their settings and data. Form Feed Explanation: The printer is ejecting paper due to a user request. This warning appears when pressing the Start/Stop button once to make the printer offline, then holding down the Start/Stop button for more than 2 seconds in order not to receive form feed command.
-
Page 102
Cover Open Explanation: The cover on the printer is open. Close the cover. Print Data Error Explanation: The print data is deleted because it is incorrect. Make sure the appropriate printer driver are used. Insufficient Memory to Print All Copies Explanation: Printing by the specified number of copies is no longer possible due to insufficient memory (RAM). -
Page 103
The installed toner cartridge is not a genuine EPSON product. Installing a genuine toner cartridge is recommended. Using a non-genuine toner cartridge may affect print quality. EPSON shall not be liable for any damages or problems arising from the use of consumable products not manufactured or approved by EPSON. -
Page 104
The installed toner cartridge is not a genuine EPSON product. Installing a genuine toner cartridge is recommended. Using a non-genuine toner cartridge may affect print quality. EPSON shall not be liable for any damages or problems arising from the use of consumable products not manufactured or approved by EPSON. -
Page 105
Toner Cartridge Memory Error Explanation: A memory read/write error has occurred. Reset the toner cartridge or replace it to a new one. See “Precautions for Replacing the Toner Cartridge” on page 64 for instructions. If this does not resolve the problem, turn the power off and then on again. -
Page 106: Canceling Printing
Paper Jam Explanation: A paper jam occurs. Clear the paper jam. See “Clearing Jammed Paper” on page 76 for instructions. Reset All Explanation: All printer settings have been reset to the default configuration, or to the last settings that were saved.
-
Page 107: The Printer Does Not Print Correctly In The Postscript Mode
The printer does not print correctly in the PostScript mode Cause What to do The printer’s emulation mode setting is incorrect. The printer is set to the Auto mode by default, so that it can automatically determine the encoding used in the received print job data and select the appropriate emulation mode.
-
Page 108: The Font On The Printout Is Different From That On The Screen
The AppleTalk zone setting is incorrect. Open the Printer Setup Utility (Mac OS 10.3.x and 10.4.x) or Print Center (Mac OS 10.2), then select the AppleTalk zone that the printer is connected to. The font on the printout is different from that on the screen Cause What to do The PostScript screen fonts are not installed.
-
Page 109: The Printer Does Not Print Normally Via The Network Interface (Only For The Dn Model)109
For Windows users only The printer cannot print binary data when it is connected to the computer via the USB interface. Make sure that the Data The Data Format setting in the printer’s Properties is Format setting, which is accessed by clicking Advanced on the not set to ASCII or TBCP.
-
Page 110: An Undefined Error Occurs (Macintosh Only)
An undefined error occurs (Macintosh only) Cause What to do The version of the Mac OS that you are using is This printer’s driver can only be used on Macintosh computers unsupported. running Mac OS X version 10.2.8 or later. Printing in the PCL6/PCL5 Mode Problems The problems listed in this section are those that you may encounter when printing in the PCL6 mode.
-
Page 111: The Edges Of Texts And/Or Images Are Not Smooth
The EPSON Screen Fonts are not installed. The screen fonts must be installed on the computer that you are using. Otherwise, the font that you select is substituted by some other font for display on the screen. The edges of texts and/or images are not smooth…
-
Page 112: Chapter 7 About The Printer Software For Windows
Chapter 7 About the Printer Software for Windows Using the Printer Driver The printer driver is the software that allows you to adjust printer settings to get the best results. Note: The printer driver’s online help provides details on printer driver settings. Note for Windows Vista users: Do not press the power button or put your computer to standby or hibernate mode manually during printing.
-
Page 113: Printing A Status Sheet
Note: ❏ This function is available only when EPSON Status Monitor is installed. ❏ This information might be different from the information displayed in EPSON Status Monitor. Use EPSON Status Monitor to get more detailed information about consumables. About the Printer Software for Windows…
-
Page 114: Ordering Consumables
❏ If the genuine EPSON toner cartridge is not used, the level indicator and the alert icon showing the remaining service life are not displayed. Ordering Consumables Click the Order Online button on the Basic Settings tab. See “Order Online” on page 122 for details.
-
Page 115
❏ See the Network Guide for information on installing EPSON Status Monitor on a network. ❏ If you want to use the printer via the print server, you have to install EPSON Status Monitor from the CD-ROM with administrator privileges in each client. -
Page 116: Accessing Epson Status Monitor
Note: ❏ You can also access EPSON Status Monitor by clicking the Simple Status button on the Optional Settings tab on the printer driver. ❏ The Order Online dialog box also appears by clicking the Order Online button on the Basic Settings tab in the printer driver.
-
Page 117: Detailed Status
Note for Windows XP users: EPSON Status Monitor is not available when printing from a Remote Desktop connection. Note for Netware users: When monitoring NetWare printers, a Novell Client that corresponds to your operating system must be used. Operation is confirmed for the versions below: ❏…
-
Page 118: Consumables Information
Clicking this button enables you to order consumables online. See “Order button: Online” on page 122 for details. Note: The remaining service life of the toner cartridge is displayed only if the genuine EPSON toner cartridge is used. About the Printer Software for Windows…
-
Page 119: Job Information
Job Information Job Name: Displays the user’s print job names. Other user’s print jobs are displayed as ———. Status: Waiting: Indicates the print job is waiting to be printed. Spooling: Indicates the print job is being spooled on your computer. Deleting: Indicates the print job is being deleted.
-
Page 120
The Job Information tab is available when the following connections are used: Server and Client Environments: ❏ When using the shared Windows 2000, Server 2003, or Server 2003 x64 LPR connection with Windows Vista, Vista x64, XP, XP x64, or 2000 clients. ❏… -
Page 121: Notice Settings
Notice Settings Monitor the printer status When this check box is selected, EPSON Status Monitor check box: monitors the printer status during a print job is processed. More Settings button: Opens the More Settings dialog box to set how to display the tray icon.
-
Page 122: Order Online
When Allow monitoring of the shared printers check box is selected, the User Account Control dialog box will appear. Then click Continue to make the settings. Note: When sharing the printer, be sure to set EPSON Status Monitor so that the shared printer can be monitored on the print server. Order Online Text box: Displays the consumables and codes.
-
Page 123: Uninstalling The Printer Software
Note: If you do not register the URL when you install Epson Status monitor, you cannot order online. If necessary, uninstall Epson Status Monitor once, then register the URL when you reinstall it. Uninstalling the Printer Software Note: The illustrations in this section show Windows XP screens.
-
Page 124: Sharing The Printer On A Network
7. Click OK. Note: You can uninstall EPSON Network Utility. When the utility is uninstalled, you cannot display the printer status from EPSON Status Monitor of other printers. 8. Follow the on-screen instructions. Sharing the Printer on a Network Sharing the printer This section describes how to share the printer on a standard Windows network.
-
Page 125: Using An Additional Driver
See “With Windows Vista, Vista x64, XP, XP x64, or 2000” on page 129. Note: ❏ When sharing the printer, be sure to set EPSON Status Monitor so that the shared printer can be monitored on the print server. See “Notice Settings” on page 121.
-
Page 126
3. For a Windows Vista, Vista x64, XP, XP x64, Server 2003, or Server 2003 x64 print server, select Share this printer, then type the name in the Share name box. Note: Do not use spaces or hyphens for the Share name, or an error may occur. For a Windows 2000 print server, select Shared as, then type the name in the Share Name box. -
Page 127
On the Windows XP, XP x64, 2000, Server 2003, or Server 2003 x64 print server Click Additional Drivers. Select Windows being used for clients, then click OK. About the Printer Software for Windows… -
Page 128
Server Name Client OS Driver Windows 2000 Windows XP or 2000 clients Intel Windows 2000 Windows XP Windows XP or 2000 clients Intel Windows 2000 or XP Windows XP x64 clients x64 Windows XP Windows XP x64, Server Windows XP or 2000 clients x86 Windows 2000, Windows XP 2003, or Server 2003 x64 and Windows Server 2003… -
Page 129: Setting Up Clients
❏ You cannot use the additional driver on the server system OS. ❏ When you want to use EPSON Status Monitor at a client, you have to install EPSON Status Monitor from the CD-ROM with administrator privileges in each client.
-
Page 130
2. For Windows 2000, double-click the Add Printer icon, then click Next. For Windows XP or XP x64 click Add a printer in the Printer Tasks menu. For Windows Vista or Vista x64, click Add a printer in the menu bar. 3. -
Page 131
For Windows XP or XP x64, select Browse for a printer. For Windows Vista or Vista x64, click Select a shared printer by name in the dialog box that appears, then click Next. 5. For Windows XP, XP x64, 2000, Server 2003, Server 2003 x64, click the icon of the computer or server that is connected to the shared printer, and the name of the shared printer, then click Next. -
Page 132: Installing The Printer Driver From The Cd-Rom
❏ If the printer driver is installed in the client beforehand, you need to select either the new printer driver or the current printer driver. When the prompt to select the printer driver appears, select the printer driver according to the message. ❏…
-
Page 133
2. Insert the CD-ROM, type the appropriate drive and folder names in which the printer driver for clients is located, then click OK. When installing drivers, “Digital Signature is not found.” may appear. Click Yes (for Windows 2000) or Continue Anyway (for Windows Vista, Vista x64, XP, XP x64, Server 2003, or Server 2003 x64) and continue installing. -
Page 134: Chapter 8 About The Printer Software For Macintosh
Chapter 8 About the Printer Software for Macintosh Using the Printer Driver The printer driver is the software that allows you to adjust printer settings to get the best results. Note: ❏ The printer driver’s online help provides details on printer driver settings. ❏…
-
Page 135: Using Epson Status Monitor
For Mac OS X users Note: After installing the EPSON Status Monitor and before doing the procedure below, you need to open the Print dialog box so the EPSON Status Monitor can display the current status of the printer. 1. Open the Applications folder on your hard disk drive, then open the Utilities folder.
-
Page 136: Detailed Status
You can check print job information. See “Job Information” on page 137. Notice Settings You can make specific monitoring settings. Access EPSON Status Monitor and select Notice Settings from the file menu. See “Notice Settings” on page 138. You can also access any of the menus by clicking the appropriate tab on each information window.
-
Page 137: Consumables Information
Note: The remaining service life of the toner cartridge is displayed only if the genuine EPSON toner cartridge is used. Job Information…
-
Page 138: Notice Settings
Job Name: Displays the user’s print job names. Other user’s print jobs are displayed as ———. Status: Waiting: Indicates the print job is waiting to be printed. Spooling: Indicates the print job is being spooled on your computer. Deleting: Indicates the print job is being deleted. Printing: Indicates the print job is printed currently.
-
Page 139: Uninstalling The Printer Software
Uninstalling the Printer Software For Mac OS X users 1. Quit all applications on the computer. 2. Insert the EPSON printer software CD-ROM in your Macintosh. 3. Double-click the Mac OS X folder. 4. Double-click the Printer Driver folder. 5. Double-click your printer’s icon.
-
Page 140: Sharing The Printer On A Network
Sharing the Printer on a Network Sharing the Printer This section describes how to share the printer on an AppleTalk network. The computers on the network can share the printer that is directly connected to one of them. The computer that is directly connected to the printer is the print server, and the other computers are the clients which need permission to share the printer with the print server.
-
Page 141: Chapter 9 About The Postscript Printer Driver
Chapter 9 About the PostScript Printer Driver System Requirements Printer hardware requirements Recommended Memory Standard + 64 MB (for duplex printing of image data at Maximum) Note: Add more memory modules into your printer if the amount of memory currently installed does not meet your printing needs.
-
Page 142: Using The Postscript Printer Driver With Windows
Note: To use binary data, Epson recommends that you use AppleTalk for the printer’s network connection. If you use a protocol other than AppleTalk for the network connection, you need to set Binary to On in the PS3 Menu on the control panel. For details about setting, see the Network Guide. If you use the printer with a local connection, you cannot use binary data.
-
Page 143: Installing The Postscript Printer Driver For The Usb Interface
9. When installation is done, click Finish. Installing the PostScript printer driver for the USB interface Caution: Never use EPSON Status Monitor and PostScript 3 driver at the same time when the printer is connected via a USB port. It may damage the system. Note: ❏…
-
Page 144: Installing The Postscript Printer Driver For The Network Interface
6. Select USB as the port the printer is connected to, then click Next. 7. Click Have Disk and specify the following path for the CD-ROM. If your CD-ROM drive is D:, the path will be D:\ADOBEPS\ENGLISH\PS_SETUP. Then click OK. Note: Change the drive letter as needed for your system.
-
Page 145: Accessing The Postscript Printer Driver
9. Click Have Disk in the Add Printer Wizard and specify the following path for the CD-ROM. If your CD-ROM drive is D:, the path will be D:\ADOBEPS\ENGLISH\PS_SETUP. Then click OK. Note: Change the drive letter as needed for your system. 10.
-
Page 146: Selecting The Printer
For Mac OS X users Note: ❏ Although EPSON FireWire appears in the interface pop-up list, you cannot use FireWire for printer connection in the PostScript 3 mode. ❏ You need to make the settings for your installed options manually when the printer is connected using USB, IP printing, or Bonjour (Rendezvous).
-
Page 147
PostScript 3 printer driver. Note for IP Printing users: ❏ Make sure to select IP Printing. Do not select EPSON TCP/IP, because it cannot be used with the PostScript 3 printer driver. ❏ After selecting IP Printing, enter the IP address for the printer, then make sure to select the Use default queue on server check box. -
Page 148: Accessing The Postscript Printer Driver
Note for IP Printing users, USB or Bonjour (Rendezvous) users: Select your printer from the Printer list, then select Show Info from the Printers menu. The Printer Info dialog box appears. Select Installable Options from the pop-up list, then make the necessary settings. 6.
-
Page 149: Chapter 10 About The Pcl6/Pcl5 Printer Driver
Chapter 10 About the PCL6/PCL5 Printer Driver About the PCL Mode Hardware requirements Your printer must meet the following hardware requirements to be able to use the PCL6/PCL5 printer driver. Memory requirements for using the PCL6/PCL5 printer driver are shown below. Install optional memory modules into your printer if the amount of memory currently installed does not meet your printing needs.
-
Page 150: Using The Pcl6/Pcl5 Printer Driver
To print in the PCL mode, you will have to install the printer driver. Consult the customer support in your region regarding how to get the printer driver. Note: The PCL6/PCL5 printer driver and EPSON Status Monitor cannot be used at the same time. About the PCL6/PCL5 Printer Driver…
-
Page 151: Installing The Pcl6 Printer Driver
❏ When uninstalling the printer driver, select EPSON Monochrome Laser P6 in the uninstallation program. If you select EPSON Printer Software, the uninstallation may not be completed successfully.
-
Page 152: Accessing The Pcl6 Printer Driver
Note: If you want to change the settings, you can access the PCL6 printer driver by clicking Document Default. Accessing the PCL6 printer driver You can change the PCL6 printer settings in the PCL6 printer driver. To access the printer driver, see “Accessing the printer driver”…
-
Page 153: Appendix A Technical Specifications
Since the quality of any particular brand or type of paper may be changed by the manufacturer at any time, Epson cannot guarantee the quality of any type of paper. Always test samples of paper stock before purchasing large quantities or printing large jobs.
-
Page 154: Printable Area
❏ Labels that peel easily or labels that do not cover the backing sheet completely ❏ Coated paper or special surface-colored paper ❏ Paper that has binder holes or is perforated ❏ Paper that has glue, staples, paper clips, or tape on it ❏…
-
Page 155: Printer
Printer General Printing method: Laser beam scanning and dry electrophotographic process 600 × 600 dpi, 1200 × 1200 dpi Resolution: Continuous printing speed Up to 28 pages per minute at 600 dpi on A4 size paper Up to 14 pages per minute at 1200 dpi on A4 size paper Paper feed: Automatic or manual feed Paper feed alignment:…
-
Page 156: Environmental
Environmental Temperature: In use: 10 to 32.5 °C (50 to 90.5 °F) Not in use: 0 to 35 °C (32 to 95 °F) Humidity: In use: 15 to 80 % RH Not in use: 5 to 85 % RH Altitude: 2500 meters (8200 feet) maximum The recommended environment is 15 to 28 °C (59 to 82 °F) and 20 to 70 % RH.
-
Page 157: Interfaces
Low Voltage Directive 2006/95/EC EN 60950-1 EMC Directive 2004/108/EC EN 55022 Class B EN 55024 EN 61000-3-2 EN 61000-3-3 Australian model: AS/NZS CISPR22 Class B Interfaces USB interface USB 2.0 High Speed mode Note: ❏ Only computers equipped with a USB connector and running Mac OS X and Windows Vista, Vista x64, XP, XP x64, 2000, Server 2003, or Server 2003 x64, support the USB interface.
-
Page 158: Options And Consumable Products
* This product conforms to CE marking requirements in accordance with EC Directive 2004/108/EC. Memory modules Make sure that DIMM you purchase is compatible with EPSON products. For details, contact the store where you purchased this printer or the EPSON sales company.
-
Page 159: Toner Cartridge
Toner cartridge Product code/model High Capacity Toner Cartridge 0435/0439 Standard Capacity Toner Cartridge 0436/0440 Return High Capacity Toner Cartridge 0437/0441 Return Standard Capacity Toner Cartridge 0438/0442 Storage temperature: 0 to 35 °C (32 to 95 °F) Storage humidity: 15 to 80 % RH This product conforms to CE marking requirements in accordance with EC Directive 2004/108/EC.
-
Page 160: Appendix B Customer Support
Check your Pan-European Warranty Document for information on how to contact EPSON Customer support. Help for Users in Australia Epson Australia wishes to provide you with a high level of customer service. In addition to your product documentation, we provide the following sources for obtaining information: Customer Support…
-
Page 161: Help For Users In Singapore
(e-mail). Epson Helpdesk Epson Helpdesk is provided as a final backup to make sure our clients have access to advice. Operators on the Helpdesk can aid you in installing, configuring and operating your Epson product. Our Pre-sales Helpdesk staff can provide literature on new Epson products and advise where the nearest dealer or service agent is located.
-
Page 162: Help For Users In Thailand
❏ Enquiries on repair service and warranty Help for Users in Thailand Contact for information, support, and services are: New :For all products World Wide Web (http://www.epson.co.th) Information on product specifications, drivers for download, Frequently Asked Questions (FAQ), and e-mail are available. Epson Hotline (Phone: (66)2685-9899) Our Hotline team can help you with the following over the phone: ❏…
-
Page 163
Epson Hotline ❏ Sales enquiries and product information ❏ Technical support Phone (62) 21-572 4350 (62) 21-572 4357 Epson Service Center Jakarta Mangga Dua Mall 3rd floor No 3A/B Jl. Arteri Mangga Dua, Jakarta Phone/Fax: (62) 21-62301104 Bandung Lippo Center 8th floor Jl. -
Page 164: Help For Users In Hong Kong
To obtain technical support as well as other after-sales services, users are welcome to contact Epson Hong Kong Limited. Internet Home Page Epson Hong Kong has established a local home page in both Chinese and English on the Internet to provide users with the following information: ❏ Product information ❏…
-
Page 165: Help For Users In India
603-56288333 Help for Users in India Contacts for information, support, and services are: World Wide Web (http://www.epson.co.in) Information on product specifications, drivers for download, and products enquiry are available. Epson India Head Office — Bangalore Phone: 080-30515000 Fax: 30515005 Epson India Regional Offices:…
-
Page 166: Help For Users In The Philippines
For Service (CDMA & Mobile Users) — 3900 1600 (9AM — 6PM) Prefix local STD code Help for Users in the Philippines To obtain technical support as well as other after sales services, users are welcome to contact the Epson Philippines Corporation at the telephone and fax numbers and e-mail address below: Phone: (63) 2-813-6567…
-
Page 167
Installing EPSON Status Monitor (Windows) printer Job Information (Windows) printer (inside of the printer) Job Information Tab (Macintosh) printer (pickup roller) Monitoring Your Printer Using EPSON Status Monitor Memory module (Macintosh) how to install Notice Settings (Windows) how to remove… -
Page 168
Print layout about the PCL Mode Modifying the print layout (Windows) hardware requirements Problems, solving system requirements contacting Epson PostScript printer driver Accessing the PostScript printer driver (Macintosh) Accessing the PostScript printer driver (Windows) hardware requirements Relocating the printer Installing the PostScript printer driver for Mac OS X… -
Page 169
operational problems options paper handling problems PCL6/PCL5 mode PostScript 3 mode print quality problems USB problems Unavailable paper Watermark how to make how to use Index…

Руководство пользователя
Индикаторы ошибок
Индикаторы ошибок
Сообщения об ошибках на панели управления
Этот раздел описывает значение сообщений, появляющихся на ЖК-дисплее.
Сообщения об ошибках Решения
Замятие бумаги
Удалите застрявшую бумагу.
Нажмите кнопку OK. Если ошибка не устранена, удали-
& «Замятие бумаги» на стр. 92
те бумагу вручную.
Замялась бумага в ADF. Удалите замятую бумагу.
Ошибка связи. Убедитесь в том, что кабель подклю-
Убедитесь, что компьютер подключен правильно. Если сооб-
чен, и попытайтесь снова.
щение об ошибке по-прежнему появляется, убедитесь, что
на компьютере установлено ПО для сканирования и что па-
раметры ПО верные.
Ошибка печати
Выключите, а затем снова включите устройство. Убедитесь,
Застревание бумаги. Откройте сканер и извлеките бу-
что в устройстве больше нет застрявшей бумаги. Если сооб—
магу, затем выключите принтер. См. документацию.
щение по-прежнему появляется, обратитесь в службу под-
держки пользователей Epson.
Ошибка ADF.
Удалите из ADF все объекты или документы. Выключи-
те питание. См. документацию.
Ошибка печати
См. документацию и при необходимости обратитесь в
сервис-центр.
Ошибка сканера
Выключите, а затем снова включите устройство. Если сообще-
См. документацию и при необходимости обратитесь в
ние по-прежнему появляется, обратитесь в службу поддерж—
сервис-центр.
ки пользователей Epson.
Срок службы впитывающей чернила прокладки прин-
Нажмите кнопку OK для возобновления печати. Сообщение
тера завершается. Обратитесь в службу технической
будет отображаться до тех пор, пока впитывающая чернила
поддержки Epson.
прокладка не будет заменена.
Обратитесь в поддержку пользователей Epson для замены
впитывающей чернила прокладки до истечения ее срока
службы. Когда впитывающие чернила прокладки будет запол-
нены, устройство прекратит печать, и потребуется сервис-
ное обслуживание Epson, чтобы ее продолжить.
Срок службы впитывающей чернила прокладки прин-
Свяжитесь со службой поддержки Epson для замены впиты-
тера истек. Обратитесь в службу технической под-
вающей чернила прокладки.
держки Epson.
Recovery Mode Обновление встроенного ПО не удалось. Необходимо повто-
рить обновление встроенного ПО. Подготовьте USB-кабель и
посетите региональный web-сайт Epson, где вы найдете даль-
нейшие инструкции.
89