 Одна из частых ошибок при запуске игр и программ в Windows — сообщение о том, что запуск программы невозможен, так как vcomp110.dll отсутствует на компьютере. Особенно распространены случаи появления этой ошибки при запуске игры Ведьмак 3 или ПО Sony Vegas Pro, которым требуется vcomp110.dll для работы, но это не единственный вариант — с проблемой можно столкнуться и при запуске других программ.
В этой инструкции — подробно о том, как скачать оригинальный vcomp110.dll для Windows 10, 8 и Windows 7 (x64 и 32-бит) для исправления ошибки «запуск программы невозможен» в witcher3.exe и других играх и программах, если вы с ней столкнулись. Также в конце инструкции — видео по загрузке файла.
Загрузка и установка оригинального файла vcomp110.dll
Прежде всего настоятельно не рекомендую скачивать этот файл со сторонних сайтов для загрузки DLL, а затем искать куда его копировать и как регистрировать в системе с помощью regsvr32.exe: во-первых, это навряд ли решит проблему (а регистрация вручную через окно Выполнить не пройдет), во-вторых это может быть не вполне безопасно.
Правильный путь — скачать vcomp110.dll с официального сайта для исправления ошибки, а все, что для этого нужно — выяснить, составной частью каких компонентов он является.
В случае с vcomp110.dll — это составная часть распространяемых компонентов Microsoft Visual Studio 2012, по умолчанию файл располагается в папке C:\Windows\System32 и (для Windows 64-бит) в C:\Windows\SysWOW64, а сами компоненты доступны для бесплатной загрузки на соответствующей странице сайта Майкрософт. При этом, если у вас уже установлены данные компоненты, не торопитесь закрывать инструкцию, так как есть некоторые нюансы.

Порядок действий будет таким:
- Зайдите на официальный сайт https://www.microsoft.com/ru-ru/download/details.aspx?id=30679 и нажмите «Скачать».

- Если у вас 64-битная система, то обязательно скачайте и x64 и x86 версию компонентов. Дело в том, что часто даже для 64-разрядных Windows 10, 8 и Windows 7 требуются библиотеки DLL 32-бит (а точнее могут требоваться для запускаемой игры или программы, выдающей ошибку). Если у вас 32-битная система, то загрузите только x86 версию компонентов.

- Запустите загруженные файлы и установите распространяемые компоненты Visual C++ 2012.


После этого перезагрузите компьютер и проверьте, была ли исправлена ошибка «запуск программы невозможен, так как на компьютере отсутствует vcomp110.dll» в Ведьмак 3 (Witcher 3), Sony Vegas, другой игре или программе.
Как исправить ошибку vcomp110.dll — видео инструкция
Примечание: если только указанных действий в Ведьмак 3 оказалось недостаточно, попробуйте скопировать (не перенести) файл vcomp110.dll из C:\Windows\System32\ в папку bin в папке Witcher 3 (в 32-битной Windows) или в папку bin\x64 в 64-разрядной Windows. Если речь идет о Ведьмак 3 Дикая Охота, то, соответственно, папка bin находится в The Witcher 3 Wild Hunt.
Периодически при запуске какой-либо видеоигры на мониторе высвечивается ошибка vcomp110.dll. Судя по огромному количеству запросов в интернете по типу «vcomp110.dll что это за ошибка как исправить», «ошибка vcomp110.dll ведьмак 3» или «ошибка vcomp110.dll что делать windows 10» – проблема достаточно распространенная.

Но не нужно сразу начинать ругать разработчиков видеоигр, появление ошибки – не их вина. Стоит разобраться, почему данная ошибка возникает, и какие существуют способы ее исправления.
Содержание статьи
- Почему возникает ошибка?
- Как исправить ошибку?
- Скачать библиотеку
- Установить конкретный файл
- Комментарии пользователей
Почему возникает ошибка?
Ошибка возникает по причине того, что в системе нет пакета данных vcomp110.dll. Это может произойти по нескольким причинам:
- удаление пакета данных вследствие работы антивируса;
- наличие сторонних программ, обеспечивающих безопасность пользователя;
- многочисленные перезаписывания пакета, вызванные установками игр, скаченных не с официальных ресурсов.
Важно! Скачивать игры нужно исключительно с официальных ресурсов. Пиратские сервисы способны не только предоставить для скачивания сломанные файлы, но и скрытно включить в них вредоносные программы.
Как исправить ошибку?
Причины, по которым на компьютере может отсутствовать файл «vcomp110.dll» понятны. Решить проблему можно двумя простыми способами. Стоит на каждом остановиться подробнее.
Скачать библиотеку
Файл vcomp110.dll входит в состав библиотеки данных Microsoft Visual Studio 2012. Данная программа выполняет множество системных функций, в том числе, она необходима для обеспечения работы видеоигр.
Во время запуска видеоигры операционная система автоматически начинает выполнять загрузку библиотек dll, vcomp110 – также относится к ним. Именно поэтому при невозможности запуска игры, разумно скачать библиотеку данных целиком, в которой гарантированно будет содержаться нужный файл.
Но перед этим, если программа уже есть на компьютере, но по каким-то причинам не функционирует, ее нужно удалить, зайдя в панель управления и перейдя во вкладку «Программы». На Windows 10 панель управления выглядит следующим образом.

Скачивание библиотеки производится с официального сайта Microsoft. Нужно лишь кликнуть по ссылке, выбрать язык и поставить пакет данных на скачивание.

На одном из этапов скачивания потребуется указать разрядность операционной системы. Проверить ее можно, зажав на клавиатуре 2 клавиши – Win и Pause. Нужно смотреть на раздел «Тип системы».

Если на компьютере установлена 32-х разрядная Windows, то нужно поставить галочку возле х86, если 64-х разрядная, то возле х64.

Заключительный шаг – установка программы. Когда программа загружена, следует дважды кликнуть по ее иконке. Запустится «Установщик». Потребуется следовать его указаниям, нажимая на кнопку «Далее». По завершению установки программы рекомендуется перезагрузить компьютер.
Установить конкретный файл
При желании, можно не переустанавливать всю библиотеку данных, а ограничиться установкой единственного недостающего файла. Для этого потребуется:
- Зайти на один из проверенных сайтов.
- Выполнить загрузку файла в соответствии с установленной операционной системой.
- Переместить загруженный файл в системную папку (для 32х разрядных систем наименование папки C:\windows\system32\, для 64х разрядных систем C:\windows\SysWOW64\).

Последний этап – регистрация файла. Нужно открыть командую строку (открыть меню «Пуск» и ввести в строку поиска «cmd») и скопировать: regsvr32 C:\windows\system32\vcomp110.dll (для х32 систем); regsvr32 C:\windows\SysWOW64\vcomp110.dll (для х64 систем).
Если ни один из указанных выше способов решения вопроса не помог, то можно перейти на сайт Microsoft и переустановить ОС. Но поступать таким образом разумно лишь в крайнем случае.

Если на экране появилась надпись «witcher3 exe системная ошибка отсутствует vcomp110.dll», переживать не стоит. Vcomp110.dll – ошибка распространенная, в 99% случаев ее можно исправить скачиванием недостающей библиотеки данных или установкой единственного файла.
This post focuses on the error — vcomp110.dll is missing Windows 10, including its possible causes and fixes. If you are bothered by vcomp110.dll error now, please explore the solutions with MiniTool.
An Overview of Vcomp110.dll
The vcomp110.dll is a redistributable component of Microsoft Visual C++. Recently, many people complain about the vcomp110 dll is missing error because they cannot start their application properly due to it. Besides, they receive error messages. The following are some frequently encountered error messages.
Note: Actually, you may encounter various DLL file errors in the daily life like Xlive.dll missing error, Hal.dll BSOD, and Logilda.dll error, etc.
- Vcomp110.dll is missing.
- Vcomp110.dll was not found.
- Vcomp110.dll could not be located.
- Cannot find vcomp110.dll.
- This application failed to start because vcomp100.dll was not found. Re-installing the application may fix this problem.
What causes the vcomp110.dll is missing Windows 10 issue? According to user reports, this error usually occurs in cases that vcomp110.dll is removed or corrupted. The vcomp110 dll is missing error may imply a registry issue, a virus or malware, or a hardware failure.
Now, it’s time to troubleshoot the vcomp110.dll missing issue. Here are some available methods for you.
Solution 1: Download/Reinstall Visual C++ Redistributable Package
You are recommended to download the Visual C++ Redistributable for Visual Studio 2012 and run it after receiving the vcomp110.dll missing error. This operation will replace/restore the vcomp110.dll with the latest copy provided by Microsoft.
Tip: Choose a download option based on your Windows version (32-bit or 64-bit) from the given options.
If it fails, try installing Visual C++ Redistributable from the program’s installation folder to fix the vcomp110.dll missing error. Under some circumstances, the video game or application contains a specific DLL file version that works better than the one offered by Microsoft.
What file or folder you should look for? The target actually is the game or program that causes the vcomp110.dll missing error. After finding the file, replace the missing or corrupt vcomp110.dll file with it.
Solution 2: Reinstall the Application that Requires Vcomp110.dll
Some users claimed that reinstalling the application that requires vcomp110.dll can fix the issue. For that, you should uninstall the application first and then install it again.
Step 1: Right click the Windows icon on the desktop to open the Start menu, and then click Apps and Features option to continue.

Step 2: Move to the right side of the window and scroll down the content to find the application having vcomp110.dll missing issue. Click on it and then click the Uninstall button. Then this app and its related info will be uninstalled, click on Uninstall after confirming the operation.

Step 3: Wait for the finish of uninstallation process. Then reinstall the program from its official website.
You can also see: How to Uninstall Programs on Windows 10? Here Are Methods
Solution 3: Recover the Vcomp110.dll File
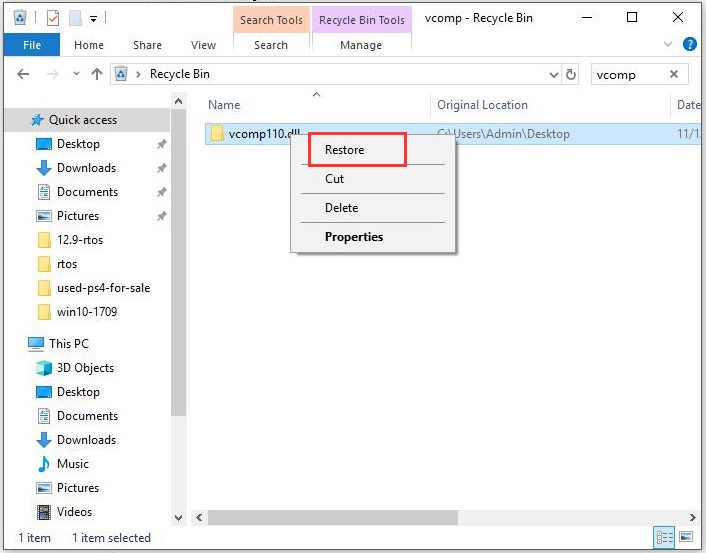
The vcomp110 dll is missing error can also occur after you delete it by accident. In this case, just restore it from the Recycle Bin.
Step 1: Double click the Recycle Bin icon on your desktop to open it.
Step 2: Find the vcomp110.dll from the Recycle Bin. The fastest way to find it is to type vcomp in the search area of Recycle. If it is deleted indeed, it will appear. Then right click on it and choose the Restore option.
If you have emptied the Recycle Bin, you can recover the missing vcomp110.dll file with a professional data recovery program. MiniTool Partition Wizard is such a tool. Its Data Recovery feature allows you to recover the data easily.
Solution 4: Install Available Windows Updates
Plenty of service packs and patches update or take the place of some of Microsoft distributed DLL files on the computer. The vcomp110.dll file might be included in one of those updates. Hence, try installing any available Windows updates to fix the vcomp110.dll error.
Check if the current system is the latest version and then install the newer version with the steps below.
Step 1: Open the Settings window by pressing Windows and I keys. Then click Update & Security icon in the main interface.
Step 2: You can see the Update status of the system in the right side of the next window. If you see “Updates are available”, then the current system is not the latest version. You need to go to the official website of Microsoft and then download and install the newest Windows version.
Tip: In some cases, you can install the latest version just by clicking Check for updates under the Windows Update section.
Solution 5: Check the Memory and Hard Drive for Errors
Hardware failure can also result in vcomp110.dll missing error. Hence, it is necessary to perform a hardware check. Among various hardware, memory and hard drive are often the sources of the fault. Now, check them by using the following steps.
Steps for Checking Memory
The Windows embedded utility – Windows Memory Diagnostic, is a free program that can help you check memory for errors. You can do that with the given steps.
Step 1: Open Windows Memory Diagnostic from the search box.
- Type mdsched or windows memory diagnostic in the search box.
- Click on Windows Memory Diagnostic under the Best match.

Step 2: If you are prompted a window to confirm the operation, click Restart now and check for problems (recommended) option.
Step 3: After that, your computer will restart automatically. When it reboots, you will see the Windows Memory Diagnostics Tool. In this window, you can view the test process and status. As it claims, the result will be displayed after you log on.

If there’s something wrong with your memory, try replacing or upgrading it by following this post.
Steps for Checking Hard Drive
If you want to check hard drive for errors, MiniTool Partition Wizard is a great choice. As a multifunctional partition manager, it enables you to wipe disk, check disk space usage, migrate OS, copy disk, recover missing data, convert MBR to GPT, etc.
You can detect bad sectors and file system errors on your hard drive with MiniTool Partition Wizard. Here are specific steps.
MiniTool Partition Wizard FreeClick to Download100%Clean & Safe
The tutorial for finding bad sectors.
Step 1: Run the MiniTool Partition Wizard to enter its main interface. Right click on the drive to test and choose Surface Test option from the pop-up menu.

Step 2: Click the Start Now button in the elevated window. Then the program will run immediately as you can see in the picture below. If there are any blocks in the scan area marked red, it indicates that there are bad sectors on your hard drive. Then you need to execute further steps.

Step 3: Run Command Prompt as administrator, and then type chkdsk f: /r and hit Enter to shield the bad sectors.
Tip: The f is the drive letter of the faulty drive, so you need to replace it with the actual one.
The tutorial for finding and fixing file system errors.
Step 1: After choosing the target drive, find and click on Check File System option in the left action panel.
Step 2: Select the Check & fix detected errors option in the next window and click Start. Then the program will fix any detected file system errors on the chosen hard drive.

Solution 6: Scan Your Computer for Virus/Malware
It is also likely that the virus or malicious software on the computer damages the DLL file and causes vcomp110.dll missing error. Therefore, you are suggested to run your anti-virus software after receiving the discussed error.
Solution 7: Repair Install System
Performing a repair install has been proven to be useful for resolving the vcomp110.dll is missing error. If you don’t have installation media, you need to get one.
Step 1: Connect your USB to the computer, and then go here and click Download tool now to get the Windows setup.

-image from microsoft.com
Step 2: Then open the downloaded file. Click Accept in the prompted window.

Step 3: Then follow the on-screen instruction to finish the process. Choose Create installation media for another PC > Next > configure language, edition, and architecture > Next > ISO file > Next > USB > Next. Wait for the finish of the process.
Tip: You should make sure that the Use the recommended options for this PC option is selected.

Step 4: Mount the ISO file with virtual clone drive.
Step 5: Double click the setup.exe from the Windows virtually loaded drive.
Step 6: Choose Download and install updates > Next > Accept. Then follow the pop-up instruction to go on.
Finally, click Keep Windows settings, personal files, and apps and the Next button in the Choose what to keep window. Then the Windows will reboot for several times during the system image is being refreshed without data loss. The vcomp110 dll is missing error can be fixed after this process finishes.
Solution 8: Clean Install Windows 10
A clean install of Windows system can help you fix the vcomp110.dll missing as well. As a clean installation means that everything on the hard drive will be erased, you need to make a backup before that.
The Copy Disk feature of MiniTool Partition Wizard enables to you back up all the data on the hard drive within a few clicks. Here’s how to do.
Tip: Before starting the operation, you need to prepare a USB that can hold all the data on the system drive.
Step 1: After installing MiniTool Partition Wizard on the computer, double click it to launch it.
Step 2: Choose the system disk and click Copy Disk in left pane. After choosing the target disk for the copied content in the elevated window, click Next.

Step 3: In this window, you can choose Copy Options and change selected partition based on your demand. Then, click Next.

Step 4: Click the Finish and Apply buttons to execute the operation.

Step 5: After that, you can reinstall Windows 10 .
Are for seeking for solutions to vcomp110 dll is missing error? Here are 8 methods for you. Pick one from them to troubleshoot the error now! Click to Tweet
Wrap up
Top 8 solutions to the error – vcomp110.dll is missing Windows 10 have been illustrated to you now. It’s time for you to make a choice. You can share your thoughts on this error with us in the comment area below. Please send us an email via [email protected] for any questions about MiniTool software.
Vcomp110.dll FAQ
How to fix vcomp110 DLL?
- Download/reinstall Visual C++ redistributable package
- Reinstall application that needs vcomp110.dll file
- Restore the vcomp110.dll file
- Install Windows latest version
- Check memory and hard drive for errors
- Perform a virus/malware scan
- Repair install Windows
- Perform a clean install
How to resolve a DLL problem?
If you encounter the error – missing DLL files in Windows 10/8/7, try fixing it with the following methods.
- Restart the computer
- Recover the deleted files with file recovery software
- Reinstall the application
- Update drivers
- Run a virus/malware scan
How to restore a DLL file?
You can restore DLL file with the steps below.
- Open Run window by pressing Windows and R keys.
- Type cmd in the window and hit OK to open the Command Prompt.
- In the prompted window, type sfc /scannow and press the Enter key.
- Wait until the finish of the scan process. After that, restart the computer. Then the DLL file will be restored.
Is it safe to delete DLL files?
Probably it is not secure to do so. If some programs share these DLL files, deleting a certain DLL file may cause issues. It means that a DLL file deletion could trigger one or more other programs to stop working correctly. Therefore, you’d better not delete an unknown DLL file.
Ошибка «vcomp110.dll отсутствует» обычно встречается, когда пользователь пытается открыть графическое приложение, например, Фотошоп, Автокад, Корел и т. д. Но в последнее время всё чаще стали возникать жалобы на то, что при недостающем файле не запускаются игры. Существует ещё одна причина возникновения error’а: C:\Windows\system32\VCOMP110.dll или не используется для работы в Windows, или повреждён. Нужно снова установить приложение, используя стандартный официальный установщик, или обратиться за помощью в службу поддержки, указанную на сайте или в окне «Помощь». Чаще всего неполадки в основном происходят из-за того, что в ОС, отображающей error, отсутствует пакет redist для Майкрософт Визуал C+ 2012 или Майкрософт Визуал C++ 2010. Хотя подавляющее большинство приложений, которые нуждаются в определённом пакете redix RedX, будут включать его в процесс установки, некоторые внешние сторонние антивирусы могут блокировать установку.

Методика устранения ошибки Vcomp110.dll.
Документ является одним из тысячи файлов Dynamic Link Library, содержащихся в различных пакетах распространения программного обеспечения Microsoft DirectX. Каждый из этих DLL-файлов содержит код, который позволяет другим программам Windows 10 и сторонним программам обращаться к ним и копировать их функциональность. Это в конечном итоге очень эффективно для системных ресурсов, поскольку несколько программ под Windows могут совместно использовать один и тот же файл одновременно. Этот конкретный файл не включён в пакеты DirectX по умолчанию, которые устанавливаются во время первоначальной загрузки Windows Windows или во время WU (Windows Update). Не соглашайтесь на загрузку отсутствующего документа vcomp110.dll с сайтов загрузки dll, которые утверждают, что предлагают быструю и безопасную альтернативу официальным каналам.
ВАЖНО. Копирование именно этого файла, скорее всего, приведёт к другой ошибке, связанной с пакетом redist DirectX, который отсутствует. Затем такие сайты будут предлагать оплаченное «исправление одним щелчком», которое волшебным образом решит все ваши dll-error.
Последствия могут быть ещё хуже, поскольку некоторые антивирусные программы обнаружили, что файлы, которые поставляются отдельно, содержат вредоносный код, предназначенный для обеспечения уязвимости системы для последующего заражения вирусами.
Как исправить ошибку
Если вы в настоящее время боретесь с этой проблемой, мы настоятельно рекомендуем вам придерживаться официальных каналов. Описанные шаги помогут исправить ошибку «vcomp110.dll отсутствует», не создавая дополнительных неприятностей. Для большинства пользователей, которые столкнулись с теми же сообщениями об ошибках, оказались эффективными два способа решения проблемы. Также мы рассмотрели другие, менее популярные методы решения ошибки. Пробуйте их по очереди, пока сообщение об ошибке не перестанет вам надоедать.
Способ 1: Установка отсутствующих распространяемых пакетов Visual C ++
Большинство пользователей, столкнувшихся с ошибкой невозможности запуска приложения, смогли исправить её через две простые установки. Этот метод включает в себя установку двух распространяемых через Visual C + пакетов, содержащих повреждённый и другие файлы, которые обычно используются графическими приложениями. Вот что вам нужно сделать:
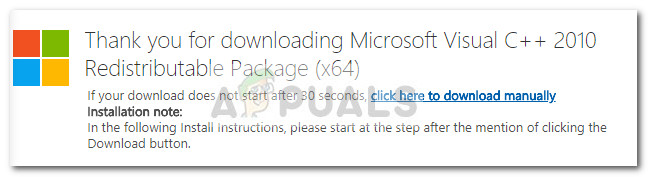
- Начнём с загрузки пакета Microsoft Visual C ++ 2010. В зависимости от архитектуры вашей ОС, скачайте с официального сайта Microsoft 32-разряднe. или 64-разрядную версию. Затем откройте установщик vcredist и следуйте инструкциям по установке дополнительного пакета DirectX в вашей системе.
ВАЖНО. Если установщик показывает, что пакет уже установлен, вместо этого нажмите кнопку «Восстановить». Это устранит любую проблему с повреждением файла.
- По завершении установки перезагрузите систему, чтобы завершить процесс.
- Теперь нужно установить Microsoft Visual C ++ 2012 Redistributable для Visual Studio 2012 Update 4 с официального сайта Microsoft. Нажмите кнопку «Загрузить», откройте программу установки и следуйте инструкциям, чтобы установить их в своей системе. Это гарантирует, что ваша система будет иметь все дополнительные файлы DirectX, которые могут потребовать сторонние приложения.

ВНИМАНИЕ. Если установщик утверждает, что пакет уже установлен, нажмите кнопку «Восстановить», чтобы все повреждённые файлы восстановились.
Способ 2. Удаление или переименование VCOMP110.dll перед его заменой
Если вы не смогли исправить проблему с использованием первого способа или при попытке установить пакеты Visual C ++ возникла ошибка, может возникнуть основная проблема с повреждением файла. Другим пользователям в подобной ситуации удалось обойти эту проблему, удалив файл вручную или переименовав его с помощью расширения .old. После того, как повреждённый файл был обработан, они смогли установить отсутствующие пакеты Visual C ++ в обычном режиме. Вот краткое руководство к этому процессу:
ВАЖНО. Имейте в виду, что есть два разных местоположения, в которых программы Windows и другие сторонние приложения будут искать файл. Чтобы этот метод был успешным, нужно провести манипуляции с обоими директориями.
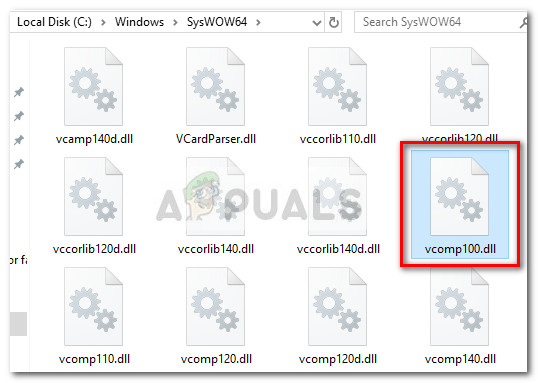
- Перейдите к C:\Windows\SysWOW64(SysWOW) и используйте функцию поиска, чтобы найти vcomp110 или прокрутите список вручную. Найдя файл, щёлкните его правой кнопкой мыши и выберите «Удалить», чтобы удалить файл из своей системы. Если файл не удаляется, щёлкните его правой кнопкой мыши и выберите «Переименовать», затем добавьте «.old» сразу после расширения. Это означает, что ваша ОС теперь будет игнорировать этот файл, поскольку он содержит старую версию – в свою очередь, это позволит вам скопировать новую копию через пакет redist.

- После первого появления ошибки перейдите в C:\Windows\System32 и используйте функцию поиска, чтобы найти файл или просто прокрутите его вручную. Как и раньше, попробуйте его удалить, и, если не удастся, переименуйте его с помощью расширения .old.
- Как только вы избавитесь от документа, замените его новыми копиями. Для этого скачайте и установите Visual C ++ с официального сайта Microsoft:
- Выполните окончательную перезагрузку. Error «vdll отсутствует» должна быть решена при следующем запуске системы.

Другие способы исправить ошибку vcomp110.dll
Если вышеописанные методы не помогли, поочерёдно выполняйте шаги, описанные ниже, пока проблема полностью не исчезнет:
Запуск антивируса
Некоторые проблемы с отсутствующим на компьютере vcomp110.dll могут быть связаны с заражением ПК вирусом или вредоносным ПО, который и повредил DLL-файл. Возможно, ошибка, которую вы видите, связана с вредоносной программой, которая маскируется как документ. Многие виды вирусов скрывают себя как не связанные с Windows и ПК проблемы, такие как нарушения работы Bluetooth, проблемы с файлами (в данном случае, vcomp110), странная активность жёсткого диска, а также другие серьёзные проблемы с Windows. Вот почему сразу нужно запустить антивирусное сканирование.

Переустановите программу
Чтобы исправить проблему, переустановите программу, которая генерирует error. В случае ошибки, когда вы запускаете определённую программу, может потребоваться переустановка указанного ПО. Переустанавливая программное обеспечение, будь то утилита повышения производительности, игра или даже офисное приложение, вы заменяете все документы программы, записи реестра и файлы, необходимые для запуска приложения. Чтобы переустановить программу наиболее подходящими средствами, вам необходимо сначала её полностью удалить.
Обновление/установка драйверов
Обновите драйверы для любого оборудования, которое может быть связано с ошибкой. Предположим, если вы получаете ошибку «отсутствует DLL» при воспроизведении звука, сразу проверьте и обновите драйвер звуковой карты. Обновление драйверов также может быть отличным способом устранения других неполадок, помимо ошибки.
Переустановка/сброс Windows
С течением времени увеличение количества документов, неправильные настройки оборудование или системы и другие переменные постепенно всё больше замедляют работу вашего компьютера. Если вы обнаружите, что часто встречаются сообщения об ошибках vcomp110.dll, и программы не работают так, как вы ожидаете, вы можете сбросить Windows до заводских настроек. Устранить проблему также может восстановление системы, если вы подозреваете, что именно обновление системы вызвало ошибку vcomp110.dll.

«Ремонт» Windows
Восстановление версии Windows на порядок проще и менее рискованно, чем сброс или переустановка Windows, поэтому для решения vcomp110.dll вы можете сначала использовать мастер восстановления Windows. Сброс ПК в Windows 10/8 весьма удобен, поскольку он перезаписывает все важные файлы, процессы, которые, как правило, устраняют проблемы vcomp110.dll, вызванные встроенными файлами Windows.
Установите обновления для Windows
Обновления Windows 10 происходят несколько раз в месяц. Вполне возможно, что некоторые изменения в операционной системе несовместимы со старой версией файла vcomp110.dll, поэтому Windows не удаётся его использовать. В этом случае может помочь установка последнего обновления Windows, предоставляя обновлённую версию файла vcomp110.dll.

Очистите реестр
Используйте бесплатный клинер реестра, чтобы устранить связанные с vcomp110.dll проблемы в реестре, исключив недопустимые записи vcomp110.dll, что могут вызывать ошибку DLL vcomp110.dll. Такие клинеры реестра особенно полезны для устранения записей реестра в файле vcomp110.dll, который больше не существует.
Проблема с оборудованием
Если вы попытались выполнить все описанные выше шаги по устранению неполадок, есть вероятность, что проблема возникла не на программном уровне, а на уровне оборудования. Обратитесь к своему системному администратору или в специализированный сервисный центр, где ваш ПК протестируют и при наличии определят существующие неполадки с оборудованием.
The error “vcomp110.dll is missing” is typically encountered when the user tries to open a graphical application such as Photoshop, AutoCAD, Corel Draw, WLXPhotoGallery and so on. However, some users are reporting getting it after a Windows game fails to open.

There is another variation of this error:
C:\Windows\system32\VCOMP110.dll is either not designed to run on Windows or it contains an error. Try installing the program again using the original installation media or contact your system administrator or the software vendor for support.
From our investigations, it seems like the errors are mostly occurring because Microsoft Visual C+ 2012 redist package or Microsoft Visual C++ 2010 redist package is missing from the system that is displaying the error.
Although the vast majority of applications that need a certain DirectX redist package will include it in the installation process, some external antivirus suite might block the installation.
What is vcomp110.dll?
The vcomp110.dll file is part of the thousands of DLL (Dynamic Link Library) files contained in the various Microsoft DirectX software distribution packages.
Each of this DLL file contains code that allows other Windows programs and 3rd party programs to call upon them and borrow their functionality. This ends up being very efficient with the system resources since multiple programs under Window can share the same DLL file at the same time.
This particular DLL file (vcomp110.dll) is not included in the default DirectX packages that get installed during the initial Windows installation or during a WU (Windows Update).
Warning: Don’t be tempted to download the individual vcomp110.dll file from DLL download sites that claim to offer a quick and safe alternative to the official channels. Copying just this DLL file will likely produce a different error related to the DirectX redist package that is missing. Some sites will then offer a paid “one-click fix” that will magically resolve all your DLL errors. It can get even worse, as some security researchers discovered that some DLL files that are hosted individually contain malicious code that is designed to leave the system vulnerable to future infections.
How to fix “vcomp110.dll is missing” error
If you’re currently struggling with this issue, we strongly encourage you to stick to the official channels. The steps below will most likely help you resolve the “vcomp110.dll is missing” issue without creating additional problems.
The two methods are confirmed to work for the majority of users that have struggled with the same error messages. Please follow the two potential fixes in order until you encounter a fix that resolves the issue in your situation.
Method 1: Installing the missing Visual C++ Redistributable packages
Most users encountering the “vcomp110.dll is missing” error have managed to fix it via two simple installations. This method involves installing the two Visual C+ Redistributable packages that contain the vcomp110.dll and other files that are commonly used by graphical applications. Here’s what you need to do:
- Let’s start by downloading the Microsoft Visual C++ 2010 Redistributable package. Depending on your OS architecture, use this link (here) for the 32-bit version or this link (here) for the 64-bit version. Then, open the vcredist installer and follow the prompts to install the optional DirectX package on your system.
 Note: If the installer shows that the package is already installed, hit the Repair button instead. This will fix any underlying corruption problem with the vcomp110.dll file.
 - Once the installation is complete, reboot your system to complete the process.
- Next, let’s install Microsoft Visual C++ 2012 Redistributable for Visual Studio 2012 Update 4 from this link (here). Hit the Download button, open the installer and follow the prompts to install it on your system. This will ensure that your system has all the optional DirectX files that 3rd party applications might ask for.
 Note: If the installers say that the package is already installed, hit the Repair button to make sure any corrupted files are replaced.
 Note: If the installer shows that the package is already installed, hit the Repair button instead. This will fix any underlying corruption problem with the vcomp110.dll file.
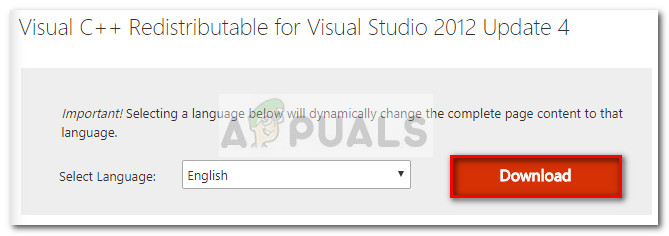 Note: If the installers say that the package is already installed, hit the Repair button to make sure any corrupted files are replaced.
Method 2: Deleting or renaming VCOMP110.dll before replacing it
If you were unable to fix the issue using Method one or a different error was triggered when you tried to install the Visual C++ packages, you might have an underlying corruption problem with the vcomp110.dll file.
Other users in a similar situation have managed to work around this problem by deleting the vcomp110.dll file manually or renaming it using the .old extension. After the corrupted file has been dealt with, they were able to install the missing Visual C++ packages normally. Heres’s a quick guide through this process:
Note: Keep in mind that there are two different locations that Windows programs and other 3rd party programs will call the vcomp110.dll file from. In order for this method to be successful, we need to deal with both occurrences.
- Navigate to C:\ Windows \ SysWOW64 (SysWOW) and either use the search function to find the vcomp110.dll or scroll manually to it. Once you find it, right-click on it and choose Delete to remove it from your system.
 Note: If the file refuses to be deleted, right-click on it and choose Rename, then add the “.old” termination right after the extension. This will signal your OS to disregard this particular file as it contains an old version – in turn, this will allow you to copy a fresh copy via the redist package later on.

- Once the first occurrence has been death with, navigate to C:\ Windows \ System32 and use the search function to find the vcomp110.dll file or simply scroll manually to it. Same as before, try to delete it and if that fails to rename it using the “.old” extension.
- Once the second vcomp110.dll occurrence has been dealt with, it’s time to replace them with fresh copies. Please install the two Visual C++ packaged using the links below:
Microsoft Visual C++ 2010 Redistributable
Microsoft Visual C++ 2012 Redistributable for Visual Studio 2012 Update 4 - Perform a final reboot. The “vcomp110.dll is missing” error should be resolved at the next restart.
 Note: If the file refuses to be deleted, right-click on it and choose Rename, then add the “.old” termination right after the extension. This will signal your OS to disregard this particular file as it contains an old version – in turn, this will allow you to copy a fresh copy via the redist package later on.
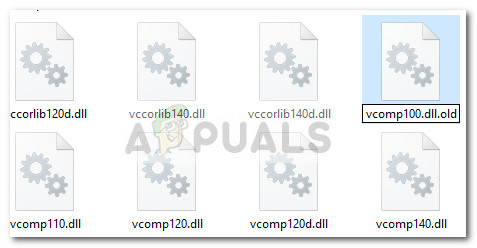

Kevin Arrows
Kevin Arrows is a highly experienced and knowledgeable technology specialist with over a decade of industry experience. He holds a Microsoft Certified Technology Specialist (MCTS) certification and has a deep passion for staying up-to-date on the latest tech developments. Kevin has written extensively on a wide range of tech-related topics, showcasing his expertise and knowledge in areas such as software development, cybersecurity, and cloud computing. His contributions to the tech field have been widely recognized and respected by his peers, and he is highly regarded for his ability to explain complex technical concepts in a clear and concise manner.