wp-cf7-log
WordPress plugin to write log messages on Contact Form 7 (CF7) submission
actions, mainly aiming to facilitate integration with fail2ban.
Overview
This is a tiny module that writes a message to syslog file ( using LOG_DAEMON
facility) on each Contact Form 7 submission.
The log message looks like:
Jul 25 22:55:28 xz wpcf7log[20374]: contact form 7 submission from 10.0.0.10
It can be matched by the fail2ban filter:
failregex = ^%(__prefix_line)scontact form 7 submission from <HOST>$
How It Works
It leverages the wpcf7_spam filter hook provided by Contact Form 7 plugin,
read more about it at:
- https://contactform7.com/2020/07/18/custom-spam-filtering/
It does not change the spam status, just prints the log message to syslog and
returns the received spam status parameter.
Installation
Deploy the folder with the plugin to your wordpress/wp-content/plugins/, then
go to the web admin interface of wordpress and enable the wp-cf7-log plugin.
The plugin can be downloaded using git:
git clone https://github.com/miconda/wp-cf7-log
Or with wget:
wget https://github.com/miconda/wp-cf7-log/archive/master.zip
unzip master.zip
mv wp-cf7-log-master wp-cf7-log
rm master.zip
Now you have the wp-cf7-log folder containing the plugin, move it to wordpress
plugins directory (e.g., /var/www/wordpress/wp-content/plugins/).
Once the plugin is activated from the web administration interface, on each
Contact Form 7 form submission, a log message is printed to syslog file.
The syslog file can be:
/var/log/syslog— for Debian/Ubuntu/… distributions/var/log/messages— for RedHat/CentOS/Fedora/.. distributions
Fail2Ban Integration
Fail2ban is a popular application that can be used to automatically block IP
addresses based on regular expression matching of log messages. The log message
has to include the IP address, then one can specify jailing rules like how
many occurrences to match and for how long to block the IP address.
No matter how many anti-spam and anti-bot layers one sets for wordpress and
contact form 7 (e.g., captcha, anti-spam, quiz, …), they can still be
worked around (e.g., by using cheap human labour for submitting via web contact
forms). A matter of what is the wordpress portal used for and the purpose of
the contact form, it may make sense to restrict the number of contact form
submissions per IP address for a defined interval of time.
Using the wp-cf7-log module together with fail2ban, one can restrict contact
form submissions using policies like: maximum 5 submissions per IP per 60 minutes,
or 1 submission per IP per 10 minutes. It is what a typical company targets
with a contact form made available for prospective customers that want to ask
details about the services and products of the company.
Note that the fail2ban integration is global per server, no matter how many
contact forms you have and how many wordpress portals are running on the same
server.
Deploy Fail2Ban Configs
In the fail2ban/ subfolder in the plugin directory are located the jail and
filter files needed to integrate with fail2ban application.
They can be deployed with the following commands:
cd wp-cf7-log
cp fail2ban/jail.d/wp-cf7-log.conf /etc/fail2ban/jail.d/
cp fail2ban/filter.d/wp-cf7-log.conf /etc/fail2ban/filter.d/
Edit /etc/fail2ban/jail.d/wp-cf7-log.conf and adjust the values to match better
your needs. It may also require the update of logpath to /var/log/messages
in case the deployment is on a RedHat/CentOS/Fedora/OpenSuse/… system.
Restart fail2ban:
systemctl restart fail2ban
The fail2ban-client status should now list the wp-cf7-log jail, like:
# fail2ban-client status
Status
|- Number of jail:	4
`- Jail list:	sshd, wp-cf7-log
Note: if the distribution does not support split jail files for fail2ban,
then just add the content of fail2ban/jail.d/wp-cf7-log.conf to
/etc/fail2ban/jail.local.
Development
The goal is to keep this module minimal, but in the future a couple of enhancements
may be added:
- web ui admin interface to set the log message content
- several log messages to print also a few more details from the submitted form
(e.g., email address of submitter, subject)
Contributions
The preferred way is to make pull requests at:
- https://github.com/miconda/wp-cf7-log/pulls
License
GPL v2.0
One sales lead is one potential customer who can stick with you in the long run. You want to make sure that you don’t lose a single one simply because you were not able to keep a list of the people who have reached out to you and have desired to do business with you.
The Contact Form 7 plugin does not automatically save the submitted messages, so for you to keep track, you will need to install Flamingo. This way, you can save the messages that your visitors and customers have sent you through your website’s contact form.
If you have not installed the Contact Form 7 plugin yet, click here to know more.
Now that you have that set up, your next step is to make sure that you have records of who has contacted you using your form, so you can make sure that every query has been responded to In any case that you have already replied to these contacts, these are counted as possible leads, as well, which you can use for your marketing campaigns.
Installing Flamingo is the same as installing any other WordPress plugin:
- Download Flamingo here.

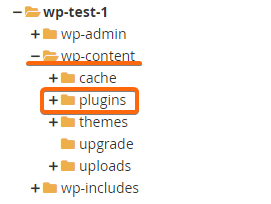
- Upload your plugin to WordPress (via File Manager) (/wp-content/plugins).

- Activate the plugin.


To test if the plugin is working, we recommend you do a test using your contact form. Use a different device or a different browser so the WordPress administrator logins will not be recognized as you enter your website. Once you have successfully sent the form, go back to WordPress and follow these steps:
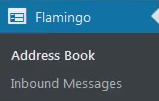
- On the left side menu, click on Flamingo.

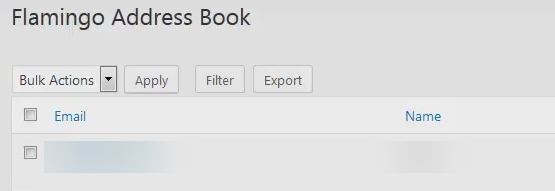
- Address Book will show/sort the messages you have received by email address:

- If you want to view your messages by subject, or by date received, select Inbound Messages.

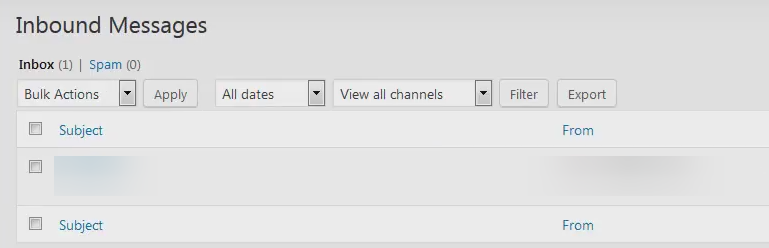
The test message you sent should be visible in these windows.
You’re good to go! Now hop on to your WordPress and get started!
Hosted with CLDY? Contact us here and we’ll help you out.
In wordpress contact form 7, i want to show different error messages for sender must fill in field like «Your name is required», «Your email is required» instead of common message Please fill the required field. for all the fields in my form,
please share here, if you have any idea.
Thanks in advance.
asked May 2, 2014 at 10:27
![]()
you can use jquery validation. You can easly implement jquery validation in contact form 7
here is sample code for jquery validation.
 $(".wpcf7-form").validate({
        rules: {
           yourname: "required",
         youremail: {
           required: true,
           email: true
          },
        },
           messages: {
            yourname: "Please include your name.",
            youremail: "Please include a valid email address.",
            yourmessage: "Please tell me how I can help you.",

        },
    });
![]()
msp
3,2977 gold badges37 silver badges49 bronze badges
answered Apr 7, 2015 at 7:45
![]()
1
PHP code,Link contact form 7
add_filter( 'wpcf7_validate_email*', 'custom_email_confirmation_validation_filter', 20, 2 );

function custom_email_confirmation_validation_filter( $result, $tag ) {
if ( 'your-email-confirm' == $tag->name ) {
    $your_email = isset( $_POST['your-email'] ) ? trim( $_POST['your-email'] ) : '';
    $your_email_confirm = isset( $_POST['your-email-confirm'] ) ? trim( $_POST['your-email-confirm'] ) : '';

    if ( $your_email != $your_email_confirm ) {
        $result->invalidate( $tag, "Are you sure this is the correct address?" );
    }
}

return $result;
}
Hope this will helps you.
answered Dec 4, 2017 at 4:48
![]()
Sunil DoraSunil Dora
1,4071 gold badge13 silver badges26 bronze badges
At the bottom of the contact form page there are a heap of settings where you can adjust which error messages are displayed in different situations.
However, I think if you wanted to show specific messages for a field that have not been filled in, you would need to dequeue the contact form 7 javascript and create your own.
wp_deregister_script( 'contact-form-7' );
Then I’d recommend copying the script into your theme, enqueing it through functions.php and adding the necessary javascript to target your specific inputs.
answered May 2, 2014 at 11:09
![]()
2
Call display: none css to your other error messages and keep only one common message
Write following code in your themes’s css file
span.wpcf7-not-valid-tip{
display:none;
}
answered May 2, 2014 at 13:11
![]()
jessicajessica
111 silver badge6 bronze badges
You can try one plugin to set your custom error message.
Once plugin activated, there is another tab at each contact form which allow admin to set custom error messages just like you mentioned in question «Your name is required», «Your email is required».
Check the plugin’s snapshot or try a demo link at plugin URL itself.
Plugin URL: https://wordpress.org/plugins/cf7-custom-validation-message/
![]()
Dharman♦
31.1k25 gold badges86 silver badges137 bronze badges
answered Jul 13, 2021 at 19:07
![]()
MohanMohan
413 bronze badges
1
Sometimes the contact form isn’t working and that’s likely to various reasons. We’re using WordPress’s built-in wp_mail() function which is the WordPress standard and issues with the Contact Form Element itself should be very rare, and instead caused by the hosting’s limitations or configuration.
Here’s a few tips how to try to debug or fix contact form issues:
1) Enable Debug mode in Contact form element#
You will need to open the contact form’s option and locate the Debug toggle eg: http://hogash.d.pr/boqI . This will help out to show the internal mail errors and will provide a better idea of what’s actually the problem.
It sometimes help to disable other plugins as they might cause conflicts.
2) As Email Sender, use “No reply” or “Custom sender”#
Some hostings are not compatible with the “Dynamic sender” option. Basically “Dynamic” means that the form will use the form’s (visitor’s) submitted email address as sender. If the visitor has submitted the form with his email address on – say – Yahoo or Gmail address, most likely it won’t work.
In order for the Dynamic as Reply Address to work, you will need to also set the email field from the contact form Fields list as “value is email”: Screenshot
The php mail() function however is problematic and doesn’t always work with this “Dynamic” method. As an alternative, you could use SMTP mail sending method. More on SMTP on the next point .3 .
3) Use SMTP:#
Because mail() is either restricted, not enabled or improperly configured, a solution is to use SMTP instead of mail(). The best plugins for this job are WP Mail SMTP or Easy WP SMTP .
4) Common error: “Could not instantiate mail function.”#
Usually caused by the Dynamic Sender option. Please see pt. 2 .
Alternatively, the option might not simply work because mail() is either restricted, not enabled or improperly configured. You can try following point 6 or point 3 .
5) Common error: “There was a problem submitting your message. Please try again.”#
First, try to see what error is actually behind this one. Please enable debug ( see pt 1 ).
6) Tips:#
You can also confirm mail problem issues by installing a separate contact form plugin such as Contact Form 7 and test sending mails with it.
7) Contact form not sending emails (issue that happens only in version 4.11.0)#
Please read this article https://my.hogash.com/documentation/contact-form-not-sending-emails-in-version-4-11-0/ .
 Make sure you run the latest theme version.#
 Make sure you run the latest theme version.#
We’re fast on solving issues and bugs! Try staying up to date with the latest theme version. Not sure if you’re running the latest version? Check the changelog here. Compare it with your version eg: http://hogash.d.pr/1lpZl .
Here’s more on updating a theme or watch a video explainer.
Alternative searches: contact form doesn’t work, contact form not sending emails, contact form error.
Do you need to solve Contact Form 7 not sending email?
Don’t worry: we have a solution for you.
In WordPress, it’s common for people to run into all kinds of issues with their forms not sending email. So in this post, we’ll show you why Contact Form 7 is no longer sending emails and what you can do to get those contact form emails working 100% reliably.
In This Article
- 1. Try Changing The From Address
- Create a New Email Address (Optional)
- Change the From Email in Contact Form 7
- 2. Set Up Contact Form 7 SMTP Settings
- Install WP Mail SMTP
- Choose Your Email Provider or SMTP Server
- Turn on Email Logging (Optional)
- FAQ on Common Contact Form 7 Errors
Fix Your Contact Form 7 Emails Now
Why Contact Form 7 Is Not Sending Emails
Contact Form 7 emails sent but not received? You aren’t alone.
Imagine this — Your website forms seem like they are functioning properly. Your form seems to work just fine, and the visitor gets a success message.
But the contact form email never ends up in your inbox.
If you’re using Contact Form 7, we’ll explain why it’s common that Contact Form 7 is not sending emails.
There are 2 main reasons:
Your Emails Are Seen As Spam
Spoof emails are similar to spam emails. Spoofing means that someone else is faking the sender address. And any emails that are suspected of spoofing rarely even make it to an inbox.
Unfortunately, Contact Form 7 sends you a notification when a form is completed by using a default or generic email as the “from” address. This is often flagged as spoofing because this email is generic and doesn’t have the right authentication. The result? Emails from Contact Form 7 going to spam!
For this reason, Contact Form 7 email notifications are commonly lost and never end up in your inbox.
Your Hosting Company Doesn’t Use the PHP Mail Function
Another reason you’re likely running into the why is Contact Form 7 not sending emails issue is because of the PHP mail function and your hosting provider.
If your web host doesn’t support the PHP mail function, (which is very common these days), that could be the reason Contact Form 7 isn’t sending email. The WordPress wp_mail() function relies on PHP mail to send emails from your site, including emails generated by contact form plugins, but many hosts disable it.
We know that people have issues with GoDaddy sending WordPress sending email for this exact reason. And some people have issues with A2 Hosting SMTP because external SMTP servers are restricted.
Even if your host does allow your site to use PHP mail, it’s a pretty lousy way to send emails. PHP mail is extremely basic, and WordPress can’t add any authentication information to the emails that it generates.
That means your Contact Form 7 emails can look like generic spam messages. So, even if you’ve configured everything correctly, it’s still very likely that your Contact Form 7 messages are going to spam.
This is why we recommend using an SMTP plugin to send emails from WordPress instead of using the default PHP mail function by itself.
So now that you’re aware of the reasons Contact Form 7 isn’t sending email, let’s take a look at how to fix the problem.
How To Fix Contact Form 7 is Not Sending Email
The first step isn’t guaranteed to work, but we recommend checking your Contact Form 7 settings anyway since it’s not a good idea to use the defaults.
Let’s take a look at that first.
1. Try Changing The From Address
By default, the Contact Form 7 From field uses a generic sender address for each form: [email protected]
This is a bad idea, because:
- Most of us never create an email mailbox or user called “WordPress,” so there’s a good chance that this sender address (From Address) doesn’t even exist.
- Using a generic or non-existent address on your contact form confuses visitors.
To fix this, you can make the emails sent from Contact Form 7 come from a real address that you control. When you get rid of the generic “WordPress” part, they will be less likely to appear spoofed. And the added benefit is that your customers will actually be able to reach you if they use this email in the future.
Create a New Email Address (Optional)
If you don’t already have a mailbox you can use as a sender, you’ll want to create one in your hosting account.
We’ll show you how to do this using Bluehost as an example.
Go to your cPanel dashboard on your web host’s website and find the Email settings.

Find the domain that you want to use with your new email account and click Manage.

On the left, you’ll want to click on the Create button to add a new email address.

On the Create an email account screen, you’ll want to set up your mailbox like this:
- Domain: Pick the domain name that matches your website
- Username: This will be the part before the @ in your email address

Then click the blue Create button to finish setting up this new email address.
Now let’s step through your Contact Form 7 settings so that emails are sent from this new mailbox.
Change the From Email in Contact Form 7
Let’s take a look at your Contact Form 7 email settings to see if they’re configured correctly.
You’ll find all your contact forms when you click Contact » Contact Forms in the sidebar.

Find the form you’re having issues with and hover your mouse over it. Click on the link that says Edit.

On the Edit Contact Form page, scroll down a little and click on the Mail tab.

On the Contact Form 7 email settings screen, change the From field to the new email address you just created in your cPanel.

Next, check that the Additional headers section says
Reply-To: [your-email]

On the contact form, [your-email] is the name of the email field. So by using this tag as the reply-to address, any replies will go to the visitor, which makes more sense than sending them to your own account.
Now, scroll all the way down and hit Save.

Unfortunately, you may not be an advanced technical person so fix #1 might not work for you, especially if this doesn’t solve the problem completely. Luckily, fix #2 provides you an option anyone can do themselves, even beginners.
So if you are serious about fixing your email deliverability issues once and for all, here’s the easiest way to fix WordPress not sending email when using Contact Form 7.
2. Set Up Contact Form 7 SMTP Settings
Next, we’re going to install the WP Mail SMTP plugin on your site.
WP Mail SMTP is the best SMTP plugin for WordPress. Instead of relying on your web hosting server to send emails, WP Mail SMTP sends them through a separate email provider.
By doing this, you’ll make sure that your emails are delivered every time. They won’t be filed as spam or silently discarded by an email server.

Sending through a 3rd party service adds important verification to the messages, so this is a crucial step, even if you already changed your From address in CF7.
There are free and paid mailer options, so you’ll easily find a service that works for you.
As you’ll see below, configuring Contact Form 7 SMTP settings is extremely easy with WP Mail SMTP.
Install WP Mail SMTP
To start, you’ll want to download the zip file from your WP Mail SMTP account. You’ll find it in the Downloads tab.

Next, open up the WordPress dashboard and upload the plugin to your WordPress site.
If you need help with this, jump over to this guide to installing a WordPress plugin.

Don’t forget to Activate the plugin. As soon as you activate it, the Setup Wizard will open.
You can also start the wizard by clicking the Launch Setup Wizard button in your WP Mail SMTP settings.
Next, we’ll set up your email provider.
Choose Your Email Provider or SMTP Server
Now let’s run the setup wizard to create the connection from your WordPress site to an email provider.
This is easy, even if you’re not a technical user.
Click the Let’s Get Started button to start connecting your WordPress site to an email provider.

In the first step, it’s time to choose your mailer. WP Mail SMTP will connect to an API to send your emails unless you choose Other SMTP, which uses regular SMTP settings.

Not sure what to pick here? We have a few tips to help you make a decision:
- SendLayer is an affordable transactional mailer that works great for small businesses. It’s super reliable and easy to set up.
- For large sites, SMTP.com or Brevo (formerly Sendinblue) are dependable options. Either of these mailers can handle large numbers of emails generated from your site.
- WP Mail SMTP supports Gmail or Google Workspace accounts. Both are great choices for small sites that don’t generate tons of emails.
- Other SMTP lets you use any SMTP server that you have access to. Some providers will limit the number of emails you can send, but this is another great option if you’re just starting out. Be sure to use the correct SMTP port if you choose this option.
- If you want to be able to send a large number of emails, it’s best to start out with the right provider. Check out this guide to transactional email providers to see full reviews of the best mailer services for WordPress.
All set? Jump to the doc for your chosen mailer to complete the set-up steps:
| Mailers available in all versions | Mailers in WP Mail SMTP Pro |
|---|---|
| SendLayer | Amazon SES |
| SMTP.com | Microsoft 365 / Outlook.com |
| Brevo | Zoho Mail |
| Google Workspace / Gmail | |
| Mailgun | |
| Postmark | |
| SendGrid | |
| SparkPost | |
| Other SMTP |
Need a hand?
Don’t forget that you can purchase the White Glove Setup service for SendLayer, Brevo, or SMTP.com when you buy WP Mail SMTP. With White Glove Setup, an expert will handle the entire connection process for you.
If you want to set up multiple mailers, you can do so in the Additional Connections settings once you’ve finished the Setup Wizard. Then you can select a Backup Connection and configure Smart Routing.
When you’ve set everything up on your email service website, come back to this guide to enable email logging on your site.
Turn on Email Logging (Optional)
At the end of the wizard, WP Mail SMTP will ask you which features to enable.
By default, 2 essential tools will already be turned on in the plugin settings:
- Improved Email Deliverability: WP Mail SMTP will route all of your messages through your new mailer
- Email Error Tracking: WP Mail SMTP will alert you if it detects problems with your DKIM, SPF, or DMARC records.
We recommend that you also turn on Detailed Email Logs and the Weekly Email Summary.

Detailed Email Logs will track your WordPress sent emails so you can easily see the status of each one in Complete Email Reports.
Even better, the Pro version also includes a helpful dashboard widget for your WordPress site. The widget shows sent and failed emails on a chart. That makes it easy to spot issues with your emails quickly. And if your mailer supports it, it’ll even show you if emails were Sent and Delivered.

Our log screen lets you search for different types of sent emails and notifications so you can quickly check the status.

The Weekly Email Summary sends a roundup of your latest email delivery stats to your inbox. You can also turn on Instant Email Alerts if you want to be notified when your site fails to send an email.
Finally, there are some advanced email logging features we recommend as well.

If these features are enabled in WP Mail SMTP, you can also:
- Save the full content of all your Contact Form 7 emails
- Resend failed emails in bulk, or forward individually to a different address
- Store Contact Form 7 attachments along with sent emails
- Track email opens and clicks for every email you send from Contact Form 7
To see more awesome features, check out this article on how to log your WordPress emails. All of the features are multisite compatible, so this is a super powerful tool!
And when you’re ready, don’t forget to head to the email reports page:

From there, you can generate awesome report charts with custom dates like this one:

Should you encounter any errors with WP Mail SMTP, don’t worry! WP Mail SMTP adds an email error log to your WordPress dashboard, which allows you to pinpoint the cause of an email issue. It also provides some context into possible solutions.
And that’s it! Now you’ve installed the most popular SMTP plugin to fix Contact Form 7 not sending emails!
Download WP Mail SMTP Now
FAQ on Common Contact Form 7 Errors
Do you have more questions on Contact Form 7 not sending email? Check out some more information on CF7 error messages and issues below.
- Does Contact Form 7 Use SMTP?
- Does Contact Form 7 Work on Localhost?
- What Email Address Do I Use in Contact Form 7 From Field?
- How Do I Connect Contact Form 7 to Gmail?
- What Does the Color of a Contact Form 7 Error Message Mean?
- The Message is Marked with a Green Border, So Why is Contact Form 7 Not Sending Email?
- How to Fix “There Was an Error Trying to Send Your Message. Please Try Again Later”
- How to Fix “Sender Email Address Does Not Belong to the Site Domain”
- How to Fix “Invalid Mailbox Syntax Is Used”
- How to Fix “Misconfiguration Leads to Mail Delivery Failure or Other Troubles. Validate Your Contact Forms Now”
- Why Is Contact Form 7 Not Sending Email to the Same Domain?
- Why Is Contact Form 7 Not Sending Email to Gmail?
- Why Is My Contact Form Stuck on the Spinning Wheel?
- Why Is Contact Form 7 Not Sending Email From Localhost?
If you’d like to browse through all of the FAQs, let’s get started.
Does Contact Form 7 Use SMTP?
No, Contact Form 7 doesn’t use SMTP by default. Instead, it sends emails through your web server, which is unreliable and can cause your contact form emails to get lost. You can install the WP Mail SMTP plugin to easily enable SMTP in Contact Form 7.
Does Contact Form 7 Work on Localhost?
Yes, WP Mail SMTP allows you to send emails via SMTP from localhost using Contact Form 7. It will only work with an SMTP plugin.
What Email Address Do I Use in Contact Form 7 From Field?
Use a valid email address that you actually have access to in your Contact Form 7 From field. The default WordPress address doesn’t have a mailbox associated with it and it’s often flagged as a spam sender by most mailing servers.
But if you use a properly authenticated email address in the From field (preferably at your own custom email domain), the chances of your Contact Form 7 emails getting rejected become close to zero.
How Do I Connect Contact Form 7 to Gmail?
You can connect Contact Form 7 to Gmail with WP Mail SMTP. We recommend using the Gmail mailer option in the Setup Wizard for the best security and features.
You can also use Gmail SMTP with the Other SMTP option in WP Mail SMTP. Note that some web hosting providers will block Gmail SMTP, so the Gmail mailer API is usually more reliable for Contact Form 7.
What Does the Color of a Contact Form 7 Error Message Mean?
Contact Form 7 has 3 color-coded error types:
- Yellow: This means your form has a validation error. For example, there might be a Required field that hasn’t been filled in.
- Orange: Your form submission has been marked as spam. This might be because of an issue with reCAPTCHA or Akismet.
- Red: The mail server failed. This often points to a hosting server problem that is causing issues with the
wp_mail()function. Try installing WP Mail SMTP to see if it fixes the issue. If it doesn’t, you’ll want to contact your host for help.
If the message is marked with a green border, keep reading.
The Message is Marked with a Green Border, So Why is Contact Form 7 Not Sending Email?
This usually means that your Contact Form 7 message has been marked as spam, or discarded on its journey from your site to the recipient. So it looks like your WordPress contact form is not working, but the email is actually in the spam folder.
This happens when the plugin configuration settings are correct, but the outgoing emails don’t have the correct authentication. It’s super common to have this problem when you’re sending emails from WordPress.
To fix this, install WP Mail SMTP as we showed you in this tutorial. WP Mail SMTP will add the right headers to your emails so that they aren’t discarded by other servers after they’re sent.
How to Fix the Contact Form 7 Error “There Was an Error Trying to Send Your Message. Please Try Again Later”
If you see the contact form 7 sending message error, it’s usually triggered by Contact Form 7’s spam protection.
By default, Contact Form 7 only supports reCAPTCHA v3. This is the strictest version of reCAPTCHA, and it’s the one that users report the most problems with.
For more flexibility, we recommend switching to WPForms Pro on your WordPress website. It lets you use a ton more methods to stop contact form spam, including:
- reCAPTCHA v2 “I am not a robot”
- reCAPTCHA v2 invisible
- reCATPCHA v3
- Akismet
- hCaptcha
- Custom CAPTCHA
- Cloudflare Turnstile
- Email allowlists and denylists
![]()
Upgrading to WPForms is worth it because it has so many extra features that Contact Form 7 doesn’t have. It’s also a lot easier to make an Elementor contact form with WPForms vs Contact Form 7.
How to Fix “Sender Email Address Does Not Belong to the Site Domain” Contact Form 7 Error
The error “Sender email address does not belong to the site domain” means that the domain in your From Email doesn’t match your website’s domain name.

You can sometimes improve email deliverability by using an email that matches the domain that the message is sent from. But the emails will still lack authentication from the server, so it probably won’t solve the problem entirely.
It’s still best to install WP Mail SMTP because this is the only way to add authentication to your WordPress emails.
How to Fix “Invalid Mailbox Syntax Is Used” Contact Form 7 Error
If you see “Invalid mailbox syntax is used,” this means you’ve made a mistake when typing in the From Email (sender address) in your Contact Form 7 Mail settings.

To fix this, check for typos and formatting mistakes in the From Email address you typed in.
How to Fix “Misconfiguration Leads to Mail Delivery Failure or Other Troubles. Validate Your Contact Forms Now”
The error “Misconfiguration leads to mail delivery failure or other troubles. Validate your contact forms now” means that you have something in your contact form settings that Contact Form 7 doesn’t allow.
Sometimes, this Contact Form 7 configuration error seems to appear for no reason. This can happen when Contact Form 7 is updated with a new validation rule.
You’ll want to go through the Mail tab carefully to address highlighted errors.
If you can’t figure out the source of the issue, it’s usually easier to switch to another free contact form plugin.
How to fix “Contact Form 7 Failed to Send Your Message”?
This error can usually be fixed by adding some form field tags in your contact form email.
To do this, click on the Mail tab and scroll down to the Message Body area. If it’s empty, then this has been known to cause errors.
You can try copying one of the form field tags from the Form tab and pasting it within the Message Body field in the Mail tab.
Make sure to wrap your tags with square brackets to avoid issues.
Why Is Contact Form 7 Not Sending Email to the Same Domain?
If Contact Form 7 is not sending email to the same domain your site’s hosted on, it’s usually an issue with one of these 2 issues:
Hosting Server Email Sending is Not Configured Correctly
You’ll want to check that your domain email is configured correctly in your hosting account, including any spam filters.
Check with your hosting provider and ask them to verify the mailserver settings on your account.
Domain’s DNS records
Your domain name needs valid MX records in order to receive email.
And to send emails with authentication, it may also need a DMARC record, 1 valid SPF record, and a DKIM record as well.
To check your domain’s DNS records for sending email, you can send a test email from WP Mail SMTP in the Test Email tab.

After sending a test email, WP Mail SMTP will report any missing records or misconfiguration in your DNS.

Why Is Contact Form 7 Not Sending Email to Gmail?
If your Gmail account is not receiving emails from Contact Form 7, this is likely because the emails don’t have any authentication. This is usually the case when WordPress is not sending email reliably.
And if you do receive emails to Gmail, they might see a warning on them, like “be careful with this message“.

You can fix Contact Form 7 not sending emails to Gmail by installing WP Mail SMTP. It’s the best SMTP plugin for Contact Form 7 because it’ll add the correct verification to your emails.
Why Is My Contact Form Stuck on the Spinning Wheel?
Sometimes, Contact Form 7 will submit, but you’ll continue to see a spinning wheel and the form doesn’t work. If you’re using Flamingo, you may also find the message is not saved.
Occasionally, this happens when there’s a new release of Contact Form 7. This can cause serious issues with existing forms.
Contact Form 7 users are normally told to disable all other plugins and switch to the default theme. This could help you to identify a conflict, but it doesn’t help you to solve the problem.
So there are 2 other things to try.
Regenerate Permalinks in WordPress
In your WordPress dashboard, head to Settings » Permalinks.

Change the Permalink structure and click Save. Then change it back to its previous setting and click Save again.
This will safely rebuild your .htacess file, which sometimes fixes issues with Contact Form 7 spinning and not sending email.
Switch to WPForms Lite
For better functionality and support, you can import your Contact Form 7 forms into WPForms Lite, which is 100% free forever.
WPForms is also a lot easier to use because it’s 100% drag and drop. So you don’t need to write code to build a form.

The support in WPForms is also awesome. Even if you choose the free version, you can access help from a team of experts on WordPress.org. You’ll always get an answer to your question within 1–3 business days.
Check out this comparison of WPForms Lite vs Contact Form 7 to learn about the extra features you’ll get when you switch!
Why Is Contact Form 7 Not Sending Email From Localhost?
The default WordPress mail functions don’t work with localhost sites. This means you won’t receive any Contact Form 7 notifications from your localhost WordPress installation.
However, there’s an easy fix to this problem. All you need is WP Mail SMTP, which reconfigures your default WordPress email settings to use an SMTP server. The result is that you can receive notifications from Contact Form 7 even with your localhosted WordPress site.
How Do I Stop Spam in Contact Form 7?
You can stop spam in Contact Form 7 using Akismet, Google reCAPTCHA, or a disallow list. However, if bots are spamming your forms, these solutions may not be enough. See this article for more ways to stop bots from spamming your forms.
Fix Your Contact Form 7 Emails Now
Next, Use a Gmail Alias With Contact Form 7
Now that you’ve installed Contact Form 7, you can use different Gmail or Google Workspace aliases to send emails from different WordPress contact forms. This is an awesome way to have different forms sending email from different teams or departments.
Check out this guide to using Gmail aliases in WordPress to find out how to set up this powerful feature.
Ready to fix your emails? Get started today with the best WordPress SMTP plugin. If you don’t have the time to fix your emails, you can get full White Glove Setup assistance as an extra purchase, and there’s a 14-day money-back guarantee for all paid plans.
If this article helped you out, please follow us on Facebook and Twitter for more WordPress tips and tutorials.