CTX101990
{{tooltipText}}
Article
|
How To / General Question
Security Vulnerability
3rd party / compatibility
|
{{likeCount}} found this helpful
|
Created:
{{articleFormattedCreatedDate}}
|
Modified:
{{articleFormattedModifiedDate}}
Symptoms or Error
Citrix Gateway, formerly Citrix NetScaler Unified Gateway
Citrix Workspace app is the new universal app for all workspace services, that will encompass all Citrix clients and app capabilities over time.
The following error messages are displayed for Receiver users accessing StoreFront or Web Interface applications:
-
«Cannot connect to the Citrix XenApp Server. SSL Error 61: You have not chosen to trust «Certificate Authority», the issuer to the server’s security certificate.»
-
«The server certificate received is not trusted (SSL Error 61)»
-
«Your app is not available. Try again later.»


Solution
Important! This article is intended for use by System Administrators. If you are experiencing this issue and you are not a System Administrator, contact your organization’s Help Desk for assistance and refer them to this article.
Update to the Latest Receiver Version
- Upgrade to the latest version of Receiver to verify if this resolves the issue.
- If you are using SHA2 certificates then the older version of Receiver does not support these certificate. Refer to CTX200114 — Citrix Receiver Support for SHA-2 to view the Receiver versions which supports SHA-2 certificates.
If this does not resolve the issue then proceed to the next section.
For information on Receiver feature updates refer to —
Citrix Receiver Feature Matrix.
Missing Root/Intermediate Certificate
This error message suggests that the client device does not have the required root certificate/intermediate certificate to establish trust with the certificate authority who issued the NetScaler Gateway server certificate.
Complete the following steps to resolve this issue:
-
Download or obtain the SSL root certificate/intermediate certificate (.crt/.cer) file issued by your SSL certificate provider.
Root certificate/intermediate certificate can be downloaded from your SSL certificate provider’s website or can be obtained on request. Usually root certificate is present in the certificate bundle provided by your SSL service provider along with intermediate and server certificates. -
Install the root certificate/intermediate certificate on the client machine.
-
If an antivirus is installed on the client machine then ensure that the antivirus trusts the certificate.
This process pairs your client machines with the server machine, and is necessary if you do not use a certificate verified by a commercial SSL certificate provider. Most commercial certificate providers arrange to have their certificates pre-installed on machines through an agreement with the operating system creator (Microsoft, Apple, and so on).

Server Certificate is Not RFC 3280 Compliant
SSL Error 61 can occur when the server certificate is not compliant with the instructions in
RFC 3280 regarding the Enhanced Key Usage field.
The system administrator might need to contact the certificate authority who sold the faulty certificate and inform them that the certificate is in violation of RFC 3280. Also ask the certificate authority to issue a new certificate that contains the following key usage value in addition to any other required values:
Server Authentication (1.3.6.1.5.5.7.3.1)
NetScaler Gateway acts as an SSL server, so Server Authentication (1.3.6.1.5.5.7.3.1) must be listed among the designated key uses if any are present. If the Extended Key Usage field is not present in the certificate, the certificate might be considered valid.
Some certificate authorities erroneously issue certificates that contain only the following key usage extensions that indicate support for Server-Gated Cryptography (SGC):
-
Unknown Key Usage (2.16.840.1.113730.4.1)
-
Unknown Key Usage (1.3.6.1.4.1.311.10.3.3)
These extensions are intended as a signal to Netscape and Internet Explorer web browsers that they should negotiate 128-bit encryption regardless of the normal capabilities of the client. They have no effect on the ICA client. When these two values are the only items listed in the Enhanced Key Usage field, the certificate is in violation of RFC 3280 and should be rejected by SSL clients seeking server authentication.
Note: Not all SGC compliant certificates are missing the Server Authentication value and not all invalid certificates are SGC compliant.
After you receive an updated certificate with the correct usage fields listed, replace the certificate on your NetScaler Gateway server using the MMC Certificates snap-in.
Additional Resources
Disclaimer
Citrix is not responsible for and does not endorse or accept any responsibility for the contents or your use of these third party Web sites. Citrix is providing these links to you only as a convenience, and the inclusion of any link does not imply endorsement by Citrix of the linked Web site. It is your responsibility to take precautions to ensure that whatever Web site you use is free of viruses or other harmful items.
by Theresa Miller
So, it was finally time to rollout SHA2 certificates for your Citrix environment. After doing so, you test your applications by launching your favorite Citrix XenApp Application. To your surprise, the application will not open and returns an SSL Error 61. Now what, what can be done to fix this issue?

Check your Trust Root or Intermediate Certificate
One of the likely causes is that the PC you are working on is missing it’s Trusted Root or Intermediate Certificate. Your certificate provider can let you know which certificate type they use. How do we make sure these are in place? This can be done manually per PC as shown in the example below, or automated per the following Microsoft article (https://technet.microsoft.com/en-us/library/cc754841.aspx). Here are the steps to update an individual PC using a Digicert root certificate. Note that these steps would be similar for most certificate providers.
————————————————————————————————
Advertisement:
Monitor/Access your virtual servers, workstations & data using Citrix XenDesktop with 24×7 support and a 99.9% uptime guarantee through CloudDesktopOnline. To know more about QuickBooks Hosting on Citrix XenDesktop, visit Apps4Rent.
————————————————————————————————
1) Open Internet Explorer go to https://www.digicert.com/digicert-root-certificates.htm
2) Download the Intermediate Certificate called “DigiCert SHA2 High Assurance Server CA” or the appropriate certificate for your environment and save your PC or a network location
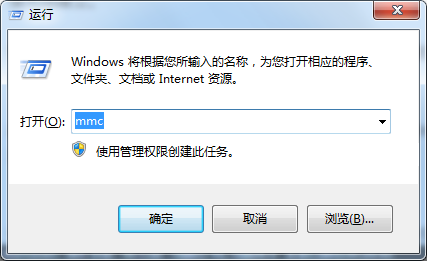
3) Go to Start, Search from your Windows 7 workstation
4) Type MMC and press enter
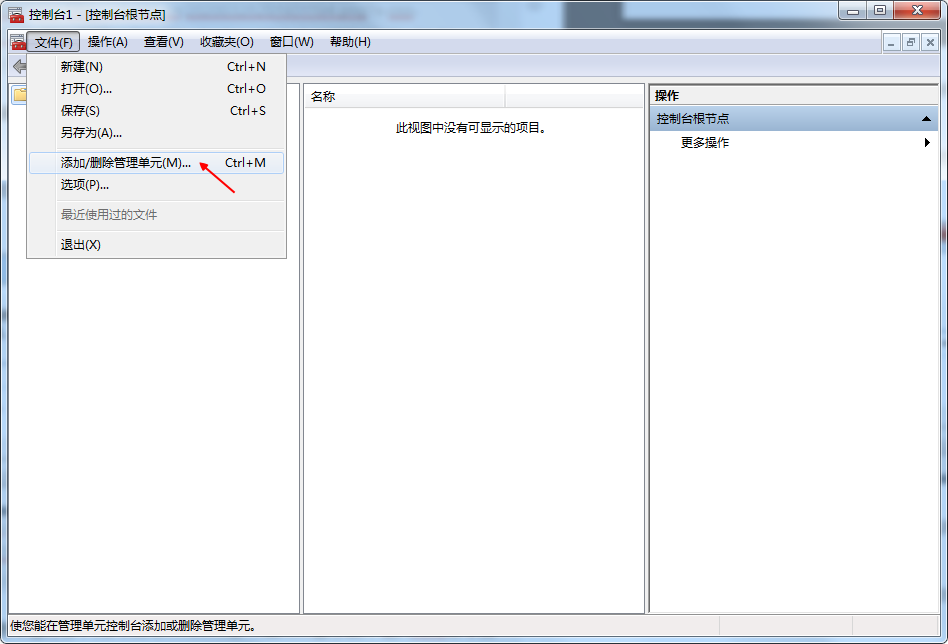
5) From the menu select, Add/Remove SnapIn
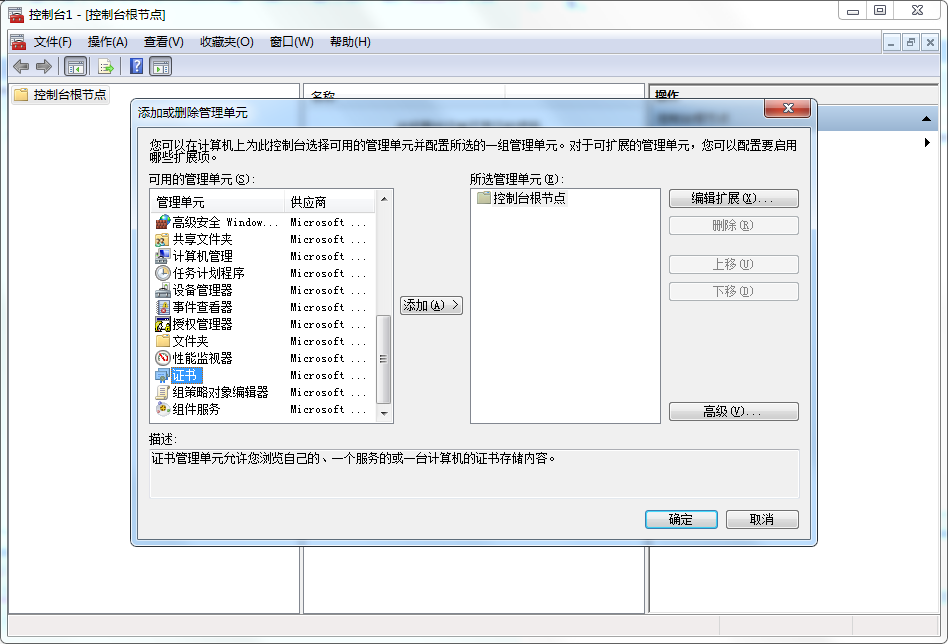
6) Select Certificates and click “Add”, then click OK
7) Choose Computer Account and click Next
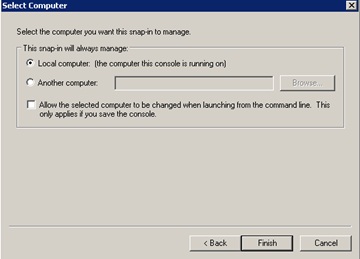
 Choose Local Computer and click finish and click OK
9) Expand Intermediate Certificates and click on Certificates.
10) Right-click on Certificates, then selectAll Tasks, and click Import

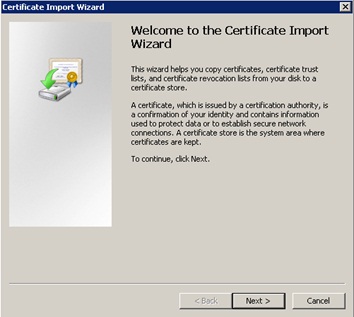
11) Click Next on the Certificate Import Wizard
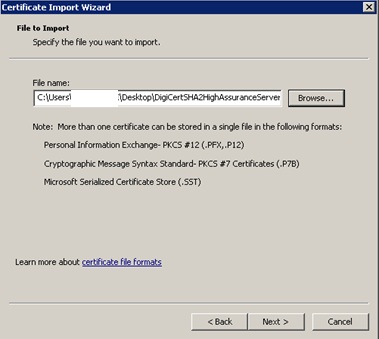
12) Click Browse and go to the location of the downloaded certificate and then click Next
[wp_ad_camp_1]
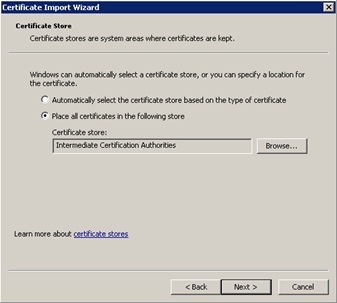
13) Click Next
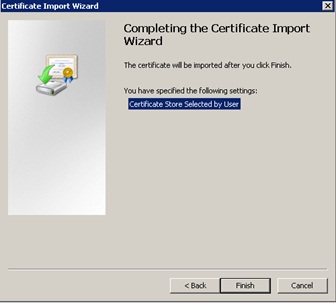
14) Click Finish
15) Test the application to verify the SSL Error 61 error has gone away
If the error didn’t go away or if the certificates were already set the way that should have been, then the next stop is to look at your version of Citrix Receiver.
Citrix Receiver
Updating to the latest Citrix Receiver version will typically resolve the issue once the certificates are in place. Here is the link to Citrix Receiver for Windows http://www.citrix.com/go/receiver.html?posit=glnav, and here is the latest version for a MAC http://www.citrix.com/downloads/citrix-receiver/mac.html
Say Goodbye to SSL Error 61!
Problem
User launches Controller-on-Cloud. User receives an error.
Symptom

Cannot connect to the Citrix XenApp server
SSL Error 61: You have not chosen to trust «DigiCert SHA2 Secure Server CA», the issuer of the server’s security certificate.
Mac:

You have not chosen to trust «DigiCert SHA2 Secure Server CA», the issuer of the server’s security certificate.
Contact your help desk for assistance.
Cause
There are several known causes of similar errors.
- TIP: For more examples, see separate IBM Technote #0738725.
This Technote specifically relates to the scenario where the cause is that the user’s client device is using an old (unsupported) Citrix client.
Resolving The Problem
Upgrade client device to the latest Citrix client (also known as ‘Citrix Receiver’ and ‘Citrix ICA client’).
TIP: At the time of writing, the current latest versions are:
- Windows = Citrix Receiver 4.11
- Mac = Citrix Receiver 12.9.1
Steps:
1. Browse to the Citrix client website
- TIP: At the time of writing, this is here: https://www.citrix.co.uk/downloads/citrix-receiver/
2. Choose your version (Windows or Mac)
- For example, at the time of writing, the latest Citrix Windows client can be downloaded from here: https://www.citrix.co.uk/downloads/citrix-receiver/windows/receiver-for-windows-latest.html
3. Click on the relevant link, for example click «Download Receiver for Windows«:

4. Run the downloaded file, and perform a default installation
5. Test.
Related Information
[{«Product»:{«code»:»SSMRTZ»,»label»:»IBM Cognos Controller on Cloud»},»Business Unit»:{«code»:»BU059″,»label»:»IBM Software w\/o TPS»},»Component»:»Not Applicable»,»Platform»:[{«code»:»PF025″,»label»:»Platform Independent»}],»Version»:»10.2;10.2.1″,»Edition»:»»,»Line of Business»:{«code»:»LOB10″,»label»:»Data and AI»}}]
Недавно при использовании Citrix Receiver для подключения возникла проблема «Невозможно подключиться, Citrix Receiver (XenApp) SSL 61 Вы не выбрали доверять издателю сертификата …». Решил эту проблему, импортировав сертификат.
Во-первых, это явление описано в этом сообщении.https://tieba.baidu.com/p/5726814088 не могу подключиться к серверу. Обратитесь к системному администратору и укажите следующую ошибку: Ошибка SSL 61: вы не выбрали доверять издателю сертификата безопасности сервера «XX CA».

Это связано с тем, что, когда система использует канал Citrix SSL для связи, сертификат, предоставляемый сервером, не регистрируется клиентом Citrix Receiver, что приводит к сбою установления соединения.
Зная, что проблему решить легче. Сначала найдите этот сертификат, вы можете спросить у администратора, или вы можете экспортировать его из других мест, где этот сертификат доступен.
В Windows выберите меню «Пуск» в поле «Найти / выполнить» (вы также можете использовать клавиши Windows + R, чтобы открыть окно «Выполнить»), введите команду mmc и нажмите Enter.
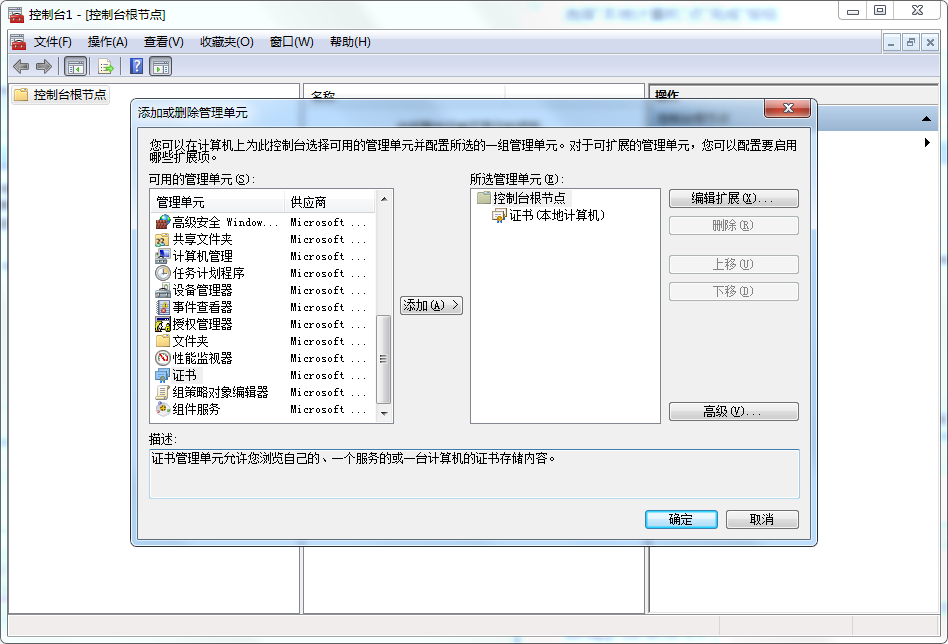
Выберите файл меню -> добавить / удалить блок управления (M) …
Выберите «Сертификат» из доступных единиц управления слева и нажмите кнопку «Добавить».
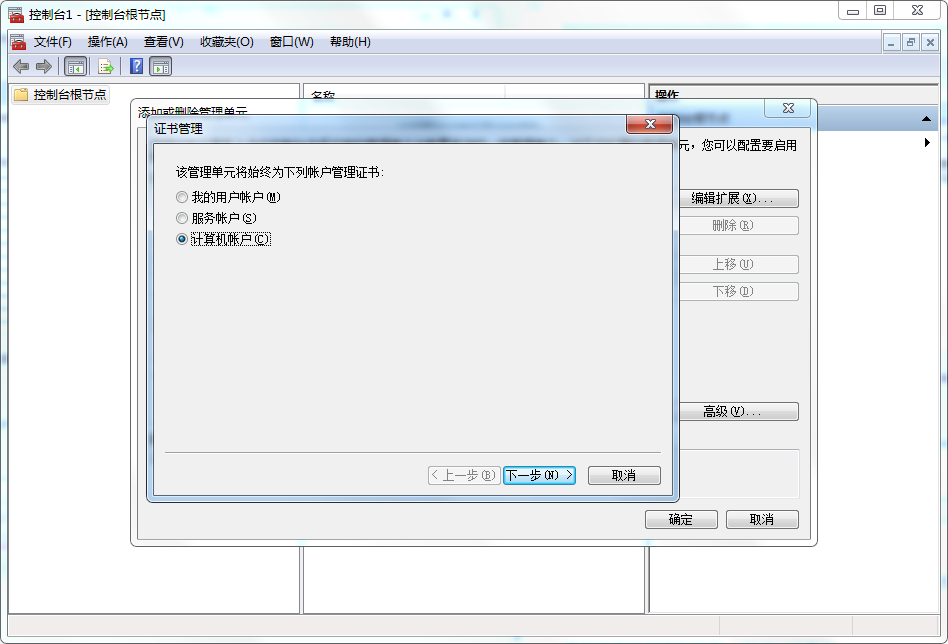
Выберите «Учетная запись компьютера» и нажмите кнопку «Далее».
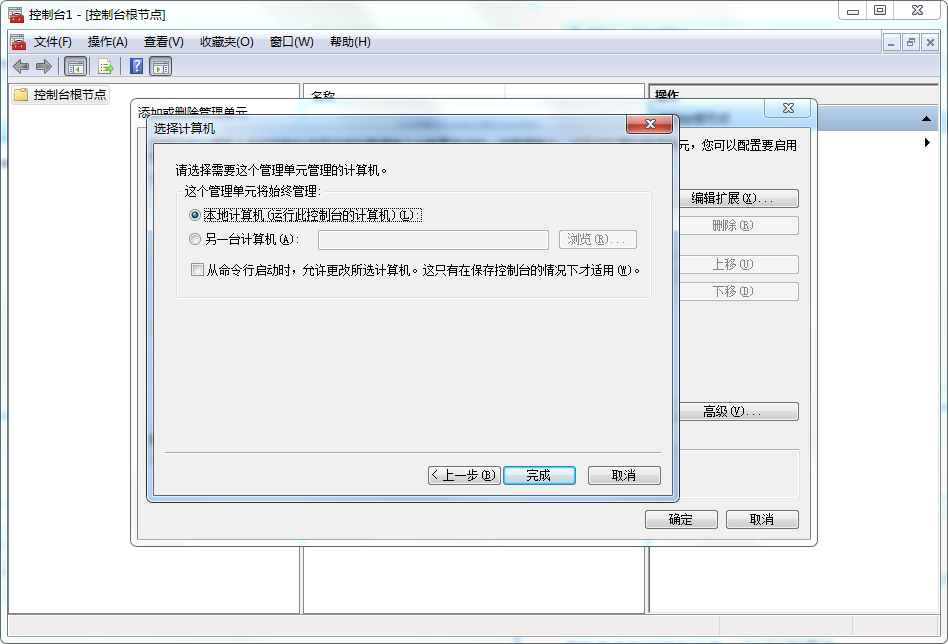
Выберите «Локальный компьютер» и нажмите кнопку «Готово».
Нажмите кнопку «Подтвердить»
В это время инициализируется консоль сертификата.

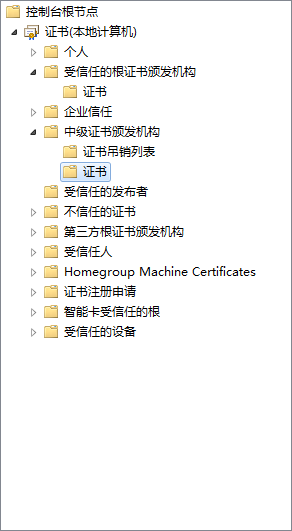
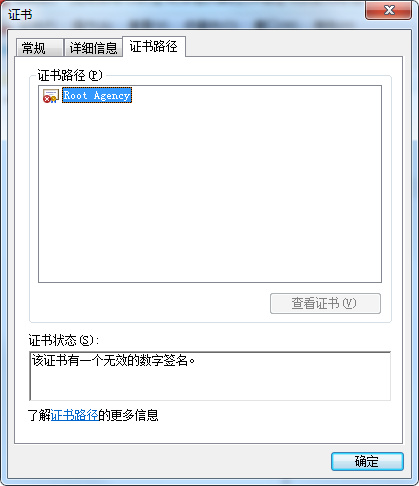
Наш сертификат обычно находится в сертификате промежуточного центра сертификации.
Вы можете выбрать имя, предложенное в приведенном выше отчете об ошибке, например это корневое агентство. Мы дважды щелкаем, чтобы открыть его на экспортированном компьютере, и открываем вкладку «Путь к сертификату», чтобы проверить действительность. Если это нормально, будет отображаться «Сертификат в порядке».
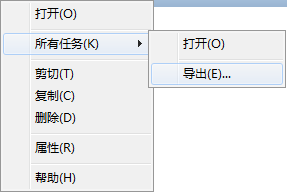
Выберите сертификат и нажмите контекстное меню, чтобы выбрать все задачи -> экспорт или выберите экспорт на панели операций.
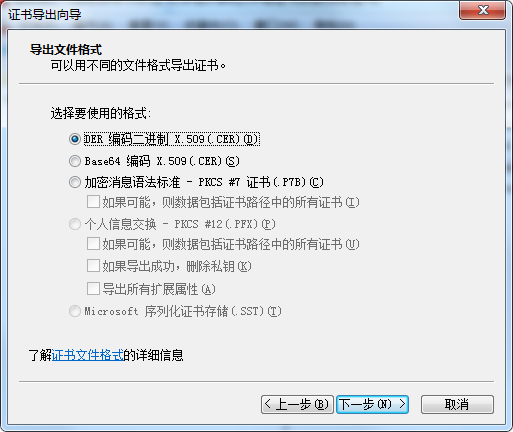
Выберите формат сертификата, например двоичный, а затем выберите имя файла для его сохранения.
На другом компьютере импортируйте его таким же образом.
Следует отметить, что только самого центра сертификации при импорте недостаточно. Эмитенту необходимо соответственно экспортировать и импортировать.

Итак, используйте тот же метод для поиска издателя целевого сертификата. Например, можно найти «Сертификаты» в разделе «Доверенные корневые центры сертификации».
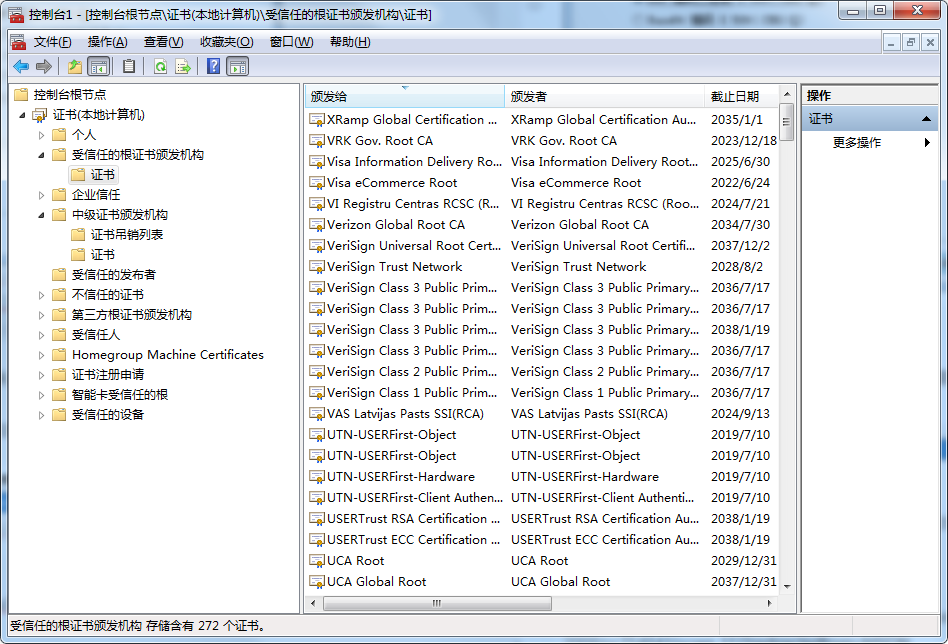
Также необходимо убедиться, что соответствующий сертификат организации также экспортируется и импортируется на компьютер, на котором работает Citrix Receiver.
На этом этапе вы можете видеть, что статус сертификата промежуточного центра сертификации, сообщившего об ошибке, уже имеет статус «с сертификатом нет проблем».
Для получения подробной информации обратитесь к этому шагуhttps://24x7itconnection.com/2015/03/10/you-can-fix-it-yes-you-can-citrix-xenapp-ssl-error-61/ 。
Официальные инструкции Microsoft здесь, но их труднее читать.
https://docs.microsoft.com/en-us/previous-versions/windows/it-pro/windows-server-2008-R2-and-2008/cc754841(v=ws.11)?redirectedfrom=MSDN
Если это версия Citrix Receiver для Linux, вы можете обратиться к следующей статье, использовать Firefox, чтобы найти соответствующий сертификат и экспортировать его в pem, затем использовать OpenSSL для преобразования в crt и, наконец, поместить его в cacerts хранилища ключей под ICAClient Citrix Receiver
https://www.cnblogs.com/kozmers/p/12346751.html
/opt/Citrix/ICAClient/keystore/cacerts$ sudo openssl x509 -in GlobalSignRootCA.crt -out GlobalSignRootCA.pem

sudo cp ~/tmp/cert/GlobalSignRootCA.crt /opt/Citrix/ICAClient/keystore/cacerts/
Solution
When a user attempts to connect to an application within Citrix, after
they have logged into the Citrix portal, they receive an error that
says, «Error SSL 61: You have chosen not to trust «QuoVadis Global SSL
ICA», the issuer of the servers security certificate.»
This error message appears because the QuoVadis Global SSL ICA
certificate has not been installed on the in the intermediate
certification authority store on each XenApp Server (formally known as
the Citrix Presentation Server). Below are the are steps that you will
need to follow in on each XenApp Server in your Citrix environment that
offers an application in the portal.
Installing the QuoVadis Global SSL ICA
These steps must be done on each XenApp Server. This also assumes that
your XenApp Servers are running in a Microsoft Windows Environment.
First you must open the Microsoft Management Console.
- Click on Start and then Run.
- In the Run window, type MMC in the Open: field and click
on OK. - Click on File at the top and then select Add/Remove
Snap-in… Alternatively, you can press Ctrl + M. - In the new window, click on the Add… button at the
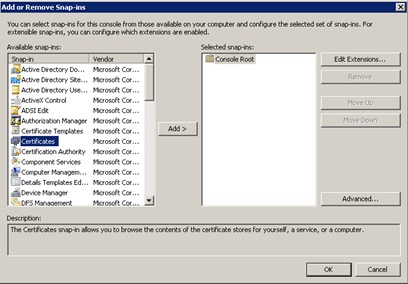
bottom. This will open a third window. - Scroll down in the Add Standalone Snap-in window and find
the Certificates component. Once found, highlight it and click
on the Add button at the bottom. Alternatively, you can double-click
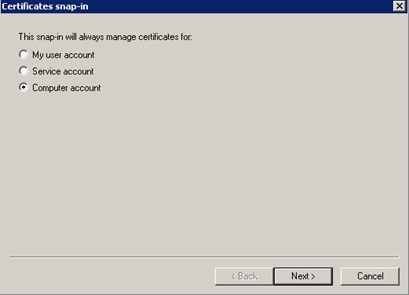
on Certificates. - Select the Computer account radio button and click on the
Next button. - At the next screen, click on the Finish button.
- Back in the Add Standalone Snap-in window, click on the Close
button. - Click on the OK button in the Add/Remove Snap-in
window. - Click on the «+» sign next to Certificates (Local Computer)
to expand it. - Locate and expand the Intermediate Certification Authorities
store and then click on the Certificates folder underneath it. - Place the certificate in a directory where they can be
accessed by the server. - Right-click on the Certificates folder underneath the Intermediate
Certification Authorities folder and in the drop-down menu, select All
Tasks and then click on Import. - The Certificate Import Wizard will appear. At the welcome
screen, click on the Next button. - You must specify the file to import. Click on the Browse…
button and find and select the QuoVadis Global SSL ICA
certificate. Once selected, it should appear in the File name:
field. Click on the Next button. - On the next screen, the option for Place all certificates in
the following store should be selected by default and in the Certificate
store: field should be Intermediate Certification Authorities.
Click on the Next button. - At the summary screen, click on the Finish button.
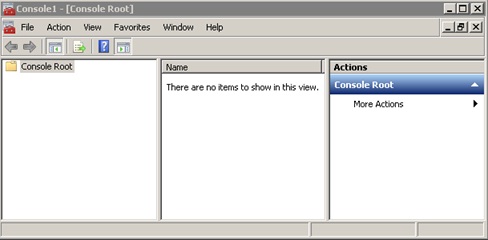
The Console1 window will appear.
In a new window, you will be given 3 options for which account you
want the certificates snap-in to manage.
You should be back in the Console1 window. You will see that
the Certificates (Local Computer) has been added on the left
hand pane.
In the right hand pane, you should see a list of certificates.
Verify that you have the QuoVadis
Global SSL ICA certificate in this list of certificate in the
right hand pane. If
you do not have this certificate installed, then the next steps will guide you through the process of
installing it.
You should get a message that reads, «The import was successful.»
Have the user retest connecting to the application in the Citrix
portal. The error should not appear. If it still does, then verify the
application they are trying to connect to and ensure that these steps
are taken for that particular XenApp Server.