Коды ошибок, актуальные для Canon imagePROGRAF iPF670, iPF605, iPF770, iPF750, iPF710, iPF650, iPF700, iPF785, iPF610, iPF765, iPF680, iPF760, iPF510, iPF780, iPF600, iPF500, iPF685, iPF720, iPF670e, iPF671, iPF671e (для картриджей PFI-102, PFI-104, PFI-107).
Check printing results
Call for service.
Call for service.
После проверки датчика деталей в сервисном меню, замените деталь, указанную в ошибке.
Проверьте загруженные данные перед повтором печати.
Проверьте количество бумаги.
Exchange for the compatible paper to HP-GL/2.
The memory is full.
Check if there is the non-image area of the print. Verify the transmitted data before reprinting.
The memory is full.
The memory is full.
The parameter is out of range.
Verify the transmitted data before reprinting.
This command is not supported.
Delete unwanted data
Delete unneeded jobs stored in Personal Boxes.
Now printing without saving data.
Delete unneeded jobs stored in Personal Boxs.
Prepare to replace the ink.
Renew the C ink tank
Prepare to replace the ink.
Renew the M ink tank.
Prepare to replace the ink.
Renew the Y ink tank.
Prepare to replace the ink.
Renew the MBK ink tank.
Prepare to replace the ink.
Renew the BK ink tank.
Replace the ink tank.
Renew the C ink tank.
Replace the ink tank.
Renew the M ink tank.
Replace the ink tank.
Renew the Y ink tank.
Replace the ink tank.
Renew the MBK ink tank.
Replace the ink tank.
Renew the BK ink tank.
Check ink tank.
Attach the C ink tank.
Check ink tank.
Attach the M ink tank.
Check ink tank.
Attach the Y ink tank.
Check ink tank.
Attach the MBK ink tank.
Check ink tank.
Attach the BK ink tank.
Check the media size check. Change the media size.
Delete unwanted data.
Press the stop button to cancel the print job. Delete print jobs from the queue.
Delete unneeded jobs stored on the hard disk.
Press Online to clear error.
Clean the printhead. Identify the nozzles in a nozzle check pattern. Replace the printhead.
Lift the release lever and reload the paper.
Check the leading end of paper. Reload the paper.
Lift the release lever and align leading edge with orange line.
Check the sheet length. Check to see if paper has not jammed.
Lift the release lever and reload the paper.
Check the right edge of paper. Check the paper type.
Lift the release lever and reload the paper.
Check the left edge of paper.
Check the paper type.
Press Online to clear the error and readjust printhead.
Check the paper on which a pattern is printed for smears. Check the environment for interferences from outside light.
Clean the printhead.
Press Online to clear the error and readjust printhead.
Check the paper on which a pattern is printed for smears. Check the environment for interferences from outside light.
Clean the printhead.
Lift the release lever and replace paper with A4/ LTR (vertical) or larger.
Replace with A4/Letter or any larger-sized paper.
Lift the release lever and replace paper with A3/ Ledger (vertical) or larger.
Replace with A3/11″x17″ or any larger-sized paper.
Lift the release lever and replace roll with 10 in. wide or larger roll.
Replace with roll media at least 10 inches in width.
Remove paper and press Load/Eject.
Remove the paper jam and reload the paper.
Lift the release lever and reload paper.
Reload the paper.
Check supported paper sizes.
Replace with larger-sized paper.
Check supported paper sizes.
Replace with smaller-sized paper.
Press Online to clear the error.
Replace with adjustable media.
Lift the release lever.
Correct the skew in the paper and reload it.
Reload paper.
Reload the paper
Press Load/Eject and reload the paper.
Reload the paper
Lift the release lever and reload the paper.
Reload the roll media.
Press Online to clear the error.
Check to see if paper has not jammed.
Press Load/Eject and load sheets.
Load cut sheets at the paper tray port.
Press OK, remove the sheets, and load a roll.
Replace with roll media.
Press Load/Eject and load a roll.
Load roll media.
Turn printer off and install roll feed unit.
Install the roll media unit.
Lift the release lever and replace the roll.
Renew the supply of roll media.
Press Load/Eject and reload the paper.
Check the type of paper that can be fed and reload the paper.
Press Load/Eject and remove the roll.
Load cut sheets at the paper tray port.
03130031-2E23
Turn off printer, wait, then turn on again.
Check the cutter unit.
03130031-2E14
Turn off printer, wait, then turn on again.
Replace the main controller PCB
03130031-2E16
Turn off printer, wait, then turn on again.
Check the mist fan.
03130031-2E17
Turn off printer, wait, then turn on again.
Check the suction fan.
03130031-2E20
Turn off printer, wait, then turn on again.
Check the purge unit.
03130031-2E22
Turn off printer, wait, then turn on again.
Check the purge unit.
03130031-2E23
Turn off printer, wait, then turn on again.
Check the purge unit.
03130031-2E25
Turn off printer, wait, then turn on again.
Check the carriage unit. Check the linear encoder for smears.
03130031-2E26
Turn off printer, wait, then turn on again.
Check the carriage unit and surrounding parts.
03130031-2E27
Turn off printer, wait, then turn on again.
Check the carriage unit and surrounding parts.
03130031-2E1F
Turn off printer, wait, then turn on again.
Check the purge unit.
03130031-2E2A
Turn off printer, wait, then turn on again.
Check the feed roller encoder and surrounding part. Check to see if paper has not jammed.
03130031-2E29
Turn off printer, wait, then turn on again.
Check the roll feed unit. Check roll media. Check to see if paper has not jammed in the printer.
03130031-2E2E
Turn off printer, wait, then turn on again.
Check the roll feed unit.
03130031-4027
Turn off printer, wait, then turn on again.
Check the carriage unit and surrounding parts.
03130031-2E13
Turn off printer, wait, then turn on again.
03130031-2F32
Turn off printer, wait, then turn on again.
Replace the multi sensor unit.
03130031-2F3A
Turn off printer, wait, then turn on again.
Check the ink supply unit.
03130031-2F3B
Turn off printer, wait, then turn on again.
Remove the ink tanks and then reload them. Check the main controller PCB.
03130031-2F70
Turn off printer, wait, then turn on again.
03130031-2F71
Turn off printer, wait, then turn on again.
03130031-2F72
Turn off printer, wait, then turn on again.
03130031-260E
Turn off printer, wait, then turn on again.
Check the carriage unit and surrounding parts. Replace the main controller PCB.
03130031-2618
Turn off printer, wait, then turn on again.
Check the power supply unit.
03130031-260F
Turn off printer, wait, then turn on again.
Turn off printer and check roll feed unit
Replace the roll feed unit.
Turn off printer, wait a while, then turn it on again.
Transmit valid ROM data.
Turn off printer, wait a while, then turn it on again.
Verify the validity of MID data before transferring it.
03130031-2F2B
Turn off printer, wait, then turn on again.
Open top cover and replace the printhead.
Replace printhead
Open top cover and replace the right printhead.
Replace printhead
Open top cover and replace the right printhead.
Replace printhead
03800500-2F40
Turn off printer, wait, then turn on again.
Проверьте блок очистки печатающей головки и окружающие детали.
Проверьте датчик управления головкой и окружающие детали.
Убедитесь, что печатающая головка установлена правильно.
Если визуально все чисто и корректно подключено, нужно пробовать:
Заменить датчик управления головкой.
Заменить главную плату контроллера.
Замените печатающую головку.
Замените каретку.
03800500-2F2F
Turn off printer, wait, then turn on again.
Замените датчик управления печатающей головкой.
Замените печатающую головку.
Identify the head management sensor unit
Replace the head management sensor unit
Replace the printhead
03800500-2F30
Turn off printer, wait, then turn on again.
Замените датчик управления печатающей головкой.
Замените печатающую головку.
Identify the head management sensor unit
Replace the head management sensor unit
Replace the printhead
Press OK and replace ink tank.
Renew the Bk ink tank
Press OK and replace ink tank.
Renew the Y ink tank
Press OK and replace ink tank.
Renew the M ink tank
Press OK and replace ink tank.
Renew the C ink tank
Press OK and replace ink tank.
Renew the MBk ink tank
Press OK and replace ink tank.
Renew the MBk ink tank
Press OK and replace ink tank.
Replace with a fully replenished Bk ink tank
Press OK and replace ink tank.
Replace with a fully replenished Y ink tank
Press OK and replace ink tank.
Replace with a fully replenished M ink tank
Press OK and replace ink tank.
Replace with a fully replenished C ink tank
Press OK and replace ink tank.
Replace with a fully replenished MBk ink tank
Press OK and replace ink tank.
Replace with a valid Bk ink tank
Press OK and replace ink tank.
Replace with a valid Y ink tank
Press OK and replace ink tank.
Replace with a valid M ink tank
Press OK and replace ink tank.
Replace with a valid C ink tank
Press OK and replace ink tank.
Replace with a valid MBk ink tank
Press OK and replace ink tank.
Replace with a valid MBk ink tank
Press OK and check ink tank.
Install a Bk ink tank
Press OK and check ink tank.
Install a Y ink tank
Press OK and check ink tank.
Install a M ink tank
Press OK and check ink tank.
Install a C ink tank
Press OK and check ink tank.
Install a MBk ink tank
Press OK and check ink tank.
Install a MBk ink tank
Turn off printer, wait a while, and turn it on again.
Close the top cover and turn on the printer again.
Turn off printer, wait a while, and turn it on again.
Close the ink tank cover and turn on the printer again.
Replace the maintenance cartridge.
Renew the maintenance cartridge.
Cartridge capacity.
Replace the maintenance cartridge.
Replace the maintenance cartridge.
Replace the maintenance cartridge.
Renew the maintenance cartridge.
Replace the maintenance cartridge.
Renew the maintenance cartridge.
Check roll position.
Online: Print Load/Eject:
Change Paper
Check to see if a borderless printing spacer is installed. Reload the paper.
Check paper size setting.
Online: Print
Load/Eject: Change Paper
Check the paper size. Change the paper size.
Online: Print
Stop: Stop Printing
Load/Eject: Change Paper
Renew the supply of roll media.
Lift the release lever and reload the paper.
Cut paper manually. Check the cutter.
Press Online to clear the error.
Check the multi sensor.
Check the head management sensor.
Online: Print
Stop: Stop Printing
Load/Eject: Change Paper
Exchange for the compatible paper to HP-GL/2 before reprinting.
Delete unwanted data on your computer to resume printing.
Press Stop to cancel printing.
Delete unneeded jobs stored in Personal Boxes.
Cannot save. Delete unwanted data on your computer to resume printing.
Press Stop to cancel printing.
Press OK to reformat
Press the [OK] button to start reformatting the hard disk. When formatting is finished, the printer automatically restarts.
Turn off printer, wait a while, and turn it on again.
Invalid files will be deleted.
Restart the printer. Only the corrupted files will be deleted, and the printer will restart.
Turn off printer, wait, then turn on again.
Check the head management sensor. Replace the head management sensor. Replace the printhead.
Turn off printer, wait, then turn on again.
Check the pinch roller and surrounding part. Replace the pinch roller pressure drive unit.
Install printhead.
Install the printhead.
Replace the printhead.
Check the maintenance cartridge.
Install the maintenance cartridge.
Lift the release lever and reload the paper.
Check the cutter unit and surrounding part. Replace the cutter.
Renew the supply of roll media.
Manually rewind roll all the way and press OK.
Check the pick-up unit and roll media. Check to see if paper has not jammed.
Load cut sheets at the paper tray port.
Check the media size. Change the media size.
Confirm usage cond. of the paper.
Reload the paper.
Reload the roll media.
Добрый день. Сегодня расскажем об ошибке «Прочистите печатающую головку. Если вы ещё видите это сообщение, то замените ее» на плоттерах Canon iPF.
Почему появляется это сообщение?
- неисправна печатающая головка
- неисправна оптопара
Плоттеры серии iPF определяют состояние головки с помощью оптопары в специальной камере, через которую при тестировании поочередно подаются чернила каждого цвета. Чернила перекрывают световой поток оптопары, фототранзистор «закрывается». Контроллер плоттера получает разрешающий сигнал для завершения тестирования остальных узлов. Если один из элементов оптопары (чаще фототранзистор) вышел из строя, такого сигнала плоттер не получит и будет думать, что чернила не проходят через дюзы печатающей головки.

Как узнать в чем проблема: в оптопаре или в головке?
Нужно войти в сервисный режим (в этом режиме отключается тестирование с помощью оптопары):
1. Выключаем плоттер.
2. Нажимаем и удерживаем кнопки [Load] и [Navigate], включаем плоттер.
3. В правом верхнем углу дисплея появится надпись «S«. Кнопки [Load] и [Navigate] можно отпустить.
4. С помощью стрелок выбираем «Set./Adj. Menu» и нажмаем [OK]. В списке меню появится «SERVICE MODE«.
5. С помощью стрелок выбираем «SERVICE MODE» и нажимаем [OK].

В сервисном режиме нужно задать опцию проверки дюз, сделать распечатку.
ADJUST -> PRINT PATTERN -> NOZZLE 1, NOZZLE 2, NOZZLE 3
Если печатают все дюзы — головка исправна, проблема в оптопаре.

Мы старались объяснить как можно понятнее.
Go в комментарии задавать вопросы и делиться опытом!
Сброс (перепрошивка) печатающей головки CANON PF-04 (Код: pF001281)
Сброс (программное восстановление) печатающей головки CANON PF-04
- Ресурс ПГ PF-04 ограничен программно, из-за чего их требуется регулярно менять на новые. Возникают ситуации когда плоттер вносит в память головки маркер о невозможности использования печатающей головки по причинам окончания ресурса, перегрева или выхода из строя контроллеров и шин печатающей головки, некачественного формирования облака чернил, сбоя передачи данных при записи в EEPROM или его неисправности. В этом случае можно произвести сброс данной записи, но плоттер помнит серийный номер головки и её состояние в своей памяти, что приводит к необходимости просто изменить серийный номер головки прописав его в памяти головки. Плоттер определит данную головку как новую и запустит процедуры инициализации головки.
На этом этапе можно понять (диагностировать) что именно случилось.
1. Если принтер проигнорировал головку и сразу указал на замену, то есть не запустил процедуры прокачки — значит были обнаружены критические ошибки типа короткого замыкания и просадка напряжений, такая головка подлежит только замене и ни какие манипуляции не помогут.
2. Если же принтер запустил процедуры прокачки и теста облака (они обычно занимают много времени 15-30 минут), но по окончании процедур указал на необходимость замены головки — это означает, что головка засорена и её необходимо чистить, промывать и т.д.
3. Иначе — вам повезло (принтер принял головку и вышел в готовность).Так же Сброс печатающей головки в некоторых случаях устраняет возникающие сообщения об ошибках типа проблемы памяти, эти проблемы решаются и обнаруживаются при программировании в нашем центре, путем замены микросхемы памяти.
- Звоните нам по телефону в Москве +7(985) 432-31-30.
- Компания осуществляет ЛЬГОТНЫЙ выезд специалиста в офис или на дом в районы: Солнцево-Парк, град Московский, Саларьево, Румянцево, Изварино, Марьино, Марушкино, Птичное, Солнцево, Переделкино, Ново-Переделкино, Западный, см. Доставка.
Описание
| Вид операции | |
| Изменение серийного номера головки | |
| Запись нового дампа в память головки | |
| Проверка записи |
Характеристики
| Совместимость головки PF03 |
imagePROGRAF iPF650, iPF655, iPF680, iPF685, iPF750, iPF755, iPF760, iPF765, iPF770, iPF780, iPF785 |
||
Мы принимаем к оплате как наличный, так и безналичный способы расчетов.
Цены
|
4 pcs. |
— | 9 pcs. |
1150 RUB / pcs. |
|
от 10 pcs. |
1089 RUB / pcs. |
Цена:
1210 RUB
плюс доставка
Количество на складе:
Неограничено
Зарегистрируйтесь, чтобы создать отзыв.
Webseite www.webdesigner-profi.de
Технологический картридж или картридж отработки (памперс) для плоттера Canon собирает чернила после прочистки сопел. Ёмкость этого картриджа не бездонная — абсорбирующий материал в картридже может удержать только определенное кол-во чернил. И для того, чтобы “памперс” не переполнился, и чернила не потекли из картриджа наружу, на нём устанавлен специальный чип, связанный с программным счётчиком.
После определённого количества прочисток печатающей головки, счётчик срабатывает и записывает в чип иинформацию, которая блокирует дальнейшую печать. Часто это случается в самый неподходящий момент, когда осталось допечатать всего ничего. Как раз на такой случай предусмотрена возможность обнуления чипа памперса.
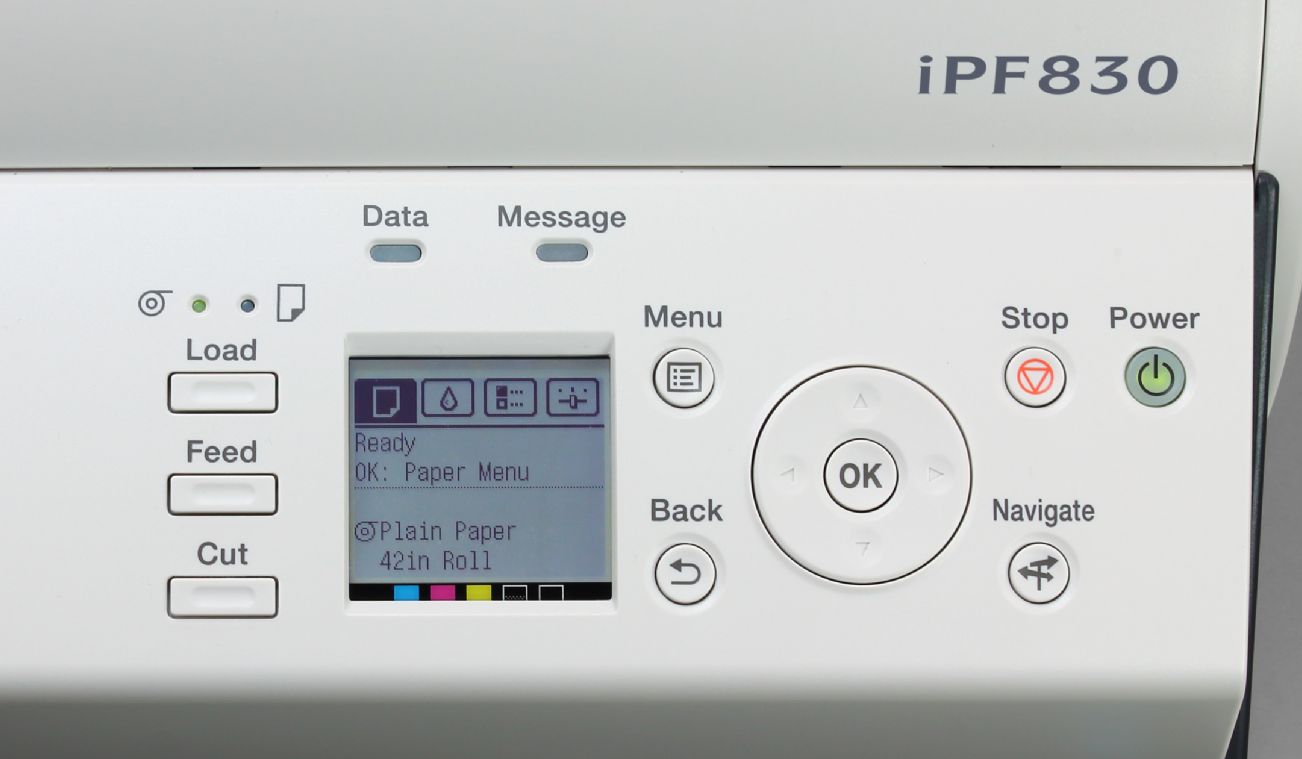
Для струйных плоттеров Canon imagePROGRAF серии iPF605, iPF750, iPF710, iPF760, iPF765, iPF610, iPF700, iPF650, iPF510, iPF6300, iPF755, iPF6300s, PF600, iPF6350, iPF500, iPF655, iPF6400/SE, iPF780, iPF785, iPF680, iPF670, iPF770, iPF685 обнуление счётчика производится через “сервисный режим” (Service Mode) в который можно войти через панель управления плоттера.
Инструкция подходит для емкостей с отработанными чернилами:
- Canon MC-10 1320B014
- Canon MC-16 1320B010
- Canon MC-05 1320B003
- Canon MC-07 1320B008
- Canon MC-08 1320B006
- Canon MC-09 1320B012
Порядок действий для сброса чипа памперса:
- Выключите плоттер.
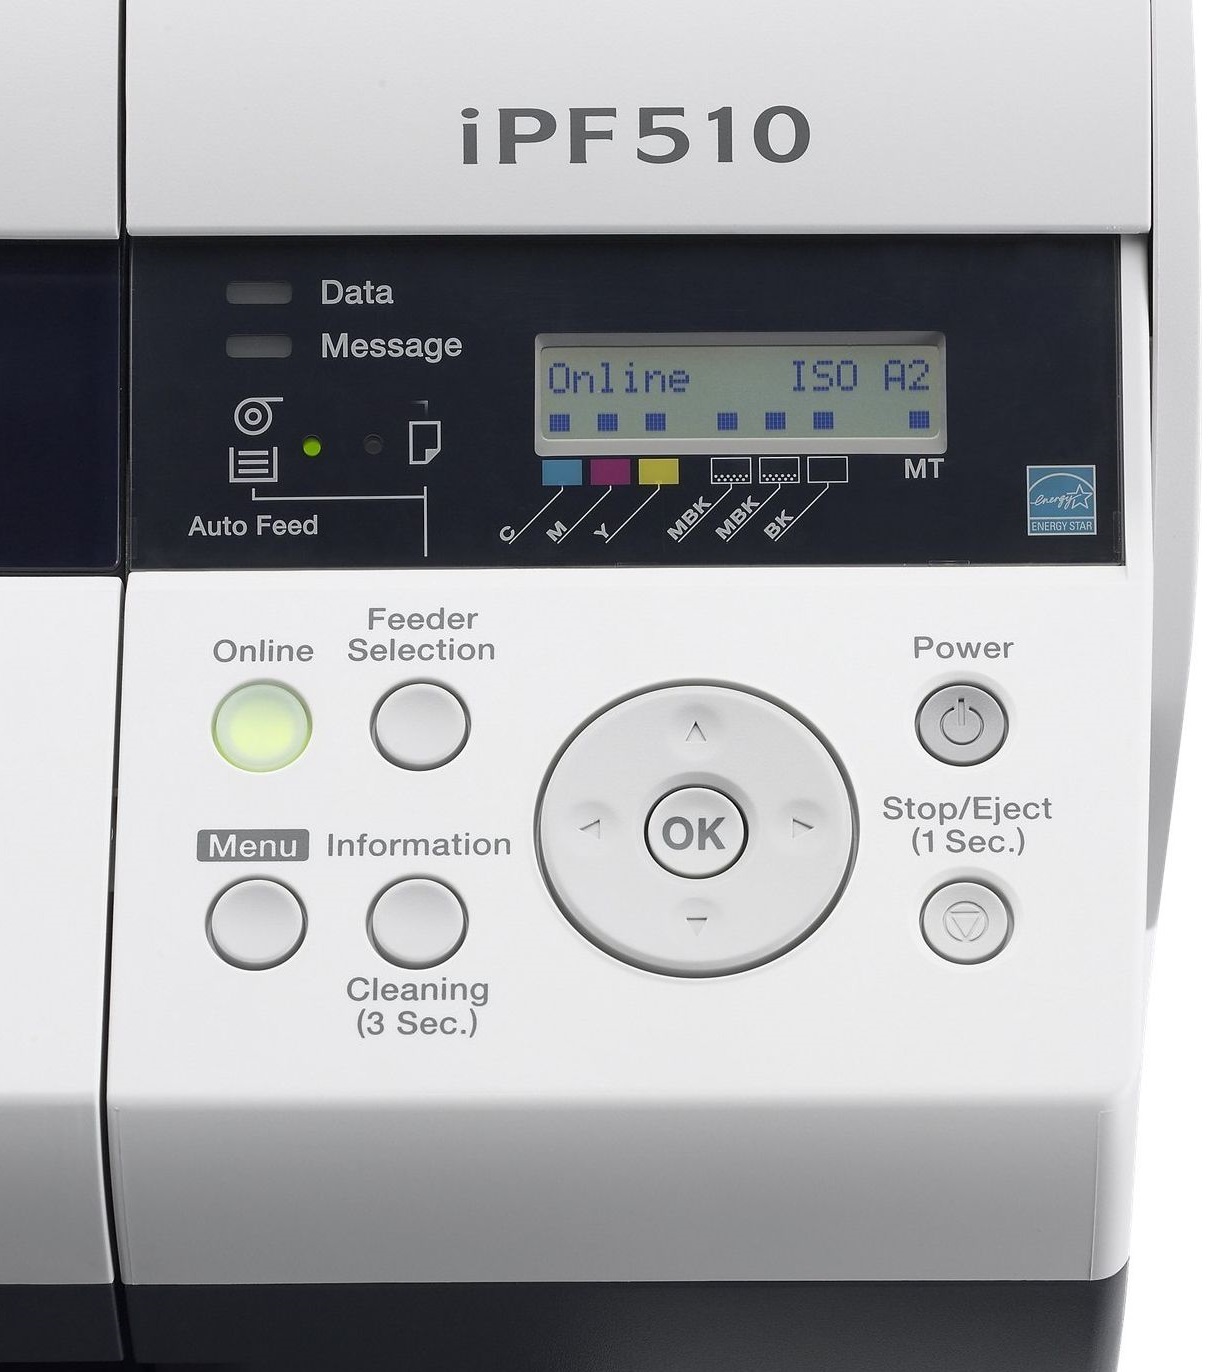
- Зажав кнопки Feeder Selection и Information включите плоттер (если на панели нет данных кнопок, следует зажимать Load и Feed). Удерживайте обе кнопки пока на мониторе в верхнем левом углу не появится символ “S”. В меню при этом должна появится новая категория “Service Mode”.
- Прокрутите курсор меню до пункта “Service Mode” и нажмите “ОК”.
- Нажимайте стрелку ВПРАВО пока не появится “Initialize”.
- Нажмите стрелку ВНИЗ.
- Снова нажимайте стрелку ВПРАВО пока не появится “W-INK” и нажмите ОК. На дисплее на пол секунды появится “=W-INK”.
- Нажимайте стрелку ВВЕРХ пока не вернетесь в главное меню. Нажимайте “Information” пока не дойдете до информации о доступном объеме картриджа отработки (“памперса”). Покажет 100% (т.е. “памперс” пуст).
- Чтобы сохранить настройки выключите плоттер.
- Включите плоттер и проверьте показания чипа “памперса”. Если все действия были выполнены верно чип покажет 100%.
Внимание! В моделях плоттеров Canon imagePROGRAF старше 750-й серии на панели управления нет кнопок «Feeder Selection» и «Information«. Вместо них следует использовать «Load» и «Feed«.

Стоит понимать, что все действия в сервисном режиме пользователь производит на свой страх и риск! Сброс параметров и настроек может стать причиной отказа от гарантийного обслуживания. Поэтому мы рекомендуем в крайних случаях использовать специальные чипы для сброса — Чип для емкости с отработанными чернилами к Canon imagePROGRAF iPF605, iPF670, iPF750, iPF770, iPF710, iPF825, iPF6400S, iPF650, iPF610, iPF785, iPF815, iPF780, iPF6400, iPF755, iPF760, W8400, не обнуляемый, одноразовый. Такой чип позволит Вам съэкономить и не потерять гарантию.
Также мы настоятельно рекомендуем следить за физической заполненостью “памперса” и ни в коем случае допускать его переполнения.
Заказать новый технологический картридж или расходные материалы для своего плоттера Вы можете в нашей компании:
- Картриджи для широкоформатных плоттеров Canon