Содержание
- 1 Вступление
- 2 Возможности программы
- 3 Требования к компьютеру
- 4 Ошибки при установке и запуске
- 4.1 Failed to install BlueStacks
- 4.2 BlueStacks Frontend has stopped working
- 4.3 BlueStacks the application failed to initialize properly (0xc0000135)
- 4.4 [RPC:S -7:AEC-0]
- 4.5 Requesting graphics APIs that are not available on your system
- 4.6 1406
- 4.7 1714
- 4.8 25000
- 4.9 25010
- 4.10 Бесконечная загрузка
- 4.11 Блокировка антивирусом или файерволом
- 5 Заключение
Вступление
Индустрия мобильных приложений достигла такого высокого уровня, что в последнее время некоторые программное обеспечение существуют лишь для мобильных платформ Android и iOS. Если пользователи последнего не испытывают проблем с мощностью устройства, так как весь софт изначально оптимизируется под него, то владельцы Android могут столкнуться с тем, что любимая игра или приложение отказывается работать из-за недостаточной мощности или нехватки памяти, а также устаревшей версии операционной системы.

Популярность и открытость Android позволяет устанавливать его даже на самые бюджетные аппараты. Далеко не каждый готов заплатить большую сумму за мощный девайс лишь из-за возможности играть в современные игры. Вот почему существуют различные эмуляторы операционной системы, позволяющие запускать мобильные программы на компьютере. Кроме того, программа будет полезной для желающих протестировать мобильное приложение перед установкой на устройство.
Одним из наиболее известных является симулятор BlueStacks. Он имеет большие возможности, но при этом многие геймеры жалуются на некорректную работу и множество ошибок при установке и авторизации. Рассмотрим популярные ошибки в работе программы, а также что делать, если BlueStacks не устанавливается либо не запускается.
Возможности программы
Утилита BlueStacks доступна для скачивания с сайта http://www.bluestacks.com/ru/index.html. Ресурс глобальной сети доступен на русском языке. По словам разработчиков, BlueStacks позволяет использовать на компьютере любые мобильные приложения, в том числе и игры, а благодаря синхронизации, даже звонить и отправлять СМС. Все данные надёжно хранятся на случай аварийного завершения работы.

С эмулятором совместимы 96% приложений и 86% игр, можно использовать камеру, сенсорный экран, присутствует функция переноса файлов между Windows и Android, работа заточена под использование мыши и клавиатуры. Кроме того, можно получить права суперпользователя и запустить приложения в полноэкранном режиме. По всем показателям этот симулятор является лучшим на сегодняшний день.
Требования к компьютеру
Ваш компьютер должен соответствовать минимальным требованиям. Если не соблюдаются все условия, шанс получить ошибку значительно увеличивается.
- Программа работает на версиях Windows XP и выше, а также Mac OS X.
- Центральный процессор должен быть частотой не менее 2 ГГц и иметь поддержку технологии виртуализации Intel или AMD. Этот режим включается через BIOS. Если там доступен пункт Virtual, Virtualization или подобное название, вы сможете нормально пользоваться BlueStacks. Большинство современных процессоров поддерживают эту технологию.
- Для запуска приложений потребуется минимум 1 ГБ ОЗУ, при этом если вы хотите запускать игры, лучше, чтобы на компьютере было от 2 гигабайт памяти.
- Для установки потребуется 1 ГБ свободного места на жёстком диске.
Если ваш компьютер не древний калькулятор, наверняка его мощности хватит для полноценной работы BlueStacks.
Ошибки при установке и запуске
Failed to install BlueStacks
Ошибка происходит при попытке установить программу. Для исправления попробуйте, пожалуйста, удалить BlueStacks при помощи Revo Uninstaller. Кроме того, нужно удалить следы программы с таких каталогов:
C:\ProgramData\BlueStacks
C:\Program Files\BlueStacks
C:\Users\\AppData\Local\BlueStacks
При использовании Revo Uninstaller кликните по папке правой кнопкой мыши и выберите «Удалить с помощью Revo Uninstaller».

BlueStacks Frontend has stopped working
Обычно возникают на компьютерах, на которых не установлены все обновления системы. Если эмулятор не запускается, войдите в Центр обновления и установите последние обновления системы. И, вообще, желательно это делать регулярно.

BlueStacks the application failed to initialize properly (0xc0000135)
Попробуйте, пожалуйста, скачать последнюю версию программы с официального сайта.

[RPC:S -7:AEC-0]
Ошибка возникает при сбое синхронизации с учётной записью Google. В случае если прога не запускается:
- В меню BlueStacks откройте Настройки — Дополнительные параметры — Приложения — Все.
- В Google Play Маrket, Google Services Framework и Сервисы Google Play по очереди кликните «Остановить», «Стереть данные», «Удалить обновления».
- Настройки — Дополнительные параметры — Google, снимите все галочки с приложений для синхронизации.
- Перезапустите BlueStacks.
- Возвратитесь обратно в последний пункт и активируйте все пункты по новой.
- Повторно перезагрузите программу.
![Популярная ситуация [RPC:S -7:AEC-0]](https://protabletpc.ru/wp-content/uploads/2016/02/RPC-S-7-AEC-0-error.jpg "Популярная ситуация [RPC:S -7:AEC-0]")
Requesting graphics APIs that are not available on your system
Перейдите в Редактор реестра, нажав Win+R — regedit. В разделе HKEY_LOCAL_MACHINE\SOFTWARE\BlueStacks\Guests\Android\Config задайте параметр GlRenderMode = 1, после чего выйдите с редактора реестра и перезапустите эмулятор.

1406

Запустите инсталлятор BlueStacks от имени администратора.
Отключите антивирус.
Очистите системный реестр. Для этого попробуйте, пожалуйста, удалить программу через Revo Uninstaller. Если не помогает, войдите в Редактор реестра, в поиске введите BlueStacks и удалите связанные записи, которые остались. После этого установите программу по новой.
1714
Ошибка происходит при установке новой версии программы, чему препятствуют следы версии предыдущей. Для этого рекомендуем почистить реестр с помощью CCleaner, а также удалить программы при помощи Revo Uninstaller.
")
25000
Довольно популярная ошибка 25000 вещает о том, что программа не может распознать вашу видеокарту, поскольку в вашей системе установлены неактуальные видеодрайверы. Чтобы убрать ошибку 25000, нужно обновить драйвер. Если вы не помните модель видеоадаптера, в Диспетчере устройств найдите, пожалуйста, раздел Видеоадаптеры, в котором отображаются установленные видеокарты. Вероятнее всего, у вас стоит видеокарта nVidia, ATI или Intel. В поисковой системе введите соответствующий запрос, перейдите на сайт разработчика и загрузите последнюю версию. После обновления ошибка 25000 исчезнет. И, вообще, желательно следить за актуальностью драйверов видео.

Кроме того, ошибка 25000 может появляться на компьютерах, работающих с двумя видеокартами: одной встроенной, а другой — дискретной. Встроенная видеокарта вряд ли полностью соответствует всем системным требованиям, но по умолчанию запускаться может именно она. Нужно перейти в панель управления видеокартой и настроить запуск дискретной видеокарты в конкретном приложении.
В Панели управления nVidia перейдите в Параметры 3D — Управление параметрами 3D — Глобальные параметры. Активируйте «Высокоскоростной процессор NVIDIA», а во вкладке «Установка конфигурации PhysX» выберите дискретную видеокарту. Примените изменения и перезагрузите компьютер. Ошибки 25000 в дальнейшем быть не должно.
Если видеокарта AMD, запустите утилиту «Настройка Radeon» — Настройки — Дополнительные настройки. В открывшемся новом окне в разделе «Питание» выберите «Параметры приложения переключаемой графики» и присвойте запуск видеокарты AMD с программой BlueStacks.
25010
Эта ошибка отображается, когда процессор не соответствует требованиям программы. Проблема в железе, решить её можно лишь покупкой нового оборудования. На худой конец, попробуйте, пожалуйста, поискать версию для слабых компьютеров.

Бесконечная загрузка
Чаще всего ошибка происходит при авторизации, когда в момент запуска свободно менее 1 ГБ оперативной памяти. Программе просто не хватает ресурсов, поэтому она и не запускается. Через диспетчер задач позакрывайте, пожалуйста, неиспользуемые программы и службы, занимающие оперативную память.

Ещё можно попробовать закрыть программу через значок в системном трее: в Панели управления необходимо перейти в раздел Администрирование — Службы и перезапустить BlueStacks Android Service и BlueStacks Log Rotator Service. Проблема должна исчезнуть.
Блокировка антивирусом или файерволом
Эта известная проблема возникает не только с BlueStacks. Советуем на момент установки отключить антивирус, а затем в настройках добавить папку программы в исключения.
Заключение
Вот мы и разобрались со всеми более или менее часто встречающимися неполадками в работе эмулятора BlueStacks, появляющихся при установке и авторизации. В очень редких случаях могут возникать и другие проблемы, но они единичные, поэтому решать их нужно в индивидуальном порядке.
Мы надеемся, что наш материал вам помог, и вы смогли решить свою проблему. Будем вам благодарны за оставленные в комментариях отзывы.
Every solution here is recommended by BlueStacks
by Milan Stanojevic
Milan has been enthusiastic about technology ever since his childhood days, and this led him to take interest in all PC-related technologies. He’s a PC enthusiast and he… read more
Updated on
- BlueStacks is a popular emulator but many reported that it’s not installing and throwing errors.
- In most cases, it’s a corrupt installer, conflicting apps, or the temporary files to blame.
- To fix things, run the installer in compatibility mode or use the dedicated uninstaller, amongst other solutions.
BlueStacks is one of the best emulators for Windows and allows users to run apps developed for Android. But many reported that BlueStacks is not installing, a problem that’s affected a large bunch of users.
In many cases, the installer thew the message, There was an error while trying to download BlueStacks. However, the problem is usually easily fixable, and we will walk you through the solutions that work for others.
Why is BlueStacks 5 not installing on my PC?
Here are the most common reasons BlueStacks is not installing properly:
- Compatibility issues – If your PC doesn’t meet the minimum requirements for BlueStacks, it will lead to trouble installing the app.
- Apps conflicting with the installation – Several third-party apps can conflict with the installation of BlueStacks, and the setup would, as a result, throw errors.
- Critical features not enabled – BlueStacks requires Virtualization support, and if the feature is not enabled, it won’t install.
What can I do if BlueStacks is not installing?
Before we head to the slightly complex solutions when BlueStacks is not installing, let’s first try a few quick ones:
- Make sure your computer fulfills the minimum requirements for BlueStacks. It would be even better if the PC matches the recommended requirements.
- Restart the computer and then try installing BlueStacks.
- Disable any third-party antivirus or other security software installed on the computer. If that works, we recommend you switch to a friendlier antivirus.
- Check your connection and make sure you are suffering from a slow Internet speed.
If none of these work, head to the solutions listed next.
1. Delete the current installer and download a fresh one
- Navigate to the location where the installer is stored, select it, and hit Del.

- Choose the appropriate response in case a confirmation prompt pops up.
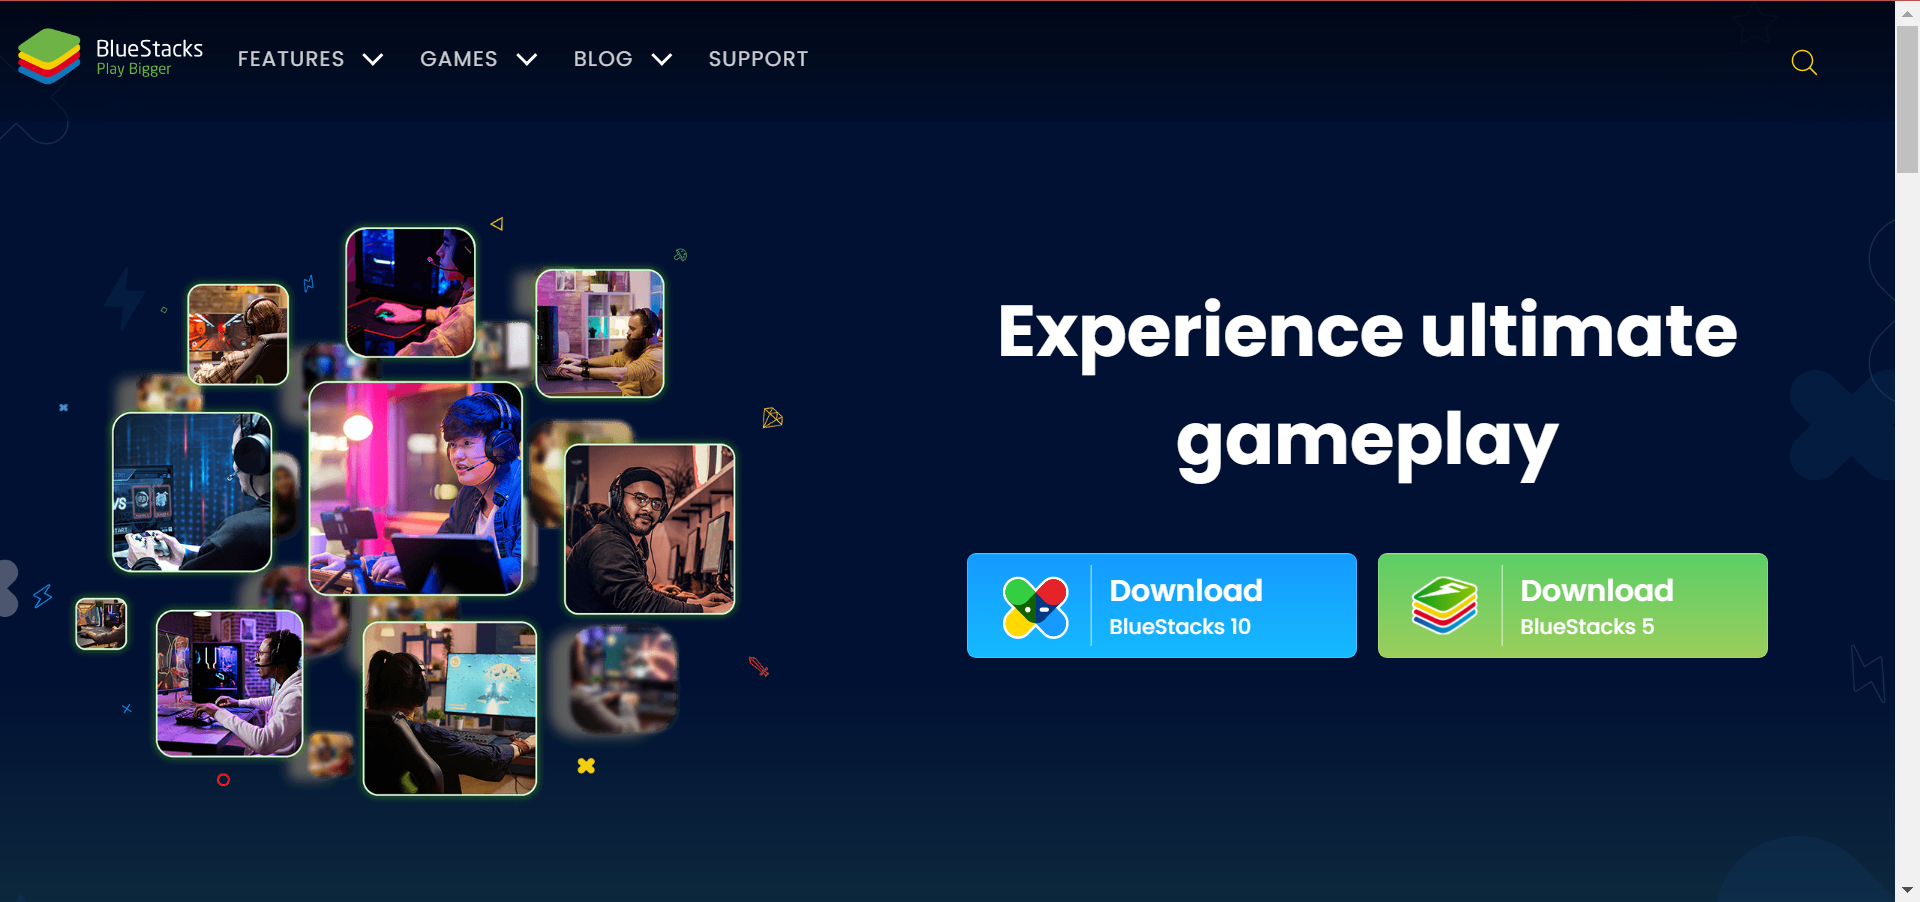
- Now, go to BlueStacks’ official website, and download the installer.

- Once done, launch the setup and proceed with the installation.

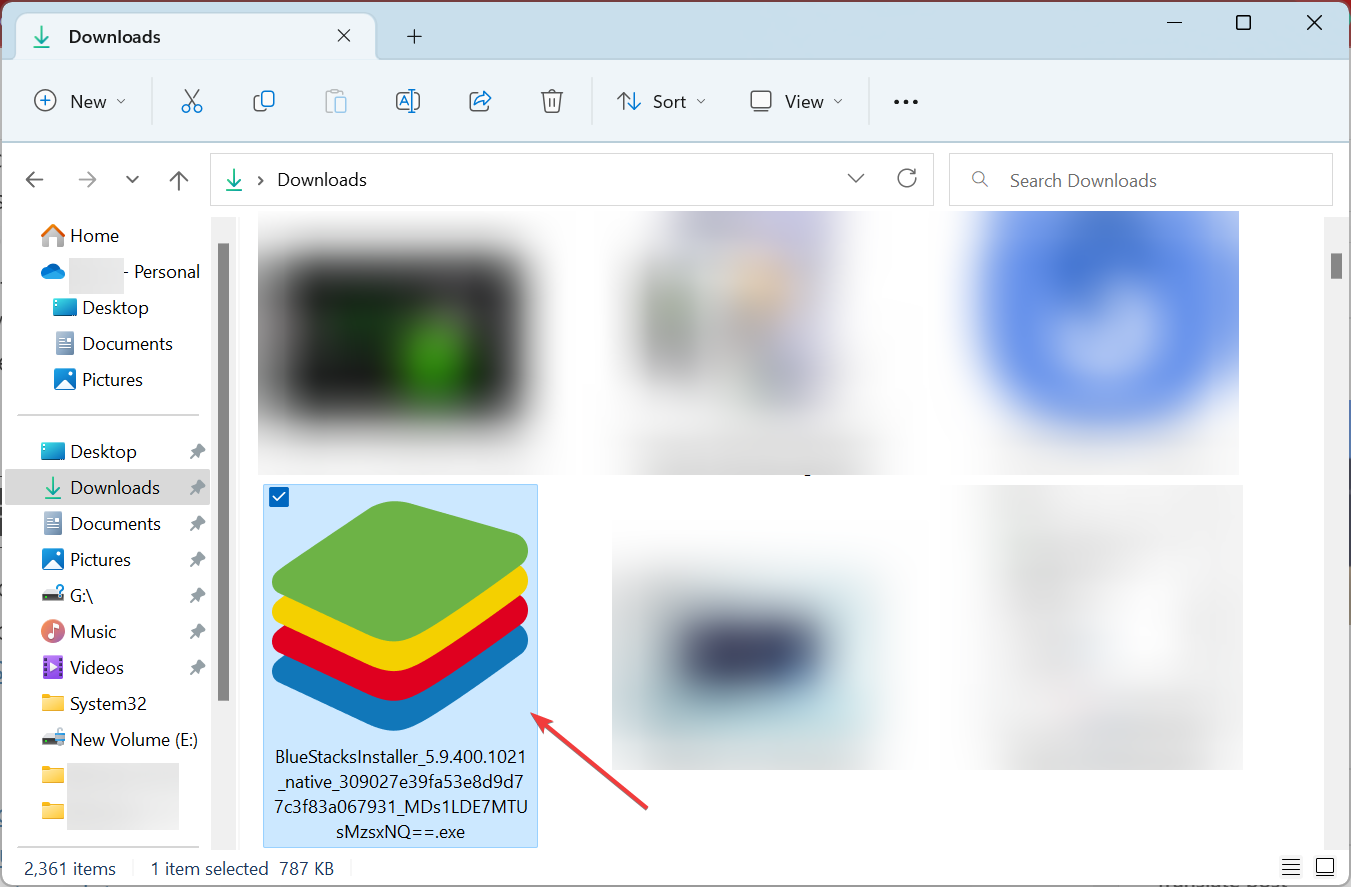
There were cases when the downloaded installer itself was corrupt, and BlueStacks was not installing as a result. Simply clearing the temporary files and getting a new installer should fix things.
2. Try a different emulator

If you’re having issues installing BlueStacks, perhaps a different Android emulator might be a good choice. LDPlayer is a great alternative to BlueStacks since it’s completely optimized for gaming.
With this emulator, you can enjoy in Android games with your keyboard and mouse. The software supports multitasking, so you can have multiple games open at the same time.
There’s also multi-instance sync, allowing you to control multiple games simultaneously. Of course, the software offers a great FPS and lag-free experience, so you can enjoy in gaming without stuttering.
LDPlayer is a great Android emulator, and if you’re having issues with BlueStacks, be sure to try it out.
Other great features:
- Simple to use
- Support for keyboard and mouse
- A wide array of supported games and apps
- Support for macros
- Multitasking support
⇒ Get LDPlayer
3. Get the offline installer
- Download the BlueStacks’ offline installer.
- Navigate to the location the installer is downloaded, type cmd in the address bar, and then hit Enter.

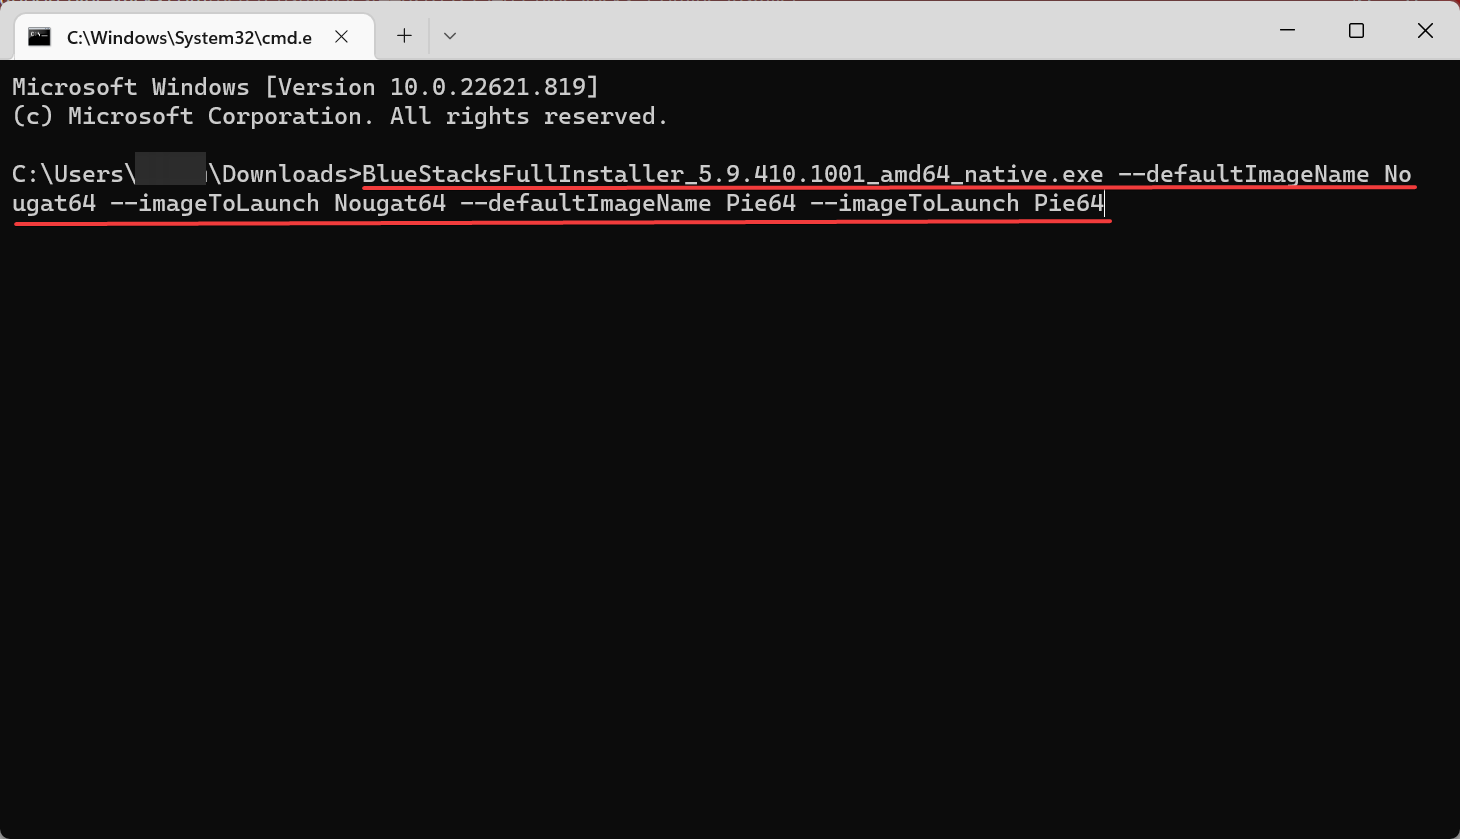
- Now, paste either of the two commands to get the relevant version of BlueStacks and hit Enter:
- Nougat –
BlueStacksFullInstaller_5.9.410.1001_amd64_native.exe --defaultImageName Nougat64 --imageToLaunch Nougat64 --defaultImageName Nougat64 --imageToLaunch Nougat64 - Pie –
BlueStacksFullInstaller_5.9.410.1001_amd64_native.exe --defaultImageName Nougat64 --imageToLaunch Nougat64 --defaultImageName Pie64 --imageToLaunch Pie64
- Nougat –
- Once done, wait for the installation to complete.

4. Use the dedicated uninstaller
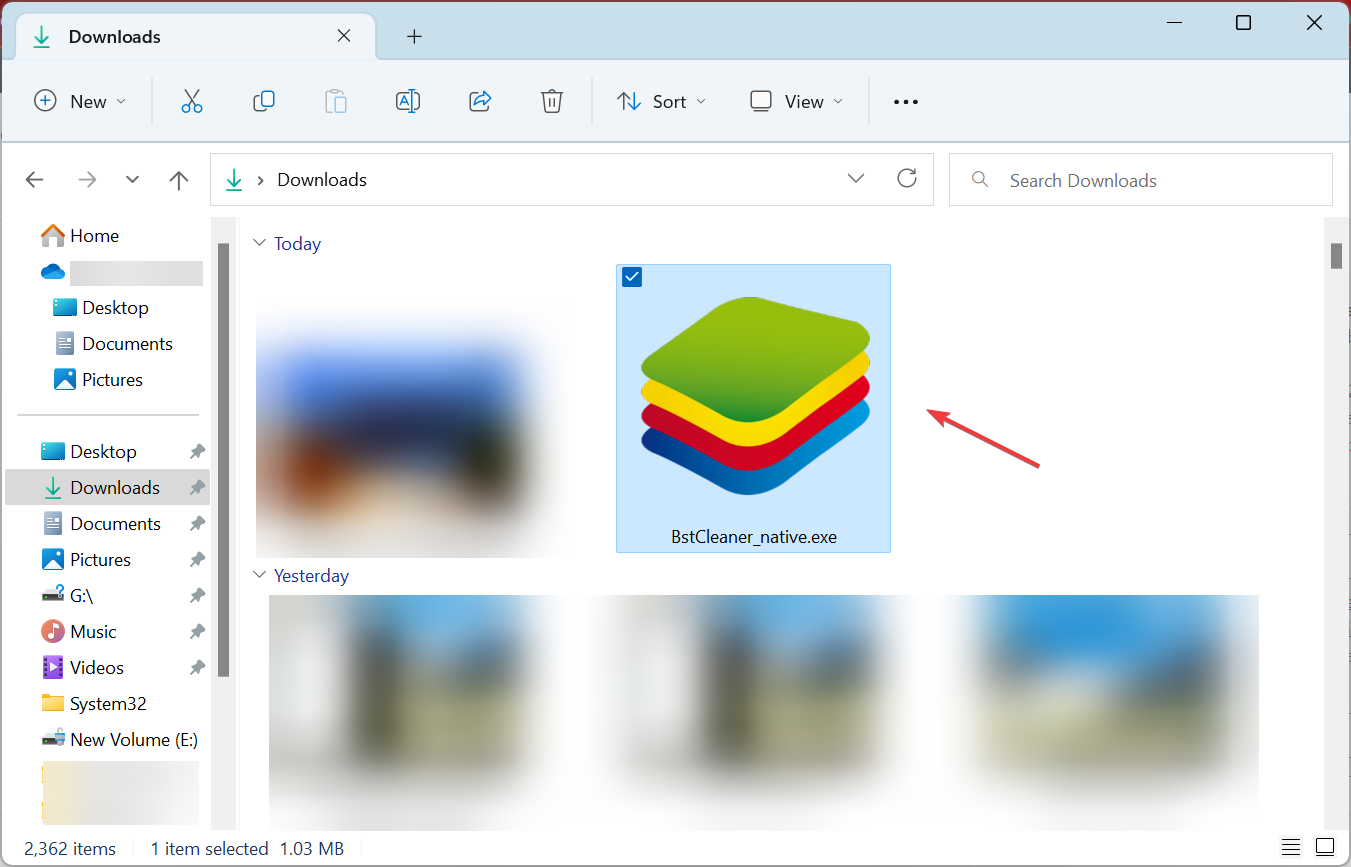
- Download the BlueStacks Cleaner tool.
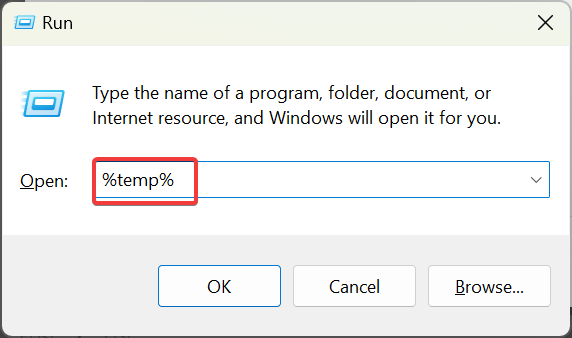
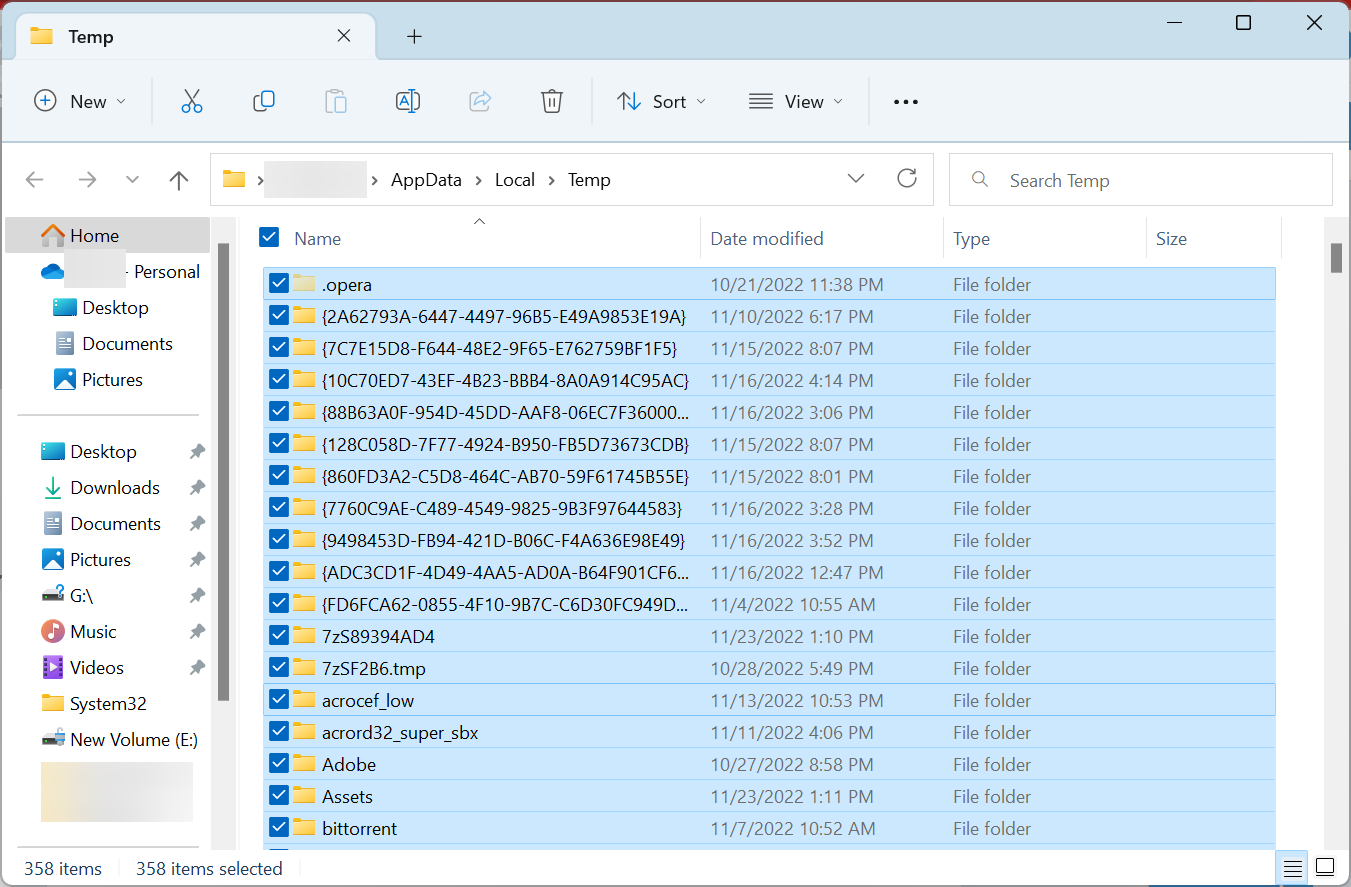
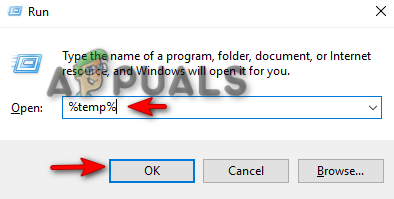
- Now, press Windows + R to open Run, type %temp% in the text field, and hit Enter.

- Press Ctrl + A to select all the files here, and then hit Del.
- Now, launch the BlueStacks Cleaner tool that you downloaded.

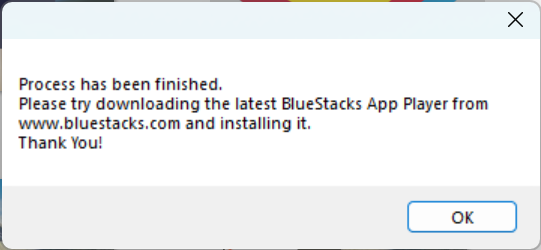
- Click Yes in case a UAC prompt appears.
- Once you see the Process has been finished message, get the BlueStacks installer from the official website, and try installing it.

This method works when BlueStacks claims that a version of it is already present on the computer and is subsequently not installing when you try. Alternatively, you could use a third-party uninstaller tool for the job.
- Error Authenticating With Venmo: 6 Ways to Fix it
- Fix: Internet Speed is Fast, but Video Calls are Slow
- Windows Software Development Kit: Everything You Need to Know
- Fix: MSI Afterburner Failed to Start Scanning
- Windows 11 Keeps Chiming? Stop it in 8 Steps
5. Run the installer in compatibility mode
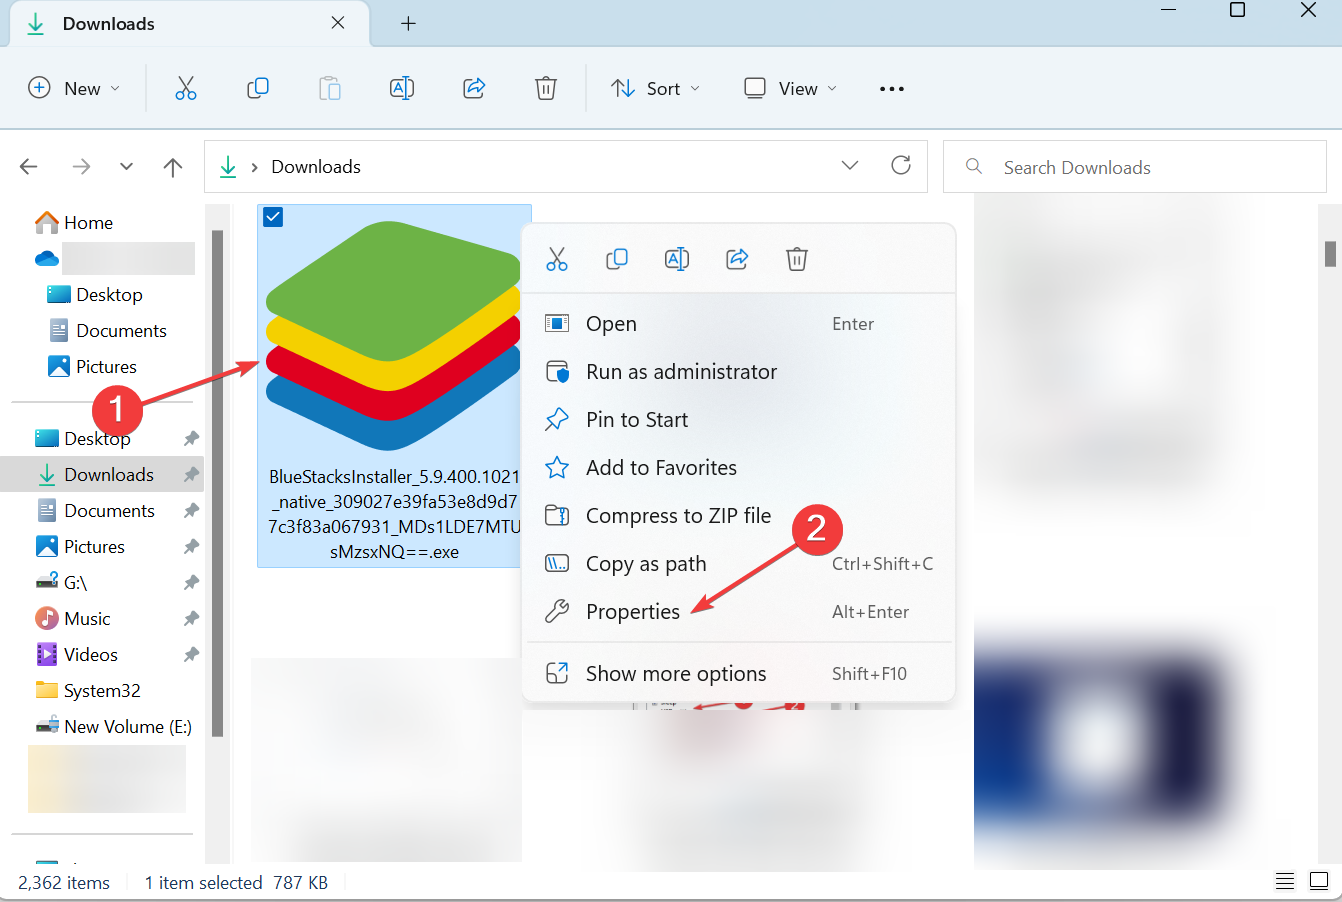
- Navigate to the folder where the BlueStacks installer is stored, right-click on it, and select Properties.

- Navigate to the Compatibility tab, tick the checkbox for Run this program in compatibility mode for, choose an earlier iteration of Windows from the dropdown menu, and click on OK to save the changes.

- Now, try running the setup and installing BlueStacks.
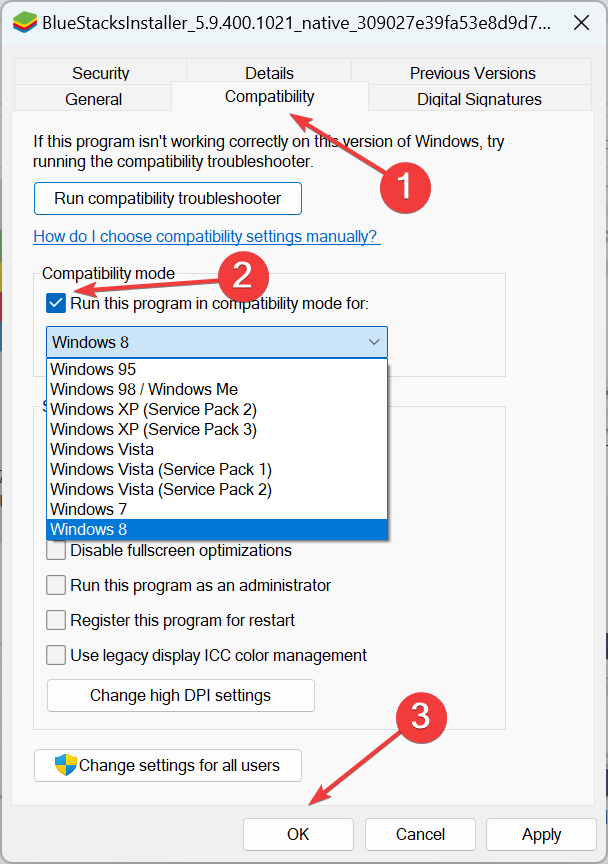
Running the installer in compatibility mode can fix things when BlueStacks is not working or installing in Windows.
6. Update the graphics driver
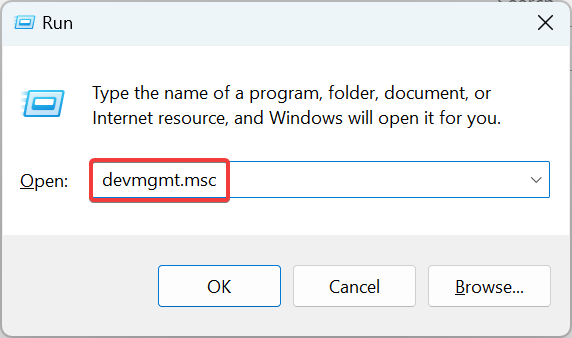
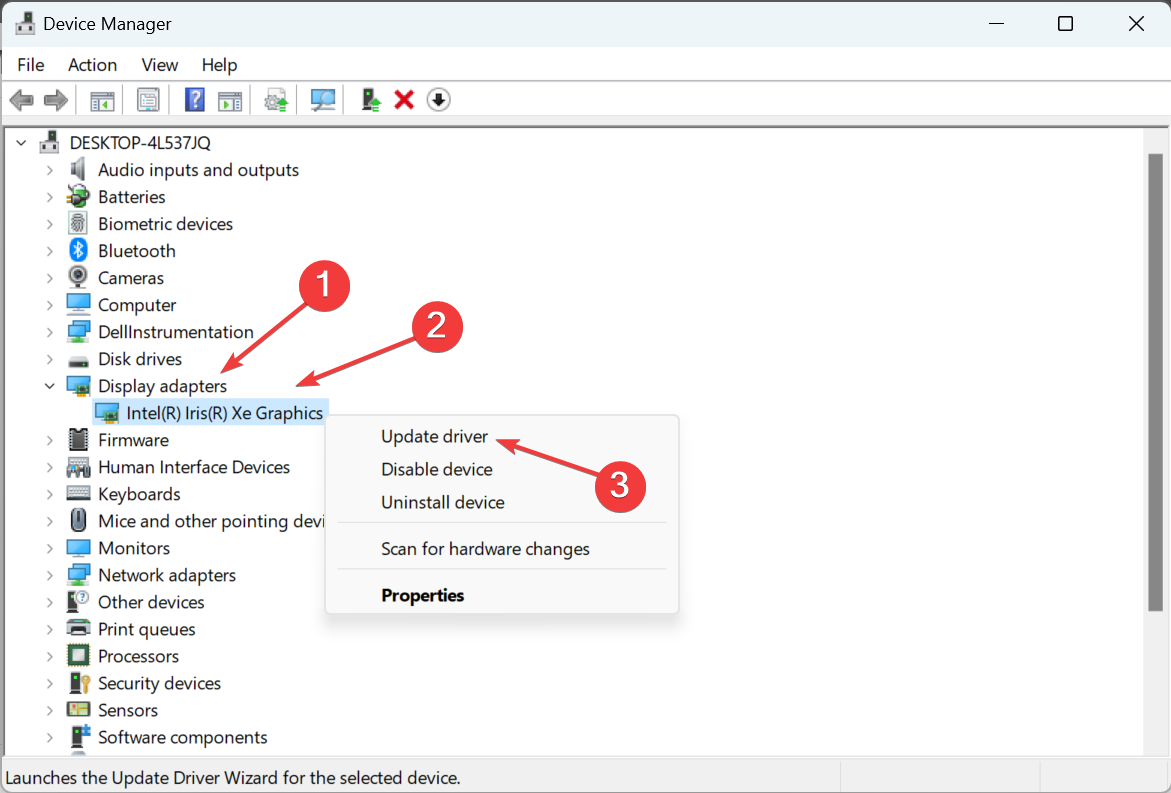
- Press Windows + R to open Run, type devmgmt.msc, and then hit Enter.

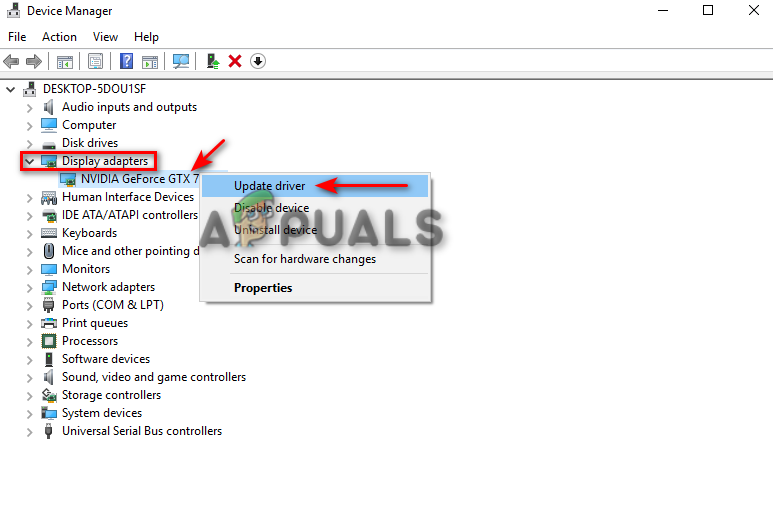
- Expand Display adapters, right-click on the graphics adapter, and select Update driver.

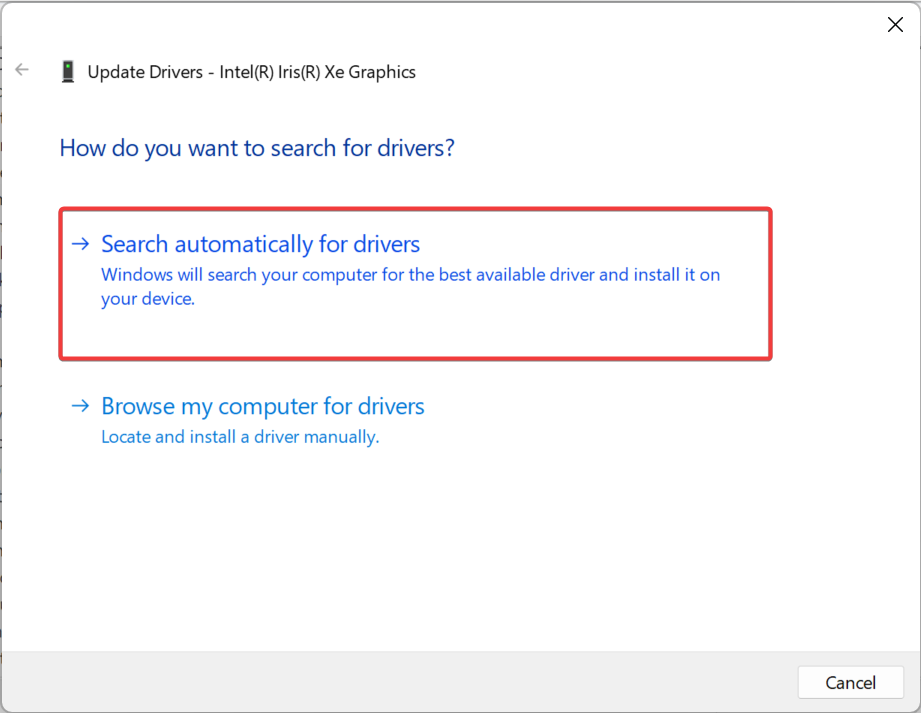
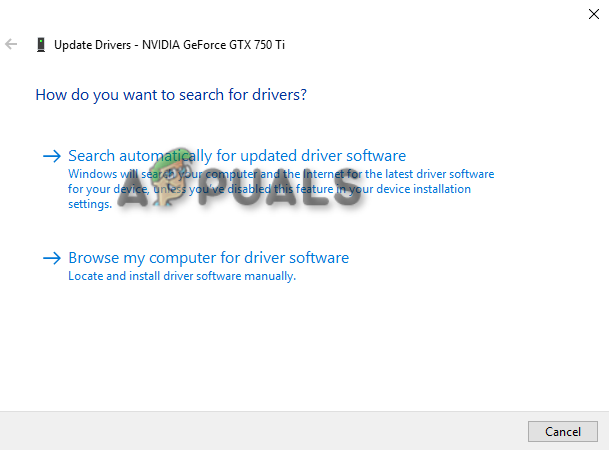
- Click on Search automatically for drivers and wait for Windows to install the best available one on the PC.

In many cases, updating the graphics driver did the trick when BlueStacks was not installing in Windows. Sometimes, Windows won’t be able to find a better version, and that’s when manually updating the driver comes into the picture.
Alternatively, you can use driver updater software and seamlessly update all the drivers in one go!
⇒ Get Outbyte Driver Updater
By now, the problem should be resolved, and BlueStacks up and running the way it should. Though some users reported that BlueStacks is stuck on loading, that, too, is easily fixable.
If you have any queries or fixed things using a different solution, drop them in the comments section below.
![]()
BlueStacks usually faces errors on PC which prevents it from properly installing and may cause an error message to pop up “Unfortunately, this app could not be installed”. This error occurs for several reasons such as interference from background processes and apps, an outdated Windows, incomplete file installation, and corrupt files on the system. However, there are other factors leading to this error as well.
In this guide, we will be showing you how to fix BlueStacks Installation Error.
Prerequisites: Check System Requirements
Before you try any methods to fix the BlueStacks Installation Error, make sure to verify if your computer is up-to-date with the system requirements of installing BlueStack. You can check your system’s specifications by following the steps given below:
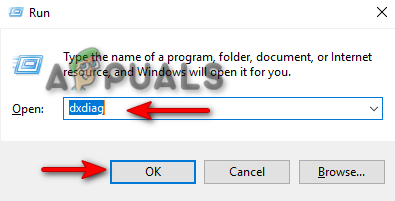
- Open the Run Command by pressing the Win + R keys together.
- Open the Diagnostic Tool by typing “dxdiag” in the search box and clicking OK.

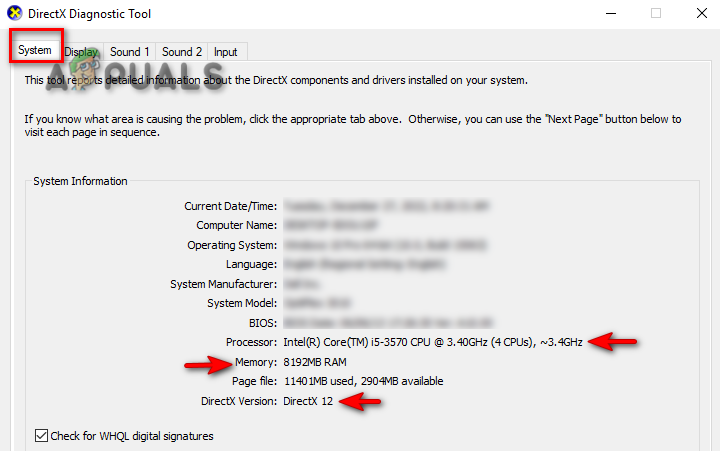
Opening the Diagnostic Tool - Now check the system information by clicking on the “System” tab.

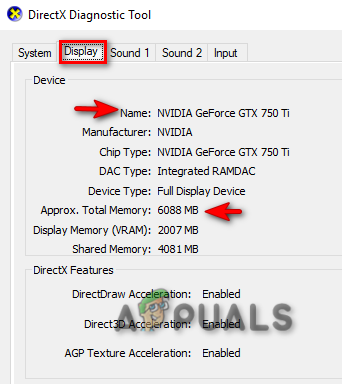
Checking System Information - To check the system graphics, click on the “Display” tab.

Checking System Display
Minimum Requirements
- OS: Microsoft Windows 7 and higher
- Processor: Intel/AMD Processor
- Graphics: Intel/Nvidia/ATI, Onboard or Discrete GPU with benchmark score >= 750
- RAM: 4GB or higher
- Storage: 5GB Free Disk Space
- Internet: Broadband network connection.
- Additional notes: You must be an administrator on your PC.
If you have confirmed that your system specifications meets the minimum requirements of running Bluestacks, then you can follow the methods shown below:
1. Check if your Internet is Connected
Make sure to see if your internet connection is turned on. In most cases when the internet connection is poor or disabled, Bluestacks may face an installation error. This happens because Bluestacks downloads some files before installation process and if it doesn’t have access to internet it won’t be able to download those files causing this Installation error.
2. End Unwanted Processes Running in the Background
One of the reasons why you may be facing the BlueStacks Installation Error is because of unwanted apps or background processes that are interfering with the installation of the app. Therefore, closing them may be helpful in fixing the error. Follow the steps below to see how to end unwanted programs in the background:
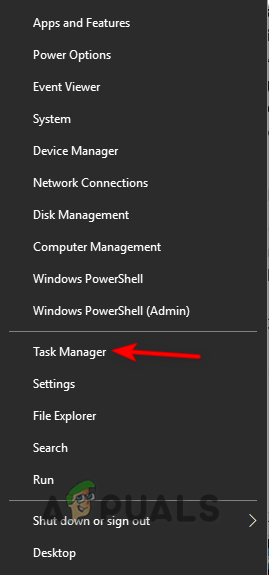
- Right-Click on the Windows Start Icon and select the “Task Manager” option.

Opening Task Manager - Open the Process Tab and click on the unwanted background processes or apps that take too much memory.
- To end these processes and apps, click on the End Task button at the bottom right part of the Window.

Closing unwanted apps and processes

3. Run Bluestacks as an Administrator
You may not be able to install the Bluestacks due to lack of permissions to launch the installer. Since one of the requirements of the app is to have administrative control over the system, you can try running the Bluestacks app as an administrator to see if that was causing the installation issue. Follow the steps below to see how to run Bluestacks as an administrator:
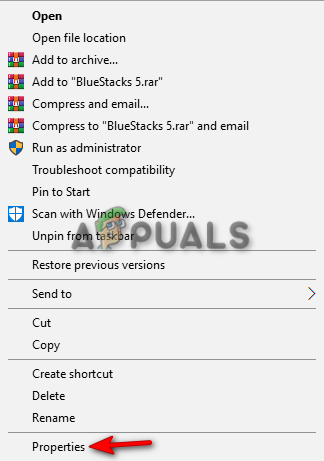
- Right-Click on the Bluestacks setup and click on the properties option.

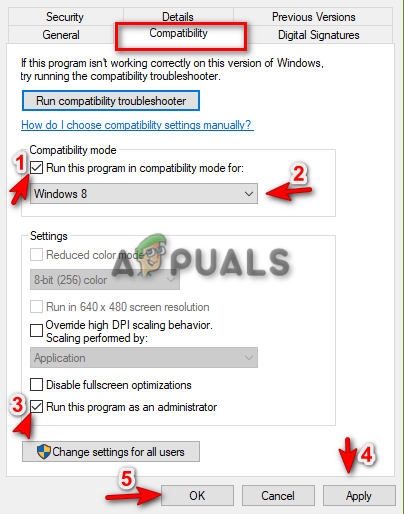
Opening BlueStacks properties - Click on the Compatibility tab and check the “Run this program in compatibility mode for” box under Compatibility mode.
- Select the type of Windows you prefer such as Windows 7/8.
- Check the “Run this program as an administrator” box under Settings and click Apply and OK.

Running program as an Administrator - Run the installer and see if this fixed the error.
4. Disable Virtualization-Based Security Temporarily
Virtualization Based Security is a feature that additionally protects your system from threats. This feature may be interfering with the installation of the Bluestacks, because Bluestacks requires virtualization support to emulate android which might trigger VBS.
Therefore, you must disable it and see if it fixes the error. Follow the steps below to see how to disable Virtualization Based Security on your Windows:
- Press the Win + I keys together to open Windows Settings app.
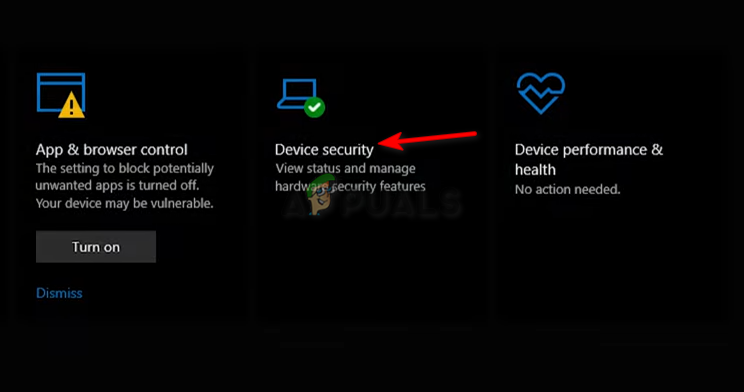
- Now in the settings app, navigate to Privacy & Security > Windows Security > Device Security

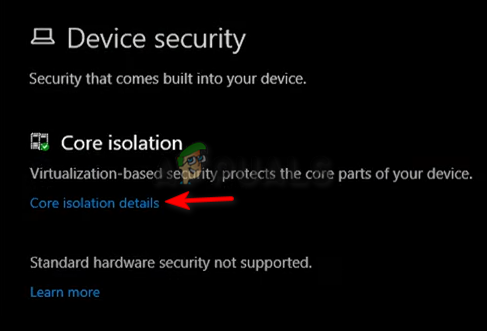
Opening Windows Device Security - Click on the “Core isolation details” option under Core Isolation.

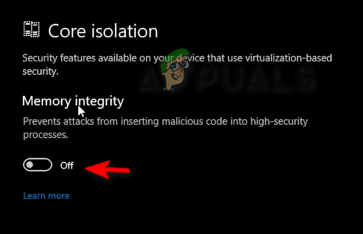
Opening Core Isolation details - Disable the Core Isolation feature by turning off the button under Memory integrity.

Disabling Core Isolation
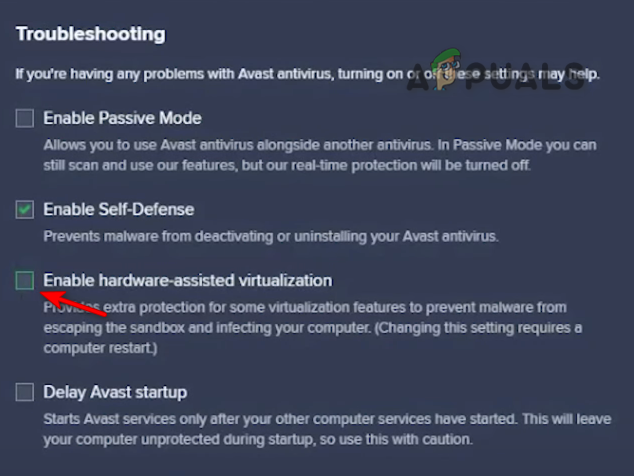
Note: If you have an antivirus such as Avast installed on your system, you must disable the Virtualization-Based Security feature from there as well. Follow the steps below to learn how to disable the VBS feature from an antivirus software:
- Open the Antivirus software and click on the Menu option at the top of the screen and navigate to Settings > Troubleshooting.
- Uncheck the “Enable hardware-assisted virtualization” box and run the Bluestacks installer.

Turning off the Virtualization feature from the antivirus
5. Update Graphics Driver
An outdated Graphics card may also be one of the factors that lead to an installation error since Bluestacks cannot run below the minimum graphics requirement. Therefore, makes sure you have an up-to-date graphics driver installed. Following the steps below, you will learn how to update your Graphics driver.
- Open the Windows Start Menu by pressing the Win key.
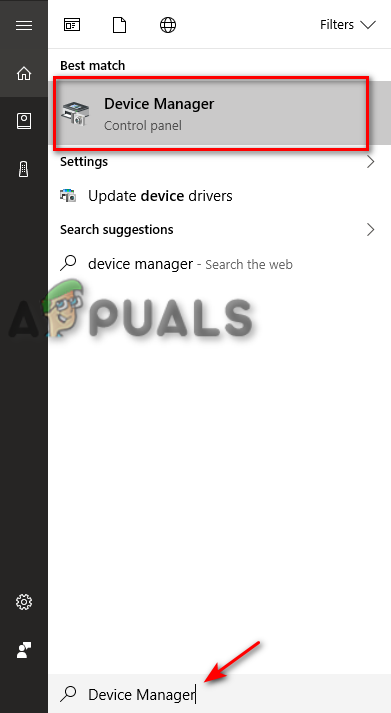
- Type “ Device Manager” on the Windows Search Bar and open it.

Opening Device Manager - On the Device Manager page, click on the Display adapters to view the installed graphics driver on your system.
- To update the Graphics Driver, right-click on the driver and click on the Update driver option.

Updating Graphics Driver - Select the method you would like to choose.

Selecting the Driver Updating method - Restart your computer after the Graphics Driver has been updated and see if this fixes the installation error.
6. Update your Windows
An outdated Windows update may also cause the error to occur. Therefore, check if you have an up-to-date Windows before Installing Bluestacks. If not, then you must install the latest Windows Update. Follow the steps below to see how to update your Windows:
- Open Windows Settings by pressing the Win + I keys together.
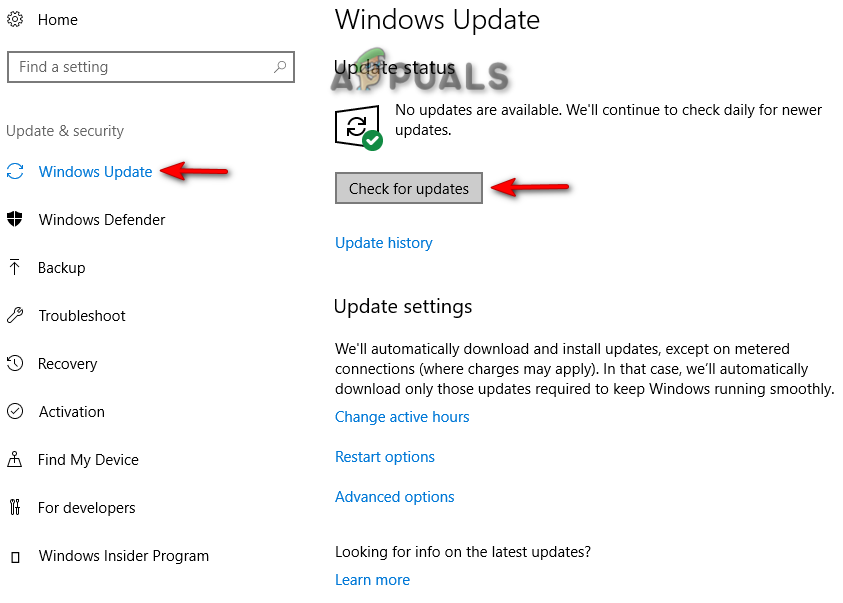
- Look if there is a Windows Update available by navigating to Windows Update and Security > Windows Security
- Click on the “Check for Updates” option.
- Click on the Download option if there is an update available and restart your computer after the Windows is updated.

Checking Windows Update
Note: In some cases, you will not be notified about an available Windows Update. Therefore, you must download the update manually. Follow the steps below to download a Windows update manually:
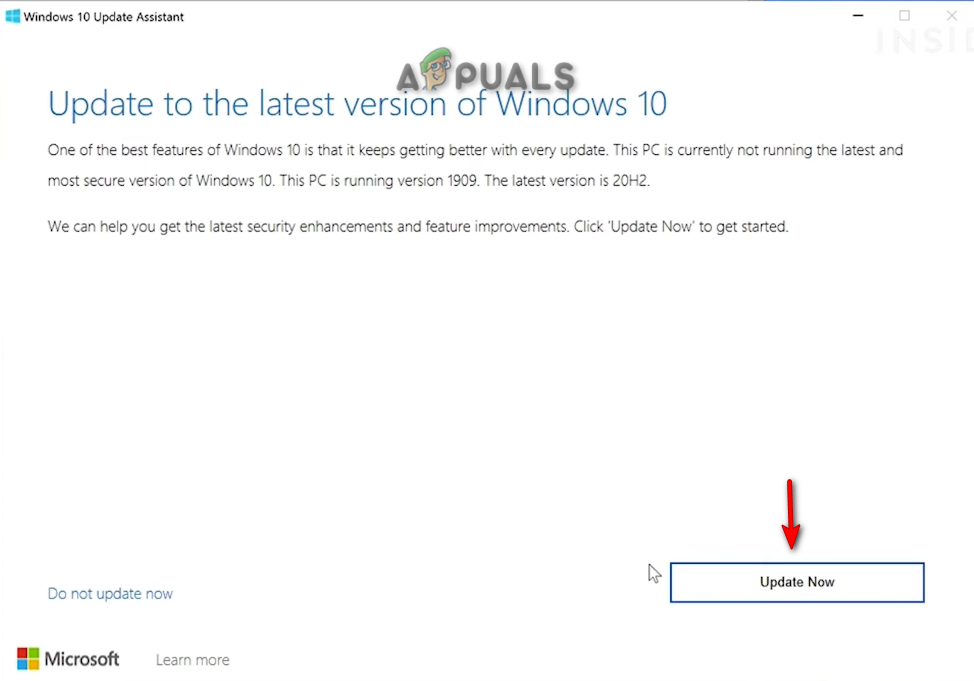
- Go to the Official Microsoft Web Page.
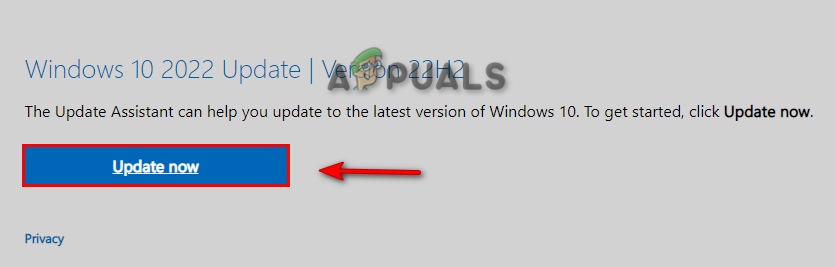
- Click on the “Update Now” option to download the Windows Update,

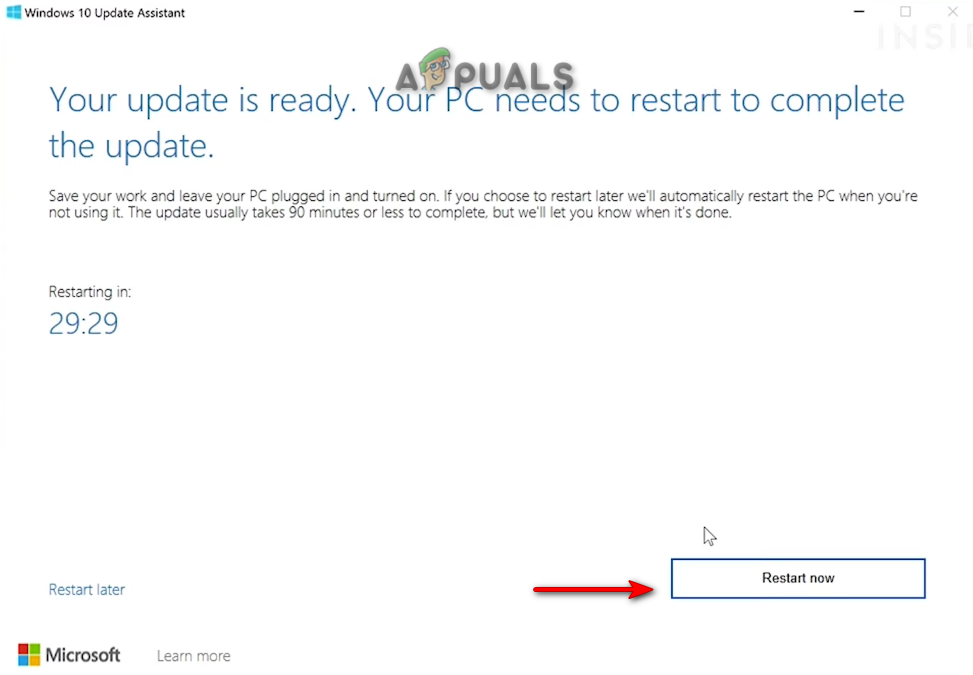
Downloading the Latest Windows Update - To Install the update, click on the “Update Now” option.

Installing Windows Update - Click on the Restart option after the installation is completed.

Restarting Computer
7. Run the System File Checker
Another reason why you may be facing this error is because of corrupted files on your system that may be interfering with the installation process. For this, you must perform a System File Checker which scans the corrupted files on your system and repairs them. Follow the steps below to perform a system file checker:
- Open the Windows Start Menu by pressing the Win key.
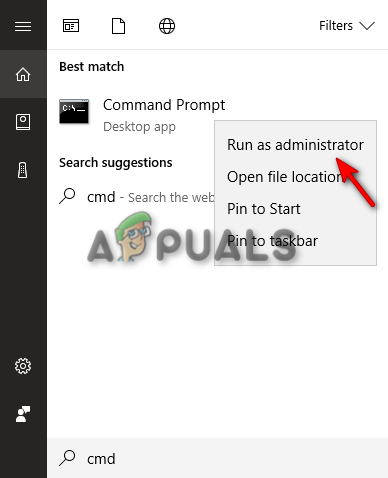
- Type “cmd” in the Windows Search bar.
- Right-click on the Command Prompt and click on the “Run as administrator” option.

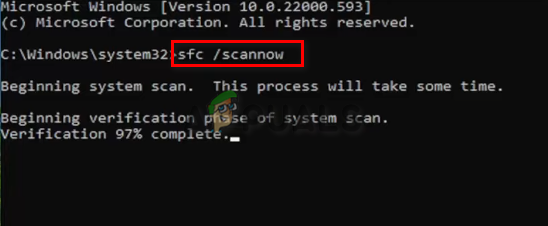
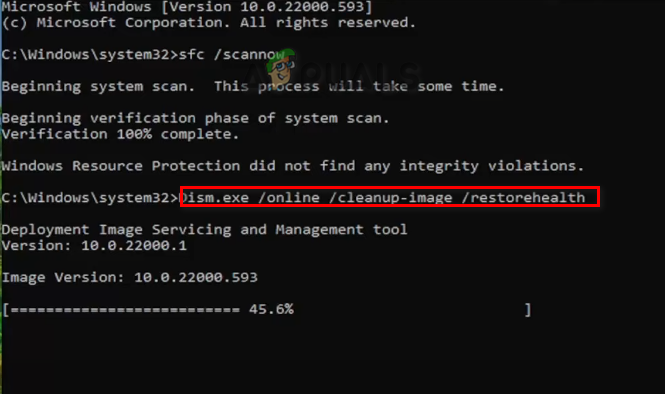
Running the Command Prompt as an administrator. - Type the following command in the Command Prompt while giving a space between “sfc” and “/.”
sfc /scannow

Running system file checker on the command prompt. - Once the scan is completed, the system file checker will repair the corrupted files automatically.
- Additionally, you must run the DISM Command by pasting the following command into the command prompt:
Dism.exe /online /cleanup-image /restorehealt

Running DISM Command on the Command Prompt - Restart your computer to see if this fixes the error.
8. Turn off Hyper-V
Hyper-V is a feature in Windows that lets you create a virtual machine. Bluestacks also has this feature available which when enabled may also be causing the error to occur. Therefore, you must try disabling this feature and then install the Bluestacks app. Follow the steps below to see how to turn off Hyper-V:
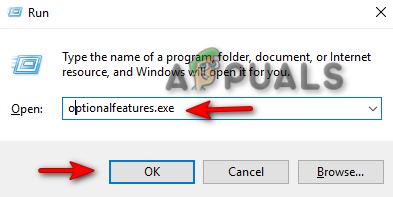
- Open the Run command by pressing the Win + R keys together.
- Open the Windows Features by typing “optionalfeatures.exe” in the search box and clicking OK.

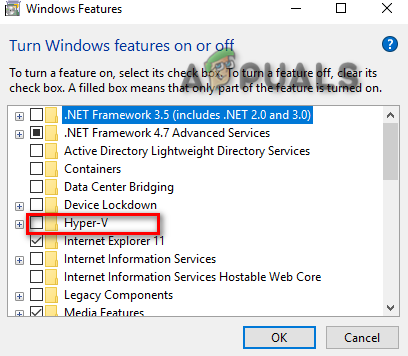
Opening Windows Features - Uncheck every “Hyper-V” related folder and click OK.

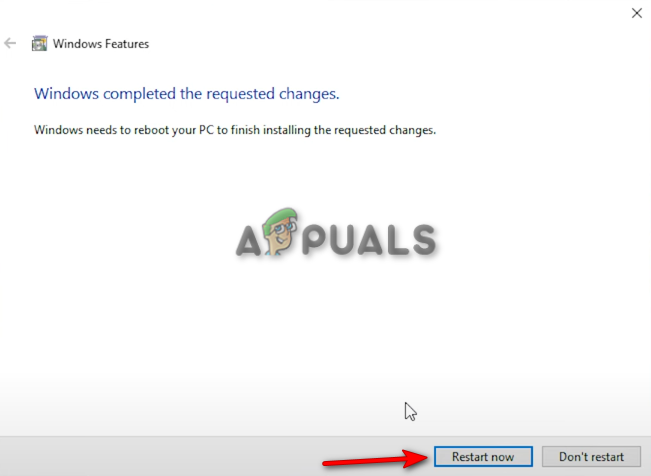
Turning off Hyper-V - Restart your computer by clicking on the “Restart Now” option to see if this fixes the error.

Restarting system
Note: Another way you can disable the Hyper-V feature is through the command prompt. Follow the steps below to do so:
- Open the Windows Start Menu by pressing the Win key.
- Type “cmd” in the Windows Search bar.
- Right-click on the Command Prompt and click on the “Run as administrator” option.
Running the Command Prompt as an administrator - Now, paste the following command into the command prompt and press the Enter key:
bcdedit /set hypervisorlaunchtype off
- Restart your computer manually from the Start Menu after the execution is completed.
9. Clean cache of Bluestacks Installer before proceeding
If you are still facing the Installation error, you must re-install the app as a last resort. Follow the steps below to perform a cleanup:
- Open the Run command by pressing the Win + R keys together.
- Open the “Temp” folder by typing “%temp%” in the search box.

Opening the Temp folder - Select all the unwanted files by pressing the Ctrl + A keys together.
- Delete all the files by pressing the Delete key.
- Now, download the BlueStacks Cleaner Tool.
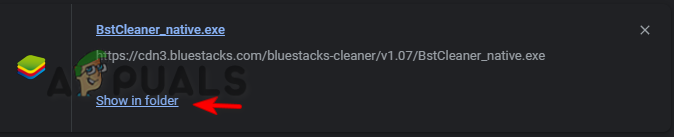
- Open the Downloads option on your browser and click on “Show in Folder” to find the location of the cleaner.

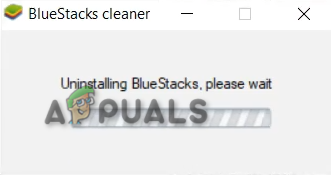
Opening BlueStacks file directory - Double-click on the cleaner and it will start uninstalling BlueStacks entirely from your system.

Uninstalling BlueStacks - After the Uninstallation is completed, click OK and re-install the BlueStacks App from the Offical website.

Muhammad Zubyan
Muhammad Zubyan is a certified Google IT Support Professional with over 7 years of extensive experience. He has worked on more than 1500 computers, gaining valuable insights that enable him to detect and troubleshoot any complicated root cause of Windows-related issues and errors. In addition to managing Appuals as a Senior Editor, he is currently developing his own Game Optimization program that caters to both gamers and casual users alike.
BlueStacks — это эмулятор Android, который позволяет запускать мобильные приложения на компьютере. Часто пользователи сталкиваются с ошибками при скачивании BlueStacks 5.10 на компьютер. Но не переживайте, существует несколько простых способов, которые помогут вам исправить эту ошибку.
Шаг 1: Проверьте свободное место на диске
Прежде чем скачивать BlueStacks 5.10, убедитесь, что на вашем компьютере достаточно свободного места на диске. Если на вашем компьютере закончилось свободное место на диске, то BlueStacks может не установиться или установится с ошибками. Рекомендуется иметь не менее 4-5 Гб свободного места на диске.
Шаг 2: Очистите временные файлы
Временные файлы могут занимать большое количество места на диске и мешать установке BlueStacks 5.10. Поэтому рекомендуется очистить временные файлы на вашем компьютере перед установкой BlueStacks.
- Откройте панель управления в вашей операционной системе.
- Выберите пункт «Система и безопасность».
- Нажмите на «Администрирование» и далее выберите «Очистка диска».
- Выберите диск, на котором хотите очистить временные файлы, и нажмите «ОК».
- Отметьте все пункты для очистки файлов и нажмите «ОК».
Шаг 3: Отключите антивирусное программное обеспечение
Антивирусные программы могут блокировать установку BlueStacks 5.10 на вашем компьютере. Поэтому рекомендуется временно отключить антивирусное программное обеспечение перед установкой BlueStacks.
- Откройте антивирусное программное обеспечение на вашем компьютере.
- Отключите антивирусное программное обеспечение или добавьте BlueStacks в список исключений.
- Запустите установку BlueStacks 5.10.
Шаг 4: Обновите драйверы
Убедитесь, что драйверы на вашем компьютере обновлены до последней версии. Устаревшие драйверы могут вызывать проблемы с установкой BlueStacks.
- Откройте «Диспетчер устройств».
- Обновите драйвера для каждого устройства, который отмечен желтым восклицательным знаком или красным крестиком.
- Перезагрузите компьютер после обновления драйверов.
Шаг 5: Установите BlueStacks 5.10 в режиме совместимости
В некоторых случаях установка BlueStacks 5.10 в режиме совместимости может помочь решить проблемы с установкой.
- Нажмите правой кнопкой мыши на файл установщика BlueStacks 5.10 и выберите «Свойства».
- Перейдите на вкладку «Совместимость».
- Отметьте «Запустить в режиме совместимости», и выберите вариант «Windows 7».
- Нажмите «ОК» и запустите установку BlueStacks 5.10.
Эти пять простых шагов помогут вам исправить ошибки при установке BlueStacks 5.10 на ваш компьютер. Если проблемы сохраняются, вы можете связаться с технической поддержкой BlueStacks, которые помогут вам решить проблему.
Introduction
Stumbling upon the BlueStacks error 2004 «something went wrong, installation failed» can be frustrating, especially when you’re eager to enjoy your favorite Android games on your PC. Fear not; this article is here to rescue you from this tech quandary. We’ll provide a comprehensive tutorial to rectify this common issue, allowing you to launch the BlueStacks emulator successfully. We’ll delve into various solutions, whether verifying you have the correct BlueStacks version, ensuring sufficient disk space, or navigating through your Windows settings. Join us as we guide you through each step, turning this complication into a simple fix.
Reinstall BlueStacks
The BlueStacks error 2004 often stems from several potential issues including inadequate user permissions, lack of storage space, missing essential drivers, or even corrupted Windows files. Let’s get started on addressing these problems:
-
Validate your BlueStacks version: Firstly, you’ll need to ascertain that you’re installing the appropriate version of BlueStacks. Click here to navigate directly to the official download page.
-
Downloading BlueStacks 5 Installer: After you’re on the page, proceed to download the latest BlueStacks 5 installer. This updated version offers improved speed and performance, making it a preferred choice among users.
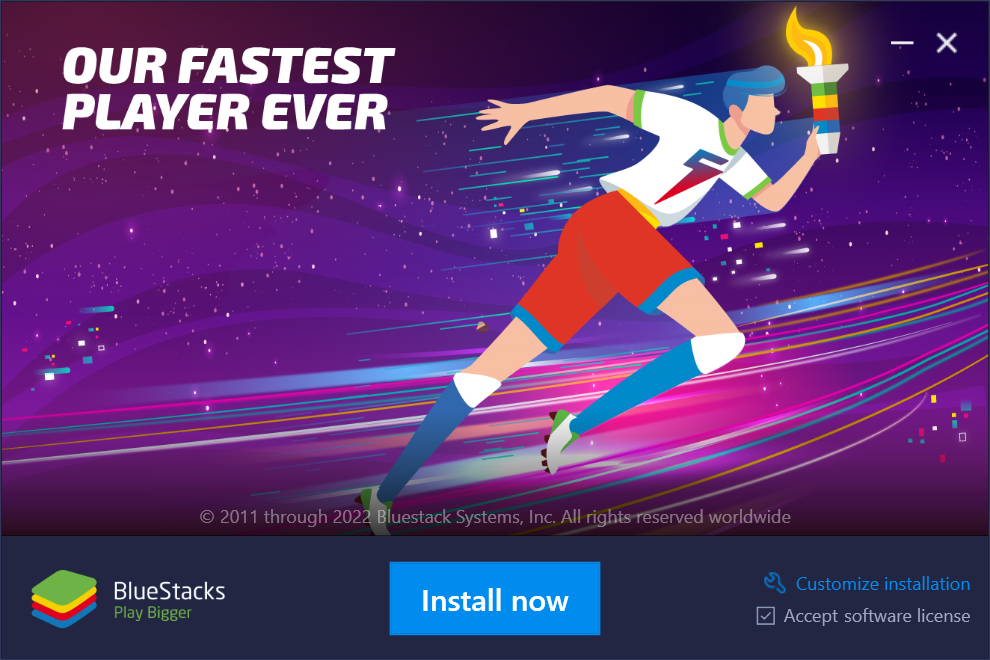
-
Installation: Once the download concludes, locate the downloaded files using your browser’s built-in file locator. Then, double-click on the installer which will initiate the installation of BlueStacks on your device.
By ensuring that you are installing the correct version of BlueStacks, you’re one step closer to solving the Error 2004 issue.

Download the BlueStacks 5 installer
Clearing Disk Space for Smooth BlueStacks Operation
A lack of sufficient disk space can often trigger the BlueStacks Error 2004. To mitigate this, it’s advisable to review your storage availability:
-
Check Storage: Navigate to your Windows settings and select «System.» Then, proceed to «Storage» to assess your current disk space.
-
Cleanup: You may notice that your available storage is insufficient. To rectify this, consider removing unneeded programs or deleting temporary files. Navigate to «Temporary Files» and proceed to eliminate Windows Update Cleanup files, Temporary Files, and content within your recycle bin.
-
Minimum Requirement: Ensure that you have at least 5GB of free space — the recommended amount for optimal BlueStacks operation.

Twitter Privacy and Safety Settings > Content you see
-
Windows Update: As a subsequent step, navigate to your Windows Update settings. Click on «Check for Updates,» and proceed to download and install any available updates. This step is crucial, as some BlueStacks features might require the latest Windows components to function properly.
With a tidied up storage and the latest Windows updates installed, your system should now be primed to launch BlueStacks without a hitch.

Windows Settings > Windows Update
Optimizing BlueStacks Compatibility Settings
Should the problem persist, you might need to adjust the compatibility settings of BlueStacks. Here’s how to do so:
-
Locate BlueStacks: Use your start menu search bar to find ‘BlueStacks’. Once you find it, right-click and choose «Open File Location».
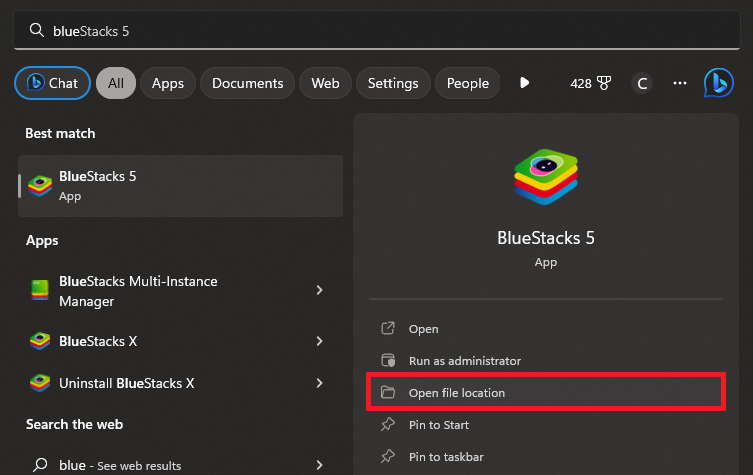
BlueStacks 5 > Open File Location
-
Access File Explorer: Your file explorer will then display the contents of the BlueStacks folder. Here, you need to right-click on the BlueStacks shortcut and select “Open File Location” again.
-
Adjust Application Properties: Now, locate the HD-Player.exe application, right-click on it to open its properties.
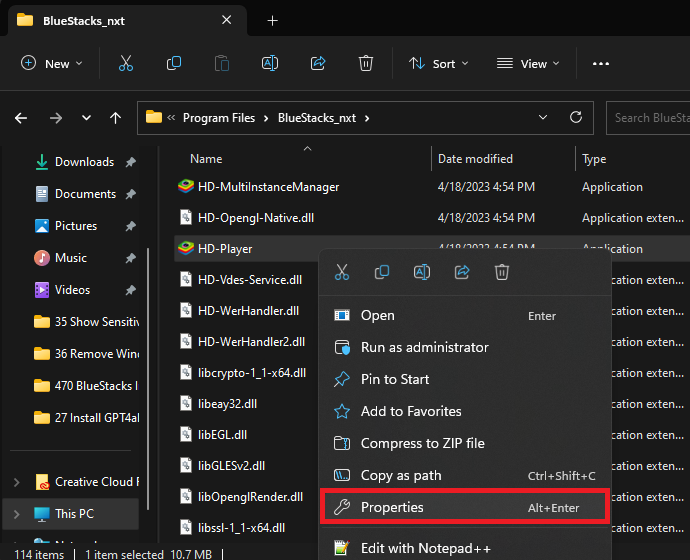
BlueStacks file location > HD-Player > Properties
-
Compatibility Changes: Within the «Compatibility» tab, ensure you enable both the «Disable Fullscreen Optimizations» and the «Run this program as an administrator» options. Don’t forget to click «Apply» to save your changes.
These tweaks optimize the BlueStacks settings, increasing the chances of successful operation without encountering the Error 2004.
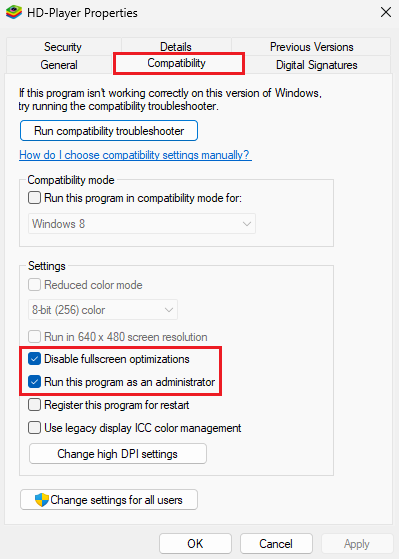
HD-Player Properties > Compatibility
Execute the System File Checker Utility
If the BlueStacks error continues, executing the System File Checker (SFC) tool could be a solution. Here’s how to go about it:
-
Access Command Prompt: Utilize your start menu search bar to locate ‘CMD’ and open your Command Prompt window.
-
Run SFC Command: Type in
Sfc /scannowand press enter. This command prompts the tool to initiate a thorough scan of your system files. -
Fix Corrupted Files: The SFC utility will now identify and repair any corrupted system files it finds, substituting them with a cached copy stored in a compressed folder in Windows.
After the scan and repair, you should be able to launch BlueStacks without encountering the ‘installation failed’ error, enhancing your PC’s smooth performance.

Command Prompt (Admin) > sfc /scannow
-
The BlueStacks error 2004 can occur due to various reasons, including insufficient permissions on your account, lack of disk space, missing drivers, or corrupted Windows files.
-
You can ensure this by visiting the official BlueStacks download page and downloading the latest BlueStacks 5 installer.
-
If disk space is an issue, try to free up some storage by uninstalling unnecessary programs or deleting temporary files from your PC. Ensure that you have at least 5GB of disk space before trying to install BlueStacks again.
-
Adjusting compatibility options like ‘Disable Fullscreen Optimizations’ and running the program as an administrator could help avoid potential conflicts that might cause the error.
-
The System File Checker (SFC) tool scans and repairs corrupted system files in Windows. Running this tool can help resolve the BlueStacks error by fixing any corrupted system files.