DirectX ошибка в Battlefield 2042 представляет собой крайне неприятную проблему, потому как она делает из новенького проекта DICE и EA практически неработоспособный «кусок кода». Одни игроки встречаются с ошибкой в главном меню, когда Battlefield 2042 пытается подключиться к серверам EA, другие — при изначальном запуске игры.
Также стоит отметить, что в сообщение DirectX ошибки может слегка отличаться от случая к случаю. Вот несколько примеров различных версий ошибки:
Что вызывает DirectX ошибку в Battlefield 2042?
К сожалению, ошибка с API DirectX в новенькой Battlefield 2042 не возникает из-за какого-то конкретного «возбудителя»: существует целый ряд потенциальный причин. Давайте кратенько пройдемся по этим причинам.
- Отсутствие в системе пользователя библиотек DirectX, которые необходимы для нормальной работы Battlefield 2042 (т.е. DirectX давно не обновлялся).
- Поврежденные или отсутствующие библиотеки той или иной версии Microsoft Visual C++.
- ОС Windows 10 недостает одного или нескольких важных обновлений.
- Устаревшие графические драйвера видеокарты.
- Проблема с идентификатором компьютера игрока и Battlefield 2042.
Решение DirectX ошибки в Battlefield 2042
Первым делом мы рекомендуем вам пройтись по самым тривиальным решениям: обновление DirectX, драйверов видеокарты и самой Windows, а также переустановка имеющихся наборов библиотек Microsoft Visual C++. Вот все необходимые ссылки:
- Веб-установщик DirectX
- Microsoft Visual C++ 2005, 2008, 2010, 2012, 2013, 2015, 2017, 2019 и 2022
- AMD (видеодрайвера←↓)
- Nvidia
- Intel
Заметка: обязательно (!) удалите со своего компьютера наборы библиотек Microsoft Visual C++, прежде чем устанавливать их снова по вышеуказанным ссылкам. Удалить их можно вполне привычным образом через «Программы и компоненты» в системной Панели управления.
Как только закончите, перезагрузите ПК и проверьте наличие DirectX ошибки в Battlefield 2042. Не помогло? Ну, тогда пора приниматься за более изощренный метод — изменение идентификатора ПК. Ничего сложного в этом нет — это займет у вас минут пять, максимум десять.
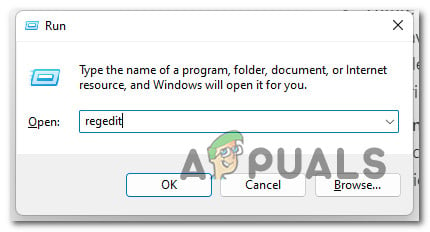
- Нажмите WIN+R, чтобы вызвать диалоговое окошко «Выполнить»;
- пропишите в строке значение «REGEDIT» и нажмите ENTER;
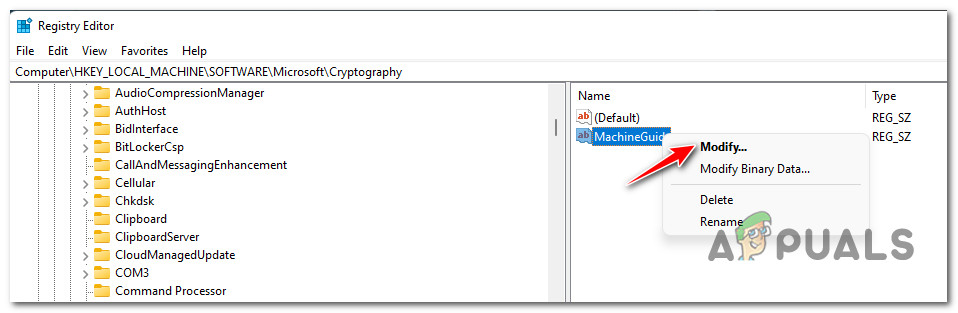
- в редакторе реестра перейдите по пути «HKEY_LOCAL_MACHINE→Software→Microsoft→Cryptography»;
- дважды кликните ЛКМ на параметр «MachineGuid» (в правой части окошка), чтобы открыть его свойства;
- вставьте в строку значение, сгенерированное по следующей ссылке, например, a81b26b9-ad31-41ba-a36c-bd1b83b96ea8, и сохраните изменения.
Запустите Battlefield 2042 и проверьте наличие ошибки DirectX.
Попробовал ваши варианты и те, что предлагали выше. Ничего не помогло.
Все необходимое программное обеспечение для игры обновлено (VC++, DirectX, драйвера и т.д.). Windows 10 обновлен до последней текущей версии, в центре обновления windows утверждает, что у меня последняя версия, а игра хочет еще более новую. Видимо с Windows 11. Файл подкачки менял, маштабирования экрана в панели Nvidia изменял. Такая же ошибка.
Это конечно не релиз, но грустненько
![]()
![]()
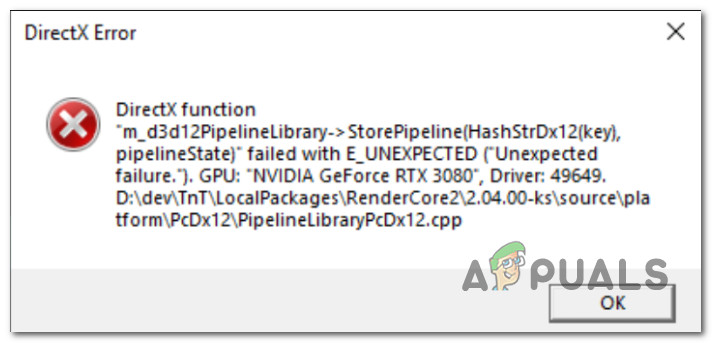
DXGI_ERROR_DEVICE_REMOVED or DXGI_ERROR_DEVICE_HUNG are the most common DirectX errors when playing Battlefield 2042. If you are also one of the victims of Battlefield 2042 DirectX error, you can check out this tutorial on MiniTool Website for more help.
Battlefield 2042 DirectX Error
Battlefield 2042 DirectX error is usually caused by the incompatibility between the game and your DirectX version, so it is very necessary to update your computer and the version of DirectX. Besides the above reason, Battlefield 2042 DirectX error may occur due to outdated GPU drivers, missing DirectX package, enabled DLSS, wrong dependencies of MachineGUID and so on. If you meet this error by accident, you can try the easy solutions provided on this page.
Tip: You might also face Battlefield 2042 issues like Battlefield 2042 crashing on PC or black screen. In this circumstance, go to – [Solved] Battlefield 2042 Black Screen Issues (7 Solutions) for detailed workarounds.
How to Fix Battlefield 2042 DirectX Error?
Way 1: Update Your Graphics Driver
Battlefield 2042 beta DirectX error may be caused by a driver issue. Therefore, you need to update your graphics driver to the latest version. There are two ways to update your graphics. One is to update it manually, the other is to update it automatically. Of course, the latter one is more convenient and fast. To do so:
Step 1. Press the Windows icon and X to open the quick start menu.
Step 2. Choose Device Manager.
Step 3. Click on Display adapters to show your graphics driver.
Step 4. Right-click on your graphics and select Update driver.
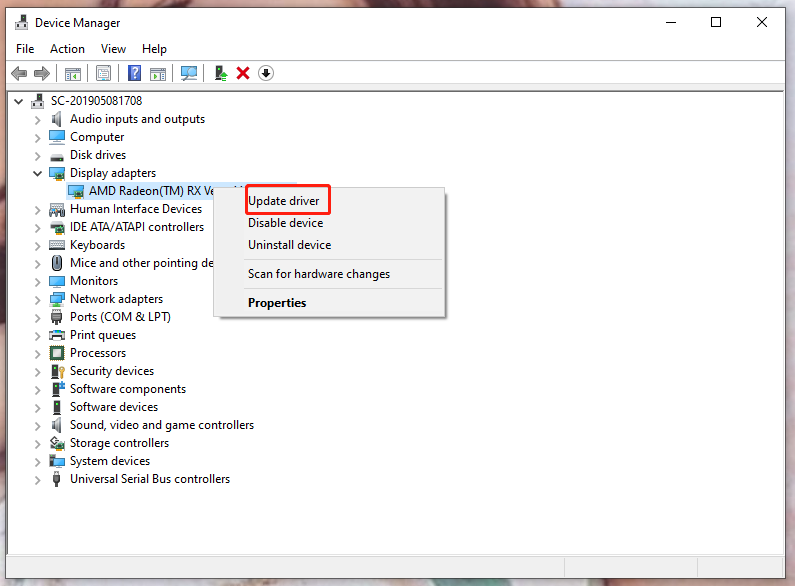
Step 5. Click Search automatically for updated driver software and follow the on-screen instructions.
Tip: Do you know what’s the difference between GPU and CPU? This article will show you thoroughly – CPU VS GPU: What’s the Difference Between Them? A Guide for You!
Way 2: Check Windows Updates
You may encounter Battlefield 2042 DirectX error due to outdated or corrupted Windows operating system version. Make sure to follow the next instructions carefully.
Step 1. Press Win + I to open Windows Settings.
Step 2. Click Update & Security > Windows Update.
Step 3. On the right page, click Check for updates.
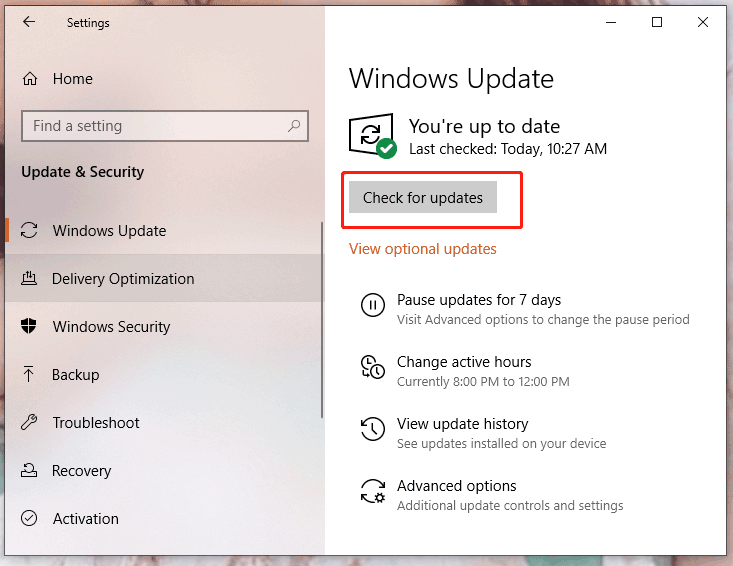
Step 4. If there is an update available, click Download and install.
Step 5. Wait patiently for a while until the update completes.
Tip: Maybe there’s something wrong with your Windows and you cannot check for Windows Updates. [SOLVED] Windows Update Cannot Currently Check for Updates will offer you some fixes to deal with that.
Way 3: Update DirectX
If you have already updated your Windows but it still doesn’t work. The chance is high that somehow the DirectX version is outdated.
First, you should check your DirectX version.
Step 1. Press Win + R to launch the Run box.
Step 2. Type dxdiag and click OK to open DirectX Diagnostic Tool.
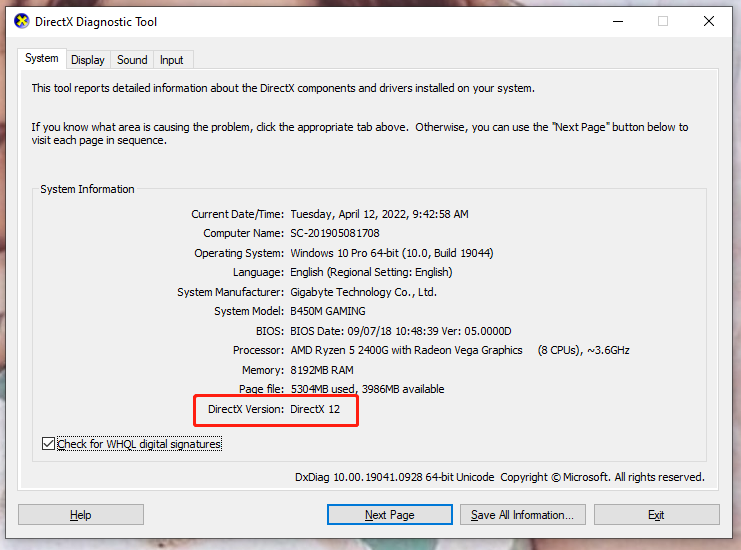
Step 3. In the System tab, you can see your DirectX version. If yours is not DirectX 12, you should do the next steps.
Step 4. Go to download the DirectX End-User Runtime Web Installer on your computer. Remember to reboot your PC after installing or updating the DirectX version manually.
Way 4: Edit the Game Profile
Even if keeping the latest version of DirectX is very significant, your device may not support it. If Battlefield 2042 DirectX error is caused by this factor, you can change the settings config files.
Step 1. Open File Explorer and click the Documents folder.
Step 2. Double-click the Battlefield 2042 folder > Settings.
Step 3. Right-click PROFISAVE_profile and select Open with Notepad.
Step 4. Make sure that you are inside the contents of the PROFISAVE_profile file.
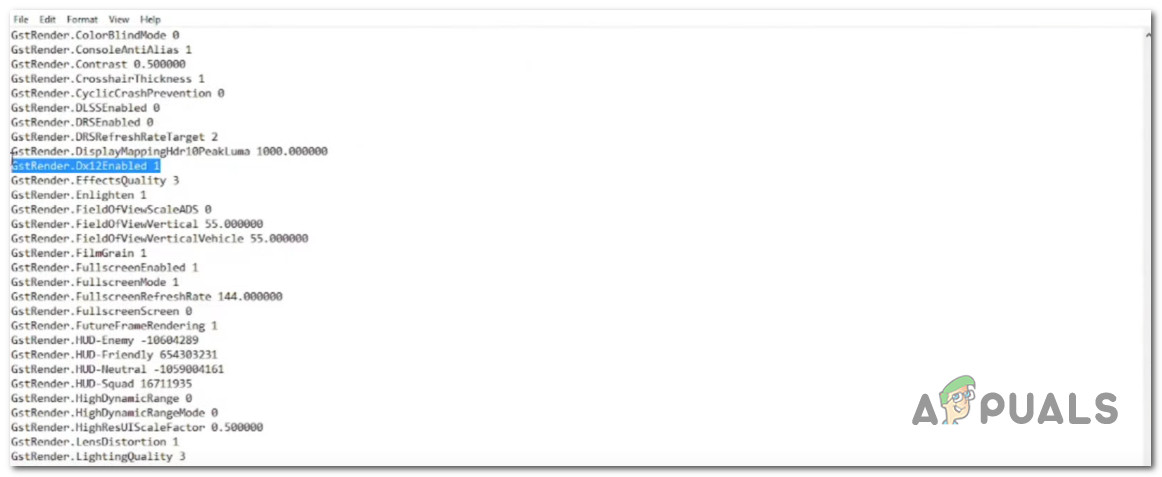
Step 5. Navigate to the option named GstRender.Dx12Enabled at the bottom of the screen.
Step 6. Change the value from 0 to 1.
Step 7. Select File and click on Save to exit this window.
Way 5: Check the Integrity of Game Files
At times, corrupted or missing game files may also trigger game launching or running problems. As a result, you are supposed to check the integrity of game files and repair them in time.
Step 1. Click Steam > Library.
Step 2. Scroll down to locate Battlefield 2042 and right-click it to choose Properties.
Step 3. Click LOCAL FILES > VERIFY INTEGRITY OF GAME FILES.

Step 4. Wait for the process to get accomplished.
Way 6: Clear the Game Cache
Clearing the game cache is helpful in improving game performance and fixing some random crashes including DirectX function error Battlefield 2042.
Tip: To do so, you must close the Steam client.
Step 1. Press Win + R to open up the Run box, copy %ProgramData%/Steam in the box, and click OK.
Step 2. Delete all folders except LocalContent.
Step 3. Open the Run box again and paste %AppData% and hit Enter.
Step 4. Scroll down to navigate to Steam and delete it.
Step 5. Navigate to C:\Users\Your Username\AppData\Local, and delete the Steam folder again.
Step 6. Restart the game via Steam.
Way 7: Disable DLSS
If you enable DLSS for the game and you own an Nvidia card. You have to disable DLSS and reboot the game to check whether Battlefield 2042 DirectX error appears or not.
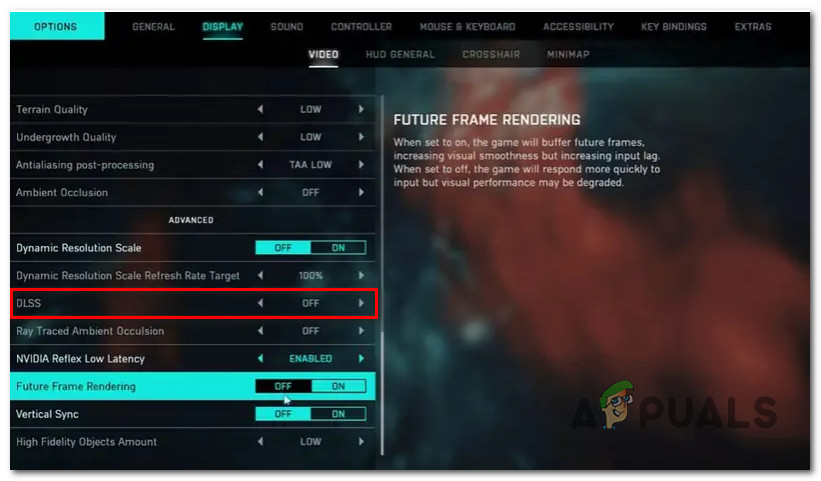
Step 1. Open the game and the Graphics Setting menu.
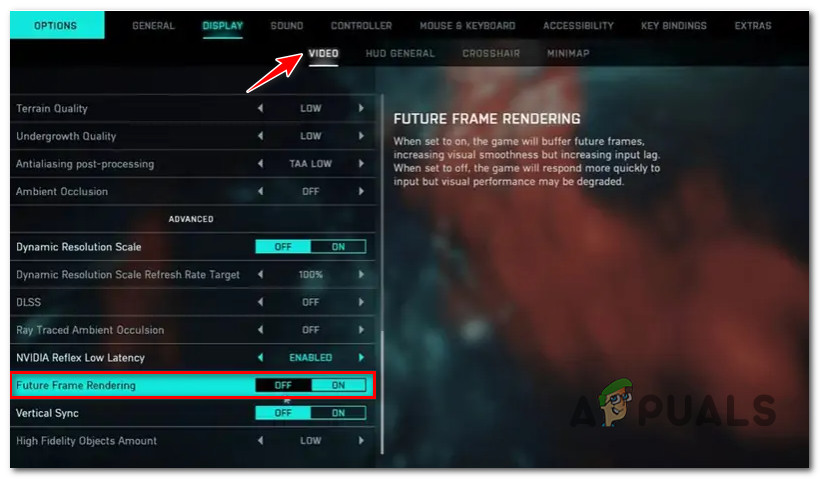
Step 2. Click Options > Display > Video.
Step 3. Turn off DLSS.
Way 8: Change the Machine GUID Registry Key
The last possibility of DirectX error Battlefield 2042 is that a registry key may point to the wrong dependency, so you need to change the actual path of MachionGUID to the right one.
Step 1. Open the Run box, type regedit in the blank box and press Ctrl + Shift + Enter to open Registry Editor with administrator privileges.
Step 2. Copy & paste the following path in the navbar and hit Enter.
HKEY_Local_Machine\Software\Microsoft\Cryptography\

Step 3. In the right-hand menu, right-click MachionGuid and choose Modify.
Step 4. Replace the value of the MachineGuid string with the following content and hit Enter to apply this change.
d1eb246e-6243-4460-a88e-5d4e52b1ef6b
Step 5. Reboot your device.
Some PC gamers are reporting that Battlefield 2042 crashes with a DirectX error that also leaves lingering performance issues leading the PC to become unstable. Most affected users are reporting that the GPU disappeared briefly once this crash occurs.
After investigating this particular issue thoroughly, we realized that there are several underlying causes that might be responsible for producing this error. Here’s a shortlist of potential causes that are known for causing this DirectX issue with Battlefield 2042:
- DLSS is Enabled – Supersampling powered by deep learning is an exclusive Nvidia technology that is also used inside BattleField 2042. But as some users have reported, this technology can also be responsible for the DirectX error crash with certain PC configurations. You can test this theory by temporarily disabling DLSS and see if the game ends up crashing with the same kind of error.
- Outdated GPU drivers – Most of the DirectX-related crashes that we’re around back when the game entered the Beta stage have since been patched by updates released by graphics card manufacturers (Nvidia and AMD). If you haven’t already, ensure that you install the latest available GPU driver.
- Missing DirectX package – Keep in mind that Battlefield 2042 uses Dynamic Link library files from a lot of different DirectX redist. packages. To make sure the game has every dependency it needs, you’ll need to run the DirectX End-User Web installer and install every missing DirectX package.
- DirectX 12 is enabled on unsupported GPU – Another reason why you might see this problem occurring is a situation where the game tries to use DirectX 12 on a configuration where this technology is not supporting, resulting in the game crashing with a DirectX error. To fix this problem, you’ll need to manually edit the Settings file of the game to ensure that DirectX12 is actually disabled.
- Future Frame Rendering-related crash – Although FFR is a great feature that helps improve the framerate if you have a configuration with a powerful GPU and a less powerful CPU, going this route might make the game less stable and force it to crash with a DirectX error. To avoid this problem, you’ll need to disable frame rendering from the in-game settings.
- MachineGUID points to wrong dependencies – There is one less common scenario where a key DirectX dependency used by the game has recently become inaccessible due to an improper Registry key. If this scenario is applicable, you can fix the problem by making some changes via Registry Editor.
Now that you are aware of every potential culprit that might be responsible for this problem, let’s go over every potential fix that other affected users have successfully used to get to the bottom of the issue.
1. Disable DLSS via GForce Experience (if applicable)
One of the most common reasons why you might expect to face this particular issue on a configuration with an Nvidia GPU is a scenario where DLSS (Deep Learning Super Sampling) is enabled.
Note: DLSS is a video rendering technique that’s exclusive to Nvidia graphics cards. It uses proprietary deep learning technology to boost the FPS without sacrificing to mooch of the visual quality.
Although this Nvidia feature is amazing for the most part, it also tends to make certain games (including Battlefield 2042) a lot less stable and prone to crashes.
If you are using an Nvidia card and DLSS is enabled for BattleField 2042 while you’re encountering the DirectX-related crash, you should start by disabling DLSS and launching the game again to see if the problem is now fixed.
When it comes to doing this, the easiest way is to do this is from Display > Video in the in-game settings.
Follow the instructions below for specific instructions on how to do this:
Note: These instructions will only be applicable as long as you can launch the game normally and play for a bit before getting the DirectX crash. If you see this error at every game startup, move directly to the next method below.
- Open the game normally and access the Options menu after you get past the initial screen.
- Once you’re inside the Settings menu, access the Display options using the ribbon menu at the top.
- Next, select Video from the sub-menu and ensure that DLSS is set to Off before saving the changes.

Disabling the DLSS functionality from the in-game menu - Once the DLSS functionality has been disabled and the changes saved, restart the game and see if the DirectX error has stopped occurring.
If this method was not applicable or you’re still experiencing this issue even after following the instructions above, move down to the next potential fix below.
2. Update GPU drivers
Keep in mind that a lot of the well-known issues that have caused this type of error back when the game was in Beta have since been addressed by Nvidia and AMD by hotfixes included in the latest cumulative driver update releases.
You can take advantage of them by using the dedicated utility (from AMD or Nvidia) to make sure that you’re using the latest compatible GPU driver and dependencies – using Nvidia Experience or AMD adrenalin.
Depending on which dedicated GPU card you’re using, follow one of the sub-guides below to update your GPU drivers to the latest version available:
Update your Nvidia GPU driver
Before you go ahead and update your current GPU driver for your Nvidia card, you should start by uninstalling every driver and remnant file first. Doing this will force your PC to switch over to generic driver equivalents, making the new installation of the dedicated driver way less prone to being affected by system file corruption.
Follow the instructions below for specific instructions on updating your Nvidia GPU driver:
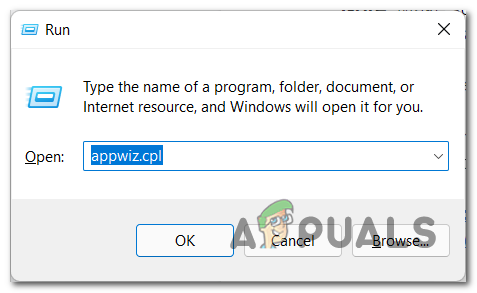
- Open up a Run dialog box by pressing Windows key + R. Next, type ‘appwiz.cpl’ inside the text box and hit Enter to open up the Programs and Features menu.

Open up the Programs and Features menu Note: If you’re prompted by the User Account Control window, click Yes to grant admin access.
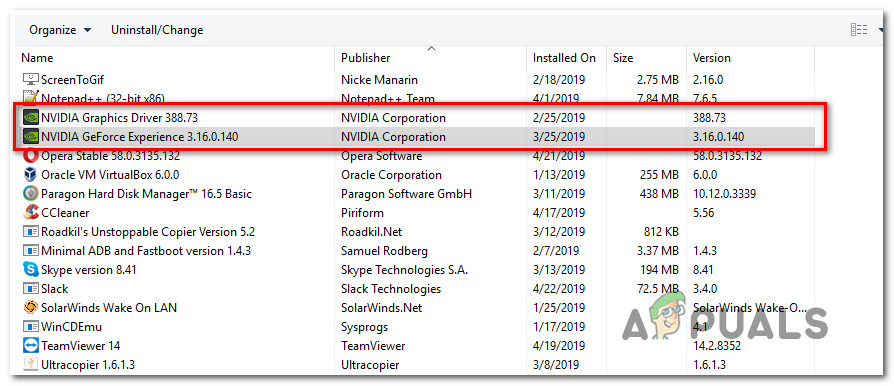
- Once you’re finally inside the Programs and Features menu, start by clicking on the Publisher button to order every item based on their publisher. This will allow us to spot the entires belonging to Nvidia more easily.

Ordering programs via Publisher - After every program is ordered accordingly, scroll down and find the entires published by Nvidia Corporation.
- Once you manage to find the correct entries, right-click on every Nvidia item and choose Uninstall from the context menu.

Uninstalling every Nvidia app - Follow the on-screen instructions to uninstall every piece of software published by NVIDIA Corporation from your computer.
- Once every NVIDIA item is uninstalled, reboot your computer and wait for the next startup to complete. This will force the generic GPU drivers to kick back into action.
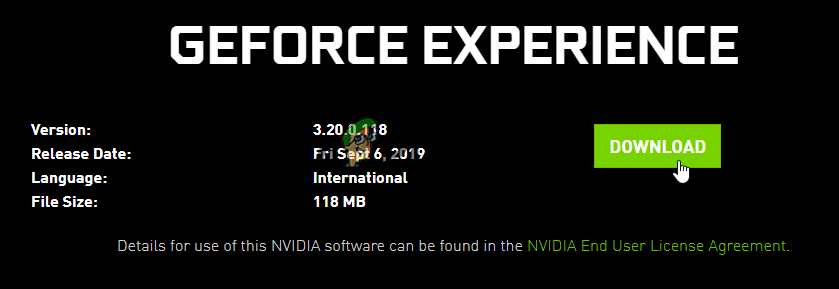
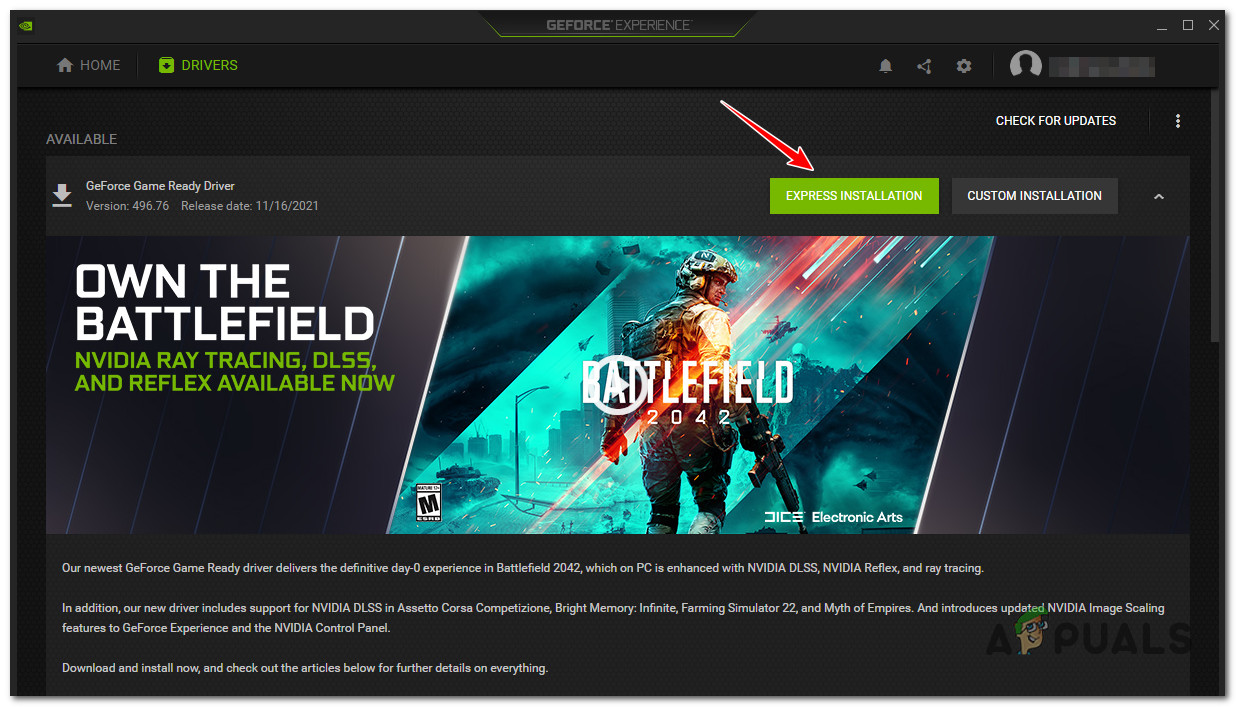
- After your PC boots back up, visit the official download page of GeForce Experience.
- Click on the Download Now button to download the latest version of GeForce Experience.

Downloading Nvidia Experience - Follow the on-screen instructions to install the latest version of GeForce Experience on your PC, then press Yes to grant admin access when prompted to do so.
- Once GeForce experience has been successfully installed, open it and navigate to the Drivers page to see if a new driver version is waiting to be installed.
- If you do have a new version waiting to be installed, click on Express installation, then follow the remaining prompts to complete the installation of the driver.

Downloading the latest Nvidia driver version - Once the installation of the driver is complete, reboot your PC (you should be prompted to do this automatically) in order to finalize the changes.
- After your PC boots back up, launch Battlefield 2042 once again and see if the problem is now fixed.

Update your AMD GPU driver
If you are using an AMD graphics card, we highly recommend that you take the time to use the AMD cleanup utility to remove the current GPU driver along with every associated dependency.
This will ensure that no corruption file ends up interfering with the new installation. After you do this, you can safely download the latest GPU version using the Auto-Detect utility.
Here are the step-by-step instructions that will guide you through the entire process:
- First, start by opening this official download page of the AMD Cleanup Utility link to automatically download the latest version.
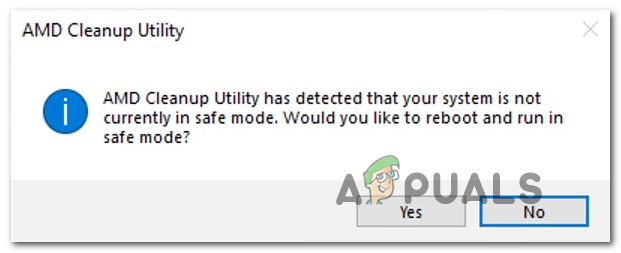
- After the download is complete, right-click on the AMD Cleanup Utility and choose Run as administrator from the context menu that just appeared.
- At some point, you will be prompted to grant admin and boot in Safe Mode to make the utility more effective. When this happens, accept the prompt by clicking Yes.

Deploying the Cleanup Utility Note: This tool will first uninstall the current AMD drivers, then deploy a system-wide scan that will look for remnant registry files and startup items that contain the AMD driver store signatures. If it finds any remnant data, it will swiftly remove it without affecting other system components. The entire process is automated so you won’t be required to do anything manual on your part.
- When you are prompted that the removal of the driver is about to begin, click Ok to start the process and have it run in the background.

Confirming the driver removal operation Note: Once the AMD Cleanup Utility kicks into action, you can expect the display to start flickering before finally going to black for a few seconds. Don’t freak out when this happens – it’s absolutely normal.
- Once the cleanup operation is finally complete, click on Finish to reboot your computer normally and make the transition to the generic drivers.
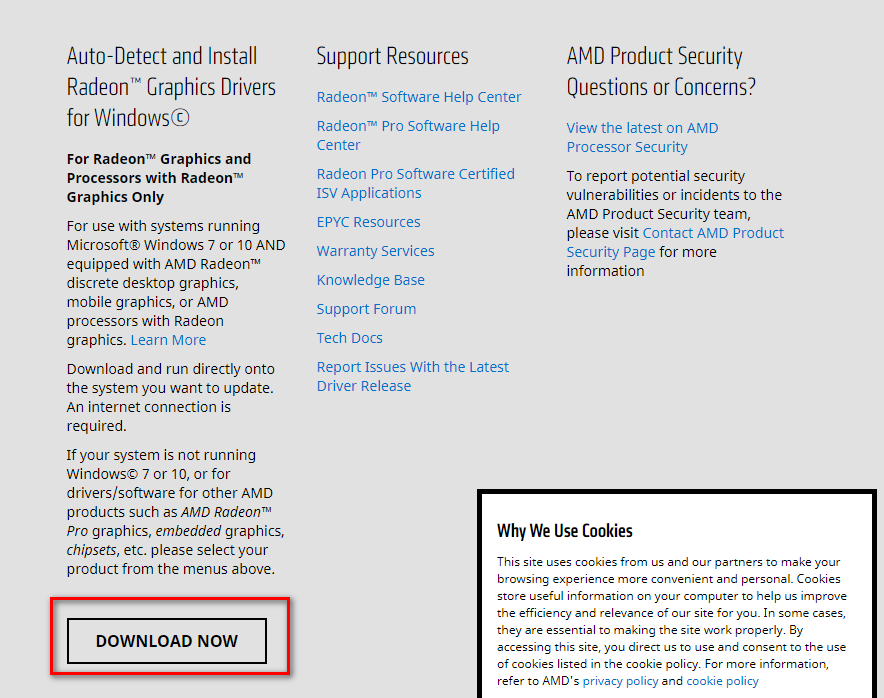
- After your Windows computer boots back up, visit the official AMD page of the Auto-Detect and Install Graphics utility.
- Once you are inside the correct page, scroll all the way down to the Auto-Detect and Install Radeon Graphics Drivers for Windows section and click on Download Now.

Downloading the Auto-Detect utility - After the download is finally complete, go ahead and double-click on the executable that you’ve just downloaded and follow the remaining prompts to install Radeon Adrenalin.

Installing the AMD Adrenalin software Note: You can change the default destination folder if you want, but this is not recommended.
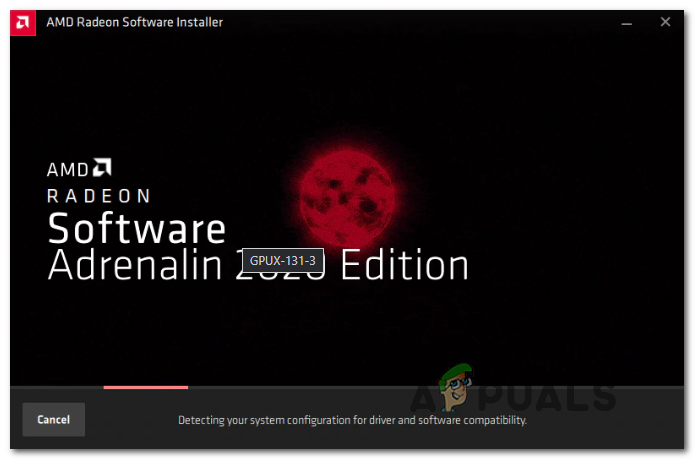
- Once the installation is complete, you should see AMD Adrenalin automatically launching itself as it starts scanning for the latest compatible AMD graphic drivers.
- Wait patiently until the driver scan is complete.
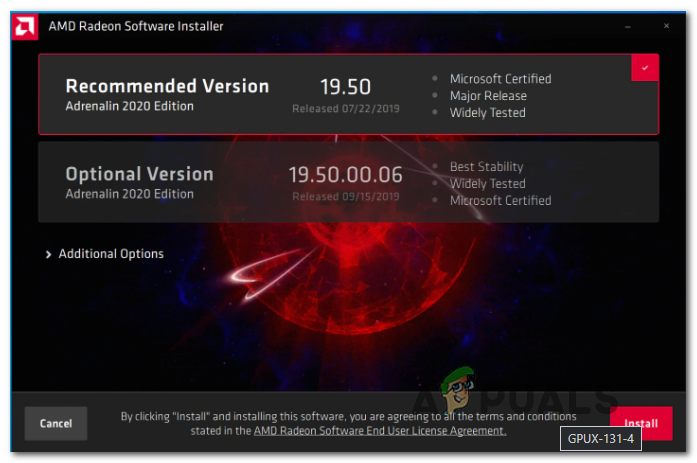
- Once the utility detects the appropriate system configuration and the correct driver that needs to be installed, you will be prompted with the option to install it. Hit Install when the prompt appears.

Downloading the latest AMD driver Note: Our recommendation is to install both the Recommended and the Optional driver.
- When prompted by the EULA (End User License Agreement), hit I agree to complete the procedure.
- Reboot your PC one final time to complete the operation, then launch Battlefield 2042 once again and see if the DirectX error is now fixed.

If the same kind of issue is still occurring even after you’ve ensured that you’re using the latest GPU drivers, move down to the next potential fix below.
Install every missing DirectX package
Keep in mind that BattleField 2042 draws from a lot of different DirectX redist. releases to achieve the smooth framerate that we’re all used to. But because of this, you’ll need to ensure that you have every public version of DirectX installed on your PC.
Several affected users that we’re also dealing with this particular DirectX-related crash when launching BattleField 2042 have confirmed that the problem stopped occurring once they run the DirectX End-User Runtime Web installer and install every missing DirectX iteration on their computer.
Follow the instructions below for specific steps on deploying the DirectX End-User Runtime Web installer on your PC:
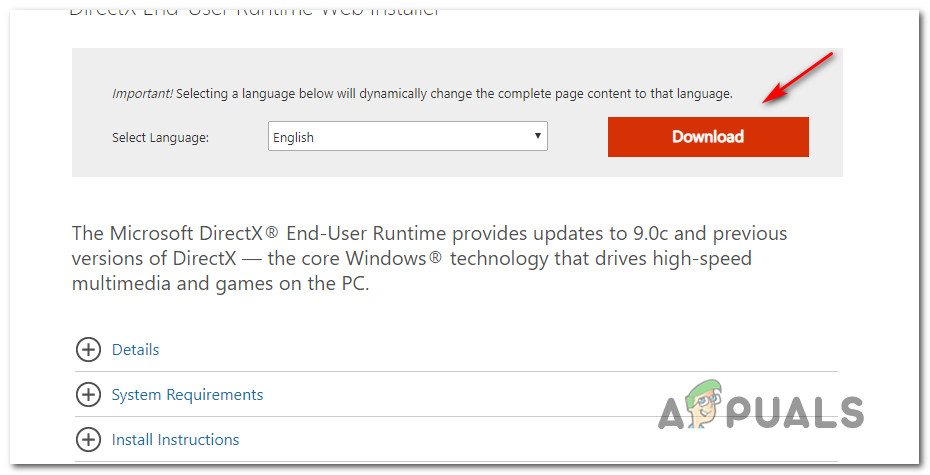
- Visit the download page of the DirectX End-User Runtime environment and select the appropriate installer language before clicking on the Download button.

Downloading the DirectX end-user runtime utility - Once you reach the next screen, uncheck every Microsoft bloatware recommendation and then click on No thanks and continue to DirectX End-User Runtime Web installer button.
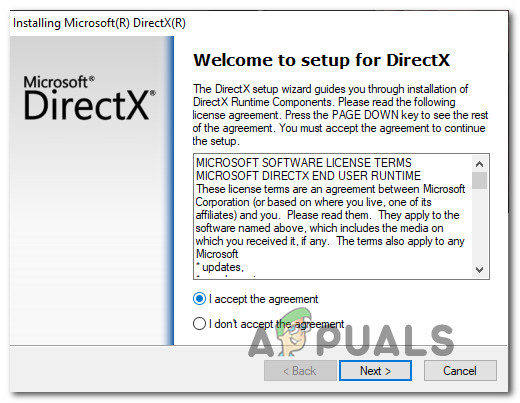
- Wait until the dxwebsetup.exe installer is downloaded, then follow the on-screen instructions to complete the process of installing every missing DirectX version to the latest.

Installing the missing DirectX installations - After the operation is complete, reboot your PC and see if the problem is fixed by booting up Battlefield 2042 once again and seeing if the DirectX error is fixed.
If you’re still experiencing the DirectX error when you attempt to launch the game or when you’re actually playing, move down to the next potential fix below.
Edit the game Profile
Another potential reason why you might experience this particular issue when attempting to launch Battlefield 2044 is an instance in which DirectX 12 is actually enabled in your in-game config files even if your PC doesn’t support it.
This type of issue typically occurs on PCs where there was a recent GPU change.
If you’re experiencing this type of issue, chances are you won’t be able to access the in-game settings menu in order to disable the use of DirectX12.
Fortunately, you can bypass this completely by editing the settings config files instead to ensure that DirectX12 remains disabled.
Follow the instructions below for specific instructions on how to do this:
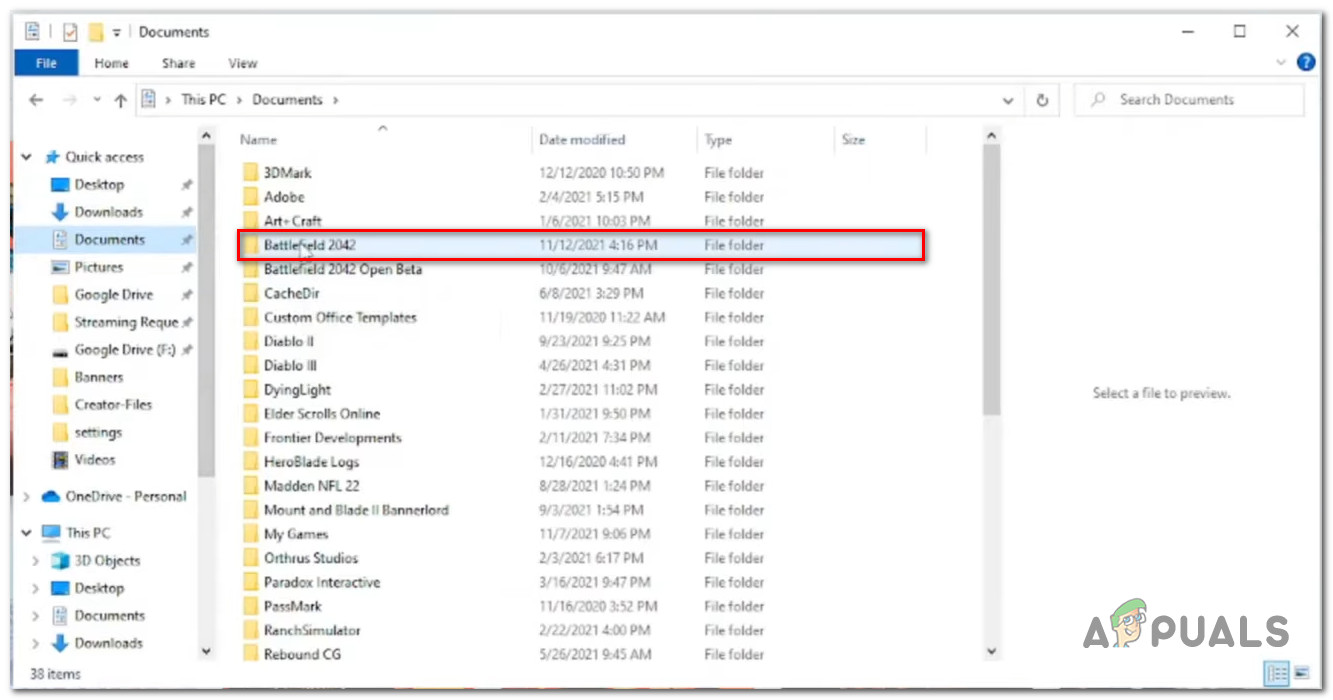
- Open File Explorer and open the Documents folder.
- Inside the Documents folder, you should find a folder named BattleField 2042. Double-click on it to access it.

Accessing the Battlefield 2042 Documents folder - Next, double-click on the Settings folder.
- Inside the settings folder, right-click on PROFISAVE_profile and choose Open With > Notepad (or any other text editor).
- Once you’re inside the contents of the PROFISAVE_profile file, scroll down all the way to the bottom of the screen and you should discover an option named GstRender.Dx12Enabled.
- When you discover it, change the associated value from 0 to 1.

Disable DirectX12 from the Profile file of Battlefield 2042 Note: This will ensure that DirectX 12 will remain disabled.
- Go to File from the ribbon at the top and click on Save, then you can safely close this window.
- Launch Battlefield 2042 once again and see if the problem is now fixed.
If this method was not applicable or it didn’t work in your case, move down to the next potential fix below.
Disable Future Frame Rendering (if applicable)
Future Frame Rendering (FFR) is a super useful feature, especially in those situations where you have a powerful GPU and a sub-par CPU. This feature takes a bit of load off your CPU and gives it to the GPU.
However, the problem with future frame rendering is that it ends up making the game (Battlefield 2042) unstable on a lot of different PC configurations. Expect much more frequent crashes, especially if you’re using an AMD GPU.
The solution if this scenario is applicable is to simply disable future frame rendering from the in-game Display menu.
Follow the instructions below to disable future frame rendering from the in-game settings menu of Battlefield 2042:
Note: If you get the DirectX error at every attempted startup, skip this method entirely and move down to the final potential fix below.
- Open Battlefield 2042 and access the Options menu after you get past the initial startup screen.
- From the Options menu, access the Display settings (using the ribbon bar at the top), then select Video from the sub-menu below.

Disabling Future Frame Rendering on Battlefield 2042 - Once you disable Future Frame Rendering, save the changes then restart the game and see if the crashes have stopped.
If the same kind of issue is still occurring, move down to the final fix below.
Edit the machine GUID registry key
A less frequent reason for the DirectX error with Battlefield is a registry key pointing to the wrong dependency, forcing your PC to crash the game at every attempted startup.
This exact problem is actually also appearing with BattleFields’s biggest rival series (Call of Duty).
Fortunately, several tech-savvy users have discovered that the problem can be swiftly resolved by using the Registry Editor to change the actual path of MachineGUID to the correct dependency. As some affected users that we’re experiencing the same problem have reported, doing this will finally make the game stable enough to get past the initial screen.
Follow the instructions below for specific instructions on deploying this fix:
- Press Windows key + R to open up a Run dialog box. Next, type ‘regedit’ and press Ctrl + Shift + Enter to open up the Registry Editor with admin access.

Opening up the Registry Editor - When you’re prompted by the User Account Control, click Yes to grant admin access.
- Once you’re inside the Registry Editor, use the left-hand side menu to navigate to the following location:
HKEY_Local_Machine\Software\Microsoft\Cryptography\
Note: You can either get here instantly by pasting the location directly into the nav bar at the top or you can manually double-click each Registry entry.
- Once you arrive inside the correct location, move over to the right-hand menu and right-click on machineGUID .
- Next, click on Modify from the context menu that just appeared.

Editing the MachineGUID string - Next, replace the value of the MachineGuid string with the following and click Ok to save the changes:
d1eb246e-6243-4460-a88e-5d4e52b1ef6b
- Restart your PC and see if the problem is now fixed when you launch Battlefield 2042 once again.
The long-anticipated Battlefield 2042 Early Access is already out and the full release will be on November 19th. However, the hype seems to have brought some disappointment. Many players are encountering different DirectX errors and can’t play the game. The most common ones are DXGI_ERROR_DEVICE_HUNG and DXGI_ERROR_DEVICE_REMOVED errors.
The developers are investigating the issues, and hopefully, we will get a definitive fix when they roll out the new updates. Before that, we have gathered some fixes that have solved the errors for some players for you to try.
Battlefield 2042 system requirements
| Minimum | Recommended | |
| OS | Windows 10 (64-bit) | Windows 10 (64-bit) |
| Processor | AMD Ryzen 5 3600 or Intel Core i5 6600K |
AMD Ryzen 7 2700X or Intel Core i7 4790 |
| Graphics | Nvidia GeForce GTX 1050 Ti or AMD Radeon RX 560 |
Nvidia GeForce RTX 3060 or AMD Radeon RX 6600 XT |
| Memory | 8 GB | 16 GB |
| Video memory | 4 GB | 8 GB |
| Storage | 100 GB | 100 GB SSD |
| DirectX | Version 12 | Version 12 |
Try these fixes…
1: Update your graphics driver
2: Repair game files
3: Install the latest Windows updates
4: Force-run DirectX 12
5: Clear game cache
Fix 1: Update your graphics driver
DirectX errors in Battlefield 2042 usually suggest a driver issue. Some of the error messages directly ask you to install the latest graphics driver.
There are two ways to keep your graphics card driver up-to-date. One is to manually update it via Device Manager. If Windows fails to detect the latest available update, you can also search on the manufacturer’s website. Be sure to choose only the driver that is compatible with your Windows version.
- NVIDIA
- INTEL
- AMD
- Asus
Automatic driver update – If you don’t have the time, patience, or computer skills to update your driver manually, you can, instead, do it automatically with Driver Easy. Driver Easy will automatically recognize your system and find the correct driver for your exact graphics card and your Windows version, then it will download and install the driver correctly:
- Download and install Driver Easy.
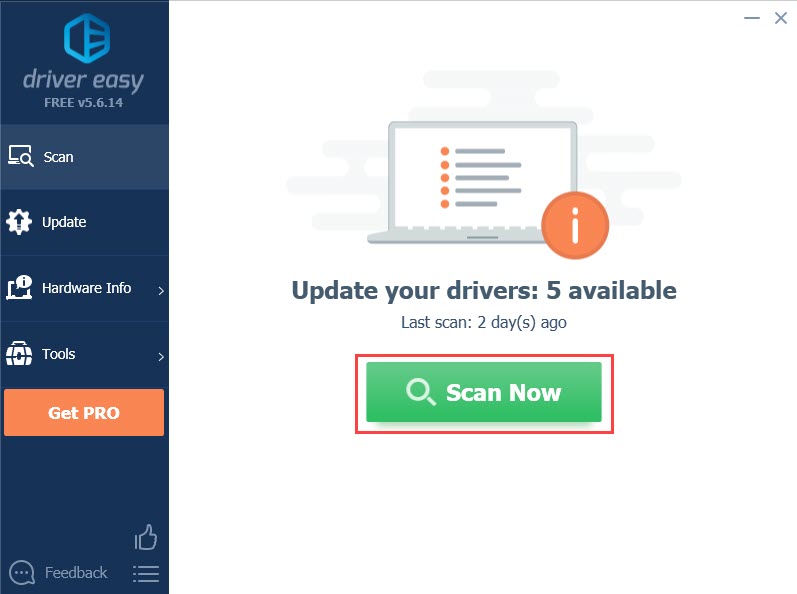
- Run Driver Easy and click the Scan Now button. Driver Easy will then scan your computer and detect any problem drivers.

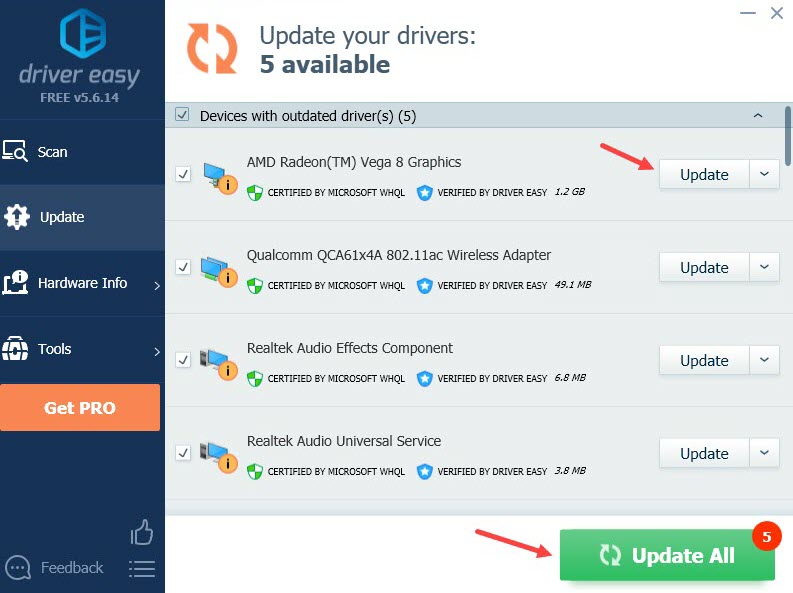
- Click the Update button next to the flagged graphics card driver to automatically download the correct version of the driver, then you can manually install it (you can do this with the FREE version).
Or click Update All to automatically download and install the correct version of all the drivers that are missing or out of date on your system. (This requires the Pro version which comes with full support and a 30-day money-back guarantee. You’ll be prompted to upgrade when you click Update All.)

The Pro version of Driver Easy comes with full technical support.
If you need assistance, please contact Driver Easy’s support team at support@drivereasy.com.
Restart your PC for the new driver to take effect. If updating the graphics driver doesn’t solve your problem, try the next fix.
Fix 2: Repair game files
Another quick fix you can try is to repair your game files. If any files are missing or corrupted, the Origin client will add or replace the problematic files for you. Here’s how:
- Launch Origin, and click My Game Library.
- Right-click Battlefield 2042, then click Repair Game.
- This process may take a while. Restart Origin and run Battlefield 2042 after the repair is complete.
If this doesn’t solve your problem, try the next fix.
Fix 3: Install the latest Windows updates
According to players’ reports, updating the system has solved the DirectX errors for them. Keeping your system up-to-date may solve compatibility issues and improve stability. This fix may make a difference if your DirectX errors were triggered by Windows issues.
If you’re on Windows 10, it’s not required to update to Windows 11 because it’s not a guaranteed fix, plus it may cause issues for your other games. Some players specifically pointed out that installing the Windows 20H2 or 21H1 updates was helpful.
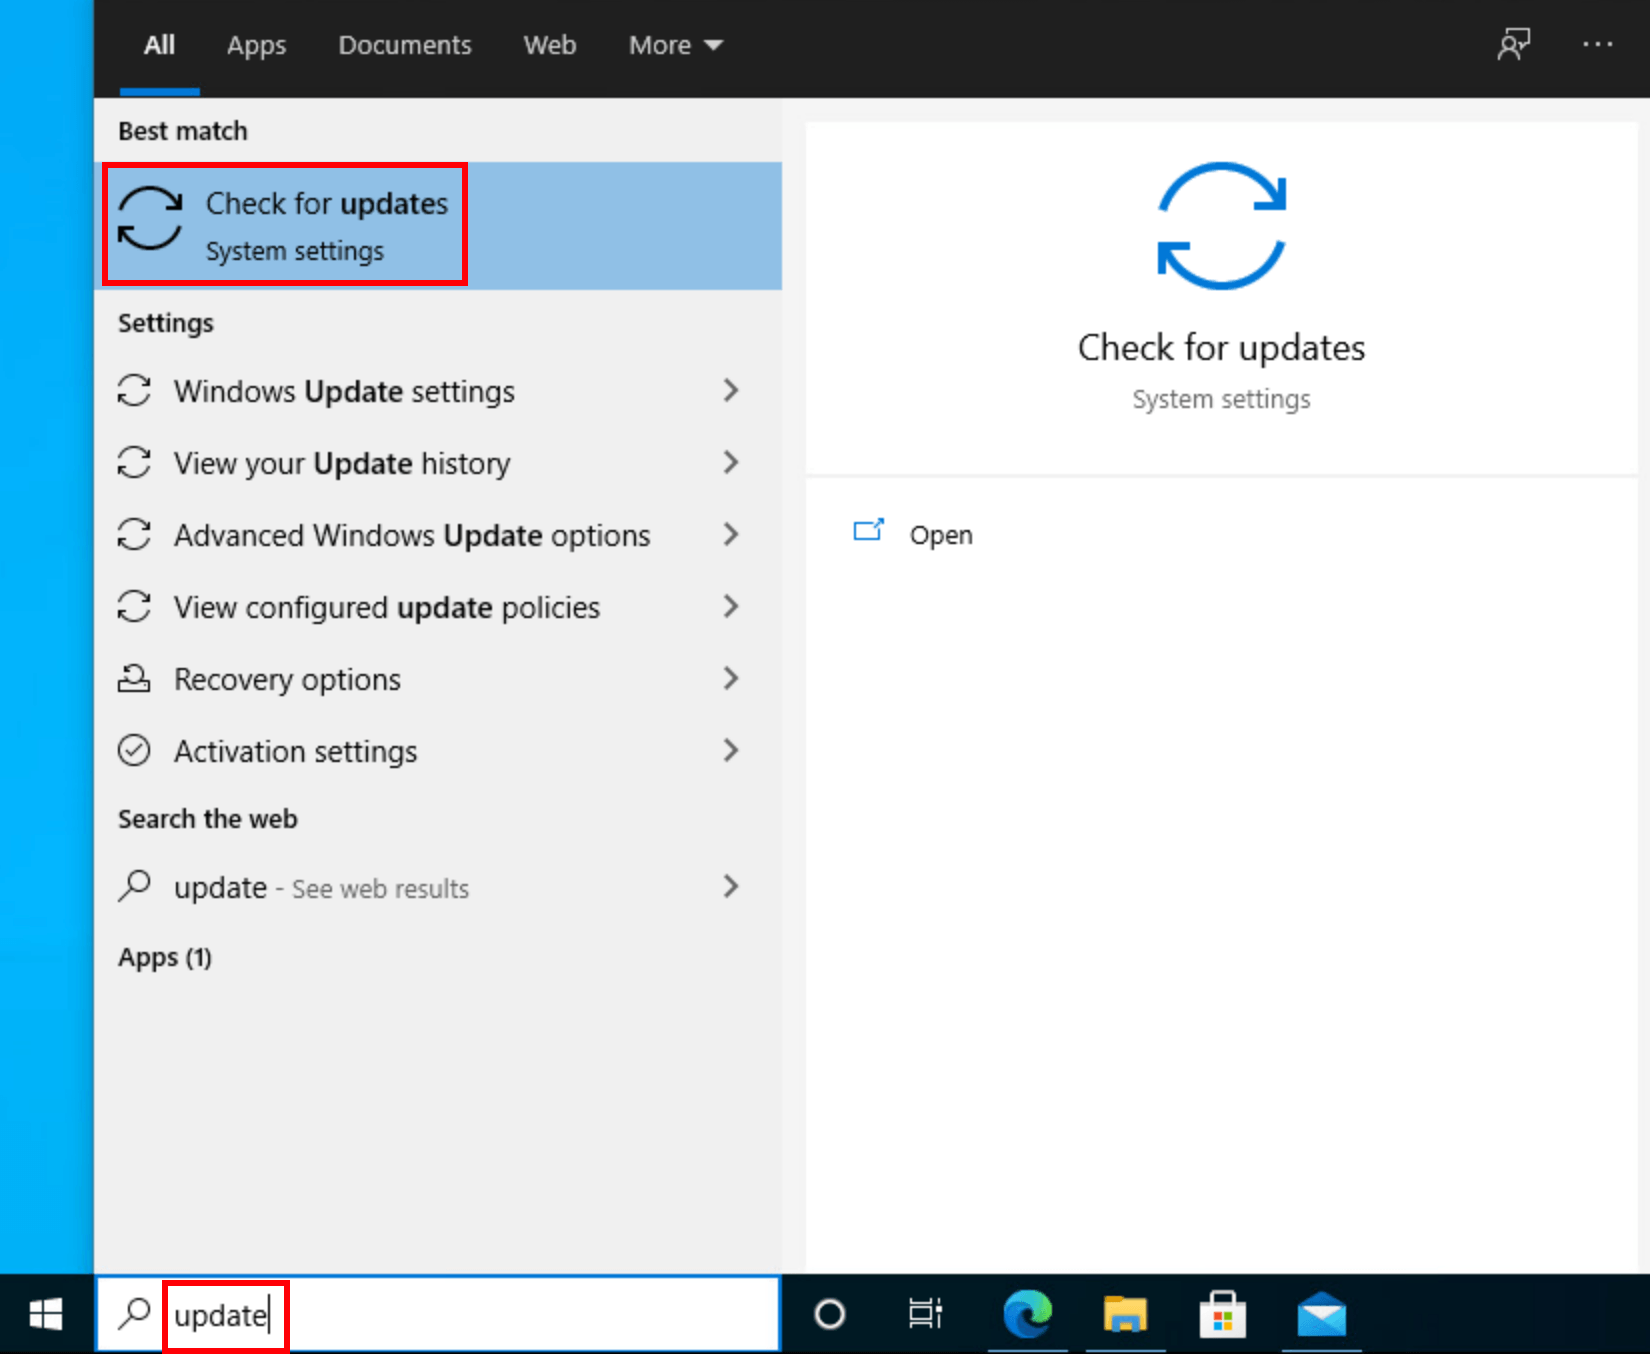
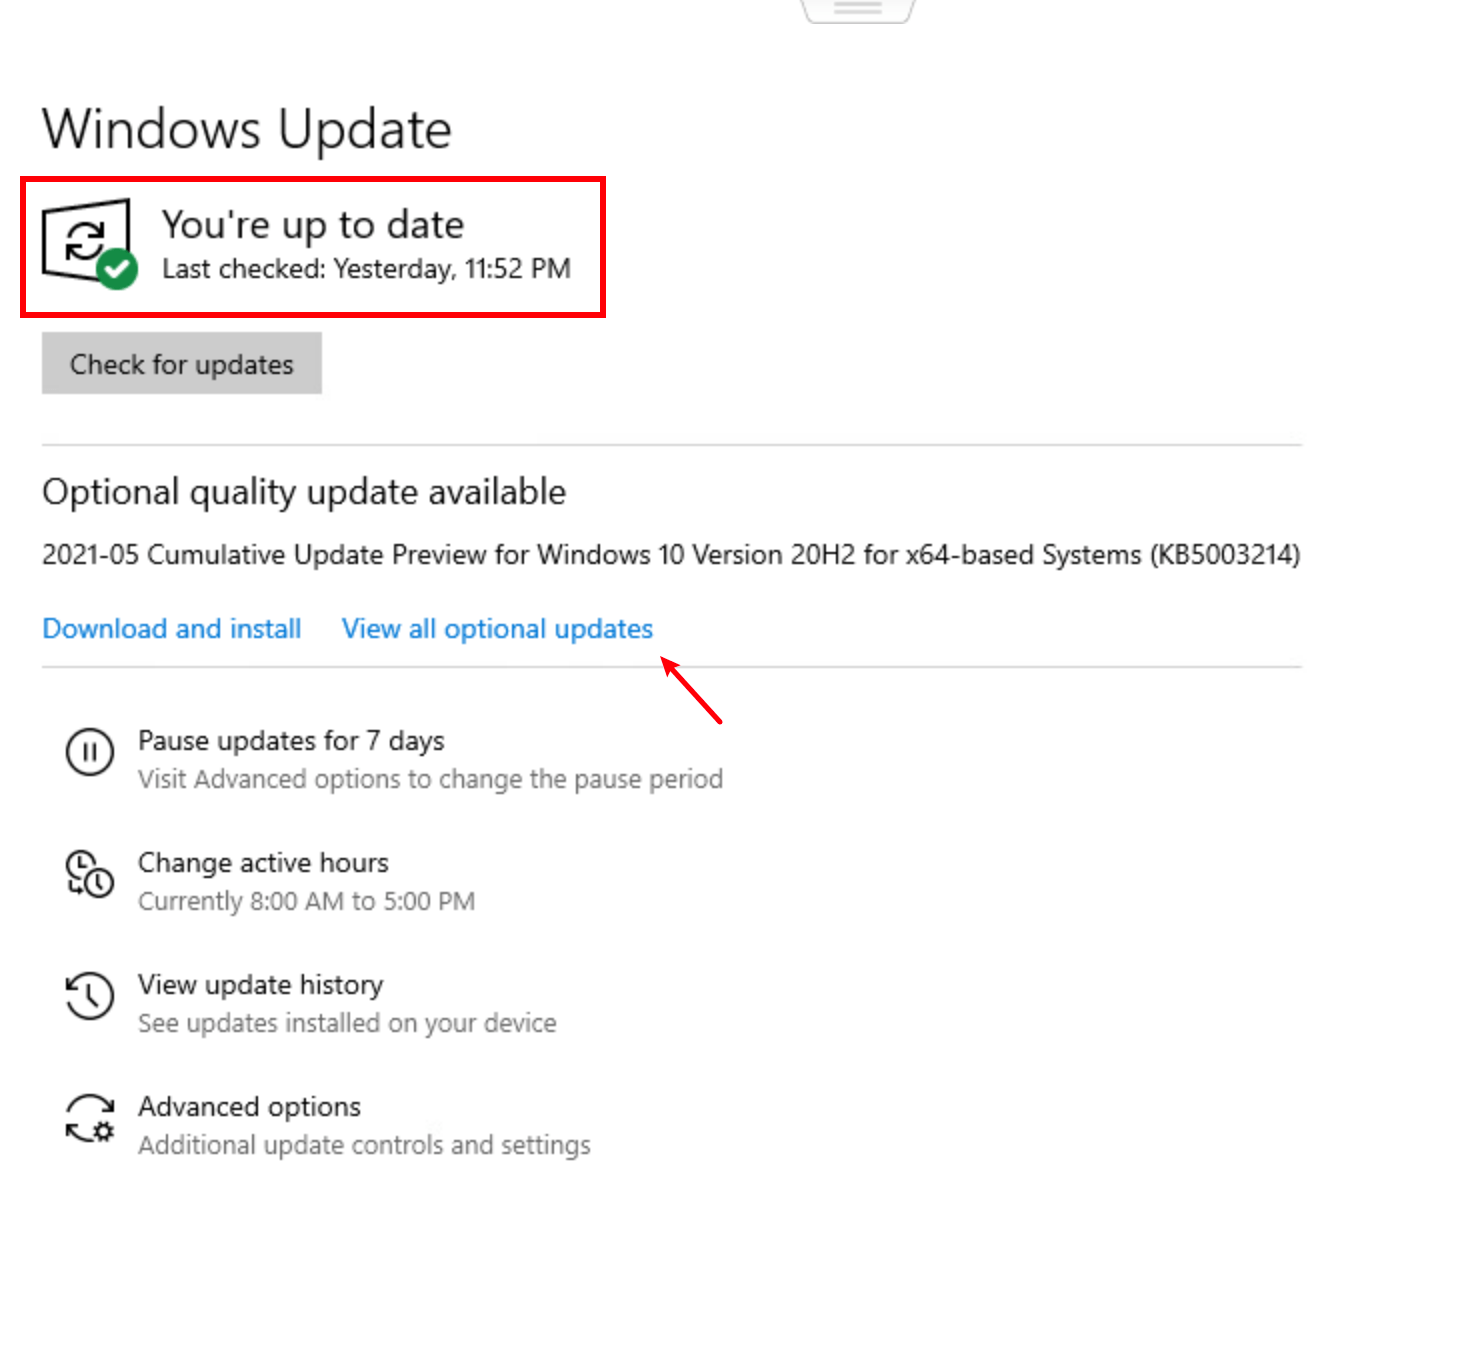
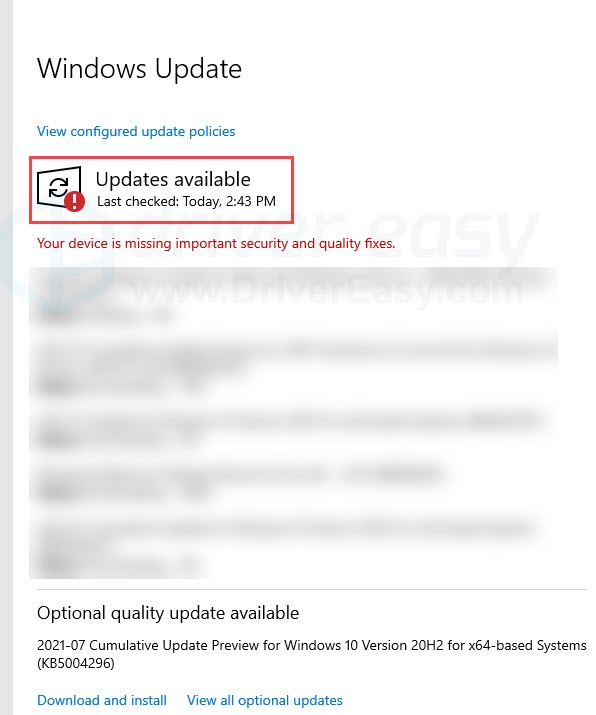
- In the search bar next to your Start button, type update, then click Check for updates.

- Windows will search for available updates. If there are no available updates, you’ll get a You’re up to date sign. You could also click View all optional updates and install them if needed.

- If there are available updates, Windows will automatically download them for you. Follow instructions to complete the installation.

If updating your system doesn’t solve the errors for you, try the next fix.
Fix 4: Force-run DirectX 12
Per the system requirement, Battlefield 2042 requires DirectX version 12, and the game should run DirectX 12 by default. But we all have different setups on our PC, and it’s possible that Battlefield 2042 isn’t running the right version of DirectX on your PC. You can manually enable DirectX12 and force the game to use it. Here’s how:
- Press the Windows key and E on your keyboard to open the file explorer.
- Navigate to C:\Users\YOUR USERNAME\Documents\Battlefield 2042\.
- Find the document named PROFSAVE_profile. Make a copy of this document before tweaking anything, so you’re able to revert the changes in case you need to.
- Right-click the document and open it with notepad.
- Find the line GstRender.Dx12Enabled 0, and change the value 0 to 1.
- Save the changes and launch Battlefield 2042 to test the issue.
If force-running DirectX 12 for Battlefield 2042 doesn’t help, move on to the next fix.
Fix 5: Clear game cache
Broken game cache could also trigger the DirectX errors in Battlefield 2042. Even if it’s not the root cause, clearing game cache may help improve game performance and fix some random crashes. Here’s how:
Origin
You need to completely shut down the Origin client before proceeding to the steps below.
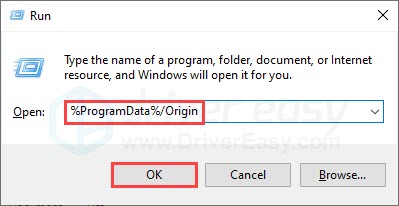
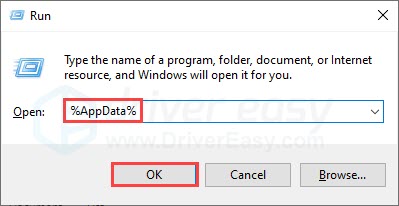
- Press the Windows key and R to invoke the Run box.
- Copy and paste %ProgramData%/Origin in the textbox, then click OK.

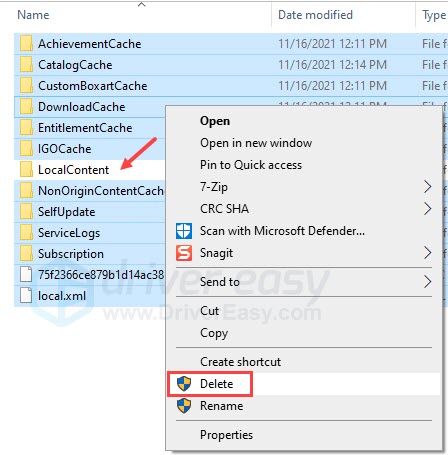
- Delete every folder and file here EXCEPT FOR the Local Content folder.

- Open the Run box again by pressing the Windows key and R on your keyboard.
- Type in %AppData%, then click OK.
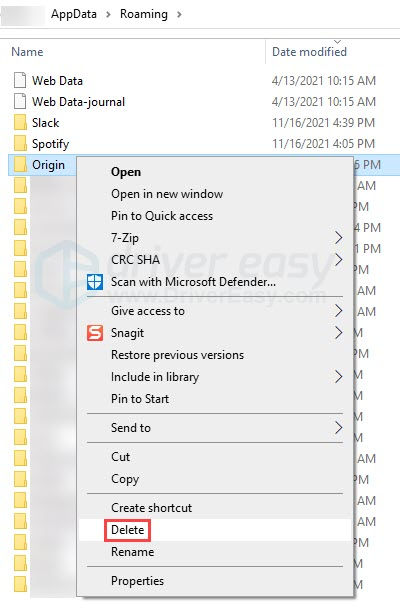
- In the pop-up window, delete the Origin folder.

- Navigate to C:\Users\Your Username\AppData\Local, and delete the Origin folder there as well.
- Reboot your PC and run Battlefield 2042 via Origin.
EA desktop app
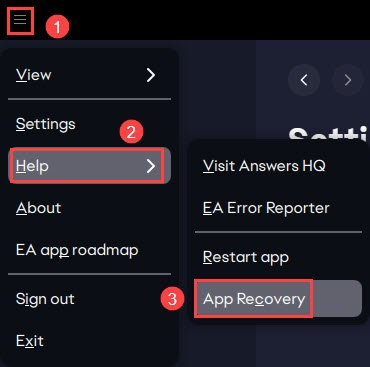
- Launch the EA app. Click the three-line icon on the top-left corner, select Help then click App Recovery.

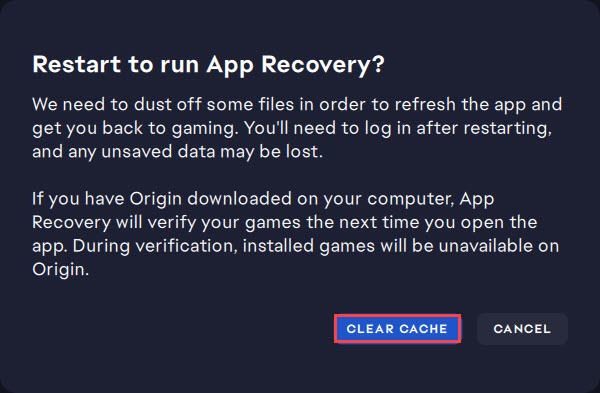
- Click Clear Cache.

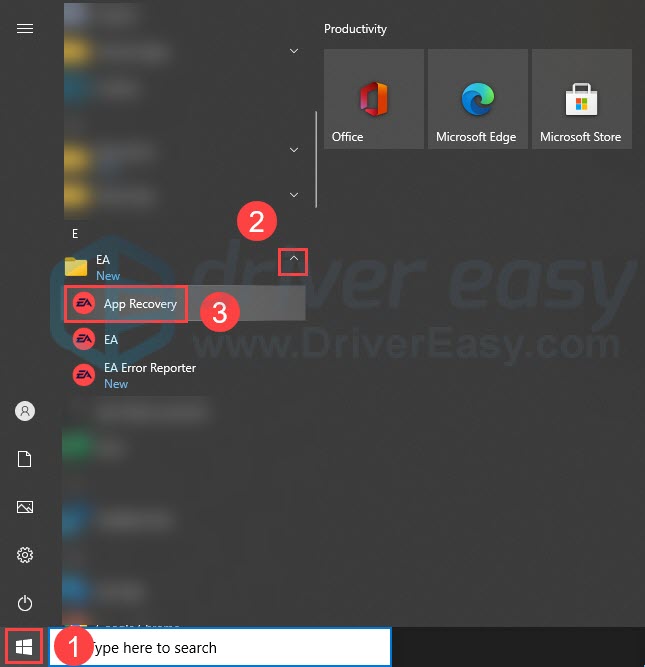
- If you’re having trouble opening the EA app, you can click the Start button, expand the EA folder, and click APP Recovery.

Hopefully this article helps! Please feel free to leave a comment down below if you have any questions or suggestions.
Be the first to like this article