- Код товара: 608327
- Артикул: 000-0864-07G
Коротко о товаре: Протяжный, A4, 600х600, CIS, USB, Серый
-
В Курске:
Самовывоз: 27.09.2023
Передача в транспортную компанию: 25.09.2023
![]()

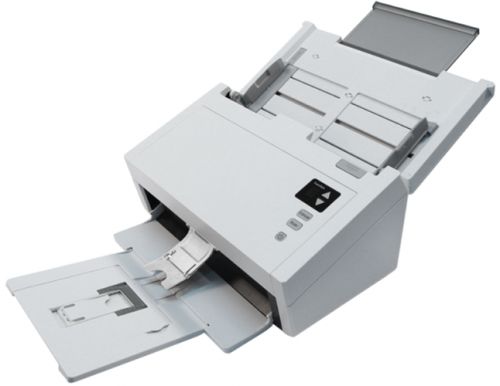
Документ-сканер Avision AD230U 000-0864-07G
-
Основные характеристики
Документ-сканер сканирует двухсторонние документы. Благодаря прямому тракту подачи бумаги позволяет сканировать пластиковые карточки, визитки или документы на плотной бумаге.
-
Тип сканера
Протяжный
-
Тип датчика
CIS
-
Источник света
Светодиод (LED)
-
Разрешение
600х600
-
Максимальная скорость сканирования (ч/б)
40
-
Максимальная скорость сканирования (цвет)
40
-
Глубина цвета
24 бит, 48 бит
-
Двустороннее сканирование
Есть
-
Устройство автоподачи
Есть
-
Емкость устройства автоподачи
80
листов -
Поддерживаемые стандарты
ISIS, TWAIN
-
Максимальные размеры документа
216
-
Максимальный формат оригинала
A4
-
Плотность оригинала
413
-
USB
Есть
-
Дисплей
Есть
-
Поддерживаемые операционные системы
Windows
-
Потребляемая мощность
17 Вт
-
Энергопотребление в режиме ожидания
2.6
Вт -
Цвет
Серый
-
Размеры
316 x 680 x 239
мм -
Вес нетто
3.9
кг
-
-
Характеристики Avision AD230U
- Прочие
-
Описание Т
Документ-сканер (Цветной, двусторонний, 40 стр./мин, ADF 80 листов, USB 2.0, A4)
- Основные характеристики
-
Тип сканера
Протяжный
-
Тип датчика
CIS
-
Источник света
Светодиод (LED)
-
Разрешение
600х600
-
Максимальная скорость сканирования (ч/б)
40
-
Максимальная скорость сканирования (цвет)
40
-
Глубина цвета
24 бит, 48 бит
-
Двустороннее сканирование
Есть
-
Устройство автоподачи
Есть
-
Емкость устройства автоподачи
80
листов -
Поддерживаемые стандарты
ISIS, TWAIN
- Размеры оригиналов
-
Максимальные размеры документа
216
-
Максимальный формат оригинала
A4
-
Плотность оригинала
413
- Интерфейсы
-
USB
Есть
- Дисплей
-
Дисплей
Есть
- Другие характеристики
-
Поддерживаемые операционные системы
Windows
-
Потребляемая мощность
17 Вт
-
Энергопотребление в режиме ожидания
2.6
Вт -
Цвет
Серый
-
Размеры
316 x 680 x 239
мм - Ссылки
-
Вес нетто
3.9
кг
Avision AD230U сертифицирован для продажи в России.
Документ-сканер Avision AD230U 000-0864-07G — фото, технические характеристики, условия доставки в Москве и России. Для того, чтобы купить Документ-сканер Avision AD230U 000-0864-07G в интернет-магазине Xcom-shop.ru достаточно заполнить форму онлайн-заказа или
позвонить по телефонам: +7 (495) 799-9669, +7 (800) 200-0069.
Изображения товара, включая цвет, могут отличаться от реального внешнего вида. Комплектация также может быть
изменена производителем без предварительного уведомления. Данное описание и количество товара не является
публичной офертой.

Нужна спец.цена?
X
Запросить специальную цену
")
Сканер Avision AD230U (000-0864-07G)
47 720 руб.
{«2360536»:{«id»:»2360536″,»sku_name»:»»,»available»:»1″,»price»:»47720″,»count»:null,»sku»:»000-0864-07G»}}
Если Вы являетесь юридическим лицом и собираетесь приобрести оборудование не в единственном экземпляре, то мы можем (в зависимости от текущей конъюнктуры рынка) предпринять попытку снизить цену именно для Вас
Я соглашаюсь с условиями обработки персональных данных
Запрос успешно отправлен.
Заполните обязательные поля
E-mail задан некорректно
Произошла ошибка. Повторите попытку позднее.
Для организаций и ИП (с НДС 20%):
50 566 ₽
![]()
Да, верноДругой городпродолжить работу
-
Услуги
-
Маркировка
-
Автоматизация
-
1С
-
Маркетплейсы
-
Услуги по маркетплейсам
- Подключение к маркетплейсам
- Интеграция 1С с маркетплейсами
-
Услуги по онлайн-кассам
- Техническое сопровождение
- Установка и настройка онлайн-кассы
- Подключение к ОФД
- Замена фискального накопителя
- Перерегистрация фискального накопителя
- Регистрация онлайн-касс в ФНС
- Снятие онлайн-кассы с учета
- Перепрошивка онлайн-кассы
- Перерегистрация онлайн-кассы
- Ввод номенклатуры в онлайн-кассу
- Программирование номенклатуры
- Обучение работе на онлайн-кассе
- Смена налогообложения в онлайн-кассе
- Тариф «Отчеты в ФНС» Платформа Госотчет
-
Услуги по принтерам этикеток
- Подключение и настройка принтера этикеток
- Создание нетипового шаблона этикетки для принтера этикеток
-
Услуги по эквайрингу
- Подключение эквайринга
- Подключение бесконтактного эквайринга PAYMOB.SoftPOS
-
Услуги по прочему оборудованию
- Подключение и настройка сканера штрих-кодов
- Подключение и настройка ТСД
- Подключение и настройка принтера чеков
- Подключение и настройка табло покупателя
- Подключение и настройка весов с печатью этикеток
- Настройка обмена данными между разными ПО в рамках POS-систем
- Подключение ридера магнитных карт
- Перепрограммирование клавиатуры
-
Услуги по электронной подписи (ЭЦП)
- Выпуск электронной подписи (ЭЦП)
- Настройка электронной подписи (ЭЦП) на компьютере
- Программа КриптоПро
-
Услуги по маркировке
- Абонентское сопровождение по работе с маркировкой на 3 мес.
- Регистрация в системе Честный Знак
- ОФД для маркировки
- ЭЦП для маркировки
- Прошивка онлайн-кассы для маркировки
- Обучение работе в системе Честный Знак
- Консультация по работе с КИЗ (маркировка меха)
- Регистрация в системе GS1
-
Услуги по ЕГАИС/ФГИС Меркурий
- Запись сертификата ЕГАИС
- Обучение по работе с ФГИС Меркурий
-
Услуги по Битрикс24
- Внедрение Битрикс24
- Техподдержка Битрикс24
- Настройка Битрикс24
- Обучение Битрикс24
- Интеграция Битрикс24
-
Маркировка товаров «под ключ»
-
Маркировка Честный ЗНАК для маркетплейсов
-
Оборудование для маркировки
- Касса для маркировки
- Сканер для маркировки
- Принтер для маркировки продукции
- Терминал сбора данных для маркировки
- Программы для маркировки
-
Услуги по маркировке
- Маркировка товаров «под ключ»
- Маркировка Честный ЗНАК для маркетплейсов
- Подключение к системе ДМДК
- ЭЦП для маркировки
- ОФД для маркировки
- Прошивка кассы для маркировки
- Платформа ОФД. Учет марок
-
Маркировка товаров 2019-2024
- Маркировка молочной продукции
- Маркировка духов и туалетной воды
- Маркировка товаров легкой промышленности
- Маркировка табака и сигарет
- Маркировка лекарств
- Маркировка шин и покрышек
- Маркировка обуви
- Маркировка фотоаппаратов и вспышек
- Маркировка шуб и меха
- Маркировка пива и слабоалкогольных напитков
- Маркировка воды
- Маркировка ювелирных изделий
-
Проверка кодов ТН ВЭД по маркировке Честный ЗНАК
-
-
Автоматизация магазина
- Магазина одежды
- Продуктового магазина
- Пивного магазина
- Мясного магазина
- Ювелирного магазина
- Интернет-магазина
- Магазина автозапчастей
-
Автоматизация склада
- Склада WMS
- Складского учета
- Складской логистики
- Склада хранения
- Склада на базе 1С
- Склада штрихкодированием на базе 1С
- Склада готовой продукции
- Адресного хранения
-
Автоматизация производства
- Бизнес процессов на производстве
- Автоматизация на базе 1С
- Мебельного производства 1С
- Швейного производства
- Молочного производства
-
Автоматизация учета
- Учета товара в магазине
- Бюджетирования
- Учёта на предприятии общественного питания
- Управленческого учета
- Бухгалтерского учета
- Налогового учета
- Бухгалтерского учета в программе 1С:Бухгалтерия
- Учета расходов и доходов
- Кадрового учета
- Учета и отчетности
- Учёта путевых листов и гсм
- Учёта на предприятии
- Складского учёта в магазине
-
Автоматизация 1С
- Торговли 1С:Розница
- Аптеки (программы 1С)
- Магазина 1С
- Курьерской службы 1С
- Торговли 1С:Управление торговлей
- Предприятия 1С
-
Автоматизация общепита
- Кафе
- Столовой
- Фаст-фуда
- Бара
- Ресторана
- Ресторанного бизнеса
- Доставки еды
- Кофейни
- Система автоматизации iiko
- R-keeper
- Общепита 1С
-
Автоматизация бизнеса
- Малого бизнеса
- Бизнес-процессов
- CRM автоматизация бизнес-процессов
- Гостиничного бизнеса
- Цветочного бизнеса
-
Автоматизация документооборота
- Документооборота на предприятии
- Делопроизводства и документооборота
- Управления документооборотом
- Кадрового делопроизводства
- Документооборота 1С
-
-
Программы 1С Хиты
- Интеграция 1С с маркетплейсами
- 1С:Бухгалтерия 8
- 1С: Управление Торговлей 8
- 1С: Розница 8
- 1С:ИТС
- 1С:Зарплата и Управление Персоналом 8
- 1С: Управление Нашей Фирмой 8
- 1С:Фреш
- 1С:CRM
- Все программы 1С
-
1С для автоматизации торговли
- 1С:Управление торговлей 8
- 1С:Розница 8
- 1С:Управление нашей фирмой
- 1С:Касса 3.0 приложение для ПК
- 1С:Рабочее место кассира (1С:РМК)
- 1С:Управление торговлей и взаимоотношениями с клиентами (CRM)
- 1С:Розница 8. Магазин одежды и обуви
- 1С:Розница 8. Аптека
- Остальные программы
-
Сервисы 1С
- 1С:Облачный архив
- 1С:Отчетность
- 1С:Контрагент
- 1С:Товары
- 1С:ДиректБанк
- 1С:Подпись
- 1С:ЭДО
- 1С:Номенклатура
- Остальные сервисы
-
1C для бухгалтерского и налогового учета
- 1С:Бухгалтерия 8
- 1С:Зарплата и Управление Персоналом 8
- 1С:Отчетность
- 1С:Комплексная автоматизация
- 1С:Фреш
- 1С:Сверка
- 1С:Финконтроль
-
1С для общественного питания
- 1С:Общепит
- 1С:Трактиръ
- 1С:Медицина. Диетическое питание
- 1С:Фастфуд и Ресторан
-
1С для автоматизации склада
- 1С:Предприятие 8. WMS Логистика. Управление складом
- 1С:Предприятие 8. 1С-Логистика:Управление складом 3.0
- 1С:Касса 3.0 приложение для ПК
- 1С:Управление торговлей 8
-
1С для автоматизации сферы услуг
- 1С:Салон красоты
- 1C:Автосервис
- 1С:Фитнес клуб
- 1С:Турагентство
- 1С:Медицина. Стоматологическая клиника
- 1С: SPA-Салон
- 1С:Кадровое агентство
- 1С:Управление ритуальными услугами
- Остальные программы
-
Облачные решения 1С
- 1С:Облако
- 1С:ФРЕШ
-
1С для кадровый учета
- 1С:Зарплата и Управление Персоналом 8
- 1С:Комплексная автоматизация
- 1С:Кабинет сотрудника
- 1С:Корпорация
- 1С:Оценка персонала
- 1С:Управление по целям и KPI
-
Услуги по 1С
- Настройка прав пользователей в 1С
- Настройка блока лояльности в 1С
- Переход Розница с 2.3 до 3.0
- Настройка запрета на списание товара ниже закупочной цены в 1С
- Настройка распределенной информационной базы в 1C
- Ввод первичной информации в 1С, параметризация
- Настройка 1С для рассылки уведомлений дебиторам в 1С
- Настройка 1С:Отчетность
- Настройка шаблона этикетки в 1С. Типовое: цена, шк, артикул
- Настройка правила формирования прайса в ПП 1С
- Настройка шаблона этикетки в 1С. Нетиповая: логотип, состав, срок годности
- Установка логотипа клиента в документы 1С: Торг12, УПД, Счет
- Доработка отчетов и функций
- Резервирование товара при выставлении счета в ПП 1С
- Загрузка номенклатуры в 1С через Exel
- Настройка шаблона чека в 1С по шаблону Заказчика (без конфигурирования)
- Настройка модуля ЭДО в 1С
- Настройка ЭДО с внешней обработкой в 1С
- «Меркурий» Россельхознадзор. Интеграция с 1С
- Обучение работе с ЕГАИС в 1С
-
-
Интеграция 1С с маркетплейсами
-
Маркировка Честный ЗНАК для маркетплейсов
-
Услуги по маркетплейсам
- Комплекc услуг по работе с маркетплейсами
- Интеграция 1С с маркетплейсами
- MPSTATS аналитика маркетплейсов
-
Контент для карточек товаров
- Создание карточки под ключ для товара на маркетплейсе (напишем описание, сделаем инфографику)
- Создание Rich-контента
- Создание описания для карточки товара на маркетплейсе
- Оптимизация описания для товара на маркетплейсе
- Поиск и составление поисковых запросов для карточки товара
- Инфографика для маркетплейсов
- Услуги дизайнера для маркетплейсов
- Баннер на OZON
- Витрина продавца на OZON под ключ
- Баннеры и вывеска на AliExpress
-
Реклама на маркетплейсах
- Настройка и ведение рекламы на маркетплейсе
- Привлечение внешнего трафика на маркетплейсах (таргетированная/контекстная реклама и т.д.)
- Единоразовая настройка рекламной кампании на 1-м маркетплейсе
-
Обучение работе с маркетплейсами
- Консультация по маркетплейсам для действующих поставщиков
- Консультация по выходу на маркетплейс
- Обучение ваших сотрудников работе с MPSTATS
-
Услуги технических специалистов для маркетплейсов
- Интеграция 1С с маркетплейсами
- Услуги программиста 1С
- Подключение к 1С модуля интеграции Яндекс Маркет или Sinchrozon + обучение пользователей
- Подключение к 1С модуля интеграции Wildberries + обучение пользователей
- ЭДО: настройка ПК пользователя для работы с ЭДО и ЭЦП
- Маркировка товаров под ключ
- Подключение к ПО и настройка оборудования: принтеров печати этикеток, ТСД, сканеров штрих-кодов
- Облачное хранение данных
-
Программные продукты для работы с маркетплейсами
- Интеграция 1С с маркетплейсами
- Контур.Диадок электронный документооборот (ЭДО)
- MPSTATS аналитика маркетплейсов
- Moneyplace
-
Оборудование для маркетплейсов
- Принтеры этикеток
- ТСД
- Этикетки для маркировки товара
- Сканеры
-
-
Доброго вечера! Киньте, пожалуйста, кто-нибудь коды ошибок, которые могут выпадать при работе сканера Avision FB2280E? Нужен перечень самих кодов, их расшифровка и способы устранения.
-

Здравтсвуйте. Да была такая проблема….прикладываю инструкцию. Думаю, что она поможет исправить ошибки и понимать какой код что означает в процессе работы сканера Avision FB2280E. Желаю удачи в использовании. Если будут вопросы пишите или обращайтесь в сервисный центр.
Вложения:
View a manual of the Avision AD230 below. All manuals on ManualsCat.com can be viewed completely free of charge. By using the ‘Select a language’ button, you can choose the language of the manual you want to view.
Page: 1
Sheet-fed Scanner
User’s Manual
Regulatory model: FL-1312B
manual-en-250-0878-E-AD230-v300
Avision Inc.
Page: 2
User’s Manual
ii
Trademarks
Microsoft is a U.S. registered trademark of Microsoft Corporation.
Windows, Windows Vista, Windows 7, Windows 8, and Windows 10
are either registered trademarks or trademarks of Microsoft
Corporation in the United States and/or other countries.
Energy Star®
is a registered trademark of the U.S. government.
IBM, IBM PC are registered trademarks of International Business
Machines Corp.
Other brands and product names herein are trademarks or
registered trademarks of their respective holders.
Copyright
All rights reserved. No part of this publication may be
reproduced, transmitted, transcribed, stored in a retrieval
system, or translated into any language or computer language,
in any form or by any means, electronic, mechanical, magnetic,
optical, chemical, manual, or otherwise, without the prior written
permission of Avision Inc.
Material scanned by this product may be protected by
governmental laws and other regulations, such as copyright
laws, the customer is solely responsible for complying with all
such laws and regulations.
Warranty
The information contained in this document is subject to
change without notice.
Avision makes no warranty of any kind with regard to this
material, including, but not limited to, the implied warranties
of fitness for a particular purpose.
Avision shall not be liable for errors contained herein or for
incidental or consequential damages in connection with the
furnishing, performance, or use of this material.
Page: 3
User’s Manual
iii
Federal Communications Commission (FCC) compliance
information statement
Part 15
This equipment has been tested and found to comply with the
limits for a Class B digital device, pursuant to Part 15 of the FCC
Rules. These limits are designed to provide reasonable
protection against harmful interference in a residential
installation. This equipment generates, uses and can radiate
radio frequency energy and, if not installed and used in
accordance with the instructions, may cause harmful
interference to radio communications.
However, there is no guarantee that interference will not occur
in a particular installation. If this equipment does cause harmful
interference to radio or television reception, which can be
determined by turning the equipment off and on, the user is
encouraged to try to correct the interference by one of the
following measures:
Reorient or relocate the receiving antenna.
Increase the separation between the equipment and
receiver.
Connect the equipment into an outlet on a circuit
different from that to which the receiver is connected.
Consult the dealer or an experienced radio/TV technician
for help.
This device complies with Part 15 of the FCC Rules. Operation is
subject to the following two conditions: (1) This device may not
cause harmful interference, and (2) this device must accept any
interference received, including interference that may cause
undesired operation.
Page: 4
User’s Manual
iv
European Union Regulatory Notice
Products bearing the CE marking comply with the following EU
Directives:
Low Voltage Directive 2006/95/EC
EMC Directive 2004/108/EC
Restriction of the use of certain hazardous substances (RoHS)
Directive 2011/65/EU
CE compliance of this product is valid if powered with the correct
CE-marked AC adapter provide by Avision.
This product satisfies the Class B limits of EN55022, EN55024,
safety requirements of EN 60950 and ROHS requirements of
EN50581.
*This machine is certified as Class 1 LED product.
Page: 5
User’s Manual
v
Disposal of Waste Equipment by Users in Private Union
This symbol on the product or on its packaging indicates that the
product can not be disposed of with your other household waste.
Instead it should be sent to appropriate facilities for recovery
and recycling in an effort to protect human health and the
environment. Fore more information about where you can drop
off your waste equipment for recycling, please contact your local
city office, your household waste disposal service or the shop
where you purchased the product.
As an ENERGY STAR®
Partner, Avision Inc. has
determined that this product meets the ENERGY
STAR guidelines for energy efficiency.
System Requirements
CPU: Intel®
Core™ 2 Duo or higher
Memory: 32 bit: 2 GB
64 bit: 4 GB
Optical Drive: DVD-ROM Drive
USB Port: USB port 2.0 (compatible with USB 1.1)
Compatible
Operating
System:
Microsoft Windows XP(SP3), Windows Vista,
Windows 7, Windows 8 (32 bits/64 bits),
Windows 10 (32 bits/64 bits)
Page: 6
User’s Manual
vi
Product Safety Guide
Please clearly read all these instructions, and follow all instructions
and warnings before installing and using the device.
The following indications are used in this document to obviate any
chance of accident or damage to you and/or the device.
WARNING Indicates potentially hazardous situations, which
if instructions are not followed, could result in
death or serious injury.
CAUTION Indicates a potentially hazardous situation
which, if instructions are not followed, may
result in minor or moderate injury or damage to
property.
WARNING
Use only the AC power adapter that came with your device.
Using any other AC power adapter could cause fire, electrical
shock, or injury.
Use only the AC power cord and USB cable that came with your
device and avoid abrasions, cuts, fraying, crimping, and kinking.
Using any other AC power cord and USB cable could cause fire,
electrical shock, or injury.
Do not place objects on top of the AC power cord, and do not
allow the AC power adapter or the AC power cord to be stepped
on or run over.
Place the device and its AC power adapter near an electrical
outlet where the AC power adapter can easily be unplugged.
If you use an extension cord with the device, make sure that
the total ampere rating of the devices plugged into the
extension cord does not exceed the cord’s ampere rating.
Place the device close enough to the computer so that the
interface cable can easily reach between the device and the
computer.
Page: 7
User’s Manual
vii
Do not place or store the device or its AC power adapter:
Outdoors
Near excessive dirt or dust, water, or heat sources
In locations subject to shocks, vibrations, high
temperature or humidity, direct sunlight, strong light
sources, or rapid changes in temperature or humidity
Do not use the device with wet hands.
Never disassemble, modify, or attempt to repair the AC power
adapter, device, or device option by yourself, except as
specifically explained in the device’s documentation. This could
cause fire, electrical shock, or injury.
Do not insert objects into any opening, as they may touch
dangerous voltage points or short-out components. Beware of
electrical shock hazards.
Unplug the device and the AC power adapter, and refer
servicing to qualified service personnel under the following
conditions:
The AC power adapter or plug is damaged.
Liquid has entered the device or the AC power adapter.
Object has entered the device or the AC power adapter.
The device or the AC power adapter has been dropped,
or the case has been damaged.
The device or the AC power adapter does not operate
normally (i.e. appearance of smoke, strange smell, odd
noise, etc.), or exhibits a distinct change in performance
Unplug the device and the AC power adapter before cleaning.
Page: 8
User’s Manual
viii
CAUTION:
Do not locate the device on rackety or aslope tables. Do not
locate the device on unstable surface. The device may fall
down and this may result in injury.
Do not place heavy objects on the unit. It may cause
unbalance and the device may fall down. This may result in
injury.
Store the AC Power cord/USB cable bundled out of the reach of
children to avoid the risk of injury.
Keep plastic bags bundled out of the reach of children or throw
them away to avoid the danger of suffocation.
If you are not going to use the device for a long period, unplug
the AC power adapter from the electrical outlet.
Page: 9
User’s Manual
ix
Table of Contents
1. Introduction …………………………………………………….1-1
1.1 Package Items…………………………………….. 1-1
1.2 Front View …………………………………………. 1-3
1.3 Rear View ………………………………………….. 1-4
2. Scanner Installation……………………………………….2-1
2.1 Precautions ………………………………………… 2-1
2.2 Installing the Scanner Driver and Connecting
the Cables………………………………………….. 2-2
2.2.1 Connecting to Power …………………………….2-2
2.2.2 Turning on the Power……………………………2-3
2.2.3 Installing the Scanner Driver ……………….2-3
2.2.4 Connecting to Computer ………………………2-5
3. Completing Your First Scan…………………………..3-1
3.1 Loading Your Paper ………………………………. 3-1
3.1.1 Notice on Using the ADF……………………….3-1
3.1.2 Loading Your Document in the ADF
Paper Tray …………………………………………….3-2
3.1.3 Scanning Cards …………………………………….3-7
3.1.4 Scanning a Stack of Document with
Various sizes and Weights …….3-8
3.2 Verifying Your Scanner Installation ………….. 3-10
3.3 A Glance of the Scanner Properties Dialog Box3-14
4. Using the Scanner Properties Dialog Box…..4-1
4.1 Buttons on the Scanner Properties Dialog Box . 4-2
4.2 Showing or Hiding Tabs …………………………. 4-4
4.3 The Image Tab ……………………………………. 4-6
4.3.1 The Image Selection Box ……………………..4-7
4.3.2 Other Image Options ………………………….4-11
4.3.3 Scanning color images………………………..4-23
4.3.4 Scanning grayscale images ………………..4-23
Page: 10
User’s Manual
x
4.3.5 Scanning B&W images………………………..4-23
4.3.6 Editing Profiles…………………………………….4-24
4.4 The Compression Tab ………………………….. 4-27
4.5 The Color Dropout Tab…………………………. 4-29
4.5.1 Color Dropout Selection………………………4-29
4.6 The Paper Tab …………………………………… 4-35
4.6.1 Cropping………………………………………………4-36
4.6.2 Other Paper Selection …………………………4-42
4.7 The Multi-Feed Detection Tab…………………. 4-48
4.8 The Preview Tab ………………………………… 4-52
4.9 The Enhancement Tab …………………………. 4-53
4.10 The Rotation Tab……………………………… 4-59
4.11 The Separation Tab ………………………….. 4-64
4.12 The Setting Tab ………………………………. 4-69
4.13 The Imprinter Tab ……………………………. 4-72
4.14 The Information Tab …………………………. 4-76
5. ISIS Interface Operation ………………………………5-1
6. Using the Buttons …………………………………………..6-1
6.1 Installing Button Manager V2…………………… 6-1
6.2 Checking the Button Configurations before
Scanning …………………………………………… 6-2
6.3 Scanning From One Touch of the Buttons ……. 6-4
7. Maintenance…………………………………………………….7-1
7.1 Cleaning the ADF …………………………………. 7-1
7.2 Cleaning the Glass ……………………………….. 7-4
7.3 Replacing the ADF Reverse Roller ……………… 7-5
7.4 Replacing the ADF Roller ………………………… 7-8
8. Troubleshooting………………………………………………8-1
8.1 Clearing a Paper Jam…………………………….. 8-1
8.2 Questions and Answers………………………….. 8-2
8.3 Technical Service …………………………………. 8-4
9. Specifications ………………………………………………….9-1
Index…………………………………………………………………………… a
Page: 11
User’s Manual
1-1
1. Introduction
Congratulations on your purchase of the color sheet-fed
image scanner. With this scanner, you can scan documents
from the auto document feeder increase your productivity.
Before you install and operate the new scanner, please take a
few minutes to read through this manual. It provides proper
instructions for you to unpack, install, operate and maintain
the scanner.
1.1 Package Items
The following figure indicates the package contents. Please
check all the items against your checklist. If you do not
receive all the items, please contact your authorized local
dealer immediately.
Page: 12
User’s Manual
1-2
1 2
4
3
1. Scanner Main Unit
2. Quick Guide/CD
3. USB Cable
4. Power Adapter & Power Cord
Note:
1. Only use the AC adapter DA-48M24 by APD included in the
machine. Using other AC adapters may damage the machine
and void the warranty.
2. Please unpack the packing carefully, and check the contents
against the checklist. If any items are missing or damaged,
please contact your dealer immediately.
3. To access more service supports, visit www.avision.com to
register your Avision’s product.
Page: 13
User’s Manual
1-3
1.2 Front View
Extension
ADF
Paper Tray
Paper Guide
LCD Screen with
Up/Down Buttons Paper Guide
Paper Stopper
Power Button
Cancel Button
Scan Button
Extension
Output Tray
Paperweight
Position Adjuster
Part Name Function
Extension Can be pulled out and adjusted to the
size of the document being scanned.
ADF Paper Tray Load the document onto this part
when scanning document.
Paper Guides Adjusts to the width of the documents
to prevent skewing of the scanned
pages.
Operation Panel LCD screen:
Shows a number indicating a scan-to
destination via the Up/Down buttons.
The Power Button:
Press to turn on the power.
The Scan Button:
Press to start a scan.
The Cancel Button:
Press to cancel a scanning job during
operation.
Page: 14
User’s Manual
1-4
Output Tray Open to collect the document after
scanned.
Position
Adjuster
Slide the adjuster inward to make the
Output Tray in a flat position.
Extension Pull it out. Documents are ejected
from the ADF to the tray.
Paperweight Used to hold down a stack of output
paper.
Paper Stopper Adjust to the length of the documents
to prevent them from falling apart.
1.3 Rear View
Power Jack
Kensington
Security Slot
USB Port
Part Name Function
USB Port Connect to your computer.
Power Jack Connect the AC adapter to the
scanner.
Kensington
Security Slot
Attach to a lock to secure the
scanner.
Page: 15
User’s Manual
2-1
2. Scanner Installation
2.1 Precautions
Keep the scanner out of direct sunlight. Direct exposure
to the sun or excessive heat may cause damage to the
unit.
Do not install the scanner in a humid or dusty place.
Be sure to use the proper AC power source.
Place the scanner securely on an even, flat surface.
Tilted or uneven surfaces may cause mechanical or
paper-feeding problems.
Retain the scanner box and packing materials for
shipping purposes.
Page: 16
User’s Manual
2-2
2.2 Installing the Scanner Driver and Connecting the
Cables
NOTE:
1). To ensure your computer can identify the USB scanner,
please install scanner driver first before connecting the
scanner to your computer.
2). The scanner driver contains TWAIN, ISIS and WIA driver.
After the installation of scanner driver is completed, this
scanner allows you to scan via a TWAIN, ISIS, or a WIA
interface. Start your TWAIN-compliant image editing
software application to select a TWAIN or WIA user interface
or your ISIS software to select an ISIS user interface. You
may also launch Microsoft’s Scanner and Camera Wizard to
scan via a WIA user interface.
2.2.1 Connecting to Power
Before connecting, make sure the power switch is off.
Plug the small end of the power adaptor into the power jack of
your scanner. Insert the other end to an appropriate power
outlet.
Page: 17
User’s Manual
2-3
2.2.2 Turning on the Power
Press the Power Switch button on the front panel, the Power
LED will flash. When it is finished and ready to scan, the LED
indicator will stop flashing and become steadily on. To turn
off the scanner, press the Power Switch button for about 3
seconds, the Power LED will be off.
2.2.3 Installing the Scanner Driver
1. Place the supplied CD-ROM onto your CD-ROM drive.
2. The software installation graphic appears. If not, run
“setup.exe”.
Page: 18
User’s Manual
2-4
Contents on the installation graphic:
Install Scanner Driver: To communicate with your
scanner, you need to install the scanner driver.
Install Button Manager V2: To use the buttons on
the scanner, you need to install Button Manager V2.
To ensure Button Manager V2 works properly, please
FIRST install scanner driver before installing Button
Manager V2.
Install Adobe Reader: To view the user’s manuals
for the scanner and Button Manager V2, you need to
use Adobe Reader to open and view the manuals in
pdf file format. If you already have Adobe Reader
installed on your computer, you may disregard this
item.
Install AVScan X: To scan and organize your multi-
page document(s), you can install the software
application to manage them easily and effectively.
View Manual: Click “View Manual” to view or
print the detailed user manual for the scanner and
Button Manager V2 respectively.
3. Click Install Scanner Driver to install the scanner driver
and then click Install Button Manager V2 to install the
Button Manager V2 unto your computer.
Page: 19
User’s Manual
2-5
2.2.4 Connecting to Computer
1. Connect the square end of the USB cable to the USB port of
your scanner. Connect the rectangle end to the USB port at
the rear side of your computer.
2. The computer should detect a new USB device and prompt a
“New Hardware Found” message.
3. By following the on-screen instructions, click the Next
button to continue. When the certification screen appears,
click Continue Anyway to complete the installation.
4. When the Finish dialog is prompted, click the Finish button.
Page: 20
User’s Manual
3-1
3. Completing Your First
Scan
3.1 Loading Your Paper
3.1.1 Notice on Using the ADF
Before using the ADF, please make sure that your paper meets
the following specifications:
Document(s) can range in size from50 x 50 mm (2 x 2 in.)
to 216 x 356 mm (8.5 x 14 in.).
Document(s) can range in weight from 27~413 g/m2
(7~
110 lb.)
ID cards up to 1.25 mm (0.05 in.) thick
Document(s) should be square or rectangular and in good
condition (not fragile or torn).
Document(s) should be free of curl, wrinkle, wet ink, or
punch holes.
Document(s) should be free of staples, paper clips, paper
sticky notes.
Page: 21
User’s Manual
3-2
3.1.2 Loading Your Document in the ADF Paper Tray
Fanning Your Document
Note:
To avoid occasional multi-feeds or paper jams, please fan
your documents and align the top edges before feeding them
into the scanner.
1. Hold both ends of the documents and fan them a few
times.
2. Rotate the documents by 90 degrees and fan them in the
same manner.
3. Align the edges of the documents in a step-like pattern
(see picture below).
Step-like
Scanning
Direction
Page: 22
User’s Manual
3-3
Document Feeding
1. Unfold the document feeder and its extension.
2. Unfold the output tray and raise the paper stopper.
Page: 23
User’s Manual
3-4
3. Raise the paper guide to hold your multi-page document.
4. Raise the paperweight.
Page: 24
User’s Manual
3-5
5. Slide the position adjustor inward to make the output
tray in a flat position .
6. Load a stack of document face down with the top of the
pages pointing into the feeder.
7. Verify that the paper guides are aligned with the edges of
the stack.
Page: 25
User’s Manual
3-6
Note: The [Paper Width] switch:
If your document width is 216 mm (8.5 in.):
If your document width is 216 mm (8.5 in.), slide the
[Paper Width] switch DOWN to fix your paper guide to
conveniently load the letter-size document.
If your document width is larger than 216 mm (8.5 in.):
If your document width is larger than 216 mm (8.5 in.)
such as invoices with punch holes, slide the [Paper
Width] switch UP and move the paper guide to the right
end to load your documents.
Slide DOWN the [Paper
Width] switch to set your
paper width to 216 mm
(8.5 in.)
Slide UP the [Paper
Width] switch to set
your paper width larger
than 216 mm (8.5 in.)
Page: 26
User’s Manual
3-7
3.1.3 Scanning Cards
To scan cards, it is recommended to press down the paper
weight and then raise the output tray to keep the cards from
falling apart.
1. Lift the output tray up to make the output tray in an angled
position.
2. Press down the paper weight.
3. Load your cards horizontally into the paper tray. Align
the paper guides and make sure the edges of cards
slightly touch the paper guides on both side as
illustrated.
8B
Page: 27
User’s Manual
3-8
3.1.4 Scanning a Stack of Document with Various sizes
and Weights
When scanning a batch of documents with different sizes and
weights, be sure to follow these guidelines to avoid a skewed
image or a paper jam:
1. Align the documents TOP EDGE first in the sequence of
paper size from large to small.
2. If two pages are of the same size yet with different weight,
arrange these pages in the sequence of paper weight from
heavyweight to lightweight.
Page: 28
User’s Manual
3-9
3. Align the edges of the documents by tapping the bottom of
the stack against the table top.
4. Center these pages in the document feeder and make sure
that the edges of page of the largest size slightly touch the
Paper Guide.
Page: 29
User’s Manual
3-10
3.2 Verifying Your Scanner Installation
To verify if your scanner installation is correct, Avision provides
you a useful test program called Avision Capture Tool. With this
tool, you can perform simple scans and view the captured
images. In addition, it helps you complete your scan at a rated
speed.
The following procedure describes how to verify your scanner
installation. If the installation is not correct, please review the
preceding section to check if the cable connection and scanner
driver have been successfully installed.
Before you begin, be sure the scanner is on.
1. Select Start>Programs>Avision xxx Scanner>Avision
Capture Tool. The Select Scanner Model dialog box will be
displayed.
2. Select your driver type and scanner model and click OK.
The following Avision Capture Tool dialog box will be
displayed.
Page: 30
User’s Manual
3-11
Fit
Page
Actual
Size
File Format
Save File Path
Setup
Scan
3. Choose your desired file format from the File Format drop
down list box. (Default is JPEG, other choice includes TIFF,
MTIFF, PDF, MPDF, GIF, and BMP.) The supported file
formats vary depending on your scanner model.
4. Type your desired folder name and file name in the File Path
box. (Default is C:Documents and SettingsUser NameMy
DocumentsMy ScanImage.)
Note: If you do not wish to save the scanned image,
deselect the Save button since default is Save Enable. In this
case, the thumbnail view will be disabled. And therefore,
after viewing all the scanned images, only the last one will
remain on the screen.
5. Click the Setup button ( ) or choose Setup from the
File menu to prompt the Scanner Properties dialog box.
Page: 31
User’s Manual
3-12
Image
Selection
Box
6. From the Image Selection Box, choose your desired image
type for your scanned image. (Default is Front B&W) If you
have a duplex scanner, choose Front and Rear to scan both
sides of your document.
7. Click OK to quit the Scanner Properties dialog box. (To
learn more details about the Scanner Properties dialog box,
please see the subsequent chapter, Using the Scanner
Properties Dialog Box.)
8. Place your document face down on the document glass or
face up in the auto document feeder.
9. In the Scan Validation dialog box, click the Scan button
( ) or choose Scan from the File menu.
10. The document will be scanned and displayed in the Scan
Validation screen. After the scanned images have been
displayed, your scanner installation verification is completed.
Page: 32
User’s Manual
3-13
Display View
Thumbnail View
11. You can view the scanned image in Fit Page ( ) or Actual
Size (100%) button ( ) from the Viewing toolbars at the
right side.
12. Click the Close box or Quit from the File menu to exit the
Scan Validation Tool.
Page: 33
User’s Manual
3-14
3.3 A Glance of the Scanner Properties Dialog Box
1
2
3
4
5
6
7
8
1. Tab Options Choice: Image, Compression, Color Dropout,
Paper, Multi-Feed Detection, Preview, Options,
Settings, Information.
2. Image
Selection Box
Choose your image type and the side of
document you wish to scan. Options vary
based on type of scanner.
3. Brightness Adjust the brightness level from –100 to +100.
4. Contrast Adjust the contrast level from –100 to +100.
5. Resolution Determine the quality of the scanned image.
The industry standard is 200 dpi.
6. Invert Reverse the color of your scanned image.
7. Scan Source Choice: Auto Document Feeder, Flatbed,
Flatbed (Book), Automatic (varies due to
different scanner model)
8. Defaults Reset all values on the tabs to the factory
default settings.
Page: 34
User’s Manual
4. Using the Scanner
Properties Dialog Box
The Scanner Properties dialog box allows you to configure the
scanner’s settings. It consists of several tabbed windows each
of which will be described in this chapter.
Note: In this chapter, all options are available based on a
duplex (double-side) scanner. If you have purchased a simplex
(single-side) scanner, all options are available for single sided
only.
The Scanner Properties dialog box
4-1
Page: 35
User’s Manual
4.1 Buttons on the Scanner Properties Dialog Box
The buttons on the Scanner Properties dialog box
Buttons Description
Defaults Click the Defaults button, the factory default
settings will be shown on each tab.
Cancel Click the Cancel button to leave the Scanner
Properties dialog box.
4-2
Page: 36
User’s Manual
The following table shows the default settings:
Tab name Default settings
Image Image:Front B&W
Binarization:Dynamic Threshold
Resolution:200 dpi
Invert:Blank on White
Scan Source:Auto Document Feeder
Threshold:None
Brightness:None
Contrast:None
Compression None
Color Dropout None
Paper Cropping:Automatic
Deskew:Yes
Orientation:Portrait
OverScan:0.00
Note: The availability of this option
varies due to scanner model.
Unit:Inch
Multi-Feed
Detection
None
Preview None
Options Rotation Degrees:None
Blank Page Removal:None
Edge Fill:White,0 mm
Image Control Option:None
Setting Enable Energy Saver:Enable, 15
minutes after last scan action
Show Scanning Progress:Yes
Show Warning Message:Yes
Save Settings after Closing:Yes
Imprinter Digital Imprinter
4-3
Page: 37
User’s Manual
4.2 Showing or Hiding Tabs
The [Scanner Properties] dialog box is displayed in default
with three basic tabs — Image, Paper, and Information. To
show more tabs, click the [Scanner Properties] icon to access
more scan settings.
To show more tabs,
1. Click the [Scanner Properties] icon ( ) on the upper
left corner, and choose [Tab] to show available tab names.
The available tabs include Compression, Color Drop out,
Preview, Rotation, Separation, Multi-Feed, Options,
Settings, and Imprinter. (Note: the options vary based on
scanner model.)
2. Choose the tab you want to display. The selected tab will
be shown with a check mark and then displayed in the
[Scanner Properties] dialog box.
3. To access the settings, click the selected tab on the top of
the [Scanner Properties] dialog box. The page of the
selected tab will be displayed.
To hide a tab window,
1. Click the [Scanner Properties] icon ( ) on the upper
left corner, and choose [Tabs] to show available tab
names.
2. Choose the tab you want to hide. Then, the selected tab
will be hided in the [Scanner Properties] dialog box.
Note: The [Image], [Paper], and [Information] tab can
not be hided since they preprogrammed to be displayed by
default.
4-4
Page: 38
User’s Manual
4-5
Page: 39
User’s Manual
4.3 The Image Tab
The Image tab allows you to choose the front side and (or) the
rear side of your document, the type of image, and to set
several basic scan settings. Note that except for the resolution,
you can set individual scan settings for the front side and the
rear side. For example, all settings in the Image tab,
Compression tab, Color Dropout tab can be set individually for
the front and the rear side. However, the settings in the Paper
tab, the Option tab, and the Setting tab have to be set the
same for the front and rear side.
The Image tab dialog box
4-6
Page: 40
User’s Manual
4.3.1 The Image Selection Box
The Image Selection box includes the
image type and document side option. If
you wish to scan both the front side and
the rear side of your color document, you
can check both Front Color and Rear Color
at the same time. Note the options vary
based on type of scanner.
Example 1:Scanning a two-sided color document, both
sides in color
Side/Image
Selection
Front Rear
4-7
Page: 41
User’s Manual
Example 2:Scanning a two-sided color document, one
in B&W, the other in color
Side/Image
Selection
Front Rear
Image Type Description
Color Choose Color if you wish to scan a color
image for your original in color.
Gray Choose Gray image if your original contains
actual shades of gray.
B&W Choose B&W if your original contains only
text, pencil or ink sketch.
B&W Gray Color
4-8
Page: 42
User’s Manual
Front/Rear Auto Color Detection:
Click to automatically detect and scan the front or the rear
page of your color document in color image mode. If your
document is in colors, the scanner will automatically scan the
document into a color image. If your document is non-color,
you can choose the output to be either B&W or Gray from the
Non-Color Selection option. This option is useful when you
have a mixture of color and non-color document.
Note: If you choose Front Rear Auto Color Detection, you can
not specify the image mode of your rear page and vice versas.
Sensitivity of Auto Color Detection
If your documents contain primarily B&W text and small
amount of light or pale colors and you do not wish them to be
recognized as color image to save the file size, you can
increase the sensitivity value by moving the bar to the right to
let these images to be detected as B&W. The value ranges from
1 to 100. The default is 37.
Original
4-9
Page: 43
User’s Manual
Sensitivity: 1
(The image is recognized as
a color one)
Sensitivity: 100
(The image is recognized as
a black and white one)
4-10
Page: 44
User’s Manual
4.3.2 Other Image Options
Binarization This is the process of converting a
grayscale or color image to a bi-tonal
image. There are several different
methods of performing this conversion.
Options: Dynamic Threshold, Fixed
Processing, Halftone 1~5, Error
Diffusion.
Dynamic Threshold: Selecting
Dynamic Threshold allows the scanner
to dynamically evaluate each document
to determine the optimal threshold value
to produce the highest quality image.
This is used to scan mixed document
containing faint text, shaded background,
or color background with a single setting.
If Dynamic Threshold is selected,
Threshold, Brightness, and Contrast are
not available.
Sensitivity of Dynamic Threshold
Occasionally your scanned image may
contain small dots or speckles. To remove
these spots, increase the sensitivity value
by moving the bar to the right. The value
ranges from 1 to 30. The default is 20.
4-11
Page: 45
User’s Manual
Fixed Processing: Used for black-and-
white and other high contrast documents. A
single level is set to determine the black-
and-white transition. The threshold is
programmable over the entire density
range. Fixed Processing sets Contrast to
0. If Fixed Processing is selected,
Contrast is not available.
Halftone: In addition to the black and
white display, Halftone can present a
somehow gray shade of image by using
different size of dots. Halftone image looks
like the picture we have seen in the
newspaper. Options include Halftone 1,
Halftone 2, Halftone 3, Halftone 4,
Halftone 5.
Error Diffusion: Error Diffusion is a type
of Halftone. Error Diffusion gives good
image texture and makes text in images
more readable than Halftone.
Halftone Image
4-12
Page: 46
User’s Manual
Error Diffusion Image
4-13
Page: 47
User’s Manual
Threshold Used to convert a grayscale image to a
bi-tonal image. The value ranges from 0 to
255. A low threshold value produces a
lighter image, and can be used to subdue
backgrounds and subtle, unneeded
information. A high threshold value produces
a darker image, and can be used to help pick
up faint images.
Adjust the threshold setting by dragging the
Threshold sliding bar to the left or right to
achieve the desired threshold setting.
200 dpi,
Threshold:50,
Brightness: 0
200 dpi,
Threshold:100,
Brightness: 0
4-14
Page: 48
User’s Manual
Gray
Document Type: Choice: Normal, Photo, Document
Three options of document type are provided when you choose
Gray as the image type for your scanned document. Choice:
Normal, Photo, Document.
Document: Choose Document if your original contains
pure text or a mixture of text and graphic since it is an
optimal setting for regular business document. When
using Document, only Threshold can be adjusted.
Photo: Choose Photo if your original contains photo to
reproduce your photo in vivid grayscale image. When
using Photo, no Threshold and Contrast can be adjusted.
Normal: When using Normal, Threshold, Brightness, and
Contrast can be adjusted.
Threshold: The value ranges from 0 to 255. The default is
230. A low threshold value produces a lighter image, and can
be used to subdue backgrounds and subtle, unneeded
information. A high threshold value produces a darker image,
and can be used to help pick up faint images. Adjust the
threshold setting by dragging the Threshold sliding bar to the
left or right to achieve the desired threshold setting.
4-15
Page: 49
User’s Manual
Normal Photo Document
(Threshold: 230)
Normal Photo Document
(Threshold: 230)
4-16
Page: 50
User’s Manual
Brightness Adjusts the lightness or darkness of an
image. The higher the value, the brighter
the image. Drag the slider to the right or
left to increase or decrease the brightness.
The range is from –100 to +100.
Contrast Adjusts the range between the darkest and
the lightest shades in the image. The
higher the contrast, the bigger the different
grayscale. Drag the slider to the right or
left to increase or decrease the contrast.
The range is from –100 to +100.
Brightness: -50 Brightness: 0
(Normal)
Brightness: +50
Contrast: -50 Contrast: 0
(Normal)
Contrast: +50
4-17
![]()
-
Форум
-
Компьютерное железо
-
Периферийные устройства
-
#1
Добрый день! Подскажите что можно сделать с потоковым сканером avision ad230u, пытаюсь отсканировать 8 листов бумаги, но после прохождения 1 листа появляется ошибка «Unable to scan. Paper jam reported by AD230U»
-
#2
Грязь, или ролики износились или намотало что то, скрепку или скотч. Может датчик. Короче разбирать его надо и смотреть
-
#3
Грязь, или ролики износились или намотало что то, скрепку или скотч. Может датчик. Короче разбирать его надо и смотреть
Понятно, короче быстро не починить. Придется в саппорт писать. Спасибо
-
Форум
-
Компьютерное железо
-
Периферийные устройства
-
На данном сайте используются cookie-файлы, чтобы персонализировать контент и сохранить Ваш вход в систему, если Вы зарегистрируетесь.
Продолжая использовать этот сайт, Вы соглашаетесь на использование наших cookie-файлов.
Поддерживаемые операционные системы Windows
Windows 10 Education, Windows 10 Education x64, Windows 10 Enterprise, Windows 10 Enterprise x64, Windows 10 Home, Windows 10 Home x64, Windows 10 Pro, Windows 10 Pro x64, Windows 2000, Windows 2000 Professional, Windows 7 Enterprise, Windows 7 Enterprise x64, Windows 7 Home Basic, Windows 7 Home Basic x64, Windows 7 Home Premium, Windows 7 Home Premium x64, Windows 7 Professional, Windows 7 Professional x64, Windows 7 Starter, Windows 7 Starter x64, Windows 7 Ultimate, Windows 7 Ultimate x64, Windows 8, Windows 8 Enterprise, Windows 8 Enterprise x64, Windows 8 Pro, Windows 8 Pro x64, Windows 8 x64, Windows Vista Business, Windows Vista Business x64, Windows Vista Enterprise, Windows Vista Enterprise x64, Windows Vista Home Basic, Windows Vista Home Basic x64, Windows Vista Home Premium, Windows Vista Home Premium x64, Windows Vista Ultimate, Windows Vista Ultimate x64, Windows XP Home, Windows XP Home x64, Windows XP Professional, Windows XP Professional x64