Get Audacity’s 9999 error code fixed on Windows and get back to recording your audio.

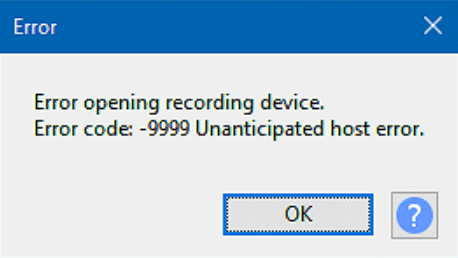
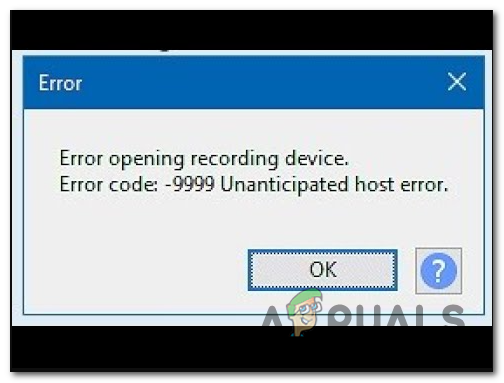
Audacity is among the foremost sound-editing software for Windows. However, some users can’t record audio in Audacity because of error code 9999. Error code 9999 is an issue that arises for some users when they try to use their recording microphones with Audacity. The sound editor throws up a message that says, “Error opening recording device. Error code: -9999.”
Users have mostly reported error 9999 happening on Windows 10 PCs. However, that doesn’t mean that issue can’t arise in Microsoft’s latest desktop platform. This is how you can fix Audacity error code 9999 in Windows 11/10.
1. Run the Recording Audio Troubleshooter
It makes sense to run the Recording Audio troubleshooter since error code 9999 is a recording issue. Running that troubleshooter isn’t widely confirmed to fix error code 9999, but it’s worth a try as it can resolve a variety of recording issues on Windows. You can run the Recording Audio troubleshooter from the Windows 11/10 Control Panel as follows:
- Start the Run accessory, which is quickly accessible with the Windows logo + R hotkey.
- Enter Control Panel in Run’s command text box and select OK.
- To see all Control Panel items, click the Large icons option that’s on the View by menu.

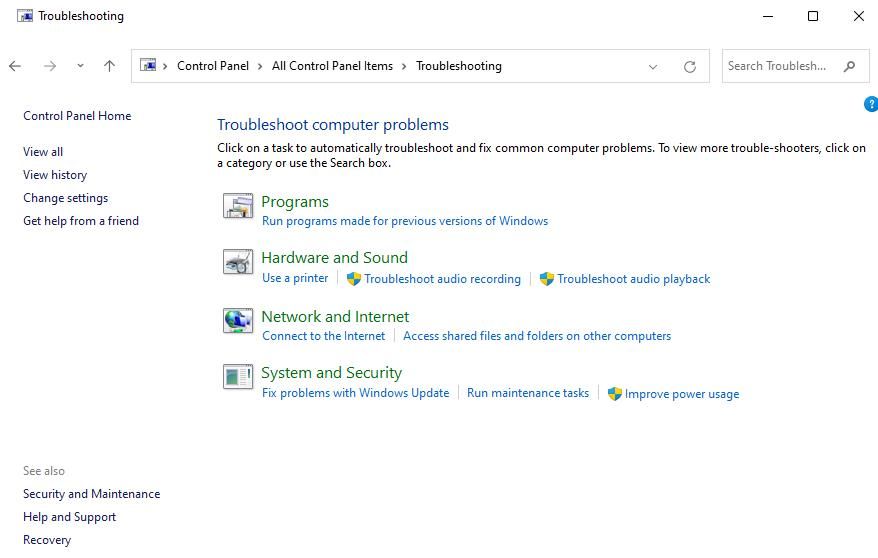
- Select Troubleshooting to open up that applet.
- Click View all to see the full list of troubleshooting tools.

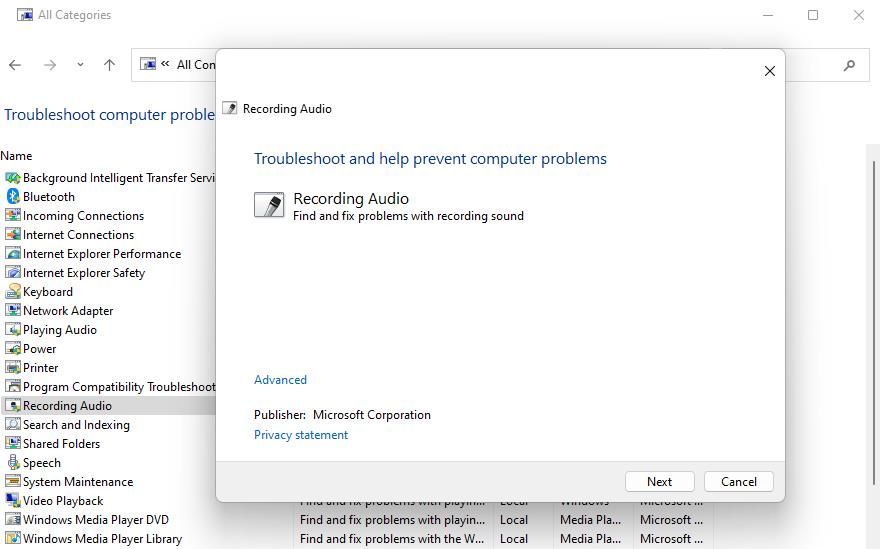
- Select Recording Audio to bring up that troubleshooter.

- Then press Next to start the Recording Audio troubleshooting.
2. Close All Communication Apps Before Running Audacity
Error 9999 can arise because of other messaging and video conference apps, such as Skype, Teams, Google Meet, and Zoom, using the microphone. Such apps can run in the background when you’re utilizing Audacity on the taskbar. If you have other communication apps installed that can potentially conflict with Audacity, try closing them like this:
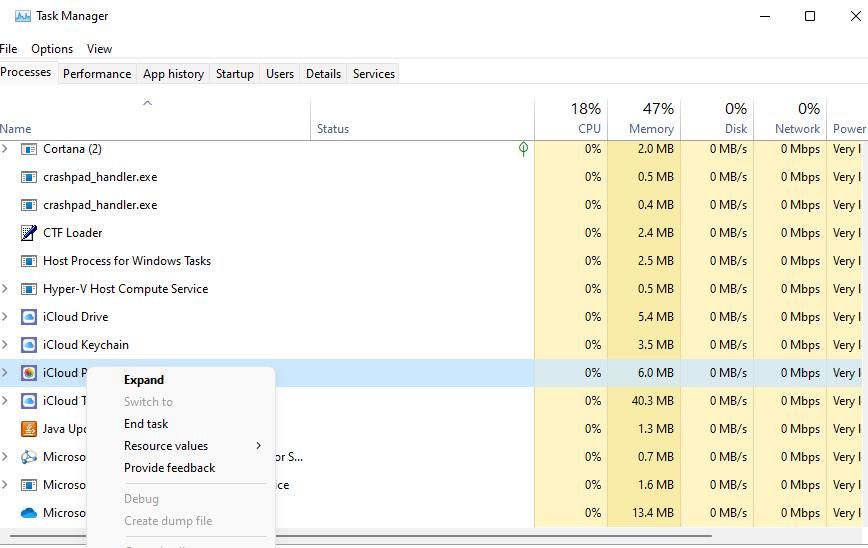
- To access Task Manager, press that utility’s Ctrl + Shift + Esc keyboard shortcut.
- Click Processes to switch to that tab if necessary.
- Select any messaging software listed under Apps and click End task.
- Then go through the Background processes section to see if there are any messaging apps there. Right-click messaging app processes there and select End task.

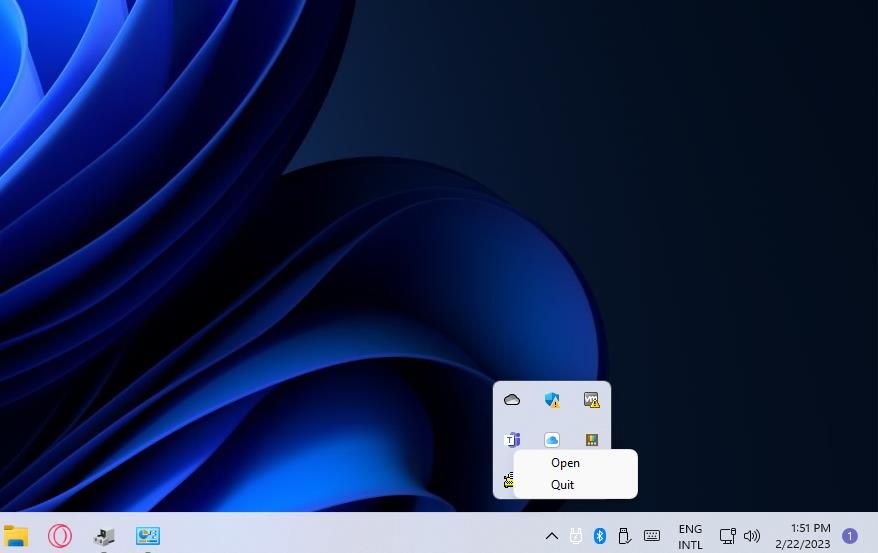
- Also, look in your system tray to see if that includes an icon for a messaging app like Skype or Zoom. Right-click any messaging app icon there and select a context menu option that closes the software.

- Then open Audacity and try recording something again.
3. Enable Microphone Access for Audacity
Error 9999 often occurs because Audacity is denied microphone access. Enabling microphone access for Windows apps is among the most widely acknowledged error 9999 resolutions to work. This is how you can enable apps to access your microphone in Windows 11/10:
- Open Settings in Windows 11 or 10 by selecting that app’s Start menu shortcut.
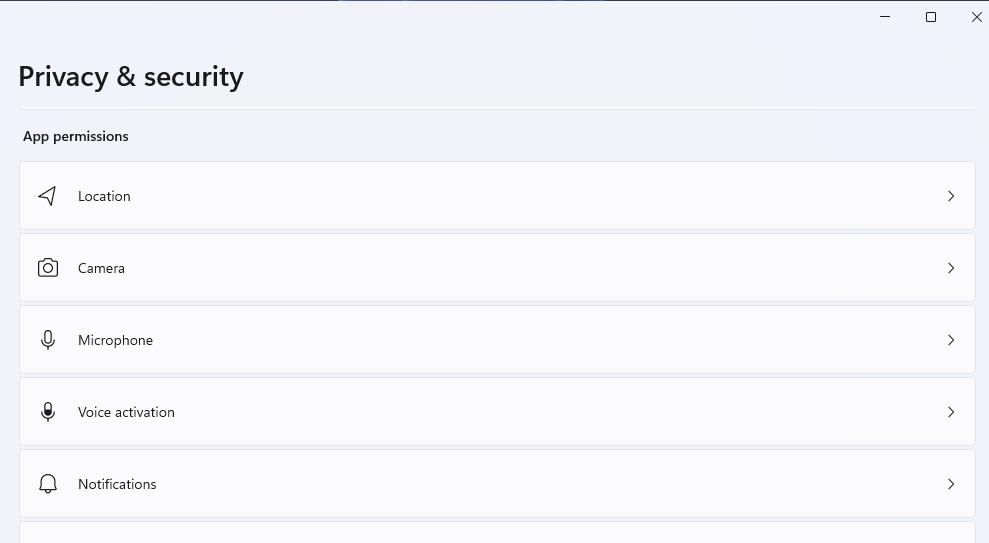
- Click the Privacy tab or category.
- Select Microphone to access those app permission settings.

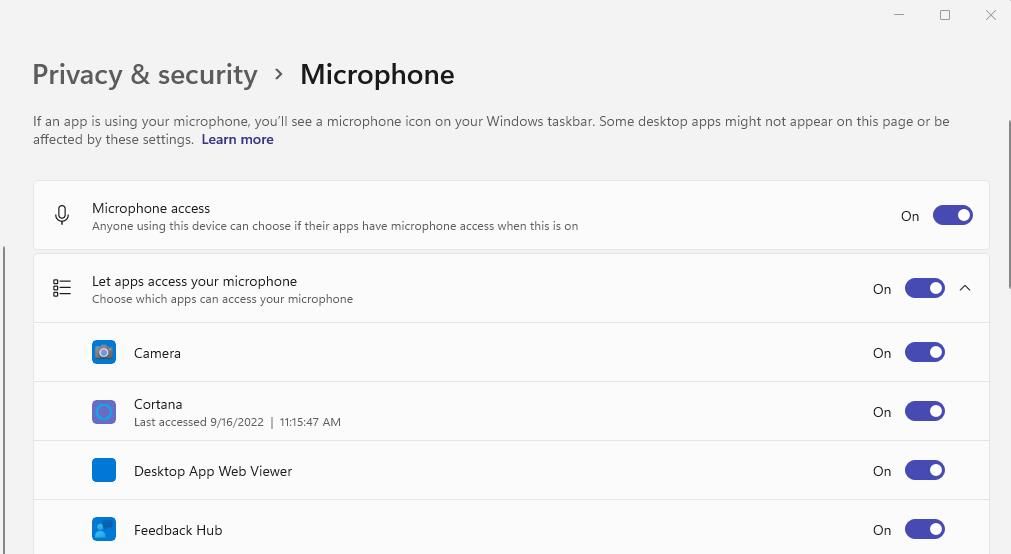
- Toggle on the Microphone access option if it’s disabled. In Windows 10, turn on the Allow apps to access your microphone setting.

- Then scroll through the list of apps below that setting and click Audacity’s toggle button to enable microphone access.
4. Reinstall the Microphone Driver
Another possible cause for error 9999 is a faulty microphone driver. Reinstalling your microphone‘s driver will address that potential cause. These are the steps for reinstalling a microphone driver in Windows:
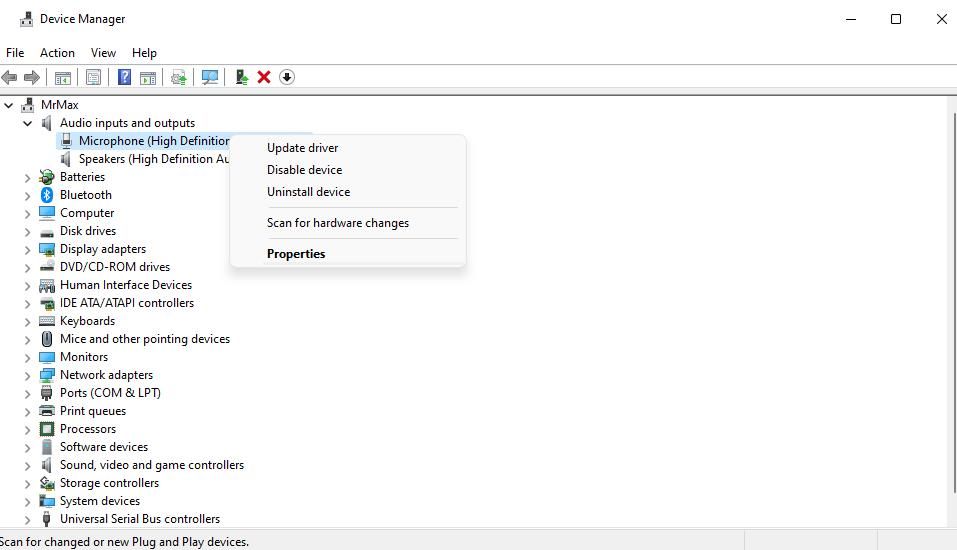
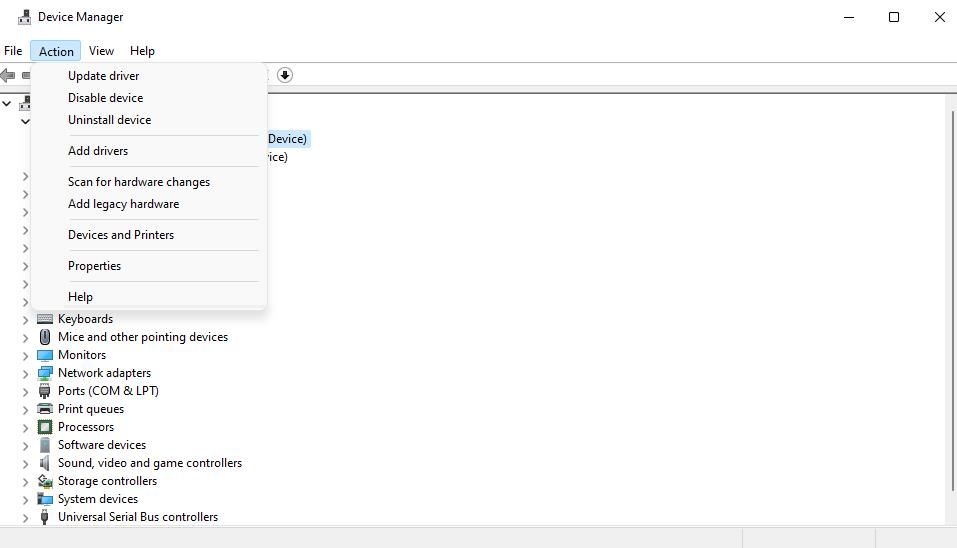
- Bring up Device Manager by right-clicking Start and selecting a shortcut for that utility on the Power User menu.
- Then double-click the Audio inputs and outputs category to view sound devices.
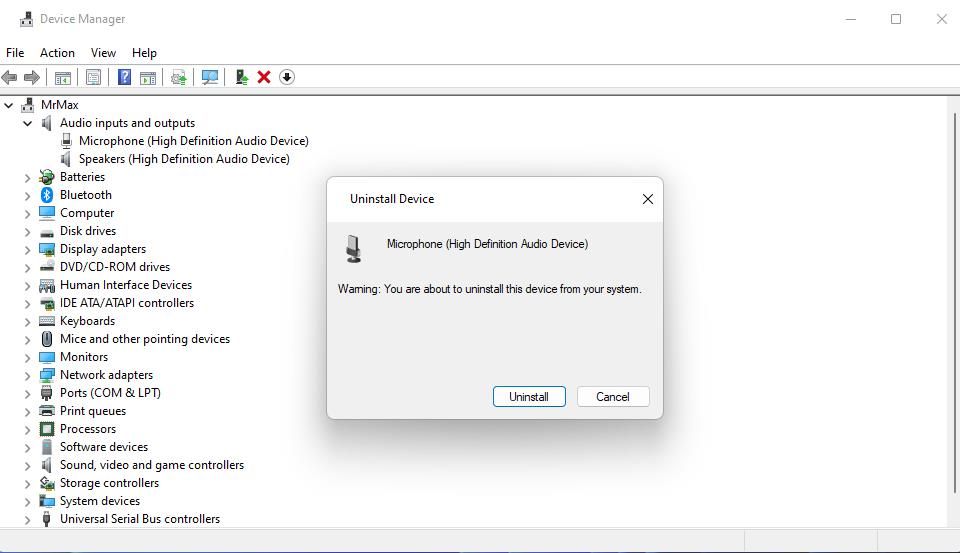
- Right-click your microphone and select Uninstall device.

- Click the confirmation dialog’s Uninstall option.

- Select Action > Scan for hardware changes to reinstall the microphone driver.

5. Turn Off Host Intrusion Protection in Kaspersky Security Software
Audacity users have confirmed disabling Host Intrusion Protection in Kaspersky antivirus (security) software fixes error 9999. Host Intrusion Protection is a feature that regulates apps’ activities in Windows 11/10. That component is enabled by default in Kaspersky security software.
Do you have Kaspersky security software installed on your PC? If so, look for and disable a Host Intrusion Protection setting in that software. This Kaspersky online help page tells you how to disable that feature in Endpoint Security for Windows. Or move Audacity to a Trusted app group in that software.
6. Disable Third-Party Antivirus Shields
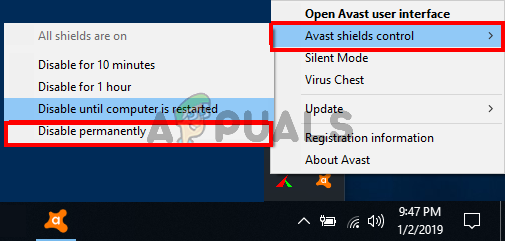
Other third-party antivirus software packages can also feasibly conflict with Audacity. If you’ve installed a third-party antivirus utility in Windows 11/10, try disabling its shield before running Audacity. You can usually do that by right-clicking an antivirus tool’s icon in the system tray and selecting a context menu option to turn off its shield.
However, some antivirus utilities have special features that monitor microphones, which can block mic access for certain apps. For example, Bitdefender has a Microphone monitor setting. Disabling your antivirus utility’s shield might not turn off such a microphone security feature. So, have a look through your security software’s tabs to see if they include any feature setting that could affect microphone access and disable it.
7. Perform a Clean Boot
Clean booting is a troubleshooting method for disabling third-party apps and services that start with Windows. Performing a clean boot is a potential error 9999 resolution because it might eliminate a background program or service interfering with Audacity. Our guide on how to clean boot on Windows tells you how to apply this potential error 9999 resolution with MSConfig and Task Manager.
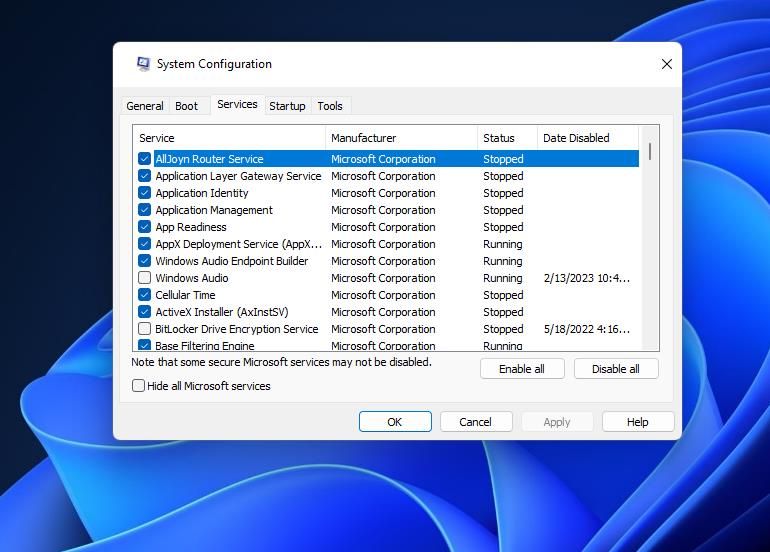
When you’ve set a clean boot and restarted Windows, try recording in Audacity. If recording works thereafter, you can leave the boot configuration as it is. However, users who prefer to re-enable startup apps and services will need to identify what one is causing error 9999.
8. Reinstall Audacity
Reinstalling Audacity is the last resort if none of the potential error 9999 solutions work for you. In this case, that sound editor app could have corrupted or missing files. You can remove Audacity within the Control Panel as instructed for method one in our guide to uninstalling software in Windows.
To reinstall the software, open the Audacity download page. Click the Download for Windows option there. Open Windows File Explorer and double-click the audacity-win-3.2.4-x64.exe file in whatever folder includes it. Then you can go through the setup wizard to reinstall Audacity.
Record Audio in Audacity Again
Those potential fixes for error 9999 are widely confirmed to work by Audacity users who’ve resolved that issue. So, it’s likely that one of those solutions will fix Audacity’s recording on your Windows PC. Then you can record audio to your heart’s content with that sound-editing software.
Некоторые пользователи Audacity сталкиваются с кодом ошибки 9999 (непредвиденная ошибка хоста) всякий раз, когда пытаются что-то записать. Обычно эта проблема возникает в Windows 10.
Код ошибки Audacity 9999 (непредвиденная ошибка хоста)
После изучения этой конкретной проблемы выяснилось, что есть несколько причин, по которым вы можете увидеть этот код ошибки при попытке что-то записать в Audacity. Вот список потенциальных виновников:
- Доступ к микрофону отключен для Audacity – если вы столкнулись с этой проблемой в Windows 10, скорее всего, эта проблема возникает из-за настройки безопасности, которая запрещает сторонним инструментам доступ к вашему записывающему устройству по умолчанию. Если этот сценарий применим, вы сможете решить эту проблему, изменив настройки конфиденциальности по умолчанию для записывающих устройств в приложении «Настройки».
- Конфликт со Skype. Один из самых популярных конфликтов, из-за которого Audacity отображает эту ошибку, – это конфликт со Skype. Как оказалось, вы можете ожидать увидеть этот код ошибки в случае, когда обе программы пытаются использовать записывающее устройство одновременно.
- Ограничение, установленное антивирусом. Еще одна довольно распространенная причина, которая может вызвать эту проблему, – это параметр безопасности, называемый Host Intrusion Protection. Если этот сценарий применим, вы можете решить эту проблему, отключив этот параметр (или его эквивалент) в меню «Параметры» вашего антивируса. Если это не сработает, вам следует отключить сторонний пакет или удалить его, чтобы устранить конфликт.
Метод 1: разрешение приложениям доступ к микрофону
Если вы столкнулись с этой проблемой в Windows 10, наиболее распространенной проблемой, которая вызывает этот код ошибки, является новый параметр конфиденциальности, который по умолчанию отключает доступ к микрофону для сторонних приложений, таких как Audacity.
Имейте в виду, что после обновления для авторов этот параметр применяется по умолчанию. Поэтому, если вы не потратите время на специальную настройку своего компьютера, чтобы разрешить сторонним приложениям доступ к вашему микрофону, вы продолжите сталкиваться с этой ошибкой.
Следуйте инструкциям ниже, чтобы разрешить Audacity доступ к вашему микрофону:
- Убедитесь, что все экземпляры Audacity закрыты.
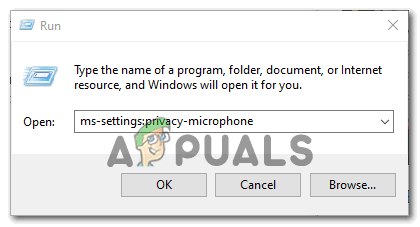
- Откройте диалоговое окно «Выполнить», нажав клавиши Windows + R. Затем введите «ms-settings: privacy-микрофон» и нажмите «Ввод», чтобы открыть окно «Конфиденциальность микрофона» в приложении «Настройки».
Запуск ms-settingsprivacy-микрофон в команде Run
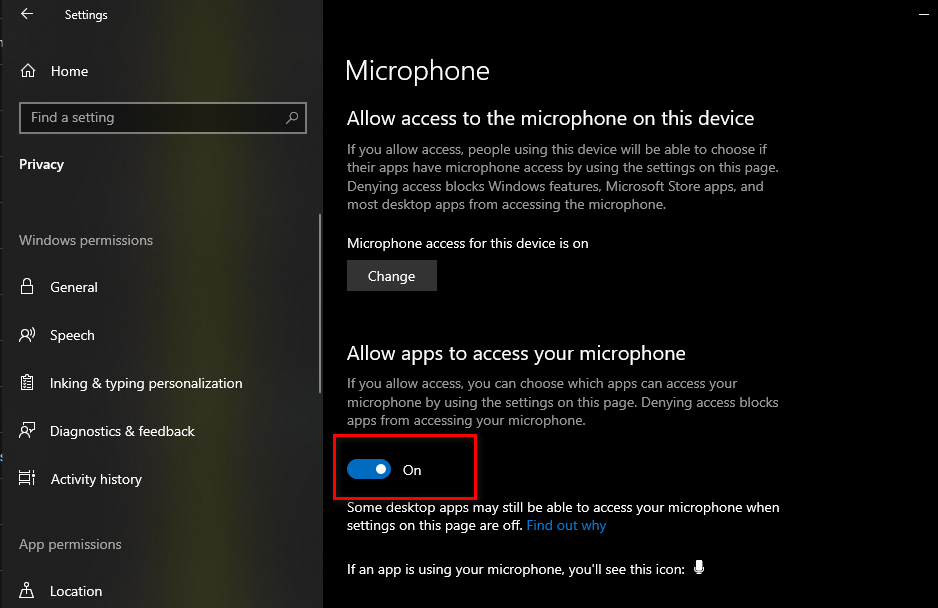
- Как только вы окажетесь на вкладке Конфиденциальность микрофона, перейдите на правую панель и включите переключатель, связанный с Разрешить приложениям доступ к вашему микрофону.
Разрешить приложениям доступ к микрофону
- После предоставления доступа на системном уровне прокрутите список разрешенных приложений и посмотрите, включен ли переключатель, связанный с Audacity. Если это не так, включите его.
- Как только доступ к микрофону будет разрешен, снова откройте Audacity и посмотрите, решена ли проблема.
Если вы все еще сталкиваетесь с кодом ошибки -9999, перейдите к следующему потенциальному исправлению ниже.
Метод 2: закрытие Skype
Как оказалось, Skype – одно из тех приложений, которые могут конфликтовать с Audacity. По словам некоторых затронутых пользователей, Skype может вызывать ошибку 9999 с Audacity даже при работе в фоновом режиме.
Причина в том, что с некоторыми гарнитурами Skype «резервирует» записывающее устройство по умолчанию, что делает его недоступным для Audacity.
Если этот сценарий применим, вы сможете исправить этот конфликт, закрыв Skype всякий раз, когда вы захотите использовать записывающее устройство в Audacity.
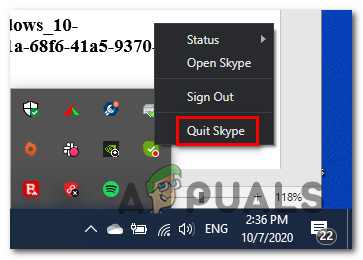
Даже если активное окно Skype не открыто, вы должны закрыть любой фоновый процесс, щелкнув правой кнопкой мыши значок Skype на значке панели задач и выбрав «Выйти из Skype» в контекстном меню.
Выход из скайпа
После успешного закрытия Skype откройте Audacity и попробуйте снова использовать функцию записи, чтобы увидеть, устранена ли ошибка.
Если вы по-прежнему сталкиваетесь с тем же кодом ошибки 9999 при использовании функции записи, перейдите к следующему потенциальному исправлению ниже.
Метод 3: Отключение защиты от вторжений хоста в Антивирусе Касперского
Если вы используете Kasperksy или другой сторонний пакет, скорее всего, вы видите код ошибки 9999 из-за функции безопасности, защищающей вас от ненадежных приложений, прослушивающих ваш микрофон – в Kaspersky эта функция называется Host Intrusion Protection.
Если вы действительно используете Kaspersky в качестве основного антивирусного ПО, вы сможете решить проблему, открыв меню «Настройки» Kaspersky Endpoint Security и выбрав Advanced Threat Protection-> Host Intrusion Prevention.
Доступ к экрану приложений Kaspersky Endpoint Security
На экране приложения просто переместите Audacity из группы Low Restricted в группу Trusted перед сохранением изменений.
Примечание. Имейте в виду, что если вы используете другой антивирус, эта функция безопасности может называться по-другому и находиться в другом месте. В этом случае вам следует поискать в Интернете конкретные шаги по отключению функций Host Intrusion Prevention.
После этого снова запустите Audacity и посмотрите, устранена ли проблема.
Если вы используете другой антивирусный пакет и не можете найти эквивалент Host Intrusion Prevention, следуйте следующему методу ниже, чтобы избавиться от конфликтующего антивируса.
Метод 4: отключение или удаление стороннего AV (если применимо)
Если вы используете сторонний пакет и подозреваете, что он может конфликтовать с программным обеспечением Audacity, вам следует попробовать отключить защиту в реальном времени или даже временно удалить пакет безопасности – это позволит вам подтвердить, имеете ли вы дело с конфликт или нет.
Идеальное место для начала – отключить функцию защиты в реальном времени и посмотреть, решит ли это проблему. В подавляющем большинстве сторонних пакетов безопасности вы можете сделать это, щелкнув правой кнопкой мыши значок панели задач вашего антивируса.
Щелкните значок антивируса на панели задач и выберите Отключить.
Однако, если эта проблема связана с ограничением брандмауэра, отключения защиты в реальном времени будет недостаточно. В этом случае вам следует найти время, чтобы удалить пакет безопасности и посмотреть, перестает ли код ошибки появляться в Audacity.
Вот краткое пошаговое руководство по удалению конфликтующего стороннего пакета:
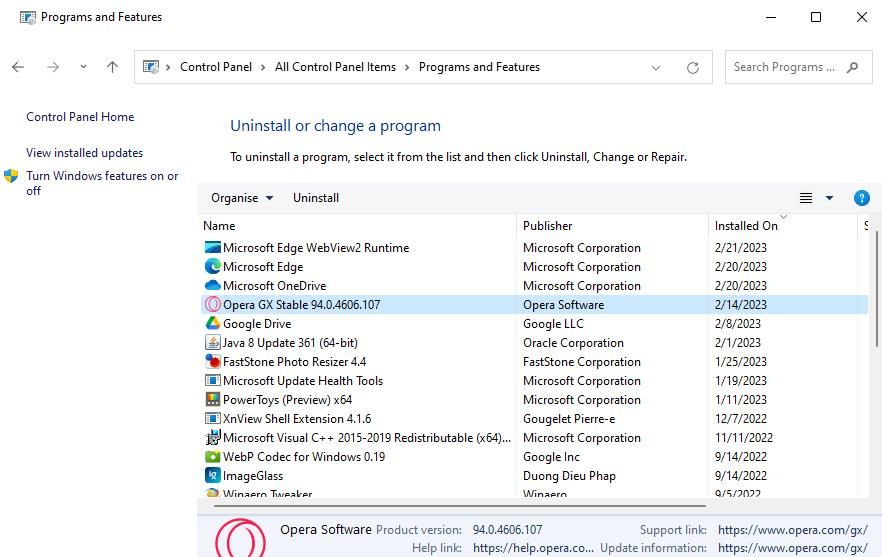
- Нажмите клавишу Windows + R, чтобы открыть диалоговое окно «Выполнить». Затем введите appwiz.cpl в текстовое поле и нажмите Enter, чтобы открыть меню «Программы и файлы».
Введите appwiz.cpl и нажмите Enter, чтобы открыть список установленных программ.
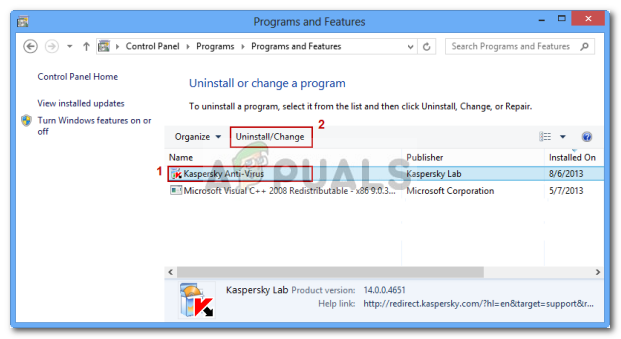
- Зайдя в меню «Программы и компоненты», прокрутите список установленных приложений и найдите антивирус, который вы хотите удалить.
Удаление антивируса с помощью панели управления
- На экране удаления следуйте инструкциям на экране, чтобы завершить удаление стороннего пакета, затем перезагрузите компьютер и дождитесь завершения следующего запуска.
- При следующем запуске откройте Audacity и запустите сеанс записи, чтобы проверить, устранена ли проблема.
-
Home
-
News
- Audacity Error Code 9999: How to Fix it in Windows 10/11?
By Charlotte | Follow |
Last Updated
If you are vexed by the Audacity Error Code 9999, you come to the right place. Here, MiniTool will provide possible reasons and solutions to help you fix the Audacity Error Code 9999 in Windows 10/11.
Causes of Audacity Error Code 9999
Audacity is one of the most popular audio recording and editing programs worldwide. However, some users of Audacity reported that they had encountered Audacity Error Code 9999 when they attempted to record audio.
This error can be caused by various factors. Here are some of the most common reasons:
- Audacity is not allowed to access the microphone.
- There is already one other audio recording app running in your system’s background.
- The third-party antivirus program on your PC has blocked Audacity’s running.
Method 1. Run the Recording Audio Troubleshoot
Troubleshoot is a built-in tool in the Windows operating system that can help you fix many basic errors. So, when you encounter Audacity Error Code 9999 on your PC, you can try running the Recording Audio Troubleshoot. Here’s the way:
- Press the Windows and R keys simultaneously to open the Run window.
- Type “control panel” in the box and press Enter.
- Set View by to Small icons or Large icons, and then select Troubleshooting from the list.
- In the new window, click View all from the left panel.
- Double-click Recording Audio from the list, and then click Next in the new window to start the Recording Audio troubleshooting.

Method 2. Check Your Privacy Settings
If Audacity is not allowed to access the microphone, you may encounter the Audacity Error Code 9999 easily. In this case, you can try checking your privacy settings to enable microphone access. Here are the detailed steps:
- Press the Windows and I keys simultaneously to open the Settings window.
- Then select Privacy > Microphone to access those app permission settings.
- Toggle on the Microphone access option in Windows 11 if it’s disabled. In Windows 10, the option is Allow apps to access your microphone.
- Next, scroll down to make sure Audacity’s toggle button is enabling microphone access.
Method 3. Reinstall the Microphone Driver
If the microphone driver is faulty, you may also encounter the Audacity Error Code 9999. So, you can follow the steps to reinstall the microphone driver to fix Audacity Error Code 9999. Here’s the guide:
- Press the Windows and X keys simultaneously, and then select Device Manager from the menu.
- Expand the Audio input and outputs category, and then right-click on your microphone and select Uninstall device.
- Click Uninstall in the new window.
- After that, select Action and click on Scan for hardware changes to reinstall the microphone driver.
Method 4. Disable Other Apps and Programs
If there are other audio recording apps running in the background, you may also encounter the Audacity Error Code 9999 Unanticipated host error. In this situation, you can try disabling other apps and programs before running Audacity to fix Audacity Error Code 9999.
Method 5. Disable Third-Party Antivirus Shields
Sometimes, the third-party antivirus may block Audacity from running normally. In this case, you can try temporarily disabling third-party antivirus to fix Audacity Error Code 9999 Unanticipated host error.
Method 6. Do a Clean Boot
Performing a clean boot can start Windows with a minimal set of drivers and startup programs so that you can determine whether a background program is interfering with your game or program. If you don’t know how to do that, you can refer to this post: How to Clean Boot Windows 10 and Why You Need to Do So?
Method 7. Reinstall Audacity
Reinstalling the app can clear all the data and files, including the corrupted data files. So, if all the above methods are unable to help you fix Audacity Error Code 9999, you can try reinstalling Audacity to fix this error.
Note:
MiniTool Partition Wizard can help you clone the system, manage disks better, and recover data. If you have this need, you can download it by clicking the download button below.
MiniTool Partition Wizard FreeClick to Download100%Clean & Safe
Bottom Line
Is this post useful to you? Do you know any other effective methods that can fix Audacity Error Code 9999? Please feel free to leave them in the comment zone.
In addition, if you are interested in MiniTool Partition Wizard, you can go to its official website to get more information.
About The Author
Position: Columnist
Charlotte is a columnist who loves to help others solve errors in computer use. She is good at data recovery and disk & partition management, which includes copying partitions, formatting partitions, etc. Her articles are simple and easy to understand, so even people who know little about computers can understand. In her spare time, she likes reading books, listening to music, playing badminton, etc.
Audacity – это звуковой редактор с открытым исходным кодом, который широко используется по всему миру. Хотя это программное обеспечение почти не содержит багов и проблем, как и любое другое приложение, оно не на 100% защищено от ошибок.
Одна из основных ошибок Audacity – это «Код ошибки -9999». За этой проблемой часто следует сообщение об ошибке – «Непредвиденная ошибка хоста».
Отключите или удалите антивирус (Kaspersky / Avast) на вашем компьютере. Проверьте, решает ли это проблему.
Содержание
- Разрешите приложению доступ к микрофону
- Закрыть фоновые программы
- Установите микрофон в качестве устройства по умолчанию
- Выйти из Skype
Разрешите приложению доступ к микрофону
Вы должны настроить разрешение на использование микрофона в окне настроек.
1. Прежде всего, одновременно нажмите клавишу Windows + I (на англ клавиатуре)
2. Затем нажмите на настройки «Конфиденциальность», чтобы получить к нему доступ.

3. Затем нажмите « Микрофон » слева.

4. В настройках «Доступ к микрофону для этого устройства» нажмите «Изменить». Переключите его на «ВКЛ».

5. Затем прокрутите вниз до «Разрешить настольным приложениям доступ к вашему микрофону».
6. Здесь переключите эту настройку на «ВКЛ».
Это включит доступ к микрофону для компьютера.
Закрыть фоновые программы
Audacity не сможет получить доступ к микрофону, если другое приложение использует его в фоновом режиме.
1. Одновременно нажмите клавишу Windows + X.
2. Затем щелкните «Диспетчер задач».
3. Когда открывается диспетчер задач, проверьте, какой процесс использует микрофон в фоновом режиме (например, Skype, Zoom и т. д.).
4. Щелкните правой кнопкой мыши процесс, использующий микрофон, и нажмите «Завершить задачу», чтобы убрать этот процесс.
5. Таким же образом завершите все процессы, связанные с микрофоном.
Проверьте, решает ли это вашу проблему.
Установите микрофон в качестве устройства по умолчанию
Вы должны установить микрофон в качестве устройства по умолчанию.
1. Нажмите клавишу Windows + R, чтобы открыть «Выполнить».
2. После этого введите «mmsys.cpl » и нажмите « ОК ».

3. Затем, когда откроется окно «Звук», щелкните вкладку « Запись ».
4. Затем щелкните правой кнопкой мыши используемый микрофон и выберите «Установить как устройство по умолчанию».
Это должно установить устройство в качестве аудиодрайвера по умолчанию на вашем компьютере.
Это должно было решить вашу проблему.
Выйти из Skype
Skype – одно из приложений, которое часто конфликтует с Audacity.
1. Закройте приложение Skype.
Но закрытие приложения Skype не означает его полный выход. Обычно закрытие Скайп просто скрывает его в панель задач и по сути Скайп продолжает использовать доступ к микрофону.
2. Чтобы окончательно закрыть приложение, щелкните стрелку на панели задач. Затем щелкните правой кнопкой мыши значок Skype и нажмите «Выйти из Skype», чтобы полностью закрыть приложение.

Точно так же, если у вас есть другие приложения, использующие микрофон, например команды Microsoft, также закройте их.
Теперь попробуйте снова использовать Audacity и проверьте, работает ли это исправление.
Ваша проблема должна быть решена.
Просмотров 4.4к.
Обновлено
Some Audacity users are encountering the 9999 error code (Unanticipated Host Error) whenever they attempt to record something. This issue is primarily reported to occur on Windows 10.
After investigating this particular issue, it turns out that there are several reasons why you might see this error code when attempting to record something in Audacity. Here’s a list of potential culprits:
- Microphone access is disabled for Audacity – If you’re encountering this problem on Windows 10, chances are this problem is occurring due to a security setting that denies 3rd party tools access to your default recording device. If this scenario is applicable, you should be able to fix this problem by modifying the default Privacy settings for recording devices from the Settings app.
- Conflict with Skype – One of the most popular conflicts that will cause Audacity to display this error is a conflict with Skype. As it turns out, you can expect to see this error code in an instance where both programs are attempting to use the recording device at the same time.
- Restriction enforced by antivirus – Another fairly common culprit that might cause this problem is a security option called Host Intrusion Protection. If this scenario is applicable, you can fix this problem by disabling this setting (or it’s equivalent) from the Setting menu of your antivirus. If that doesn’t work you should disable the 3rd party suite or uninstall it to eliminate the conflict.
Method 1: Allowing Apps to Access the Microphone
If you’re facing this issue on Windows 10, the most common problem that will cause this error code is a new privacy setting that cuts microphone access to 3rd party apps such as Audacity by default.
Keep in mind that after the Creator’s Update, this setting is enforced by default. So unless you take the time to specifically configure your computer to allow 3rd party apps access to your microphone, you’ll keep encountering this error.
Follow the instructions below to allow Audacity access to your microphone:
- Ensure that every instance of Audacity is closed.
- Open a Run dialog box by pressing Windows key + R. Next, type ‘ms-settings:privacy-microphone‘ and press Enter to open up the Microphone Privacy window of the Settings app.

Running the ‘ms-settingsprivacy-microphone’ in Run command - Once you’re inside the Microphone privacy tab, move over to the right-hand pane and enable the toggle associated with Allow apps to access your microphone.

Allowing apps to access the microphone - Once access is granted at a system level, scroll down through the list of allowed apps and see if the toggle associated with Audacity is enabled. If it’s not, enable it.
- Once microphone access is allowed, open Audacity once again and see if the problem is now fixed.
In case you are still encountering the error code -9999, move down to the next potential fix below.
Method 2: Closing Skype
As it turns out, Skype is one of those apps that can conflict with Audacity. According to some affected users, Skype can cause the 9999 error with Audacity even when running in the background.
The reason for this is that with certain headsets, Skype will ‘reserve’ the default recording device, which will make it unavailable for Audacity.
If this scenario is applicable, you should be able to fix this conflict by closing Skype whenever you want to use a recording device in Audacity.
Even if there is no active Skype window open, you should close off any background process by right-clicking on the Skype icon in the tray bar icon and choosing Quit Skype from the context menu.
Once Skype is successfully closed, open Audacity and attempt to use the recording feature again to see if the error is now resolved.
In case you are still encountering the same error code 9999 when using the recording feature, move down to the next potential fix below.
Method 3: Disabling the Host Intrusion Protection in Kaspersky Antivirus
If you’re using Kasperksy or a different 3rd party suite, chances are you’re seeing the 9999 error code due to a security feature protecting you from untrusted apps listening in to your microphone – on Kaspersky, this feature is called Host Intrusion Protection.
If you are indeed using Kaspersky as your main AV, you should be able to resolve the issue by going by opening the Settings menu of Kaspersky Endpoint Security and going to Advanced Threat Protection->Host Intrusion Prevention.

Inside the application screen, simply move Audacity from the Low Restricted group to the Trusted group before saving the changes.
Note: Keep in mind that if you’re using a different antivirus, this security feature might be called differently and be found in a different location. In this case, you should search online for specific steps of disabling the Host Intrusion Prevention features.
After you do this, launch Audacity again and see if the issue is now fixed.
In case you are using a different antivirus suite and you can’t find the equivalent of Host Intrusion Prevention, follow the next method below to get rid of the conflicting antivirus.
Method 4: Disabling or Uninstalling the 3rd party AV (if applicable)
If you are using a 3rd party suite and you suspect that it might be conflicting with the Audacity software, you should try disabling the real-time protection or even uninstalling the security suite temporarily – this will allow you to confirm whether you’re dealing with a conflict or not.
The ideal place to start is to disable the real-time protection feature and see if this ends up resolving the problem. With the vast majority of 3rd party security suites, you can do this by right-clicking on the tray bar icon of your antivirus.
However, if this problem is related to a firewall restriction, disabling real-time protection will not be enough. In this case, you should take the time to uninstall the security suite and see if the error code stops occurring in Audacity.
Here’s a quick step-by-step guide on how to uninstall the conflicting 3rd party suite:
- Press Windows key + R to open up a Run dialog box. Next, type ‘appwiz.cpl’ inside the text box and press Enter to open up the Programs and Files menu.

Type appwiz.cpl and Press Enter to Open Installed Programs List - Once you’re inside the Programs and Features menu, scroll down through the list of installed applications and locate the antivirus that you wish to uninstall.

Uninstalling Antivirus Using Control Panel - Inside the uninstallation screen, follow the on-screen prompts to complete the uninstallation of your 3rd party suite, then restart your computer and wait for the next startup to complete.
- At the next startup, open Audacity and initiate a recording session to see if the problem is now fixed.


Kevin Arrows
Kevin Arrows is a highly experienced and knowledgeable technology specialist with over a decade of industry experience. He holds a Microsoft Certified Technology Specialist (MCTS) certification and has a deep passion for staying up-to-date on the latest tech developments. Kevin has written extensively on a wide range of tech-related topics, showcasing his expertise and knowledge in areas such as software development, cybersecurity, and cloud computing. His contributions to the tech field have been widely recognized and respected by his peers, and he is highly regarded for his ability to explain complex technical concepts in a clear and concise manner.