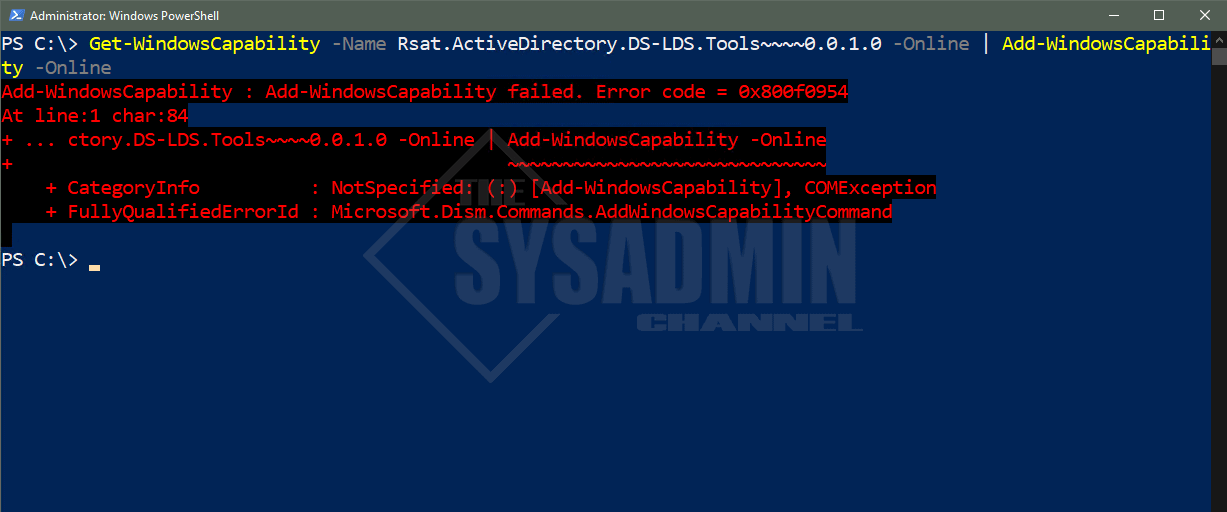
If you have tried to install Remote Server Administration tools for Windows 10 version 1809, 1903 or later you might have come across: Add-WindowsCapability failed. Error code = 0x800f0954. If you haven’t, that’s great! If you have, you’re in luck because today we’re going to go over the steps needed to fix the issue.
By default, the WindowsCapability logs are stored in C:\Windows\Logs\DISM\dism.log so we’ll check there to see what’s happening behind the scenes.
DISM   DISM Package Manager: PID=1280 TID=6320  Error in operation: (null) (CBS HRESULT=0x800f0954) - CCbsConUIHandler::Error
DISM   DISM Package Manager: PID=1280 TID=5772 Failed finalizing changes. - CDISMPackageManager::Internal_Finalize(hr:0x800f0954)
DISM   DISM Package Manager: PID=1280 TID=5772 Failed processing package changes with session options - CDISMPackageManager::ProcessChangesWithOptions(hr:0x800f0954)
DISM   API: PID=11232 TID=1244 Failed to install capability. - CAddCapabilityCommandObject::InternalExecute(hr:0x800f0954)
DISM   API: PID=11232 TID=1244 InternalExecute failed - CBaseCommandObject::Execute(hr:0x800f0954)
DISM   API: PID=11232 TID=8352 CAddCapabilityCommandObject internal execution failed - DismAddCapabilityInternal(hr:0x800f0954)
The steps to fix this are pretty simple and should only take a couple of minutes.
- On the problem child machine open gpedit.msc
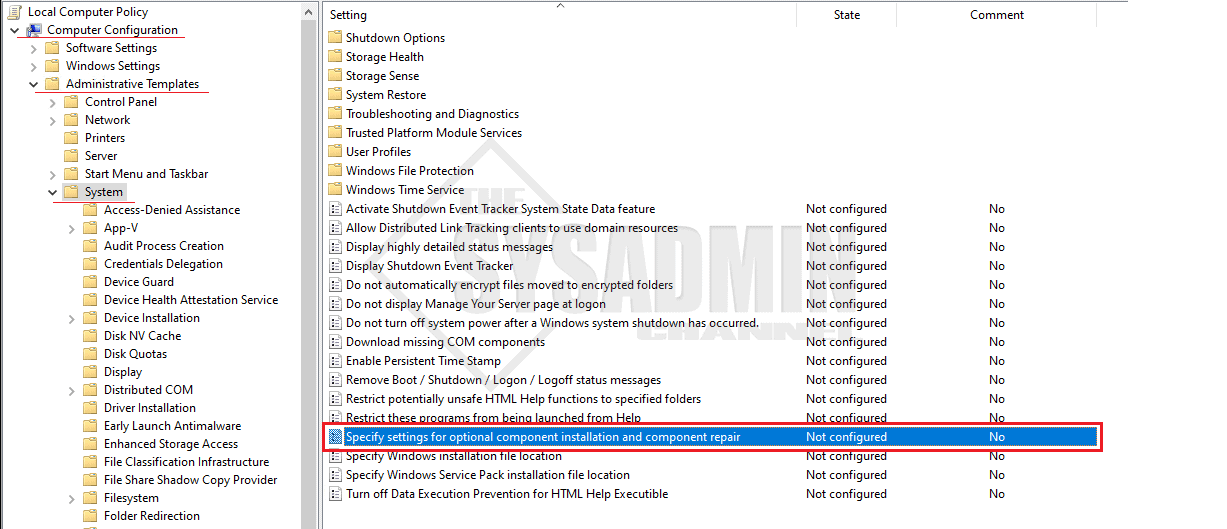
- Go to Computer Configuration -> Administrative Templates -> System
- Open Specify settings for optional component installation and component repair
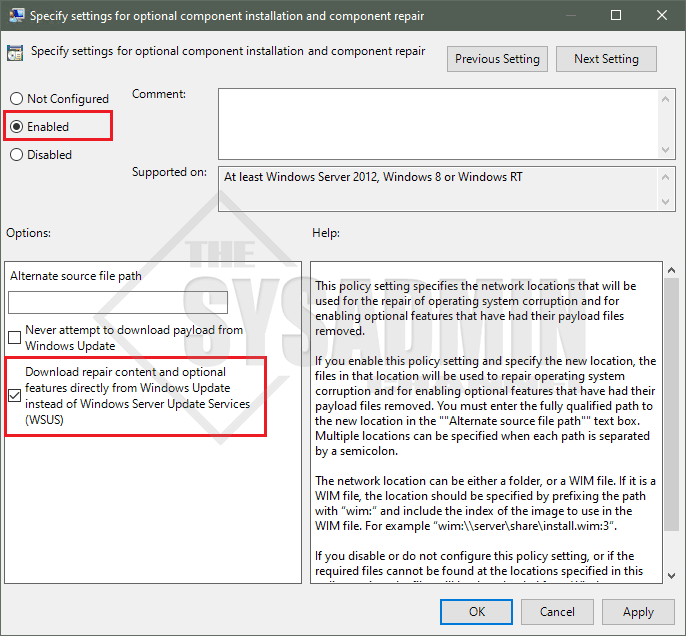
- With that settings open, select Enabled
- Check Download repair content and optional features directly from Windows Updates instead of Windows Server Updates Services (WSUS)
- Go back in your Powershell Window
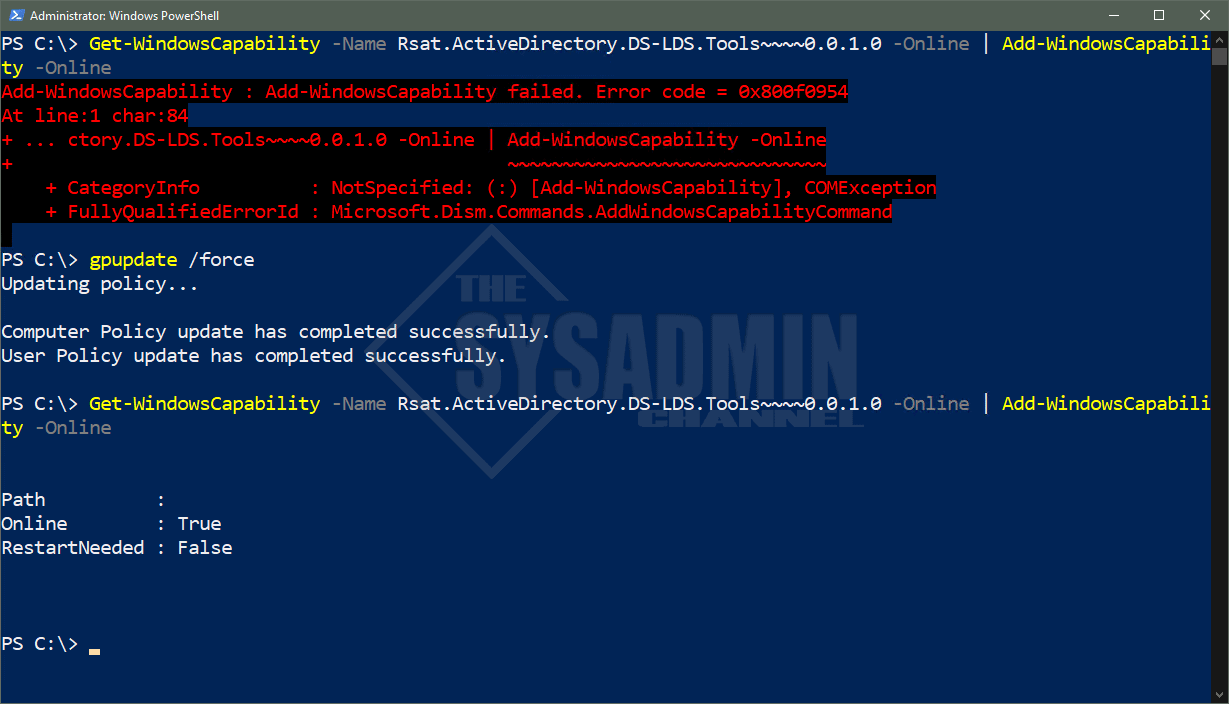
- Run a gpupdate /force
- Rerun the Add-WindowsCapability again to install the feature
Once you’ve installed the RSAT tools for 1809, 1903 and later you might want to consider undoing those settings because this will install unnecessary updates on your machine. You would especially want to reconsider this if you’re deploying software updates using SCCM. Hopefully you’ve been able to fix the Add-WindowsCapability failed. Error code = 0x800f0954 error that so many of us have been running into.
Finally, feel free to check out the rest of our server administration for more of that content.
- Remove From My Forums

Windows 10 — 1809 — RSAT Toolset — error code of 0x800f0954
-
Question
-
Got the upgrade the 1809 this morning — trying to add the RSAT Toolset
Getting error code of Add-WindowsCapability failed. Error code = 0x800f0954
Does anyone know what this means and how to correct this?
Thanks in advanced
Answers
-
I found this answer in another thread. It worked for me!
Run «gpedit.msc» to edit your local computer policy The setting in question is: Computer Configuration\Administrative Templates\System\Specify settings for optional component installation and component repair
My local policy seems to have defaulted to «Disabled» — after changing it to «Enabled» and selecting the checkbox labeled «Download repair content and optional features directly from Windows Update instead of Windows Server
Update Services (WSUS)» the RSAT tools installed for me.-
Marked as answer by
Wednesday, October 3, 2018 6:44 PM
-
Marked as answer by

If you have tried to install a Windows Compatibility feature in Windows 10, Windows 11, Windows Server 2019, or Windows Server 2022, you might have come across: Add-WindowsCapability failed. Error code = 0x800f0954. You can view the WindowsCapability error logs in the C:\Windows\Logs\DISM\dism.log file and you might see something similar to this:
DISM DISM Package Manager: PID=1280 TID=6320 Error in operation: (null) (CBS HRESULT=0x800f0954) – CCbsConUIHandler::Error
DISM DISM Package Manager: PID=1280 TID=5772 Failed finalizing changes. – CDISMPackageManager::Internal_Finalize(hr:0x800f0954)
DISM DISM Package Manager: PID=1280 TID=5772 Failed processing package changes with session options – CDISMPackageManager::ProcessChangesWithOptions(hr:0x800f0954)
DISM API: PID=11232 TID=1244 Failed to install capability. – CAddCapabilityCommandObject::InternalExecute(hr:0x800f0954)
DISM API: PID=11232 TID=1244 InternalExecute failed – CBaseCommandObject::Execute(hr:0x800f0954)
DISM API: PID=11232 TID=8352 CAddCapabilityCommandObject internal execution failed – DismAddCapabilityInternal(hr:0x800f0954)
How to Fix Add-WindowsCapability failed Error code = 0x800f0954
You’ll need administrator rights to fix this issue, so once you’re logged in as an administrator, go through these steps:
- Start > Run gpedit.msc
- Go to Computer Configuration > Administrative Templates > System
- Open Specify settings for optional component installation and component repair
- Select Enabled and check the box for Download repair content and optional features directly from Windows Updates instead of Windows Server Updates Services (WSUS)

- In Powershell, run gpupdate /force
- Now Rerun the Add-WindowsCapability command to install the feature and it should work

Depending on your environment, you might want to consider undoing these settings once you install your feature because this could install unnecessary updates on your machine, especially if you’re using SCCM.
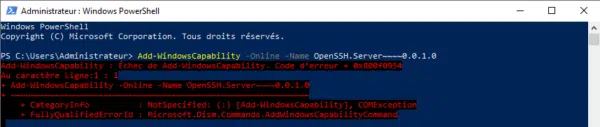
In this tutorial, I will explain how to solve error 0x800f0954 with the PowerShell Add-WindowsCapability Cmdlet when trying to install a Windows feature.
This error mainly occurs when you use a WSUS server to update your Windows computers and therefore when using the Cmdlet Add-WindowsCapability, it will look for files on the WSUS server.
Here is the error:
To solve this problem, you must tell the computer to use Windows Update for optional components, this configuration is done using Group Policy.
This need being punctual, I advise you to do this configuration locally.
Open the Local Group Policy Editor console: gpedit.msc.
Go to the location: Computer Configuration / Administrative Templates / System and find the setting Specify settings for installing optional components and repairing component 1, double click on it to open it.

Enable setting 1 and check the box 2 Download repair content and optional options from Windows Update instead of Windows Server Update Services (WSUS), then click Apply buttons 3> > and OK 4 to confirm and close.

Enter the gpupdate /force command to update the settings.
You should be able to run your Add-WindowsCapability command again and it should run without error.
In this post, we will look at how to resolve RSAT Tools Installation Error 0x800f0954. The error 0x800f0954 appears while installing .NET Framework 3.5 or an optional feature on Windows computers.
The RSAT error 0x800f0954 appears on both Windows 10 and Windows 11 devices while using the DISM command-line tool to install additional features.
In my previous post I showed the steps to install RSAT tools on Windows 10. I covered two methods to install RSAT tools, a GUI based and another is using DISM.
On one of my Windows 10 VM, I encountered add-windowscapability failed error code = 0x800f0954. Let’s find out the reasons why you encounter error 0x800f0954 during RSAT tools installation and solution to this error.
Why do you get Error Code 0x800f0954?
There are many reasons why you could encounter error 0x800f0954 during RSAT usage.
- Unable to access Windows Update server: If a domain joined computer cannot access Windows Update server in the network, the RSAT installation terminates with 0x800f0954 error. In this case, you can resolve the issue by bypassing the WSUS.
- Install .NET Framework using PowerShell: If you’re trying to install an older .NET Framework package, trying doing it from a PowerShell window to avoid the 0x800f0954 error.
- Group policy preventing the feature installation: When you are trying to install a RSAT feature using DISM tool, a GPO could be the reason for error 0x800f0954. You can resolve the issue by enabling the “Specify settings for optional component installation and component repair” policy.
While installing RSAT features using DISM command line tool on my Windows computer, I encountered error 0x800f0954. The feature failed to install with the following error details:
Error 0x800f0954
DISM Failed. No operation was performed.
For more information, review the log file. The DISM Log file can be found at C:\Windows\Logs\DISM\dism.log

By default, the WindowsCapability logs are stored in C:\Windows\Logs\DISM\dism.log. Reviewing the dism.log, I found multiple errors.
The below information shows the error details logged in dism.log file. Among the errors in dism.log, one prominent error was 0x800f0954. So if you are seeing the same error while installing RSAT tools on Windows computer, head to next section for the solution.
DISM Package Manager: PID=4828 TID=5752 Error in operation: (null) (CBS HRESULT=0x800f0954) - CCbsConUIHandler::Error
DISM DISM Package Manager: PID=4828 TID=6516 Failed finalizing changes. - CDISMPackageManager::Internal_Finalize(hr:0x800f0954)
DISM Package Manager: PID=4828 TID=6516 Failed processing package changes with session options - CDISMPackageManager::ProcessChangesWithOptions(hr:0x800f0954)
DISM Package Manager: PID=4828 TID=6516 Failed to install capability. - CPackageManagerCLIHandler::ProcessCmdLine_AddCapability(hr:0x800f0954)
DISM Package Manager: PID=4828 TID=6516 Failed while processing command add-capability. - CPackageManagerCLIHandler::ExecuteCmdLine(hr:0x800f0954)
2DISM Package Manager processed the command line but failed. HRESULT=800F0954

Solution for RSAT Tools Installation Error 0x800f0954
You can resolve the RSAT error 0x800f0954 by enabling the “Specify settings for optional component installation and component repair” policy on your computer.
Fix RSAT Tools Installation Error 0x800f0954
- On your Windows computer, right click Start and click Run.
- Now type gpedit.msc and hit enter.
- In the local group policy editor, navigate to Computer Configuration\Administrative Templates\System.
- On the right pane look for policy named “Specify settings for optional component installation and component repair“.

Right click policy setting and click Enabled. In addition to that, check the box “Download repair content and optional features directly from Windows Updates instead of Windows Server Updates Services (WSUS)“.

Click Apply and OK. Now open the command prompt on your computer and run the command gpupdate so that the latest policy settings are applied to the local machine.
Running the same DISM command now should install the RSAT feature without any errors.


Prajwal Desai is a Microsoft MVP in Intune and SCCM. He writes articles on SCCM, Intune, Windows 365, Azure, Windows Server, Windows 11, WordPress and other topics, with the goal of providing people with useful information.