Windows 7 Enterprise Windows 7 Home Basic Windows 7 Home Premium Windows 7 Professional Windows 7 Starter Windows 7 Ultimate More…Less
Symptoms
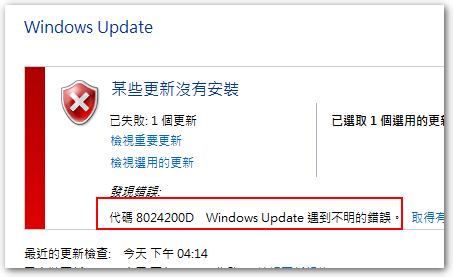
When you install Windows 7 Service Pack 1 (SP1), you may receive the following error message:
Error 0x8024200D
Cause
This issue can occur if Windows 7 Service Pack 1 (SP1) was downloaded by Windows Update but has not yet been installed, or if the installation has become corrupt. For more information about this service pack, click the following article number to view the article in the Microsoft Knowledge Base:
976932 Information about Service Pack 1 for Windows 7 and for Windows Server 2008 R2
Resolution
To have us fix this problem for you, go to the «Fix it for me» section. If you prefer to fix this problem yourself, go to the «Let me fix it myself» section.
Fix it for me
To fix this problem automatically, click the Fix it button or link. Then click Run in the File Download dialog box, and follow the steps in the Fix it wizard.
Notes
-
This wizard may be in English only. However, the automatic fix also works for other language versions of Windows.
-
If you are not on the computer that has the problem, you should save the Fix it solution to a flash drive or a CD and then run it on the computer that has the problem.
Uninstall Windows 7 Service Pack 1
To resolve this issue, uninstall Service Pack 1 by using the DISM command. To do this, follow these steps for your version of Windows 7.
For the 32-bit version of Windows 7
-
Click Start, and then type cmd in the Search box.
-
Right-click cmd.exe, and then click Run as administrator.
-
Type the following command, and then press Enter:
dism.exe /online /remove-package /packagename:Package_for_KB976932~31bf3856ad364e35~x86~~6.1.1.17514
-
After the removal is complete, type exit, and then press Enter.
-
Restart the computer.
For the 64-bit version of Windows 7
-
Click Start, and then type cmd in the Search box.
-
Right-click cmd.exe, and then click Run as administrator.
-
Type the following command, and then press Enter:
dism.exe /online /remove-package /packagename:Package_for_KB976932~31bf3856ad364e35~amd64~~6.1.1.17514
-
After the removal is complete, type exit, and then press Enter.
-
Restart the computer.
Determine whether you installed the Beta version of Windows 7 SP1
If you installed the Beta version of Windows 7 SP1, you need to uninstall the Beta version and then install the released version of Service Pack 1. To Uninstall the Beta version, follow these steps for your version of Windows 7.
Note If you uninstalled the Beta version of Windows 7 SP1 and you continue to receive the error, you may have remnants of the Beta version on your PC. These steps will also clean any remnants of the Beta version from your PC.
For the 32-bit version of Windows 7
-
Click Start, and then type cmd in the Search box
-
Right-click cmd.exe, and then click Run as administrator.
-
Type the following command, and then press Enter:
dism.exe /online /remove-package /packagename:Package_for_KB976932~31bf3856ad364e35~x86~~6.1.1.17105
-
After the removal is complete, type exit, and then press Enter.
-
Restart the computer.
For the 64-bit version of Windows 7
-
Click Start, and then type cmd in the Search box.
-
Right-click cmd.exe, and then click Run as administrator.
-
Type the following command, and then press Enter:
dism.exe /online /remove-package /packagename:Package_for_KB976932~31bf3856ad364e35~amd64~~6.1.1.17105
-
After the removal is complete, type exit, and then press Enter.
-
Restart the computer.
More Information
When you install Windows 7 or Windows Server 2008 R2 SP1 you may also receive error 0x800f081f.
When you check the CBS log(C:\Windows\Logs\CBS\cbs.log), you will find the errors like below:
2011-03-03 21:38:06, Error CBS Exec: Failed to pre-stage package: Package_for_KB976933~31bf3856ad364e35~amd64~cs-CZ~6.1.7601.17514, file: TsUsbGD.sys, source: \\?\C:\Windows\Servicing\Packages\amd64_tsgenericusbdriver.inf_31bf3856ad364e35_6.1.7601.17514_none_9872c8452ac8f816\TsUsbGD.sys, sandbox: (null) [HRESULT = 0x800f081f — CBS_E_SOURCE_MISSING]
2011-03-03 21:38:06, Info CBS Failed to gather all required files. [HRESULT = 0x800f081f — CBS_E_SOURCE_MISSING]
You can use the following methods to resolve the issue:
-
Run System Update Readiness Tool (KB947821). It should resolve the error in most of cases
-
If the System Update Readiness Tool does not resolve the issue, it may be that you have a pre-release version of the RSAT tools installed on the system.
To resolve this issue, do the following:
-
Uninstall the pre-release RSAT tools
-
Reboot the system
-
Install the release version of the RSAT tools (http://www.microsoft.com/download/en/details.aspx?FamilyID=7d2f6ad7-656b-4313-a005-4e344e43997d&displaylang=en)
-
Reinstall Windows 7 SP1
-
Need more help?
Want more options?
Explore subscription benefits, browse training courses, learn how to secure your device, and more.
Communities help you ask and answer questions, give feedback, and hear from experts with rich knowledge.
The Windows Update Error 8024200D (WU_E_UH_NEEDANOTHERDOWNLOAD) means that the Windows Update handled can’t install the update because the update downloaded is invalid and corrupted. This error is most commonly encountered on Windows 7.

If you are affected by this error code, you are likely to experience this behavior every time Windows Update attempt to install an update that has failed on the first try. This problem has been patched with newer Windows builds but remains prevalent with older builds.
The main reason why you’ll see this error is a WU inconsistency that can be fixed either by resetting the entire Windows component or by bypassing it entirely by downloading and installing the update manually using the Windows Update Catalog.
Update: This problem can also occur due to a corrupted Windows Update database.
Here’s a list of confirmed methods that you can use to troubleshoot this error:
1. Install the failing update manually
If you’re looking for a quick fix that will bypass a local issue that triggers the 8024200d error, use the Windows Update Catalog to install the failing update manually.
This method is only recommended if you only have one update that is throwing the 8024200d WU error when you attempt to install it.
Important: Keep in mind that going this route will not effectively address the root source of the issue. Even if this allows you to bypass the error and install the problematic update, it will not address the root cause of the issue. If you want to fix root the issue, continue troubleshooting with the remaining methods below even if this method allows you to install the failing update.
Here’s how to use the Windows Update Catalog to bypass the 8024200d error:
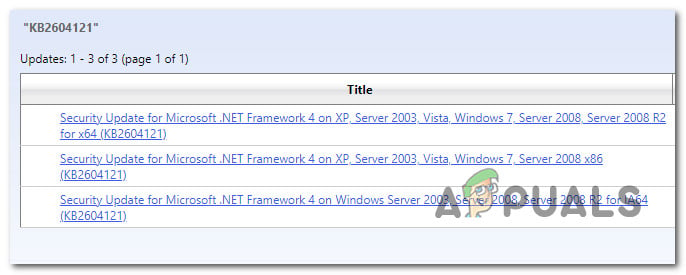
- Launch the homepage for the Microsoft Update Catalog in your web browser.
- Use the search box in the upper-right corner of the Microsoft Update Catalog page to discover the update that failed to install.

Searching for the failing update inside Windows Update Note: You can grab the update code from the WU error message inside the Windows Update page.
- From the list of results, identify the update applicable to your Windows version.

Identify the correct update Note: Consider the CPU architecture and Windows version while looking for an appropriate update, after analyzing the findings.
- After identifying the required update, click the Download option and wait until the download is complete.
- Once the download is complete, double-click the executable file you just downloaded from the Downloads folder.
- Follow the on-screen instructions to complete the sideloading of the next Windows update.
- Now that the update is installed, reboot your PC and see if the 8024200d has disappeared from the Windows update screen.

2. Run the Windows Update Troubleshooter
Running the Windows Update troubleshooter is a great way to try and fix this issue using the built-in tools provided by Microsoft.
If you are experiencing the 8024200D error due to a common WU inconsistency, running the Windows Update Troubleshooter and applying the recommended fix should help you resolve this issue.
Note: The Windows Update Troubleshooter provides a collection of automated repair strategies that may be used to treat the most common causes of a failing Windows update.
If Windows Update Troubleshooter manages to identify the cause of the error, follow the instructions to apply the recommended solution.
Here’s how to run the Windows Update Troubleshooter and apply the recommended fix:
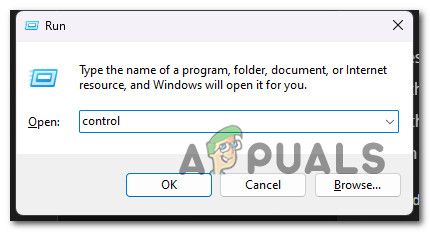
- Press the Windows key + R to open the Run dialog box.
- Type “control” and hit the Enter key to enter the Control Panel interface.

Open up the classic Control Panel interface - Click “Yes” when prompted by User Account Control to grant administrator permissions.
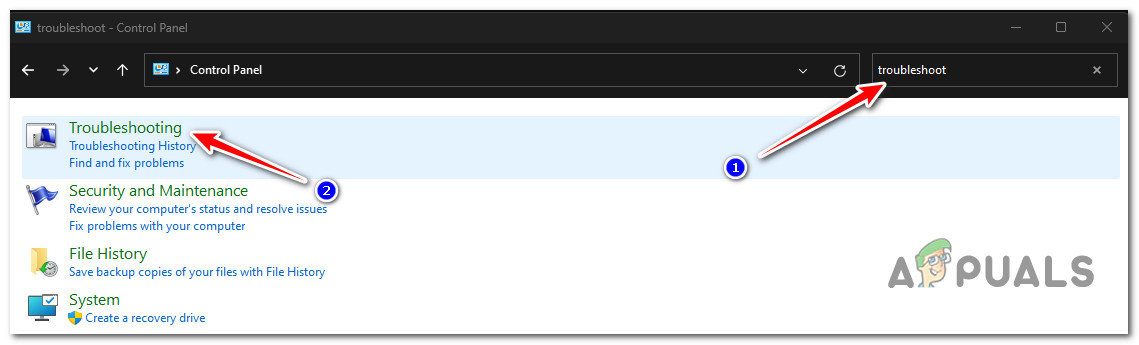
- Utilize the Control Panel’s search function to look for “troubleshoot” (top-right corner of the screen).
- From the list of search results, click on Troubleshooting.

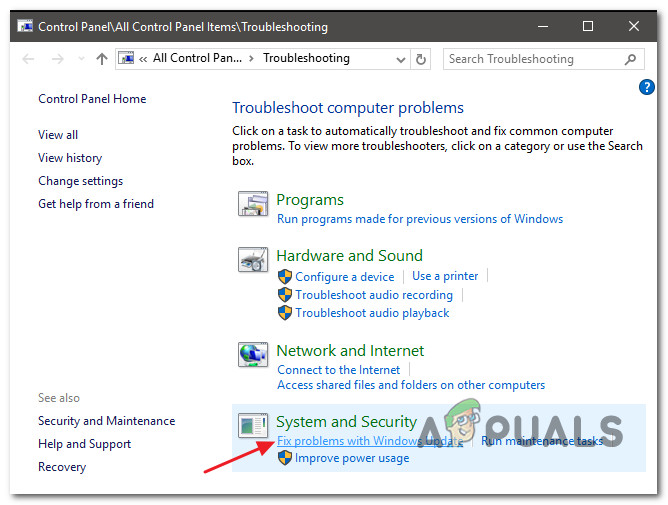
Open up the Troubleshooting tab - Under System and Security, click on Fix problems with Windows Update.

Find and Fix Problems with Windows Update Note: If you are running Windows 11, you may see different displays moving forward.
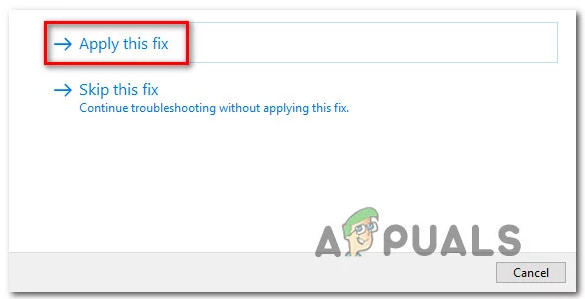
When asked by the Windows Update Troubleshooter, click Next and wait for the initial scan to complete. - Click Apply this Fix if you find a possible solution to implement it in the current situation.

Apply this fix - Once the solution is effective, restart your computer and attempt to reapply the unsuccessful update.
3. Reset the BITS & Cryptographic Services
Another scenario where you might see the 8024200d error when installing a pending Windows update is if two very important service dependencies (Background Intelligent Transfer Service and Cryptographic Service) do not receive content link headers.
Note: This is an old issue that is patched on Windows 11 and Windows 11 but still occring on Windows 7.
To fix this issue, you’ll need to reset both services & rename the two folders where Windows Update stores temporary Windows Files (Catroot 2 & Software Distribution). However, in order to complete this methods, you’ll also need to disable a series of additional WU dependencies to make sure there’s no interference.
Here’s a quick guide on how to do this:
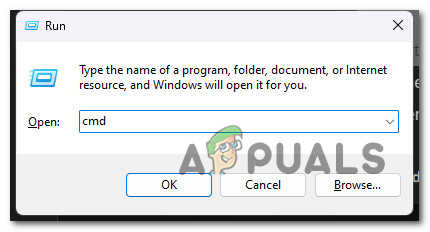
- To open the Run dialog box, press the Windows key + R.
- Then, to start a Command Prompt with elevated privileges, type “cmd” into the text box and press Ctrl + Shift + Enter.
Open up an elevated CMD prompt Note: Grant administrator access by choosing Yes when asked by the UAC (User Account Control) window.
- To stop all WU-related services, type the following commands in the following order at the elevated Command Prompt and press Enter after each command:
net stop wuauserv
net stop cryptSvc
net stop bits
net stop msiserver
Note: By following these steps, the Windows Update Service, MSI Installer, Cryptographic Service, and BITS Service will all be killed manually.
- Use the following commands to remove and rename the SoftwareDistribution and Catroot2 folders once all relevant services have been stopped:
ren C:\Windows\SoftwareDistribution SoftwareDistribution.old
ren C:\Windows\System32\catroot2 Catroot2.old
Important: These folders are responsible for storing updated files required by the WU component. If you rename these folders, your operating system will be compelled to build new, healthy copies.
- After the folders have been cleaned up, execute the following commands to enable the previously deactivated services:
net start wuauserv
net start cryptSvc
net start bits
net start msiserver
- Restart your computer when it has restarted to verify if the issue has been resolved.
4. Run SFC & DISM Scans
File corruption that interferes with the auto-updating capability of Windows installation is one of the most common reasons of the 8024200d error while attempting to install a pending system update.
In this case, it’s recommended to perform a few system file scans utilizing built-in tools System File Checker (SFC) and Deployment Image Servicing and Management (DISM).
Note: Although SFC and DISM are fairly similar, we recommend running both checks in short succession to enhance the likelihood of recovering corrupt system files.
Our recommendation is to start with a simple SFC scan. You can deploy this tool without an active connection to the internet.
Important: It is imperative to maintain the CMD window active after initiating this process, even if the application seems frozen. This is a common occurrence, especially on Windows 7. Stopping the operation before it’s finished, this might result in logical problems on your HDD or SSD.
Once the SFC scan is finished, follow it up with a DISM scan with admin access without restarting your PC. DISM uses a component of Windows Update to obtain healthy replacements to replace corrupt system files. Because of this, you’ll need to ensure that you have a stable internet connection before beginning this operation.
Before commencing this operation, you must thus ensure that you have access to a reliable Internet connection.
After the DISM scan is complete, restart your computer to verify if the 8024200d error has been addressed.
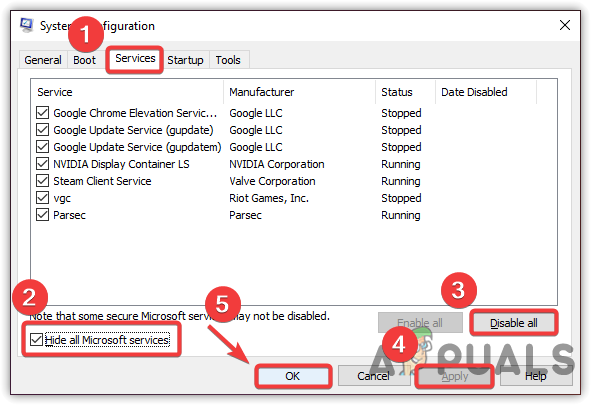
5. Install Update in Clean Boot Mode
It’s also possible that you’re dealing with this issue due to a scenario where a 3rd party application, startup item or service that is interfering with the Windows Update procedure.
If this scenario is applicable, one way to get around the 8024200d error is to is to achieve a clean boot state before attempting to install the update again.
Note: A clean boot forces your system to load just the required Windows apps and services. Once the clean boot state has been reached, no third-party services, processes, or starting items will be permitted to run.
Here’s a quick guide on achieving a clean boot state before reinstalling the problematic update that’s triggering the 8024200d error:
- Follow the steps outlined in this article to achieve a clean boot state.

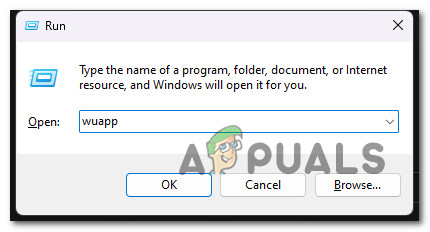
Achieve a clean boot state - Once you restart your PC in clean boot mode, press Windows key + R to open up a Run dialog box.
- Next, type ‘wuapp’ inside the text box of Run, then press Ctrl + Shift + Enter to open up an elevated Windows Update instance.
Open up the Windows update menu via Run box Note: This command will only work for Windows 7. If you’re on Windows 10 or Windows 11, use ‘ms-settings:windowsupdate’ instead.
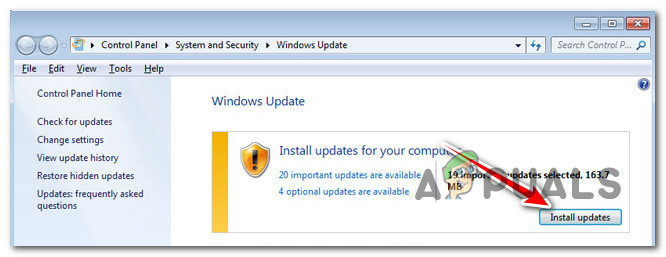
- Inside the Windows Update screen, click on Check for Updates.
- If the problematic update is available to install again, click on Install updates and see if it installs without the same 8024200d error.

Install pending updates
6. Delete Update logs & reinstall the update
Inconsistent WU log files can also cause this error. This is even more likely you have multiple updates that are all failing with the 8024200d and you started to experience this issue after an unexpected system shutdown while the update was installing.
In this case, you’re probably dealing with an issue affecting the integrity of servicing packages, manifests or WU underlying components.
To address this issue, you’ll need to access a series of hidden directories and delete the update logs before retrying the update.
Here’s how to do this:
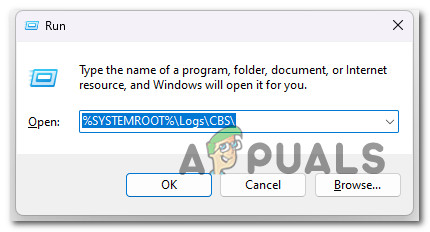
- Press Windows key + R to open up a Run dialog box.
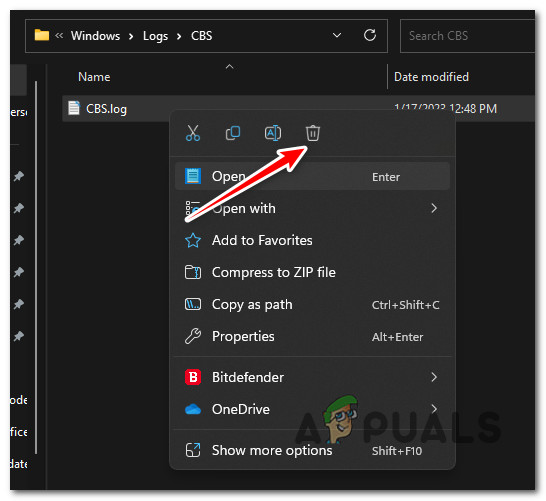
- Next, type ‘%SYSTEMROOT%\Logs\CBS\’ and press Ctrl + Shift + Enter to the first hidden folder with admin access.
Open up the CBS folder - At the User Account Control (UAC), click Yes to grant admin access.
- Inside the location, delete the cbs.log by right-clicking on it and clicking Delete from the context menu.

Deleting the CBS log Note: If the CBS folder contains a secondary log file named CheckSUR.log delete that as well.
- Once both files have been deleted, restart your PC and see if the problem is now fixed.
7. Perform a repair install
If you’ve come this far and you still can get past the 8024200d and install the pending update, you are likely dealing with file corruption that you will not be able to fix without replacing the entire suite of Windows files.
In this case, doing an in-place repair (repair install) or a clean installation are your only options on getting back to a state where Windows is able to install pending updates automatically.
A clean installation is a simpler option, but the main disadvantage is that you cannot preserve your data – including applications, games, and personal files (unless you back them out first).
If you’re looking for a method to save you from losing data, go for a repair install procedure. The main advantage is that you get to keep your data, including applications, games, files present on the OS drive and even certain user preferences.
-
Home
-
News
- How to Repair Windows Update Error 8024200d on Your PC
By Alin |
Last Updated
Some users reported that they encountered the error code 8024200d when trying to install some Windows updates like KB2930275, KB2925418, KB2929961, or KB2929733. How to fix this issue? This post of MiniTool Partition Wizard will give you the answers.
I have been unsuccessful in installing Windows updates KB2925418, KB2929961, KB2930275, and KB2929733. All fail with error 8024200d.
—from Microsoft Community
The Windows update error 8024200d (WU_E_UH_NEEDANOTHERDOWNLOAD) most commonly appears on Windows 7, but it can also occur on other versions of Windows. It indicates that the Windows Update handler can’t install the update because the update downloaded is invalid and damaged.
What Causes the Error Code 8024200d
The Windows update error may occur for various reasons. Here, we summarize some possible causes, such as:
- Corrupted system files
- Corrupted Windows Distribution folder
- Problematic installation of programs
- Virus or malware attacks
You can try the methods below to fix the error code 8024200d.
Way 1. Disable Third-Party Security Software
Some antivirus programs or firewall settings may interfere with Windows updates and cause the error code 8024200d3. To fix this issue, you can temporarily disable your security software and try to install the update again.
Way 2. Run the Windows Update Troubleshooter
You can follow the steps below to run the Windows Update troubleshooter to diagnose and fix common problems with Windows updates.
Step 1. Go to Settings > Update & Security > Troubleshoot > Additional troubleshooters.
Step 2. Then click Windows Update and select Run the troubleshooter.
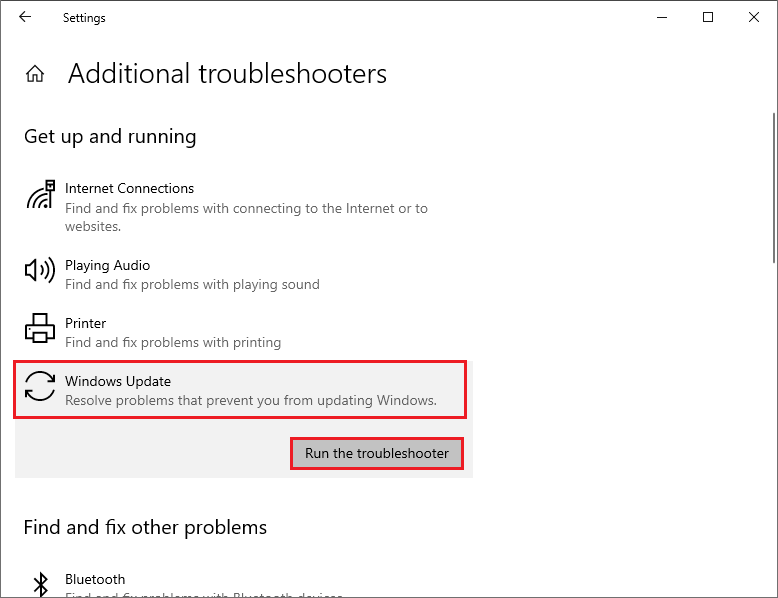
Step 3. In the pop-up window, follow the on-screen wizard to complete troubleshooting. Once done, restart your system and view if the error disappears.
Way 3. Run SFC and DISM
To get rid of the Windows update error 8024200d, you can run SFC and DISM to repair corrupted system files.
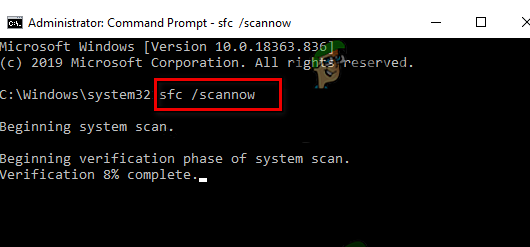
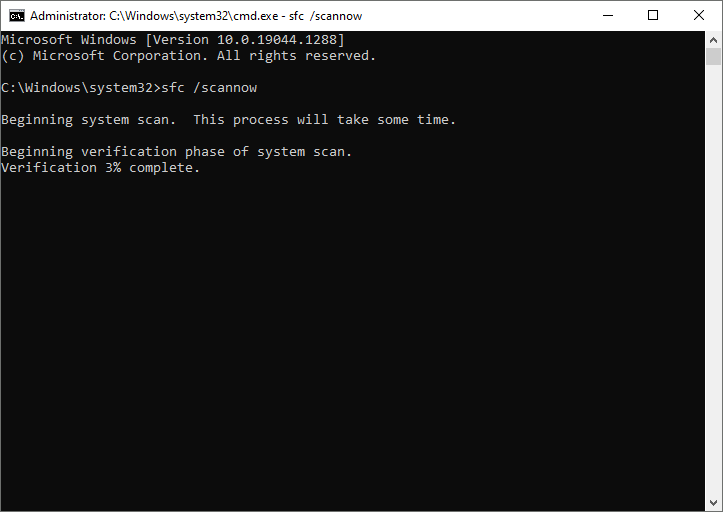
Step 1. Press Win + R to open the Run dialog box. Then type cmd and press Ctrl + Shift + Enter to run Command Prompt as administrator.
Step 2. Type sfc /scannow and press Enter to run SFC. Once the process ends up, reboot your computer.
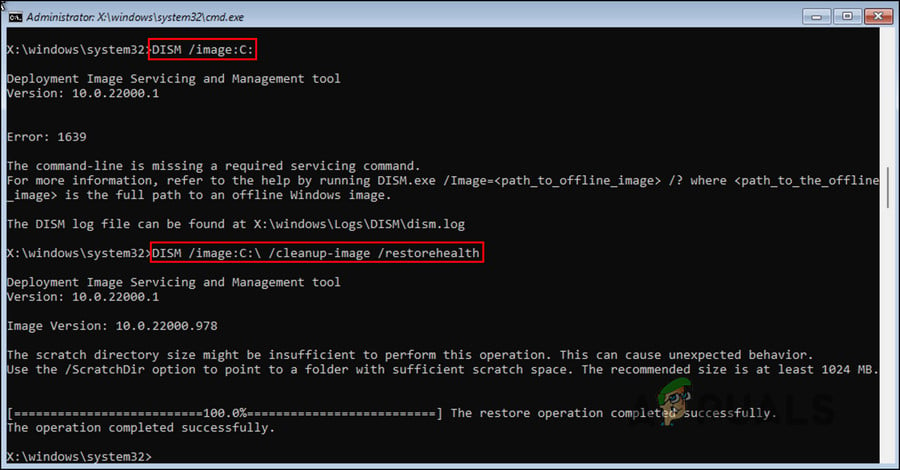
Step 3. If the issue still exists, run Command Prompt as administrator again, type the following commands, and press Enter after each one to run DISM.
DISM /Online /Cleanup-Image /CheckHealth
DISM /Online /Cleanup-Image /ScanHealth
DISM /Online /Cleanup-Image /RestoreHealth
Way 4. Reset the Windows Update Components
Another possible cause of the Windows update error 8024200d is that the services that handle the update and download process are not working properly. You can try to restart this service with this guide: How to Reset Windows Update Components in Windows 11/10?
Way 5. Clear and Expand the System Partition If Necessary
You can check if your system partition has enough free space to install the update. The system partition is usually labeled as C: in File Explorer. If it is almost full, the error code 8024200d may happen. You can use MiniTool Partition Wizard – a professional partition manager to resize your system partition and allocate more space to it.
Click the following button to download and install MiniTool Partition Wizard and then follow this guide: How to Make Windows System Partition Bigger? Solutions Are Here.
MiniTool Partition Wizard FreeClick to Download100%Clean & Safe
Way 6. Manually Download and Install the Update
If none of the above methods works, you can try manually downloading and installing the latest Windows updates by using Media Creation Tool or from Microsoft Update Catalog. You can follow this guide: [Tutorial] How to Download & Install Windows 10 Updates Manually.
In addition to the above methods, you can try installing the update in Clean Boot mode or uninstalling recently installed software to fix the error code 8024200d.
Conclusion
Is this post helpful to you? Do you have any suggestions or other nice methods to fix the Windows update error 8024200d? You can feel free to share them with us in the following comment part.
About The Author
Position: Columnist
Alin is a new member of MiniTool. Her articles are mainly about disk & partition management, data recovery, and hard disk issues. She is enthusiastic about acquiring computer knowledge and helping users to solve problems with computers. To provide more useful and professional solutions, she will keep learning and know more computer knowledge.

- Remove From My Forums
-
Вопрос
-
Часто возникает код ошибки 8024200D при этом обновления устанавливаются( или делают вид)но, не применяются
Ответы
-
-
Предложено в качестве ответа
Anton Sashev Ivanov
17 августа 2018 г. 7:34 -
Помечено в качестве ответа
Anton Sashev Ivanov
4 сентября 2018 г. 6:58
-
Предложено в качестве ответа
Все ответы
-
Добрый день! Очень частая проблема, особенно в Windows 7. Я бы вам посоветовал установить нужный KB и проверить средством устранения неполадок, вот пример решения ошибки 8024200D.
А вообще уже пора переходить на Windows 10, там такого не наблюдал. -
-
Предложено в качестве ответа
Anton Sashev Ivanov
17 августа 2018 г. 7:34 -
Помечено в качестве ответа
Anton Sashev Ivanov
4 сентября 2018 г. 6:58
-
Предложено в качестве ответа
Windows 7 Enterprise Windows 7 Home Basic Windows 7 Home Premium Windows 7 Professional Windows 7 Starter Windows 7 Ultimate More…Less
Symptoms
When you install Windows 7 Service Pack 1 (SP1), you may receive the following error message:
Error 0x8024200D
Cause
This issue can occur if Windows 7 Service Pack 1 (SP1) was downloaded by Windows Update but has not yet been installed, or if the installation has become corrupt. For more information about this service pack, click the following article number to view the article in the Microsoft Knowledge Base:
976932 Information about Service Pack 1 for Windows 7 and for Windows Server 2008 R2
Resolution
To have us fix this problem for you, go to the «Fix it for me» section. If you prefer to fix this problem yourself, go to the «Let me fix it myself» section.
Fix it for me
To fix this problem automatically, click the Fix it button or link. Then click Run in the File Download dialog box, and follow the steps in the Fix it wizard.
Notes
-
This wizard may be in English only. However, the automatic fix also works for other language versions of Windows.
-
If you are not on the computer that has the problem, you should save the Fix it solution to a flash drive or a CD and then run it on the computer that has the problem.
Uninstall Windows 7 Service Pack 1
To resolve this issue, uninstall Service Pack 1 by using the DISM command. To do this, follow these steps for your version of Windows 7.
For the 32-bit version of Windows 7
-
Click Start, and then type cmd in the Search box.
-
Right-click cmd.exe, and then click Run as administrator.
-
Type the following command, and then press Enter:
dism.exe /online /remove-package /packagename:Package_for_KB976932~31bf3856ad364e35~x86~~6.1.1.17514
-
After the removal is complete, type exit, and then press Enter.
-
Restart the computer.
For the 64-bit version of Windows 7
-
Click Start, and then type cmd in the Search box.
-
Right-click cmd.exe, and then click Run as administrator.
-
Type the following command, and then press Enter:
dism.exe /online /remove-package /packagename:Package_for_KB976932~31bf3856ad364e35~amd64~~6.1.1.17514
-
After the removal is complete, type exit, and then press Enter.
-
Restart the computer.
Determine whether you installed the Beta version of Windows 7 SP1
If you installed the Beta version of Windows 7 SP1, you need to uninstall the Beta version and then install the released version of Service Pack 1. To Uninstall the Beta version, follow these steps for your version of Windows 7.
Note If you uninstalled the Beta version of Windows 7 SP1 and you continue to receive the error, you may have remnants of the Beta version on your PC. These steps will also clean any remnants of the Beta version from your PC.
For the 32-bit version of Windows 7
-
Click Start, and then type cmd in the Search box
-
Right-click cmd.exe, and then click Run as administrator.
-
Type the following command, and then press Enter:
dism.exe /online /remove-package /packagename:Package_for_KB976932~31bf3856ad364e35~x86~~6.1.1.17105
-
After the removal is complete, type exit, and then press Enter.
-
Restart the computer.
For the 64-bit version of Windows 7
-
Click Start, and then type cmd in the Search box.
-
Right-click cmd.exe, and then click Run as administrator.
-
Type the following command, and then press Enter:
dism.exe /online /remove-package /packagename:Package_for_KB976932~31bf3856ad364e35~amd64~~6.1.1.17105
-
After the removal is complete, type exit, and then press Enter.
-
Restart the computer.
More Information
When you install Windows 7 or Windows Server 2008 R2 SP1 you may also receive error 0x800f081f.
When you check the CBS log(C:WindowsLogsCBScbs.log), you will find the errors like below:
2011-03-03 21:38:06, Error CBS Exec: Failed to pre-stage package: Package_for_KB976933~31bf3856ad364e35~amd64~cs-CZ~6.1.7601.17514, file: TsUsbGD.sys, source: \?C:WindowsServicingPackagesamd64_tsgenericusbdriver.inf_31bf3856ad364e35_6.1.7601.17514_none_9872c8452ac8f816TsUsbGD.sys, sandbox: (null) [HRESULT = 0x800f081f — CBS_E_SOURCE_MISSING]
2011-03-03 21:38:06, Info CBS Failed to gather all required files. [HRESULT = 0x800f081f — CBS_E_SOURCE_MISSING]
You can use the following methods to resolve the issue:
-
Run System Update Readiness Tool (KB947821). It should resolve the error in most of cases
-
If the System Update Readiness Tool does not resolve the issue, it may be that you have a pre-release version of the RSAT tools installed on the system.
To resolve this issue, do the following:
-
Uninstall the pre-release RSAT tools
-
Reboot the system
-
Install the release version of the RSAT tools (http://www.microsoft.com/download/en/details.aspx?FamilyID=7d2f6ad7-656b-4313-a005-4e344e43997d&displaylang=en)
-
Reinstall Windows 7 SP1
-
Need more help?
Want more options?
Explore subscription benefits, browse training courses, learn how to secure your device, and more.
Communities help you ask and answer questions, give feedback, and hear from experts with rich knowledge.
Весь интернет уже обгуглен. Есть аналогичная тема со счастливым концом.
Ошибка установки наборов исправлений качества системы безопасности 8024200D
Но написать в личку Turok123 я не могу (видимо потому что только зарегистрировался). Может кто- то если не поможет, то напишет ему ссылку на эту ветку. СПАСИБО!
Добавлено через 2 часа 12 минут
Turok123
Могу использовать тег NICK, но пока 2 дня не пройдет (и 3 сообщения) написать ему не могу  . Не могу даже зайти в свою ЛК.
Добавлено через 4 часа 26 минут
Решил пока пойти дальше, а именно UpdatePack7R2 для Windows 7 SP1.
1) Поставилось еще не менее 7 обновлений.
2) Интересные вещи можно почерпнуть из описания на том сайте.
Перед описанием прочитал что KB4534310 часто ломал рабочий стол, если картинку рабочего стола надо было растягивать и именно поэтому видимо:
а) KB4537820-x86-x64 с отключением телеметрии и проверки процессоров (заменяет KB4534310-x86-x64)
б) KB4540688-x86-x64 с отключением телеметрии и проверки процессоров (заменяет KB4537820-x86-x64)
в) KB4550964-x86-x64 с отключением телеметрии и проверки процессоров (заменяет KB4540688-x86-x64)
г) KB4556836-x86-x64 с отключением телеметрии и проверки процессоров (заменяет KB4550964-x86-x64)
Вот не уверен что это последнее обновление, т.к. оно очень свежее. (май) ") )))).
)))).
И хоть центр обновления все еще хочет KB4534310 и все еще дает ту же самую ошибку 8024200D, теперь думаю насколько оно действительно надо.
Пока ставился Набор обновлений UpdatePack7R2 также видел интересное сообщение про KB4556836 (последнее заменяющее то, что дает ошибку). Так вот KB4556836 тоже не поставилось с ошибкой 0x800f081f (та же ошибка, о которой говорил windows update troubleshoting, и которой вроде не должно быть в windows 7, а только в windows 10).
В общем пока рою дальше.
Добавлено через 1 час 56 минут
Ручная установка KB4556836 дает ошибку 80070002.
 最近在幫一台舊的 NB 還原 Windows 7 後,Windows Update 一直卡在無法將 KB4534310、KB4539601 這兩個 KB 裝上,不管裝哪一個都會出現 8024200D 錯誤,爬文測試了兩天,總算解決。
先講結果,主要的問題是因為少裝了 KB4524157,因此只要補上這個更新,即可正常安裝 KB4534310、KB4539601 這兩個 KB。至於為什麼會漏裝 KB4524157,我也不確定,猜想是 Windows Update 的判斷機制存在著一些問題。
在國外 Sysnative 論壇有不少求助 Windows Update 錯誤的文章,解決方式都是先透過 Dism 安裝無法安裝的 KB,再去調閱 CBS.log 查看出錯的原因為何,進而排除掉問題。下面以我這次安裝 KB4534310 遇到 8024200D 為例:
◎ 首先下載 KB4534310 的.msu 檔。
◎ 將其放在特定目錄,下面以 “C:temp” 為例。
◎ 以系統管理員身分執行 cmd,並切換到 C:temp。
◎ 將 .msu 檔解開。
expand windows6.1-kb4534310-x64_4dc78a6eeb14e2eac1ede7381f4a93658c8e2cdc.msu -f:* C:temp
◎ 透過 Dism 安裝。
DISM.exe /Online /Add-Package /PackagePath:C:tempWindows6.1-KB4534310-x64.cab
◎ 安裝過程應該同樣會跳出錯誤,接著開啟 C:WindowsLogsCBSCBS.log 檔,檢查錯誤內容。以這次為例,可以找到以下錯誤:
2020-10-07 10:00:01, Info  CBS    Failed to find file: amd64_microsoft-windows-t..s-clientactivexcore_31bf3856ad364e35_7.2.7601.24513_none_483bacf91f1898ddmstscax.dll [HRESULT = 0x80070002 - ERROR_FILE_NOT_FOUND]
2020-10-07 10:00:01, Info  CBS    Failed to gather all required files. [HRESULT = 0x80070002 - ERROR_FILE_NOT_FOUND]
2020-10-07 10:00:01, Info  CBS    Failed to gather all missing files for package: Package_for_RollupFix~31bf3856ad364e35~amd64~~7601.24544.1.9 [HRESULT = 0x80070002 - ERROR_FILE_NOT_FOUND]
比較可惜的是,接下來我不知道要怎麼藉由這些錯誤訊息,去查到所缺的 KB 檔為何,論壇上的文章,都是提問者提供 CBS 檔後,回文者會點出關鍵的錯誤的訊息,接著並指示可以安裝某某 KB 後,再試試看。我這次就是嘗試過不少 log 中的關鍵字去咕狗,但最後仍是只找到 Sysnative 上的討論串,告知要去下載 KB4524157,真可惜~。
【參考連結】
- [SOLVED] – Update KB4534310 fails with error 8024200D on Windows Server 2008 R2 | Sysnative Forums
- 2019 年 10 月 3 日 – KB4524157 (每月彙總套件)
- 2020 年 1 月 14 日 – KB4534310 (每月彙總套件)
- Remove From My Forums
-
Вопрос
-
Часто возникает код ошибки 8024200D при этом обновления устанавливаются( или делают вид)но, не применяются
Ответы
-
-
Предложено в качестве ответа
Anton Sashev Ivanov
17 августа 2018 г. 7:34 -
Помечено в качестве ответа
Anton Sashev Ivanov
4 сентября 2018 г. 6:58
-
Предложено в качестве ответа
Все ответы
-
Добрый день! Очень частая проблема, особенно в Windows 7. Я бы вам посоветовал установить нужный KB и проверить средством устранения неполадок, вот пример решения ошибки 8024200D.
А вообще уже пора переходить на Windows 10, там такого не наблюдал. -
-
Предложено в качестве ответа
Anton Sashev Ivanov
17 августа 2018 г. 7:34 -
Помечено в качестве ответа
Anton Sashev Ivanov
4 сентября 2018 г. 6:58
-
Предложено в качестве ответа
Прочтите следующее руководство, в котором вы узнаете чтобы исправить код ошибки обновления 8024200D в Windows 10, 8, 7 . Неисправность «8024200D», а также ошибка 0x800765e в Центре обновления Windows являются наиболее распространенными, но, к счастью, существует несколько способов их решения.
В большинстве случаев эта ошибка вызвана неудачным обновлением Windows. Фактически, это обычно относится к проблеме с файлами, возникающей при их повреждении. La повреждение файла может быть вызвано различными причинами, причиной может быть сбой подключения к Интернету, но также могут происходить сбои.
В других случаях проблемы с жестким диском также могут привести к повреждению файлов. В любом случае, в большинстве случаев ошибка «8024200D» может быть устранена без серьезных проблем, так же легко, как и с другими ошибками, такими как Ошибка Центра обновления Windows 0xd0000034 и многие другие.
Существует несколько методов решения проблемы обновления «8024200D» в Windows. Тогда мы покажем вам самый простой и самый простой которым часто удается найти решение этой неприятной проблемы.
Перезагрузите компьютер
Это может показаться глупым решением, но часто ошибка «8024200D» исправляется с помощью простой перезапуск компьютера . Когда вы это сделаете, компьютер попытается установить файлы, загруженные из Центра обновления Windows, и в большинстве случаев, если есть поврежденный файл, он будет удален.

После его устранения по умолчанию Windows снова начнет его загрузку, а после загрузки при следующем перезапуске обычно устанавливается правильно.
Освободите место для установки обновлений
Одна из причин повреждения файлов: что не хватает места для загрузки обновлений. В связи с этим мы рекомендуем вам освободить значительный объем места, чтобы избежать этой проблемы.
Поэтому проверьте, осталось ли мало места на системном жестком диске, и если да, сделайте все необходимое, чтобы освободить место для обновления.
Используйте средство устранения неполадок Центра обновления Windows
Еще один способ устранения проблем при обновлении Windows — использовать инструмент, предназначенный для этой цели. Для этого нужно зайти в настройки системы и запустить программу. Просто начните и найдите опцию «Конфигурация» / «Конфигурация вашего ПК» .
Теперь найдите параметр «Обновление и безопасность», который вы можете найти в разделе «Устранение неполадок». Найдите опцию «Центр обновления Windows». Система начнет сканировать компьютер на наличие проблем с обновлениями Windows.

Подождите, пока процесс завершится, и Windows сообщит вам, что делать дальше. В большинстве случаев вам не нужно много делать, и простой перезагрузки будет достаточно, чтобы исправить ошибку «8024200D».
Использование PowerShell
Так же, как PowerShell хорош для исправить код ошибки 0x80072ee7 , мы также можем использовать его для правильный ошибки установки Мизес в курсе. Это очень простой процесс, вам просто нужно нажать кнопку Windows + X . Когда вы это сделаете, при запуске Windows появится контекстное меню, просто выберите опцию «Windows PowerShell (администратор)».
Когда вы сделаете это, откроется вкладка PowerShell Admin, введите здесь следующий код «DISM.exe / Online / Cleanup-image / Restorehealth» и нажмите клавишу «Enter». Система начнет сканирование и восстановление, дождитесь окончания.
Наконец, вам нужно написать следующий код в консоли «sfc / scannow» и снова нажать клавишу «Enter». Во многих случаях это решение обычно эффективно для решения проблемы обновления «8024200D».
Используйте антивирус
Хотя антивирус Defender для Windows поставляется по умолчанию с операционной системой, чтобы быть очень хорошим, иногда он может скрывать некоторые вредоносные файлы. По этой причине рекомендуется установить бесплатный антивирус на Windows если у вас постоянно возникают подобные проблемы.
Microsoft выпустила последний патч для Windows 7, который сломал функцию установки обоев на рабочий стол. Новых обновлений больше не будет, и пользователям придется самостоятельно решать возникшую проблему.
Обновление с сюрпризом
Последнее обновление для ОС Windows 7, срок поддержки которой истек 14 января 2020 г. сломало функциональность рабочего стола. Пользователи, установившие апдейт, стали жаловаться на невозможность установки обоев рабочего стола.
Пакет обновлений за номером KB4534310, вышедший 14 января 2020 г., вносит в систему ошибку, которая приводит к тому, что после каждой перезагрузки ПК обои с рабочего стола удаляются — ОС меняет их на сплошной черный цвет. Как сообщает ресурс MSPowerUser, проблему с финальным обновлением Windows 7 вынесли на обсуждение в Reddit — топики были созданы пользователями MrMii-Already-Reddit и Arilandon в середине января 2020 г., и на момент публикации материала они содержали, в общей сложности, свыше 110 ответов. Дополнительно была создана тема на форуме Microsoft, и более 30 человек подтвердили, что столкнулись с подобной ситуацией.
Пользователи Reddit выяснили, что Windows 7 с установленным обновлением KB4534310 удаляет обои рабочего стола только в случае, если в настройках их отображения выбран параметр «Растянуть». Другие варианты отображения такую проблему не вызывают.

Они предположили, что данный параметр после установки апдейта система перестает учитывать, что и приводит к заливке рабочего стола черным цветом после каждой перезагрузки. Журналисты ресурса Bleeping Computer подтвердили факт наличия проблемы — они воспроизвели ее на собственных ПК под управлением Windows 7.
Как решить проблему
Существует три способа решения проблемы с обоями, связанными с пакетом обновлений KB4534310. Первый заключается в отказе от его установки, а второй — в его удалении из системы (откат до предыдущей точки восстановления, развертывание резервной копии и другие варианты).
Третий способ пользователи Reddit предложили для тех, кто установил патч и не хочет его удалять. Для этого нужно установить в качестве обоев необходимое изображение, выбрать параметр «Растянуть», сделать снимок экрана (без ярлыков рабочего стола) и после перезагрузки поставить получившееся изображение с любым другим параметром («Замостить», «По центру» и т. д.).
Также можно воспользоваться любым современным графическим редактором и подогнать нужное изображение под разрешение экрана монитора.
Windows 7 и некачественные обновления
KB4534310 — не единственный патч для Windows 7, выпущенный в последние годы ее поддержки, приводящий к определенным сбоям в ее работе. К примеру, в январе 2018 г. CNews сообщал, что экстренное накопительное обновление безопасности для нее, необходимое для устранения выявленных уязвимостей Meltdown и Spectre, приводило к возникновению различных проблем и непредсказуемых последствий. В частности, пользователи жаловались на регулярные появления синего «экрана смерти» после установки патча на компьютерах с процессором AMD Opteron.
Некоторые обновления Windows 7 и вовсе не позволяла установить. В мае 2019 г. пользователи, на чьих компьютерах присутствовал антивирусы практически любого производителя, столкнулись с тем, что система не могла развернуть патч безопасности KB4499164. Обновление зависало на 30%, и приходилось переводить ПК в безопасный режим и вручную деинсталлировать недоустановленный пакет.
Несмотря на то, что Microsoft прекратила поддержку Windows 7, корпоративные клиенты (представители сегмента SMB наравне с крупным бизнесом) получат возможность обновлять Windows 7 и дальше. В рамках сервиса Extended Security Update (ESU), как сообщал CNews, они смогут поддерживать свою Windows 7 в актуальном состоянии до января 2023 г. Подписка на сервис продается с 1 декабря 2019 г. и в 2020 г. стоит $25 для каждого компьютера в отдельности. В 2021 г. пишет The Verge, цена вырастет до $50, а в 2021 г. — до $100. К примеру, правительству Германии «корпоративная» поддержка Windows 7 обойдется приблизительно в $887 тыс.