Restart essential associated services to easily fix this error
by Claire Moraa
Claire likes to think she’s got a knack for solving problems and improving the quality of life for those around her. Driven by the forces of rationality, curiosity,… read more
Updated on
- The Microsoft Store is an all-in-one hub for downloading apps, so it is concerning when it fails to do so.
- Usually, a restart of the application should do the trick to salvage the situation. However, if this fails, try other troubleshooting steps, such as the SFC scan.
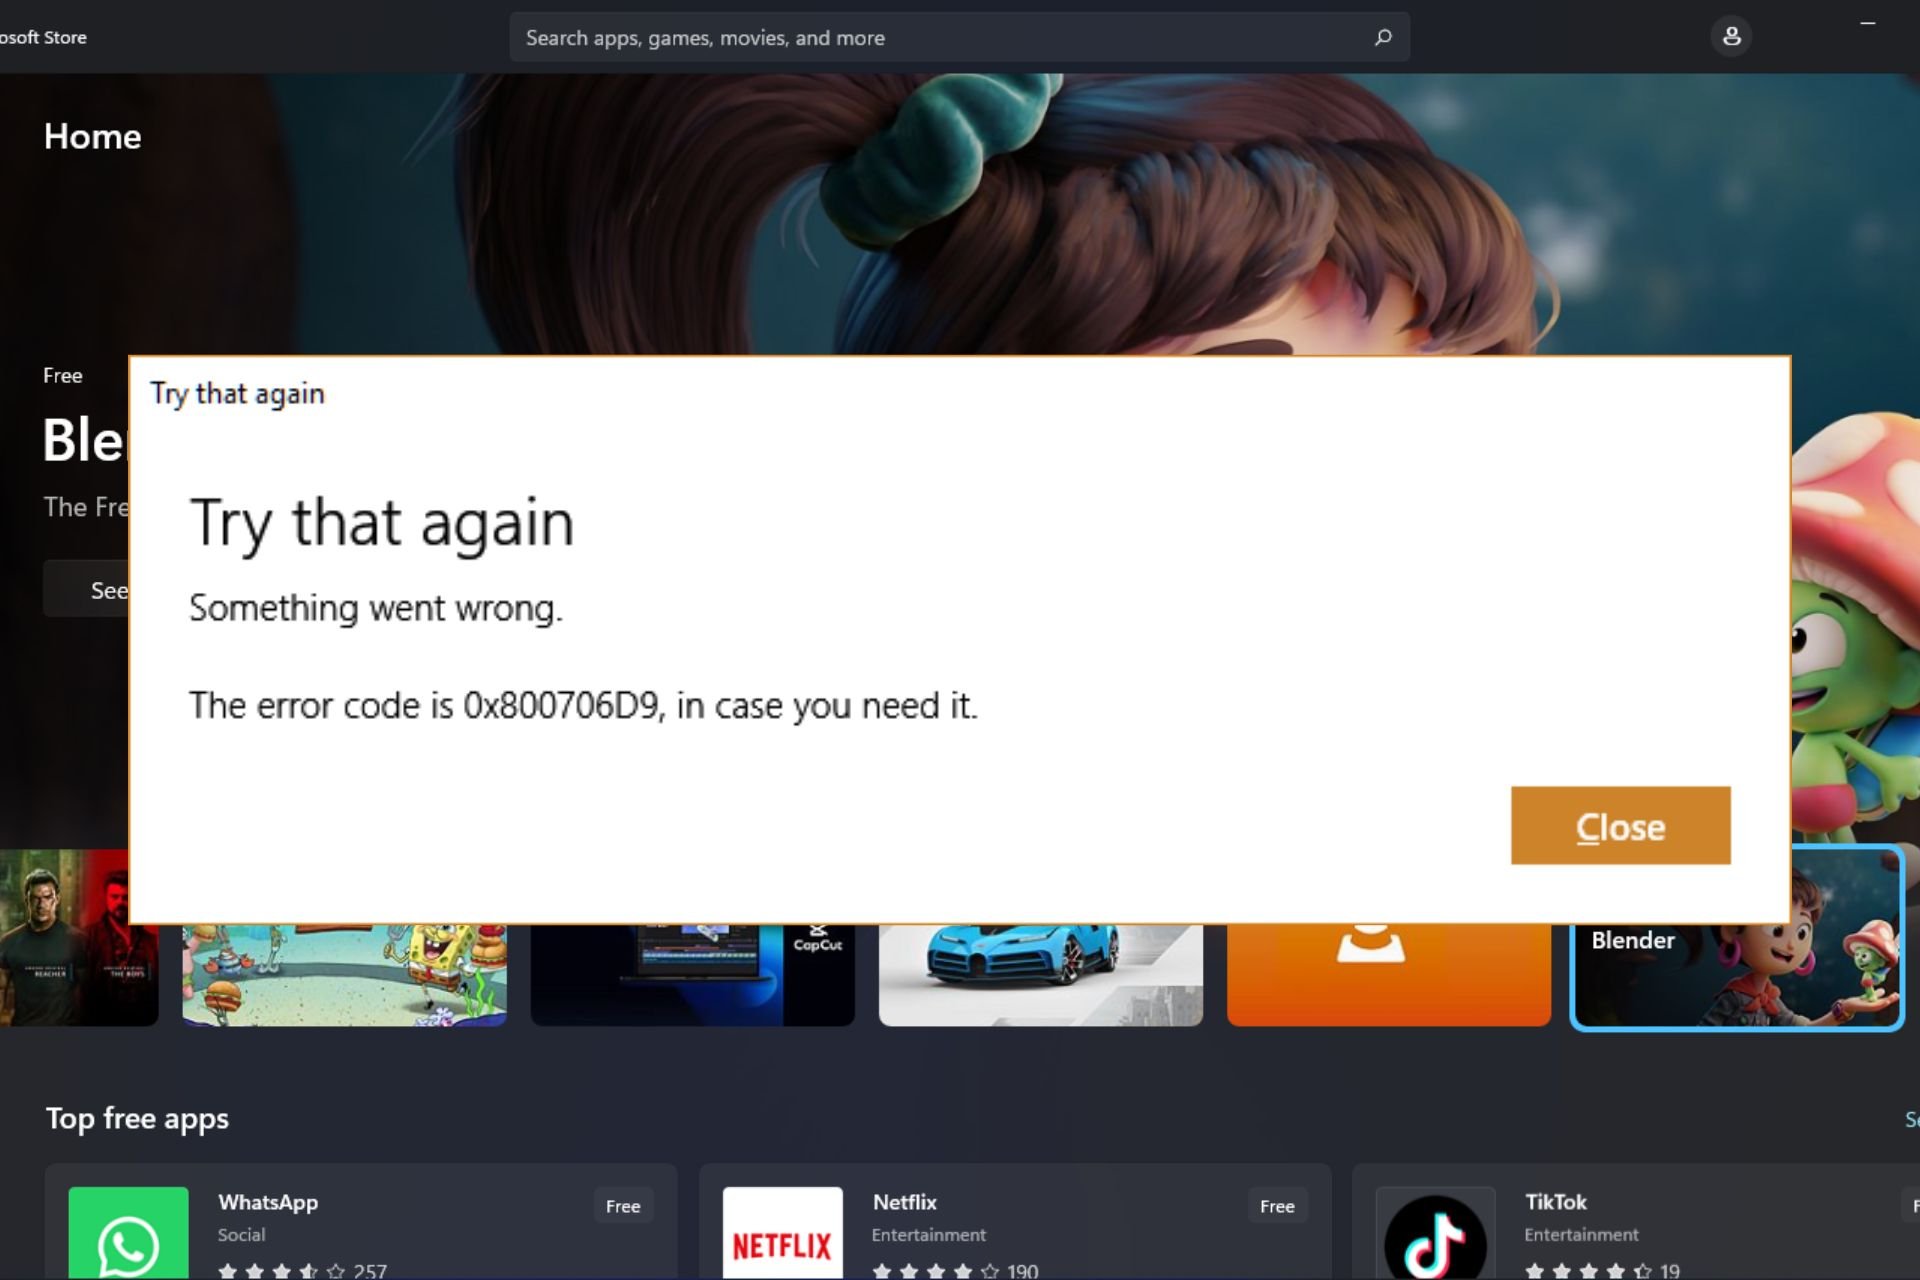
0x800706d9 is an error code that appears when installing an app from the Microsoft Store. The Microsoft Store is one of the most important apps in Windows 11 as it is the one-stop shop for all your apps.
If Microsoft Store isn’t working, you’ll be unable to update or download apps. This can affect many applications, so you need to get to the bottom of this issue immediately. Luckily, we have compiled the top solutions for you, as reported by users.
What is problem 0x800706d9?
Problem 0x800706d9 is a common error that occurs during the installation or update process of an app from the Microsoft Store. This error has many causes, but the most common ones are:
- Firewall settings – If you see this message while downloading an app, it could mean your network administrator or firewall blocked the app.
- Corrupt installation files – The error is usually caused by an installation package that’s corrupted or incomplete. It can also be triggered by system files that have been damaged.
- Internet connection problems – If your internet connection isn’t working properly, you won’t be able to access Microsoft Store or download/install apps and games.
- Corrupted cache files – Sometimes, corrupted cache files can accumulate over time and cause this issue.
- Insufficient funds – If you’re trying to purchase and download an app, the download may fail because you don’t have enough money in your account.
How do I fix error code 0x800706d9?
To resolve this error, try these basic troubleshooting steps first:
- Ensure you have connected your PC to the internet, preferably via Ethernet cable instead of Wi-Fi.
- Check your date and time settings. The date and time on your computer can affect how programs behave, so it’s important to make sure Windows has the correct time and date set.
- Try signing out of your Microsoft account, then sign back in after 30 seconds.
- Ensure that you have sufficient funds in your Microsoft account if you were trying to purchase an app.
- Make sure that your credit card information is correct on file so that it matches up with what is on your screen.
- Verify that your security software isn’t blocking Microsoft Store from communicating with its servers.
- Delete and reinstall the app that is giving you the error.
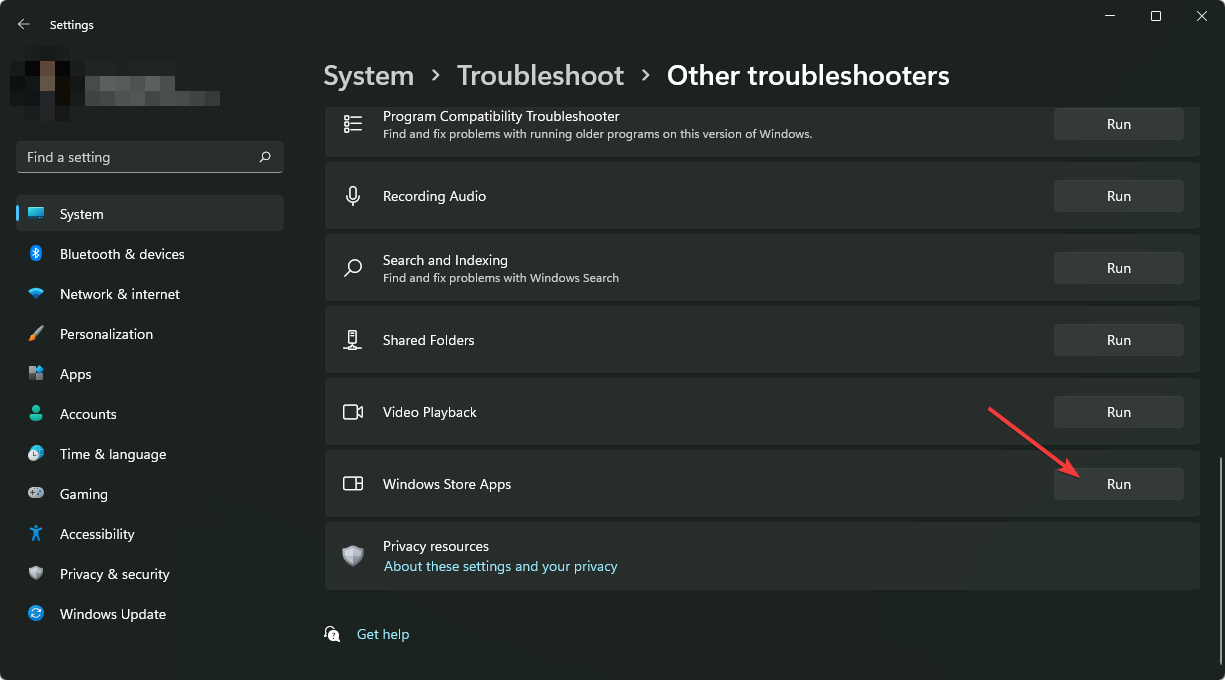
1. Run the Windows Store troubleshooter
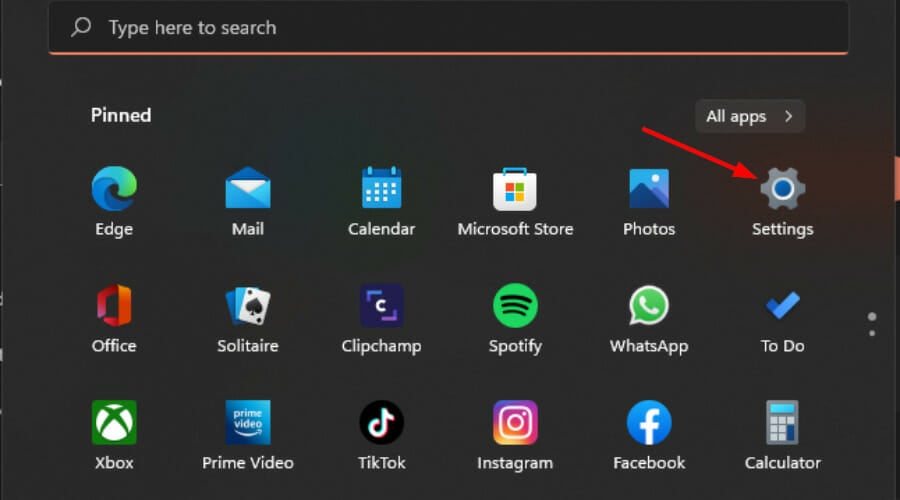
- Hit the Windows key and click on Settings.

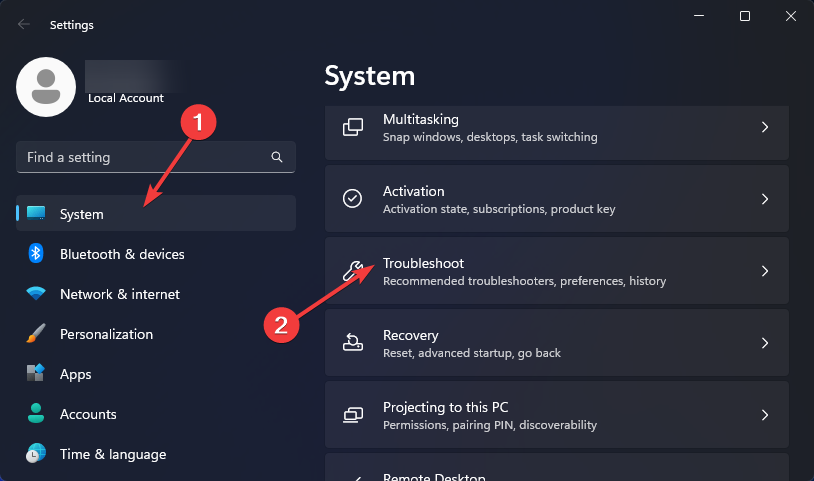
- Click on System on the left pane then Troubleshoot on the right pane.

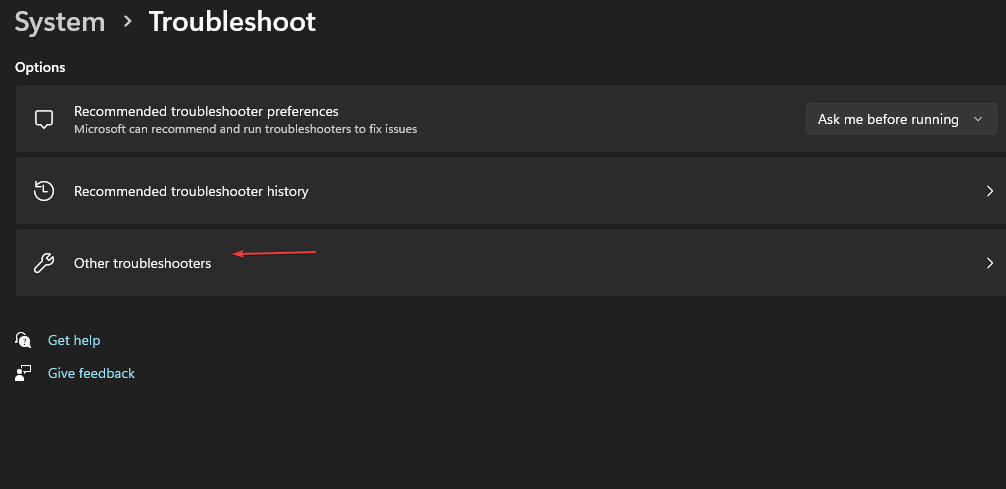
- Select Other troubleshooters.

- Scroll down, locate Windows Store Apps and click the Run button.

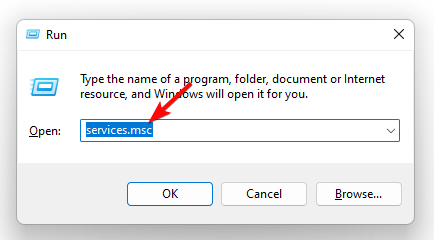
2. Restart Windows services
- Hit the Windows + R keys to open the Run command.
- Type services.msc in the dialog box and click OK.

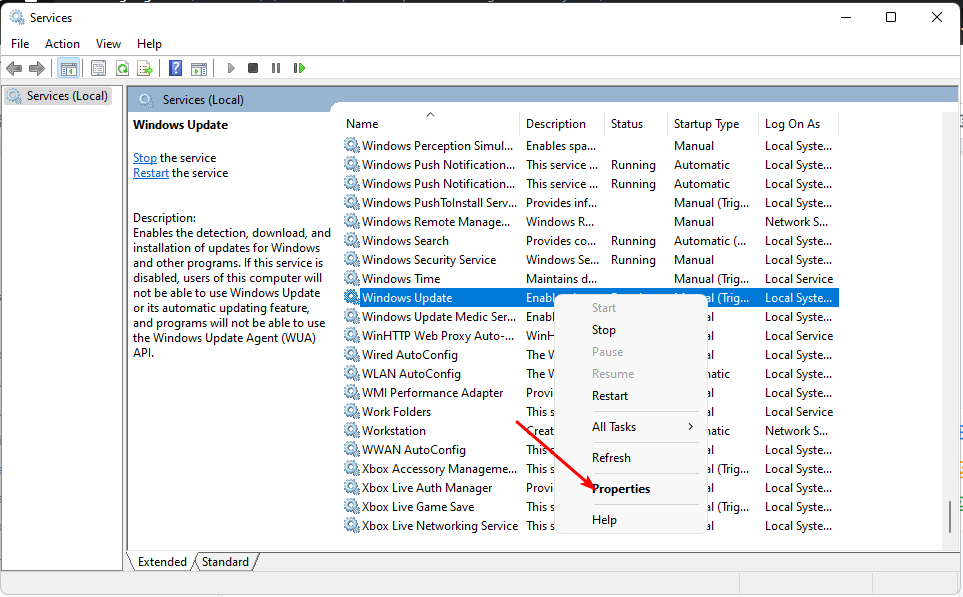
- Find the Windows Update service, right-click on it, and select Properties.

- Under Startup type, select Automatic from the drop-down menu, click Start then press Apply and OK to save changes.

- Repeat steps 1 to 4 with Storage Service and Windows Defender Firewall as well.

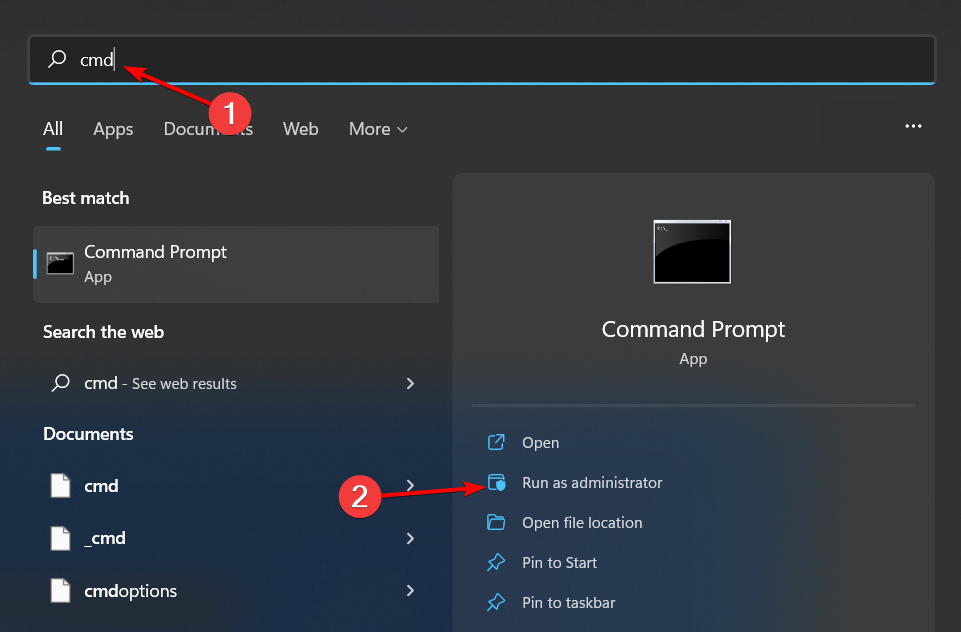
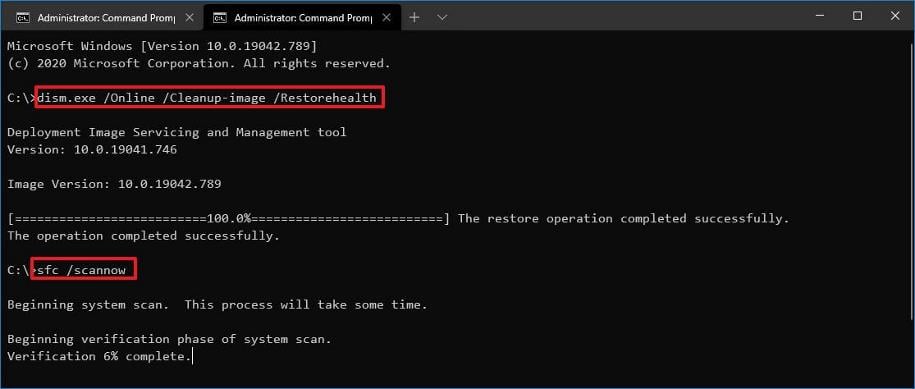
3. Run the DISM and SFC scans
- Hit the Windows key, type cmd and hit Run as administrator.

- Type the following commands and press Enter after each one:
DISM /Online /Cleanup-Image /RestoreHealthsfc /scannow
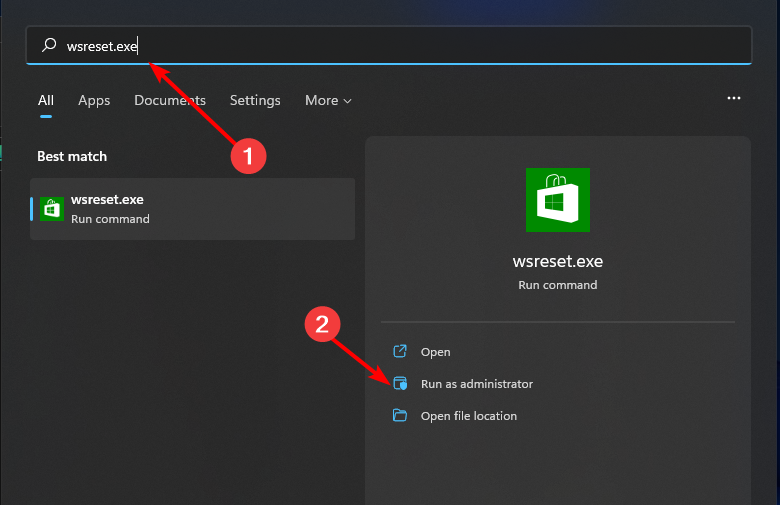
4. Reset the Microsoft Store cache
- Hit the Windows Search icon.
- Type WSReset.exe in the search bar and hit Run as administrator.

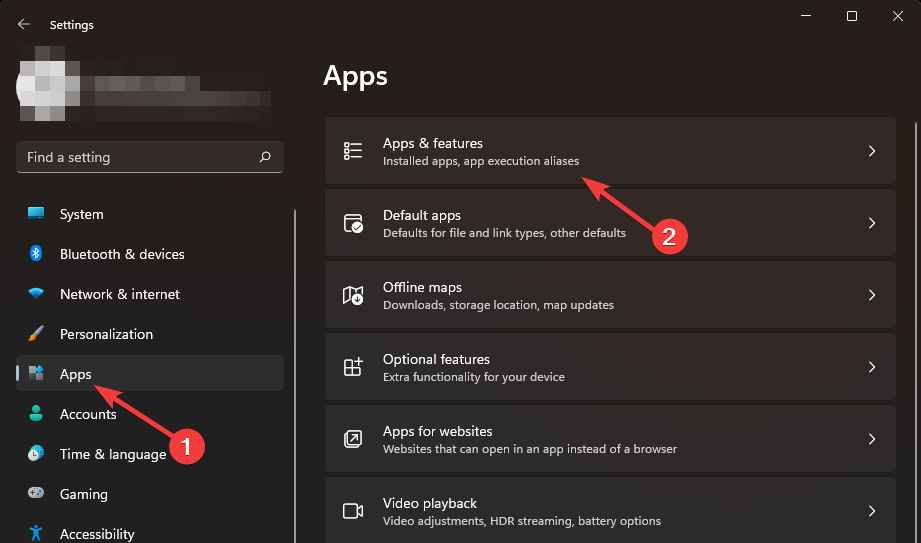
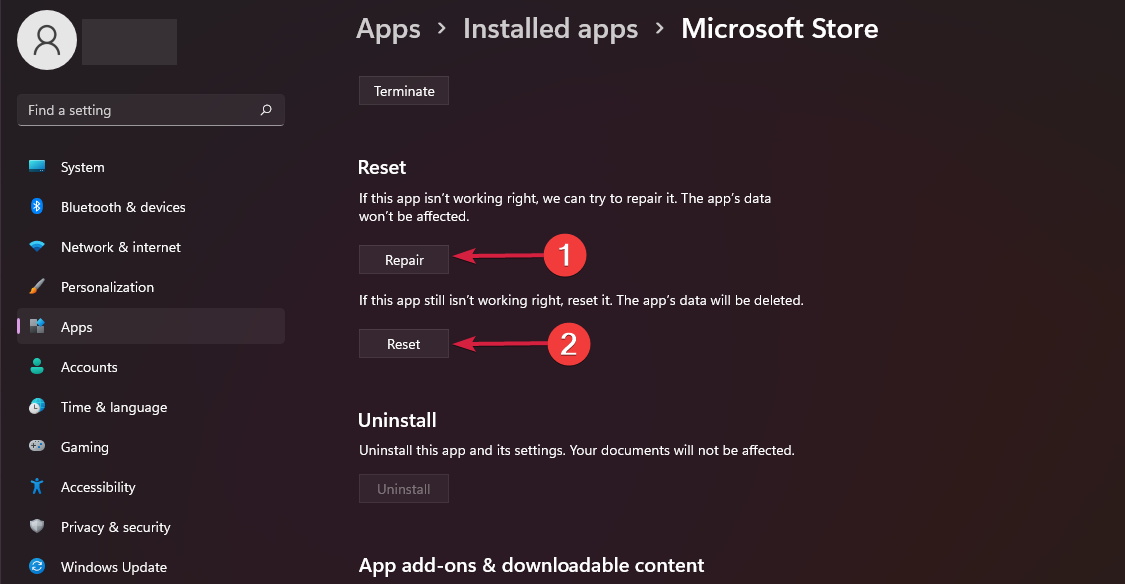
5. Repair/reset Microsoft Store
- Hit the Windows key and click on Settings.
- Click on Apps on the left pane then Apps & features on the right pane.

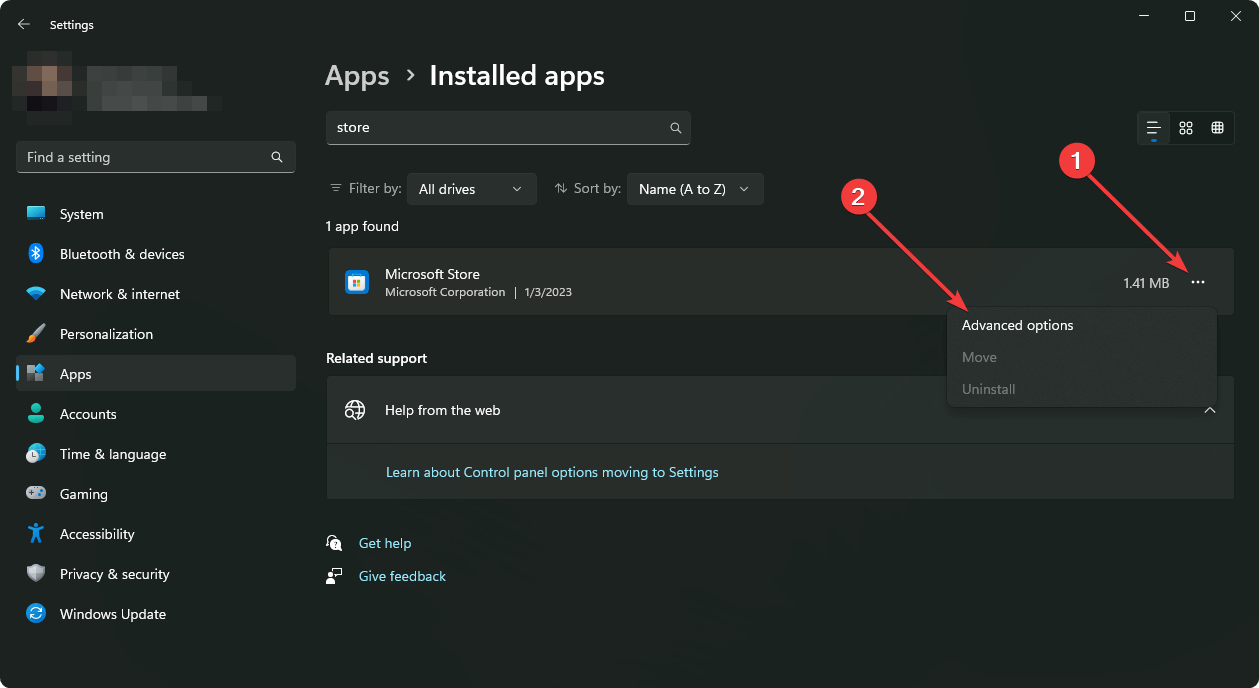
- Locate the Microsoft Store app, click on the three vertical ellipses and select Advanced options.

- Click on Repair.

- Go back and click on Reset if the repair option failed.
In case Microsoft Store is missing from the Apps and features section, here’s what to do to restore it.
- Error Authenticating With Venmo: 6 Ways to Fix it
- Fix: Internet Speed is Fast, but Video Calls are Slow
- Fix: MSI Afterburner Failed to Start Scanning
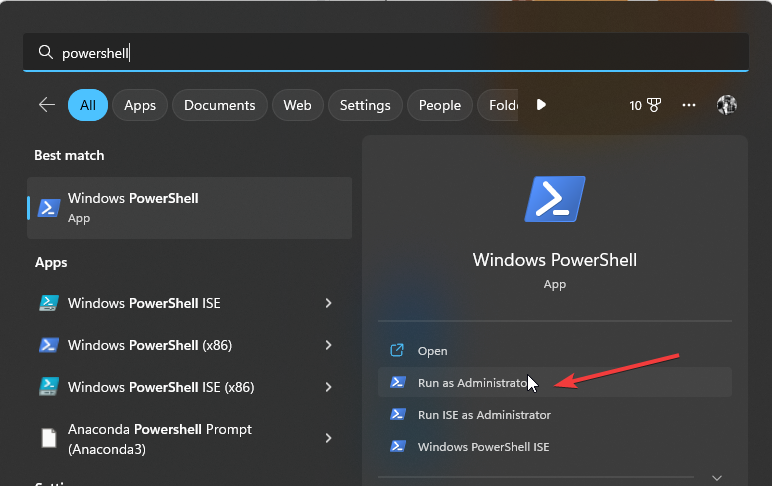
6. Reinstall the Microsoft Store
- Press the Windows + I keys simultaneously to open Settings.
- Type Powershell in the search bar and click Run as administrator.

- Enter the following command:
Get-AppxPackage -allusers Microsoft.WindowsStore | Foreach {Add-AppxPackage -DisableDevelopmentMode -Register "$($_.InstallLocation)\AppXManifest.xml"
Aside from the error code 0x8007069d, you may also come across an issue where the Microsoft Store fails to download anything. This should not be a cause for alarm, as we have already covered ways to overcome this hurdle.
If you frequent the Microsoft Store, you may get bored of the default theme over time. Don’t worry, as we are here to help refresh things. Check out our impressive library of the best Microsoft Store themes that will elevate your browsing experience.
Find out more in our in-depth review of the Microsoft Store and get to learn about all that it has to offer.
Let us know which solution fixed this error in the comment section below.
![]()
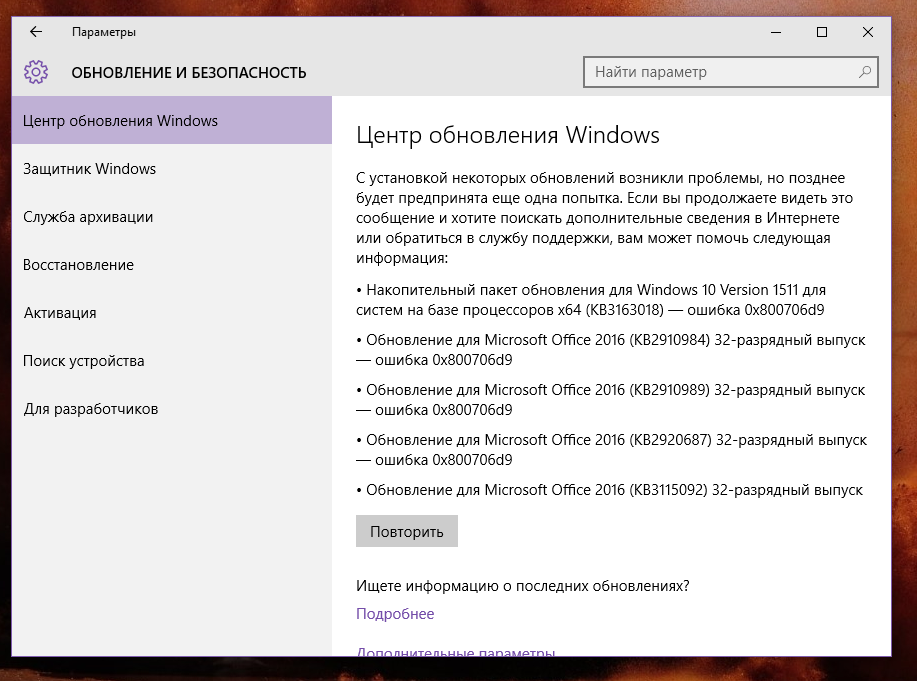
Во время обновления ПК на базе Windows 10 некоторые пользователи могут сталкиваться с ошибкой 0x800706d9. Самая частая причина за этой неполадок — деактивированный брандмауэр Windows. Впрочем, иногда она может возникать из-за проблем с компонентами Центра обновления.
Как исправить ошибку 0x800706d9?
Прежде всего, создайте точку восстановления на вашем компьютере. Она поможет вам в случае того, если что-то пойдет не так. Нажмите Win+S и пропишите в поисковую строку запрос «Создание точки восстановления». В появившемся окошке выполните все необходимые действия и создайте точку на одном из разделов диска. Как только закончите, переходите к методам ниже.
Метод №1 Включение брандмауэра Windows
Ошибка 0x800706d9 может возникать в процессе обновления Windows, если в вашей системе отключен брандмауэр. Чтобы включить его, сделайте следующее:
- нажмите Win+S для вызова поисковой строки;
- пропишите запрос «Брандмауэр Защитника Windows»;
- кликните на ссылку «Включение и выключение брандмауэра Защитника Windows» в левой части окошка;
- выберите опции по включению брандмауэра и сохраните внесенные изменения;
- перезагрузите компьютер и попробуйте запустить апдейт ОС Windows еще раз.
Метод №2 Проверка параметров служб брандмауэра и Центра обновления
Возможно, параметры служб брандмауэра и Центра обновления были изменены, вследствие чего те перестали нормально функционировать. Вот что вам нужно сделать:
- нажмите комбинацию Win+R;
- пропишите в пустой строчке services.msc и нажмите Enter;
- найдите в списке службу «Центр обновления Windows» и дважды кликните на нее ЛКМ;
- выставьте в типе запуске значение «Автоматически»;
- сохраните выставленные настройки и закройте окно свойств службы;
- сделайте все вышеописанное для службы «Брандмауэр Защитника Windows»;
- перезагрузите компьютер и проверьте наличие ошибки 0x800706d9.
Метод №3 Запуск средства устранения неполадок Центра обновления
В некоторых случаях приходится положиться на системное средство устранения неполадок. Оно не всегда помогает, но попробовать все же стоит. Сделать это можно вот так:
- нажмите Win+S;
- пропишите «Устранение общих проблем» и выберите результат;
- выберите пункт «Центр обновления Windows» и нажмите на кнопку «Запустить средство устранения неполадок»;
- следуйте инструкциям, которые предлагает вам средство;
- перезагрузите компьютер, если в этом будет необходимость.
Как только зайдете в Windows, запустите процесс обновления и проверьте, была ли решена ошибка 0x800706d9.
Метод №4 Сброс компонентов Центра обновления
Если ничего из вышеуказанного не помогло, предлагаем вам заняться сбросом компонентом Центра обновления. Да, звучит сложно, но на деле процедура крайне простая. Вот что вам нужно сделать:
- нажмите Win+R;
- напишите notepad.exe и нажмите Enter;
- вставьте в окно Блокнота следующие команды:
:: Run the reset Windows Update components.
:: void components();
:: /*************************************************************************************/
:components
:: —— Stopping the Windows Update services ——
call :print Stopping the Windows Update services.
net stop bitscall :print Stopping the Windows Update services.
net stop wuauservcall :print Stopping the Windows Update services.
net stop appidsvccall :print Stopping the Windows Update services.
net stop cryptsvccall :print Canceling the Windows Update process.
taskkill /im wuauclt.exe /f
:: —— Checking the services status ——
call :print Checking the services status.sc query bits | findstr /I /C:»STOPPED»
if %errorlevel% NEQ 0 (
echo. Failed to stop the BITS service.
echo.
echo.Press any key to continue . . .
pause>nul
goto :eof
)call :print Checking the services status.sc query wuauserv | findstr /I /C:»STOPPED»
if %errorlevel% NEQ 0 (
echo. Failed to stop the Windows Update service.
echo.
echo.Press any key to continue . . .
pause>nul
goto :eof
)call :print Checking the services status.
sc query appidsvc | findstr /I /C:»STOPPED»
if %errorlevel% NEQ 0 (
sc query appidsvc | findstr /I /C:»OpenService FAILED 1060″
if %errorlevel% NEQ 0 (
echo. Failed to stop the Application Identity service.
echo.
echo.Press any key to continue . . .
pause>nul
if %family% NEQ 6 goto :eof
)
)call :print Checking the services status.
sc query cryptsvc | findstr /I /C:»STOPPED»
if %errorlevel% NEQ 0 (
echo. Failed to stop the Cryptographic Services service.
echo.
echo.Press any key to continue . . .
pause>nul
goto :eof
):: —— Delete the qmgr*.dat files ——
call :print Deleting the qmgr*.dat files.del /s /q /f «%ALLUSERSPROFILE%\Application Data\Microsoft\Network\Downloader\qmgr*.dat»
del /s /q /f «%ALLUSERSPROFILE%\Microsoft\Network\Downloader\qmgr*.dat»:: —— Renaming the softare distribution folders backup copies ——
call :print Deleting the old software distribution backup copies.cd /d %SYSTEMROOT%
if exist «%SYSTEMROOT%\winsxs\pending.xml.bak» (
del /s /q /f «%SYSTEMROOT%\winsxs\pending.xml.bak»
)
if exist «%SYSTEMROOT%\SoftwareDistribution.bak» (
rmdir /s /q «%SYSTEMROOT%\SoftwareDistribution.bak»
)
if exist «%SYSTEMROOT%\system32\Catroot2.bak» (
rmdir /s /q «%SYSTEMROOT%\system32\Catroot2.bak»
)
if exist «%SYSTEMROOT%\WindowsUpdate.log.bak» (
del /s /q /f «%SYSTEMROOT%\WindowsUpdate.log.bak»
)call :print Renaming the software distribution folders.
if exist «%SYSTEMROOT%\winsxs\pending.xml» (
takeown /f «%SYSTEMROOT%\winsxs\pending.xml»
attrib -r -s -h /s /d «%SYSTEMROOT%\winsxs\pending.xml»
ren «%SYSTEMROOT%\winsxs\pending.xml» pending.xml.bak
)
if exist «%SYSTEMROOT%\SoftwareDistribution» (
attrib -r -s -h /s /d «%SYSTEMROOT%\SoftwareDistribution»
ren «%SYSTEMROOT%\SoftwareDistribution» SoftwareDistribution.bak
if exist «%SYSTEMROOT%\SoftwareDistribution» (
echo.
echo. Failed to rename the SoftwareDistribution folder.
echo.
echo.Press any key to continue . . .
pause>nul
goto :eof
)
)
if exist «%SYSTEMROOT%\system32\Catroot2» (
attrib -r -s -h /s /d «%SYSTEMROOT%\system32\Catroot2»
ren «%SYSTEMROOT%\system32\Catroot2» Catroot2.bak
)
if exist «%SYSTEMROOT%\WindowsUpdate.log» (
attrib -r -s -h /s /d «%SYSTEMROOT%\WindowsUpdate.log»
ren «%SYSTEMROOT%\WindowsUpdate.log» WindowsUpdate.log.bak
):: —— Reset the BITS service and the Windows Update service to the default security descriptor ——
call :print Reset the BITS service and the Windows Update service to the default security descriptor.sc.exe sdset wuauserv D:(A;;CCLCSWLOCRRC;;;AU)(A;;CCDCLCSWRPWPDTLOCRSDRCWDWO;;;BA)(A;;CCDCLCSWRPWPDTLCRSDRCWDWO;;;SO)(A;;CCLCSWRPWPDTLOCRRC;;;SY)S:(AU;FA;CCDCLCSWRPWPDTLOCRSDRCWDWO;;WD)
sc.exe sdset bits D:(A;;CCLCSWLOCRRC;;;AU)(A;;CCDCLCSWRPWPDTLOCRSDRCWDWO;;;BA)(A;;CCDCLCSWRPWPDTLCRSDRCWDWO;;;SO)(A;;CCLCSWRPWPDTLOCRRC;;;SY)S:(AU;FA;CCDCLCSWRPWPDTLOCRSDRCWDWO;;WD)
sc.exe sdset cryptsvc D:(A;;CCLCSWLOCRRC;;;AU)(A;;CCDCLCSWRPWPDTLOCRSDRCWDWO;;;BA)(A;;CCDCLCSWRPWPDTLCRSDRCWDWO;;;SO)(A;;CCLCSWRPWPDTLOCRRC;;;SY)S:(AU;FA;CCDCLCSWRPWPDTLOCRSDRCWDWO;;WD)
sc.exe sdset trustedinstaller D:(A;;CCLCSWLOCRRC;;;AU)(A;;CCDCLCSWRPWPDTLOCRSDRCWDWO;;;BA)(A;;CCDCLCSWRPWPDTLCRSDRCWDWO;;;SO)(A;;CCLCSWRPWPDTLOCRRC;;;SY)S:(AU;FA;CCDCLCSWRPWPDTLOCRSDRCWDWO;;WD):: —— Reregister the BITS files and the Windows Update files ——
call :print Reregister the BITS files and the Windows Update files.cd /d %SYSTEMROOT%\system32
regsvr32.exe /s atl.dll
regsvr32.exe /s urlmon.dll
regsvr32.exe /s mshtml.dll
regsvr32.exe /s shdocvw.dll
regsvr32.exe /s browseui.dll
regsvr32.exe /s jscript.dll
regsvr32.exe /s vbscript.dll
regsvr32.exe /s scrrun.dll
regsvr32.exe /s msxml.dll
regsvr32.exe /s msxml3.dll
regsvr32.exe /s msxml6.dll
regsvr32.exe /s actxprxy.dll
regsvr32.exe /s softpub.dll
regsvr32.exe /s wintrust.dll
regsvr32.exe /s dssenh.dll
regsvr32.exe /s rsaenh.dll
regsvr32.exe /s gpkcsp.dll
regsvr32.exe /s sccbase.dll
regsvr32.exe /s slbcsp.dll
regsvr32.exe /s cryptdlg.dll
regsvr32.exe /s oleaut32.dll
regsvr32.exe /s ole32.dll
regsvr32.exe /s shell32.dll
regsvr32.exe /s initpki.dll
regsvr32.exe /s wuapi.dll
regsvr32.exe /s wuaueng.dll
regsvr32.exe /s wuaueng1.dll
regsvr32.exe /s wucltui.dll
regsvr32.exe /s wups.dll
regsvr32.exe /s wups2.dll
regsvr32.exe /s wuweb.dll
regsvr32.exe /s qmgr.dll
regsvr32.exe /s qmgrprxy.dll
regsvr32.exe /s wucltux.dll
regsvr32.exe /s muweb.dll
regsvr32.exe /s wuwebv.dll:: —— Resetting Winsock ——
call :print Resetting Winsock.
netsh winsock reset:: —— Resetting WinHTTP Proxy ——
call :print Resetting WinHTTP Proxy.if %family% EQU 5 (
proxycfg.exe -d
) else (
netsh winhttp reset proxy
):: —— Set the startup type as automatic ——
call :print Resetting the services as automatics.
sc.exe config wuauserv start= auto
sc.exe config bits start= delayed-auto
sc.exe config cryptsvc start= auto
sc.exe config TrustedInstaller start= demand
sc.exe config DcomLaunch start= auto:: —— Starting the Windows Update services ——
call :print Starting the Windows Update services.
net start bitscall :print Starting the Windows Update services.
net start wuauservcall :print Starting the Windows Update services.
net start appidsvccall :print Starting the Windows Update services.
net start cryptsvccall :print Starting the Windows Update services.
net start DcomLaunch:: —— End process ——
call :print The operation completed successfully.echo.Press any key to continue . . .
pause>nul
goto :eof
:: /*************************************************************************************/
- нажмите на пункт «Файл» в строке меню и выберите «Сохранить как…»;
- задайте файлу имя «WinUpdReset.cmd» (обязательно укажите расширение CMD в конце!) и сохраните его в удобное для вас место;
- дважды кликните ЛКМ на созданный WinUpdReset.cmd и следуйте инструкциям в окошке Командной строки;
- перезагрузите компьютер по окончанию сброса компонентов Центра обновления.
После выполнения этого процесса ошибка 0x800706d9 не должна вас больше донимать.
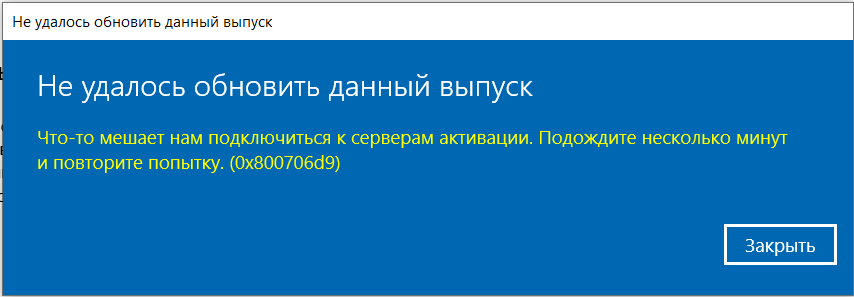
Если у Вас при попытке загрузки или установке обновлений в системе, или при активации (либо обновлении системы с «Домашней» версии до Pro) возникает ошибка с кодом — 0x800706d9. Есть несколько вариантов как это исправить.
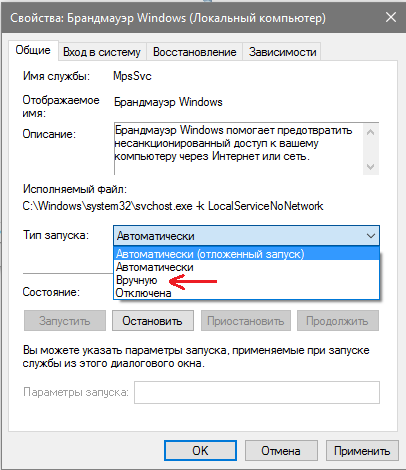
1) Заходим в меню «Службы», сделать это можно путем вызова горячих клавиш Win + R => В поле ввода введите services.msc => Находите в списке окна «Службы» пункт «Брандмауэр Защитника Windows» => Щелкаем на него дважды и переводим в ручной режим. Далее применить. Помимо всего, рекомендуем отключить антивирус на время обновления, или активации, если он у Вас установлен. Т.к антивирус может блокировать исходящие и входящие соединения с серверами Microsoft.
Теперь можете повторить активацию системы, либо ее обновление.
2) Если Вам нужна активации системы, либо к примеру обновление Windows 10 Домашняя до Windows 10 Pro, при наличии у Вас ключа активации Windows 10 Pro. То Вы можете попробовать активировать альтернативным способом через терминал, по следующей инструкциии.
3) Помимо всего мы рекомендуем использовать только оригинальные дистрибутивы Windows 10. Скачать их можете с сайта Microsoft по инструкции, либо из нашего каталога.
Did you recently encounter Error Code 0x800706d9 while opening a Store app, launching Sandbox, or updating Windows 10? Well, in this guide, we explore the reasons that lead to this bug in the first place along with some working ways to resolve the issue.
The error 0x800706d9 may occur due to corrupt system files, missing Windows components, fail to start certain services, storage-related issues, etc. In general, we can categorize them into four different types and each one has its own set of solutions. If you do know why you are receiving this error, reach out to the specific section below –
- Update Error 0x800706D9
- Sandbox Error 0x800706D9
- Microsoft Store Error 0x800706D9
- Windows Defender Error 0x800706D9
To solve the Update error 0x800706D9, try the below workarounds –
1] Run System File Checker
The update error 0x800706D9 occurs mainly due to corrupt or missing system files. SFC is a great utility program designed to scan and repair damaged system files. Here’s how to use this tool –
- First of all, open Command Prompt with Admin rights.
- Copy/paste
sfc/ scannowon the elevated console and press the Enter key.
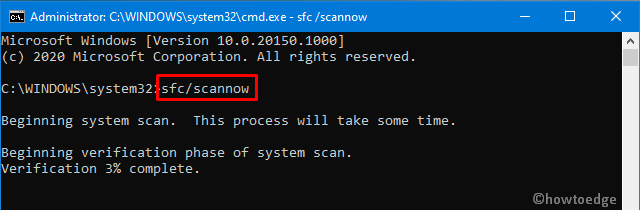
- This usually takes 15-20 minutes to locate and repair corrupt system files. In certain cases, this might even take more time, so wait accordingly.
- Once over, Restart Windows so that changes made come into effect.
2] Manually Install Cumulative Update
If the error persists, one should manually download and install the recent standalone package on the computer. Here’s how to perform this task –
- First of all, visit the Windows 10 Update History page.
- On the left column, select the Windows 10 version that you are having on the computer.
- Scroll down to “In this release“.
- Note down the KB number and reach out to the Microsoft Update Catalog site.
- Paste the KB number noted down earlier and hit Enter. A list of matching results will pop-up.
- Look for the system architecture
- Here, hit the Download button next to the system architecture that you are currently having
- On the subsequent screen, click the top link to download the .msu file.
After the file gets downloaded, browse to the Download folder and double-click the setup to install this.
3] Purge Windows Update Folder
Usually, manually installing the recent cumulative update will resolve any update-related issues on Windows 10. If the 0x800706D9 bug persists even after this, purge the update folder and reinstall the setup file (downloaded above). Here’s how to purge Windows update folder –
- Type “regedit” on the search bar and click the top result.
- When the UAC window prompts, hit Yes.
- On the registry window, navigate to –
HKEY_LOCAL_MACHINE\SOFTWARE\Policies\Microsoft\Windows\WindowsUpdate
Note: If you don’t find the WindowsUpdate folder at the above location, use either system backup or clean install Windows 10, May 2020 Update.
- Head over to the right pane and search for
WUServerandWIStatusServerfolders. - Right-click on each one of them and select “delete“.
- Restart Windows to save the recent changes.
Sign back into Windows 10 and re-follow the method-2.
Fix: Windows Sandbox Error 0x800706d9
The Sandbox error 0x800706D9 may occur due to some corruption inside the system files, certain services not working properly, or installing an incorrect feature update. To correct this, attempt to disable then re-enable Hyper-V services.
Note: Make sure to enable the virtualization settings inside the computer BIOS or Firmware menu before proceeding to the solutions.
Here’s how to fix disable then re-enable Hyper-V related services –
1] Check the status of Hyper-V Related Services
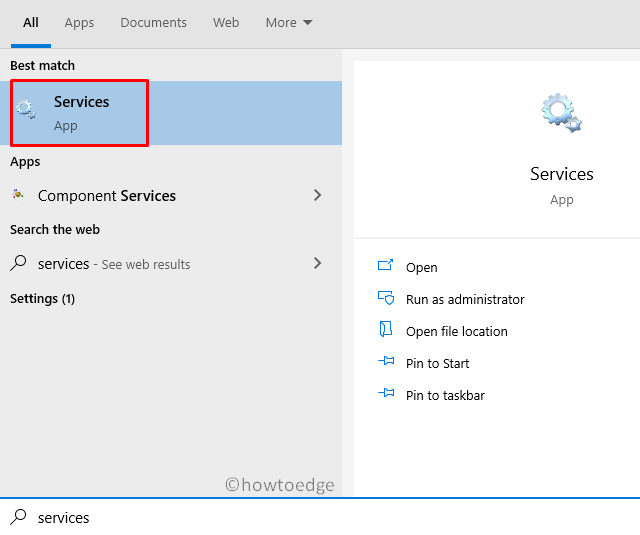
- Press Win+S to invoke the Search UI.
- Type “services” in the text field and click the top result.
- Now, check each one of the services below.
- If you find any one of them as “stopped”, hit “Start” to restart them.
Network Virtualization Service
Virtual Disk
Hyper-V Virtual Machine Manager
Hyper-V Host Compute Service
Container Manager Services
Application Guard Container Service
Remote Procedure Call (RDC)
2] Disable and Enable Hyper-V
First of all, disable the following services –
- Windows Defender Random Folder Protection
- Tamper Protection Service
- Container Manager service
- Windows Sandbox
Next, browse to the below paths –
C:\ProgramData\Microsoft\Windows\Containters\Sandboxes
C:\ProgramData\Microsoft\Windows\Containters\Zygotes
Here, search for VHDX files and delete them. However, make sure not to delete these files from the recycle bin. Now, re-enable the services that you have stopped earlier following the exact reverse order i.e. –
- Windows Sandbox
- Container Manager service
- Tamper Protection Service
- Windows Defender Random Folder Protection
Do Restart Windows to incorporate the above changes. From the next logon, Windows Sandbox will start normally.
Fix: Microsoft Store Error 0x800706D9
This error may also occur while opening Microsoft Store or any of its applications. To solve this, try the following suggestions –
1] Run Store App Troubleshooter
Windows 10 includes a troubleshooter for each one of its services and components. Store App Troubleshooter is one such tool that can locate and repair any bugs related to Windows Store. In case this doesn’t solve the issue, it suggests mending ways to address the issue at hand. Here’s how to use this tool –
- Press Win+I shortcut to start Windows Settings UI.
- Click Update & Security thereafter Troubleshoot on the left overlay.
- Move to the right side and click the “Additional troubleshooter” link.
- Scroll down to Windows Store apps and click to extend its pane.
- Hit Run the troubleshooter.
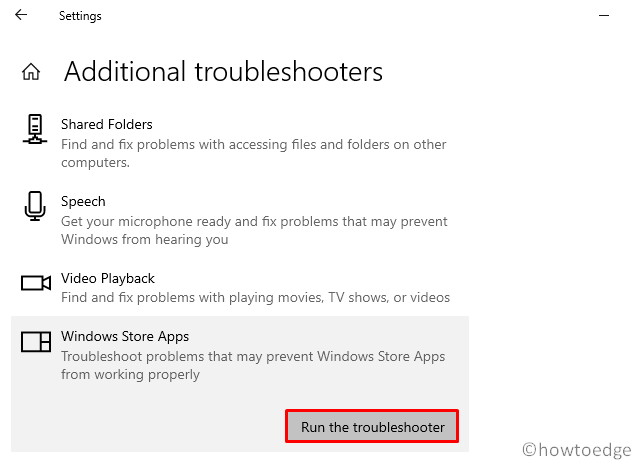
- The tool immediately starts detecting and fixing any errors (if it finds any).
2] Enable Storage Services
At times, the 0x800706D9 error occurs due to Storage services becoming troublesome. Users often disable storage services so as to avoid Windows writing hidden files on USB devices. The 0x6D9 error might occur due to such restrictions on Windows 10. To get rid of this bug, you need to re-enable the services manually following these easy steps –
- Right-click on the Windows icon and choose Run.
- Type “services.msc” without quotes and hit the OK button.
- Locate Storage Service on the succeeding window.
- Double-click the same to launch its Properties window.
- If the Service status displays “stopped”, click the start button.

- Click Apply then OK to confirm these changes.
- Restart Windows so that changes made come into effect from the next logon.
3] Re-register All Store apps
If you are still getting the 0x800706D9 bug, you must re-register each one of the Store apps using PowerShell command. Here are the essential steps to work upon –
- Right-click on the Start button and choose “Windows PowerShell (Admin)“.
- When the UAC window comes into view, tap Yes.
- On the elevated console, copy/paste the below code and hit Enter –
Get-AppXPackage -AllUsers | Foreach {Add-AppxPackage -DisableDevelopmentMode -Register "$($_.InstallLocation)\AppXManifest.xml"}
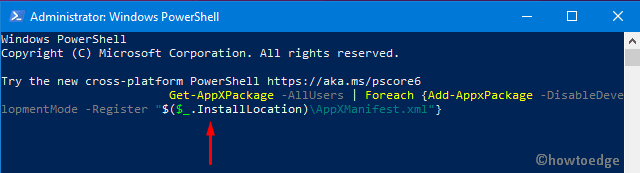
- After this code runs successfully, reboot PC to implement the recent changes.
Fix: Windows Defender Firewall Error 0x800706d9
If you are getting the error code 0x800706d9 while opening Windows Defender, try these solutions –
Tip: Make sure to uninstall or remove any third-party antivirus program as well to avoid this error.
1] Disable Microsoft Defender
- Go and click the “up arrow” available near the notification area and hit the “Shield” icon.
- Doing so will launch the Microsoft Defender application.
- Head over to the right pane and click Virus & threat protection.
- On the succeeding page, tap Manage settings link.
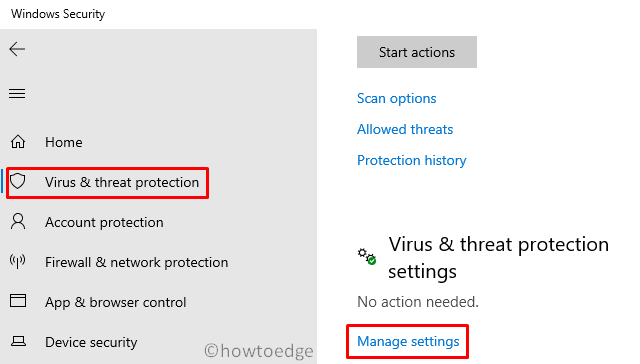
- Next, turn off the Real-time protection toggle switch.
- When a confirmation window appears, hit the Yes button.
You may now check whether the error 0x800706d9 is still appearing or has disappeared.
2] Set Windows Firewall to Automatic
As per certain user’s POV, disabling the Firewall/ICS service directly may fix this issue on Windows 10. However, doing so you might not even launch the Windows Firewall wizard. Here’s how to fix this –
- Make a right-click on the Windows icon and select Run.
- Type “devmgmt.msc” and press Enter to launch the Device Manager.
- This time, right-click on the Windows firewall and set it to Automatic.
That’s it, I hope the above tutorial does help to address the error code 0x800706d9 on Windows 10.
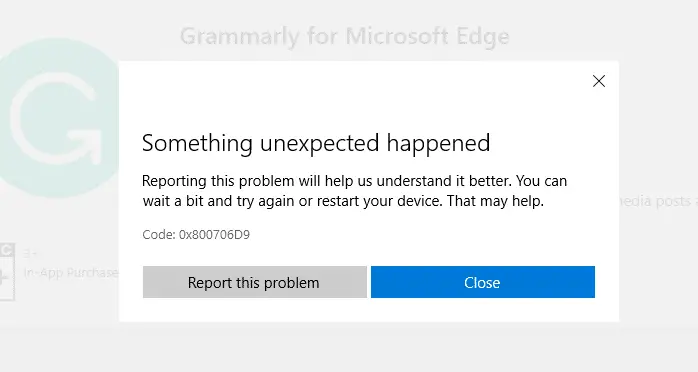
You may be unable to download new apps or update existing apps using the Microsoft Store due to error 0x800706D9 — Something unexpected happened. Error code 0x800706D9 translates to “There are no more endpoints available from the endpoint mapper”, which doesn’t make much sense for the end-user.
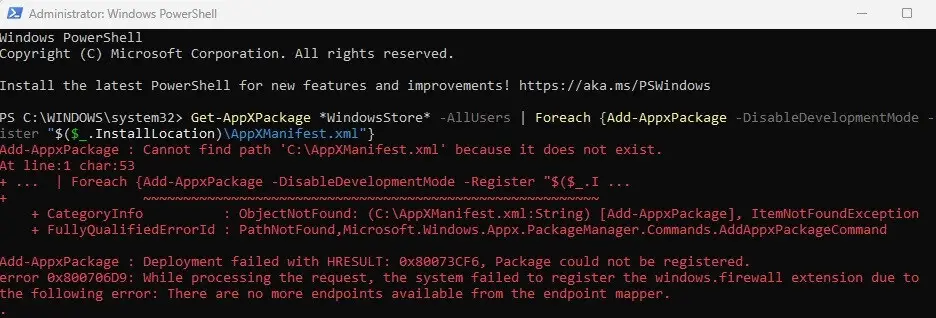
Also, the same error is shown when you install or update apps using PowerShell.
The error message is:
Add-AppxPackage: Deployment failed with HRESULT: 0x80073CF6, Package could not be registered.

error 0x800706B9: While processing the request, the system failed to register the windows.firewall extension due to the following error: There are no more endpoints available from the endpoint mapper.
This post tells you how to fix Microsoft Store 0x800706D9 in Windows 10/11.
To resolve Microsoft Store Error 0x800706D9 in Windows 10, follow these steps:
- Launch the Services MMC by running
services.mscfrom the Run dialog. - Double-click Storage Service and set it to Automatic (Delayed Start)
- Click Start to start the services manually.
- Also, make sure that the following services are started/running:
- Windows Defender Firewall (previously “Windows Firewall”)
- Windows Update
(If you’re using a 3rd party firewall application, Windows Defender Firewall will be disabled automatically. That’s normal. You don’t have to start the firewall service in that case.)
- Exit the Services console.
You should be able to download or update Store apps now.
Note: If Windows Firewall doesn’t start correctly, check out the article Windows Firewall Error 0x6d9 “The snap-in failed to load” for a fix.
Note: Storage Service provides enabling services for storage settings and external storage expansion. If this service is not running, drives may go missing in the Storage Settings and App Save Locations dropdown. The Storage Service may be the main interface with which the Windows Store apps (UWP) can write to the file system. The classic (Win32) desktop apps may not need this service anyway.
Reinstall Windows Store
If starting the Storage service doesn’t help, you may try reinstalling the Windows Store using PowerShell, using the following command-line from an admin PowerShell window:
Get-AppxPackage -allusers Microsoft.WindowsStore | Foreach {Add-AppxPackage -DisableDevelopmentMode -Register "$($_.InstallLocation)\AppXManifest.xml"}

For more details, check out the article Reinstall Windows Store in Windows 10 after uninstalling it with PowerShell.
One small request: If you liked this post, please share this?
One «tiny» share from you would seriously help a lot with the growth of this blog.
Some great suggestions:
- Pin it!
- Share it to your favorite blog + Facebook, Reddit
- Tweet it!
So thank you so much for your support. It won’t take more than 10 seconds of your time. The share buttons are right below. 
Ramesh Srinivasan is passionate about Microsoft technologies and he has been a consecutive ten-time recipient of the Microsoft Most Valuable Professional award in the Windows Shell/Desktop Experience category, from 2003 to 2012. He loves to troubleshoot and write about Windows.
Ramesh founded Winhelponline.com in 2005.