Ошибка 0x80070026 не является новой проблемой в ОС от Майкрософт, но пользователи Windows 10 с недавнего времени снова начали ощущать на себе данную проблему. Итак, для начала давайте разберемся, что собой представляет эта ошибка.
0x80070026 — это ошибка, возникающая во время очередного обновления операционной системы Windows 10. Причиной этой проблемы являются повреждения системных файлов, но также не исключены и иные причины.
Способы решения 0x80070026 в Windows 10
Способ №1 Запуск утилиты SFC
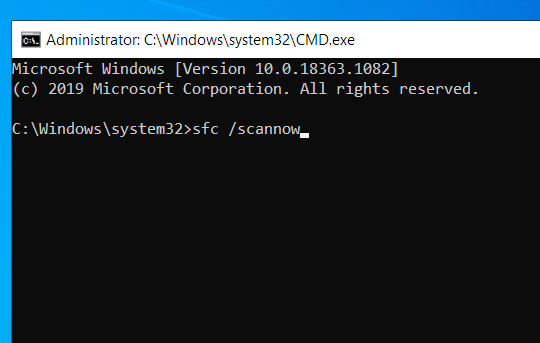
SFC — это отличная утилита ОС Windows для проверки и исправления системных файлов. Если ваши системные файлы были повреждены, что вероятней всего при ошибке 0x80070026, то применение утилиты SFC — это здравомыслящий шаг. Она просканирует вашу систему на наличие поврежденных файлов и исправит их, но только если это будет возможно. Итак, для запуска SFC нужно сделать следующее:
- Кликните ПКМ на Пуск и выберете «Командная строка(администратор)».
- Впишите в нее команду sfc /scannow и нажмите Enter для запуска работы утилиты.
Вот, собственно, и все. После нажатия на Enter, утилита SFC запустит сканирование вашего компьютера для проверки целостности системных файлов. Если она найдет какие-то повреждения, то она попытается устранить их.
Способ №2 Запуск утилиты DISM
Если проблема в виде ошибки 0x80070026 все еще присутствует при попытках обновить Windows 10, то вы можете попробовать запустить другую системную утилиту — DISM или же система обслуживания образов развертывания и управления. Для ее запуска сделайте следующее:
- Откройте Командную строку точно также, как это было показано в предыдущем пункте.
- Открыв командную строку с повышенными правами, вписывайте в нее следующие команды, при этом нажимая Enter после каждой из них:
- dism /Online /Cleanup-Image /CheckHealth
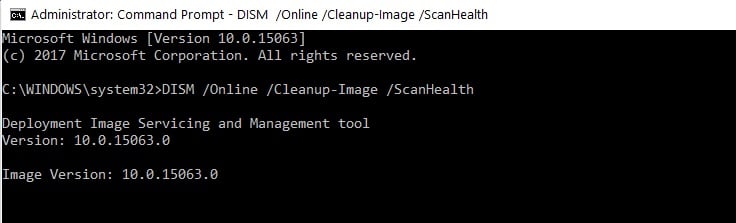
- dism /Online /Cleanup-Image /ScanHealth
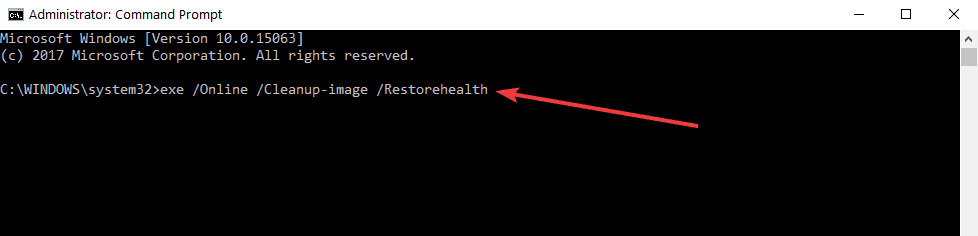
- dism /Online /Cleanup-Image /RestoreHealth
Перезагрузите свой компьютер и попробуйте снова попробовать запустить обновление Windows 10. Возможно, что вы все-таки смогли устранить ошибку 0x80070026.
Если же у вас так и не получилось исправить эту неприятную ошибку, то можно посоветовать еще несколько действий в этой ситуации:
- Проверьте свою систему на наличие вирусов в ней, так как некоторые особо вредоносные образцы могут блокировать некоторые функции ОС.
- Проверьте, не устанавливали ли вы недавно каких-то сомнительных утилит, которые могли бы создавать проблемы при обновлении. Например, некоторые программы по уборке компьютера от мусорных или временных файлов могут стать причиной ошибки 0x80070026.
- Убедитесь, что ваше Интернет-соединение вполне стабильно для загрузки обновления в Центре обновления Windows.
- Можете воспользоваться удобным для вас способом Восстановления системы. Рекомендуем для начала использовать точку восстановления.
This post suggests ways to fix error 0x80070026 for Windows Update or System Restore. Several users have faced this issue that when they try to update Windows or perform a System Restore – the process doesn’t complete and they receive this 0x80070026 error.

This Windows Update error code 0x800700 normally appears when users try to install a cumulative update for Windows 10. The entire error message looks like this:
There were problems installing some updates, but we’ll try again later. If you keep seeing this and want to search the web or contact support for information, this may help – Error 0x80070026
Let’s check the fixes that might come in handy:
- Run Windows Update Troubleshooter
- Clear contents of SoftwareDistribution folder
- Clear contents of catroot2 folder
- Manually download and install the Update via the Microsoft Catalog website.
1] Run Windows Update Troubleshooter

Here are the steps:
- Press Win+I to open the Settings app
- Click on Update & Security category
- Access the Troubleshoot page using the left section
- Click on the Additional troubleshooters‘ option visible on the right part
- Click on the Windows Update option
- Hit the Run the troubleshooter button.
Now it will start detecting problems (by checking registry keys, pending restart, diagnosing other issues, etc.) and provide you the fixes.
2] Clear contents of SoftwareDistribution folder

SoftwareDistribution folder is present in the Windows directory which temporarily stores files and folders that are needed to install new updates. If for some reason, such files are corrupt, then removing all such content from the Software Distribution folder might help to get Windows updates and install them. So, simply clear the contents of the SoftwareDistribution folder. The steps are:
- Press Win+E hotkey to open File Explorer
- Access SoftwareDistribution folder. The path is:
C:\Windows\SoftwareDistribution
- Press Ctrl+A hotkey to select all the items present in that folder
- Use the Delete key to clear all the content.
If you want, you can also simply delete the SoftwareDistribution folder too. It is recreated automatically. After that, try to install updates. It might work.
3] Clear contents of catroot2 folder

catroot2 is a system folder that is needed for the Windows update process. There are chances that the contents of that folder are corrupted.
So, in that case, you need to reset the catroot2 folder by deleting or clearing its contents. After that, check if Windows Update works fine.
4] Manually download & install Update via the Microsoft Update Catalog website
If the above options don’t work, then you have to access the Microsoft Update Catalog website and download the required update. Use the search option on that website, enter the update name, click on the Download button, and install the update.
TIP: More suggestions here if Windows Cumulative Update not installing or fails to install.
Error 0x80070026 for System Restore

Users have experienced the same error code 0x80070026 for the system restore process. The whole error message goes like this:
System Restore did not complete successfully. Your computer’s system files and settings were not changed.
Details:
System Restore failed to extract the original copy of the directory from the restore point.
Source: %ProgramFiles%\WindowsApps
Destination: AppxStaging
An unspecified error occurred during System Restore: (0x80070026)
You can try System Restore again and choose a different restore point. If you continue to see this error, you can try an advanced recovery method.
Here are a couple of fixes that might be useful:
- Temporarily disable antivirus or firewall and try
- Boot in Clean Boot State, Advanced Startup Options, or Safe Mode
- Troubleshoot in Clean Boot State to identify the offender.
1] Temporarily disable antivirus or firewall
It might be possible that Windows Defender Antivirus or some other 3rd party antivirus software is interfering with the system restore process. The same can also happen with Windows Firewall or other firewall software installed on your computer.
In such a case, disable the antivirus or firewall that you’re using and try the system restore process. If the system restore is completed successfully, then your security tool was causing the issue.
2] Boot in Clean Boot State, Advanced Startup Options, or Safe Mode
If the first option doesn’t work, then you should boot your computer in Clean Boot State, access Advanced Startup Options, or boot Windows in Safe Mode and then try to perform a system restore. This might work.
3] Troubleshoot in Clean Boot State to identify the offender
Clean Boot is a native feature of Windows 10 that helps in identifying the service or application that is causing some issue.
So, troubleshoot in Clean Boot State, and check if you are able to complete your system restore process.
If yes, then there would be some background program that was causing the error. You need to find that program and then remove/disable it.
TIP: More suggestions here to fix System Restore problems.
Hope something will work.
На чтение 8 мин. Просмотров 5.2k. Опубликовано
Сталкивались ли вы с кодом ошибки 80070026 в Windows 10, 8.1 или Windows 7 при использовании функции обновления, доступной в системе? Ну, я могу сказать вам с самого начала, что есть очень простой способ как исправить код ошибки 80070026 в Windows 10, 8.1, 7 и возобновить вашу повседневную работу. Так что просто следуйте шагам, перечисленным ниже, в том порядке, в котором они описаны, и вы сразу же включите и запустите свою операционную систему.

Код ошибки обновления Windows 80070026 обычно появляется в Windows 10, 8.1, 7 при попытке установить последние обновления. Возможная причина, по которой вы получаете этот код ошибки, заключается в том, что ваша папка C: Users была изменена на другую папку, например «F: Users», что может привести к потенциальным системным ошибкам с помощью функции Центра обновления Windows.
Содержание
- Как исправить ошибку обновления Windows 10 0x80070026
- 1. Удалите содержимое папки Temp
- 2. Скопируйте папку $$ PendingFiles.
- 3. Запустите DISM
- 4. Обновите свой компьютер
- 5. Запустите средство устранения неполадок Центра обновления Windows.
- 6. Сброс компонентов Windows Updates
- 7.Проверьте свой антивирус
- 8. Установите обновления вручную
Как исправить ошибку обновления Windows 10 0x80070026
- Удалить содержимое папки Temp
- Скопируйте папку $$ PendingFiles
- Запустить DISM
- Обнови свой компьютер
- Запустите средство устранения неполадок Центра обновления Windows
- Сброс компонентов обновлений Windows
- Проверьте свой антивирус
- Установить обновления вручную
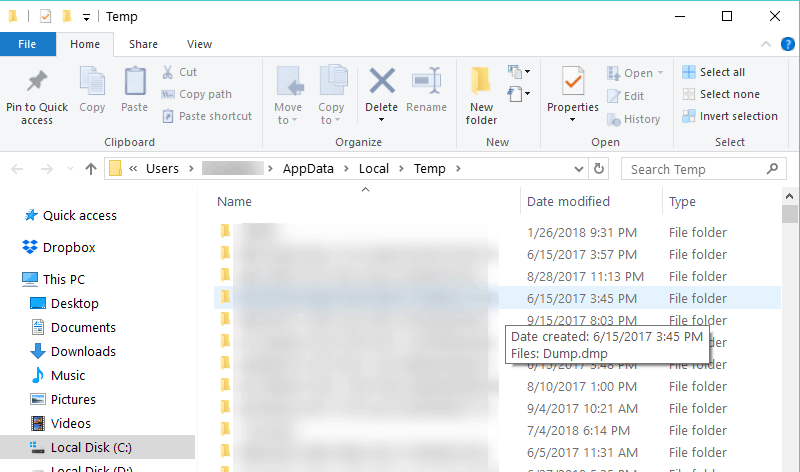
1. Удалите содержимое папки Temp
-
В этом методе мы собираемся изменить папку «User», как описано ниже.
Примечание. Также, прежде чем предпринимать шаги, описанные ниже, необходимо создать резервную копию всех ваших важных данных, таких как файлы и папки быть произведенным. - Перезагрузите операционную систему Windows 10, 8.1, 7.
- Когда устройство запустится, вам нужно будет войти под своей учетной записью администратора и паролем.
- Откройте раздел с операционной системой Windows 10, 8.1, 7 (обычно это раздел C:)
- В разделе «C:» дважды щелкните или дважды нажмите на папку «Пользователи».
- Дважды щелкните в папке «Пользователи» для доступа к папке «itnota».
- Найдите и дважды щелкните, чтобы открыть папку «AppData».
- Теперь из папки «AppData» найдите и дважды щелкните, чтобы открыть папку «Local».
-
Теперь из локальной папки дважды щелкните, чтобы открыть папку «Temp».

-
Удалите все содержимое в папке «Temp».
Примечание. Перед удалением содержимого в папке «Temp» закройте все активные приложения.

– СВЯЗАННО: исправьте проблемы обновления Windows с помощью этих двух инструментов
2. Скопируйте папку $$ PendingFiles.
- Нажмите и удерживайте кнопку с логотипом «Windows» и кнопку «C».
- Щелкните левой кнопкой мыши или коснитесь функции «Настройки», представленной в появившемся меню.
- Щелкните левой кнопкой мыши или коснитесь функции «Изменить настройки ПК», представленной в правой нижней части окна.
- Щелкните левой кнопкой мыши на вкладке «Общие», расположенной в левой части окна «Изменить настройки ПК».
- На правой боковой панели в разделе «Расширенный запуск» щелкните левой кнопкой мыши или нажмите кнопку «Перезагрузить сейчас».
- После завершения процесса перезагрузки вы должны открыть окно с надписью «Выберите опцию».
- Щелкните левой кнопкой мыши или коснитесь функции «Устранение неполадок», представленной в меню.
- Затем щелкните левой кнопкой мыши или нажмите на «Дополнительные параметры».
- Затем щелкните левой кнопкой мыши или нажмите «Командная строка».
- Теперь устройство перезагрузится, и вы попадете на черный экран (Командная строка)
- Вам нужно будет скопировать папку «$$ PendingFiles» с имеющейся у вас буквы SSD-диска или другого внешнего жесткого диска на внутренний жесткий диск.
- В этом примере мы будем использовать командную строку, чтобы определить, какие буквы дисков вам понадобятся.
- В окне командной строки напишите следующее: «dir C:» и нажмите кнопку ввода на клавиатуре.
- Сделайте это для всех разделов, которые у вас есть на устройстве, чтобы определить, какой раздел находится на SSD или внешнем жестком диске, а какой – на внутреннем жестком диске.
- Теперь после того, как вы выяснили, в каких разделах есть папка «Пользователи».
- Например, мы возьмем раздел «G:» в качестве источника (внешний жесткий диск) и раздел «H:» в качестве внутреннего жесткого диска, на который мы будем копировать папку «$$ PendingFiles».
- В окне командной строки напишите следующее: «robocopy/copyall/mir/xj G: $$ PendingFiles H: $$ PendingFiles» без кавычек.
- Нажмите кнопку ввода на клавиатуре
- После выполнения команды напишите следующее в окне командной строки: «rmdir/S/Q G: $$ PendingFiles» без кавычек
- Нажмите кнопку ввода на клавиатуре.
- Теперь откройте проводник и посмотрите, какое письмо имеет внутренний жесткий диск. Мы собираемся взять, например, букву «С:»
- Напишите в окне командной строки следующее: «mklink/J G: $$ PendingFiles C: $$ PendingFiles» без кавычек.
- Нажмите кнопку ввода на клавиатуре.
- Напишите в окне командной строки следующее: «Выход» без кавычек.
- Нажмите кнопку ввода на клавиатуре.
- Перезагрузите операционную систему Windows 10, 8.1, 7.
- Когда устройство запустится, вам нужно будет открыть функцию Центра обновления Windows и еще раз проверить, появляется ли по-прежнему код ошибки «80070026».
Примечание . Если некоторые шаги, перечисленные для второго решения, недоступны на вашем компьютере с Windows 10, полностью пропустите это решение и перейдите к следующему.
- СВЯЗАННЫЕ: ИСПРАВЛЕНИЕ: сбой при настройке обновлений Windows, отмена изменений
3. Запустите DISM
- Переместите курсор мыши в верхнюю правую часть экрана.
- В появившемся меню вам нужно будет щелкнуть левой кнопкой мыши или нажать на функцию поиска.
- В диалоговом окне поиска напишите следующее: «Командная строка» без кавычек.
- После завершения поиска щелкните правой кнопкой мыши или удерживайте нажатой иконку «Командная строка».
- Щелкните левой кнопкой мыши или коснитесь функции «Запуск от имени администратора».
- Если вы получаете сообщение от пользователя об управлении учетной записью, щелкните левой кнопкой мыши или нажмите «Да», чтобы продолжить.
-
Напишите в окне командной строки следующее: «DISM.exe/Online/Cleanup-image/Scanhealth» без кавычек.
- Нажмите кнопку ввода на клавиатуре.
-
Запишите в командной строке следующее: «DISM.exe/Online/Cleanup-image/Restorehealth» без кавычек.
- Нажмите кнопку ввода на клавиатуре.
- Напишите в командной строке «Выход» без кавычек.
- Нажмите кнопку ввода на клавиатуре.
- Перезагрузите операционную систему еще раз и попробуйте проверить, правильно ли работает ваша функция Windows Update.


4. Обновите свой компьютер
- Переместите курсор мыши в верхнюю правую часть экрана.
- В появившемся меню щелкните левой кнопкой мыши или коснитесь функции «Настройки».
- Теперь в подменю «Настройки» щелкните левой кнопкой мыши или нажмите «Изменить настройки ПК».
- Щелкните левой кнопкой мыши или коснитесь опции «Обновление и восстановление», представленной в следующем окне.
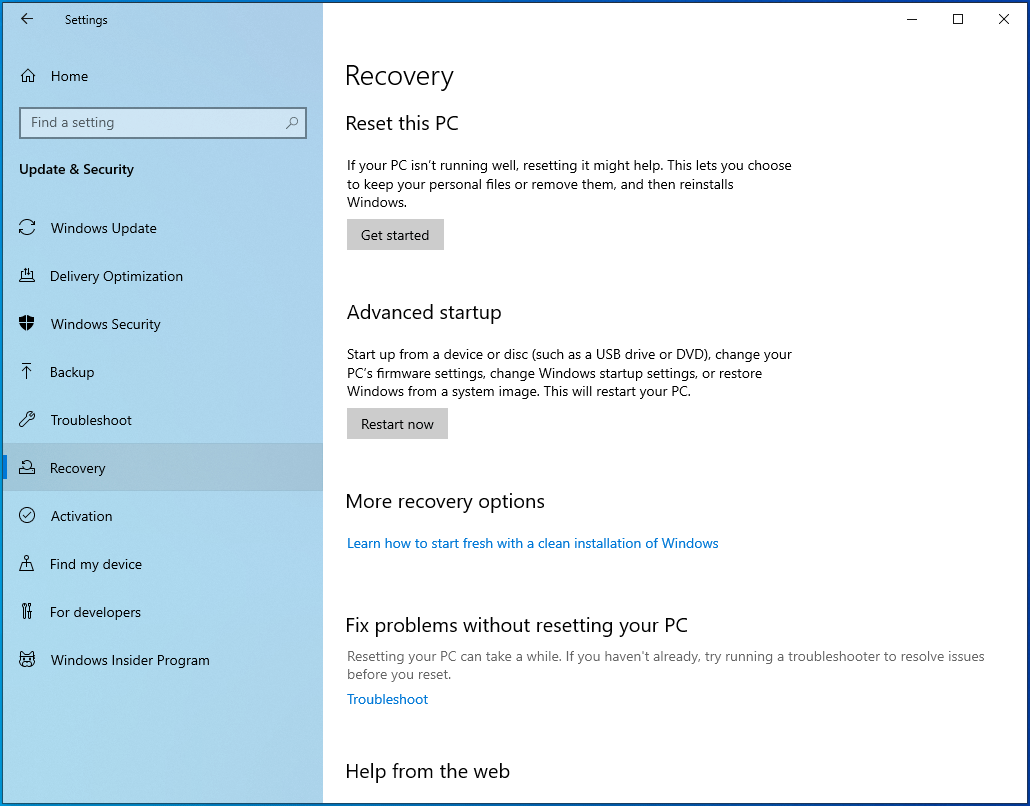
- Щелкните левой кнопкой мыши или нажмите на кнопку «Восстановление». В Windows 10 зайдите в Recovery> Reset this PC.
-
Щелкните левой кнопкой мыши или нажмите на кнопку «Начать», расположенную под «Обновить ваш компьютер, не затрагивая ваши файлы»
- Следуйте инструкциям на экране, чтобы завершить обновление системы и попробуйте снова функцию обновления Windows, чтобы увидеть, как это происходит.

– СВЯЗАННО: Windows 10 не позволяет пользователям выключать ПК без установки обновлений
5. Запустите средство устранения неполадок Центра обновления Windows.
Если проблема не устранена и вы хотите отдохнуть от каких-либо сложных решений по устранению неполадок, вы можете запустить встроенное средство устранения неполадок обновления Windows. Этот полезный инструмент может помочь вам решить общие проблемы с обновлениями, чтобы вы могли завершить установку последних обновлений ОС на вашем ПК.
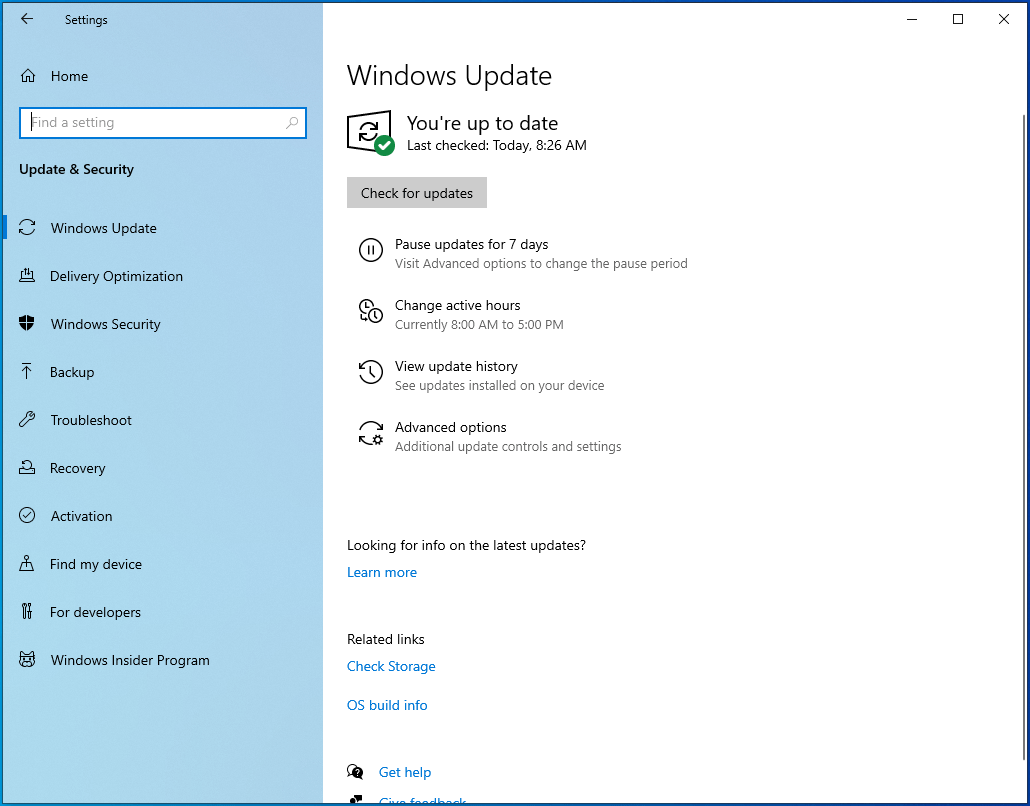
Если вы используете Windows 10, выберите «Настройки»> «Обновление и безопасность»> «Устранение неполадок» и запустите средство устранения неполадок обновления, как показано на снимке экрана ниже.

Если вы используете Windows 7 или Windows 8.1, вы можете запустить средство устранения неполадок с помощью панели управления. Откройте Панель управления> введите «устранение неполадок» в строке поиска> выберите «Устранение неполадок»> выберите «Просмотреть все», чтобы просмотреть список всех средств устранения неполадок, а затем найдите и запустите средство устранения неполадок «Обновление».

– СВЯЗАН: ошибка 0xc1900204 блокирует обновления Windows 10 [FIX]
6. Сброс компонентов Windows Updates
- Щелкните правой кнопкой мыши Пуск> Запустить командную строку (администратор).
- Нажмите Да, когда спросят о разрешениях
-
Остановите службы Центра обновления Windows, введя следующие команды и нажимая Enter после каждой:
- net stop wuauserv
- net stop cryptSvc
- чистые стоповые биты
- Чистый стоп-сервер
-
Переименуйте папку SoftwareDistribution и Catroot2, введя команды:
- Рен С: WindowssoftwareDistribution SoftwareDistribution.old
- Рен C: WindowsSystem32catroot2 Catroot2.old
-
Перезапустите службы Центра обновления Windows, введя следующие команды:
- net start wuauserv
- net start cryptSvc
- чистые стартовые биты
- net start msiserver
- Выйдите из командной строки, перезагрузите компьютер и проверьте, можете ли вы установить последние обновления.
7.Проверьте свой антивирус
Довольно часто ваш антивирус может помешать вам обновить компьютер. Чтобы проверить, является ли виновным ваш антивирусный инструмент, временно отключите его, а затем нажмите кнопку « Проверить обновления ». Не забудьте включить антивирусную защиту, как только вам удастся установить последние обновления ОС.
8. Установите обновления вручную
Если служба Windows Update все еще не работает, попробуйте установить проблемные обновления вручную. Например, если вы пытаетесь установить последние обновления драйверов оборудования, перейдите на веб-сайт производителя и получите обновления оттуда. Если вы пытаетесь установить последние исправления Windows, перейдите в каталог обновлений Microsoft, введите номер КБ соответствующего обновления и нажмите кнопку загрузки.
И вы сделали. Если вы тщательно следовали приведенным выше методам, теперь у вас есть работающая функция Windows Update в Windows 10, 8.1 или Windows 7. Если вам нужна дополнительная помощь, вы можете написать нам в разделе комментариев на странице, расположенной ниже, и мы вернемся к Вы как можно скорее.
by Ivan Jenic
Passionate about all elements related to Windows and combined with his innate curiosity, Ivan has delved deep into understanding this operating system, with a specialization in drivers and… read more
Updated on
- When updating your Windows, you sometimes get error code 0x80070026.
- It’s not something to get extremely worried about and it should be easily fixed using one of the solutions below.
- Repair tools can come in handy on various occasions. See our recommendations in the Troubleshooters section.
- We’ve extensively documented most Windows 10 issues, so take a look at the Errors Hub.
XINSTALL BY CLICKING THE DOWNLOAD FILE
Repair all Windows Updates Errors with Fortect:
SPONSORED
Windows update failures can be annoying! With Fortect, you will get rid of errors caused by missing or corrupted files after an update. The utility maintains a repository of the original Windows system file versions, and it uses a reverse algorithm to swap out the damaged ones for good ones.
- Download Fortect and install it on your PC
- Start the tool’s scanning process to look for corrupt files that are the source of the issues
- Right-click on Start Repair to resolve security and performance issues with your computer
- Fortect has been downloaded by 0 readers this month, rated 4.4 on TrustPilot
The Windows update error code 80070026 usually appears in Windows 10 when you try to install the latest updates.
A possible reason as to why you get this error code is the fact that your C:Users folder was changed to another directory, like F:Users resulting in potential system errors with the Windows Update feature.
Luckily, there are a few very easy methods to fix error code 80070026 and resume your everyday work. So just follow the steps listed below in the order they are described and you’ll have your operating system up and running in no time.
How can I fix the Windows Update error 0x80070026?
- Delete the content of the Temp folder
- Copy the $$PendingFiles folder
- Check your antivirus
- Run DISM
- Refresh your PC
- Run the Windows Update Troubleshooter
- Reset Windows Updates components
- Install updates manually
1. Delete the content of the Temp folder
- Reboot your PC.
- Log in with your administrator account.
- From the “C:” partition (or your main partition) double-click the Users folder.
- Double-click the itnota folder.
- Open AppData, then go to Local.
- Now, open the Temp folder and delete all the contents.

Note: Before attempting the steps above backup call your important data like files and folders.
2. Copy the $$PendingFiles folder
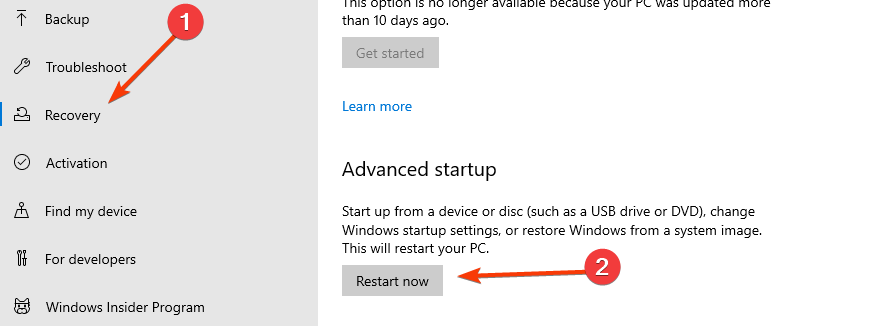
- Open the Windows 10 Settings menu.
- Choose Update & Security.
- In the Recovery tab, scroll down to Advanced Startup.
- Click on Restart now.

- After the reboot process has finished, you should get to a window that says Choose an option.
- Select Troubleshoot and look for the Advanced options.
- Next, click or tap on Command Prompt.
- Write the following command and press the Enter:
dir C: - Do this for all your partitions to determine which one is on the SSD or external hard drive, and which one is on the internal hard drive. (We are going to take partition G as the external hard drive and partition H as the internal hard drive.)
- In the command prompt window, write the following and press Enter:
robocopy /copyall /mir /xj G:$$PendingFiles H:$$PendingFiles - Afterward, run the following and press again Enter:
rmdir /S /Q G:$$PendingFiles - Now open the File Explorer and see what letter the Internal HDD has. (We are going to use C.)
- Write in the command prompt window the following and hit Enter:
mklink /J G:$$PendingFiles C:$$PendingFiles - Exit Command Prompt and reboot your device.
- When the device starts you will need to open your Windows Update feature and check again if you still get the error code 80070026.
Note: If some of the steps listed for the second solution are not available on your Windows 10 device, skip this solution completely and go to the next one.
3. Check your antivirus
Quite frequently, your antivirus prevents you from updating your computer. To check if your antivirus tool is the culprit, temporarily disable it and then hit the Check for updates button.
Many times, disabling your antivirus won’t be enough so you will need to uninstall it completely. If this proved helpful, that means you should consider switching to another solution.
There are numerous valuable antivirus programs available, and many of them are designed with unique and interesting features for each user’s needs.
4. Run DISM
- In the search dialog box, write Command Prompt and open as admin.
- Write the following and hit Enter: DISM.exe /Online /Cleanup-image /Scanhealth

- Then, run the following and press Enter: DISM.exe /Online /Cleanup-image /Restorehealth

- Exit and reboot your operating system once more.
See if your Windows Update feature is working correctly.
5. Refresh your PC
- Open the Recovery menu as shown in the second solution.
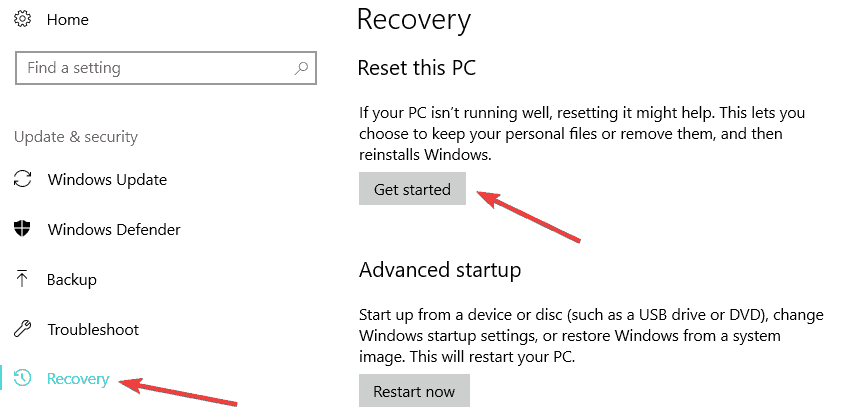
- In the Reset this PC section click on Get Started.

- Follow the instructions on the screen to finalize the System Refresh and try again your Windows Update feature to see how it goes.
- Fix Windows 10 Update error 0x80070020 in 7 easy steps
- Adding layers in Windows 11’s Paint greatly increases RAM usage
- How to copy texts from images with Snipping Tool’s Text Action
6. Run the Windows Update Troubleshooter
If the issue persists and you want to take a short break from any complex troubleshooting solutions, then you can run Windows’ built-in update troubleshooter.
This useful tool can help you fix general update issues so that you can finish installing the latest OS updates on your PC.
If you’re running Windows 10, go to Settings > Update & Security > Troubleshooter and run the update troubleshooter as shown in the screenshot below.
If you’re running Windows 7 or Windows 8.1, you can launch the Update troubleshooter from Control Panel.
Type troubleshoot in Contol Panel windows, open the tool and select View All to list all the troubleshooting tools. Locate and run the Update troubleshooter.

7. Reset Windows Updates components
- Launch Command Prompt as admin again.
- Stop the Windows Update Services by typing the following commands and hit Enter after each one:
net stop wuauservnet stop cryptSvcnet stop bitsnet stop msiserver - Rename the SoftwareDistribution and Catroot2 folder by typing the commands:
Ren C:WindowssoftwareDistribution SoftwareDistribution.oldRen C:WindowsSystem32catroot2 Catroot2.old - Restart the Windows Update Services by typing the following commands:
net start wuauservnet start cryptSvcnet start bitsnet start msiserver - Exit Command Prompt, restart your computer and check if you can install the latest updates.
8. Install updates manually
If the Windows Update service is still not working, try to install the problematic updates manually.
For example, if you’re trying to install the latest hardware driver updates, go to the manufacturer’s website and get the updates from there.
If you’re trying to install the latest Windows patches, go to Microsoft’s Update Catalog, enter the KB number of the respective update(s) and hit the download button.
If you’ve carefully followed the methods above, you now have a working Windows Update feature on your device.
If you need further assistance, you can write to us in the comments section of the page situated below and we will get back to you as soon as possible.
![]()
Contents
- What Is the Error Code 0x80070026 in Windows 10?
- What Causes the Windows Update Error Code 0x80070026?
- How to Fix the Update Error 0x80070026 on a Windows 10 PC
- Solution 1: Temporarily Disable Your Antivirus
- Solution 2: Run the Windows Update Troubleshooter
- Solution 3: Empty the Contents of the Temp Folder
- Solution 4: Run the SFC and DISM Tools
- Solution 5: Reset Windows Update Components
- Solution 6: Try Using the Windows Media Creation Tool
- Solution 7: Try Installing the Updates Manually
- Solution 8: Temporarily Disable Your Proxy Connection
- Solution 9: Reset Your PC

Sometimes, when trying to update Windows 10, you may come across the update error code 0x80070026. It’s a fairly common error on Windows 10 PCs, and our post today highlights some of the solutions on how to fix the Windows Update error code 0x80070026.
What Is the Error Code 0x80070026 in Windows 10?
First, let’s try to understand what the error code 0x80070026 means and why you’re encountering it on your PC. On Windows 10, unlike on older versions of Windows, whenever updates are available, the update feature automatically downloads and installs them.
However, sometimes, you may want to manually check for updates by launching the Windows Update service. That’s when the error occurs. It reads in full:
“There were problems installing some updates, but we’ll try again later”. If you keep seeing this and want to search the web or contact support for information, this may help:
- Cumulative Update for Windows 10 Version 1511 for X64-based system (KB3120677) – Error 0x80070026.”
You’ll notice that the updates are being downloaded, but then they fail.
What Causes the Windows Update Error Code 0x80070026?
Various reasons could be responsible for the error code 0x80070026 when installing Windows 10 updates, the main one being damaged system files. This can be a result of malware infection or file corruption.
Another cause of this error is if Windows Update fails to function properly. Since this feature is directly responsible for downloading and installing Windows updates, if it ceases to work as required, you’re likely to encounter errors when installing updates.
Other causes include the following:
- Your antivirus blocking the installation of updates
- A failure to communicate with Microsoft servers
How to Fix the Update Error 0x80070026 on a Windows 10 PC
Solution 1: Temporarily Disable Your Antivirus
Your antivirus software could be preventing the updates from being installed on your computer. Third-party antivirus programs are notorious for blocking downloads from external servers, and this may be the case in your situation.
You can try temporarily disabling your antivirus tool to see if this gets rid of the error. Depending on your antivirus, the steps to disable it will vary. Once you’re done, try running the installation again. If the error persists, you may have to completely uninstall the app.
If this doesn’t work, you may try disabling the firewall temporarily. If you’re using Windows Defender as your primary security program, follow these steps:
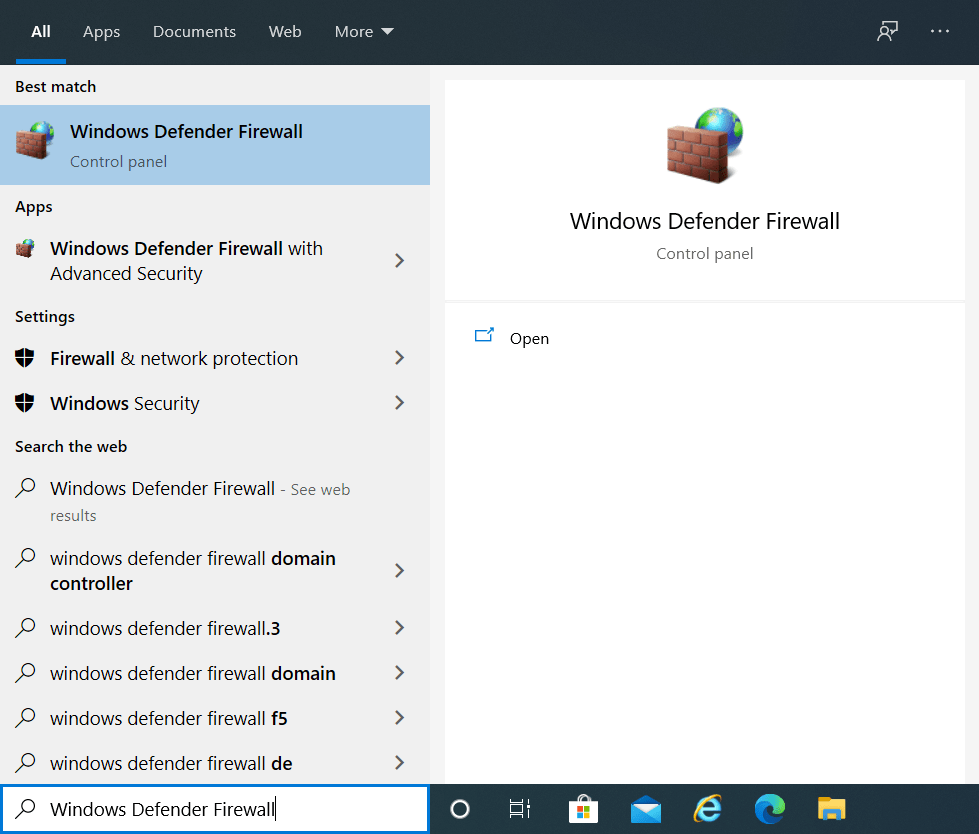
- Press the Windows logo on your keyboard, type “Windows Defender Firewall” (without quotes), and hit “Enter”.

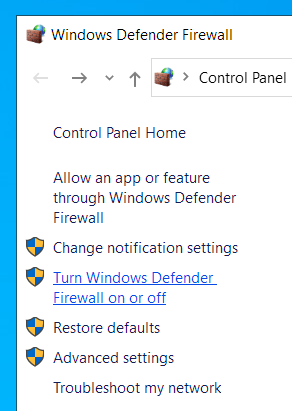
- On the “Windows Defender Firewall” screen, select “Turn Windows Defender Firewall on or off” in the left sidebar.

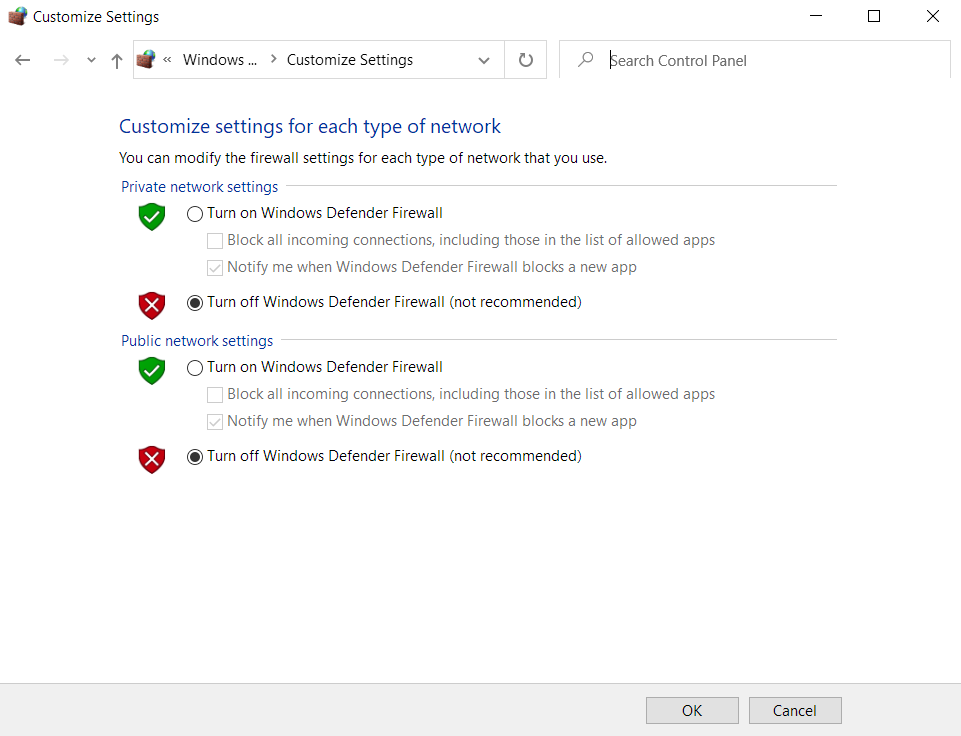
- Click on the “Turn off Windows Defender Firewall (not recommended)” radio buttons for both the “Private network settings” and “Public network settings” options.

- Click on “OK” to apply these settings and exit the Control Panel.
- Now, try installing Windows 10 updates to see if you run into the Windows Update error 0x80070026.
Solution 2: Run the Windows Update Troubleshooter
Before you start applying more sophisticated solutions, try running the built-in Windows Update troubleshooter to check if this resolves your issue. This tool can be useful when trying to fix update errors whose origin you can’t pinpoint.
Here are the guidelines on how to run the Windows Update troubleshooter:
- Press the Win + I keyboard shortcut to launch the Windows Settings app.
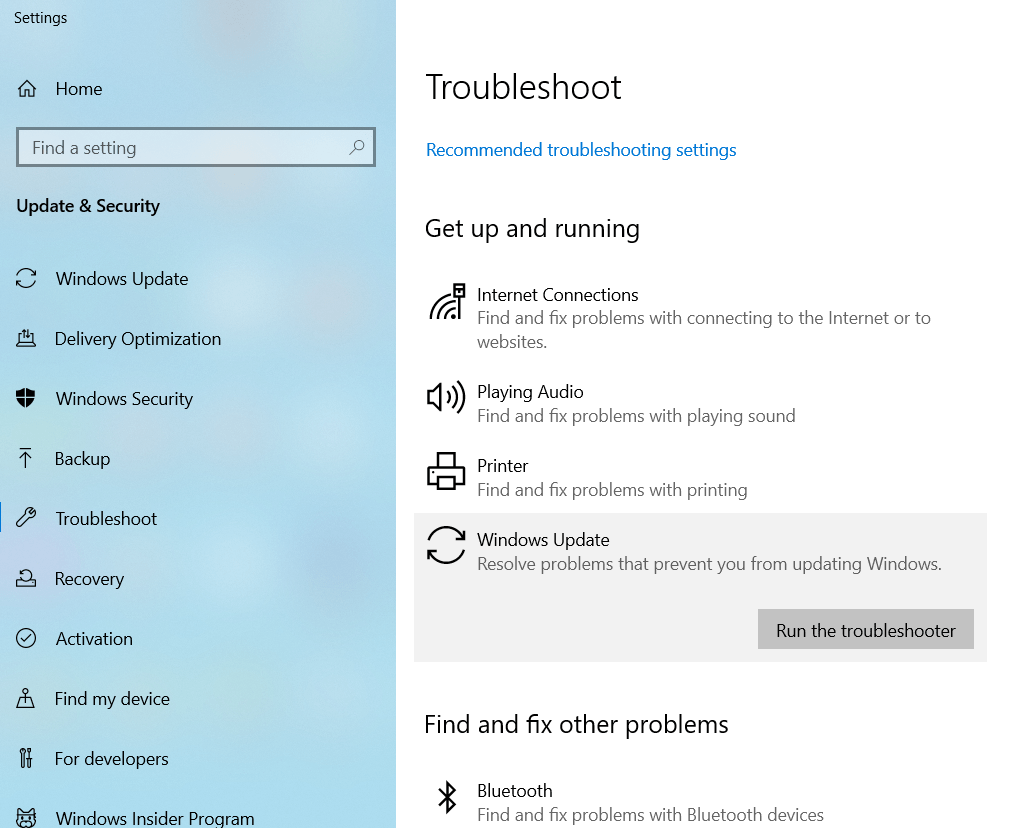
- In the “Find a setting” text box, type “Troubleshoot” (without quotes), and select “Troubleshoot other problems”.

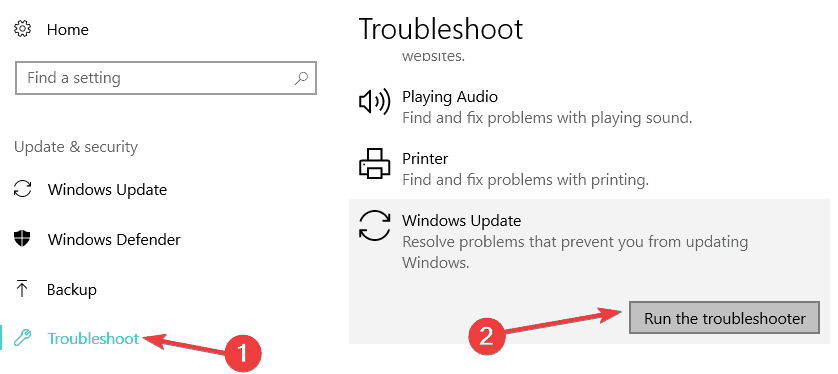
- On the next page, find “Windows Update” and click on it once to reveal the “Run the troubleshooter” button.

- Click this button to initiate the troubleshooting process. If Windows detects any errors, it will attempt to fix them. Apply any suggestions displayed.

Solution 3: Empty the Contents of the Temp Folder
The temporary folder is where Windows stores temporary files when you run various processes. These files are useful and may help programs load faster the next time you want to access them.
Despite their usefulness, temporary files can get corrupted and end up interfering with the running processes, including the installation of Windows updates. To prevent this from happening, it’s advisable to clear the temp folder on your PC.
Here’s how:
- Restart your computer and log in using your administrator account.
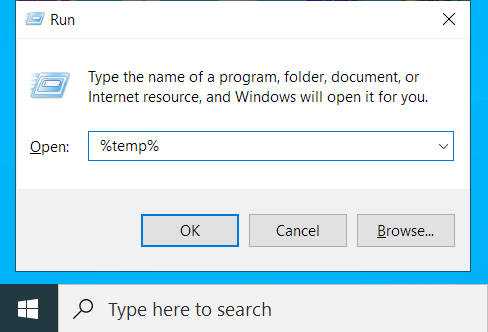
- Press the Win + R keyboard shortcut, type %temp% into the “Run” dialog box, and hit “Enter”.

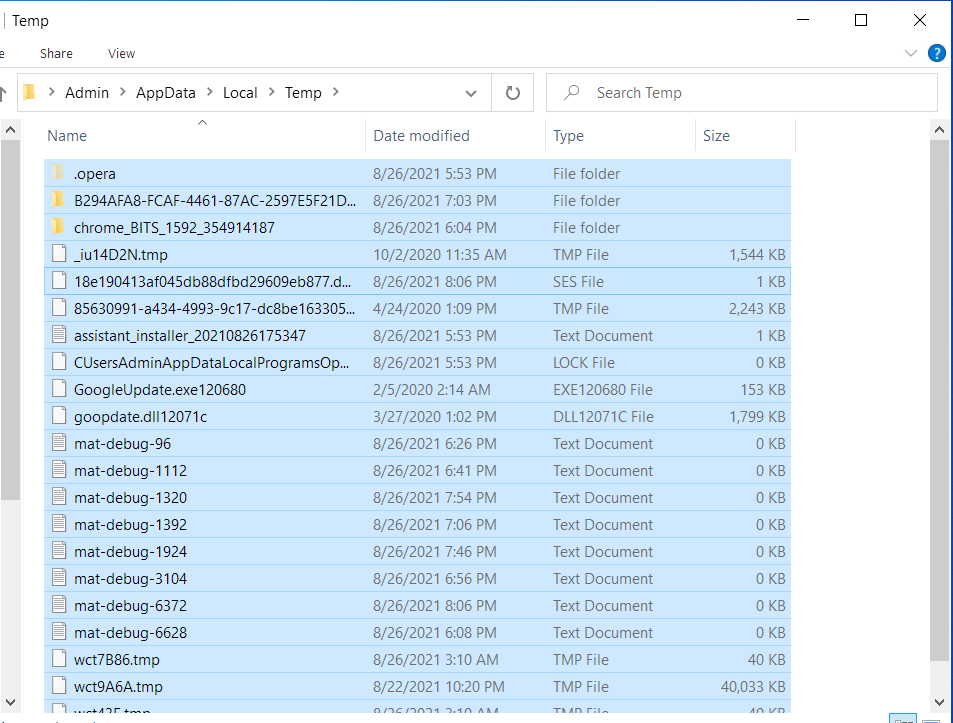
- Select everything in this folder using the Ctrl + A shortcut and hit the “Delete” button.

Now, go back to “Settings” and try updating your Windows 10 PC to check if the error has been resolved.
A faster and safer way of clearing the temp folder, along with removing PC junk, is to use reliable PC optimization software like Auslogics BoostSpeed. This program scans your system, detects all speed-reducing and error-causing issues, and attempts to fix them.
BoostSpeed offers you more than a dozen PC optimization tools, including Registry Cleaner, Disk Defrag, Duplicate File Finder, Internet Optimizer, Empty Folder Cleaner, and Deep Disk Cleaner, to name but a few.
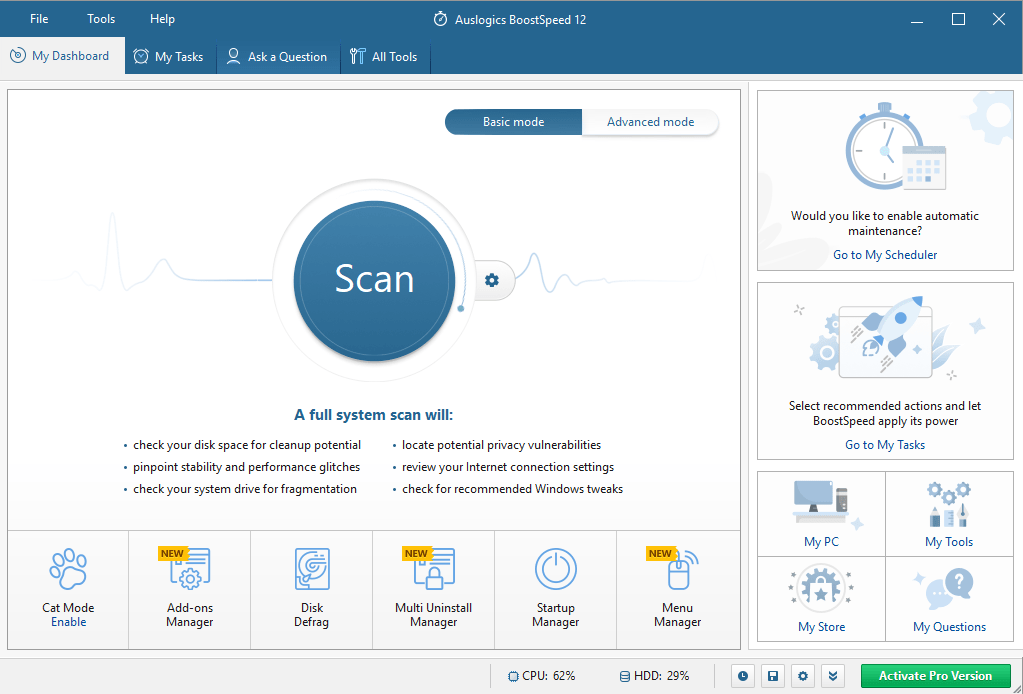
The Delete Temp Files option is accessible via the Clean Up tab. All you have to do is click the Deep Disk Cleaner button to view a list of system and application temporary files that have accumulated on your drives. You can easily select the files you want to be removed from your system as they are conveniently categorized into five groups, namely Web Cache, System Files, Application Files, Temporary Files, and Advanced. Once selected, click on the “Clean up” button. You’ll also find the option to back up the changes, just in case you need to restore some files.
You can also run the Registry Cleaner tool to eliminate corrupted or outdated registry entries to fix and prevent random freezes and crashes and other system errors. Running Auslogics BoostSpeed regularly ensures your system’s overall stability and improved performance.
Solution 4: Run the SFC and DISM Tools
Another solution to the Windows Update error code 0x80070026 is to fix corruption in your system files. For this, we’ll use built-in Windows tools such as System File Checker (SFC) and Deployment Image Servicing and Management (DISM).
The SFC utility scans for corrupted system files and attempts to restore them with a cached copy. To use this tool to fix the error 0x80070026, follow these steps:
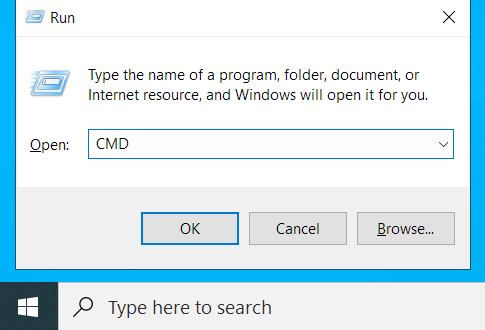
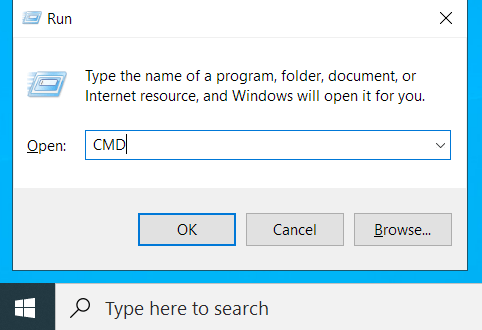
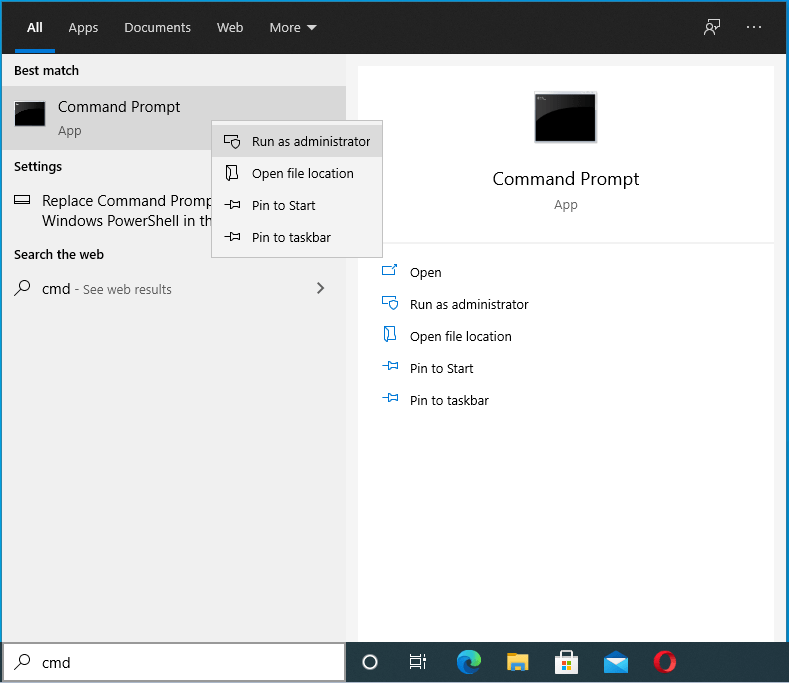
- Run the Command Prompt as an administrator. To do that, press the Win + R shortcut, type CMD into the “Run” text box, and press the Ctrl + Shift + Enter shortcut.

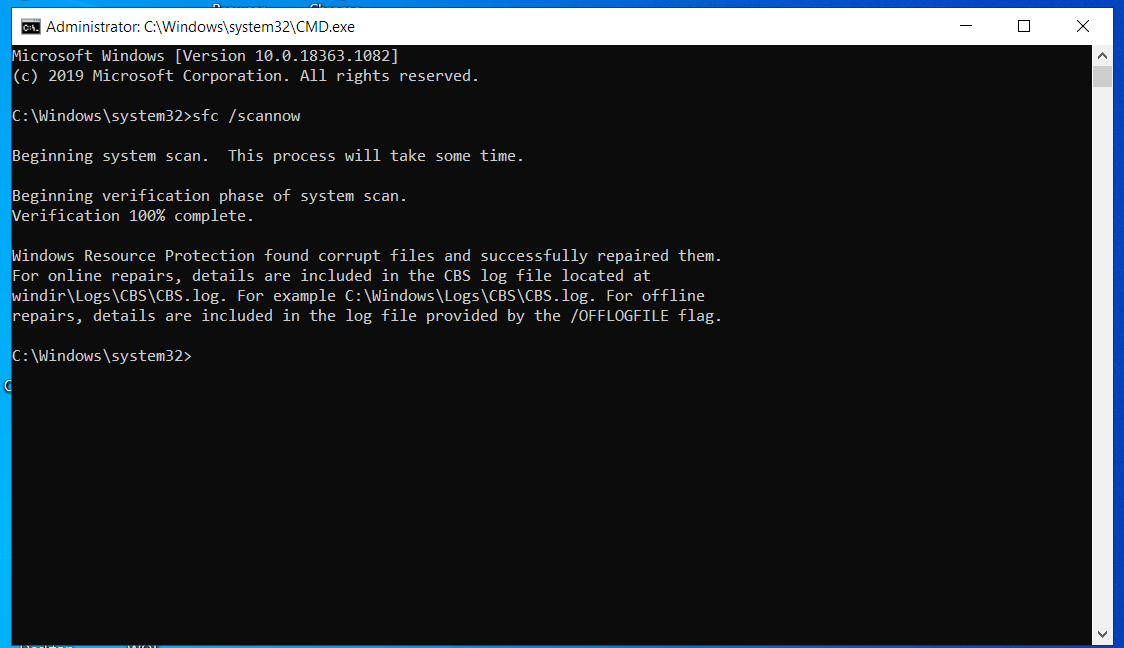
- In the elevated Command Prompt, type or paste the command sfc /scannow and press “Enter”. Wait for the scan to be completed so that the damaged files can be fixed.

- If the process is successful, you’ll see the notification “Windows Resource Protection found corrupt files and successfully repaired them”.

- Reboot your Windows 10 PC and try running Windows Update again to check if the error still shows up.
If it does, you should run the DISM utility. This tool manages Windows Update files, and it can be useful in this scenario. Here is how to use the tool:
- Open an elevated Command Prompt as outlined in step 1 above.

- Type or paste the following command lines and press “Enter” after each one:
- Reboot your PC and check if the Windows updates will now install without fail.
Solution 5: Reset Windows Update Components
Like we mentioned earlier, the Windows Update service should be functioning properly for Windows to install all updates successfully. If something’s wrong with this feature, then it might explain why you’re getting the Windows Update error code 0x80070026.
There are two main folders that contain all the information related to the updates you perform on your Windows 10 PC. These are the SoftwareDistribution and Catroot2 folders, and you will need to rename them. You will also need to restart certain Windows Update services.
Here is what you should do:
- Launch the Command Prompt as an admin as shown above.

- Type the following commands, hitting “Enter” after each one:
- Next, rename the Catroot2 and SoftwareDistribution folders. To do that, copy and paste the commands ren C:\\Windows\\System32\\catroot2 Catroot2.old and ren C:\\Windows\\SoftwareDistribution SoftwareDistribution.old, and hit “Enter” after each one.
- Finalize the process by restarting MSI Installer, Windows Update, Cryptographic Service, and BITS. To do so, copy and paste the commands below one after the other, hitting the “Enter” key after each one:
- net start wuauserv
- net start cryptSvc
- net start bits
- net start msiserver
- Exit the Command Prompt and try installing the updates to check if the error code 0x80070026 has been rectified.
Solution 6: Try Using the Windows Media Creation Tool
Sometimes, when having trouble installing Windows updates, the Windows Media Creation Tool might come in handy. Here is how to use it:
- Go to the official Microsoft website to download Windows 10 installation media.
- Select “Run”. You need to be an administrator to use this tool.
- On the “What do you want to do?” page, choose “Upgrade this PC now” and select “Next”.
- Wait for the necessary files to be downloaded and the upgrade process to complete.
- Lastly, restart your PC.
This solution should fix the Windows Update error code 0x80070026.
Solution 7: Try Installing the Updates Manually
If you’re still getting the error code 0x80070026 when trying to update Windows 10, you can try installing the latest Windows patches by going to Microsoft’s Update Catalog page. Once on this page, enter the KB numbers of the updates you want to install and click the “Download” button.
Likewise, if you want to install the latest driver updates, visit the manufacturers’ websites and download the updates from there.
Solution 8: Temporarily Disable Your Proxy Connection
If you’re using a proxy connection on your Windows 10 PC, it may be the culprit behind the error code 0x80070026. Try disabling it to check if this fixes the problem. Here’s how:
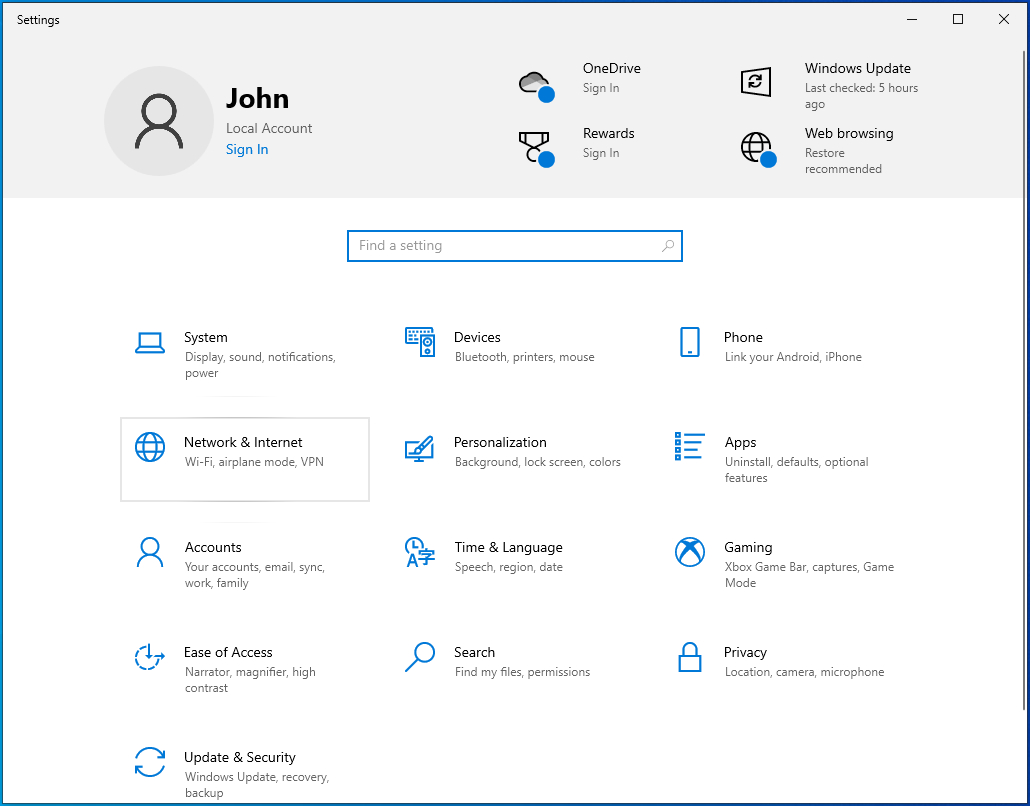
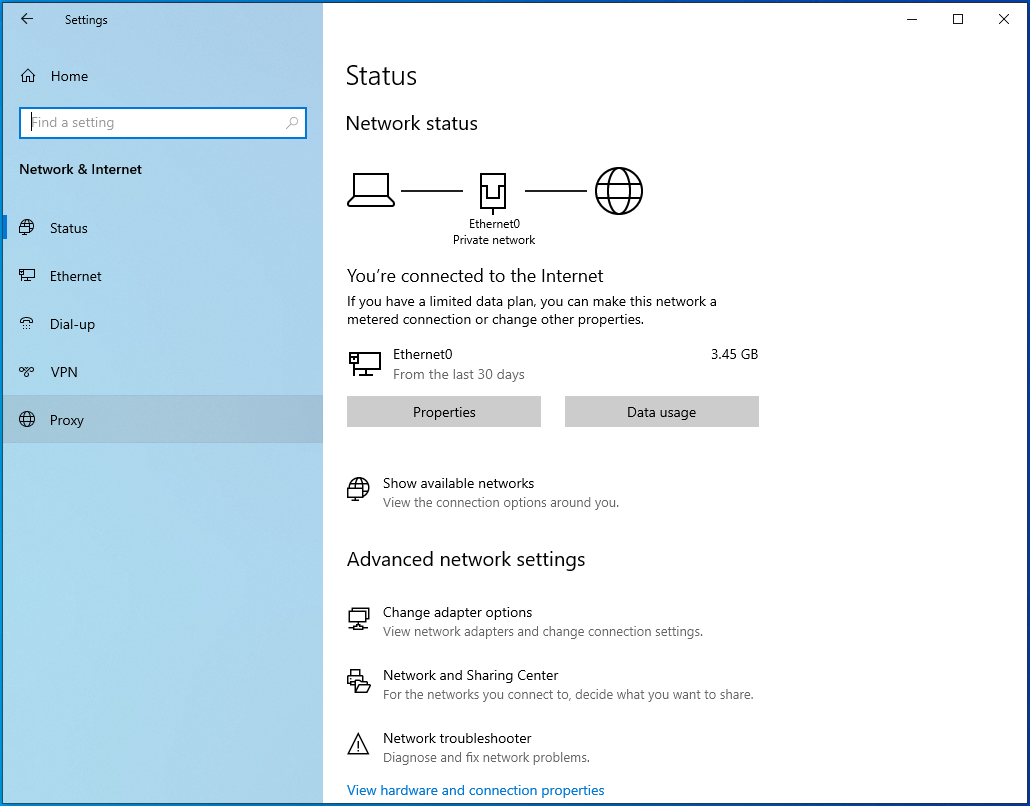
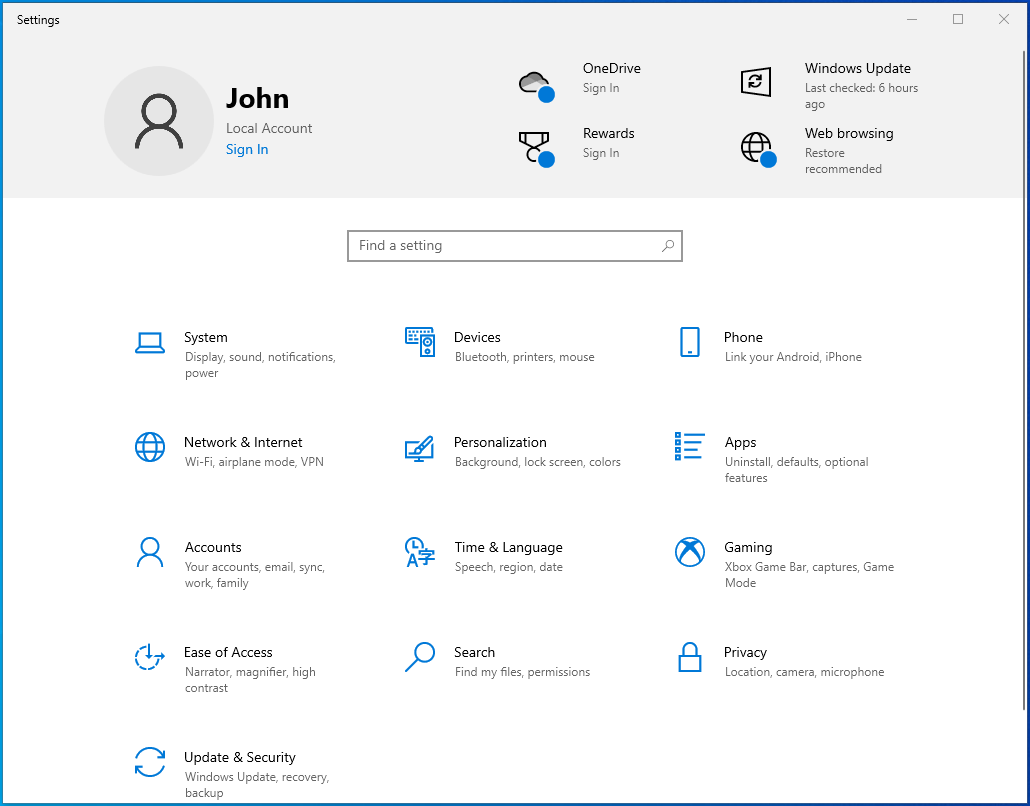
- Open Windows Settings and select “Network & Internet”.

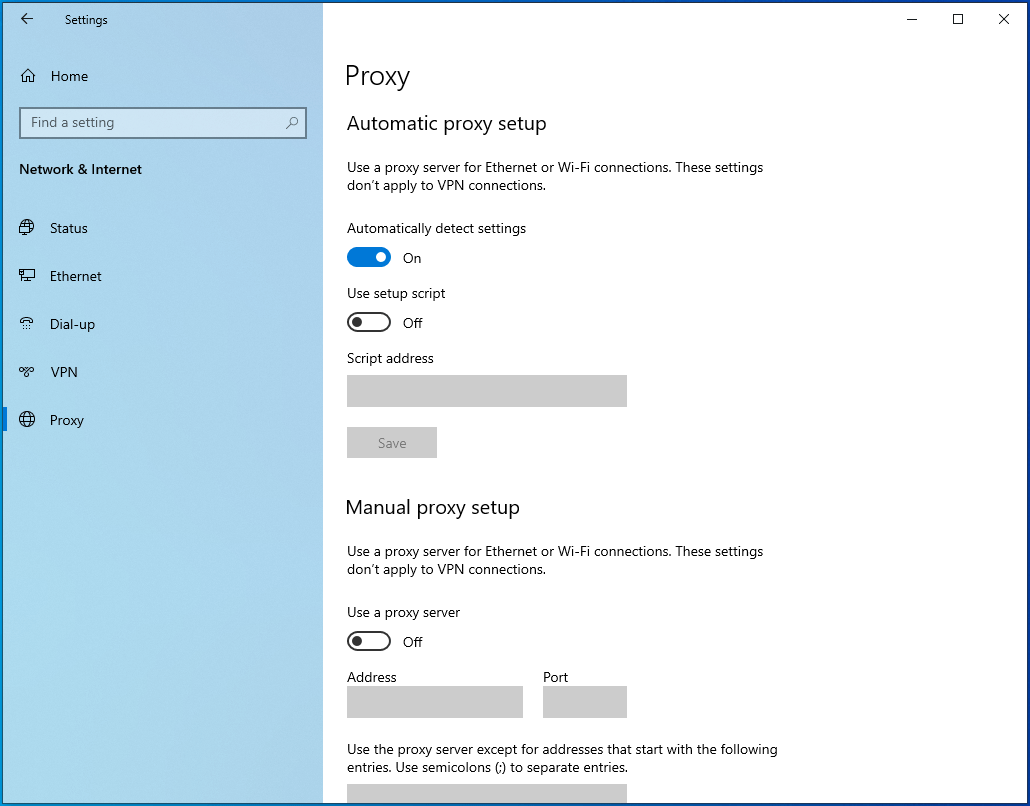
- Click on “Proxy” in the left sidebar.
- On the right sidebar, toggle the “Automatically detect settings” to “On”.
- Under “Manual proxy setup”, toggle the “Use a proxy server” button to “Off”.
- Now, try running Windows Update again to see if it works this time around.
If you don’t use a proxy, skip this solution.
Solution 9: Reset Your PC
If none of the solutions above are fruitful in fixing the Windows Update error code 0x80070026, you may have to reset your PC. Be sure to back up important data before you proceed since resetting your PC may delete some files. It’s advisable to back up the files to an external hard drive. Once you’re done, follow these instructions:
- Open your “Settings” app using the Win + I shortcut.
- Go to Update & Security > Recovery.
- Under “Reset this PC”, click on the “Get started” button to initiate the reset process. Follow the on-screen prompts to finalize resetting Windows.
- Once you are done, check if the Windows Update feature is functioning as expected. If it does, you should no longer encounter the update error code 0x80070026.
We hope the solutions in this post work for you. If you have additional information regarding the error code 0x80070026, feel free to contribute by commenting below.