![]()
When clicking in the «Verify Email Address» button in the verify email, I get the following error when using either Sendgrid or AWS SES:
403
Invalid signature.
GO HOME
However, when i test in Mailtrap it works and the email address is verified!
![]()
![]()
I have the same problem. laravel version v5.7.19
![]()
@Claud I fixed the issue by changing the APP_URL to match the domain the request is coming in on, obviously you need to config:cache etc.
Hope this helps 
![]()
I fixed the issue by changing the APP_URL to match the domain the request is coming in on, obviously you need to config:cache etc.
Wow, it took me a few hours to stumble on this and resolve my issue.
![]()
![]()
![]()
The same problem in Laravel 5.8.10
@Claud I fixed the issue by changing the APP_URL to match the domain the request is coming in on, obviously you need to config:cache etc.
Hope this helps

This doesn’t help(
![]()
I have the same problem. I made the request from postman for an api route, and I’m going in to check the email by browser.
Would I have any conflicts if I did so? The above solution did not solve my problem either.
![]()
For me the problem was that I had enabled valet secure, so all my url’s were changed to https. It was still signing the url’s with http, so of course it wasn’t valid when it checked with a url from https.
![]()
this continues happened on laravel 5.8.31 if time expires you got error 403.
![]()
Hello, i’m working on Laravel 5.8.15 and i have the same error !
I did set the .env file
APP_ENV=production
APP_URL=https://domain.co/
APP_USE_HTTPS=true
in the AppServiceProvider
public function boot(UrlGenerator $url)
{
URL::forceScheme(‘https’);
}
In web.php and api.php
if (App::environment(‘production’)) {
URL::forceScheme(‘https’);
}
and in the TrustProxies file
protected $proxies = ‘*’;
but I still getting the same error (403 | Invalid signature.) on the email verification!
someone can helpme ?
![]()
This issue is mainly introduced by adding following in your code,
URL::forceScheme('https');
If you are just trying to fix SSL URL links (When SSL is terminated in your load balancer & laravel server is receiving requests on port 80), you should not above approach. Instead, use approach given by Laravel. It will take care of exact this scenario.
https://laravel.com/docs/6.x/requests#configuring-trusted-proxies
If you have to have forceShceme anyway, make sure you configure TrustedProxies
![]()
It’s 2020 and I still get the same problem on production with Laradock.
I have applied several times
$ php artisan key:generate
I have updated my .env file at APP_URL to match the https://my-domain.com, which works well, since right at mailtrap, the email verify URL matches perfectly the domain.
So then why do I still get that 403 invalid signature error?
I tried URL::forceScheme('https'); and it didn’t work. I don’t feel like trying TrustedProxies. Will it actually work?
Does clear cache work?
Does anybody know how to fix this?
![]()
![]()
laravel
locked and limited conversation to collaborators
Aug 11, 2020
I have enabled Email verification on my laravel site.
If they dont do it immediatly, but after a day or two, the link times out.. and they land on a page with 403-invalid signature.
From there they cannot do anything else beside manually editing the link. this is the point where I already lost some registrations. Is there a way to:
a) make this timeout much longer
b) in case of timeout/error land on a page that actually makes sense to the user?
asked May 2, 2020 at 11:33
![]()
sharkyenergysharkyenergy
3,84210 gold badges46 silver badges98 bronze badges
@Omer YILMAZ answears your «a)» call and I am answearing your «b)» call:
We should disable signed Middleware that validates the URL signature (expiration) and automatically shows 403 page for the verification route, and then we should create a custom logic to validate the URL signature doing whatever we would like if it is invalid (expired).
Laravel 5.7, 5.8, 6.x and 7.x
Changing Auth\VerificationController provided by Laravel:
<?php

namespace App\Http\Controllers\Auth;

use App\Http\Controllers\Controller;
use App\Providers\RouteServiceProvider;
use Illuminate\Foundation\Auth\VerifiesEmails;

class VerificationController extends Controller
{
    use VerifiesEmails {
        verify as verifyTrait;
    }

    protected $redirectTo = '/';

    public function __construct()
    {
        $this->middleware('auth');
        // $this->middleware('signed')->only('verify'); <-- remove this: it is causing 403 for expired email verification URLs
        $this->middleware('throttle:6,1')->only('verify');
    }

    public function verify(Request $request)
    {
        if (!$request->hasValidSignature()) {
            // some custom message
        }
        else {
            return $this->verifyTrait($request);
        }
    }
}
Laravel 8.x
Changing the example provided by Laravel:
use Illuminate\Foundation\Auth\EmailVerificationRequest;
use Illuminate\Http\Request;

Route::get('/email/verify/{id}/{hash}', function (EmailVerificationRequest $request) {
    if (!$request->hasValidSignature()) {
        // some custom message
    }
    else {
        $request->fulfill();

        return redirect('/home');
    }
})->middleware(['auth', /*'signed' <-- remove this*/])->name('verification.verify');
answered Mar 24, 2021 at 15:44
![]()
1
In laravel 5.8 or above add this lines to config/auth.php
'verification' => [
    'expire' => 525600, // One year in minutes
],
answered May 2, 2020 at 11:46
![]()
Omer YILMAZOmer YILMAZ
1,2341 gold badge7 silver badges15 bronze badges
2
The following solution worked for me. Go to the next folder, app/Http/Middleware, and edit the following file TrustProxies.php. Change protected $proxies; edit for the following protected $proxies = ‘*’;
namespace App\Http\Middleware;

use Fideloper\Proxy\TrustProxies as Middleware;

class TrustProxies extends Middleware
{
    protected $proxies  = '*';
![]()
Karl Hill
13k5 gold badges59 silver badges95 bronze badges
answered Apr 27, 2022 at 20:53
![]()

-
#2
Здравствуйте.
Попробуйте выйти из своей учетной записи на нашем сайте и вновь зайти. После этого снова пройдите по ссылке в письме.
Убедитесь, что Вы залогинены на ту учетную запись, которую хотите подтвердить, именно в том браузере, в котором переходите по ссылке.

-
#4
Не помогает выходил и входил как вы написали несколько раз в одном браузере, результат тот же((( учетная запись у меня только одна
Если проблема актуальна, то удалите старые письма и попробуйте ещё раз. Предварительно заново авторизуйтесь в личном кабинете
#1 27.02.2020 10:51:32
Verify Email Address Laravel 6.0 ошибка 403 Invalid signature.
При верификации электронной почты выскакивает ошибка 403 Invalid signature.
Все делал как описано в документации https://laravel.com/docs/6.x/verification , на почту приходит письмо со ссылкой https://www.mysite.fun/email/verify/100 … d511f788fd но при переходе по ссылке выскакивает указанная ошибка. Причем когда тестил локально то все работало, почта подтверждалась, а на хосте не работает.
Изменено Blag (27.02.2020 10:52:22)
#2 28.02.2020 10:54:48
Re: Verify Email Address Laravel 6.0 ошибка 403 Invalid signature.
после изучения этой проблемы выяснилось что когда урл возвращается в приложение то туда добавляются некоторые поля /email/verify/1000017/969d08de8def0191793ac93159abcd46b8104a23?_url=%2Femail%2Fverify%2F1000017%2F969d05de8def0191793ac93159abcd46b5104a23&expires=1582806418
подчеркнул те данные которых не должно было быть…что бы все начало работать пришлось переопределить посредника , который отвечает за проверку валидности сингатуры…
#3 28.02.2020 11:00:40
Re: Verify Email Address Laravel 6.0 ошибка 403 Invalid signature.
новый посредник выглядит так
<?php
namespace App\Http\Middleware;

use Closure;
use Illuminate\Routing\Exceptions\InvalidSignatureException;
use Illuminate\Http\Request;
use Illuminate\Support\Arr;
use Illuminate\Support\Facades\App;
use Illuminate\Support\Carbon;
use Illuminate\Support\Facades\Log;

class ValidateHttpsSignature
{
    var $keyResolver;

    public function __construct()
    {
        $this->keyResolver = function () {
            return App::make('config')->get('app.key');
        };
    }

    /**
     * gebaseerd op vendor/laravel/framework/src/Illuminate/Routing/Middleware/ValidateSignature.php
     * maar zorgt er voor dat een url altijd als https behandeld wordt. dit fixt het feit dat
     * laravel achter een rewrite proxy draait en urls binnenkrijgt als http.
     *
     * Handle an incoming request.
     *
     * @param  \Illuminate\Http\Request  $request
     * @param  \Closure  $next
     * @return mixed
     */
    public function handle($request, Closure $next)
    {
        Log::info('class ValidateHttpsSignature в методе handle');
        Log::info($request);
        if ($this->hasValidSignature($request)) {
            return $next($request);
        }
        throw new InvalidSignatureException;

    }

    /**
     * Determine if the given request has a valid signature.
     * copied and modified from
     * vendor/laravel/framework/src/Illuminate/Routing/UrlGenerator.php:363
     * @param  \Illuminate\Http\Request  $request
     * @param  bool  $absolute
     * @return bool
     */
    public function hasValidSignature(Request $request, $absolute = true)
    {

        $url = $absolute ? $request->url() : '/'.$request->path();
        $url = str_replace("http://","https://", $url);
//        $original = rtrim($url.'?'.Arr::query(
//                Arr::except($request->query(), 'signature')
//            ), '?');
        $original = rtrim($url.'?expires='.$request->expires);

        $expires = $request->query('expires');
        $signature = hash_hmac('sha256', $original, call_user_func($this->keyResolver));

        return  hash_equals($signature, (string) $request->query('signature', '')) &&
            ! ($expires && Carbon::now()->getTimestamp() > $expires);

    }

}
#4 28.02.2020 11:05:56
Re: Verify Email Address Laravel 6.0 ошибка 403 Invalid signature.
ну и дальше в контроллере VerificationController namespace App\Http\Controllers\Auth; в конструкторе меняем посредника
//        $this->middleware('signed')->only('verify');
        $this->middleware('customsigned')->only('verify');
и регистрируем его в Kernel namespace App\Http;
'customsigned' => \App\Http\Middleware\ValidateHttpsSignature::class,решение временное пока не выясним что добавляет лишние поля в урл.
Что означает ошибка http 403 Forbidden — доступ запрещен
Уведомление 403 (Forbidden) – причисляется к серверным ошибкам, но оно не сигнализирует о техническом сбое, а является вежливым ответом сервера: «Извините, вам сюда нельзя».

Сообщение возникает на экране браузера в том случае, если вы обратились к интернет-ресурсу, директории, папке, файлу или скрипту, в доступе к которому вам отказано.
Причин того, почему вам отказывают в доступе, может быть множество. От банального недоразумения или сбоя в работе сервера, до преднамеренного закрытия части виртуального пространства по политическим мотивам или с целью сохранения конфиденциальной информации.
Доступ к сайту запретили для целого региона или страны
Как только происходит вход в виртуальное пространство, посетителю присваивается номер – IP. Делает это провайдер, предоставляющий доступ в интернет. IP состоит из четырех групп цифр, по два или три знака в каждой. Группы разделены точками. Самая важная для интернета маркировка – две первых группы цифр. По ней можно определить национальную принадлежность посетителя.
Например, сервисы от гугла доступны не во всех странах. Вот так будет выглядеть окно ошибки:
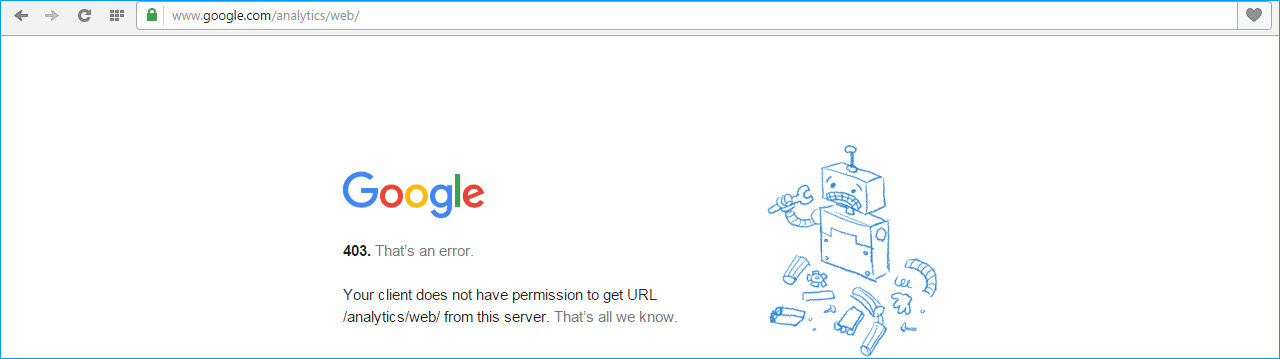
Когда страны имеют друг к другу претензии, то по команде «сверху» все IP адреса, принадлежащие одной стране, блокируются. Если вы попытались пройти на интересный зарубежный сайт и получили в ответ уведомление 403 Forbidden, то наверняка для этой страны вы персона non grata, хотя ничего плохого ей и не делали. Подвести пользователя под монастырь способен и провайдер. Если он пользуется списанным зарубежным оборудованием, то национальный идентификатор IP может отличаться от действительного географического положения.
Рядовому пользователю можно не страшиться того, что заблокируют именно его. Дело в том, что обычные пользователи Всемирной сети получают «плавающий» IP, изменяющийся всякий раз, как происходит выход в интернет. Постоянным номером пользуются только те, у кого «выделенная линия». А это означает дополнительные расходы на оплату выделенного IP адреса ежемесячно. Поэтому, если вы при попытке входа в любимую социальную сеть получили «отлуп» в виде ошибки «403 – в доступе отказано», попробуйте зарегистрироваться еще раз и зайти под другим логином и паролем. В крайнем случае, если вы чисты как ангел, повторите попытку через несколько часов или на другой день.
Нарушена работа Вашего интернет-сайта вследствие изменения кода — как устранить
Случается и так, что вы обращаетесь к собственному сайту, но видите сообщение об отказе в доступе. Этому есть три объяснения:
- сайт атаковали хакеры и поломали индексный файл;
- вы переносили сайт самостоятельно и положили дистрибутив не в ту папку;
- вы пытаетесь зайти с IP-адреса, доступ с которого запрещен.
Индексные файлы – это те, к которым сервер, получив адресный запрос, обращается в первую очередь. Они так называются потому, что в названии первым идет слово index. Если сайт статичный, и написан на HTML, то индексный файл выглядит как index.html. У активных интернет-ресурсов, работающих на системах управления контентом, индексные файлы имеют расширение php. В Joomla их два – index1 и index2. Обратите внимание, что если сервер хостера работает на ОС Linux, то ему небезразличен регистр надписи. Index и index – для него совершенно разные сущности. Примите за правило, что индексные файлы пишутся со строчной буквы. Взять чистый и работоспособный файл index для систем управления контентом можно из дистрибутива, распакованного на домашнем компьютере.
Если вы обнаружили, что дистрибутив сайта лежит не в той папке, которая является «корневой», а, например, в предназначенной для скриптов (cgi-bin) то не трудитесь переносить, а переименуйте директории.
Ищете надежный хостинг с профессиональной техподдержкой? Посмотрите наши тарифы на услуги хостинга!
Действия с индексными файлами и переименованиями папок можно совершать по протоколу FTP, но лучше, если вы войдете в панель управления на хосте. В этом случае можно увидеть следы злоумышленников, если они взломали сайт. Дело в том, что любое изменение в директории или файле фиксируется. Причем указывается не только дата, но и время изменения. Проверьте папки и файлы, которые были изменены без вашего ведома, и вы наверняка найдете там что-то «лишнее» или вирусный код, начинающийся с ?php eval или iframe.
Если папки и файлы на месте, но на сайт вас так и не пускают, то обратитесь в техническую поддержку.
Ошибка 403 выдается при попытке входа на опредленную страницу или папку
Гораздо чаще случается, когда не дают доступ к одной из страниц, или «403» вылезает при попытке совершить действие. Например, при нажатии на кнопку «Купить», чем нередко грешит компонент Virtue Mart после переноса сайта с локального сервера вебмастера на хост. Такие отказы в доступе вредны для бизнеса. Ведь пользователь не захочет обращаться в техподдержку, чтобы ему дали возможность купить что-либо именно в этом интернет-магазине. Он пойдет в другое место.
Локальные отказы спровоцированы тем, что папкам и директориям в корне сайта прописаны ненадлежащие права доступа. Они назначаются программой CHMOD, имеющей очень дружелюбный интерфейс. Ко всякой папке и к каждому файлу обращаются три группы пользователей:
- хозяин сайта или суперпользователи;
- группа доверенных лиц (администраторы);
- посетители сайта.
Программа CHMOD устанавливает то, что им позволено совершать с файлом или папкой:
- 1) читать – обозначается цифрой 7 или буквой r;
- 2) писать (изменять) – цифра 7 или буква w;
- 3) исполнять – та же семерка или буква х.
Если файлу назначили права доступа 777 (в буквенном коде, rwx–rwx–rwx), то он открыт для всех желающих вставить вирусный код, изменить смысл текста. Как вы понимаете, это неприемлемый вариант для безопасности ресурса.
Наиболее распространенной директивой прав является 755, в буквенном виде выглядящая как rwx–r-x–r-x. Если в первой группе не будет буквы r, то к файлу или папке не допустят даже хозяина сайта. Пользователю запретят совершать действия (покупки, отправку сообщений и другие интерактивные функции), если в третьей группе CНMOD не будет буквы х.
При установке прав на файл вам не требуется ничего знать. В корневой папке сайта список файлов и директорий представлен в виде в таблицы. В ячейке возле файла кликните по крохотной черточке или букве, и она изменит значение. Если же панель управления требует от вас цифры, то смело пишите 755. Это универсальная директива, подходящая к большинству случаев.
Провоцируем 403 сами
Вы можете сами спровоцировать появление ошибки 403 для выбранной группы пользователей или одного конкретного злодея хакера или спамера. Для этого используйте служебный файл .htaccess. В составе дистрибутива CMS Joomla он есть под именем htaccess.txt. Переименуйте файл, не забыв поставить точку перед именем. Его несложно создать и самостоятельно. Используйте для этого программу Notepad ++.
Если в файле написать:

, то вы закроете доступ к сайту всем, кроме заданного IP. Учитывая, что IP злоумышленника меняется, нежелательный IP адрес указывается в директиве Deny. Две следующие за ними заполните одной цифрой 0. Вы сами можете устроить бан для всех посетителей из конкретной страны, если знаете национальный код. В этом случае после deny from напишите, например: 83.4.0.0/14. Цифра 14 после слеша указывает, что надо блокировать все IP, начинающиеся с 83.4.
IP обидчика (спамера, взломщика) вычисляется двумя путями:
- компоненты CMS (форум) пишут этот адрес, сообщая администратору о новом посте.
- в папке log-файлов на хосте.
Копаться в «логах» придется долго, но оно того стоит. Выберите IP того, кто посещал сайт в ту минуту, когда файл или папка были несанкционированно изменены или пришел спамерский пост. А потом заблокируйте вредителя.
Также можно дополнительно защитить особо важные директории или файлы. В Joomla это папка Libraries.
Создайте файл .htaccess, напишите в нем:
Order allow deny
Deny from all
, потом положите его в защищаемую папку. Тот, кто наберет адрес сайта и поставит после него /libraries, получит на экране браузера уведомление об ошибке 403.
Если Вы ищете хостинг для определенной системы управления контентом – загляните на нашу страницу CMS хостинга.
Как исправить 403 ошибку
Обойти запрет на посещение ресурса можно. Это несложный прием, которым пользуются те, кто не желает светить свою персону в интернете. Чтобы избавиться от 403 ошибки — используются прокси-серверы. Они подменяют провайдера и становятся посредниками между вами и Всемирной сетью. Поэтому IP меняет национальность или иные признаки географической принадлежности.
Ресурсы, предоставляющие такие услуги, функционируют как в России, так и за ее пределами. Обычно они платные. Обращение к ним не расценивается как криминал. Но и не приветствуется.
Кроме тех, кто предоставляет услуги прокси-сервера именно с целью сокрытия личности посетителя интернета, существуют и вполне легальные прокси, обеспечивающие функциональность связи. Например, канал GPRS. Если использовать мобильный телефон как модем, то IP меняется даже в течение одного сеанса выхода в интернет.
Это объясняется тем, что голосовые контакты в мобильной связи пользуются приоритетом, а для пакетной передачи данных выделяются оставшиеся каналы. Также пользуются прокси-серверами провайдеры несимметричного выхода в интернет, когда запрос идет по GPRS, а ответ поступает по каналу спутниковой связи.
iPipe – надёжный хостинг-провайдер с опытом работы более 15 лет.
Мы предлагаем:
- Виртуальные серверы с NVMe SSD дисками от 299 руб/мес
- Безлимитный хостинг на SSD дисках от 142 руб/мес
- Выделенные серверы в наличии и под заказ
- Регистрацию доменов в более 350 зонах
- The Primary Bits
- Getting an SSL cert with Let’s Encrypt, Nginx, and Docker
- 403 Invalid Signature and Email Verification
- The problem with websockets? Nginx of course!
- Final words
So, I just got through the process of deploying a Docker application with Websockets, Nginx, Let’s Encrypt.
To put it lightly, it was rough. Lots of hair-pulling days and nights of little to no progress, but a whole lot of lessons on what does not work.
After many days of going four search results deep with all purple links, my coworker joked that I should write an article on deploying with this configuration. Given the amount of work it required, I think it should be documented for others who might be running a similar configuration.
Project layout and structure
If you are here, I am assuming you have a Dockerized Laravel application that you are attempting to deploy to some server like AWS EC2, Digital Ocean, GCP, Azure, etc. But what’s this, your Nginx configuration is causing issues with SSL/Websockets? I hope this can help a bit.
The primary bits
- Nginx configuration file
- Docker Compose file
- Environment variables file
These are the configuration files pre-deployment, some oddities:
Mapping port 6001 to our local machine to connect to websockets, I think I need to configure the nginx proxy for that too but it’s easier in development to just do localhost. It will be fixed in production, along with only exposing port 443
docker-compose.yml
version: '3.7'
services:
  myapp-app:
    build:
      args:
        user: sgadmin
        uid: 1000
      context: ./
      dockerfile: Dockerfile
    image: myapp
    container_name: myapp-app
    restart: unless-stopped
    working_dir: /var/www/
    volumes:
      - ./:/var/www
    networks:
      - myapp

  myapp-db:
    image: mariadb
    container_name: myapp-db
    depends_on:
      - myapp-redis
    restart: unless-stopped
    environment:
      MYSQL_DATABASE: ${DB_DATABASE}
      MYSQL_ROOT_PASSWORD: ${DB_PASSWORD}
      MYSQL_PASSWORD: ${DB_PASSWORD}
      MYSQL_USER: ${DB_USERNAME}
      SERVICE_TAGS: dev
      SERVICE_NAME: mysql
    volumes:
      - ./docker-compose/mysql:/docker-entrypoint-initdb.d
    networks:
      - myapp

  myapp-websockets:
    image: myapp
    command: ['php', 'artisan', 'websockets:serve']
    container_name: myapp-websockets
    restart: unless-stopped
    working_dir: /var/www/
    volumes:
      - ./:/var/www
    ports:
      - ${LARAVEL_WEBSOCKETS_PORT}:6001
    networks:
      - myapp

  myapp-nginx:
    image: nginx:alpine
    container_name: myapp-nginx
    restart: unless-stopped
    ports:
      - ${APP_PORT}:80
    volumes:
      - ./:/var/www
      - ./docker-compose/nginx/local:/etc/nginx/conf.d/
    networks:
      - myapp

networks:
  myapp:
    driver: bridge
docker-compose/nginx/local/nginx.conf
server {
    listen 80;
    index index.php index.html;
    error_log  /var/log/nginx/error.log;
    access_log /var/log/nginx/access.log;
    root /var/www/public;
    location ~ .php$ {
        try_files $uri =404;
        fastcgi_split_path_info ^(.+.php)(/.+)$;
        fastcgi_pass myapp-app:9000;
        fastcgi_index index.php;
        include fastcgi_params;
        fastcgi_param SCRIPT_FILENAME $document_root$fastcgi_script_name;
        fastcgi_param PATH_INFO $fastcgi_path_info;
    }
    location / {
        try_files $uri $uri/ /index.php?$query_string;
        gzip_static on;
    }
}
.env
APP_NAME=MyApp
APP_ENV=local
APP_KEY=
APP_DEBUG=true
APP_URL=http://localhost
APP_PORT=8000 other if you have conflict

NODE_ENV=development

SANCTUM_STATEFUL_DOMAINS=localhost,127.0.0.1,localhost:8000,127.0.0.1:8000 # update if port changes

LARAVEL_WEBSOCKETS_HOST=localhost
LARAVEL_WEBSOCKETS_PORT=6001
LARAVEL_WEBSOCKETS_SSL_LOCAL_CERT=
LARAVEL_WEBSOCKETS_SSL_LOCAL_PK=
LARAVEL_WEBSOCKETS_SSL_PASSPHRASE=

BROADCAST_DRIVER=pusher

PUSHER_APP_ID=myapp-websockets-channel
PUSHER_APP_KEY=myapp-wbsocks
[email protected]@
PUSHER_APP_CLUSTER=mt1

MIX_PUSHER_APP_KEY="${PUSHER_APP_KEY}"
MIX_PUSHER_APP_CLUSTER="${PUSHER_APP_CLUSTER}"
MIX_PUSHER_APP_TLS="false"

# All other env variables...
With this configuration, locally, websockets works fine. My client app can listen in and react to real time events. However, once we attempt to deploy we run into a whole bunch of issues.
Getting an SSL cert with Let’s Encrypt, Nginx, and Docker
It was simple at first, buy a server, clone the repo, and spin up the containers like I do locally. Yay! Well, http works which is unacceptable in any modern website.
So I did what any developer does, Google how to do X with Y. After failing, I looked up how to do X with Y and Z, and X with ❅. More failing, until I stumbled upon a wonderful article with many claps and a Github Repo for the script file with many stars to go with it.
I followed them to a T and what do you know, I was able to visit my HTTPS website, with a wonderful lock. Fiddle with your .env files and Laravel configuration to match the new production/HTTPS environment. Now, here is where the 403 email invalid signature appeared and caused my client to throw various errors when attempting to connect to the websockets channel.
403 Invalid Signature and Email Verification
When testing the email verification feature, I ran into the same issue as here. I couldn’t figure it out until I realized I did not modify the Nginx configuration file to fully work through HTTPS.
So I created a new NGINX configuration file ./docker-compose/nginx/prod/nginx.conf with the contents
After following the tutorial, our files should look something like this, with a few differences
./docker-compose/nginx/prod/nginx.conf
server {
    listen 80;
+   listen [::]:80;

+   location /.well-known/acme-challenge/ {
+       root /var/www/certbot;
+   }

+   return 301 https://$host$request_uri;

-   index index.php index.html;
-     error_log  /var/log/nginx/error.log;
-     access_log /var/log/nginx/access.log;
-     root /var/www/public;
-     location ~ .php$ {
-         try_files $uri =404;
-         fastcgi_split_path_info ^(.+.php)(/.+)$;
-         fastcgi_pass myapp-app:9000;
-         fastcgi_index index.php;
-         include fastcgi_params;
-         fastcgi_param SCRIPT_FILENAME $document_root$fastcgi_script_name;
-         fastcgi_param PATH_INFO $fastcgi_path_info;
-     }
-     location / {
-         try_files $uri $uri/ /index.php?$query_string;
-         gzip_static on;
-     }

}

+server {
+    listen 443 ssl http2;
+    listen [::]:443 ssl http2;
+
+    root /var/www/public;
+    server_tokens off;
+
+    access_log /var/log/nginx/access.log;
+
+    add_header X-Frame-Options "SAMEORIGIN";
+    add_header X-XSS-Protection "1; mode=block";
+    add_header X-Content-Type-Options "nosniff";
+
+    index index.html index.php;
+
+
+    location / {
+        try_files $uri $uri/ /index.php?$query_string;
+        gzip_static on;
+    }
+
+    location ~ .php$ {
+        fastcgi_split_path_info ^(.+.php)(/.+)$;
+        fastcgi_pass myapp-app:9000;
+        fastcgi_index index.php;
+        include fastcgi_params;
+        fastcgi_param SCRIPT_FILENAME $document_root$fastcgi_script_name;
+        fastcgi_param PATH_INFO $fastcgi_path_info;
+    }
+
+    client_max_body_size 20M;
+
+    gzip on;
+    gzip_disable "msie6";
+
+    tcp_nopush on;
+    tcp_nodelay on;
+
+    charset utf-8;
+
+    ssl_certificate /etc/letsencrypt/live/example.com/fullchain.pem;
+    ssl_certificate_key /etc/letsencrypt/live/example.com/privkey.pem;
+    include /etc/letsencrypt/options-ssl-nginx.conf;
+    ssl_dhparam /etc/letsencrypt/ssl-dhparams.pem;
+}
docker-compose.yml
version: '3.7'
services:
  # remaining services above

  myapp-nginx:
    image: nginx:alpine
    container_name: myapp-nginx
    restart: unless-stopped
    ports:
      - ${APP_PORT}:80
+     - ${APP_PORT}:443
    volumes:
      - ./:/var/www
-     - ./docker-compose/nginx/local:/etc/nginx/conf.d/
+     - ./docker-compose/nginx/prod:/etc/nginx/conf.d/
+     - ./docker-compose/certbot/conf:/etc/letsencrypt
+     - ./docker-compose/certbot/www:/var/www/certbot

    networks:
      - myapp

+  myapp-certbot:
+    image: certbot/certbot
+    container_name: myapp-certbot
+    volumes:
+      - ./docker-compose/certbot/conf:/etc/letsencrypt
+      - ./docker-compose/certbot/www:/var/www/certbot
+    entrypoint: "/bin/sh -c 'trap exit TERM; while :; do certbot renew; sleep 12h & wait $${!}; done;'"
+    networks:
+      - myapp

# Volumes and networks unchanged
# add certbot service and volume mappings to compose
.env
- APP_PORT=80
+ APP_PORT=443
- APP_URL=http://localhost
+ APP_URL=https://myapp.com
Once all traffic was forwarded directly to 443, instead of processing a request through HTTP first and then forwarding it to HTTPS after, the invalid signature went away. This was because passing through two proxies cause the signature to change and thus we received an invalid signature error.
I praise Travis Ryan for helping me figure this out. Before him my life was this Google page

So that was solved, but I realized my websockets connection kept failing now that our SSL configuration was complete. It took weeks to diagnose and resolve this issue, but it was also done.
The problem with websockets? Nginx of course!
Once we moved from local to production and our app was being served with SSL, the application could no longer communicate to our websockets service. It took weeks of diagnosing but it was unfortunately quite simple…
The only exposed port in our application is 443, all traffic must be reverse proxied. Begin by removing port mapping for our websockets container and modify our Nginx configuration to reverse proxy the websockets traffic as well.
docker-compose.yml
version: '3.7'
services:
  ...
  myapp-websockets:
    image: myapp
    command: ['php', 'artisan', 'websockets:serve']
    container_name: myapp-websockets
    restart: unless-stopped
    working_dir: /var/www/
    volumes:
      - ./:/var/www
-   ports:
-     - ${LARAVEL_WEBSOCKETS_PORT}:6001
    networks:
      - myapp
docker-compose/nginx/myapp.conf
...
server {
    ...
    # in the 443 block!
    ...

+    location /app/ {
+        proxy_pass             http://myapp-websockets:6001;
+        # THIS IS IMPORTANT, host is container name
+        proxy_read_timeout     60;
+        proxy_connect_timeout  60;
+        proxy_redirect         off;
+
+    #     Allow the use of websockets
+        proxy_http_version 1.1;
+        proxy_set_header Upgrade $http_upgrade;
+        proxy_set_header Connection 'upgrade';
+        proxy_set_header Host $host;
+        proxy_cache_bypass $http_upgrade;
+     }

    # The below may not be necessary

+    location = /favicon.ico { access_log off; log_not_found off; }
+    location = /robots.txt  { access_log off; log_not_found off; }
+
+    location ~ /.ht {
+        deny all;
+    }
}
.env
- LARAVEL_WEBSOCKETS_HOST=localhost
+ LARAVEL_WEBSOCKETS_HOST=myapp-websockets # from localhost to docker container name
LARAVEL_WEBSOCKETS_PORT=6001
Those were the primary changes to take our application from development to production using Laravel, Docker Compose, Nginx, and Websockets.
I may have missed some external deployment steps regarding Laravel steps but you have to follow the documentation for that. The infrastructure needs to be improved, we need to move our database from a Docker container into the cloud, same with Redis and even Websockets as we scale, really any X-as-a-service. However, those are typically a matter of changing environment variables and configuration files again, but just getting the application deployed via HTTPS was a big step. I saw many people running similar issues like myself, so maybe I will pop up in a search.