Free System Design Interview Course
Many candidates are rejected or down-leveled due to poor performance in their System Design Interview. Stand out in System Design Interviews and get hired in 2023 with this popular free course.
What is Flask?
Flask is a lightweight Python framework for quick and rapid web application development.
What are status codes in HTTP?
HTTP response status codes are used in web development to determine whether a particular HTTP request has been completed successfully.
Status code in a tuple
The view function can return the status code as one of a tuple’s elements. A response object is automatically created from the return result of a view function. It is possible to get a tuple back that contains additional information. The tuple with the status code to be returned can be in any of the following formats:
(response, status_code)(response, status_code, headers)
Code
from flask import Flask, make_response, request

app = Flask(__name__)

@app.route("/userDetails", methods=["GET", "POST"])
def user_details():

    if request.method == "POST":

        username = request.form.get("username")
        firstname = request.form.get("firstname")
        lastname = request.form["lastname"]

        return "Success", 201

@app.route("/userSignUp", methods=["POST"])
def sign_up():

    if request.method == "POST":

        username = request.form.get("username")
        password = request.form.get("password")

        return "Success", 200, {"Access-Control-Allow-Origin": "*"}
Explanation
In the code above, the important lines to focus on are the following:
- Line 14: We are returning the response as a tuple with the response body as
Successand the status code of201. - Line 24: We are returning the response as a tuple with the response body as
Success, status code of200, and some headers as a dictionary.
Use the following curl commands to test the userDetails endpoint.
curl -X POST http://localhost:5000/userDetails -H "Content-Type: application/x-www-form-urlencoded" -d "username=sam&firstname=john&lastname=king"
Use the following curl commands to test the userSignUp endpoint.
curl -X POST http://localhost:5000/userSignUp -H "Content-Type: application/x-www-form-urlencoded" -d "username=sam&firstname=john"
The make_response() method
The make_response method from Flask returns a Response object that can be used to send custom headers and change the properties such as status_code, mimetype, and so on.
We can set the status code using the make_response method in two ways:
- Pass the status code as a constructor parameter.
- Use the property
status_codeto set the status code. Here, the value set has to be an integer.
Code
from flask import Flask, make_response, request

app = Flask(__name__)

@app.route("/userDetails", methods=["GET", "POST"])
def user_details():

    if request.method == "POST":

        username = request.form.get("username")
        firstname = request.form.get("firstname")
        lastname = request.form["lastname"]

        response = make_response("<h1>Success</h1>", 201)
        return response

@app.route("/userSignUp", methods=["POST"])
def sign_up():

    if request.method == "POST":

        username = request.form.get("username")
        password = request.form.get("password")

        response = make_response("<h1>Success</h1>")
        response.status_code = 200
        return response
Explanation
In the code above, the important lines to focus on are the following:
- Line 14: We use the
make_responsemethod to create an instance of theResponseclass. We pass the status code as a constructor parameter. - Lines 25–26: We use the
make_responsemethod to create an instance of theResponseclass. We set the status code by explicitly setting thestatus_codeproperty of the response object.
Use the following curl commands to test the userDetails endpoint.
curl -X POST http://localhost:5000/userDetails -H "Content-Type: application/x-www-form-urlencoded" -d "username=sam&firstname=john&lastname=king"
Use the following curl commands to test the userSignUp endpoint.
curl -X POST http://localhost:5000/userSignUp -H "Content-Type: application/x-www-form-urlencoded" -d "username=sam&firstname=john"
CONTRIBUTOR
![]() Abhilash
Abhilash
Copyright ©2023 Educative, Inc. All rights reserved
Ответ сервера
Flask предлагает три варианта для создания ответа:
- В виде строки или с помощью шаблонизатора
- Объекта ответа
- Кортежа в формате (
response, status, headers) или (response, headers)
Далее о каждом поподробнее.
Создание ответа в виде строки
@app.route('/books/<genre>')
def books(genre):
    return "All Books in {} category".format(genre)
До сих пор этот способ использовался, чтобы отправлять ответ клиенту. Когда Flask видит, что из функции представления возвращается строка, он автоматически конвертирует ее в объект ответа (с помощью метода make_response()) со строкой, содержащей тело ответа, статус-код HTTP 200 и значение text/html в заголовке content-type. В большинстве случаев это — все, что нужно. Но иногда необходимы дополнительные заголовки перед отправлением ответа клиенту. Для этого создавать ответ нужно с помощью функции make_response().
Создание ответа с помощью make_response()
Синтаксис make_response() следующий:
res_obj = make_response(res_body, status_code=200)
res_body — обязательный аргумент, представляющий собой тело ответа, а status_code — опциональный, по умолчанию его значение равно 200.
Следующий код показывает, как добавить дополнительные заголовки с помощью функции make_response().
from flask import Flask, make_response,

@app.route('/books/<genre>')
def books(genre):
    res = make_response("All Books in {} category".format(genre))
    res.headers['Content-Type'] = 'text/plain'
    res.headers['Server'] = 'Foobar'
    return res
Следующий — демонстрирует, как вернуть ошибку 404 с помощью make_response().
@app.route('/')
def http_404_handler():
    return make_response("<h2>404 Error</h2>", 400)
Настройка куки — еще одна базовая задача для любого веб-приложения. Функция make_response() максимально ее упрощает. Следующий код устанавливает два куки в клиентском браузере.
@app.route('/set-cookie')
def set_cookie():
    res = make_response("Cookie setter")
    res.set_cookie("favorite-color", "skyblue")
    res.set_cookie("favorite-font", "sans-serif")
    return res
Примечание: куки обсуждаются подробно в уроке «Куки во Flask».
Куки, заданные в вышеуказанном коде, будут активны до конца сессии в браузере. Можно указать собственную дату истечения их срока, передав в качестве третьего аргумента в методе set_cookie() количество секунд. Например:
@app.route('/set-cookie')
def set_cookie():
    res = make_response("Cookie setter")
    res.set_cookie("favorite-color", "skyblue", 60*60*24*15)
    res.set_cookie("favorite-font", "sans-serif", 60*60*24*15)
    return res
Здесь, у куки будут храниться 15 дней.
Создание ответов с помощью кортежей
Последний способ создать ответ — использовать кортежи в одном из следующих форматов:
(response, status, headers)

(response, headers)

(response, status)
response — строка, представляющая собой тело ответа, status — код состояния HTTP, который может быть указан в виде целого числа или строки, а headers — словарь со значениями заголовков.
@app.route('/')
def http_500_handler():
    return ("<h2>500 Error</h2>", 500)
Функция представления вернет ошибку HTTP 500 Internal Server Error. Поскольку при создании кортежей можно не писать скобки, вышеуказанный код можно переписать следующим образом:
@app.route('/')
def http_500_handler():
    return "<h2>500 Error</h2>", 500
Следующий код демонстрирует, как указать заголовки с помощью кортежей:
@app.route('/')
def render_markdown():
    return "## Heading", 200, {'Content-Type': 'text/markdown'}
Сможете догадаться, что делает следующая функция?
@app.route('/transfer')
def transfer():
    return "", 302, {'location': 'https://localhost:5000/login'}
Функция представления перенаправляет пользователя на https://localhost:5000/login с помощью ответа 302 (временное перенаправление). Перенаправление пользователей — настолько распространенная практика, что во Flask для этого есть даже отдельная функция redirect().
from flask import Flask, redirect

@app.route('/transfer')
def transfer():
    return redirect("https://localhost:5000/login")
По умолчанию, redirect() осуществляет 302 редиректы. Чтобы использовать 301, нужно указать это в функции redirect():
from flask import Flask, redirect

@app.route('/transfer')
def transfer():
    return redirect("https://localhost:5000/login", code=301)
Перехват запросов
В веб-приложениях часто нужно исполнить определенный код до или после запроса. Например, нужно вывести весь список IP-адресов пользователей, которые используют приложение или авторизовать пользователя до того как показывать ему скрытые страницы. Вместе того чтобы копировать один и тот же код внутри каждой функции представления, Flask предлагает следующие декораторы:
before_first_request: этот декоратор выполняет функцию еще до обработки первого запросаbefore_request: выполняет функцию до обработки запросаafter_request: выполняет функцию после обработки запроса. Такая функция не будет вызвана при возникновении исключений в обработчике запросов. Она должна принять объект ответа и вернуть тот же или новый ответ.teardown_request: этот декоратор похож наafter_request. Но вызванная функция всегда будет выполняться вне зависимости от того, возвращает ли обработчик исключение или нет.
Стоит отметить, что если функция в before_request возвращает ответ, тогда обработчик запросов не вызывается.
Следующий код демонстрирует, как использовать эти точки перехвата во Flask. Нужно создать новый файл hooks.py с таким кодом:
from flask import Flask, request, g

app = Flask(__name__)

@app.before_first_request
def before_first_request():
    print("before_first_request() called")

@app.before_request
def before_request():
    print("before_request() called")

@app.after_request
def after_request(response):
    print("after_request() called")
    return response

@app.route("/")
def index():
    print("index() called")
    return '<p>Testings Request Hooks</p>'

if __name__ == "__main__":
    app.run(debug=True)
После этого необходимо запустить сервер и сделать первый запрос, перейдя на страницу https://localhost:5000/. В консоли, где был запущен сервер, должен появиться следующий вывод:
before_first_request() called
before_request() called
index() called
after_request() called
Примечание: записи о запросах к серверу опущены для краткости.
После перезагрузки страницы отобразится следующий вывод.
before_request() called
index() called
after_request() called
Поскольку это второй запрос, функция before_first_request() не будет вызываться.
Отмена запроса с помощью abort()
Flask предлагает функцию abort() для отмены запроса с конкретным типом ошибки: 404, 500 и так далее. Например:
from  flask import  Flask,  abort

@app.route('/')
def index():
    abort(404)
    # код после выполнения abort() не выполняется
Эта функция представления вернет стандартную страницу ошибки 404, которая выглядит вот так:

abort() покажет похожие страницы для других типов ошибок. Если нужно изменить внешний вид страниц с ошибками, необходимо использовать декоратор errorhandler.
Изменение страниц ошибок
Декоратор errorhandler используется для создания пользовательских страниц с ошибками. Он принимает один аргумент — ошибку HTTP, — для которой создается страница. Откроем файл hooks.py для создания кастомных страниц ошибок 404 и 500 с помощью декоратора:
from flask import Flask, request, g, abort
#...
#...
@app.after_request
def after_request(response):
    print("after_request() called")
    return response

@app.errorhandler(404)
def http_404_handler(error):
    return "<p>HTTP 404 Error Encountered</p>", 404

@app.errorhandler(500)
def http_500_handler(error):
    return "<p>HTTP 500 Error Encountered</p>", 500

@app.route("/")
def index():
    # print("index() called")
    # return '<p>Testings Request Hooks</p>'
    abort(404)

if  __name__  ==  "__main__":
#...
Стоит отметить, что оба обработчика ошибок принимают один аргумент error, который содержит дополнительную информацию о типе ошибки.
Если сейчас посетить корневой URL, отобразится следующий ответ:

Flask API includes a set of named constants that you can use to make more code more obvious and readable.
from flask_api import status

...

@app.route('/empty-view/')
def empty_view(self):
    content = {'please move along': 'nothing to see here'}
    return content, status.HTTP_404_NOT_FOUND
The full set of HTTP status codes included in the status module is listed below.
The module also includes a set of helper functions for testing if a status code is in a given range.
from flask_api import status
import unittest

...

class ExampleTestCase(unittest.TestCase):
    def test_success(self):
        with app.test_client() as client:
            response = client.get('/')
            self.assertTrue(status.is_success(response.status_code))
For more information on proper usage of HTTP status codes see RFC 2616
and RFC 6585.
Informational — 1xx
This class of status code indicates a provisional response. There are no 1xx status codes used in REST framework by default.
HTTP_100_CONTINUE
HTTP_101_SWITCHING_PROTOCOLS
Successful — 2xx
This class of status code indicates that the client’s request was successfully received, understood, and accepted.
HTTP_200_OK
HTTP_201_CREATED
HTTP_202_ACCEPTED
HTTP_203_NON_AUTHORITATIVE_INFORMATION
HTTP_204_NO_CONTENT
HTTP_205_RESET_CONTENT
HTTP_206_PARTIAL_CONTENT
Redirection — 3xx
This class of status code indicates that further action needs to be taken by the user agent in order to fulfill the request.
HTTP_300_MULTIPLE_CHOICES
HTTP_301_MOVED_PERMANENTLY
HTTP_302_FOUND
HTTP_303_SEE_OTHER
HTTP_304_NOT_MODIFIED
HTTP_305_USE_PROXY
HTTP_306_RESERVED
HTTP_307_TEMPORARY_REDIRECT
Client Error — 4xx
The 4xx class of status code is intended for cases in which the client seems to have erred. Except when responding to a HEAD request, the server SHOULD include an entity containing an explanation of the error situation, and whether it is a temporary or permanent condition.
HTTP_400_BAD_REQUEST
HTTP_401_UNAUTHORIZED
HTTP_402_PAYMENT_REQUIRED
HTTP_403_FORBIDDEN
HTTP_404_NOT_FOUND
HTTP_405_METHOD_NOT_ALLOWED
HTTP_406_NOT_ACCEPTABLE
HTTP_407_PROXY_AUTHENTICATION_REQUIRED
HTTP_408_REQUEST_TIMEOUT
HTTP_409_CONFLICT
HTTP_410_GONE
HTTP_411_LENGTH_REQUIRED
HTTP_412_PRECONDITION_FAILED
HTTP_413_REQUEST_ENTITY_TOO_LARGE
HTTP_414_REQUEST_URI_TOO_LONG
HTTP_415_UNSUPPORTED_MEDIA_TYPE
HTTP_416_REQUESTED_RANGE_NOT_SATISFIABLE
HTTP_417_EXPECTATION_FAILED
HTTP_428_PRECONDITION_REQUIRED
HTTP_429_TOO_MANY_REQUESTS
HTTP_431_REQUEST_HEADER_FIELDS_TOO_LARGE
Server Error — 5xx
Response status codes beginning with the digit «5» indicate cases in which the server is aware that it has erred or is incapable of performing the request. Except when responding to a HEAD request, the server SHOULD include an entity containing an explanation of the error situation, and whether it is a temporary or permanent condition.
HTTP_500_INTERNAL_SERVER_ERROR
HTTP_501_NOT_IMPLEMENTED
HTTP_502_BAD_GATEWAY
HTTP_503_SERVICE_UNAVAILABLE
HTTP_504_GATEWAY_TIMEOUT
HTTP_505_HTTP_VERSION_NOT_SUPPORTED
HTTP_511_NETWORK_AUTHENTICATION_REQUIRED
Helper functions
The following helper functions are available for identifying the category of the response code.
is_informational()  # 1xx
is_success()        # 2xx
is_redirect()       # 3xx
is_client_error()   # 4xx
is_server_error()   # 5xx
I have a Flask API that is a wrapper for a customer service API. I use generators throughout to keep memory overhead low. I noticed the other day that the 3rd party had removed a key from their API, which was causing call_cs_api to throw an exception. I would expect Flask to throw a 500 error as a result, but it instead returns a 200. So, I changed my generator to handle the exception as you see below (the solution came from here).
However, even with that addition, and with werkzeug acknowledging the 500 error, I still get a 200 returned to me when I curl that endpoint.
Curiously, if I turn on app.run() and run the program from main instead of through uwsgi, a 500 is returned successfully. So perhaps it’s a flask setting I don’t know about. Here is the code and some log trace:
First, the class that handles logging in/retrieving data from the 3rd party:
def call_cs_api(self):
    req = requests.get(self.url)
    resp = json.loads(req.text)
    for case in resp['_embedded']['entries']:
            case = self.cleanse_data(case)
            yield (case, None)
    if next_call:
        print next_call
        try:
            print req.headers['Rate-Limit-Remaining']
            print req.headers['Rate-Limit-Reset']
            if req.headers['Rate-Limit-Remaining'] == 0:
                sleep(int(req.headers['X-Rate-Limit-Reset'])+2)
        except KeyError, e:
            yield (None, e)
        self.url = next_call['href']
        for call in self.call_cs_api():
            yield call
And my Flask api:
from flask import Flask, abort, Response
import cs_api

@application.route('/users', methods = ['GET'])
def users():
    api = cs_api.CSApi('users')
    def generate():
        cases = api.call_cs_api()
        for case,e in cases:
            if case:
                yield json.dumps(case)
            if e:
                abort(500)
    return Response(generate())

@application.errorhandler(500)
    def internal_error(error):
    return "500 error - Internal Server Exception"
Stack Trace. The last 2 lines show the 500/200 incongruity:
Traceback (most recent call last):
  File "/usr/local/lib/python2.7/dist-packages/werkzeug/wsgi.py", line 682, in __next__
    return self._next()
  File "/usr/local/lib/python2.7/dist-packages/werkzeug/wrappers.py", line 81, in _iter_encoded
      for item in iterable:
  File "cs_handler.py", line 31, in generate
      abort(500)
  File "/usr/local/lib/python2.7/dist-packages/werkzeug/exceptions.py", line 576, in __call__
      raise self.mapping[code](*args, **kwargs)
  werkzeug.exceptions.InternalServerError: 500: Internal Server Error
  [pid: 20937|app: 0|req: 1/1] 10.100.100.51 () {38 vars in 463 bytes} [Sat Nov  7 15:25:37 2015] GET /users => generated 53529 bytes in 481 msecs (HTTP/1.1 200) 1 headers in 59 bytes (50 switches on core 0)
- Home
- Flask tutorial
- Custom Response and Hook Points in Flask
Last updated on July 27, 2020
Custom Response #
Flask provides three different patterns for creating response:
- As a string or using a template engine.
- As a response object.
- As a tuple in the form
(response, status, headers)or(response, headers).
Let’s take a look at these patterns one by one.
Creating Response as a String #
@app.route('/books/<genre>') def books(genre): return "All Books in {} category".format(genre) |
So far we have used this pattern to send the response to the client. When Flask sees that we are returning a string from a view function it automatically converts the string into a response object ( using make_response() method ) with string as the body of the response, HTTP status code of 200 and content-type header set to text/html. Most of the time that’s all you need. However, sometimes you would need to set some additional headers before sending the response to the client. For such cases, you have to create the response using the make_response() function.
Creating response using make_response() #
The syntax of the make_response() is as follows:
res_obj = make_response(res_body, status_code=200)
The res_body is the required argument which represents the response body and status_code is the optional HTTP status code which defaults to 200.
The following listing shows how to set additional headers using the make_response() function.
from flask import Flask, make_response, @app.route('/books/<genre>') def books(genre): res = make_response("All Books in {} category".format(genre)) res.headers['Content-Type'] = 'text/plain' res.headers['Server'] = 'Foobar' return res |
The following listing shows how you can return HTTP 404 error using the make_response() function.
@app.route('/') def http_404_handler(): return make_response("<h2>404 Error</h2>", 400) |
Setting cookies is another common task in a web application. The make_response() function makes this operation very easy. The following listing set two cookies in the client’s browser.
@app.route('/set-cookie') def set_cookie(): res = make_response("Cookie setter") res.set_cookie("favorite-color", "skyblue") res.set_cookie("favorite-font", "sans-serif") return res |
Note: We are discussing cookies in detail in lesson Cookies in Flask.
The cookies set by the above listing will last until the browser session. We can set the expiration time of cookie by passing number of seconds as a third argument to the set_cookie() method. For example:
@app.route('/cookie') def set_cookie(): res = make_response("Cookie setter") res.set_cookie("favorite-color", "skyblue", 60*60*24*15) res.set_cookie("favorite-font", "sans-serif", 60*60*24*15) return res |
This listing sets the expiration time of the cookies to 15 days.
Creating Response using Tuples #
The last pattern to create response is to use tuples in one of the following formats:
(response, status, headers) (response, headers) (response, status) |
The response is a string which represents the body of the response, status is the HTTP status code it can be integer or string and headers is a dictionary containing header values.
@app.route('/') def http_500_handler(): return ("<h2>500 Error</h2>", 500) |
This view function will return HTTP 500 Internal Server Error. Since we can omit parentheses while creating tuples, the above code can also be written as follows:
@app.route('/') def http_500_handler(): return "<h2>500 Error</h2>", 500 |
The following listing shows how to set headers using tuples:
@app.route('/') def render_markdown(): return "## Heading", 200, {'Content-Type': 'text/markdown'} |
Can you guess what the following view function does?
@app.route('/transfer') def transfer(): return "", 302, {'location': 'http://localhost:5000/login'} |
This view function redirects the user to http://localhost:5000/login using HTTP 302 response code (a temporary redirect). Redirecting a user to a different page is so common that Flask provides a helper function called redirect() to make the job easier.
from flask import Flask, redirect @app.route('/transfer') def transfer(): return redirect("http://localhost:5000/login") |
By default, redirect() performs a HTTP 302 redirect, to perform a HTTP 301 redirect pass the HTTP status code of 301 to the redirect() function as follows:
from flask import Flask, redirect @app.route('/transfer') def transfer(): return redirect("http://localhost:5000/login", code=301) |
Hook Points #
In a web application, it is quite common to execute some code before after every request. For example, let’s say we want to log the IP address of users who are visiting our application or authenticate a user before displaying hidden pages. Rather than duplicating such code inside every view function (which would be crazy) Flask provides following decorators for such scenarios:
-
before_first_request: This decorator registers a function to execute before the first request is handled. -
before_request: This decorator registers a function to execute before a request is handled. -
after_request: This decorator registers a function to execute after a request is handled. The registered function will not be called in case an unhandled exception occurred in the request handler. The function must accept a response object and return the same or new response. -
teardown_request: Similar toafter_requestdecorator but the registered function will always execute regardless of whether the request handler throws an exception or not.
Note that if the function registered by before_request decorator returns a response then the request handler will not be called.
The following listing demonstrates how to utilize hooks points in Flask. Create a new file named hooks.py with the code as shown below:
flask_app/hooks.py
1 2 3 4 5 6 7 8 9 10 11 12 13 14 15 16 17 18 19 20 21 22 23 24 25 |
from flask import Flask, request, g app = Flask(__name__) @app.before_first_request def before_first_request(): print("before_first_request() called") @app.before_request def before_request(): print("before_request() called") @app.after_request def after_request(response): print("after_request() called") return response @app.route("/") def index(): print("index() called") return '<p>Testings Request Hooks</p>' if __name__ == "__main__": app.run(debug=True) |
Start the server and make your first request by visiting http://localhost:5000/. In the standard output of the shell that runs the server you should get following output:
before_first_request() called before_request() called index() called after_request() called |
Note: Server request logs are omitted for brevity.
Refresh the page and this time you should get the following output in the shell.
before_request() called index() called after_request() called |
As this is our second request before_first_request() function is not executed.
Aborting Request using abort() #
Flask provides a function named abort() for terminating a request with a specific error code like 404, 500 and so on. For example:
from flask import Flask, abort @app.route('/') def index(): abort(404) # code after abort() execution will never be executed |
This view function will return a generic 404 page that looks like this:
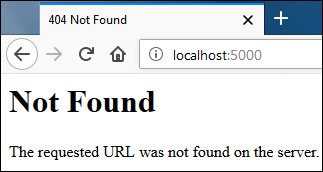
The abort() will display similar pages for other types of errors. If you want to customize the error pages use errorhandler decorator which is discussed next.
Custom Error Pages #
The errorhandler decorator is used to create custom error pages. It accepts a single argument which is the HTTP error code for which you are creating custom error page. Open hooks.py file and create custom error pages for HTTP 404 and HTTP 500 errors using errorhandler decorator as follows (changes are highlighted):
flask_app/hooks.py
1 2 3 4 5 6 7 8 9 10 11 12 13 14 15 16 17 18 19 20 21 22 23 24 |
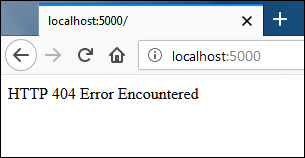
from flask import Flask, request, g, abort #... #... @app.after_request def after_request(response): print("after_request() called") return response @app.errorhandler(404) def http_404_handler(error): return "<p>HTTP 404 Error Encountered</p>", 404 @app.errorhandler(500) def http_500_handler(error): return "<p>HTTP 500 Error Encountered</p>", 500 @app.route("/") def index(): # print("index() called") # return '<p>Testings Request Hooks</p>' abort(404) if __name__ == "__main__": #... |
Notice that both error handlers takes a single argument named error which contains additional information about the type of error occurred.
If you now visit the root URL, you will get the following response: