При установке обновления Windows6.1-KB2998527-x64.msu на систему Windows 7 x64 возникала ошибка:

В журнале Windows ошибка:

Решение нашел на Technet-e https://social.technet.microsoft.com/Forums/windows/en-US/15d12de0-b58a-444a-a1dc-426adeaf0daa/wusaexe-error-when-attempting-to-install-windows-updates-from-microsoft-downloads?forum=itprovistaapps
А именно нужно:
— stop Windows Update service
— delete contents in %systemroot%\SoftwareDistribution, both folders Datastore and download
— restart the service
или
— остановить службу Центр обновления Windows

— очистить папку %systemroot%\SoftwareDistribution\Datastore
— запустить службу Центр обновления Windows.
Запись опубликована в рубрике Обновление. Добавьте в закладки постоянную ссылку.
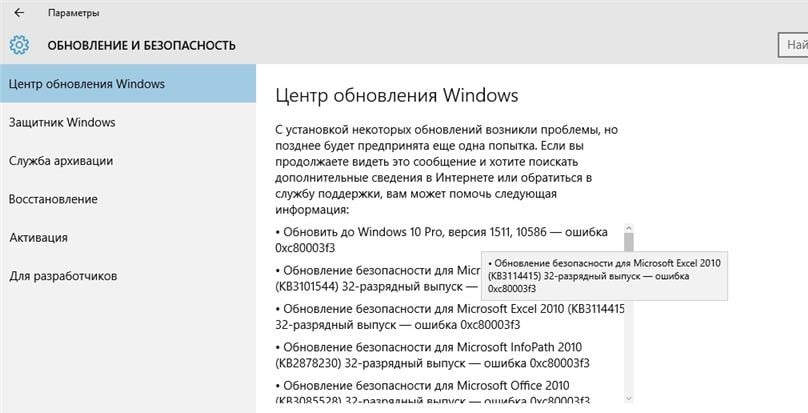
Обновляя ОС, можете столкнуть с ошибкой 0xc80003f3. Причина — внутренний сбой Windows Update.
Для решения проблемы пробуйте следующие способы:
- Перезапуск и сброс настроек апдейтера. Через Службы Windows остановите процесс wuauserv. Очистите директорию %systemroot%\SoftwareDistribution\Datastore. Запустите остановленный процесс.
- Перезапуск, скидывание настроек и регистрация компонентов. Откройте Блокнот и скопируйте в него следующее:
- regsvr32 MSXML3.dll /s
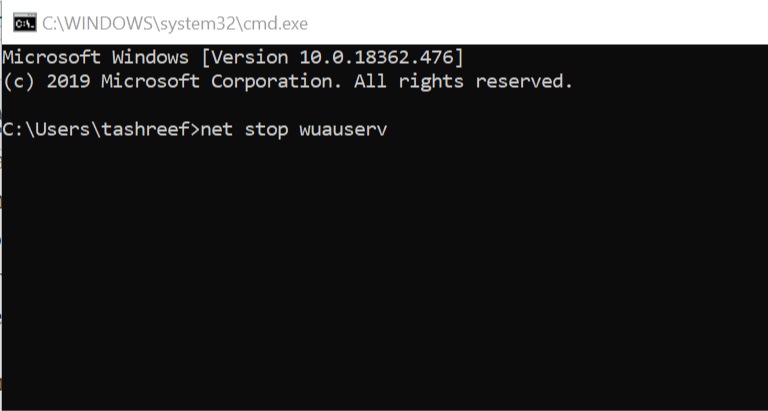
- net stop wuauserv
- cd /d %windir%SoftwareDistribution
- rd /s /q DataStore
- net start wuauserv
- regsvr32 softpub.dll
- regsvr32 mssip32.dll
Сохраните документ как bat-файл, после чего откройте его с правами администратора.
- Убедитесь, что выделено достаточно оперативной памяти. Это актуально в том случае, если обновление происходит в ОС на виртуальной машине. Во избежание появления ошибки 0xc80003f3 требуется не менее 1 гигабайта оперативки.
A comprehensive guide on fixing this issue
by Tashreef Shareef
Tashreef Shareef is a software developer turned tech writer. He discovered his interest in technology after reading a tech magazine accidentally. Now he writes about everything tech from… read more
Updated on
- The error code c80003f3 is usually present on Windows 7 machines.
- To fix the Windows update error C80003F3 run the Windows Update troubleshooter, before other solutions.
- Otherwise, check if Windows update services running or reset Windows update components.

XINSTALL BY CLICKING THE DOWNLOAD FILE
Repair all Windows Updates Errors with Fortect:
SPONSORED
Windows update failures can be annoying! With Fortect, you will get rid of errors caused by missing or corrupted files after an update. The utility maintains a repository of the original Windows system file versions, and it uses a reverse algorithm to swap out the damaged ones for good ones.
- Download Fortect and install it on your PC
- Start the tool’s scanning process to look for corrupt files that are the source of the issues
- Right-click on Start Repair to resolve security and performance issues with your computer
- Fortect has been downloaded by 0 readers this month, rated 4.4 on TrustPilot
Sometimes, when trying to install Windows updates or running Windows Update utility you may encounter the Windows update error C80003F3. This error can occur on newer as well as the older version of Windows as explained by a user in the Microsoft community forum.
Unable to install Windows Update. Error: C80003F3
Windows update wont run. Says windows update services not running but it is running.
If you are also troubled by this error, here are a couple of troubleshooting tips to help you resolve the Windows update error C80003F3.
How do I fix the Windows update error C80003F3?
- How do I fix the Windows update error C80003F3?
- 1. Run Windows Update troubleshooter
- 2. Enable Windows Update services
- Enable Windows Update services using Command Prompt
- 3. Reset all Windows Update components
- Reset Windows Update components using Command Prompt
- 4. Disable/uninstall firewall apps
- 5. Re-register WSIS DDLs
1. Run Windows Update troubleshooter
- Click on Start and select Settings.
- Go to Update and Security.
- Open the Troubleshoot tab.
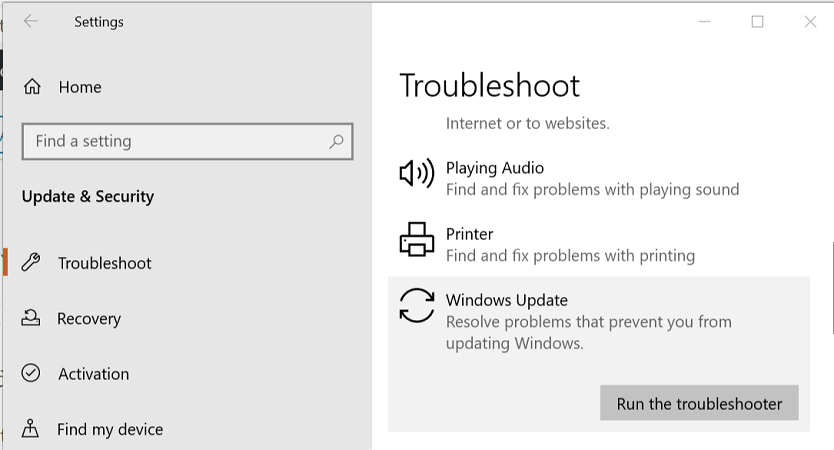
- From the right pane, scroll down to Windows Update and select it.
- Click the Run the Troubleshooter button.
- The troubleshooter will initialize the scan to detect issues with the Windows Updater utility.
- Follow on-screen instructions and apply the recommended fixes. If prompted, click Apply this fix option.
- Close the troubleshooter and try updating Windows once again.
2. Enable Windows Update services
- Press Windows Key + R to open Run.
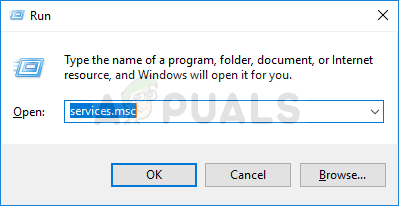
- Type services.msc and click OK.
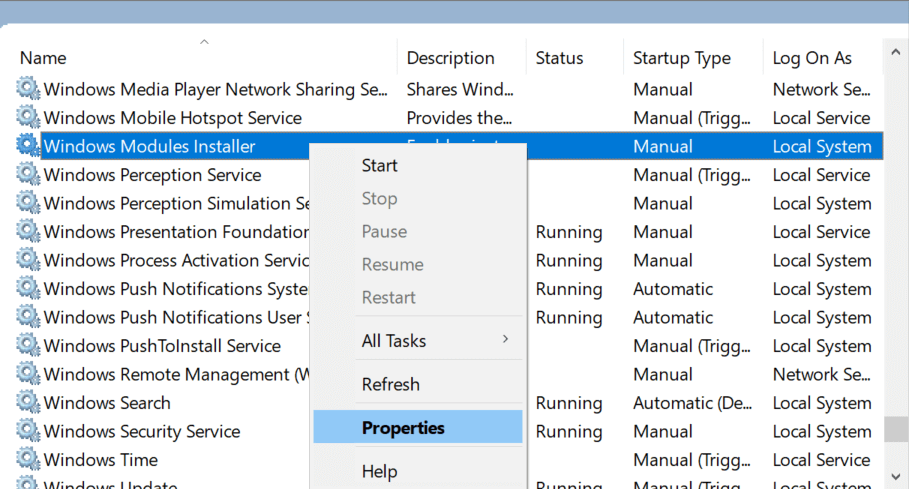
- In the Services window, locate the Windows Module Installer service.
- Right-click on Windows Module Installer and select Properties.
- In the Properties window, make sure the service is running. If not, click the Start button.
- For Startup type, click the drop-down menu and select Automatic.
- Click OK > Apply to save the changes.

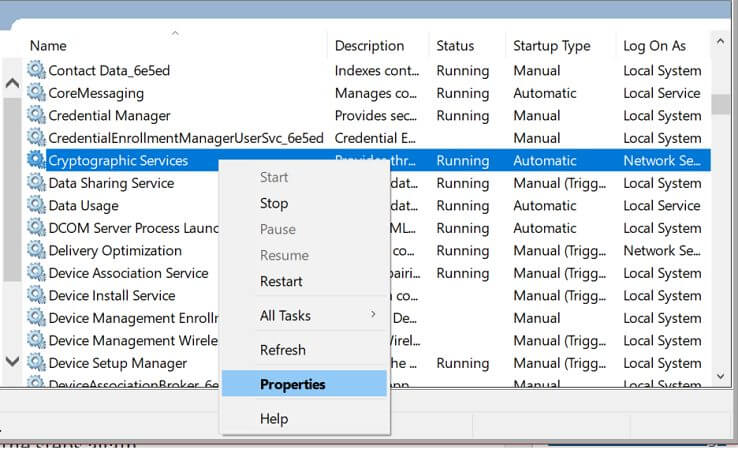
- In the Services window, locate Cryptographic Service and repeat the steps from 4-6.
- Locate the Trusted Installer service and repeat the steps again, then check whether the C80003F3 error is gone.
Enable Windows Update services using Command Prompt
- Press the Windows key and type cmd.
- Right-click on Command Prompt and select Run as Administrator.
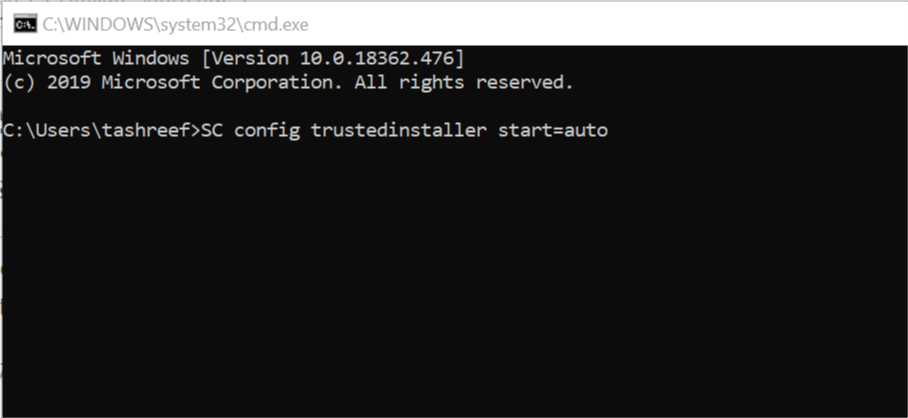
- In the Command Prompt window, type the following command one by one and hit enter to execute:
SC config trustedinstaller start=auto
SC config bits start=auto
SC config cryptsvc start=auto - Once executed, close the Command Prompt window and check for any improvements.
3. Reset all Windows Update components
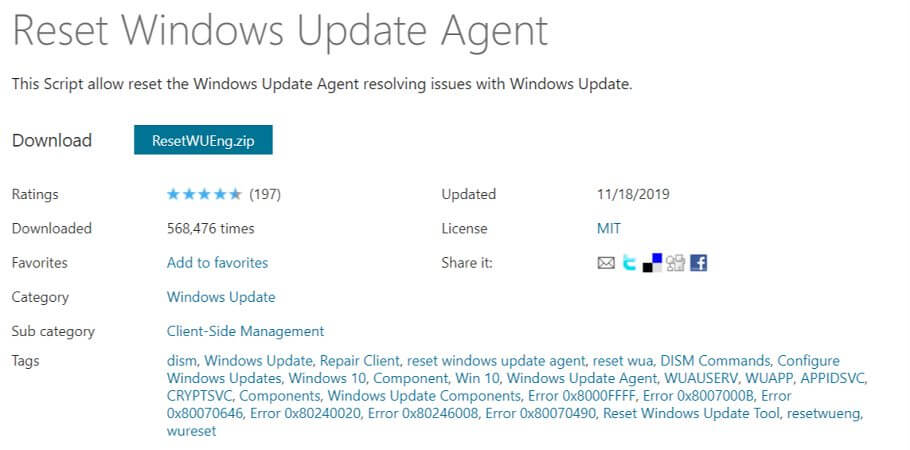
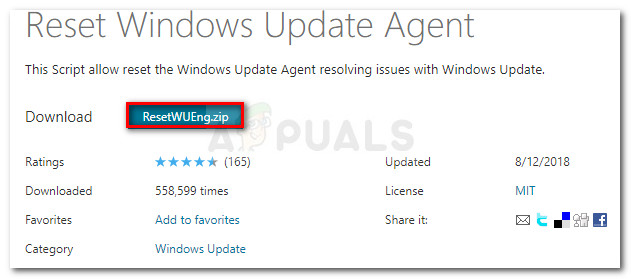
- Download Windows Update Agent script from the official website.
- Extract the Zip file to a folder.
- Open the folder and run ResetWUENG.exe file.
- Follow on-screen instructions to run the script on your computer.
- This will reset all the Windows Update component successfully.
- Once the process is complete, restart the computer and check for any improvements.
Reset Windows Update components using Command Prompt
- Press Windows Key + R to open Run.
- Type cmd and then press Ctrl + Shift + Enter to open Command Prompt as administrator.
- In the Command Prompt window, type the following command and hit enter one by one.
net stop wuauserv
net stop crypt
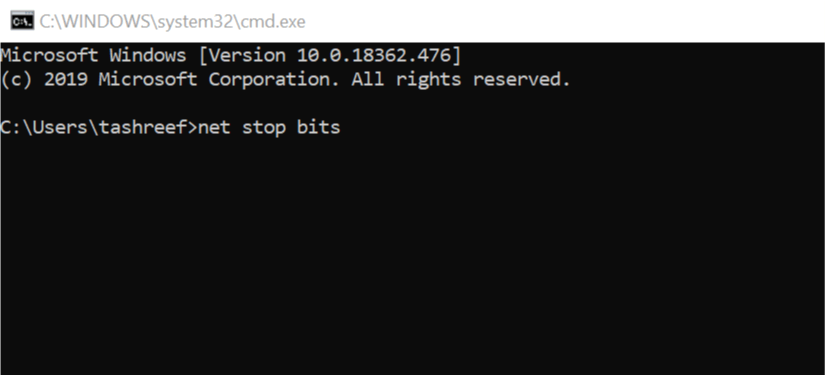
Svcnet stop bits
net stop msiserver - Once all the commands are executed, enter the following command:
ren C:WindowsSoftwareDistribution SoftwareDistribution.old
ren C:WindowsSystem32catroot2 Catroot2.old - The above command will clear and rename the SoftwareDistribution and Catroot2 folder.
- Once the folders are disabled, enter the following commands to enable the services:
net start wuauserv
net start cryptSvc
net start bits
net start msiservr - Close the Command Prompt and restart your computer. Check for any improvements.
4. Disable/uninstall firewall apps

- Press Windows Key + R to open Run.
- Type control and click OK.
- In Control Panel, go to Programs > Programs and features.
- Locate the Comodo firewall (if installed) and click on Uninstall.
- Click Yes to confirm the action.
- Restart your computer and check for any improvements.
On the older version of Windows, like Windows 7, the Comodo firewall has reportedly created issues with the Windows Update services. Uninstall the software and check if that helps resolve the issue.
5. Re-register WSIS DDLs
- Press Windows key + R to open Run.
- type notepad and click OK to open Notepad.
- In the Notepad window, enter the following in the notepad document:
net stop bits
net stop wuauserv
net stop appidsvc
net stop cryptsvc
Del “%ALLUSERSPROFILE%Application DataMicrosoftNetworkDownloaderqmgr*.dat”
Del %windir%SoftwareDistribution*.* /S /Q
Ren %windir%system32catroot2 catroot2.bak
sc.exe sdset bits D:(A;;CCLCSWRPWPDTLOCRRC;;;SY)(A;;CCDCLCSWRPWPDTLOCRSDRCWDWO;;;BA)(A;;CCLCSWLOCRRC;;;AU)(A;;CCLCSWRPWPDTLOCRRC;;;PU)
sc.exe sdset wuauserv D:(A;;CCLCSWRPWPDTLOCRRC;;;SY)(A;;CCDCLCSWRPWPDTLOCRSDRCWDWO;;;BA)(A;;CCLCSWLOCRRC;;;AU)(A;;CCLCSWRPWPDTLOCRRC;;;PU)
cd /d %windir%system32
regsvr32.exe /S atl.dll
regsvr32.exe /S urlmon.dll
regsvr32.exe /S mshtml.dll
regsvr32.exe /S shdocvw.dll
regsvr32.exe /S browseui.dll
regsvr32.exe /S jscript.dll
regsvr32.exe /S vbscript.dll
regsvr32.exe /S scrrun.dll
regsvr32.exe /S msxml.dll
regsvr32.exe /S msxml3.dll
regsvr32.exe /S msxml6.dll
regsvr32.exe /S actxprxy.dll
regsvr32.exe /S softpub.dll
regsvr32.exe /S wintrust.dll
regsvr32.exe /S dssenh.dll
regsvr32.exe /S rsaenh.dll
regsvr32.exe /S gpkcsp.dll
regsvr32.exe /S sccbase.dll
regsvr32.exe /S slbcsp.dll
regsvr32.exe /S cryptdlg.dll
regsvr32.exe /S oleaut32.dll
regsvr32.exe /S ole32.dll
regsvr32.exe /S shell32.dll
regsvr32.exe /S initpki.dll
regsvr32.exe /S wuapi.dll
regsvr32.exe /S wuaueng.dll
regsvr32.exe /S wuaueng1.dll
regsvr32.exe /S wucltui.dll
regsvr32.exe /S wups.dll
regsvr32.exe /S wups2.dll
regsvr32.exe /S wuweb.dll
regsvr32.exe /S qmgr.dll
regsvr32.exe /S qmgrprxy.dll
regsvr32.exe /S wucltux.dll
regsvr32.exe /S muweb.dll
regsvr32.exe /S wuwebv.dll
netsh winsock reset
netsh winhttp reset proxy
net start bits
net start wuauserv
net start appidsvc
net start cryptsvc - Click File and select Save As.
- Enter a name for the file and save it with .bat extension (like script.bat).
- Make sure the Save as type is set to All Files.
- Right-click on the saved file and select Run as Administrator.
- Wait till the scripts are executed.
- Once done, try installing Windows updates.
- Adding layers in Windows 11’s Paint greatly increases RAM usage
- How to copy texts from images with Snipping Tool’s Text Action
- The Windows 11’s weather widget now offers a detailed weather forecast
- Windows 11’s share window will let you send files to your Teams contacts
The Windows update error C80003F3 can occur due to various reasons. In this article, we have listed all the possible solutions to help you fix the error in Windows and successfully install the updates.
![]()
Question
Issue: How to fix Windows update error 0xc80003f3?
Hello. I have been trying to install the available Windows updates but I receive an error code 0xc80003f3 every time after the process fails. How can I fix this?
Solved Answer
Windows is one of the most widely used operating systems throughout the world. Its user-friendly interface, customization abilities, and built-in troubleshooters are praised. As with any other software, it is important to keep it updated. However, sometimes people run into issues when trying to install available updates.
Recently, users reported receiving an error 0xc80003f3 after the update installation process failed. The error code indicates that the machine’s short-term memory (RAM)[1] is full. Sometimes this can be caused by repeatedly putting the computer to sleep instead of shutting it down. The error seems to occur on Windows 10, Windows 8.1, and Windows 7.
Although there is no single solution to the Windows update error 0xc80003f3, there are certain steps you can take to try to fix the issue. In this guide, you will find 5 solutions that may help you fix the update process. Installing Windows feature updates and security patches is important to keep the system running smoothly so we recommend you complete all the steps.
You can also use a maintenance tool like FortectMac Washing Machine X9 that can fix most system errors, BSODs,[2] corrupted files, and registry[3] issues. This powerful software can also automatically clear cookies and cache which are often the culprits of many malfunctions. Otherwise, proceed with the instructions provided below.

Solution 1. Run the Update Troubleshooter
Fix it now!
Fix it now!
To repair damaged system, you have to purchase the licensed version of Fortect Mac Washing Machine X9.
- Press the Windows + X keys and go to Settings
- Go to Update and Security
- Click Troubleshooter
- Select Additional troubleshooters
- Run the Update troubleshooter

- Restart
Solution 2. Delete Files in the SoftwareDistribution Folder
Fix it now!
Fix it now!
To repair damaged system, you have to purchase the licensed version of Fortect Mac Washing Machine X9.
- Press Windows key + R to open the Run command box
- Type services.msc and click OK
- In Services control panel locate the Windows Update service
- Right-click on Windows Update service and select Stop
- Now open Windows Explorer and navigate to: C:\\Windows folder

- Find the SoftwareDistribution folder and Delete its contents
Solution 3. Enable Services used by Windows Updates
Fix it now!
Fix it now!
To repair damaged system, you have to purchase the licensed version of Fortect Mac Washing Machine X9.
- Press the Windows key + R to open the Run box
- Type cmd and press Ctrl + Shift + Enter to open up an elevated Command Prompt
- If you’re prompted by the User Account Control (UAC), click Yes at the window
- Type the following commands and hit Enter after each one:
SC config trustedinstaller start=auto
SC config bits start=auto
SC config cryptsvc start=auto

- Perform a system reboot and check if the issue persists
Solution 4. Install the Update Manually
Fix it now!
Fix it now!
To repair damaged system, you have to purchase the licensed version of Fortect Mac Washing Machine X9.
Whenever Windows updates fail to install automatically, you can always try doing it manually. First, you need to find out which KB number is relevant to you.
- Right-click Start button and pick Settings
- Go to Update & Security
- On the right, locate and click View update history

- From the list, note the KB number that fails to install with the error code
- Go to Microsoft Update Catalog page, type in the KB number and press Search

- Download the update and install it manually
(Note: if you are dealing with a Windows upgrade issue, make sure you also download KB4498524 and KB4515384 updates as well)
Solution 5. Repair Install Windows
Fix it now!
Fix it now!
To repair damaged system, you have to purchase the licensed version of Fortect Mac Washing Machine X9.
- Download the Windows 10 ISO file
- Now mount the ISO file
- Double-click on the file setup.exe to start the repair, install from the mounted drive
- When the installation provides the License Terms, read them and click Accept
- Windows 10 will now check for updates and will install the ones available
- When all is set, click Install

- When the installation is complete, follow the on-screen instructions
Repair your Errors automatically
ugetfix.com team is trying to do its best to help users find the best solutions for eliminating their errors. If you don’t want to struggle with manual repair techniques, please use the automatic software. All recommended products have been tested and approved by our professionals. Tools that you can use to fix your error are listed bellow:
do it now!
Download Fix
Happiness
Guarantee
do it now!
Download Fix
Happiness
Guarantee
Compatible with Microsoft Windows
Compatible with OS X
Still having problems?
If you failed to fix your error using FortectMac Washing Machine X9, reach our support team for help. Please, let us know all details that you think we should know about your problem.
Fortect — a patented specialized Windows repair program. It will diagnose your damaged PC. It will scan all System Files, DLLs and Registry Keys that have been damaged by security threats.Mac Washing Machine X9 — a patented specialized Mac OS X repair program. It will diagnose your damaged computer. It will scan all System Files and Registry Keys that have been damaged by security threats.
This patented repair process uses a database of 25 million components that can replace any damaged or missing file on user’s computer.
To repair damaged system, you have to purchase the licensed version of Fortect malware removal tool.To repair damaged system, you have to purchase the licensed version of Mac Washing Machine X9 malware removal tool.
Private Internet Access is a VPN that can prevent your Internet Service Provider, the government, and third-parties from tracking your online and allow you to stay completely anonymous. The software provides dedicated servers for torrenting and streaming, ensuring optimal performance and not slowing you down. You can also bypass geo-restrictions and view such services as Netflix, BBC, Disney+, and other popular streaming services without limitations, regardless of where you are.
Malware attacks, particularly ransomware, are by far the biggest danger to your pictures, videos, work, or school files. Since cybercriminals use a robust encryption algorithm to lock data, it can no longer be used until a ransom in bitcoin is paid. Instead of paying hackers, you should first try to use alternative recovery methods that could help you to retrieve at least some portion of the lost data. Otherwise, you could also lose your money, along with the files. One of the best tools that could restore at least some of the encrypted files – Data Recovery Pro.
Several Windows users are encountering the “Windows Update Error C80003F3″ when they try to install to install a particular Windows update or whenever they try to launch the WU utility. The error code is signaling that the computer is out of short-Term Memory (RAM). In most cases, this issue typically occurs if the users have the habit of putting the computer to sleep instead of a Shutdown. 
Windows Update Error C80003F3In more severe cases, this issue effectively breaks the auto-update ability, so users need to resort to manual updating to get their Windows version up to date. Based on our investigations, the issue is reported to occur on Windows 7, Windows 8.1 and Windows 10.
What’s causing the Windows Update Error C80003F3?
We investigated this particular issue by looking into various user reports and by testing out various repair strategies that are recommended by users that were previously affected by the same problem. As it turns out, several different scenarios might spawn this error code. Here’s a shortlist with culprits that might trigger this error message:
- Glitched Windows Update instance – The most common cause that will trigger this error code is when one or more WU components become stuck in a limbo state. In situations like this one, the best approach is to run the Windows Update troubleshooter (a utility capable of identifying most inconsistencies and applying the correct repair strategy automatically).
- The update that’s failing requires a prerequisite – As it turns out, certain updates might display this error code because they require an update that is not yet installed on this particular machine. This typically happens when the user tries to install a non-mandatory update while important security updates are also pending. In this case, you can resolve the issue by installing the Important Updates first.
- Some essential WU services aren’t enabled – Another possibility why you’d encounter this error code is situations where crucial services involved in the WU process are disabled. This can either happen due to manual user intervention or due to a resource optimization chore performed by a Resource Management app. If this scenario is applicable, you should be able to resolve the issue by ensuring that all essential WU services are enabled.
- Corrupted WU component – In more serious cases, this error code might occur due to a persisting WU bug that will not go away conventionally. If certain components become stuck in a limbo state, the only viable fix is to reset every WU component so that you eliminate the possibility of a paralyzed component. This can either be done by using the automated WU agent or by deploying a series of commands in an elevated CMD prompt.
- De-registered Windows Update DDLs – After investigating several users reports, it turns out that this issue can also occur due to a bulk de-registering of important DDLs involved with te WSUS operation. If this scenario is applicable, you should be able to resolve the issue by creating a.a .BAT script that’s capable of re-registering all .DDL files involved in the updating process.
- Overprotective Firewall suite – As it turns out, certain firewall suites might end up blocking the connection between the end-user computer and the WU server. Commodo firewall is most commonly reported for being responsible by affected users (but there might be others). In this case, you will be able to fix the issue by uninstalling the overprotective suite and reverting to the native firewall.
If you’re currently struggling with the same error message, this article will provide you with several different troubleshooting steps. Down below, you’ll a collection of potential fixes that other users in a similar situation have successfully used to resolve the “Windows Update Error C80003F3″.
For the best results, we advise you to follow the methods below in the same order that we arranged them in as they are ordered by efficiency and severity. Eventually, you should encounter a fix that will fix the problem and allow your Windows to self-update regardless of the culprit that’s currently causing the issue.
Let’s begin!
Method 1: Running the Windows Update troubleshooter
Before we explore other repair strategies, you should start by ensuring that Windows is not capable of dealing with the issue on itself. Several users that have been encountering the Windows Update Error C80003F3 have reported that the problem was resolved after they ran the Windows Update troubleshooter.
This built-in utility will analyze the whole WU component for inconsistencies and will recommend a repair strategy if it manages to find a strategy that is suitable for this scenario. Here’s a quick guide on running the Windows Update Troubleshooter:
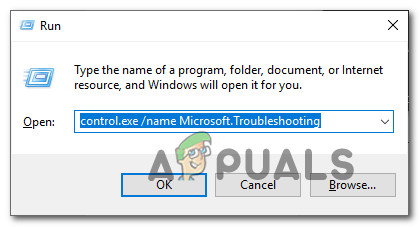
- Press Windows key + R to open up a Run dialog box. Next, type “ms-settings-troubleshoot” and press Enter to open up the Troubleshooting tab of the Settings app.

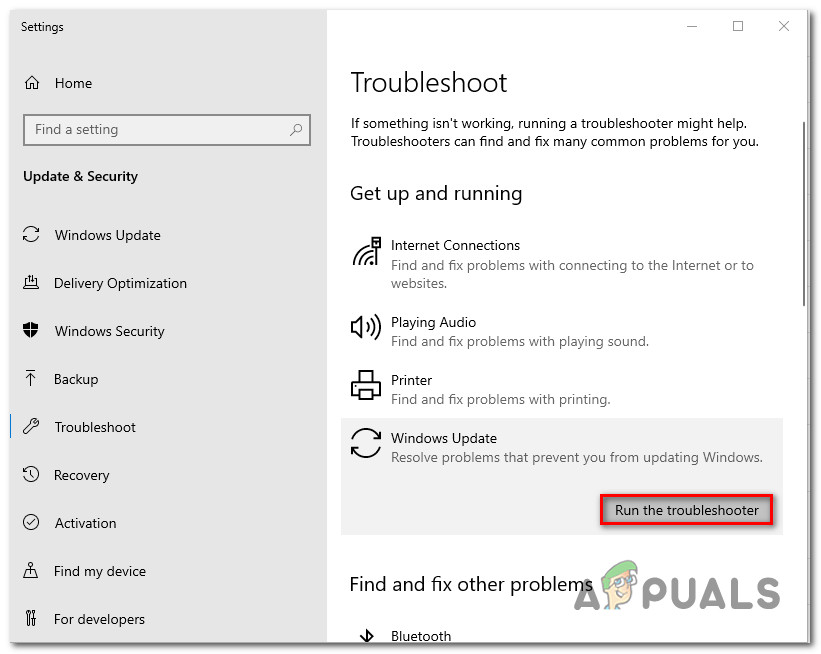
Opening the Troubleshooting tab on every Windows version - Once you’re inside the Troubleshooting tab, move over to the right-hand pane and go over to the Get up and running section. Once you get there, click on Windows Update, then click on Run the troubleshooter.

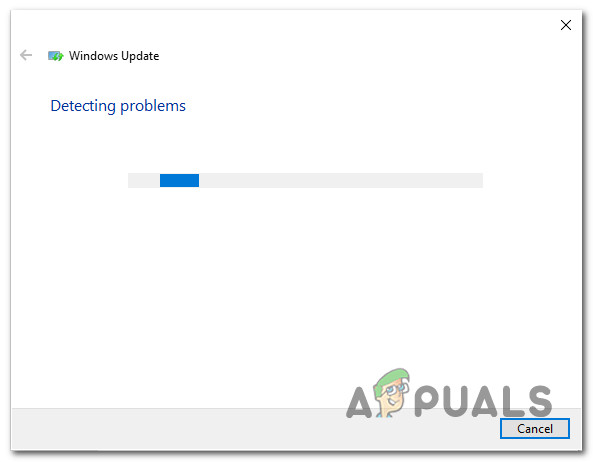
Running the Windows Update troubleshooter - After you manage to start the utility, wait patiently until the initial scan is complete. This will determine whether any of the repair strategies included with the troubleshooter apply to your particular scenario.

Detecting problem with Windows Update - If a viable fix is identified, you’ll be presented with a new window. In this case, click on Apply this fix and then follow the on-screen instructions to enforce the recommended repair strategy.

Apply this fix - After the fix is successfully applied, restart your computer and see if the issue is now resolved.

If you’re still encountering the Windows Update Error C80003F3, move down to the next method below.
Method 2: Installing Important Updates first
Some Windows updates have prerequisites, meaning that to be installed properly, they need a certain update to be installed first. As some users have reported, this could be the reason why you’re seeing the Error C80003F3 when you try to install a certain Windows update.
You may be trying to install an update that is conditioned by an Important Update. In this case, you should be able to resolve the issue by installing every other pending update first and leave the failing update to install last.
Here’s a quick guide on how to do this:
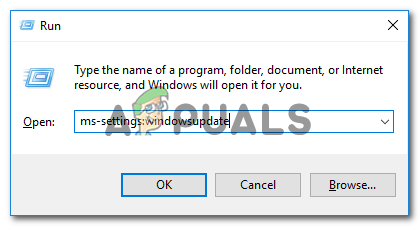
- Press Windows key + R to open up a Run dialog box. Then, type ”ms-settings:windowsupdate” and press Enter to open up the Windows Update tab of the Settings app.
Opening the Windows Update screen Note: If you’re not using Windows 10, use replace the ”ms-settings:windowsupdate” command with ‘wuapp’.
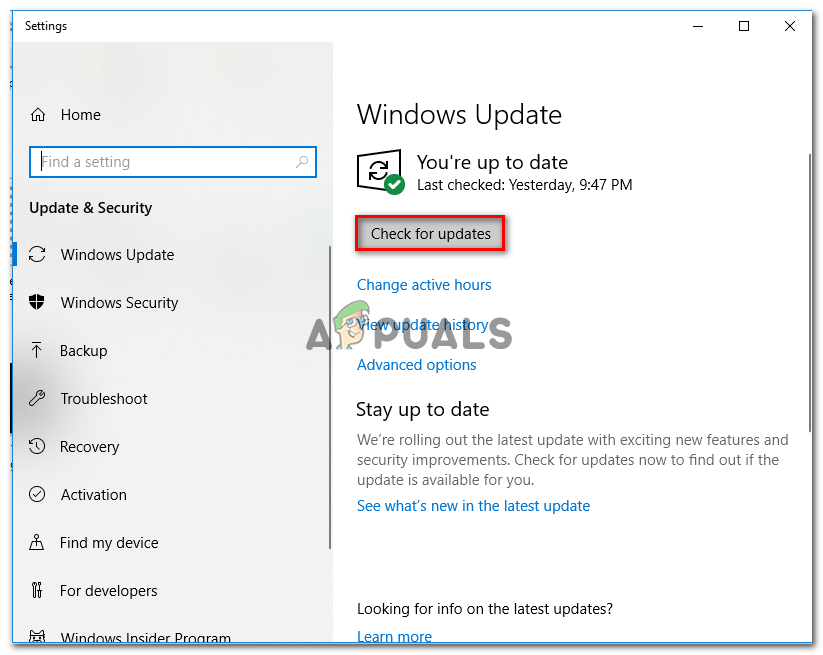
- Once you’re inside the Windows Update screen, move over to the right-hand pane and click on Check for updates. Then, follow the on-screen prompts to install every update aside from the one that is failing. Look to prioritize Important (Critical updates).

Installing every pending Windows update - After you manage to install every pending update (aside from the one that’s failing), restart your computer and install the pending update once the next startup sequence is complete.
If you’re still encountering the Error C80003F3 or your computer was already up to date, move down to the next potential fix below.
Method 3: Enabling all essential WU services
Another possible scenario in which you’ll see the Windows Update Error C80003F3 are situations where one or multiple services essential to the process of installing pending updates are disabled. If any of these key services, the process of installing the update will eventually fail (often with this error code).
Several affected users that found themselves in a similar situation have reported that they managed to fix the issue by checking the and enabling every essential WU service that wasn’t running. After doing this, the installation of the problematic update completed without issues.
Depending on your technical abilities, two different methods will allow you to ensure that every critical WU service needed for the updating operation is enabled. Both method will allow you to do the same thing, so be sure to choose whatever guide you’re most comfortable with.
Enabling services via Command Prompt
This is the quickest way and most effective method of ensuring that all essential services are running as intended. Here’s a quick guide on enabling all essential WU services via an elevated Command Prompt:
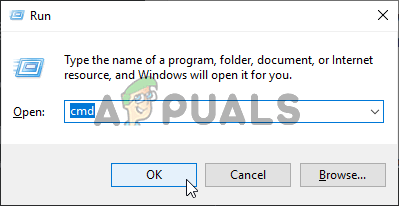
- Press Windows key + R to open up a Run dialog box. Next, type “cmd” inside the text box and press Ctrl + Shift + Enter to open up a Command Prompt with admin access.

Running Command Prompt Note: If you see the UAC (User Account Control) prompt, click Yes to grant administrative privileges.
- Once you manage to get inside the Elevated Command Prompt window, type the following commands in order and press Enter to modify each Startup type of each essential service to Automatic:
SC config trustedinstaller start=auto SC config bits start=auto SC config cryptsvc start=auto
- After each essential service has been adjusted, restart your machine and see if the issue is resolved at the next system startup.
Enabling all WU services via GUI
If you’re not that fond of using the CMD terminal, there’s also a workaround that will enable you to modify the status of the same WU services by using the Windows GUI – using the Services screen. But be warned, the steps are a little more tedious, but the results are exactly the same. Here’s what you need to do:
- Open up a Run dialog box by pressing Windows key + R. Next, type “services.msc” inside the text box and press Enter to open up the Services screen.
Running the Services tool - After you manage to get inside the Services screen, scroll down through the list of services and locate the Windows Module installer service. Once you see it, double-click on it to open up the Properties screen.

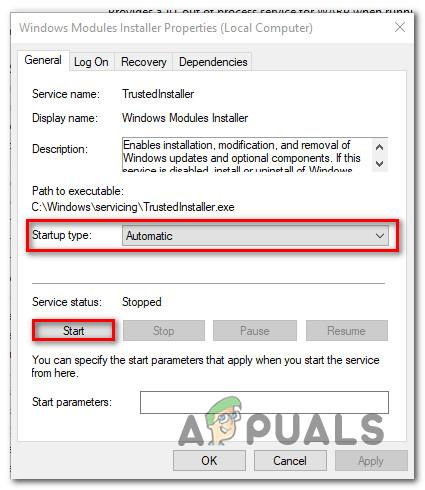
Accessing the Properties screen of the Windows Modules Installer services - Inside the Windows Module Installer Properties screen, go to the General tab and change the Startup type to Automatic, then click on Apply to enforce the changes.

Making the required changes to the Windows Module Installer service. - Next, repeat step 2 and step 3 with both the Cryptographic Service and the Trusted Installed service.
- Once you confirm that all involved services are enabled, restart your computer and see if the issue has been resolved.

If none of the two operations presented above have allowed you to resolve the issue, move down to the next method below.
Method 4: Reset all WU Components
If none of the methods above have allowed you to resolve the Windows Update Error C80003F3, there’s a high chance that you’re dealing with a persisting WU (Windows Update) bug that will not go away conventionally. Under certain circumstances, certain WU services might become stuck in a limbo state, which has the potential of triggering this kind of behavior.
If this scenario is applicable, you can resolve the issue by resetting all WU components involved in this operation. You can achieve this by using two different methods – you either go the manual route or you use the automated WU agent.
Resetting all WU components using the automated agent
- Access this Microsoft Technet page (here) with your default browser and download the Reset Windows Update Agent script.

Download Windows Update Reset Agent - Wait patiently until the download is complete, then extract the zip archive with a utility like WinRar, WinZip or 7Zip.
- After the extraction is complete, double-click on the ResetWUENG.exe, then follow the on-screen instructions to run the script on your computer. During this process, all your WU components will be reset automatically.
- Once the operation is complete, restart your computer and see if you can install the update that was previously failing with the Windows Update Error C80003F3.
Resetting all WU components via an elevated CMD prompt
- Press Windows key + R to open up a Run dialog box. Inside the Run box, type “cmd” inside the text box, then press Ctrl + Shift + Enter to open up an elevated Command Prompt. Once you see the UAC (User Account Control), click Yes to grant administrative privileges.
Running Command Prompt - Once you’re inside the elevated Command Prompt, type the following commands in order and press Enter after each one to stop all WU related services:
net stop wuauserv net stop crypt Svcnet stop bits net stop msiserver
Note: As soon as you run these commands, you will effectively stop the Windows Update Services, MSI Installer, Cryptographic services, and BITS services.
- After you manage to stop all relevant services, fun the following commands to clear and rename the SoftwareDistribution and Catroot2 folders:
ren C:\Windows\SoftwareDistribution SoftwareDistribution.old
ren C:\Windows\System32\catroot2 Catroot2.old
Note: These two folders right here are responsible for storing temporary update files that are being used by the WU component.
- Now that the Catroot2 and SoftwareDistribution folders have been deleted, run the following commands and press Enter after each one to re-enable the services that we previously disabled:
net start wuauserv
net start cryptSvc
net start bits
net start msiserver
- Restart your computer and, once the next startup is complete, repeat the action that was previously causing the issue and see if the issue is now resolved.
If the same issue is still occurring, move down to the next method below.
Method 5: Re-registering DDLs connected to WSUS
Several Windows users that have tried resetting all WU components without success have finally been able to resolve the issue by re-registering all the DDLs that are involved with WSUS. The steps of creating this script are not hard to replicate, and it will save you from a lot of manual labor.
Here’s a quick guide on using Notepad to create a script that will reset all Windows components and re-register all involved DLLs components:
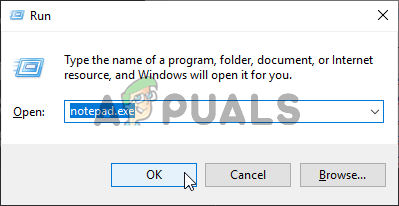
- Press Windows key + R to open up a Run dialog box. Then, type “notepad.exe” and press Ctrl + Shift + Enter to open up Notepad with administrative privileges. When you’re prompted by the UAC (User Account Control), click yes to grant administrative privileges.
Running Notepad - Once you’re inside the elevated Notepad window, paste the following commands inside the blank notepad window:
net stop bits
net stop wuauserv
net stop appidsvc
net stop cryptsvc
Del "%ALLUSERSPROFILE%\Application Data\Microsoft\Network\Downloader\qmgr*.dat"
Del %windir%\SoftwareDistribution\*.* /S /Q
Ren %windir%\system32\catroot2 catroot2.bak
sc.exe sdset bits D:(A;;CCLCSWRPWPDTLOCRRC;;;SY)(A;;CCDCLCSWRPWPDTLOCRSDRCWDWO;;;BA)(A;;CCLCSWLOCRRC;;;AU)(A;;CCLCSWRPWPDTLOCRRC;;;PU)
sc.exe sdset wuauserv D:(A;;CCLCSWRPWPDTLOCRRC;;;SY)(A;;CCDCLCSWRPWPDTLOCRSDRCWDWO;;;BA)(A;;CCLCSWLOCRRC;;;AU)(A;;CCLCSWRPWPDTLOCRRC;;;PU)
cd /d %windir%\system32
regsvr32.exe /S atl.dll
regsvr32.exe /S urlmon.dll
regsvr32.exe /S mshtml.dll
regsvr32.exe /S shdocvw.dll
regsvr32.exe /S browseui.dll
regsvr32.exe /S jscript.dll
regsvr32.exe /S vbscript.dll
regsvr32.exe /S scrrun.dll
regsvr32.exe /S msxml.dll
regsvr32.exe /S msxml3.dll
regsvr32.exe /S msxml6.dll
regsvr32.exe /S actxprxy.dll
regsvr32.exe /S softpub.dll
regsvr32.exe /S wintrust.dll
regsvr32.exe /S dssenh.dll
regsvr32.exe /S rsaenh.dll
regsvr32.exe /S gpkcsp.dll
regsvr32.exe /S sccbase.dll
regsvr32.exe /S slbcsp.dll
regsvr32.exe /S cryptdlg.dll
regsvr32.exe /S oleaut32.dll
regsvr32.exe /S ole32.dll
regsvr32.exe /S shell32.dll
regsvr32.exe /S initpki.dll
regsvr32.exe /S wuapi.dll
regsvr32.exe /S wuaueng.dll
regsvr32.exe /S wuaueng1.dll
regsvr32.exe /S wucltui.dll
regsvr32.exe /S wups.dll
regsvr32.exe /S wups2.dll
regsvr32.exe /S wuweb.dll
regsvr32.exe /S qmgr.dll
regsvr32.exe /S qmgrprxy.dll
regsvr32.exe /S wucltux.dll
regsvr32.exe /S muweb.dll
regsvr32.exe /S wuwebv.dll
netsh winsock reset
netsh winhttp reset proxy
net start bits
net start wuauserv
net start appidsvc
net start cryptsvc
- Once the script is successfully pasted inside the Notepad window, go to File > Save As. After you establish a location where you want to save the script, name it however you want, but make sure you change the extension at the end to .bat.
- Click Save to produce the .bat file, then right-click on the newly created file and choose Run as administrator to run the script.
- Run the script, then wait until all commands are processed. Once the script is finished, close the elevated CMD prompt and install the Windows Update that was previously causing the Windows Update Error C80003F3.

If the same problem is still occurring, move down to the next method below.
Method 6: Uninstalling Commodo firewall (if applicable)
As it turns out if you’re using Commodo antivirus on an older Windows version like Windows 7 or Windows Vista. There are a couple of Commodo firewall versions (particularly versions older than v3.0.15.277) that will cause this error with new Windows Updates.
Several users that found themselves in a similar situation have managed to resolve it and install the failing update by getting rid of the 3rd party firewall solution first. As it turns out, switching to the native firewall will no longer trigger this particular behavior. This suggests the possibility that Commodo firewall tends to be overprotective in certain situations.
Here’s a quick guide on uninstalling Commodo firewall and removing any remnant files:
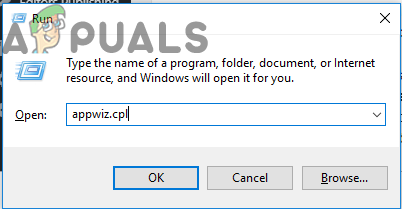
- Press Windows key + R to open up a Run dialog box. Once you’re inside the Run dialog box, type “appwiz.cpl” and press Enter to open up the Programs and Features screen.

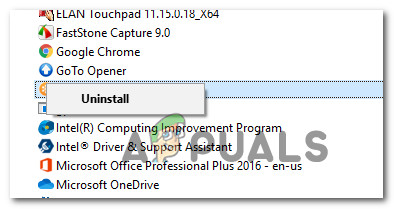
Typing in “appwiz.cpl” in the Run prompt - Once you’re inside the Programs and Features screen, scroll down through the list of installed applications and locate Comodo firewall. When you see it, right-click on it and choose Uninstall from the newly appeared context menu.

Uninstalling Commodo antivirus - Follow the on-screen prompts to complete the uninstall process.
- Make sure you remove any remnant file that might still interfere with the Windows Update component by following the instruction (here).
- Restart your computer and see if the issue is resolved at the next system startup.