The Error Code 0xC8000247, commonly is faced while Windows tries to search and install updates through Automatic Update Service or when the user tries to install manually a specific Windows Update by using the Windows Update Standalone Installer, on a Windows 7 or Vista based computer. Other symptoms of the «0xC8000247» problem is that Microsoft Security Essentials (or Windows Defender) cannot update or download the virus database (definitions).
When the «0xC8000247» issue is faced, the user may receive one of the following error messages:
«Windows Update Service is not running»
«Windows Update could not run»
«Installer encountered an error: 0xC8000247»

In this tutorial you ‘ll find the most efficient methods to resolve the 0xC8000247 error in Windows Update (Windows Standalone Installer encountered an error: 0xC8000247).
How to fix Windows Update Error 0xC8000247 in Windows 7 or Vista.
Method 1: Install Servicing stack update for Windows 7
1. Download and install the latest Servicing stack update for Windows 7.
2. After installation, restart your PC.
3. Finally, go to Windows Update Center and check if the Error 0xC8000247 has been resolved.
Method 2: Update the Intel Rapid Storage Technology Driver.
Install the latest Intel Rapid Storage Technology Driver (Intel RST), from your computer’s manufacturer support site.
– If you own a HP Laptop, then you can download the Intel Rapid Storage Driver from http://support.hp.com/gb-en/document/c02219204 or from ftp://ftp.hp.com/pub/softpaq/sp47501-48000/sp47845.exe (direct link).
– Additionally, you can download the latest IRST driver from Intel® Rapid Storage Technology (Intel® RST) Download Center or to use the Intel® Driver Update Utility to find and install the missing drivers automatically.

Method 3. Uninstall the Intel Matrix Storage Driver.
In other occasions the solution to resolve the Windows Update error 0xC8000247, is to uninstall the Intel Matrix Storage driver. To do that: *
* Attention: If the Intel Matrix Storage Driver acts as a RAID controller at two or more hard drives (RAID 0, RAID 1, RAID 5, etc..) , then the below steps will break the configured RAID level and you will lose your data. At this case, do not aptly the below steps and try to find another solution.
1. Navigate to Windows Control Panel > Programs and Features.
2. Select the Intel Matrix Storage Driver and click Uninstall.
3. After uninstall, restart your computer and then check for updates.
That’s all! Did it work for you?
Please leave a comment in the comment section below or even better: like and share this blog post in the social networks to help spread the word about this solution.
If this article was useful for you, please consider supporting us by making a donation. Even $1 can a make a huge difference for us.

Some Windows users have been encountering Windows Update Error 0xc8000247. According to reports, users have been facing this issue for some particular updates, but others are installing just fine. In this article, we are going to talk about this issue in detail and see what you need to do to resolve this issue.
What causes Windows Update Error 0xc8000247?
Error Code: 0xc8000247 is usually seen when any of the Windows Update or System files are corrupted. The corruption can be caused by various things, such as viruses and malware, improper download of the update file, or just some random glitch. Whatever the case, it can be resolved. We have mentioned all the solutions you need to repair those files.
Also, there is a possibility that the corrupted Intel Rapid Storage Technology Driver (IRST) is responsible for the error in question. To fix it, you need to update the driver, we have mentioned steps to do the same.
If you are seeing Error 0xc8000247 in Windows Update, then check these solutions to resolve the issue.
- Run Windows Update Troubleshooter
- Install the latest version of Intel Rapid Storage Technology Driver (IRST)
- Run SFC and DISM
- Flush SoftwareDistribution Folder
- Reset Windows Update Components
- Troubleshoot in Clean Boot
Let us talk about them in detail
1] Run Windows Update Troubleshooter
Let us start by deploying the built-in Windows Update Troubleshooter to fix the issue. This utility will scan your update files and resolve the fault in them. To run the troubleshooter, follow the prescribed steps.
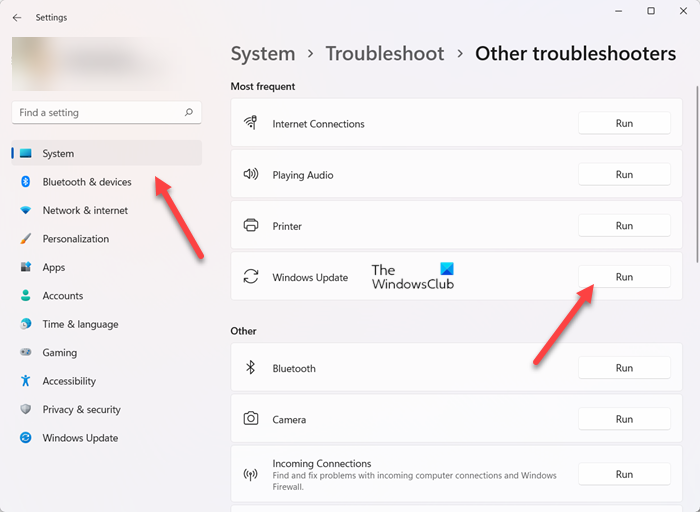
Windows 11
- Open Settings.
- Go to System.
- Click on Troubleshoot and then select Other troubleshooters.
- Now, click the Run button for Windows Update.
Let it run and resolve the issue for you.
Windows 10
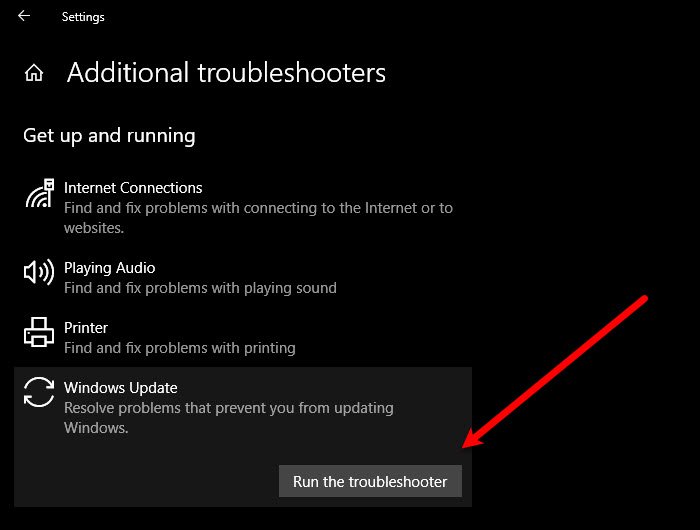
- Launch the Settings app.
- Click on Update & Security > Troubleshoot > Additional troubleshooters.
- Finally, select Windows Update and click Run the troubleshooter.
Hopefully, this will do the trick for you.
2] Install the latest version of Intel Rapid Storage Technology Driver (IRST)
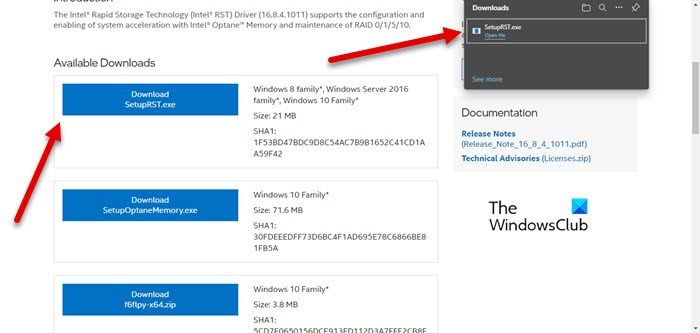
For some users, outdated Intel Rapid Storage Technology Driver (IRST)is causing the issue. Even though most Windows 7 users have reported this instance, this solution is applicable for all the other versions as well. You need to visit intel.com and download SetupSRT.exe. Run the setup file and install the utility. This should do the trick for you.
3] Run SFC and DISM
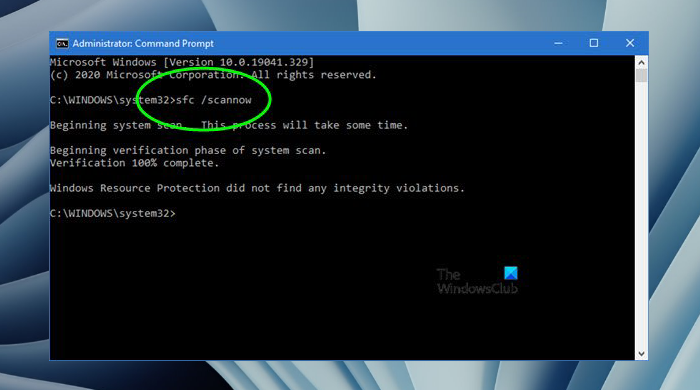
You can also see the error code in question if your system files are corrupted. We are going to use two commands in order to scan and repair corrupted system files.
Open Command Prompt as an administrator by searching it out of the Start Menu and run the following command.
sfc /scannow
If that doesn’t work, then try the next command.
DISM /Online /Cleanup-Image /RestoreHealth
These should do the trick for you.
4] Flush SoftwareDistribution Folder
The SoftwareDistribution folder present on your computer can get corrupted, as a result of which, you can see the error code in question. Try to delete the content of the folded and allow the Windows Update to create a new one.
Run Command Prompt as an administrator and run the following commands.
net stop wuauserv
net stop bits
Open File Explorer and go to the following location.
C:\Windows\SoftwareDistribution
Now, flush the folder. After clearing out the content of the SoftwareDistribution folder, we need to restart the services. To do that run the following CMD commands.
net start wuauserv
net start bits
Restart your computer and check if the issue persists. Hopefully, this will do the trick for you.
Read: How to use authenticated Proxy Servers to fix Windows Update and Microsoft Store app Installation errors
5] Reset Windows Update Components
SoftwareDistribution folder is not the only component vulnerable to corruption, there are some other Windows Update Components that can get corrupted, we are going to reset them and see if that helps. These Windows Update components can get corrupted easily because of various reasons. You should reset Windows Update Components and see if that works. Hopefully, it will do the job for you.
6] Troubleshoot in Clean Boot
Last but not least, we can not overlook the possibility of a third-party application conflicting with the update process and causing issues. We need to troubleshoot in Clean Boot, manually enable tasks and then find out who the culprit is. Then, just remove the program that was conflicting and your issue should be resolved. This should do the job for you.
We hope that you are able to resolve the issue and install the update with the help of the solutions mentioned in this article.
How do I fix a Windows Update error?
Mostly, a Windows Update error is caused if there is an update file that got corrupted or went missing. You can try running the Windows Update troubleshooter as it will scan and fix the issue. However, it is better if you use the error code to search for the solution.
Read: Fix Windows Update error 0x800f0247.
How do I fix Windows Update error 0x80248007?
Windows Update error 0x80248007, WU_E_DS_NODATA, The information requested is not in the data store, can be resolved by executing the solutions mentioned in the linked article.
That’s it!
Also Check: Windows Update failed to install or will not download.
Во время обновления Windows можно наткнуться на ошибку 0xc8000247. Многие пользователи утверждают, что данный код можно увидеть лишь при установке каких-то определенных обновлений для системы.
Зачастую на эту ошибку жалуются владельцы Windows 7, тем не менее ее появление было замечено и на других версиях Windows, например Windows 8, 8.1 и «десятке».
Что вызывает ошибку 0xc8000247?
Проанализировав сообщения пользователей, мы пришли к выводу, что зачастую эта ошибка возникает по следующим причинам:
- некорректно работающие компоненты Центра обновления Windows;
- вмешательство антивируса в процесс обновления;
- в системе отсутствует драйвер технологии хранения Intel Rapid;
- поврежденные системные файлы.
Воспользуйтесь нижеуказанными методами, дабы разрешить ошибку и произвести установку необходимого обновления Windows.
Методы решения ошибки 0xc8000247
Метод №1 Применение средства устранения неполадок
Перед выполнением более серьезных методов вам требуется воспользоваться системным средством устранения неполадок Центра обновления Windows. Подобное средство, к сожалению, выполняет возложенную на него работу не так уж и часто, однако оно все-таки может сработать.
Для запуска средства устранения неполадок сделайте следующее:
- нажмите комбинацию Windows+I;
- откройте в Параметрах раздел «Обновление и безопасность»;
- перейдите во вкладку «Устранение неполадок»;
- кликните на пункт «Центр обновления Windows»;
- теперь нажмите на кнопку «Запустить средство устранения неполадок», находящуюся под указанным выше пунктом;
- следуйте инструкциям на экране, которые будут предложены средством.
После применения средства устранения неполадок проверьте, исчезла ли ошибка 0xc8000247.
Метод №2 Установка драйвера технологии хранения Intel Rapid
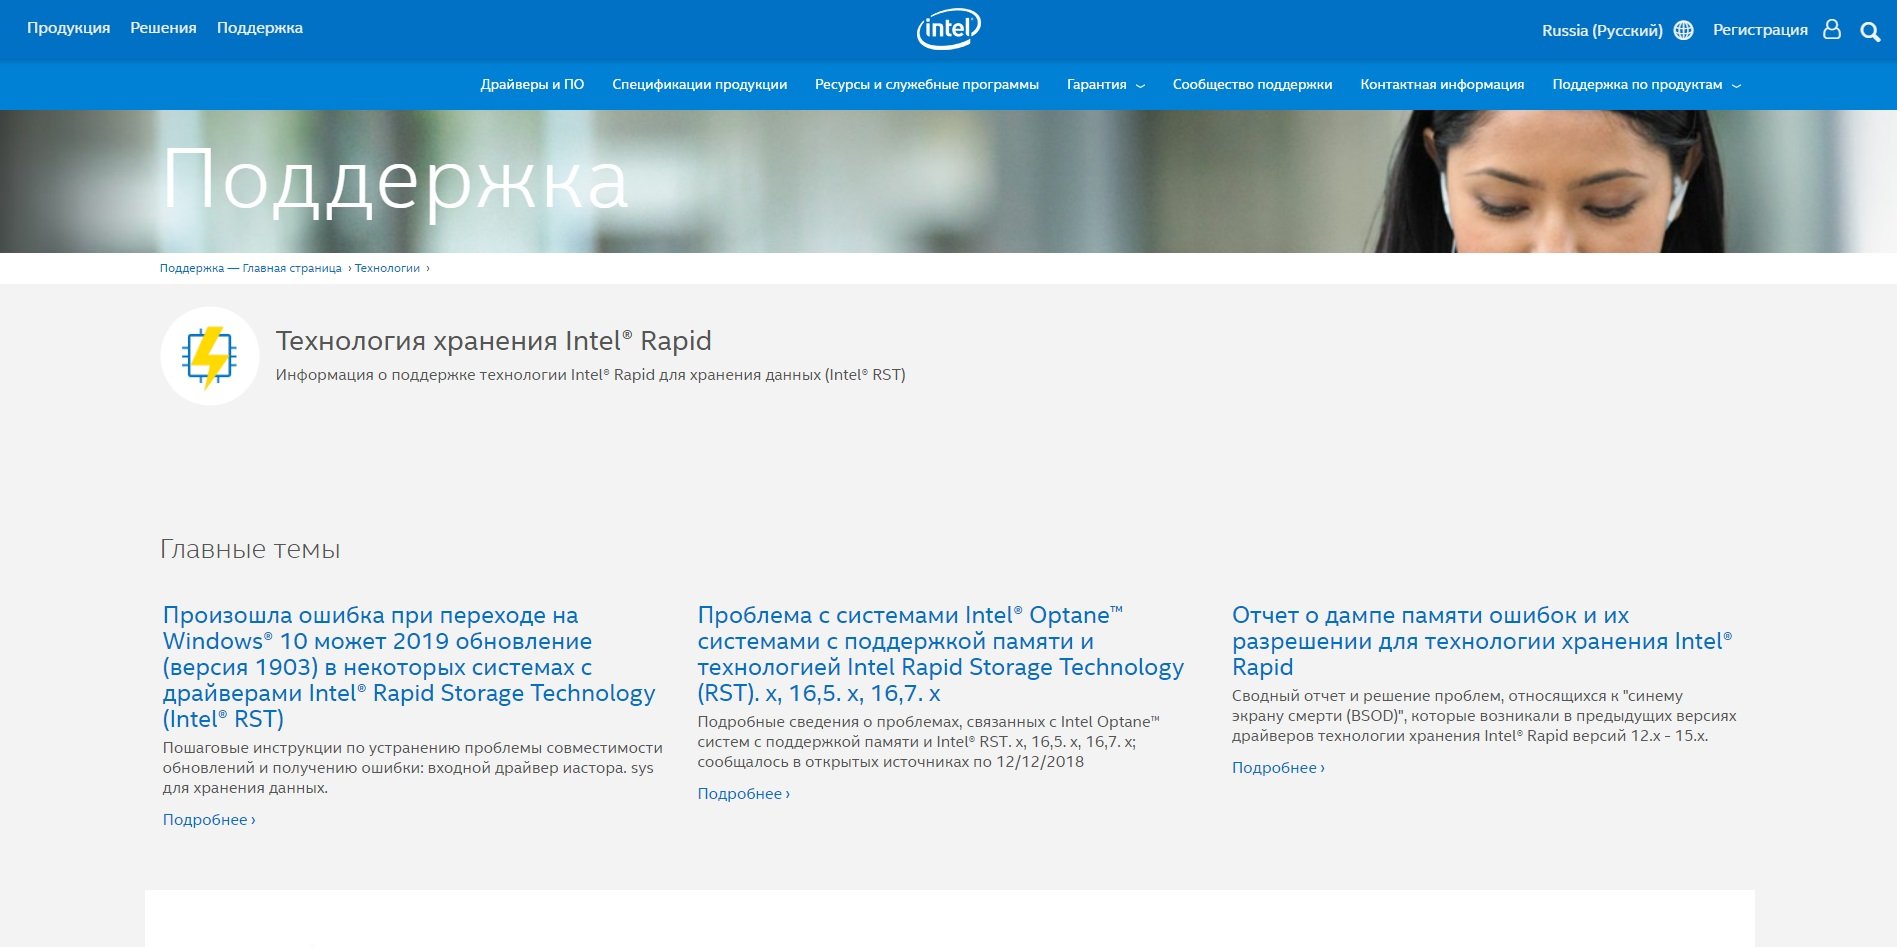
Некоторые пользователи, столкнувшиеся с данной проблемой, утверждают, что им удалось избавиться от ошибки установкой драйвера технологии хранения Intel Rapid.
Было отмечено, что чаще всего такая ситуация возникает в системе, полученной при помощи клонирования HDD такой программой, как Acronis True Image или другим подобным программным обеспечением. И чаще всего такими «счастливчиками» становятся обладатели HDD от компании Western Digital.
Перейдите по этой ссылке на официальный сайт Intel для загрузки установщика драйвера Intel Rapid. Запустите загруженный файл и следуйте инструкциям на своем экране. Как только вы завершите установку драйвера, перезагрузите компьютер и попробуйте снова обновить Windows. Ошибка 0xc8000247 могла исчезнуть.
Метод №3 Отключение/удаление сторонний антивирус

Оказывается, подобную ошибку при обновлении Windows может вызывать чрезвычайно заботливый сторонний антивирус. В список таких антивирусов входят Norton, McAfee, Avast и другие. Для начала попробуйте просто деактивировать активную защиту своего антивируса. Однако этого порой недостаточно и антивирус приходится полностью удалять из системы.
Метод №4 Сброс компонентов Центра обновления Windows
Это довольно сложный метод по своему исполнению, но, как утверждают пользователи, чаще всего именно после его выполнения ошибка 0xc8000247 исчезает. Возможно, некоторые компоненты вашего Центра обновления были повреждены, а поэтому вам нужно попробовать их сброс.
Для сброса компонентов Центра обновления вам нужно сделать следующее:
- нажмите комбинацию клавиш Windows+X;
- кликните на пункт «Командная строка (администратор)»;
- пропишите следующие команды для остановки работы служб BITS, Криптографии, Удостоверения приложений и Центра обновления:
- net stop bits
- net stop wuauserv
- net stop appidsvc
- net stop cryptsvc
- теперь пропишите эту команду для удаления файла qmgr*.dat:
- del «$env:ALLUSERSPROFILE\Application Data\Microsoft\Network\Downloader\qmgr*.dat»
- для переименования папок SoftwareDistribution и catroot2, имеющих прямое отношение к процессу обновления, необходимо прописать следующие команды:
- Ren %systemroot%\SoftwareDistribution SoftwareDistribution.bak
- Ren %systemroot%\system32\catroot2 catroot2.bak
- далее вам необходимо провести сброс разрешений служб BITS и Центра обновления Windows, выполнив следующие две команды:
- exe sdset bits D:(A;;CCLCSWRPWPDTLOCRRC;;;SY)(A;;CCDCLCSWRPWPDTLOCRSDRCWDWO;;;BA)(A;;CCLCSWLOCRRC;;;AU)(A;;CCLCSWRPWPDTLOCRRC;;;PU)
- exe sdset wuauserv D:(A;;CCLCSWRPWPDTLOCRRC;;;SY)(A;;CCDCLCSWRPWPDTLOCRSDRCWDWO;;;BA)(A;;CCLCSWLOCRRC;;;AU)(A;;CCLCSWRPWPDTLOCRRC;;;PU)
- следующим шагом является выполнение этой команды:
- cd /d %windir%\system32
- выполните абсолютно все команды, прописанные в списке ниже:
- regsvr32.exe atl.dll
- regsvr32.exe urlmon.dll
- regsvr32.exe mshtml.dll
- regsvr32.exe shdocvw.dll
- regsvr32.exe browseui.dll
- regsvr32.exe jscript.dll
- regsvr32.exe vbscript.dll
- regsvr32.exe scrrun.dll
- regsvr32.exe msxml.dll
- regsvr32.exe msxml3.dll
- regsvr32.exe msxml6.dll
- regsvr32.exe actxprxy.dll
- regsvr32.exe softpub.dll
- regsvr32.exe wintrust.dll
- regsvr32.exe dssenh.dll
- regsvr32.exe rsaenh.dll
- regsvr32.exe gpkcsp.dll
- regsvr32.exe sccbase.dll
- regsvr32.exe slbcsp.dll
- regsvr32.exe cryptdlg.dll
- regsvr32.exe oleaut32.dll
- regsvr32.exe ole32.dll
- regsvr32.exe shell32.dll
- regsvr32.exe initpki.dll
- regsvr32.exe wuapi.dll
- regsvr32.exe wuaueng.dll
- regsvr32.exe wuaueng1.dll
- regsvr32.exe wucltui.dll
- regsvr32.exe wups.dll
- regsvr32.exe wups2.dll
- regsvr32.exe wuweb.dll
- regsvr32.exe qmgr.dll
- regsvr32.exe qmgrprxy.dll
- regsvr32.exe wucltux.dll
- regsvr32.exe muweb.dll
- regsvr32.exe wuwebv.dll
- после повторной регистрации компонентов BITS и Центра обновления Windows вам необходимо сбросить Winsock, выполнив эту команду:
- netsh winsock reset
- теперь вам нужно запустить ранее отключенные службы BITS, Криптографии, Удостоверения приложений и Центра обновления этими командами:
- net start bits
- net start wuauserv
- net start appidsvc
- net start cryptsvc
Перезагрузите свой компьютер и попытайтесь обновить Windows. Ошибка 0xc8000247 должна была исчезнуть к этому моменту.
Метод №5 Применение SFC и DISM
Потенциальная причина 0xc8000247 — повреждение системных файлов. Центр обновления Windows полагается на целую кучу самых разных системных файлов, так что повреждение запросто может вызвать рассматриваемую проблему.
Исправить повреждения можно при помощи системных средств DISM и SFC. Для их запуска вам необходимо сделать следующее:
- нажмите комбинацию Windows+X;
- кликните на «Командная строка (администратор)»;
- выполните следующие команды:
- Dism.exe /online /cleanup-image /scanhealth
- Dism.exe /online /cleanup-image /restorehealth
- подождите окончания работы DISM и перезагрузите компьютер;
- снова откройте Командную строку с правами Администратора;
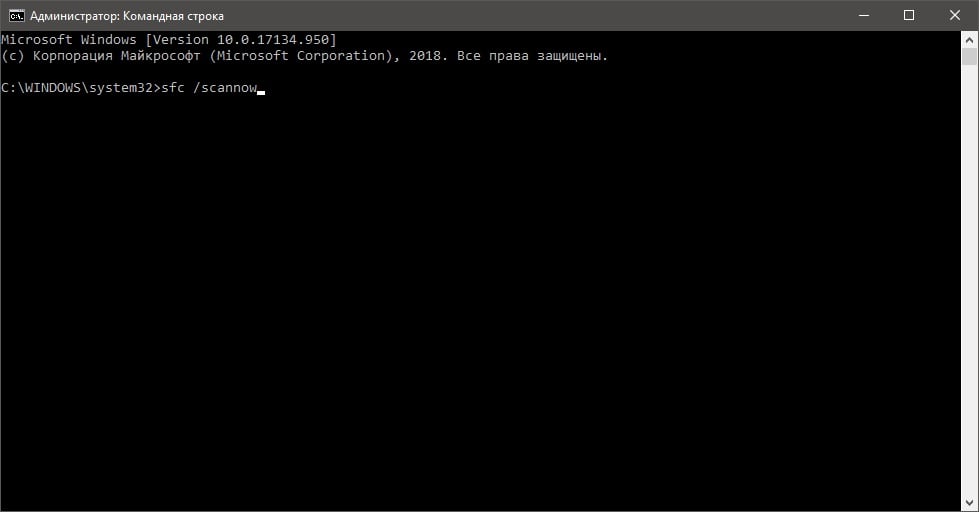
- теперь выполните эту команду:
- sfc /scannow
- дождитесь окончания работы SFC и перезагрузите свой ПК.
Зайдите в Центр обновления и попробуйте обновить Windows.
Метод №6 Использование точки восстановления
Если вы начали наталкиваться на ошибку 0xc8000247 совсем недавно, то мы рекомендуем вам воспользоваться точкой восстановления. После ее применения никакие ошибки при обновлении Windows не должны вас больше беспокоить.
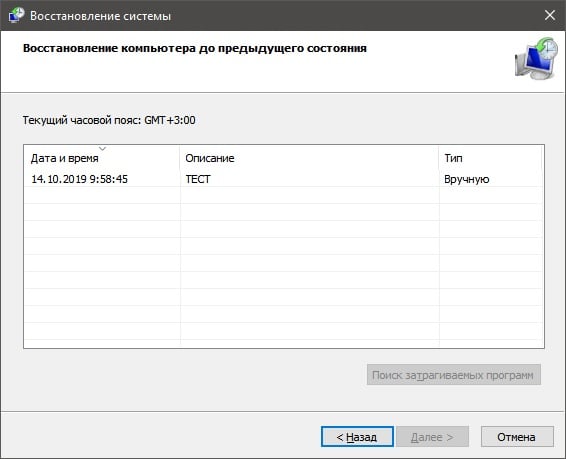
Итак, чтобы воспользоваться точкой восстановления, сделайте следующее:
- нажмите комбинацию Windows+R;
- пропишите значение «rstrui» и нажмите Ввод;
- далее кликните на кнопку «Далее» в появившемся окошке;
- поставьте галочку возле опции «Показать больше точек восстановления»;
- выберите точку восстановления, на время создания которой в вашей системе не наблюдалось проблем в обновлении, и нажмите на кнопку «Далее»;
- и наконец-то, кликните на кнопку «Завершить».
Начнется восстановление Windows. Как только процесс завершится и вы войдете в систему, зайдите в Центр обновления Windows и проверьте наличие ошибки 0xc8000247.
При установке netfx3, 4, обновлений вручную и т.д. выдается ошибка 0xc8000247 или 0x8E5E0247 или сообщение «Центр обновления Windows в настоящее время не может выполнить поиск обновлений, поскольку эта служба не запущена.Возможно, потребуется перезагрузка компьютера». Проблема весьма популярная, а решения подходят далеко не все! Вот рабочее решение:

- Может быть Вам поможет fixit из этой статьи: http://support.microsoft.com/kb/971058
- Но скорее всего поможет удаление «Intel RST» или «Intel® Matrix Storage Manager»
Join @AdmNtsRu on Telegram
Смотрите также:
You may receive Update Failed Error 0xC8000247 in Windows 10/8/7/Vista after upgrading hard disk or upgrading to Windows 10. After upgrading system hardware or operating system when you try to update Windows 10/8/7 or Windows Vista, you may receive the following error message.
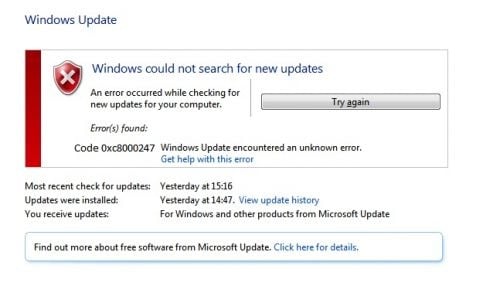
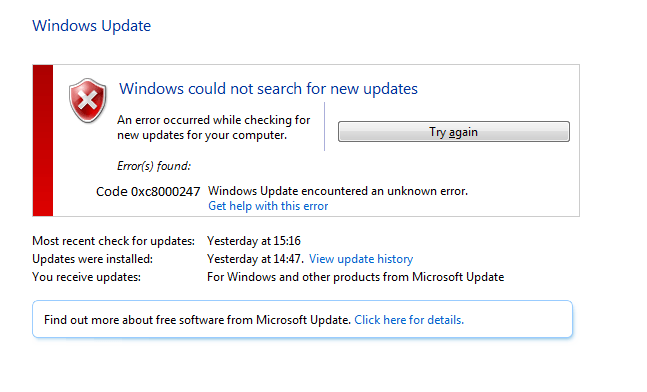
Windows could not search for new updates. An error occurred while checking for new updates for your computer.
Error(s) found: Code 0xC8000247 Windows update encountered an unknown error.
When you change your faulty hard disk and install Windows from Recovery Disk, when you update your windows, it may fail with above error code. In this article, I will tell you all the possible ways to fix this error.
How to Fix Windows Update Error 0xC8000247
Mostly this error occurs when some DLLs files get corrupted, registry file has invalid entries, bad file sector, missing other system files, corrupted windows update folder etc. Here I am adding several methods and you apply them one by one until your problem got fixed.
Method 1: Fix using Advanced System Repair Tool
The most of the common reason behind windows update failed is corrupted or damaged system files like DLL files, EXE files, sys files etc. There are thousands of tiny system files are there that work specific task. If one of the files gets replaced, deleted or damaged then you may get windows update error 0xC8000247.
Windows is made with huge number of dll files, exe files, sys files, various types of services, databases, etc so, it is not possible to keep monitoring all the files always. A brilliant PC Optimizer tool repairs damages, fix errors, update windows and drivers, and eliminate various types of errors silently.
Outbyte PC Repair Tool does all the above task easily and provides you an errorfree and smooth Windows environment to work so that you can focus on your business only.
![]()
3 Steps to Fix this Error
Step 1. Download Outbyte PC Repair Tool [File Size: 16.4 MB]
Step 2. SCAN your Windows PC
Step 3. Click Fix button to Repair Error
Download and Install Advanced System Repair Tool and scan your PC. It has the large database with 25 million files. It will find all the damaged or deleted system files and reinstall them with the fresh one. After, optimizing with Advanced System Repair Tool, try to install windows update again.
Method 2: Run System File Checker Tool.
This should be the first primary treatment when you get any update related error. System File Checker tool scans the whole PC thoroughly for missing or corrupted system files and replaces them with a new one. You don’t need to find this tool online because it is a command line tool that can be easily used.
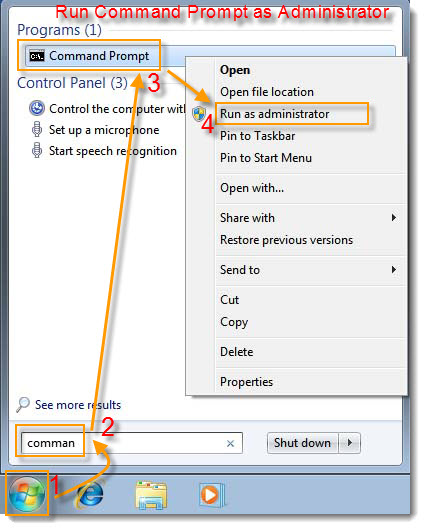
Step 1: Open command prompt as administrator. Go to Start Menu and search for the command. Right click on Command Prompt and select Run as Administrator.
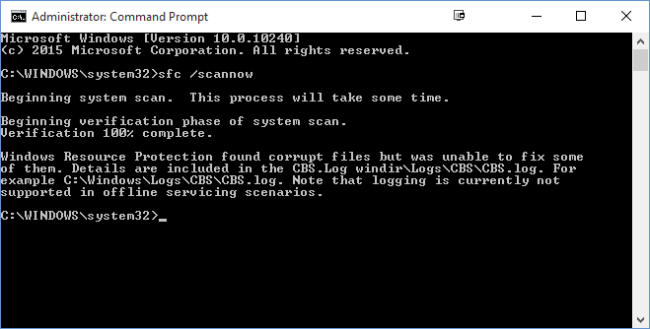
Step 2: Now type the following command and press Enter.
sfc /scannow
Method 3: Update Driver
When you upgrade the operating system from lower version to higher version, or when you upgrade your system hardware like hard disk then, most of the driver gets damaged or outdated. All the device driver is strongly associated with hardware and when you change the device it becomes outdated or corrupted. Either you update all the driver manually or install Advanced System Repair Tool that will do all the update task automatically with ease.
Method 4: Disable Third Party Security Program
Antivirus and Firewall are designed to protect PC from virus and outer threat. Most of the time due to uncertain reason these security programs consider windows update as a malicious program and stops them from downloading and installing updates. Disable Third-party antivirus, windows defender and firewall temporarily and start windows in clean boot mode. In the Clean Boot Mode try to install windows updates.
Method 5: Boot PC in Clean Boot Mode
Clean Boot Mode is the stage of booting PC without loading any third-party driver or software. Windows used only necessary drivers for booting so, there are no conflicting issues with third-party software or driver.
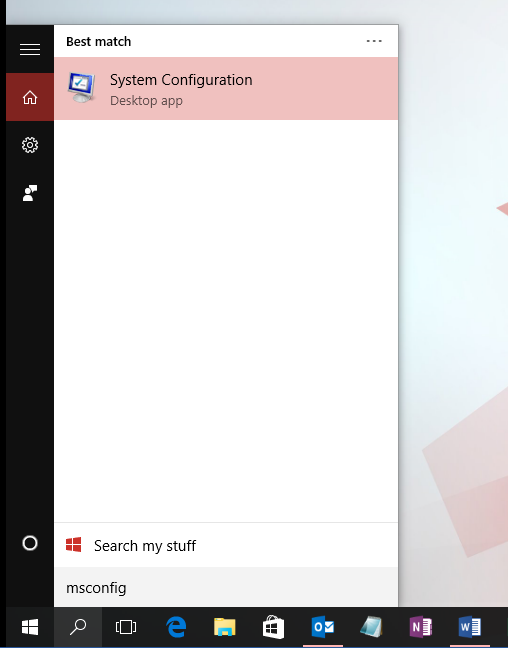
Step 1: Go to Start Menu and search for msconfig. Select System Configuration from the search results.
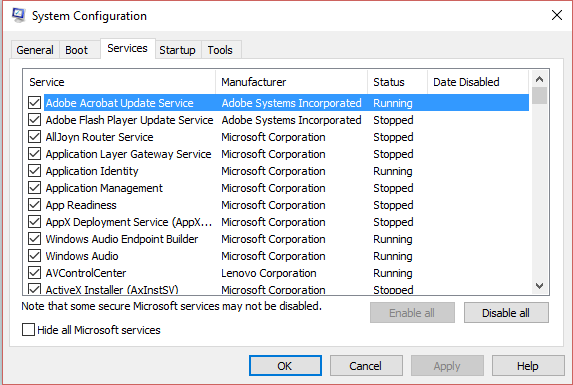
Step 2: Click on Service Tab and check the Hide all Microsoft services check box. Next click Disable All button.
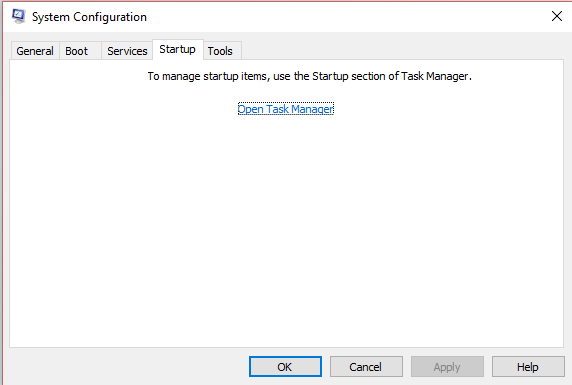
Step 3: Go to Startup Tab and click Open Task Manager link.
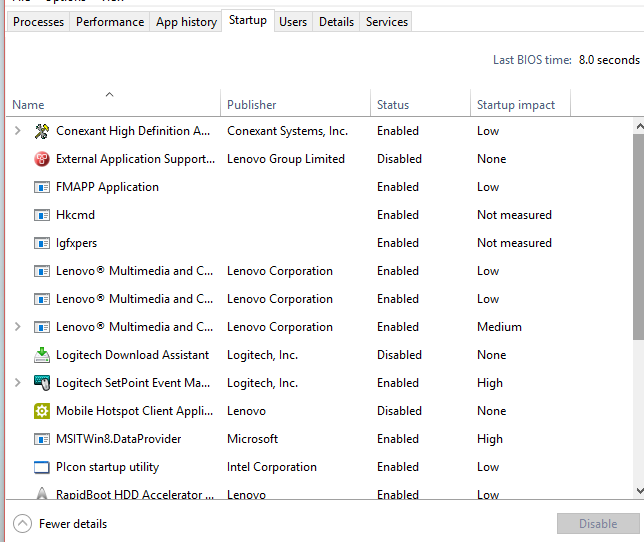
Step 4: Go to Startup Tab in the Task Manager and Disable all the Startup Item.
Step 5: Close the Task Manager and Click OK in System Configuration Dialog Box and then Restart your PC.
Summary
In this article, I have tried to explain how to fix Update Failed Error 0xC8000247. This error is associated with Windows 10, Windows 8, Windows 7 and Windows Vista. There are some awesome and guaranteed fixing methods are explained in this article, that will quickly help you resolve this problem yourself.