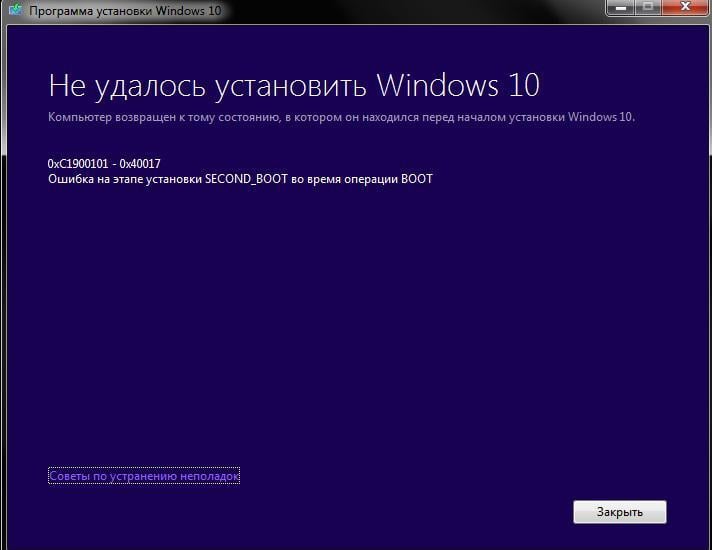
Ошибка под номером 0xC1900101 – 0x40017 может возникнуть в процессе инсталляции (апдейта до) ОС Windows 10. В ошибке говорится вот что:
Компьютер возвращен к тому состоянию, в котором он находится перед началом установки Windows 10.
0xC1900101 – 0x40017
Ошибка на этапе установки SECOND_BOOT во время операции BOOT
Майкрософт выпустила фиск от подобных ошибок, тем не менее он работает не в каждом случае — иногда приходится задействовать особые методы.
Что может вызывать 0xC1900101 – 0x40017?
- Антивирус от сторонних разработчиков.
- Устаревшие драйвера для различных устройств.
- Внешний жесткий диск/твердотельный накопитель.
- Брандмауэр Windows.
Решение №1 Повторный запуск установки
А вы пробовали запустить процесс установки Windows 10 еще раз? В некоторых случаях ошибку 0xC1900101 – 0x40017 удается обойти именно таким способом. Также вы можете попробовать перезагрузить свой ПК и запустить установку еще раз.
Решение №2 Отключение Брандмауэра Windows
Большинство пользователей утверждают, что у них ошибка 0xC1900101 – 0x40017 возникала из-за работающего Брандмауэра Windows. По какой-то причине тот может мешать процессу установки/обновлению до Windows 10, препятствуя загрузке необходимых файлов. Деактивировать Брандмауэр Windows можно вот так:
- нажмите Windows+I, чтобы открыть окошко с параметрами системы;
- пропишите в поисковую строку «Брандмауэр Защитника Windows» и выберите найденный результат;
- кликните на ссылку «Включение и отключение брандмауэра Защитника Windows»;
- отметьте опции «Отключить брандмауэра Защитника Windows (не рекомендуется)» для всех типов сетей;
- сохраните изменения.
Запустите установку ОС Windows 10 еще раз и посмотрите, исчезла ли ошибка 0xC1900101 – 0x40017.
Решение №3 Отключение внешних устройств
Подобную проблему могут вызывать некоторые внешние устройства. USB-накопители, внешние HDD/SSD, игровые контроллеры, смартфоны и прочие гаджеты — отключите от своего ПК всё ненужное, а затем повторно запустите установку Windows 10.
Решение №4 Отключение антивируса
Используете на своем компьютере антивирусное ПО от сторонних разработчиков? Знайте, что как раз оно и может вызывать появление ошибки 0xC1900101 – 0x40017. Отключите активную защиту своего антивируса, после чего попытайтесь установить Windows 10 еще раз.
Решение №5 Обновление драйверов
Устаревшие драйвера могут послужить причиной за появлением 0xC1900101 – 0x40017. Вам нужно найти проблематичные драйвера в своей системе и заняться их обновлением. Апдейт драйверов можно произвести следующим образом:
- нажмите Win+R и выполните значение devmgmt.msc;
- раскройте, например, раздел «Видеоадаптеры»;
- нажмите ПКМ на свою видеокарту и выберите «Обновить драйвер»;
- кликните на опцию «Автоматический поиск обновленных драйверов»;
- следуйте дальнейшим инструкциям на экране для обновления драйвера.
Выполните вышеуказанные действия со всем оборудованием в своей системе, после чего перезагрузите компьютер и запустите установку Windows 10.
Решение №6 Освобождение дополнительного места на диске
Знайте, что установка Windows 10 требует наличия свободного места на диске. Возможно, вы пытаетесь перейти на «десятку» с забитым до самых краев диском. Почистите свой SSD/HDD от ненужных файлов, например, фильмов или видеоигр. Если никакой ошибки при установке Win10 не возникло, значит вам действительно просто не хватало свободного места.
Решение №7 Чистая загрузка системы
Некоторые службы и программы от сторонних разработчиков могут препятствовать установке Windows 10. Чтобы это проверить, вам нужно проделать так называемую «Чистую загрузку». Вот что вам нужно сделать:
- нажмите Win+R и выполните msconfig;
- пройдите в «Службы»;
- поставьте галочку возле опции «Не отображать службы Майкрософт»;
- нажмите на кнопку «Отключить все»;
- пройдите в «Автозагрузка»;
- кликните на ссылку «Открыть диспетчер задач»;
- отключите все программы, которые будут находиться в списке автозагрузки;
- перезагрузите компьютер.
Начните установку Windows 10 и проверьте, покажется ли 0xC1900101 – 0x40017. Если все пройдет гладко, то проблема действительно заключалась в одной из отключенных служб или программ. Вернитесь в конфигурацию системы (и диспетчер задач) и включите все ранее деактивированные элементы.
Решение №8 Обновление BIOS
Некоторые владельцы ноутбуков Dell утверждают, что им справиться с 0xC1900101 – 0x40017 помогло обновление BIOS. У вас такой же ноутбук? Воспользуйтесь вот этим материалом от компании Dell, чтобы обновить BIOS на своем ноутбуке.
В данной статье рассмотрим как решить проблему ошибок «0xc1900101, 0x40017 или ошибка на этапе установки second_boot«
Если у Вас возникает ошибка при обновлении из «Центра обновления Windows», либо при апгрейде на более новую версию Windows 10 данные ошибки, то эти решения определенно Вам помогут.
Путем долгих проб и ошибок удалось найти способ, который помог именно нашим пользователям, возможно и Вам поможет решить данную проблему.
1) Запускаем командную строку от имени администратора: Поиск => CMD => Правой кнопкой мыши => Запуск от имени администратора
Введите следующие команды поочередно (возможно некоторые из них у Вас не будут срабатывать, ничего страшного, следуйте списку):
net stop bits
net stop wuauserv
net stop appidsvc
net stop cryptsvc
DEL «%ALLUSERSPROFILE%\Application Data\Microsoft\Network\Downloader\qmgr*.dat»
move c:\Windows\SoftwareDistribution SoftwareDistribution1
move c:\Windows\system32\catroot2 catroot21
del /F /Q c:\Windows\SoftwareDistribution1\*
rmdir /S /Q c:\Windows\SoftwareDistribution1
sc.exe sdset bits D:(A;;CCLCSWRPWPDTLOCRRC;;;SY)(A;;CCDCLCSWRPWPDTLOCRSDRCWDWO;;;BA)(A;;CCLCSWLOCRRC;;;AU)(A;;CCLCSWRPWPDTLOCRRC;;;PU)
sc.exe sdset wuauserv D:(A;;CCLCSWRPWPDTLOCRRC;;;SY)(A;;CCDCLCSWRPWPDTLOCRSDRCWDWO;;;BA)(A;;CCLCSWLOCRRC;;;AU)(A;;CCLCSWRPWPDTLOCRRC;;;PU)
net start bits
net start wuauserv
net start appidsvc
net start cryptsvc
2) Скачиваете следующие .reg файлы, в эти файлы исправят автоматически некоторые значения в Вашем реестре. Один из них так же у Вас может не запуститься, ничего страшного.
Скачать: Файл-1, Файл-2
После проведения всех 2х процедур перезагрузите ПК и попробуйте повторить обновление системы.
Quick tutorial navigation for fixing 0xc1900101 error in Windows update:
| Workable Solutions | Step-by-step Troubleshooting |
|---|---|
| Fix 1. Check Upgrade Space | According to Microsoft, 64 GB* or greater available storage is required to install Windows 11…Full steps |
| Fix 2. Update or Re-Install Drivers | 0xC1900101 error is a driver-related problem. To fix the error, you can update or reinstall drivers…Full steps |
| Fix 3. Run SFC Scan | SFC can scan and fix all protected system files for corruption that cause 0xC1900101 error…Full steps |
| Fix 4. Run DISM Scan | If SFC failed to repair protected system files, use DISM instead, which is more powerful…Full steps |
| Fix 5. Install Windows 11 with bootable USB | When 0xC1900101 error stops you from installing Windows 11, use EaseUS Win11Builder to install Win11…Full steps |
User Case: Cannot install Windows 11 — Error 0xc1900101
«I am trying to install the new Windows 11 update from Windows Update, but I keep getting error 0xc1900101. The installation starts, and after a couple of restarts, it says:» Attempting to recover installation «, » Undoing changes made to your computer «. And then I am greeted with error 0xc1900101 on Windows Update». — A user problem in Microsoft Community
Windows 11 was officially released on October 5, 2022, and has been gaining a very high degree of attention around the world. Many people have upgraded to the new Windows 11 for the first time. (Get to know how to download Windows 11)
But as with previous Windows 10 upgrades, some people have encountered 0xc1900101 error during the upgrade process and failed to install Windows 11. In this article, we will discuss terror 0xc1900101 in Windows 11 and come up with some effective solutions to fix the issue, hoping to help you.
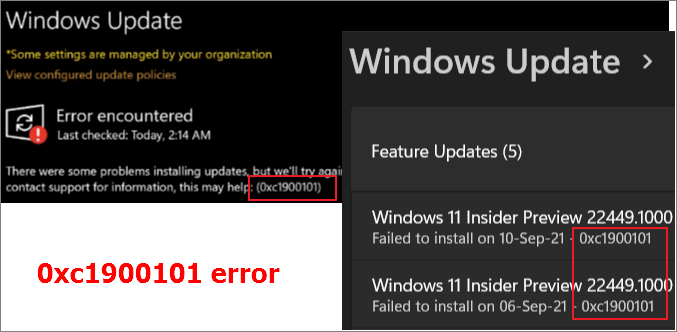
What Is Windows Update Error 0xc1900101
Many users cannot install Windows 11 or Windows 10 because of a series of 0xC1900101 errors, such as:
- 0xC1900101 — 0x2000c
- 0xC1900101 — 0x20004
- 0xC1900101 — 0x20017
- 0xC1900101 — 0x40017
- 0xC1900101 — 0x30018
- 0xC1900101 — 0x40021
Usually, 0xC1900101 errors are specific to driver-related issues. For example, users don’t have the latest driver update installed on their computers, some drivers are not compatible with Windows 11 or the latest Windows 10 version, your computer is missing some drives or has problematic drivers, and more.
Windows Update error 0xC1900101 can render your computer unusable, so fixing it is a top priority. Take the following methods to resolve 0xC1900101 driver errors in Windows 10 or Windows 11.
1. Ensure Enough Upgrade Space
To install or upgrade to Windows 11, your device must meet the minimum hardware requirements, including clear storage requirements. According to Microsoft, 64 GB* or greater available storage is required to install Windows 11. Additional storage space might be required to download updates and enable specific features. (Note: Upgrading to Windows 10 needs at least 16GB of storage.)
You may run into 0xC1900101 errors if you upgrade without meeting this memory requirement. So before upgrading, check your available drive space.
More information on how to free up hard drive space on Windows 11.
2. Update or Re-Install Drivers
Since 0xC1900101 error is a driver-related problem, the first approach should be to solve the driver problem. You can upgrade or reinstall your drivers.
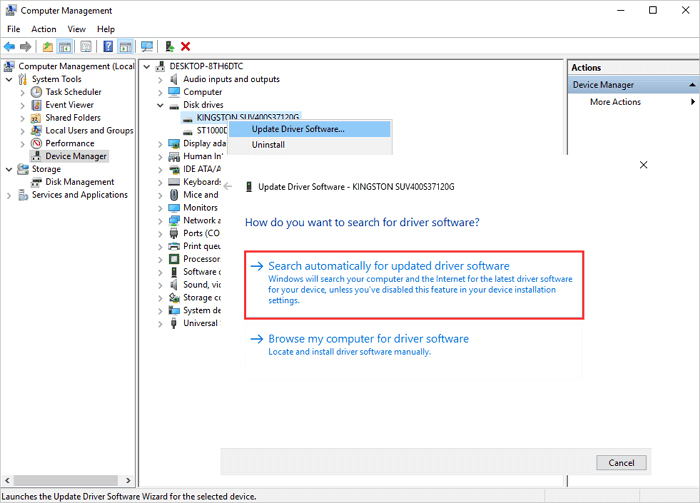
Update Disk Drivers
Step 1. Right-click «This PC» > click «Manage». On the left panel, click «Device Manager».
Step 2. Expand Disk driver. Right-click the outdated or problematic disk driver and select «Update Driver Software…».
Step 3. On the Update Driver Software window, choose «Search automatically for updated driver software» and wait for the process to complete. After this, your computer will have the latest driver software. Try to upgrade your Windows again.
Un-install and Re-install Disk Drivers
To solve the 0xC1900101 error, you can also try to uninstall and reinstall the driver.
Right-click the target disk driver, click «Uninstall». Restart your computer and Windows will check and reinstall the driver.
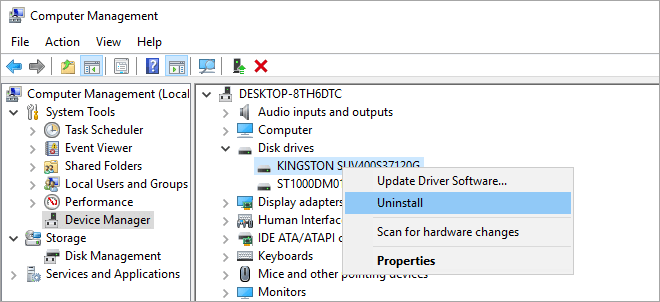
Or you can go to the disk website and find the latest driver you need to download and install on your computer.
3. Run SFC Scan to Fix 0xC1900101 Error
System file error or corruption may lead to 0xC1900101 error on Windows update. You can repair damaged system files with the SFC tool. SFC, short for System File Checker, can scan and fix all protected system files for corruption.
Step 1. Right-click the Start menu, and choose Command Prompt((Admin) from the context menu.
Step 2. On the Command Prompt window, type sfc/scannow and press «Enter».
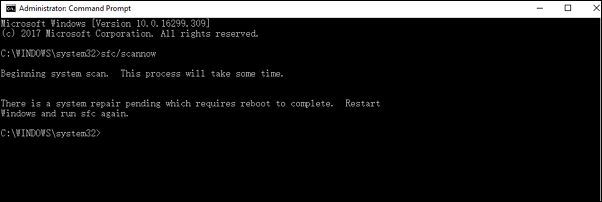
If the protected file has been corrupted or changed, the SFC scanner will repair and replace it with the correct copy from the system32\dllcache folder. The SFC can even try to repair the file cache if it is found to be changed or corrupted.
4. Run DISM Scan
If SFC failed to repair protected system files, you still have another tool to figure out. Use DISM instead, which is much more powerful and capable.
Step 1. Right-click the Start menu, and choose Command Prompt((Admin).
Step 2. In Command Prompt, type DISM /Online /Cleanup-Image /RestoreHealth and press «Enter». Then, wait for the tool to repair corrupted files. When this process finishes, restart your computer and check if you can upgrade to Windows 11.
If this doesn’t work, move to the next solution to install Windows 11 by using EaseUS Windows 11 Builder (Now renamed as EaseUS OS2Go).
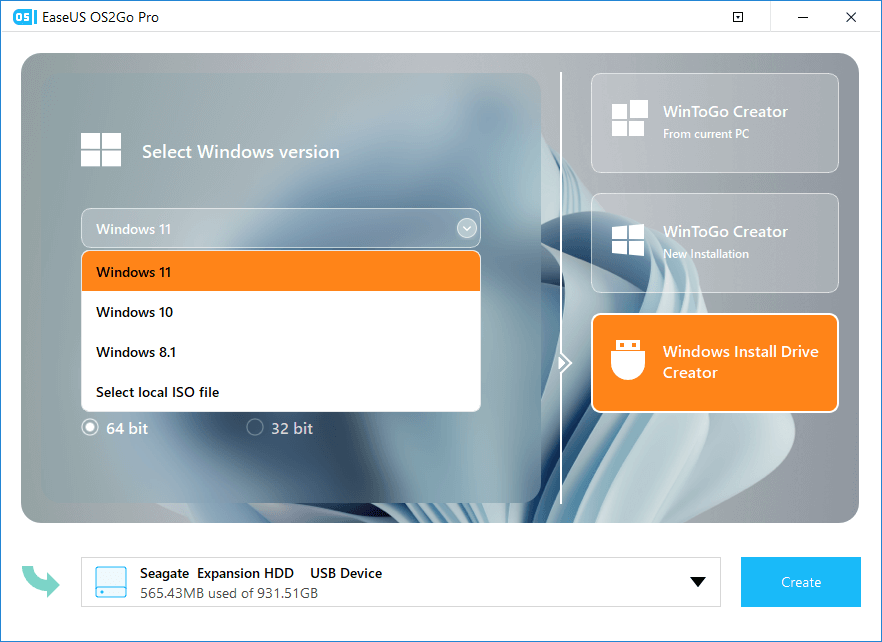
5. Download and Upgrade to Windows 11 with a Bootable USB Drive
If you can’t install Windows 11, you can use EaseUS Windows 11 installation software, which enables you to download and upgrade to Windows 11 easily. All you need is to prepare a USB flash drive of 4GB to download the Win11 ISO file we have prepared for you, and then you can install Windows 11 with the bootable USB drive.
Step 1. Launch OS2Go after installation, and click Windows Install Drive Creator. The obtained system information is available on the home screen, and it keeps updating all the time. Apart from Windows 11, Win11 builder also supports you to download Windows 10/8.1.
Step 2. Connect your USB flash drive to the computer. Win11 builder will automatically detect your USB device, so all you need to do is click the Create button.
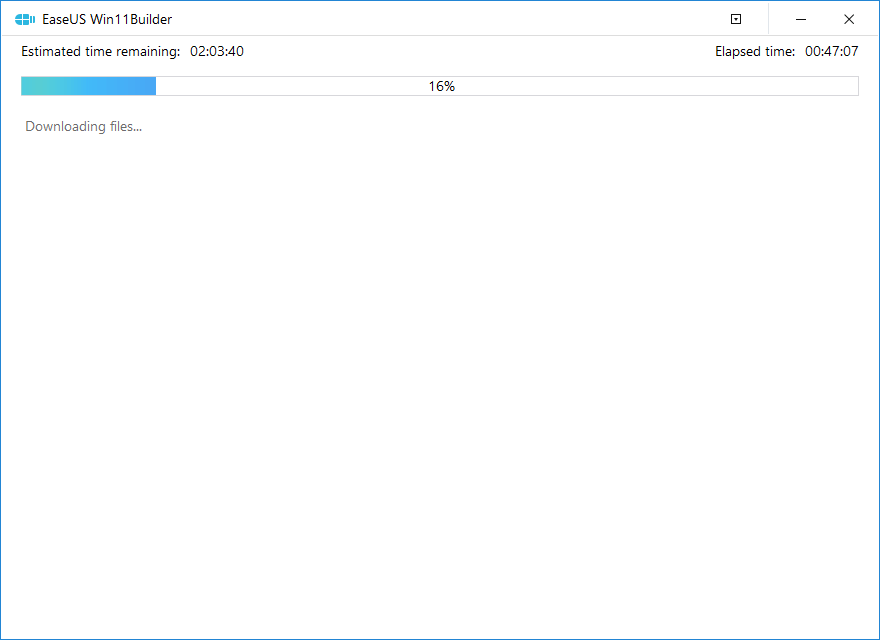
Step 3. The software will empty your USB drive data if it’s a used one. Once the downloading process begins, wait there until it finished or leave for a while to do you own job.
Step 4. After successfully downloading the Windows 11 iso image file on the USB drive, start to install Windows 11 from the bootable USB drive on your computer by following the installation wizard step by step.
6. Uninstall Problematic Applications
Some users have reported that sometimes, certain third-party software can interfere with Windows upgrades and cause 0xC1900101 error.
You can uninstall your recently added applications in order and try to perform the upgrade again. If you can install Windows 11 after removing a specific program, congratulations, the problem, then, is a software conflict.
Concluding Words
Except for the above solutions, there are some other useful tips to solve the 0xC1900101 errors in Windows Update. For example, unplug all peripherals, run antivirus software to remove virus or malware, remove additional RAM or your Network card, and more.
The 0xC1900101 error on Windows 10 or Windows 11 can be tricky and it prevents you from installing the latest updates. Try to troubleshoot by using the methods in this tutorial. If you have any other problems, contact our technical support team via live chat for help.
Когда выпускается новая версия Windows, пользователи обычно хотят ее обновить. Если человек, использующий более старую версию Windows 10, 7 или 8, попытается перейти на более новую версию Windows, процесс установки может завершиться ошибкой, в результате чего пользователь получит сообщение об ошибке. После остановки установки система вернется к предыдущей версии Windows.
Если это случилось с вами в какой-то момент, то этот пост предназначен для того, чтобы вам помочь. Мы поможем вам точно понять, что такое ошибка 0xC1900101 — 0x40017, возможные причины и соответствующие решения, которые вы можете попытаться решить.
Что такое ошибка 0xC1900101 — 0x40017 в Windows 10?
Ошибка 0xC1900101 — 0x40017 — это код, который пользователи получают во время обновления Windows 10. Код ошибки указывает на то, что проблема может быть связана с неподдерживаемым оборудованием, несовместимым BIOS, драйвером или программой в системе.
Вы должны понимать, что эта проблема не вызвана вредоносным ПО, поэтому средство защиты от вредоносных программ здесь не поможет.
Совет профессионала: просканируйте свой компьютер на наличие проблем с производительностью, ненужных файлов и т. д. вредоносные приложения и угрозы безопасности
, которые могут вызвать проблемы в системе или снизить производительность.
Проблемы с бесплатным сканированием для ПК. Об Outbyte, инструкции по удалению, лицензионное соглашение, политика конфиденциальности.
Что вызывает ошибку 0xC1900101 — 0x40017?
Ошибка 0xC1900101 — 0x40017 может быть вызвана несколькими факторами, в том числе:
Сторонними инструментами безопасности
Эта ошибка может возникать на некоторых компьютерах из-за наличия сторонних антивирусных программ.
Устаревшие драйверы устройств
Иногда ошибка может быть вызвана устаревшими драйверами. В этом случае вам необходимо обновить драйверы.
Внешнее оборудование
Внешние устройства, подключенные к вашему компьютеру, также могут вызвать помехи в системе и привести к ошибке.
Брандмауэр Windows
Есть сообщения, что брандмауэр Windows иногда вызывает ошибку. После выключения брандмауэра проблема решается.
Как исправить ошибку 0xC1900101 — 0x40017
Когда дело доходит до того, как исправить ошибку 0xC1900101 — 0x40017, существует несколько доступных решений. Microsoft проделала потрясающую работу, придумав официальные исправления для этой ошибки. Однако эти исправления применимы не ко всем случаям. Чаще всего для каждого случая есть свое уникальное решение.
Прежде чем приступить к исправлению ошибки, сначала необходимо сделать следующее:
- Убедитесь, что Дата & amp; Настройки времени верны.
- Если включено шифрование жесткого диска, отключите его.
- Отключитесь от сети, отсоединив кабель Ethernet или отключив адаптер Wi-Fi.
- Наконец, перезагрузите компьютер и повторите попытку обновления до Windows 10.
Если вы применили все приведенные выше инструкции по устранению неполадок, но обновление до Windows 10 по-прежнему не удалось, перейдите к решениям, перечисленным ниже. Просмотрите каждое из восьми решений ошибок Windows, чтобы увидеть, какое из них работает в вашей ситуации.
Если процесс установки обновления идет не так, как ожидалось, запуск его несколько раз может оказаться полезным в решении проблемы. В качестве альтернативы вы можете попробовать перезагрузить компьютер, а затем запустить обновление. Это даст вам желаемые результаты.
Весьма вероятно, что проблема возникла из-за наличия брандмауэра Windows, что иногда мешает процессу установки. Брандмауэр потенциально может остановить обновление. В этом случае отключите брандмауэр, а затем попробуйте запустить обновление.
Если это решение не работает, вам все равно нужно отключить брандмауэр, пока вы не закончите пробовать другие решения.
Иногда внешние компоненты мешают процессу обновления. Хорошая новость в том, что решение этой проблемы довольно простое. Все, что вам нужно сделать, это отключить все устройства, подключенные к вашему компьютеру, а затем попробовать выполнить обновление до Windows 10 еще раз.
Весьма вероятно, что причиной ошибки является сторонняя антивирусная программа, которую вы используете. Если у вас установлена сторонняя программа безопасности, перед попыткой обновления убедитесь, что она отключена.
Если устаревшие драйверы являются причиной неудачного обновления, вам сначала нужно будет поискать устройство, драйверы которого вызывают проблемы, а затем обновить их. Это можно упростить с помощью программы обновления драйверов, которая сканирует ваш компьютер на наличие отсутствующих или устаревших драйверов и позволяет легко их обновлять.
Если на вашем устройстве недостаточно места, процесс обновления завершится ошибкой. Вам необходимо как минимум 16 ГБ свободного места, поэтому сначала удалите ненужные файлы.
Этот вариант почти гарантированно работает для вас, если все остальные не увенчались успехом. Этот процесс исключает возможность того, что фоновые процессы не вызывают помех и не приводят к ошибке.
Многие пользователи Dell утверждают, что для них не работает никакое другое решение, кроме этого. Ошибка 0xC1900101 — 0x40017 может быть результатом устаревшего BIOS. Если вы являетесь пользователем Dell, вам необходимо сначала обновить BIOS.
Заключение
Если ни одно из решений не помогло вам решить проблему, рекомендуется найти надежный инструмент восстановления, который сканирует репозиториев и заменяет поврежденные или отсутствующие файлы. Если вы чувствуете, что это не в ваших силах, обратитесь к специалисту, чтобы не повредить его.
YouTube видео: Ошибка 0xC1900101 — 0x40017, сбой установки на этапе SECOND_BOOT
09, 2023
This tutorial contains instructions to fix the Windows 10 Upgrade Error 0xC1900101 – 0x40017: «The installation failed in the SECOND_BOOT phase with an error during BOOT operation».

Windows 10 Upgrade Problem 0xC1900101 – 0x40017 in details: When you try to upgrade Windows 10 to the latest version (build) or when you try to upgrade your system from Windows 7 or 8.1 to Windows 10, the installation stops with error «We couldn’t install Windows 10 – 0xC1900101 – 0x40017 – The installation failed in the SECOND BOOT phase with an error during BOOT operation», and then reverts back to the previous Windows version.
How to FIX Windows 10 Update Error 0xC1900101 – 0x40017 «Installation failed in the SECOND_BOOT phase with an error during BOOT operation»
The error code 0xC1900101 – 0x40017 during the Windows 10 upgrade, indicates a problem with an incompatible device, driver or program on the system. So, before you continue to apply the methods below, apply the following:
1. First of all, make sure that the Date & Time settings are correct.
2. Then, ensure that you have enough free space. Windows 10 requires at least 32 GB of free space to upgrade. To free up disk space use Disk Cleanup.
3. Install the latest drivers for all the devices on your system, especially for the Ethernet & the Wireless adapter (if any). *
4. Disconnect all external USB drives & SD cards and any other USB device that don’t needed.
5. If you ‘re using a third-party antivirus program, then temporarily disable or -better- uninstall it.
6. Disable the Hard Drive Encryption (If enabled).
7. Finally, before restarting your computer to install the update, disconnect from the network. (e.g. Unplug the Ethernet cable or disable the Wi-Fi) adapter).
* Note: If after applying the instructions in this article, the Windows 10 Upgrade Installation still fails, proceed and update also the BIOS (Firmware) on your system.
Method 1. Run the Windows Update Troubleshooter.
The first method to fix the Windows 10 update error 0xC1900101 – 0x4001E, is to run the Windows Update Troubleshooter.
1. Navigate to Windows Control Panel, set the ‘View By’ to Small icons and open Troubleshooting.

2. In Troubleshooting options, click Fix problems with Windows Update.

3. Click Next to troubleshoot Windows update problems.

5. When the troubleshooting process is complete, close the troubleshooter and restart your PC.
6. Check for updates.
Method 2. Delete the ‘SoftwareDistribution’ Folder.
The “C:\Windows\SoftwareDistribution“ folder, is the location where Windows store the Windows Updates. Many times, this folder becomes corrupted and you must re-create it in order to download the updates from scratch. To rebuild (re-create) the “SoftwareDistribution” folder follow the steps below:
Step 1: Stop Windows Update Service.
1. Open Windows Services control panel: To do that:
- Press Windows
 + R keys to open the run command box.
 - In the Search box, type: services.msc & click OK.
- (Accept the UAC warning if appears).

2. In Services control panel locate the «Windows Update» service.
3. Right-click on Windows Update service and select “Stop”.

Step 2: Delete the SoftwareDistribution folder.
1. Open Windows Explorer and navigate to: C:\Windows folder.
2. Find and Delete the “SoftwareDistribution” folder (or rename it. e.g. to “SoftwareDistributionOLD”) .

Step 3: Start the Windows Update Service.
1. Open Windows Services control panel.
2. Right-click on Windows Update service and select “Start”.

Step 4: Check and Install Windows 10 Update.
1. Navigate to Settings -> Update and Security and click Check for Updates.
Method 3. Update Windows 10 by using the Update Assistant
1. Navigate to Windows 10 download site and click the Update now button.

2. Save the «Windows10Upgrade9252.exe» file on your desktop.
3. Double click at the downloaded file to open the Windows Upgrade Assistant.
4. Click Update Now to start the update.

5. Let Windows to finish the downloading and the verification.
6. When the verification is reaches 100%, disconnect your computer from the Internet, or set it to «Airplane mode«.
7. Wait until Windows updating your system.
8. When prompted, restart your system to install the update.
Method 4. Update Windows 10 from ISO/USB.
The next method to fix the Windows 10 update error «Installation failed in SECOND_BOOT phase» is to update Windows 10, from the Windows ISO file. To do that:
Step 1. Download Windows 10 in a ISO File.
1. Navigate to Windows 10 download page and download the Media Creation Tool.

2. Run the ‘Media Creation Tool’ and Accept the License Terms at the first screen.
3. Select Create installation media for another PC.

4. At ‘Language, architecture and edition’ screen click Next.
5. Select ISO file and click Next.

6. Save the ‘Windows.iso’ file to your desktop.
7. The Media Creation Tool will now begin to download the Windows 10 in an ISO format.
8. When the download is completed, close the Media Creation Tool.
Step 2. Update Windows 10 from the ISO file.
1. Disconnect your computer from the Internet, (or set it to «Airplane mode» if you own a laptop).
2. Disable or temporarily uninstall any third-party antivirus.
3. Then, right click on the «Windows.iso» file (on your desktop) and click Mount.
4. Double click at Setup application.

5. At the below screen choose ‘Not right now’ and click Next.

6. Follow the rest onscreen instructions to update your system.
Method 5. Clean install Windows 10.
The last method, to fix the Windows 10 Upgrade issues, is to perform a clean installation of Windows 10 on your system.
Important: The clean Windows 10 installation means that all your files and settings will be lost during the installation process. So, proceed and backup all your important files and settings to another storage media before continue. (e.g. to an external USB drive).
To perform a clean Windows 10 installation read the instructions on this article: How to clean install Windows 10
That’s all folks! Did it work for you? Please leave a comment in the comment section below or even better: like and share this blog post in the social networks to help spread the word about this solution.
If this article was useful for you, please consider supporting us by making a donation. Even $1 can a make a huge difference for us.
