Некоторые пользователи Windows 10 сталкиваются с ошибкой 0x80D05001, когда пытаются запустить апдейт системы через Центр обновления. В сети также можно найти сообщения, согласно которым данная ошибка появляется при установке различных программ из приложения магазина Windows.
В сегодняшней статье мы сосредоточимся на ошибке именно во время обновления.
Причины ошибки 0x80D05001
- Глюк в работе Центра обновления Windows.
- Поврежденные компоненты Центра обновления.
- Некорректно настроенный прокси-сервер или VPN.
- Чересчур «агрессивный» брандмауэр.
- Повреждение системных файлов.
Решение ошибки 0x80D05001
Давайте теперь посмотрим с вами на несколько методов решения ошибки 0x80D05001. Начиная от автоматических средств и заканчивая сложными комбинациями действий — устранить данную проблему можно самыми разными способами.
Метод №1 Запуск автоматизированного средства
Ошибка 0x80D05001 может возникать в результате бага в работе Центра обновления Windows и его компонентов. Благо, в операционной системе находится особое средство по устранению различных неполадок, которое в автоматическом режиме может исправить вашу проблему. Давайте попробуем с вами воспользоваться им:
- нажмите комбинацию Win+R;
- вставьте в пустую строку значение ms-settings:troubleshoot и нажмите Enter;
- найдите в списке Центр обновления и выберите его;
- кликните на кнопку «Запуск средства устранения неполадок»;
- далее вам нужно просто делать все согласно инструкциям на вашем экране.
После проведенной работы средством устранения неполадок перезагрузите компьютер. Возможно, на сей раз при обновлении Windows 10 ошибка 0x80D05001 не будет вам докучать.
Метод №2 Восстановление поврежденных компонентов Центра обновления
Если средство устранения неполадок не сработало, то ошибка 0x80D05001 наверняка возникла в результате повреждения некоторых компонентов Центра обновления Windows 10. Нет, в таком случае вам не потребуется переустановка операционной системы, а поэтому можете не переживать. Тем не менее вам нужно выполнить кое-какие действия, свойственные опытным пользователям.
Итак, выполните следующий ряд шагов:
- создайте на своем рабочем столе самый обычный текстовый файл (ПКМ→Создать→Текстовый документ);
- вставьте в только что созданный текстовик следующий ряд команд (ничего не меняйте!):
- @echo off
::Сброс центра обновлений
::GamesQA.ru:: Checking and Stopping the Windows Update services
set b=0:bits
set /a b=%b%+1
if %b% equ 3 (
goto end1
)net stop bits
echo Checking the bits service status.
sc query bits | findstr /I /C:»STOPPED»
if not %errorlevel%==0 (
goto bits
)
goto loop2:end1
cls
echo.
echo Cannot reset Windows Update since «Background Intelligent Transfer Service» (bits) service failed to stop.
echo.
pause
goto Start:loop2
set w=0:wuauserv
set /a w=%w%+1
if %w% equ 3 (
goto end2
)
net stop wuauserv
echo Checking the wuauserv service status.
sc query wuauserv | findstr /I /C:»STOPPED»
if not %errorlevel%==0 (
goto wuauserv
)
goto loop3:end2
cls
echo.
echo Cannot reset Windows Update since «Windows Update» (wuauserv) service failed to stop.
echo.
pause
goto Start:loop3
set app=0
:appidsvc
set /a app=%app%+1
if %app% equ 3 (
goto end3
)
net stop appidsvc
echo Checking the appidsvc service status.
sc query appidsvc | findstr /I /C:»STOPPED»
if not %errorlevel%==0 (
goto appidsvc
)
goto loop4:end3
cls
echo.
echo Cannot reset Windows Update since «Application Identity» (appidsvc) service failed to stop.
echo.
pause
goto Start:loop4
set c=0:cryptsvc
set /a c=%c%+1
if %c% equ 3 (
goto end4
)
net stop cryptsvc
echo Checking the cryptsvc service status.
sc query cryptsvc | findstr /I /C:»STOPPED»
if not %errorlevel%==0 (
goto cryptsvc
)
goto Reset:end4
cls
echo.
echo Cannot reset Windows Update since «Cryptographic Services» (cryptsvc) service failed to stop.
echo.
pause
goto Start:Reset
Ipconfig /flushdns
del /s /q /f «%ALLUSERSPROFILE%\Application Data\Microsoft\Network\Downloader\qmgr*.dat»
del /s /q /f «%ALLUSERSPROFILE%\Microsoft\Network\Downloader\qmgr*.dat»
del /s /q /f «%SYSTEMROOT%\Logs\WindowsUpdate\*»if exist «%SYSTEMROOT%\winsxs\pending.xml.bak» del /s /q /f «%SYSTEMROOT%\winsxs\pending.xml.bak»
if exist «%SYSTEMROOT%\winsxs\pending.xml» (
takeown /f «%SYSTEMROOT%\winsxs\pending.xml»
attrib -r -s -h /s /d «%SYSTEMROOT%\winsxs\pending.xml»
ren «%SYSTEMROOT%\winsxs\pending.xml» pending.xml.bak
)if exist «%SYSTEMROOT%\SoftwareDistribution.bak» rmdir /s /q «%SYSTEMROOT%\SoftwareDistribution.bak»
if exist «%SYSTEMROOT%\SoftwareDistribution» (
attrib -r -s -h /s /d «%SYSTEMROOT%\SoftwareDistribution»
ren «%SYSTEMROOT%\SoftwareDistribution» SoftwareDistribution.bak
)if exist «%SYSTEMROOT%\system32\Catroot2.bak» rmdir /s /q «%SYSTEMROOT%\system32\Catroot2.bak»
if exist «%SYSTEMROOT%\system32\Catroot2» (
attrib -r -s -h /s /d «%SYSTEMROOT%\system32\Catroot2»
ren «%SYSTEMROOT%\system32\Catroot2» Catroot2.bak
):: Reset Windows Update policies
reg delete «HKCU\SOFTWARE\Policies\Microsoft\Windows\WindowsUpdate» /f
reg delete «HKCU\SOFTWARE\Microsoft\Windows\CurrentVersion\Policies\WindowsUpdate» /f
reg delete «HKLM\SOFTWARE\Policies\Microsoft\Windows\WindowsUpdate» /f
reg delete «HKLM\SOFTWARE\Microsoft\Windows\CurrentVersion\Policies\WindowsUpdate» /f
gpupdate /force:: Reset the BITS service and the Windows Update service to the default security descriptor
sc.exe sdset bits D:(A;;CCLCSWRPWPDTLOCRRC;;;SY)(A;;CCDCLCSWRPWPDTLOCRSDRCWDWO;;;BA)(A;;CCLCSWLOCRRC;;;AU)(A;;CCLCSWRPWPDTLOCRRC;;;PU)sc.exe sdset wuauserv D:(A;;CCLCSWRPWPDTLOCRRC;;;SY)(A;;CCDCLCSWRPWPDTLOCRSDRCWDWO;;;BA)(A;;CCLCSWLOCRRC;;;AU)(A;;CCLCSWRPWPDTLOCRRC;;;PU)
:: Reregister the BITS files and the Windows Update files
cd /d %windir%\system32
regsvr32.exe /s atl.dll
regsvr32.exe /s urlmon.dll
regsvr32.exe /s mshtml.dll
regsvr32.exe /s shdocvw.dll
regsvr32.exe /s browseui.dll
regsvr32.exe /s jscript.dll
regsvr32.exe /s vbscript.dll
regsvr32.exe /s scrrun.dll
regsvr32.exe /s msxml.dll
regsvr32.exe /s msxml3.dll
regsvr32.exe /s msxml6.dll
regsvr32.exe /s actxprxy.dll
regsvr32.exe /s softpub.dll
regsvr32.exe /s wintrust.dll
regsvr32.exe /s dssenh.dll
regsvr32.exe /s rsaenh.dll
regsvr32.exe /s gpkcsp.dll
regsvr32.exe /s sccbase.dll
regsvr32.exe /s slbcsp.dll
regsvr32.exe /s cryptdlg.dll
regsvr32.exe /s oleaut32.dll
regsvr32.exe /s ole32.dll
regsvr32.exe /s shell32.dll
regsvr32.exe /s initpki.dll
regsvr32.exe /s wuapi.dll
regsvr32.exe /s wuaueng.dll
regsvr32.exe /s wuaueng1.dll
regsvr32.exe /s wucltui.dll
regsvr32.exe /s wups.dll
regsvr32.exe /s wups2.dll
regsvr32.exe /s wuweb.dll
regsvr32.exe /s qmgr.dll
regsvr32.exe /s qmgrprxy.dll
regsvr32.exe /s wucltux.dll
regsvr32.exe /s muweb.dll
regsvr32.exe /s wuwebv.dll
regsvr32.exe /s wudriver.dll
netsh winsock reset
netsh winsock reset proxy
:: Set the startup type as automatic
sc config wuauserv start= auto
sc config bits start= auto
sc config DcomLaunch start= auto:Start
net start bits
net start wuauserv
net start appidsvc
net start cryptsvc
- @echo off
- далее выберите Файл→Сохранить как…;
- задайте файлу любое имя, но обязательно поменяйте ему расширение с .txt на .bat;
- выберите нужное вам расположение, например, рабочий стол, и кликните кнопку «Сохранить»;
- дважды кликните на только что созданный «батник»;
- подождите завершения сброса компонентов Центра обновления и нажмите на любую кнопку на клавиатуре при появлении соответствующего сообщения в командной строке.
Перезагрузите компьютер и проверьте наличие ошибки 0x80D05001.
Метод №3 Отключение прокси или VPN-клиента
Ошибка 0x80D05001 также могла возникнуть в результате использования вами прокси-сервера или VPN-клиента. Последнее вам придется деактивировать самостоятельно, но вот с прокси-сервером мы вам поможем. Чтобы отключить прокси-сервер на своей Windows 10, сделайте следующее:
- нажмите Win+S на своей клавиатуре;
- впишите запрос «Прокси» и выберите из списка результатов пункт «Параметры прокси-сервера»;
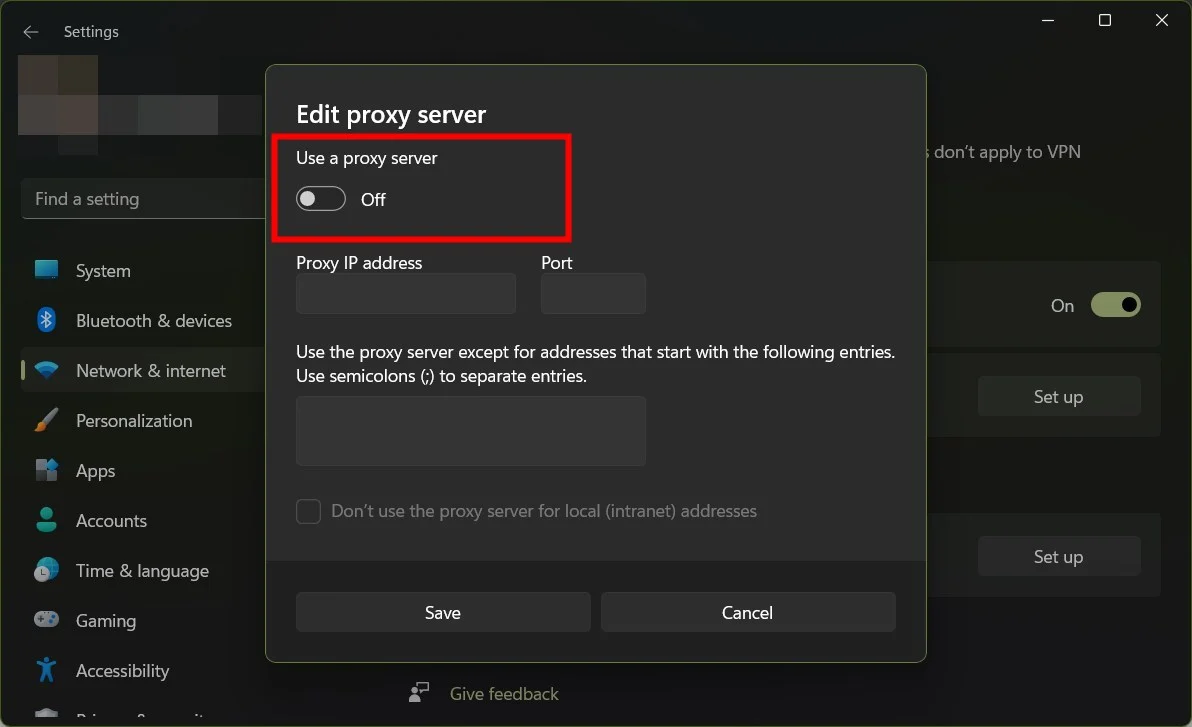
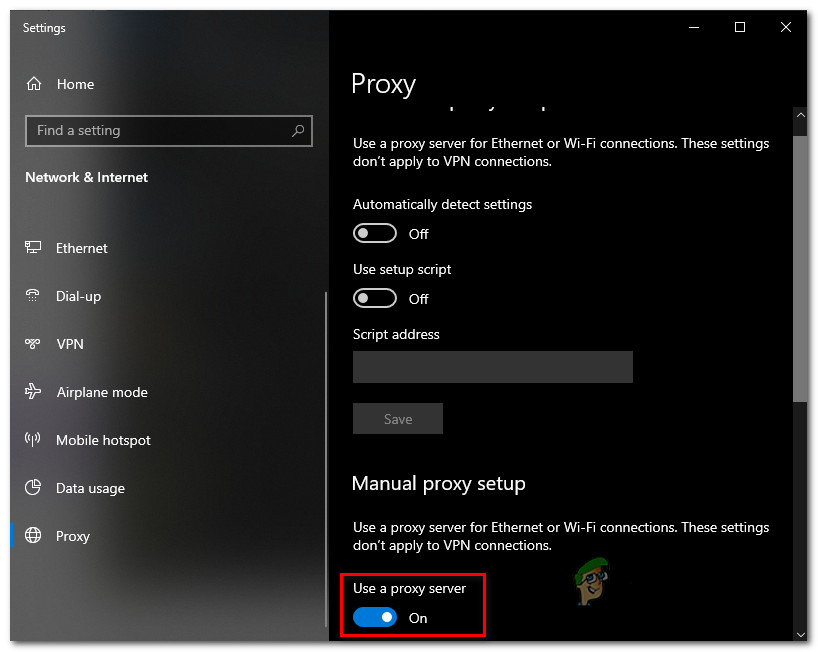
- выставьте переключатель рядом с опцией «Использовать прокси-сервер» в положение «Откл.»;
- закройте все окошки и перезагрузите свой компьютер.
Итак, как только вы войдете в систему, пройдите в Центр обновления и запустите апдейт Windows 10.
Метод №4 Отключение брандмауэра
Некоторые пользователи утверждают, что ошибка 0x80D05001 может возникать из-за чересчур «заботливого» брандмауэра. Как правило, такая ситуация возникает с фаерволом от сторонних разработчиков. Вот что мы советуем вам сделать: либо временного отключите фаервол (если такая возможность присутствует), либо удалите утилиту, которая предоставляет данный функционал. Ни то, ни другое решение для вас не в радость, но проверить все-таки стоит. Возможно, придется заменить текущий фаервол на фаервол другого разработчика.
Метод №5 Запуск сканирований SFC и DISM
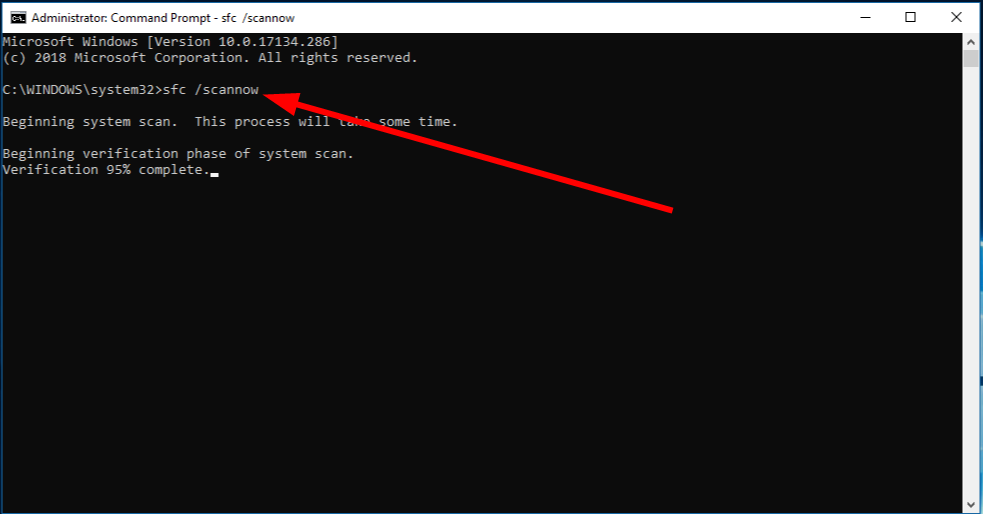
Возможно, вы имеете дело с поврежденными системными файлами и компонентами Windows 10. В такой ситуации стоит воспользоваться утилитами System File Checker и DISM. Не нужно ничего качать или долго настраивать: открыли командную строку (Win+R→cmd→Ctrl+Shift+Enter) и выполнили определенную пачку команд. Кстати, вот и эти команды:
- sfc /scannow
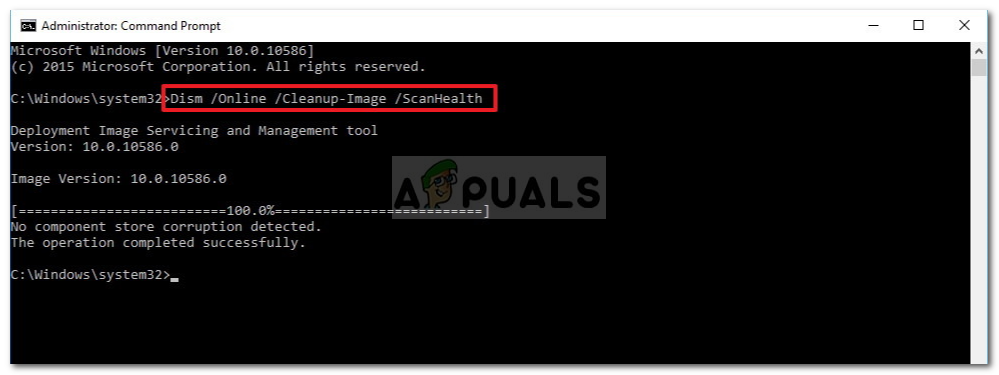
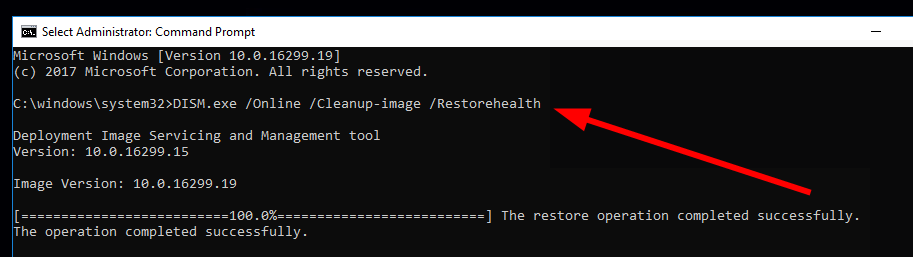
- Dism /Online /Cleanup-Image /RestoreHealth
Понятное дело, дожидаемся окончания работы каждой из программ и делаем все, что от нас требуется в командной строке, в конце — перезагружаемся. Как только закончите чинить свою потенциально поврежденную ОС, запустите ее обновление и проверьте, была ли устранена ошибка 0x80D05001.
Try uninstalling any VPN apps or fixing the system files
by Sagar Naresh
Sagar is a web developer and technology journalist. Currently associated with WindowsReport and SamMobile. When not writing, he is either at the gym sweating it out or playing… read more
Updated on
- Windows update error code 0x80d05001 is a different error from the Microsoft Store error 0x80d05001.
- This error prevents users from installing the latest available Windows updates on their PC.
- To fix this, you can check if the Bluetooth Intelligent Service is running or reset the Windows update service.
XINSTALL BY CLICKING THE DOWNLOAD FILE
Repair all Windows Updates Errors with Fortect:
SPONSORED
Windows update failures can be annoying! With Fortect, you will get rid of errors caused by missing or corrupted files after an update. The utility maintains a repository of the original Windows system file versions, and it uses a reverse algorithm to swap out the damaged ones for good ones.
- Download Fortect and install it on your PC
- Start the tool’s scanning process to look for corrupt files that are the source of the issues
- Right-click on Start Repair to resolve security and performance issues with your computer
- Fortect has been downloaded by 0 readers this month, rated 4.4 on TrustPilot
Well, there is a long list of Windows update errors that you will face on your Windows PC, irrespective of the OS version you are running.
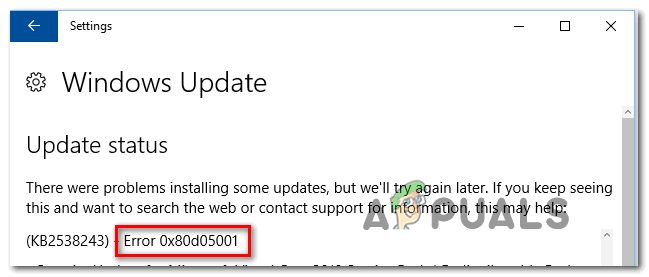
In this guide, we will discuss the Windows update error 0x80d05001. This error is different from the error 0x80D05001 in Microsoft Store. Here is the complete error message that you will come across:
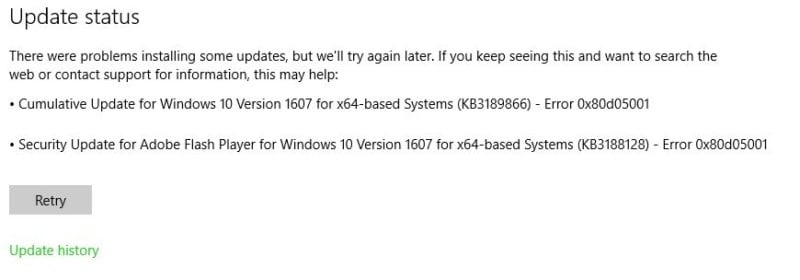
Download error – 0x80d05001
There were problems downloading some updates, but we’ll try again later. if you keep seeing this, try searching the web or contacting support for help. this error code might help: (0x80d05001)
Why am I getting Windows update error 0x80d05001?
We have found some of the most common reasons that will trigger the Windows update error 0x80d05001.
- Windows update glitch: There might be a normal bug in the Windows update service that is preventing you from downloading the update.
- You are using a VPN: If you are using a VPN, then this could conflict with the Windows update servers and trigger the update error 0x80d05001.
- Aggressive Firewall: Often aggressive Firewall or antivirus setting can also block important Windows services, which could be causing the problem.
- System files are corrupt: Missing or corrupt system files will not only trigger Windows update errors but will also hamper the smooth performance of your PC.
The Windows Update error 0x8024a21e can also be daunting but the highlighted guide will help you with tested solutions.
How can I fix Windows update error 0x80d05001?
Here are a few fixes that we would suggest you try before going ahead with the advanced troubleshooting methods:
- Restart your PC as it will help the system load all the files from scratch. Here’s what to do if your computer fails to restart.
- Run the Windows update again and check if it lets you download the update or continues to throw the error.
- Disconnect external devices such as Bluetooth mouse, keyboard, etc., and check if the update is starting or not.
Now, let us check out the solutions that have helped users fix the problem.
1. Run the Windows update troubleshooter
- Press the Win + I buttons to open Settings.
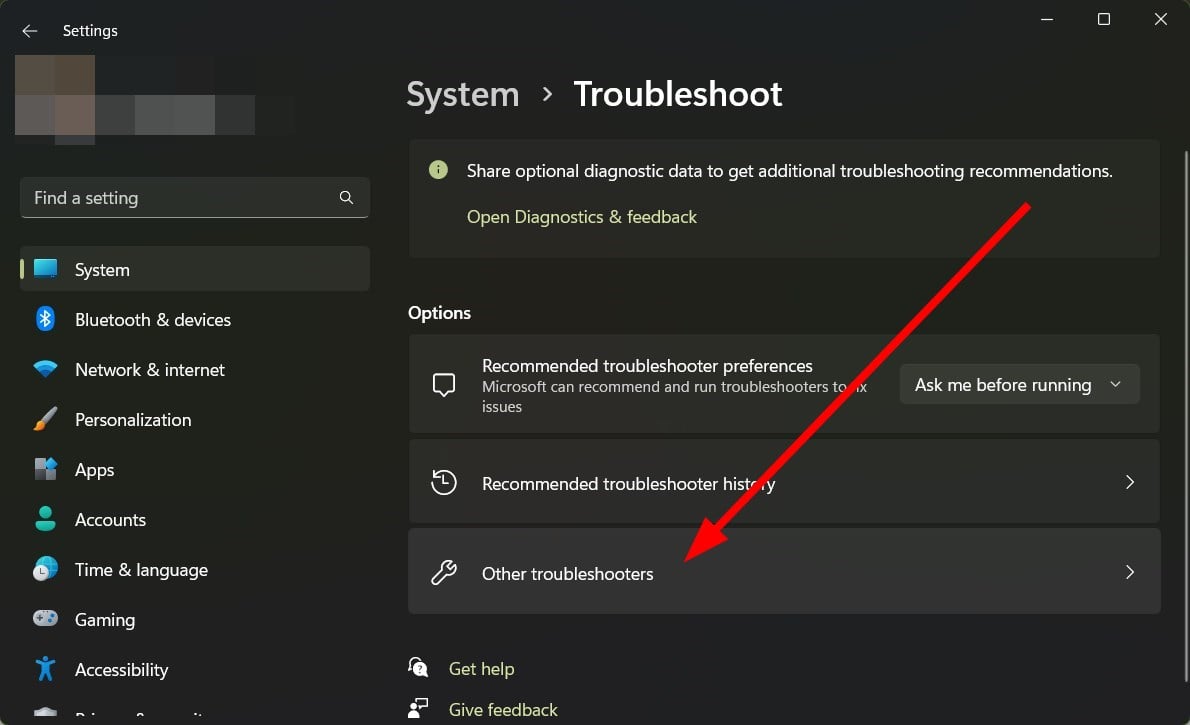
- Click on Troubleshoot.

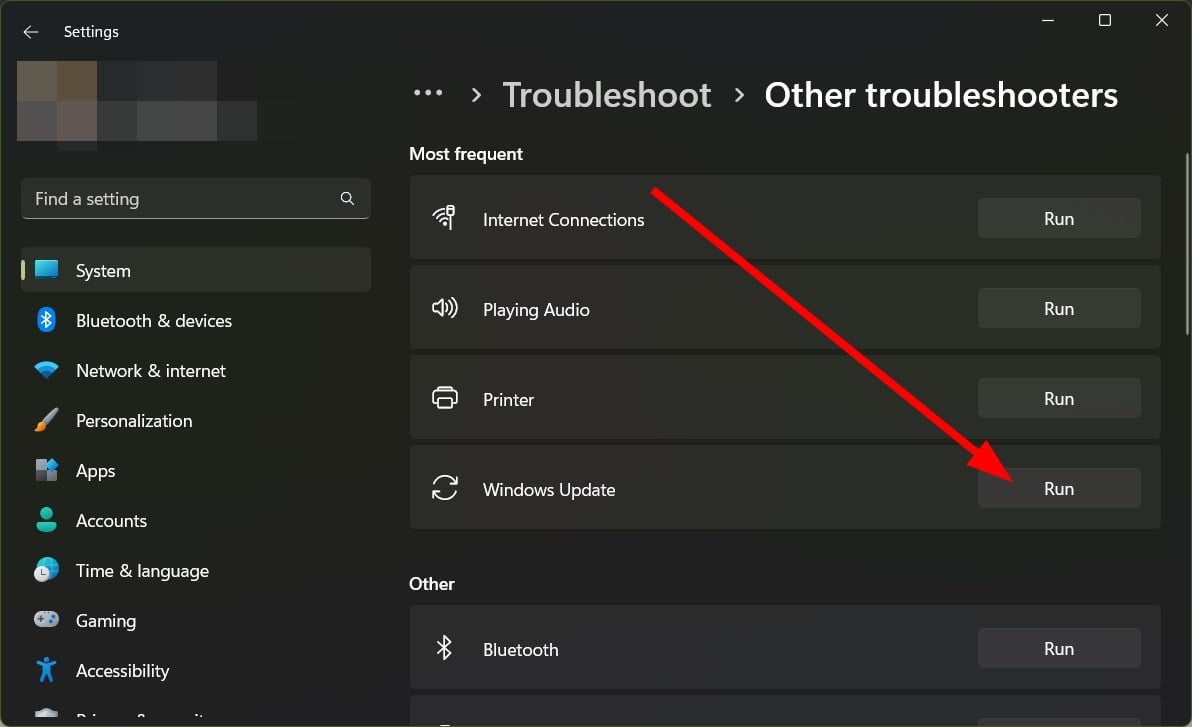
- Select Other troubleshooters.
- Hit the Run button for Windows Update.

- The troubleshooting process will begin and will prompt you to apply the fixes if it detects any issues.

Windows OS comes with an in-built troubleshooting tool that can help you resolve some petty bugs or glitches that might be preventing you from using the feature perfectly.
2. Reset the Windows update
- Press the Win key to open the Start menu.
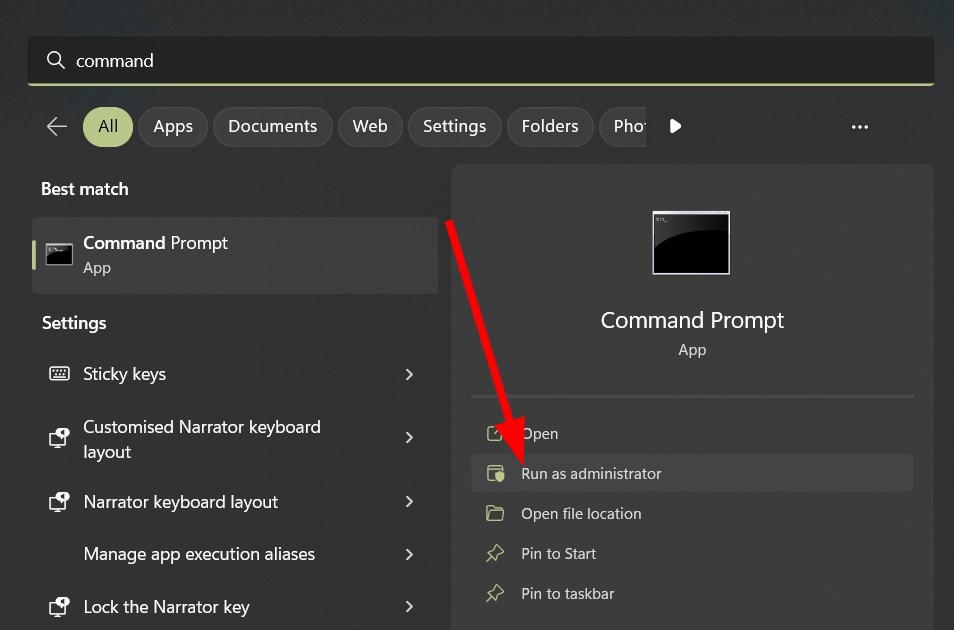
- Type the command prompt and open it as an administrator.

- Execute the below commands and press Enter after each one.
net stop wuauservnet stop cryptSvcnet stop bitsnet stop msiserver - Run the below commands and press Enter after each one.
ren C:\Windows\SoftwareDistribution SoftwareDistribution.oldren C:\Windows\System32\catroot2 Catroot2.old
- Execute the below commands.
net start wuauservnet start cryptSvcnet start bitsnet start msiserver - Restart your PC and check if this fixes the issue or not.


- Shortcuts Are Not Working in Chrome? 5 Ways to Fix Them
- Fix: NAS Drive Not Showing in Windows 11
3. Disable the proxy server
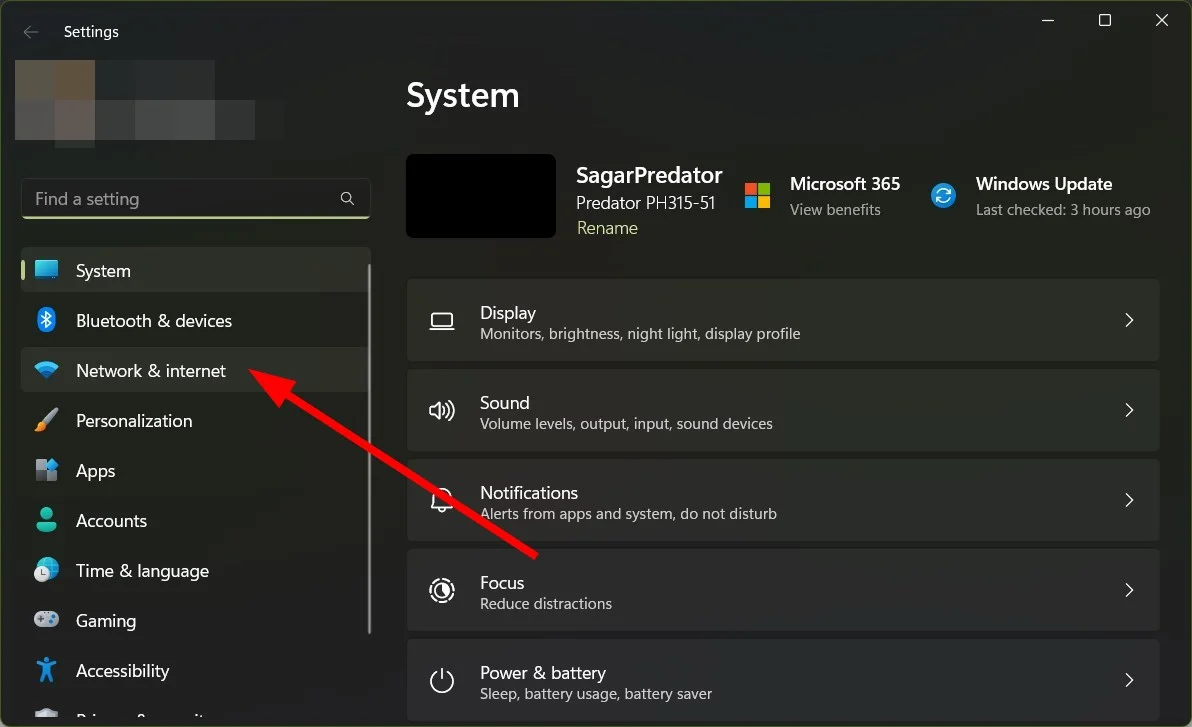
- Press the Win + I keys to open the Settings menu.
- Select Network & Internet.
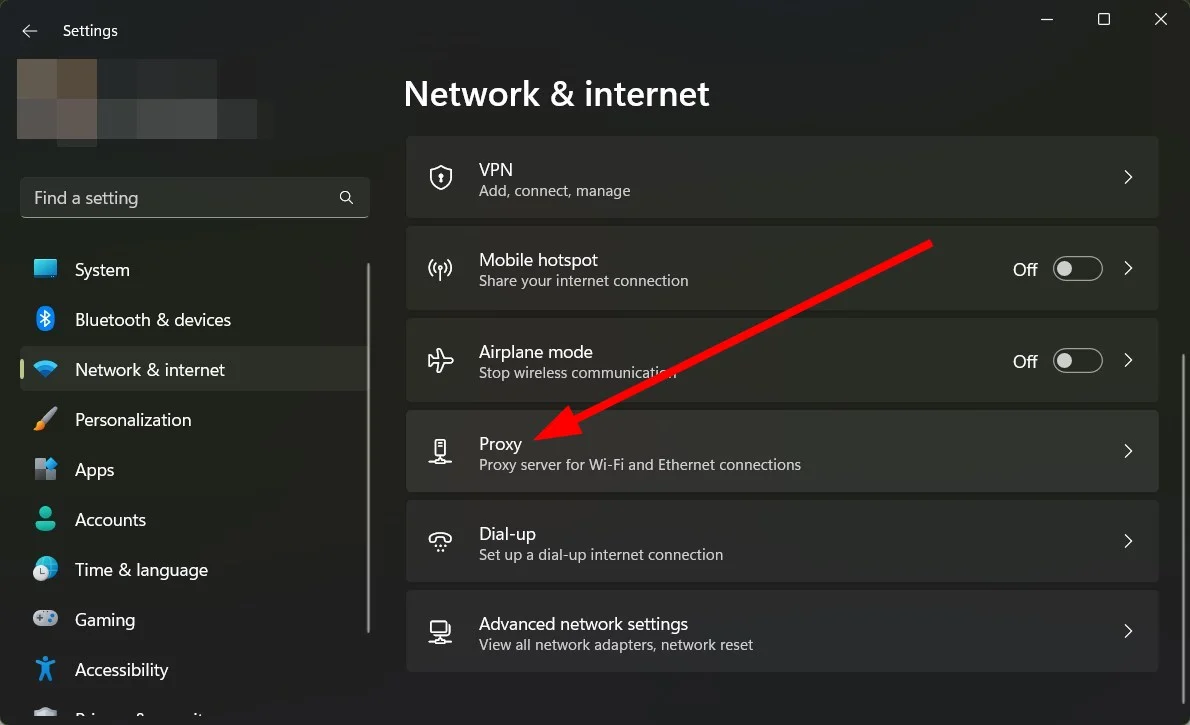
- Click on Proxy.
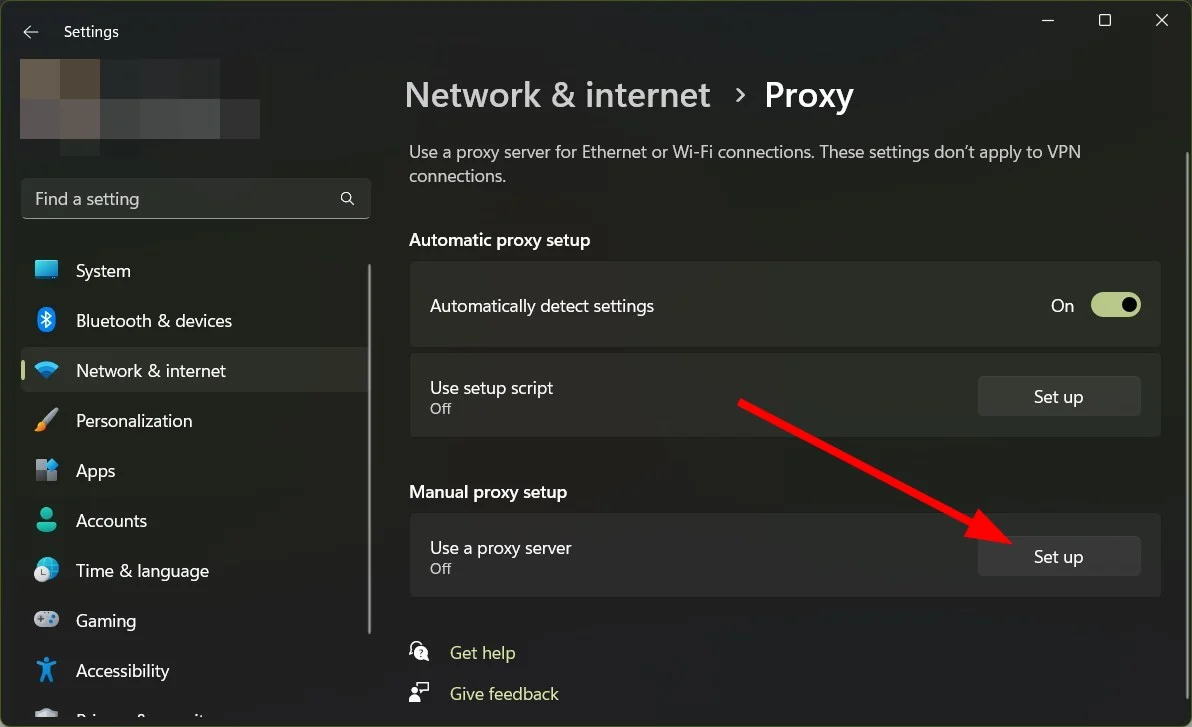
- Under Manual proxy setup, click the Set up button.
- Turn on the Use a proxy server option.
- Restart your PC.
4. Uninstall VPN
- Open the Start menu by pressing the Win button.
- Open Control Panel.
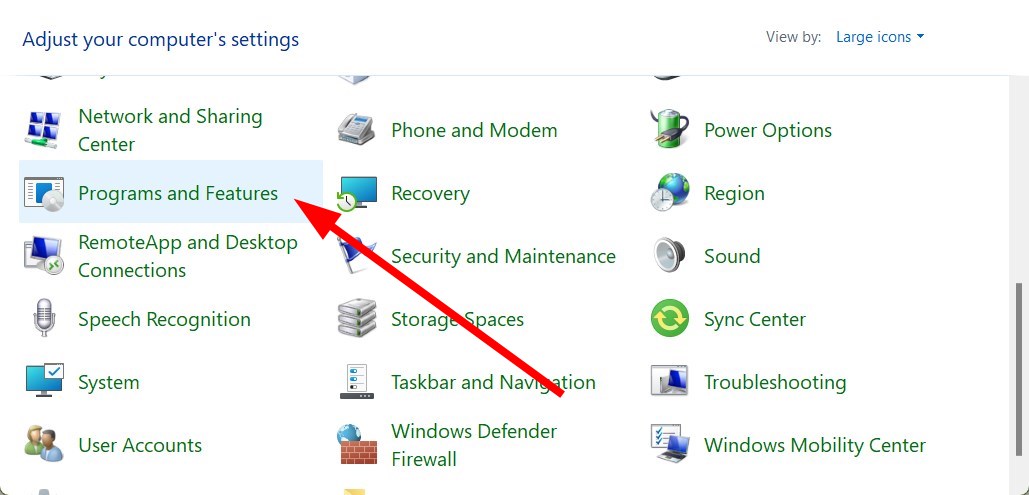
- Click on Programs and Features.

- Select the VPN and hit the Uninstall button.
- Follow the on-screen prompts to remove the VPN from your PC.
- Restart your PC.
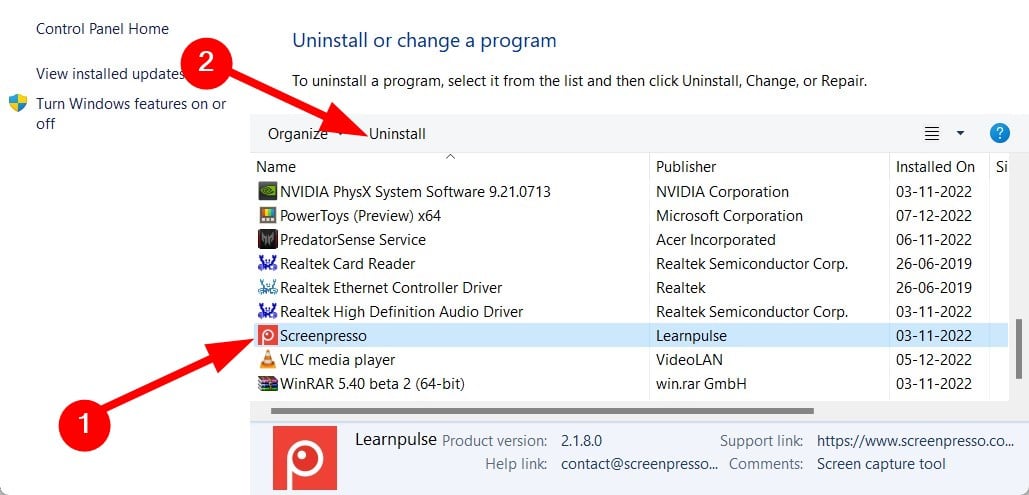
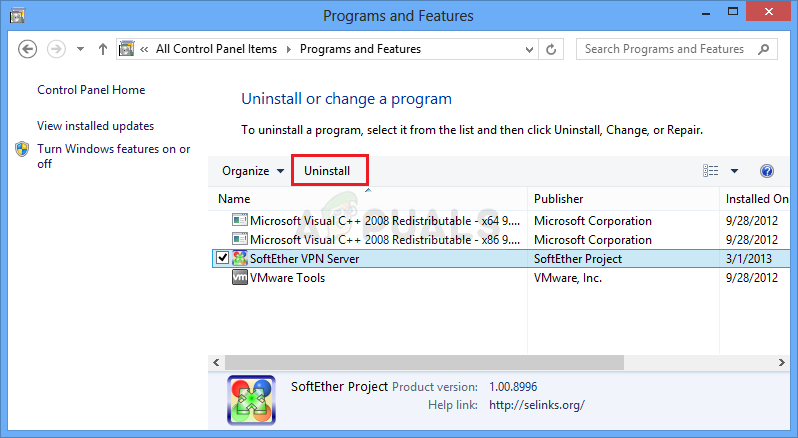
We have shown the steps for removing a different program, but the steps are the same for removing any VPN from your PC.
5. Run SFC Scan and DISM commands
- Open the Start menu.
- Type command prompt and run it as an administrator.
- Type the below command and press Enter.
sfc /scannow
- Wait for the process to complete.
- Execute the below commands.
Dism /Online /Cleanup-Image /Check healthDism /Online /Cleanup-Image /restorehealth
- Let the process complete.
- Restart your PC.
You can make use of the SFC Scan and DISM commands to check the health of your PC and fix the corrupt or missing system files.
While the above process requires you to use some commands, it isn’t a cup of tea for everyone. Some like to use an automated program that will do everything for them with just a click.
For those users, we would recommend using the Fortect app. Using Fortect, not only you will fix corrupt or missing system files, but also fix BSOD (Blue Screen of Death) errors, damaged DLLs, system crashes, and much more.
⇒ Get Fortect
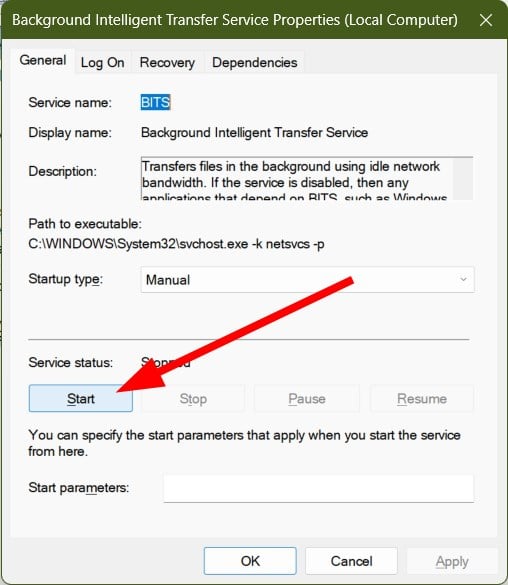
6. Run the Background Intelligent Transfer Service
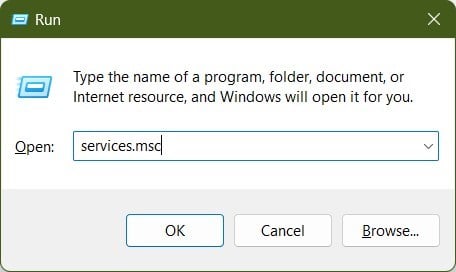
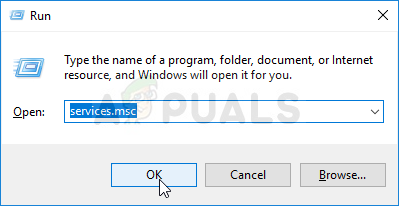
- Press the Win + R keys to open the Run dialogue.
- Type services.msc and press Enter.

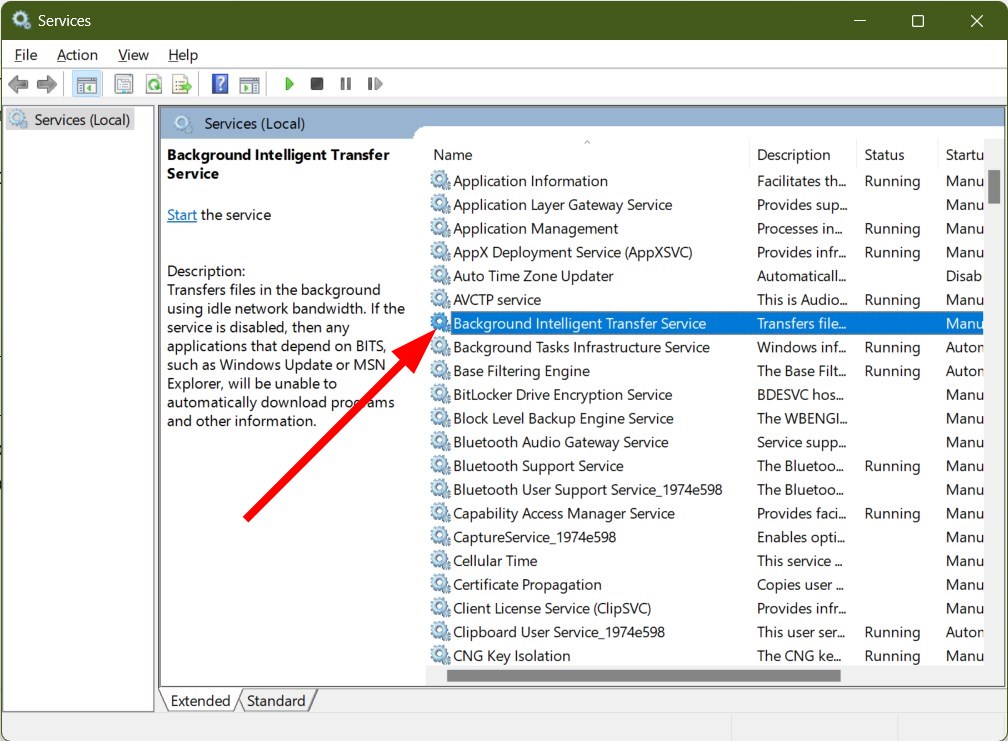
- Locate Background Intelligent Transfer Service and double click on it.

- Under Service Status, select Start.

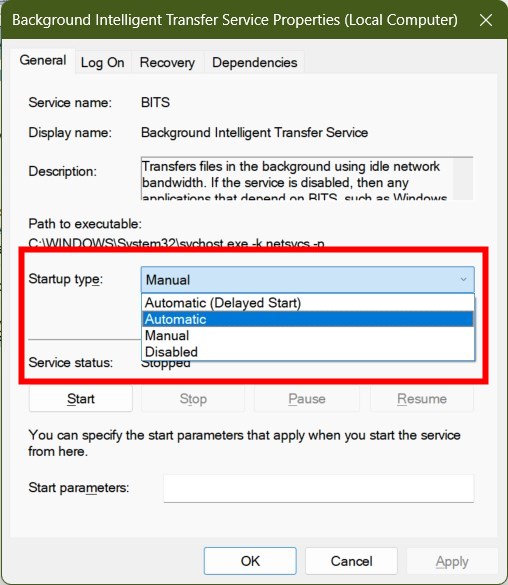
- From the Start up type drop-down select Automatic.
That is it from us in this guide. We have a guide for users getting Windows update error 0X800f081f. You can also refer to our guide on 0x800f0988 Windows Update error to fix the problem.
Our guide on Windows update error 0x80070002 and update error 0x800f0905 will help you resolve the problem with some effective solutions.
We have listed five quick tips to resolve the Windows update error 0x800704cf. You can also check out our guide on update error 0x800f0831. Let us know in the comments below which one of the above solutions resolved the problem for you.
![]()
- Remove From My Forums

Error 0x80d05001 with Server 2016 — Windows 10 Clients
-
Question
-
This is on a new install. All Windows Updates were performed on the server.
Windows 7 machines are updating like normal, but Windows 10 machines are throwing 0x80D05001 during the downloading step.
IIS on the WSUS server is showing no errors, requests are always responded to with 200 OK.
Log on the Windows 10 machine shows the following:
2018/07/16 11:29:31.2041384 3784 4692 DownloadManager Dynamic download data fetcher for ServiceId 3DA21691-E39D-4DA6-8A4B-B43877BCB1B7 does not exist.
2018/07/16 11:29:31.2056279 3784 4692 DownloadManager Update the URLs for DO Job 86BB1BCA-679E-43D0-885D-8E7DA791D985 — Update 7E1C8B32-BCEF-45A9-A324-67E26609A809.200
2018/07/16 11:29:31.2061021 3784 4692 DownloadManager Download job 86BB1BCA-679E-43D0-885D-8E7DA791D985 resumed.
2018/07/16 11:29:31.2063063 3784 4692 DownloadManager Dynamic download data fetcher for ServiceId 3DA21691-E39D-4DA6-8A4B-B43877BCB1B7 does not exist.
2018/07/16 11:29:31.5609160 3784 8832 DownloadManager Suspended update 7E0B1F76-AEC3-4146-AE28-3B25E2A97A24 for reason 0x40000 (DynamicUrl)
2018/07/16 11:29:31.5609210 3784 8832 DownloadManager Attempted to resume update 7E0B1F76-AEC3-4146-AE28-3B25E2A97A24 for reason 0x40000 (DynamicUrl), update is no longer suspended afterward.
2018/07/16 11:29:31.5609359 3784 8832 DownloadManager DO job {9B2794CE-4FE0-4D1D-A67B-4EC8399042E7} failed, updateId = 7E0B1F76-AEC3-4146-AE28-3B25E2A97A24.200, hr = 0x80D05001. File URL = http://SERVER:8530/, local path = C:\WINDOWS\SoftwareDistribution\Download\6b8c686eddd1df25bc825c072d95a89e\Windows10.0-KB4338832-X64.cab,
The response headers = HTTP/1.1 200 OK Date: Mon, 16 Jul 2018 15:29:32 GMT Content-Length: 299 Content-Type: text/html; charset=UTF-8 Server: Microsoft-IIS/10.0 X-Powered-By: ASP.NET
2018/07/16 11:29:31.5610491 3784 8832 DownloadManager Progress failure bytes total = 21692015, bytes transferred = 0
2018/07/16 11:29:31.5642302 3784 8832 DownloadManager *FAILED* [80D05001] Error occurred while downloading update 7E0B1F76-AEC3-4146-AE28-3B25E2A97A24.200; notifying dependent calls.
На чтение 5 мин. Просмотров 1.1k. Опубликовано
Магазин Windows является основным приложением и игровым центром для пользователей Windows 10. Microsoft постоянно стремится к тому, чтобы работа в Магазине Windows была как можно более гладкой, но, похоже, предстоит еще много работы.
Недавно гигант Redmond удалил 100 000 приложений из Магазина, но по-прежнему существует множество ошибок, от которых ежедневно страдают тысячи пользователей. В большинстве случаев возникают ошибки, когда пользователи хотят загружать приложения из Магазина.
Ошибка 0x80D05001 – одна из самых частых ошибок Магазина Windows, которая не позволяет пользователям Windows 10 загружать приложения и устанавливать обновления.
Начиная с Anniversary Update, я получаю ошибку 0x80D05001 при попытке загрузить приложения или обновления. Есть ли способ исправить это?
Как исправить ошибку 0x80D05001 в Магазине Windows
Содержание .
- Сбросить Windows 10 Store
- Запустите встроенный инструмент устранения неполадок Windows
- Выполнить сканирование SFC
- Изменить настройки региона
- Отключить антивирус и брандмауэр
- Запустить DISM
- Восстановление магазина Windows 10
Исправлено: ошибка Microsoft Store 0x80D05001
Решение 1. Сбросьте хранилище Windows 10 .
Первое, что мы собираемся попробовать, – это перезагрузить Microsoft Store. Это в основном наиболее распространенное решение для всех видов проблем в Магазине, и мы начнем с него. Сбросить Store в Windows 10 довольно просто. Но если вы не уверены, как это сделать, сделайте следующее:
- Перейдите в Поиск, введите wsreset и откройте WSReset.exe.
- Дождитесь окончания процесса и перезагрузите компьютер.
Решение 2. Запустите встроенное средство устранения неполадок Windows .
Если перезагрузка Магазина не выполнила работу, давайте попробуем с парой встроенных средств устранения неполадок. Первым средством устранения неполадок, которое мы собираемся попробовать, является средство устранения неполадок Windows 10. Этот инструмент можно использовать для решения различных проблем в системе, в том числе ошибок Microsoft Store.
Вот как запустить средство устранения неполадок Windows 10:
- Перейдите в настройки.
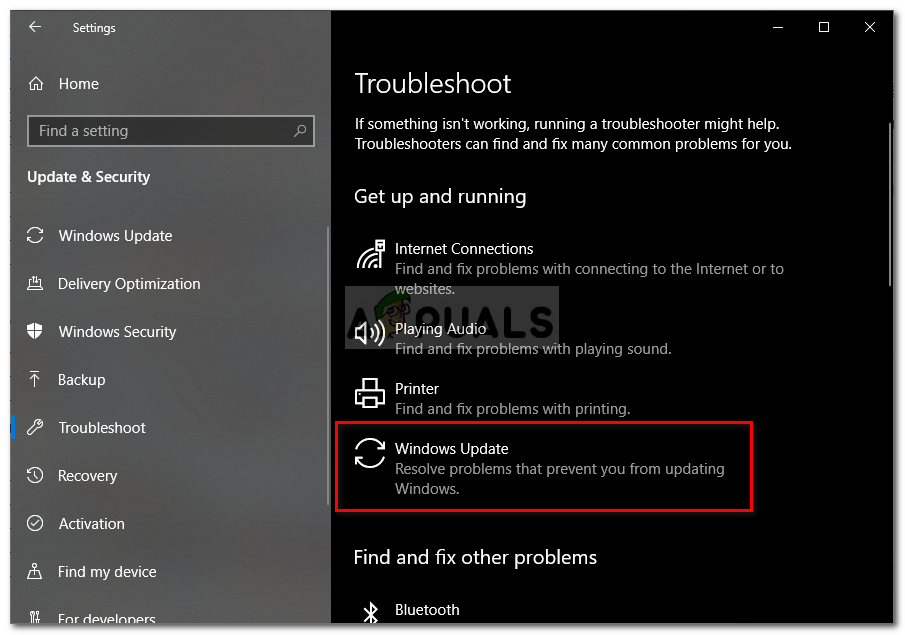
- Перейдите на страницу Обновления и безопасность > Устранение неполадок .
-
Нажмите Приложения Магазина Windows и выберите Запустить средство устранения неполадок .

- Подождите, пока средство устранения неполадок завершит процесс.
- Перезагрузите компьютер.

Решение 3. Выполните сканирование SFC
Следующий инструмент устранения неполадок, который мы собираемся попробовать, – это сканирование SFC. Это средство устранения неполадок командной строки, которое, как и средство устранения неполадок Windows 10, может решать различные проблемы. Разница в том, что сканирование SFC сканирует всю систему в поисках потенциальных проблем. Таким образом, вам не нужно выбирать конкретную функцию, как в средствах устранения неполадок.
Вот как запустить сканирование SFC в Windows 10:
- Перейдите в Поиск, введите cmd , щелкните правой кнопкой мыши Командная строка и перейдите в Запуск от имени администратора .
-
Введите следующую команду и нажмите Enter на клавиатуре: sfc/scannow
- Подождите, пока процесс завершится (он может быть длительным).
- Перезагрузите компьютер.

Решение 4. Изменить настройки региона
Есть одна деталь, которая может нарушить работу Магазина Microsoft, даже если вы этого не заметите. И это неправильная дата или время. Если ваши настройки времени и даты не верны, вы в основном не сможете ничего делать в Магазине Microsoft.
Кроме того, Магазин недоступен по всему миру, поэтому есть вероятность, что вам не разрешат доступ к нему. Если это так, вам просто нужно изменить свой Регион , в идеале на США, и Магазин должен снова работать без проблем.
Решение 5. Отключите антивирус и брандмауэр .
В наших статьях мы постоянно говорим, что сторонние антивирусные программы не поддерживают Windows 10 и ее функции. Так что вполне возможно, что ваш антивирус блокирует Магазин. Чтобы узнать, так ли это на самом деле, отключите антивирус на пару минут. Если Магазин работает без проблем, то это антивирус. Теперь у вас есть три варианта. Переключитесь на Защитника Windows, откажитесь от Магазина в пользу антивируса или используйте другое антивирусное решение.
Кстати, мы рекомендуем BitDefender. Честно говоря, мы не знаем, вызовет ли это какие-либо проблемы с Магазином (но, вероятно, нет), но для начала это отличное антивирусное решение. BitDefender обеспечит максимальную безопасность вашей системы, так что это определенно стоит рассмотреть.
Вы можете попробовать BitDefender здесь .
Теперь, когда мы закончили исследование вашего антивируса, давайте на секунду перейдем к брандмауэру Защитника Windows. Хотя крайне маловероятно, что эта функция заблокирует Магазин, не повредит, если мы отключим его на несколько минут, просто чтобы убедиться. Вот как:
- Перейдите в Поиск, введите брандмауэр и откройте Брандмауэр Защитника Windows .
-
Выберите Включить или выключить брандмауэр Защитника Windows .
- Отключите брандмауэр Windows для частных и общедоступных сетей.
- Подтвердите выбор и попробуйте обновить снова.

Решение 6 – Запустите DISM
Последний инструмент для устранения неполадок, который мы собираемся попробовать, – это DISM. Обслуживание образов развертывания и управление ими (DISM) – это инструмент, который развертывает образ системы снова и снова, решая возможные проблемы на пути.
Вот как запустить DISM в Windows 10:
- Перейдите в Поиск, введите cmd , щелкните правой кнопкой мыши Командная строка и перейдите в Запуск от имени администратора .
-
В командной строке скопируйте и вставьте эти строки одну за другой и нажимайте Enter после каждого:
-
DISM/онлайн/Cleanup-Image/ScanHealth
- DISM/Online/Cleanup-Image/RestoreHealth
-
DISM/онлайн/Cleanup-Image/ScanHealth

Решение 7. Восстановление магазина Windows 10 .
И наконец, если ни одно из предыдущих решений не помогло решить проблему, давайте попробуем «починить» Магазин Microsoft. Вот как:
- Перейдите в Поиск, введите powershell , щелкните правой кнопкой мыши PowerShell и перейдите в Запуск от имени администратора .
-
В командной строке введите следующую команду: PowerShell -ExecutionPolicy Unrestricted –Command «& {$ manifest = (Get-AppxPackage Microsoft.WindowsStore) .InstallLocation +‘ \ AppxManifest.xml ’; Add-AppxPackage -DisableDevelopmentMode -Register $ manifest} »
- Дождитесь окончания процесса и перезагрузите компьютер.

Вы также столкнулись с ошибкой 0x80D05001? Если вы столкнулись с другим обходным путем, перечислите шаги по устранению неполадок в разделе комментариев ниже.
Примечание редактора . Этот пост был первоначально опубликован в ноябре 2016 года и с тех пор был полностью переработан и обновлен для обеспечения свежести, точности и полноты.
Some Windows 10 users are encountering the 0x80D05001 error code after a Windows Update or Windows Store app update fails to install. The majority of users are seeing this error with every new update that they attempt to install.
There are several potential culprits that might trigger the Error 0x80D05001 with Windows Update or Windows Store:
- Common WU / Store glitch – When troubleshooting for this issue, you should start by attempting to fix the issue automatically with utilities like Windows Update Troubleshooter or Windows Store Troubleshooter.
- Update component inconsistency – If you see this error while attempting to install an update, you should reset the Windows Update / Windows Store component completely (depending on the specifics of your problem.
- Improperly Configured Proxy or VPN – This error code can also occur due to an improperly configured proxy server or VPN client that is being rejected by Windows Update or Windows Store. If this scenario is applicable, you can disable the Proxy server or uninstall your VPN client.
- Overprotective firewall – If you’re using a 3rd party firewall, a certain feature that block pop-ups might also interfere with the Windows Update function. In this case, you will need to disable the real-time protection or uninstall it altogether if the security rules are enforced at a system level.
- Underlying system file corruption – Under certain circumstances, you might be dealing with some type of system corruption that ends up affecting Windows Update or Windows Store. In this case, you can use SFC and DISM scans to identify and fix the corruption problems that are contributing to this issue.
Method 1: Running the Windows Update/ Windows Apps Troubleshooter
If this particular error is being facilitated by a common inconsistency, your first attempt at fixing the issue should be the Windows Update Troubleshooter. This built-in utility holds together a collection of repair strategies that can be automatically applied in case a recognizable scenario is identified.
After you launch this utility, it will begin to scan for common Windows Update inconsistency and recommend a viable repair strategy that you can apply with just several clicks.
Note: In case you are encountering the 0x80D05001 error when attempting to update an app via the built-in Windows Store, you will need to run the Windows Apps Troubleshooter instead.
If you didn’t try this potential fix yet, follow the instructions below to run the Windows Update troubleshooter / Windows Apps Troubleshooter and apply the recommended repair strategy:
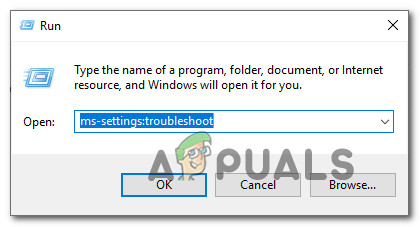
- Open up a Run dialog box by pressing Windows key + R. Next, type ‘ms-settings:troubleshoot’ and press Enter to open up the Troubleshooting tab of the Settings app.

Accessing the Activation troubleshooter - Once you’re inside the Troubleshooting tab, scroll down to the Get up and running section click on Windows Update. From the newly appeared context menu, click on Run the troubleshooter.

Running Windows Update Troubleshooter Note: In case you are having issues when updating an app via the Microsoft Store, you need to run the Windows Apps Troubleshooter instead.
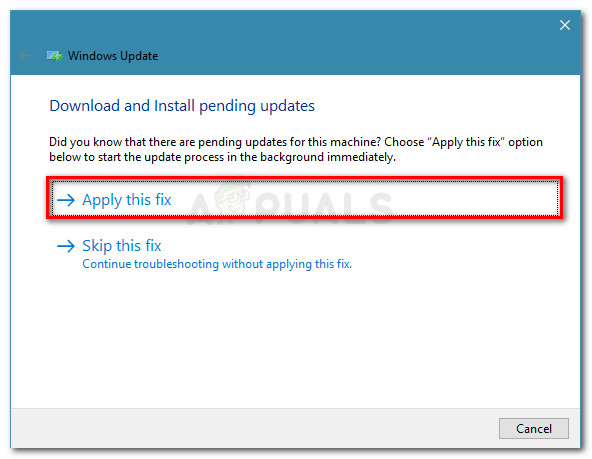
- After you launch this utility, wait patiently until the initial scan is complete. If the problem and a viable repair strategy are identified, you will be able to apply the recommended fix by clicking on Apply this fix. If you’re presented with this option, do so and wait for the process to complete.

Apply this fix for Windows Update - Once the repair operation is complete, reboot manually and see if the issue is resolved at the next computer startup by attempting to install an update that was previously failing.
In case the same problem is still occurring, move down to the next potential fix below.
Method 2: Resetting Windows Update / Windows Store
In case the built-in troubleshooter that you deployed above didn’t work for you, it’s likely that you’re seeing the 0x80D05001 error due to an update component inconsistency (especially if you’re seeing this error with every update that you attempt to install).
In most cases, you will see the 0x80D05001 error due to the fact that the updating component is somehow stuck in a limbo state (neither opened or closed). If this scenario is applicable, you should be able to fix the problem swiftly by resetting Windows Update or Windows Store (depending on the specifics of your problem).
To accommodate both potential scenarios, we’ve created 2 separate sub guides. If you’re encountering the issue when installing a Windows update, follow the first guide (A). In case you’re seeing the error when installing an update through Windows Store (Microsoft Store), follow the second guide (B):
A. Resetting Windows Update
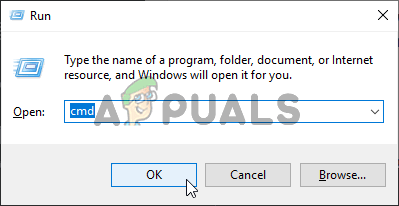
- Press Windows key + R to open up a Run dialog box. Next, type ‘cmd’ and press Ctrl + Shift + Enter to open up an elevated Command Prompt window.

Running Command Prompt with admin access Note: Once you are prompted by the UAC (User Account Control), click Yes to grant admin access.
- Once you’re inside an elevated CMD window, type the following commands in whichever order and press Enter after each one:
net stop wuauserv
net stop cryptSvc
net stop bits
net stop msiserver
Note: This set of commands will stop all the relevant Windows Update services from running: BITS service, Cryptographic service, MSI Installer service, Windows update service (main).
- After you manage to stop every relevant service, run the following commands in order to clear and rename two vital WU folders (SoftwareDistribution and Catroot2):
ren C:\Windows\SoftwareDistribution SoftwareDistribution.old
ren C:\Windows\System32\catroot2 Catroot2.old
Note: SoftwareDistribution and Catroot are the two main folders responsible for holding and maintaining Windows Update files. Since you can’t really delete them conventionally, the best way to ensure that they don’t have any corrupted files that might contribute to this error is to rename them in order to force your OS to create new and healthy equivalents.
- Once the two folders have been renamed, run the following commands in order to re-enable the services that you previously disabled (at step 2):
net start wuauserv
net start cryptSvc
net start bits
net start msiserver
- Once every relevant service has been restarted, repeat the WU action that was previously triggering the 0x80D05001 error and see if the problem is now fixed.

B. Resetting Windows Store
- Open up a Run dialog box by pressing Windows key + R. Next, type ‘cmd’ inside the text box and press Ctrl + Shift + Enter to open up an elevated Command Prompt window. When you see the User Account Control (UAC) prompt, click Yes to grant admin access.
Running the Command Prompt - Inside the elevated Command Prompt, type the following command and press Enter to initiate a complete Windows Store reset (and also clear any associated dependencies):
wsreset.exe

Resetting Windows Store - After the operation is complete, attempt to install the app update once again and see if the problem is now fixed.

In case you’ve already reset Windows Update or Windows Store and you’re still seeing the same error message, move down to the next potential fix below.
Method 3: Disable Proxy or VPN client (if applicable)
This particular error code is often an underlying sign that you are dealing with an improperly configured proxy server or VPN client that is being rejected by Windows Update. Due to security reasons, Windows Update might decide to distrust the VPN / Proxy connection and block communications with it.
Several affected users that have previously dealt with this problem have confirmed that they managed to fix the issue after they disabled their VPN Client or Proxy server.
If this scenario is applicable, follow one of the two sub-guides bellows to get rid of the VPN client you’re currently using or disable the Proxy server that’s currently active:
A. Disable Proxy Server on Windows
- Press Windows key + R to open up a Run dialog box. Inside the newly appeared Run box, type ‘ms-settings:network-proxy’ and press Enter to open up the Proxy tab of the Settings menu.
Running Services in the Run dialog box - Once you’re inside the Proxy tab of the Settings menu, scroll all the way down to the Manual proxy setup. When you get there, simply disable the toggle associated with Use a proxy server.

Disabling the use of a proxy server - Once you complete this modification, reboot your computer and repeat the action that was previously causing the 0x80D05001 error.
B. Uninstall VPN client on Windows
- Open up a Run dialog box by pressing Windows key + R. Next, type ‘appwiz.cpl’ and hit Enter to open up the Programs and Features menu.
Type appwiz.cpl and Press Enter to Open Installed Programs List - Once you’re inside the Programs and Features screen, scroll down through the list of installed applications and locate the VPN client that you’re looking to uninstall.
- After you manage to identify your VPN client, right-click on it and choose Uninstall from the newly appeared context menu.

Uninstalling a VPN tool - Once you’re inside the uninstallation window, follow the on-screen prompts to complete the process, then restart your computer.
- After the process is complete, restart your computer and see if the 0x80D05001 error is resolved.

In case this potential fix is not applicable to your particular scenario, move down to the next potential fix below.
Method 4: Disable Overprotective Firewall (if applicable)
As some affected users have confirmed, the 0x80D05001 error can also be facilitated by an overprotective firewall function. For example, certain 3rd party firewalls have a security suite that blocks pop-ups. Well, as it turns out, this function can also end up blocking the Updating function on Windows 10.
In case you’re using a 3rd party firewall that you suspect might be responsible, you should start by attempting to disable the real-time protection before repeating the updating operation. In most cases, AV suites will allow you to do this directly from the taskbar icon.

Once you’ve disabled your firewall, attempt to perform the update again and see if the issue is resolved.
If that didn’t work, keep in mind that some firewalls enforce restrictions at a network level and often enough, these security rules will remain in place even if the real-time protection is disabled. Because of this, you should also try uninstalling your firewall and removing any remnant files before ruling this potential culprit out.
In case this scenario is not applicable or you’ve already done this and you’re still seeing the 0x80D05001 error, move down to the final fix below.
Method 5: Running SFC and DISM scans
If none of the fixes detailed above have worked for you, there’s a high chance that the problem is actually being facilitated by some type of system file corruption that ends up affecting the Windows Update or Windows Store component.
If this is your culprit, you should be able to fix the issue by initiating an SFC scan and wait patiently until the process is complete. But keep in mind that once you start this process, forcibly closing the CMD window might produce additional logical errors.
After this SFC scan is complete, reboot your machine and see if the issue is fixed. In case you’re still encountering the 0x80D05001 error, advance with initiating a DISM scan.