Deleting previous installations is often effective
by Ivan Jenic
Passionate about all elements related to Windows and combined with his innate curiosity, Ivan has delved deep into understanding this operating system, with a specialization in drivers and… read more
Updated on
- The error code 0x80246017 is an update error that makes your computer vulnerable to exploits and attacks.
- While there are a few solutions, most users have found deleting previous Windows files to be effective.
XINSTALL BY CLICKING THE DOWNLOAD FILE
Repair all Windows Updates Errors with Fortect:
SPONSORED
Windows update failures can be annoying! With Fortect, you will get rid of errors caused by missing or corrupted files after an update. The utility maintains a repository of the original Windows system file versions, and it uses a reverse algorithm to swap out the damaged ones for good ones.
- Download Fortect and install it on your PC
- Start the tool’s scanning process to look for corrupt files that are the source of the issues
- Right-click on Start Repair to resolve security and performance issues with your computer
- Fortect has been downloaded by 0 readers this month, rated 4.4 on TrustPilot
Windows 10 users could sometimes face an error when updating their Windows 10 version to the subsequent build.
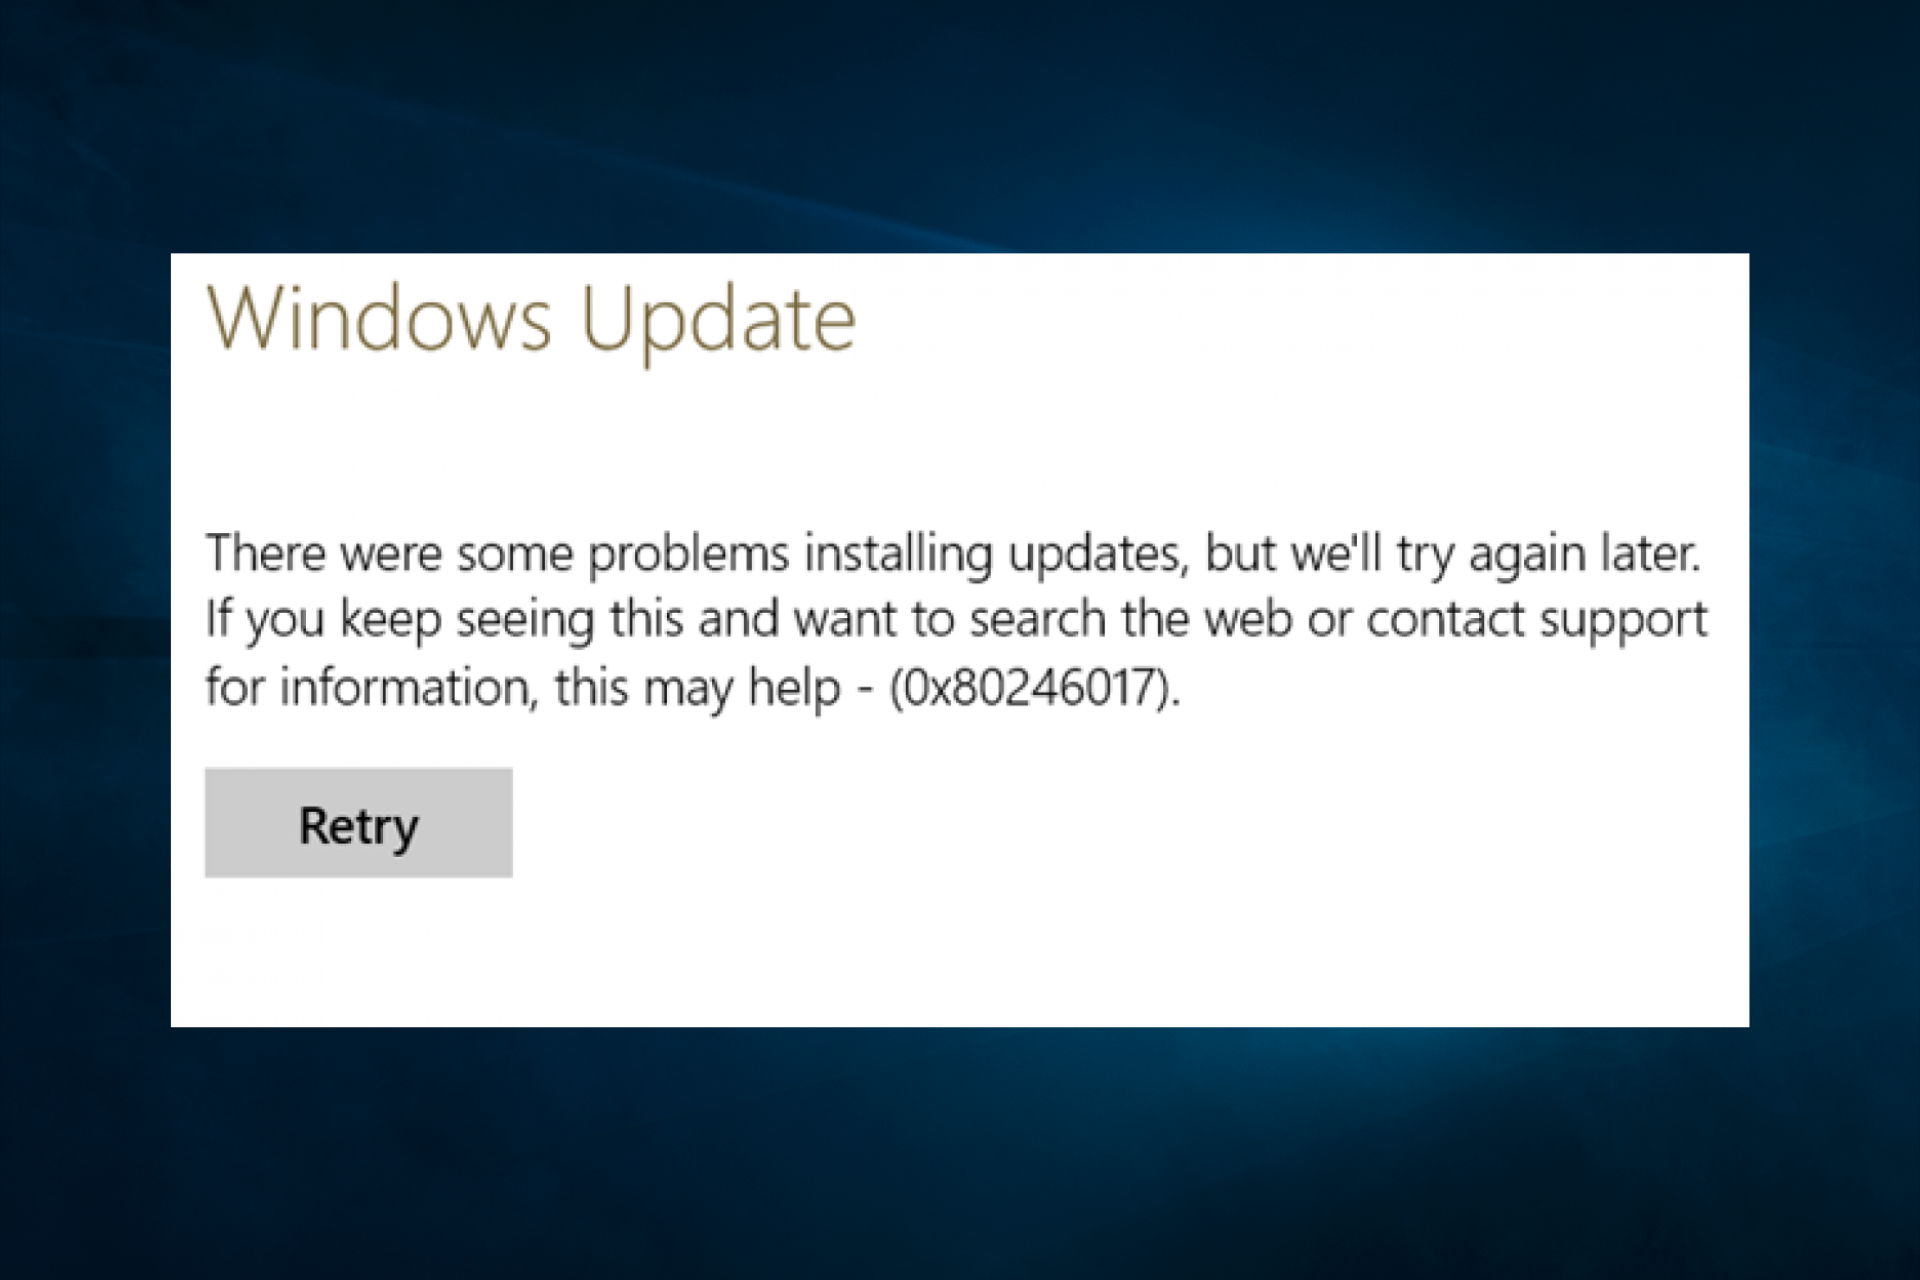
Windows 10 update error 0x80246017 appears, and the update installation gets stuck. The entire error message reads: WU_E_DM_UNAUTHORIZED_LOCAL_USER & The download failed because the local user was denied authorization to download the content.
While many users have complained about it in Windows 10, error 0x80246017 also exists on Windows 11.
Luckily, there’s a solution to this problem, and you’ll find it in this article.
How can I fix the Windows Update error 0x80246017?
1. Delete Previous Windows Installation files
The most common solution for the Windows 10 update error 0x08246017 error is deleting previous Windows installation files. To delete these files, just do the following:
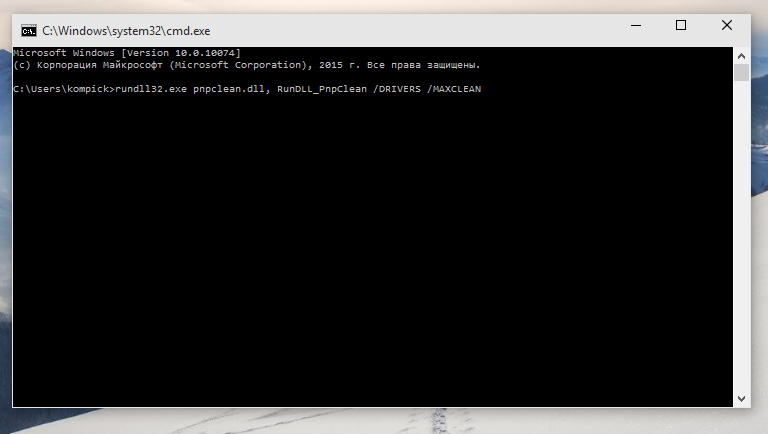
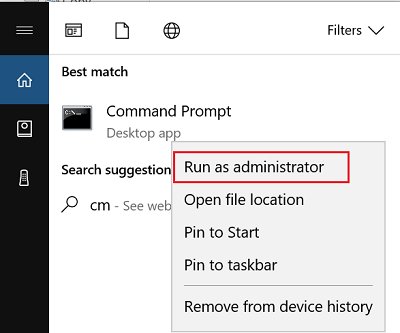
- Open Command Prompt as admin.
- Type the following command and press Enter:
rundll32.exe pnpclean.dll,RunDLL_PnpClean /DRIVERS /MAXCLEAN
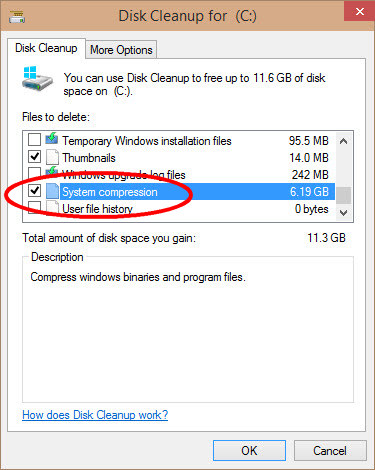
- Now go to Search, type disk cleanup, and one Disk Cleanup tool.
- Remove Temporary files and Previous Windows Installations.
- Reboot your computer
If this workaround didn’t get the job done, you can try with a little registry tweak, just follow the instructions shown below.
2. Reset registry keys values
Installing the new build should set the registry keys values back to normal, but if it somehow fails to, you won’t be able to install the update. Thus, the Windows 10 update error 0x80246017 or some similar error might appear. To fix this issue, just follow these instructions:
- Go to Search, type regedit and open Registry Editor
- Navigate to the following path:
- HKEY_LOCAL_MACHINESOFTWAREMicrosoftWindowsSelfHostApplicability
- Find BranchName and check if it shows FBL_AWESOME1501 (If it doesn’t, change it)
- Locate TresholdRiskLevel and change it to low
- Find TresholdInternal and delete it
- Find TresholdOptedIn and delete it
- Close Registry Editor
3. Run the Update Troubleshooter
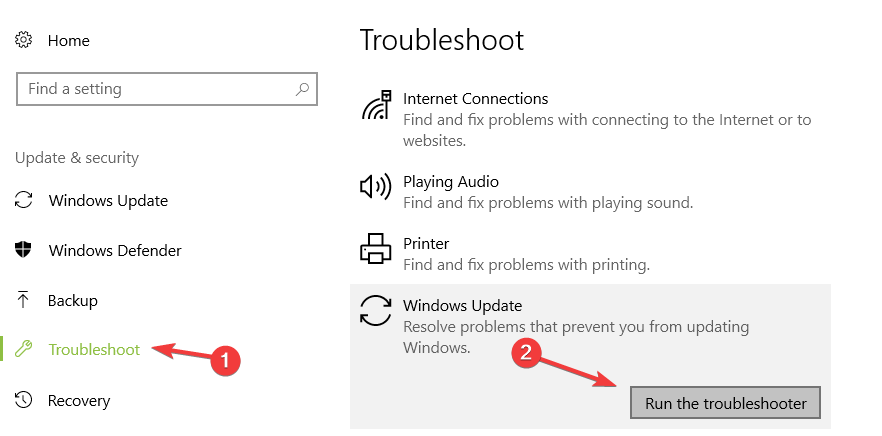
Windows 10 also features a built-in troubleshooting tool that can help you to fix general update issues and bugs. So, if the two methods listed above didn’t work, you can go to Settings > Update & Security > Troubleshoot and run the troubleshooter.
4. Disable your antivirus
As many Windows 10 users have found out by now, sometimes your antivirus software may trigger various update errors. The quickest way to fix this issue is to simply disable your antivirus tool and re-enable it after you’ve installed the latest updates.
That would be all, after performing one of these fixes, you should be able to install the latest build update for your Windows 10 Technical Preview build.
- Adding layers in Windows 11’s Paint greatly increases RAM usage
- How to copy texts from images with Snipping Tool’s Text Action
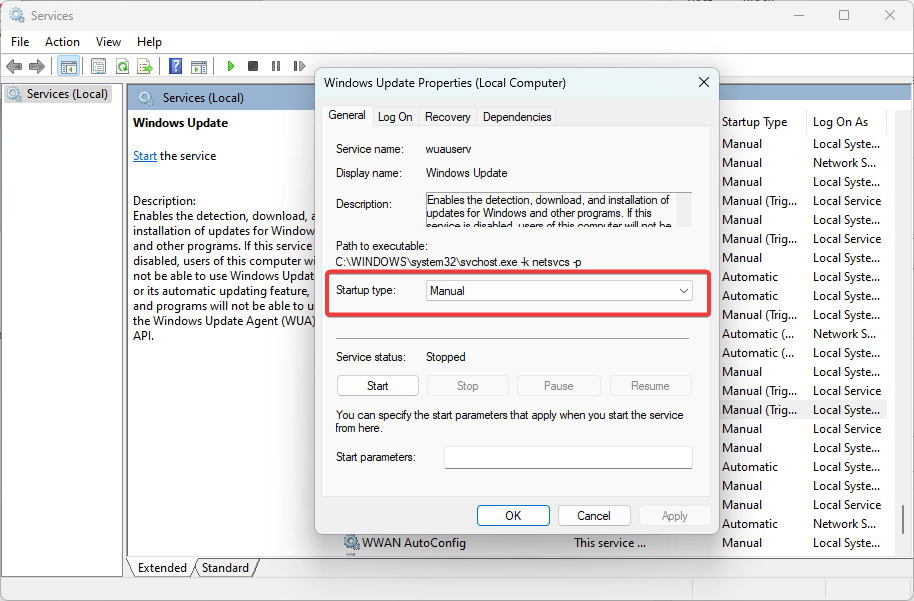
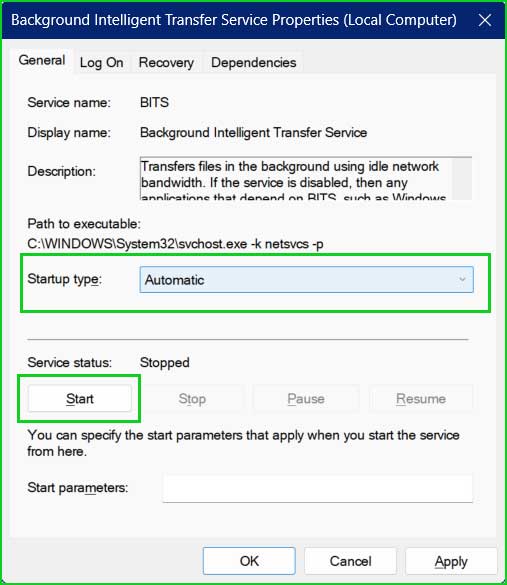
5. Check the status of some important Windows Services
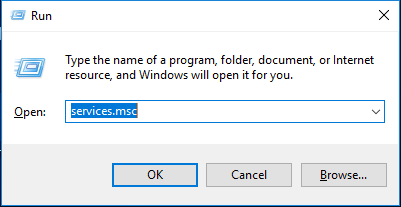
- Press Windows + R, type services.msc, and hit Enter.

- Scroll down to the Windows Update service, double-click it, ensure it is running, and set the Startup type to Manual.

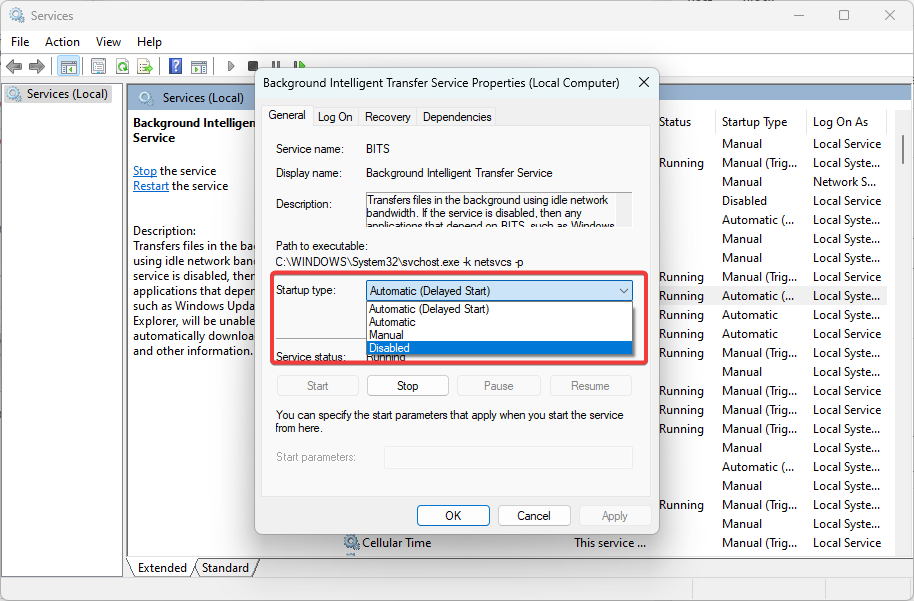
- Next, locate the Background Intelligent Transfer Service, double-click it, ensure it is running and set the Startup type to Manual.


If you have any questions, suggestions, or maybe you know other solutions to fix the Windows Update error 0x80246017, make sure you reach for the comments section and share your ideas.
![]()
Иногда при переходе на более новую версию Windows 10 Technical Preview приходится сталкиваться с разными неполадками, например, на каком-то этапе процесс обновления внезапно останавливается и дальше не идёт. Так, многие пользователи отмечали, что подобная ошибка чаще всего встречалась при попытке обновления до версии 10122. При этом процесс обновления останавливался при достижении прогресса 18 процентов, а затем Windows выдавала ошибку 0x80246017.
Проблема распространённая, неприятная, но вполне разрешимая. Исправить её можно несколькими кликами мыши. Для этого откройте командную строку и выполните следующую команду:
rundll32.exe pnpclean.dll, RunDLL_PnpClean /DRIVERS /MAXCLEAN
Теперь осталось удалить временные файлы предыдущего неудачного обновления. Откройте свойства системного раздела и во вкладке «Общее» выберите очистку диска. Запустить утилиту можно также из открытой консоли CMD, выполнив команду cleanmgr. В окошке утилиты очистки диска следует отметить системные файлы, а затем выполнить их очистку.
После удаления временных файлов перезагрузите компьютер и попробуйте выполнить обновление. Теперь всё должно пройти без ошибок, хотя стопроцентной гарантии этому дать нельзя.
![]() Загрузка…
Загрузка…
Ошибку 0x80246017 можно встретить во время попытки выполнить обновление операционной системы Windows 10. Совершенно недавно, Майкрософт выпустили обновление под номером KB4020102, и люди, которые пытаются содержать свои компьютеры в постоянно обновленном состоянии, попытались установить его вручную.
Однако, процесс установки обновления у некоторых из них заканчивался уже указанной ошибкой 0x80246017. Более тщательное исследование проблемы показало, что это обновление также не могло быть установлено автоматически для огромного количества пользователей.
Если обладатель ПК проверит историю в Центре обновления Windows, то он обнаружит, что обновление KB4020102 было загружено в систему, но, по каким-то причинам, оно не было установлено. Хотя, некоторыми пользователями было указано, что ошибка 0x80246017 может происходить не только с упомянутым обновлением, то также и со многими другими.
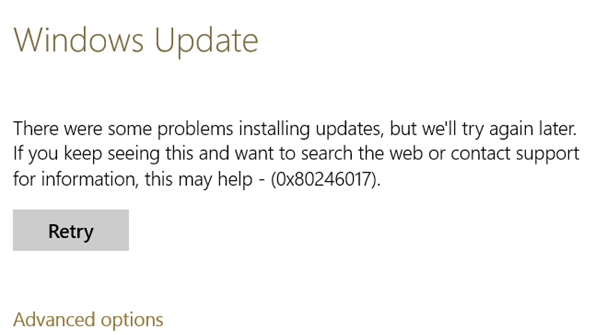
Итак, что же происходит во время появления этой ошибки? Сначала все идет нормально, обновление скачивается, устанавливается, но на определенном моменте процесс останавливается, а затем на экране появляется примерно следующее сообщение о возникших во время установки обновления проблемах.
Согласно Майкрософт, причина ошибки 0x80246017 относится в сборке 9926 для Windows 10, которая была выпущена еще в Январе 2015 года. Хоть и прошло огромное количество времени, но, так сказать, остатки записей в Реестре Windows могут вмешиваться в процесс установки теперешних обновлений.
Важная заметка: любое неаккуратное изменение записей Реестра Windows может привести к серьезным проблемам с работоспособностью операционной системы или даже к синим экранам смерти.
- Нажмите на клавиатуре Win+R.
- Впишите в пустую строку regedit.exe и нажмите Enter.
- Нажмите на разделе в Реестре, а затем нажмите «Файл→Экспорт».
- Выберите место, в которое вы хотите сохранить файл бекапа Реестра.
Если что-то пойдет не так после выполнения нижеописанных шагов, то воспользуйтесь созданным файлом для приведения дел в порядок.
Итак, давайте теперь рассмотрим непосредственно способ, с помощью которого вы сможете попытаться избавиться от ошибки 0x80246017 при обновлении Windows 10.
Шаг №1 Удаление файлов установки предыдущей Windows
- Нажмите правой кнопкой мыши на Пуск и выберите пункт «Командная строка(администратор)».
- Впишите в строку команду rundll32.exe pnpclean.dll,RunDLL_PnpClean /DRIVERS /MAXCLEAN
- Закройте Командную строку.
- Нажмите на клавиатуре Win+S и впишите в поисковую строку «Освобождение места…».
- С помощью этого средства, избавьтесь от Временных файлов и установочных файлов предыдущей Windows.
- После завершения предыдущий действий, перезагрузите свой компьютер.
Шаг №2 Сброс нескольких разделов Реестра Windows
- Нажмите на клавиатуре Win+R.
- Впишите regedit.exe и нажмите Enter.
- Пройдите в раздел HKEY_LOCAL_MACHINE\SOFTWARE\Microsoft\WindowsSelfHost\Applicability.
- Найдите ключ BranchName и дважды кликните на него. Если в нем будет записано значение FBL_AWESOME150, то все нормально. Если же нет, то впишите его туда самостоятельно.
- Далее найдите ключ TresholdRiskLevel и измените его значение на низкое.
- Найдите ключи TresholdInternal и TresholdOptedIn, а затем удалите их.
- Закройте Реестр Windows и перезагрузите свой компьютер еще один раз.
По загрузке Windows 10, снова попробуйте загрузить и установить обновление для ОС, с которым ранее возникала проблема в виде ошибки 0x80246017.
Windows 10 все еще находится в предрелизном состоянии, и хотя пользователи получили удобный механизм обновления через систему Windows Update, периодически и этот функционал выдает ошибки. Как исправить ошибку 0x80246017 при попытке обновления?
Решение проблемы предлагают представители Microsoft. Чтобы избавиться от бага, необходимо исправить реестр системы. Пользователю нужно перейти в каталог ПО (HKEY_LOCAL_MACHINE\SOFTWARE), затем найти раздел Microsoft, а в нем — WindowsSelfHost и вложенную папку Applicability.
Для начала следует проверить настройку BranchName. Параметр должен быть установлен в значение fbl_impressive. Если указано что-то другое, значение нужно откорректировать вручную.
Также нужно проверить и при необходимости изменить параметр ThresholdRiskLevel. Правильное значение для него — low.
В разделе Applicability не нужны параметры ThresholdOptedIn и ThresholdInternal. Если такие есть, их необходимо удалить в ручном режиме.
После правки системного реестра можно устанавливать обновления. Для этого перейдите в Параметры, раздел Обновления и безопасность. В подразделе Дополнительные параметры нужно проверить и при необходимости изменить вариант поставки обновлений. Он должен быть установлен в значение Fast. Затем проверьте, есть ли обновления для системы, и установите желаемые.
Причина ошибки
Компания-разработчик объяснила, почему у пользователей появляется такая ошибка. Ее вызывает отсутствие прав у системы на скачивание релиза при помощи Windows Update.
Чаще всего появление такой ошибки связано с предыдущими попытками некоторых тестеров-инсайдеров получить доступ к версиям системы, предназначенным только для разработчиков, путем корректировки системного реестра.
В результате таких «правок» и появляется текущая ошибка. Все, что необходимо сделать пользователю — вернуть системные значения реестра, устанавливаемые «по умолчанию».
Windows updates are essential for keeping your operating system secure and up to date with the latest features and improvements. However, sometimes you may encounter errors during the update process. One such error is 0x80246017, which can prevent you from installing Windows updates. If you’re facing this issue, don’t worry! In this article, we’ll explore several solutions to help you fix Windows 10/11 update error 0x80246017.
Solution 1: Fix using Advanced PC Repair Tool
If your PC is facing the Update related issues, driver problems, application crashes, etc, then there is an optimization issue with this PC. Use the Outbye PC Repair tool to correct the Windows OS problems.
Windows is made with huge number of dll files, exe files, sys files, various types of services, databases, etc so, it is not possible to keep monitoring all the files always. A brilliant PC Optimizer tool repairs damages, fix errors, update windows and drivers, and eliminate various types of errors silently.
Outbyte PC Repair Tool does all the above task easily and provides you an errorfree and smooth Windows environment to work so that you can focus on your business only.
![]()
3 Steps to Fix this Error
Step 1. Download Outbyte PC Repair Tool [File Size: 16.4 MB]
Step 2. SCAN your Windows PC
Step 3. Click Fix button to Repair Error
Solution 2: Run the Windows Update Troubleshooter
Windows provides a built-in troubleshooter that can detect and fix common Windows Update issues. Here’s how to use it:
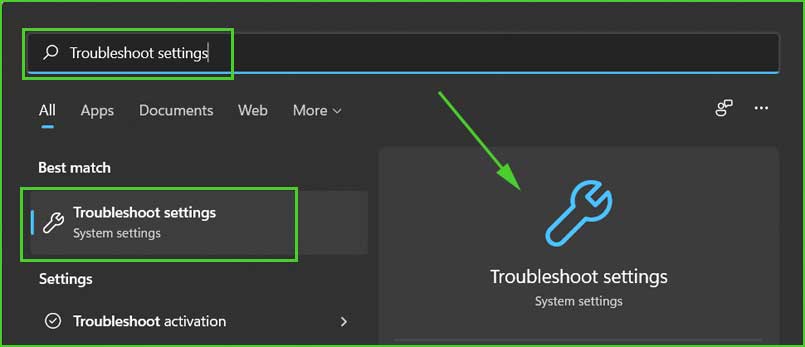
Step 1: Find Windows update troubleshooter in Windows 11 and 10. Click on the Start menu and search for Troubleshoot Settings. Open the first search result as below:
Step 2: Click on Other troubleshooters.
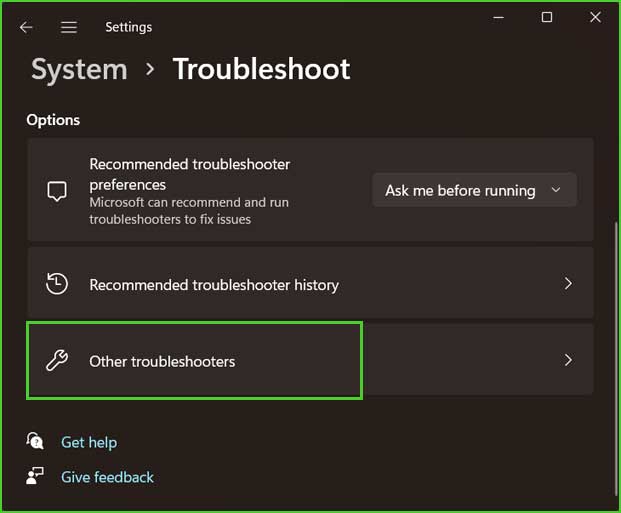
Step 3: Locate Windows update and click on the Run button to start the troubleshooting process.
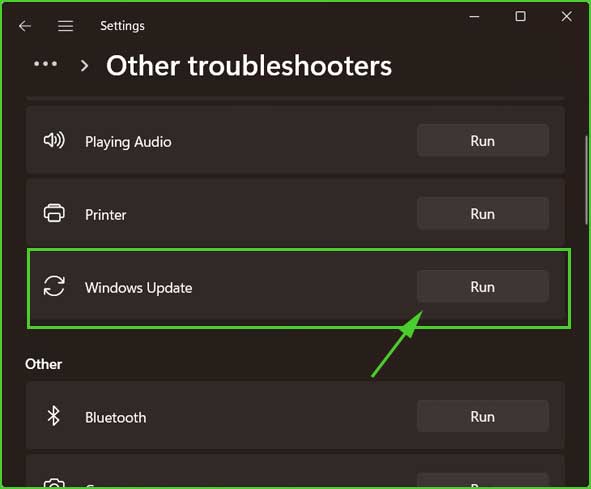
Step 4: It will take a few minutes to complete and show the result. If the troubleshooter couldn’t fix your problem, then move to the next method.
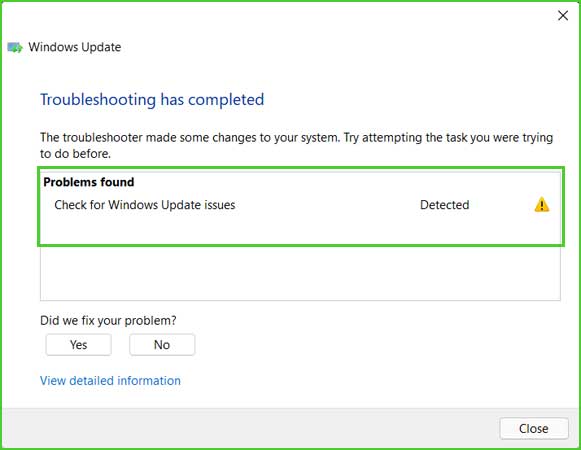
Allow the troubleshooter to scan for issues and apply the recommended fixes. Once the troubleshooter completes its process, restart your computer, and try updating Windows again.
Solution 3: Restart Windows Update Services
Sometimes, restarting the Windows Update services can resolve update-related errors. Here’s how to do it:
Step 1: Press the Windows Key + R to open the Run dialog box. Type services.msc and press Enter.
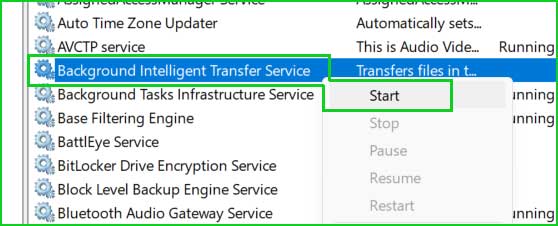
Step 2: In the Services window, locate the following services:
Background Intelligent Transfer Service (BITS), Cryptographic Services, and Windows Update.
Right-click on each service, select Properties, and ensure that their Startup Type is set to Automatic.
Step 3: If any of the services are not running, right-click on them and select Start.
Step 4: Restart your computer and try running Windows Update again.
Solution 4: Clear the Windows Update Cache
Corrupted files in the Windows Update cache can cause update errors. Clearing the cache might resolve the issue. Follow these steps:
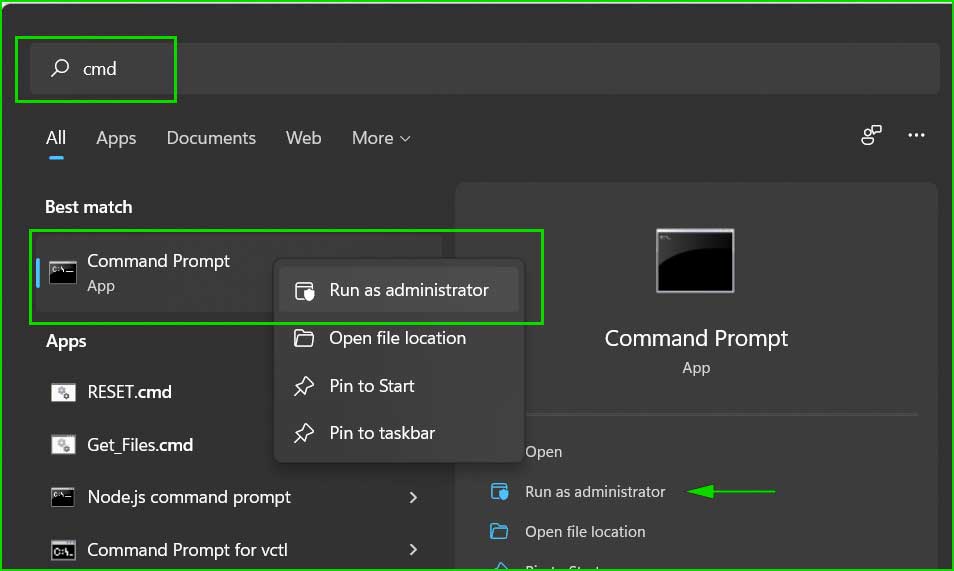
Step 1: Open elevated Command Prompt.
Step 2: In the Command Prompt, enter the following commands one by one, pressing Enter after each command:
net stop wuauserv

net stop cryptSvc

net stop bits

net stop msiserver

ren C:\Windows\SoftwareDistribution SoftwareDistribution.old

ren C:\Windows\System32\catroot2 catroot2.old

net start wuauserv

net start cryptSvc

net start bits

net start msiserver
Step 3: Close the Command Prompt and restart your computer.
After the restart, try updating Windows again.
Solution 5: Reset Windows Update Components
If the previous solutions didn’t work, resetting the Windows Update components might help. Here’s how to do it:
Step 1: Open an elevated Command Prompt.
Step 2: In the Command Prompt, enter the following commands one by one, pressing Enter after each command:
net stop wuauserv

net stop cryptSvc

net stop bits

net stop msiserver

ren C:\Windows\SoftwareDistribution SoftwareDistribution.old

ren C:\Windows\System32\catroot2 catroot2.old

net start wuauserv

net start cryptSvc

net start bits

net start msiserver
Step 3:: Close the Command Prompt and restart your computer.
After the restart, try updating Windows again.
Solution 6: Use the DISM Tool
If the error persists, you can use the DISM (Deployment Image Servicing and Management) tool to repair the Windows system image. Follow these steps:
Step 1: Open an elevated Command Prompt.
Type the following command and press Enter:
DISM /Online /Cleanup-Image /RestoreHealth
Step 2: Wait for the process to complete. This may take some time.
Step 3: Restart your computer and try updating Windows again.
If none of these solutions resolve the error 0x80246017, it may be helpful to seek assistance from Microsoft Support or visit the Microsoft Community forums for further guidance.
Remember to always keep your system updated to ensure optimal performance, security, and access to new features.
Summary
In conclusion, encountering Windows update error 0x80246017 can be frustrating, but with the solutions provided in this article, you can overcome the issue and resume updating your Windows 10 or 11 operating system. Remember to follow these steps in the given order and restart your computer whenever required.