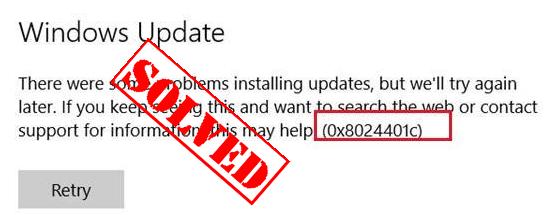
If you see the Windows Update error 0x8024401c in your computer when running the Windows Update, you run into a problem installing the updates and have no idea what to do. No worries! There are fixes to the issue.
How do I fix 0x8024401c in Windows? Try these fixes:
- Check the network settings
- Update drivers
- Modify the setting in Registry Editor
- Repair system files
- Perform a clean boot
Why does 0x8024401c happen on my computer?
Why does the error occur? the error 0x8024401c usually occurs when you have problems installing or downloading the Windows updates in your computer.
The causes generally are the improper Internet connection, or the server timed out waiting for the request. Another reason is likely because of the inappropriate device drivers in your computer.
You can try the methods below to fix 0x8024401c in your computer.
Note: All the screenshots below are shown on Windows 10, and the fixes apply to Windows 8 & 7.
Method 1: Check the network settings to fix 0x8024401c
As mentioned above, the network issue can cause the 0x8024401c error, so you can check the following two settings of the network to fix the error.
1. Switch network connection in your computer
As many people know, switching the network connection fixes the issue.
Thus, if you are connecting to WiFi in your computer, you can try switching the WiFi connection to wired connection or Ethernet connection and try the Windows Update to see if it works. If you are using the wired connection, you can change to WiFi connection, then try the Windows Update again to see if it works.
2. Uncheck IPv6 network
If switching your network doesn’t work, you can try to uncheck the IPv6 network, and make your computer go with IPv4 network. Follow the instructions to do that:
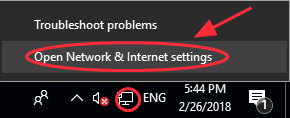
1) Right click the Internet Icon at the bottom right corner on your computer, and click Open Network & Internet settings.
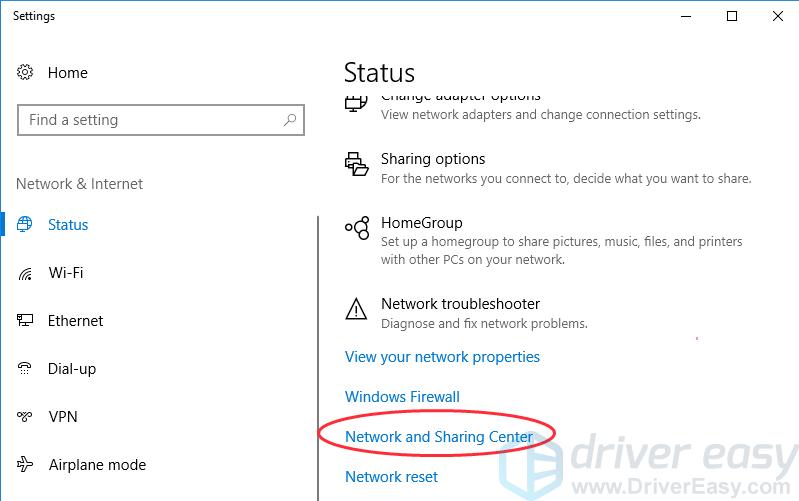
2) Click Network and Sharing Center.
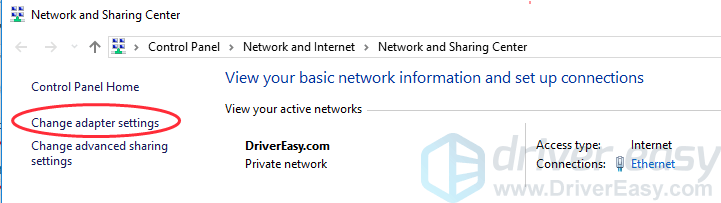
3) Click Change adapter settings.
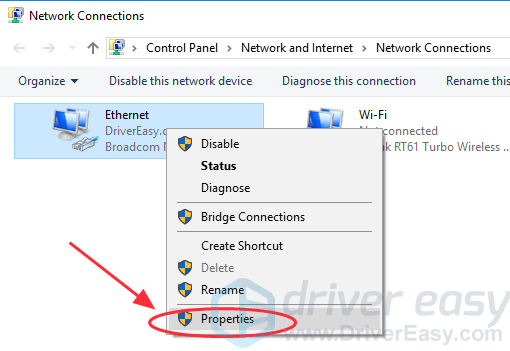
4) Right click the network connection (LAN, Ethernet or WiFi) that you are currently connecting, then click Properties.
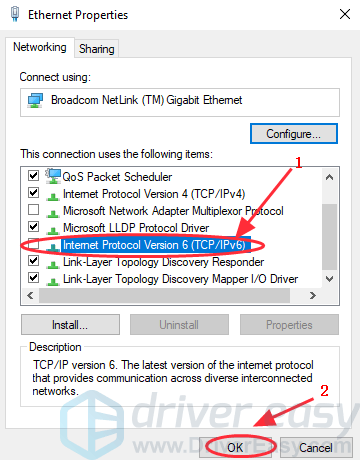
5) In the popup pane, uncheck Internet Protocol Version 6 (TCP/IPv6). Then OK to save the setting.
6) Restart your computer and try to update your Windows again.
Method 2: Update drivers to fix 0x8024401c
The missing or outdated drivers in your computer can also stop the Windows Update from working, so you can update the drivers in your computer to fix it.
There are two ways you can update the drivers: manually or automatically.
Manual driver update – You can update your drivers manually by going to the manufacturer’s website and searching for the most recent correct driver.
Automatic driver update – If you don’t have the time, patience or computer skills to update your network card driver manually, you can, instead, do it automatically with Driver Easy. Driver Easy will automatically recognize your system and find the correct drivers for it:
1) Download and install Driver Easy.
2) Run Driver Easy in your computer, and click Scan Now. Driver Easy will then scan your computer and detect any problem drivers.

3) Click the Update button next to the flagged network card to automatically download and install the correct version of its driver (you can do this with the FREE version).
Or click Update All to automatically download and install the correct version of all drivers that are missing or outdated. (This requires Pro version – You’ll be prompted to upgrade if you click Update All.)
4) After updating all the drivers, restart your PC and try Windows Update again.
Method 3: Modify the setting in Registry Editor to fix 0x8024401c
You can try to modify the settings in Registry Editor to fix Modify the setting in Registry Editor to fix 0x8024401c in your computer. Follow these steps:
1) Press the Windows logo key  + R at the same time on your keyboard.
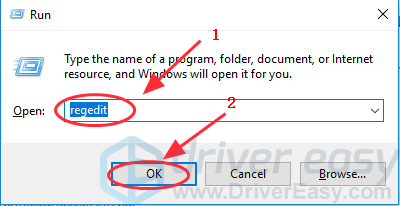
2) Type regedit in the Run box, and click OK.
3) Go to HKEY_LOCAL_MACHINE > Software > Policies > Microsoft > Windows > WindowsUpdate.
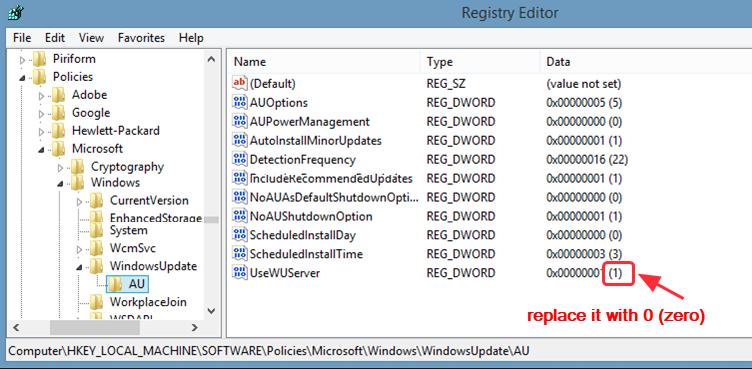
4) Click AU in WindowsUdpate, and find UseWUServer.
5) Replace whatever is in the registry value data on the right pane with 0 (zero).
6) Click OK to save.
7) Restart the computer and try to install the update again.
Method 4: Repair system files
The 0x8024401c error may be related to system files. When the system files were broken or corrupted, it may cause a Blue screen issue.
There are 2 ways to solve it. Here’s how:
- Option 1- Automatically (Recommended)
Use a repair tool to check various areas in your computer to determine the cause of Windows common issues. It will deal with issues related to system errors, critical system files and find the right fix for you. - Option 2 – Manually
System File Checker is a built-in tool to check for corrupt, damaged system files and manage to restore them if there’re any. However, this tool can only diagnose major system files, and won’t deal with damaged DLL, Windows Registry key, etc.
Option 1 – Automatically (Recommended)
Fortect is a computer repair software that can diagnose problems on your computer and fix them immediately.
It is tailored to your specific system and is working in a private and automatic way. It will first check hardware-related issues to identify problems, and then security issues, and finally it detects programs that crash, missing system files. Once complete, it will find a solution to your specific problem.
- Download and install Fortect.
- Open Fortect and click Yes to run a free scan of your PC.

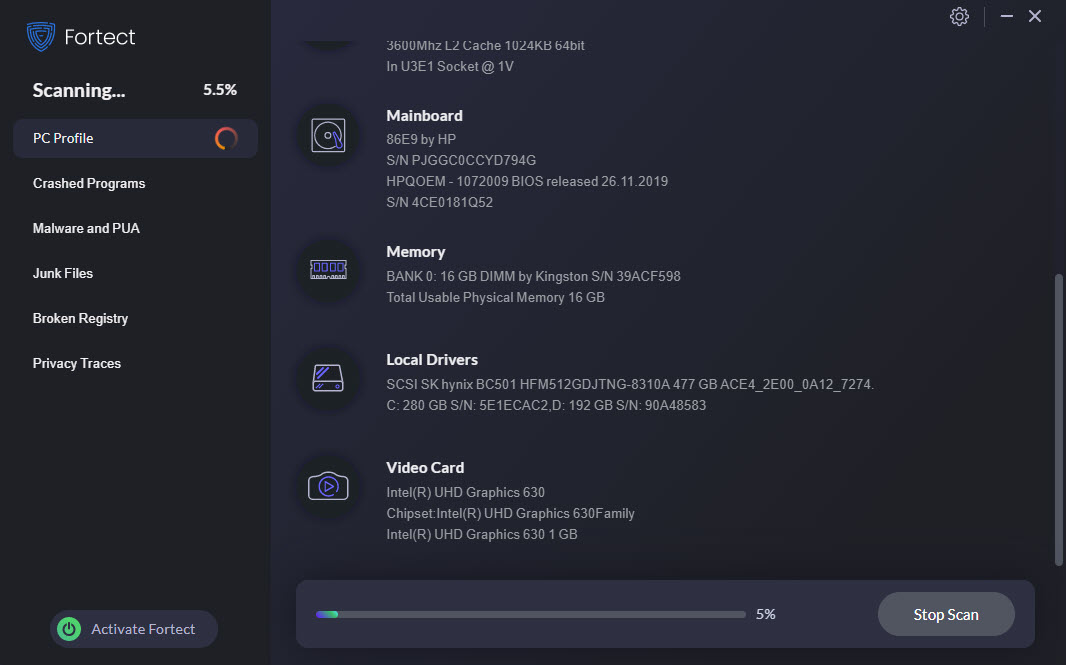
- Fortect will scan your computer thoroughly. This may take a few minutes.

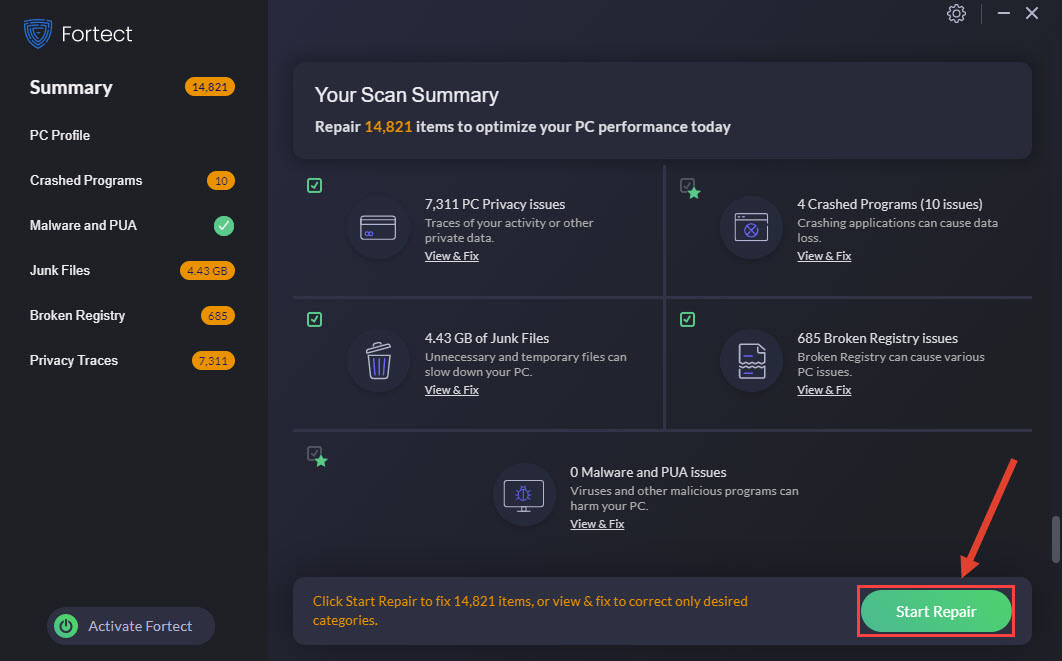
- Once done, you’ll see a detailed report of all the issues on your PC. To fix them automatically, click START REPAIR. This requires you to purchase the full version. But don’t worry. If Fortect doesn’t solve the issue, you can request a refund within 60 days.

The Pro version of Fortect comes with 24/7 technical support. If you need any assistance, please contact Fortect support:
Email: support@fortect.com
Option 2 – Manually
The SFC (System File Checker) is a Windows utility that helps automatically check and repair the corrupted or incomplete system files, so you can run an SFC scan in your system and let it be automatically repaired if there are any issues.
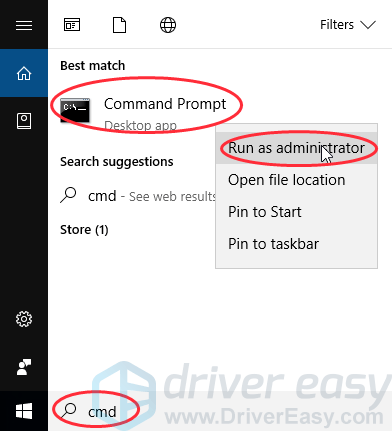
1) Type cmd in the search box.
2) Right-click Command Prompt, and select Run as administrator.
3) Type sfc /scannow in the window, and press Enter.
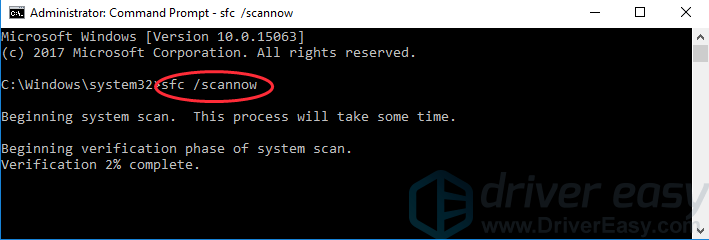
4) This process can take some time, and it will try to automatically fix the issues after scanning. So don’t close the window until verification 100% complete. After it’s completed, restart your PC and try updating Windows again.
Method 5: Perform a clean boot
You can perform a clean boot in your system. Try the steps:
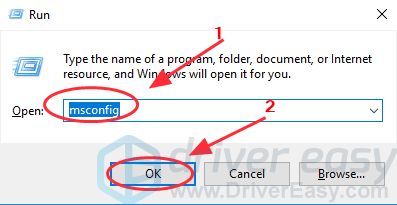
1) Press the Windows logo key + R at the same time on your keyboard.
2) Type msconfig in the Run box and click OK.
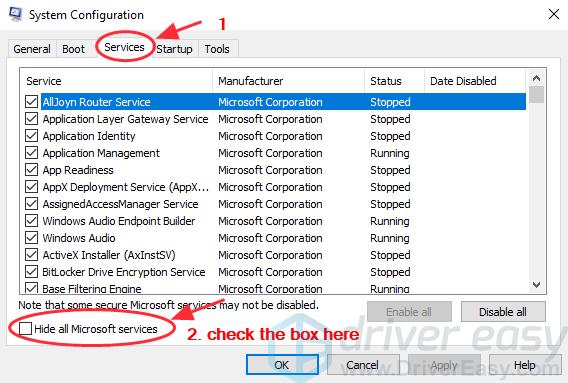
3) Click the Services tab, and check the box next to Hide all Microsoft services.
4) Click Disable all, then click OK.
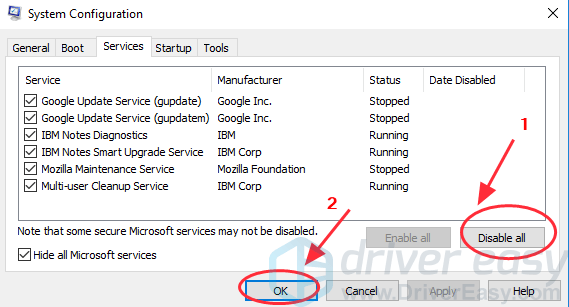
5) Restart your system and check for the updates.
These are the useful methods to fix Windows Update error 0x8024401c. If you have any further questions, feel free to comment below and we’ll see what more we can do to help.
У одного из заказчиков столкнулись с проблемой обновлений новых ПК с Windows 10 1607 и Windows Server 2016 с внутреннего WSUS сервера (на Windows Server 2012 R2). Компьютеры Windows 10 появляются в консоли WSUS, но при запуске поиска обновлений, клиент очень долго пытается их найти и возвращает ошибку 0x8024401c.
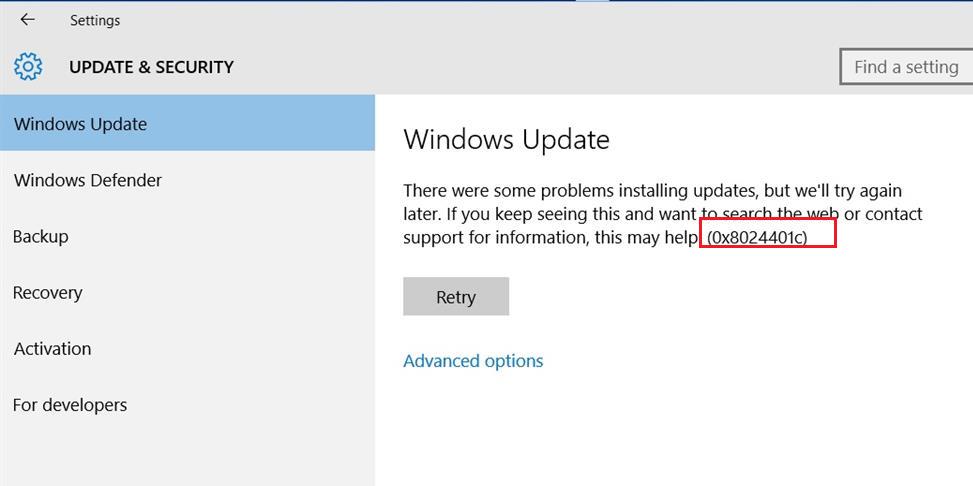
There were some problems installing updates, but we’ll try again later. If you keep seeing this and want to search the web or contact support for information, this may help: (0x8024401c)
Согласно списка кодов ошибок центра обновления Windows ошибка 0x8024401C означает превышение таймаута ответа от клиента: WU_E_PT_HTTP_STATUS_REQUEST_TIMEOUT — HTTP status 408 — the server timed out waiting for the request.
В новом журнале логов службы Windows Update Windows 10 при этом также периодически фиксируется ошибка, связанная с таймаутом ответа WSUS.
2017-05-30 14:11:24:870  816 1244 WS WARNING: There was an error communicating with the endpoint at 'http://msk-wsus:8530/ClientWebService/client.asmx'.
2017-05-30 14:11:24:870  816 1244 WS WARNING: There was an error receiving the HTTP reply.
2017-05-30 14:11:24:870  816 1244 WS WARNING: The operation did not complete within the time allotted.
2017-05-30 14:11:24:870  816 1244 WS WARNING: The operation timed out
Сама страница ‘
http://msk-wsus:8530/ClientWebService/client.asmx
‘ при этом с клиента доступна и открывается, т.е. возникает такое ощущение, что сервер WSUS или клиент просто не успевают выполнить некую операцию и клиент отваливается по таймауту. Возможно при инициирующем сканировании, новому клиенту WSUS прилетает слишком большой список обновлений, в результате чего достигаются некие лимиты рабочего процесса IIS.
Чтобы решить проблему с клиентами, мне пришлось сначала установить на сервере WSUS обновление KB3159706 (на сервере должен быть установлен Wndows Server 2012 R2 Update 1).
В статье KB3159706 (Update enables ESD decryption provision in WSUS in Windows Server 2012 and Windows Server 2012 R2) обратите внимание на ручные действия, которые нужно выполнить после установки обновления (иначе может перестать открываться консоль WSUS).
- Выполнить команду
"C:\Program Files\Update Services\Tools\wsusutil.exe" postinstall /servicing

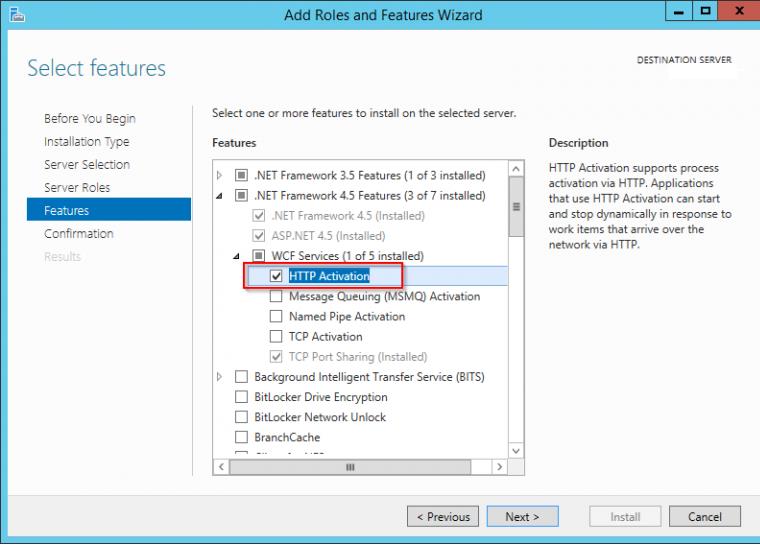
- Проверить, установлен ли компонент.NET Framework 4.5 -> HTTP Activation (
Get-WindowsFeature -Name NET-WCF-HTTP-Activation45
), и если он отсутствует, установить:
- Если на WSUS используется SSL, нужно выполнить редактирование файла C:\Program Files\Update Services\WebServices\ClientWebService\Web.config в соответствии с рекомендациями в статье (в нашем случае этот пункт выполнять не пришлось).
- Отредактируйте файл config ( C:\Program Files\Update Services\WebServices\ClientWebService\web.config ), заменив строку
<httpRuntime maxRequestLength="4096" />
на
<httpRuntime maxRequestLength="204800" executionTimeout="7200"/> - Осталось перезапустить службу WSUS с помощь PoSh:
Get-Service -Name WsusService | Restart-Service -Verbose

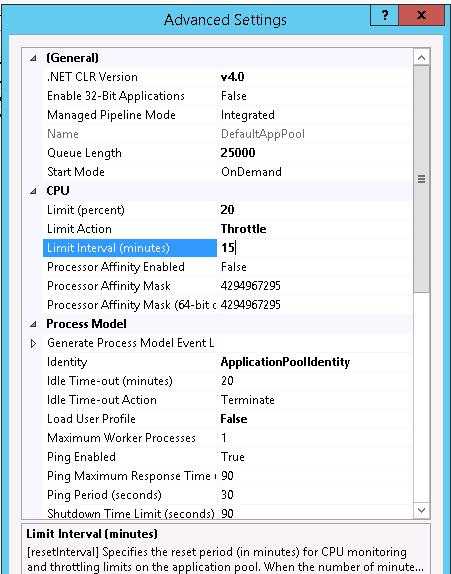
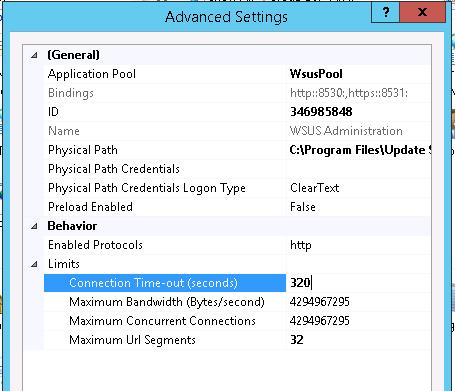
Далее с помощью консоли IIS Manager нужно внести следующие изменения в настройки пула WsusPool (Application Pools -> WsusPool -> Advanced settings)
- Private Memory Limit (KB) – 0 (было 1258015, убирается лимит на использование памяти рабочим процессов WSUS, в результате служба может использовать более 1,2 Гб памяти)
- Queue Length — 25000 (увеличиваем длину очереди к пулу приложения с 10000)
- Limit Interval (minutes) — 15 (увеличиваем с 5 минут до 15 минут время для сброса счетчиков и выполнения CPU Throttling)
- Service Unavailable Response — TcpLevel (при старом значение HttpLevel клиенту возвращается ошибка HTTP 503, теперь соединение просто сбрасывается)
Затем в настройках сайта WSUS Administration -> Advanced settings нужно изменить значение Connection Time-out со 180 до 320.
 Осталось перезапустить IIS:
IISReset
Теперь мы увеличили таймауты и ресурсы сервера, требуемые клиентам Windows 10 для поиска и проверки обновлений на сервере обновлений WSUS. На следующий день – все клиенты смогли обнаружить и установить все требуемые обновления.
29.05.2021
Просмотров: 3931
При попытке обновить Windows 10 через Центр обновления Windows может появиться ошибка с кодом 0x8024401C, которая указывает на поврежденные или неверные настройки реестра. Также проблемы с подключением к серверу Microsoft и поврежденные системные файлы могут вызвать ошибку 0x8024401c в Центре обновления Windows 10 или в разделе Параметров системы.
Читайте также: При обновлении Windows 10 появляется ошибка 0x8007001f-0x20006
Способы исправления ошибки 0x8024401c в Центре обновления Windows 10
Для решения ошибки 0x8024401C существует два способа: редактирование системного реестра и сброс параметров Центра обновления. Перед использованием любого метода рекомендуем создать точку восстановления системы и копию реестра.
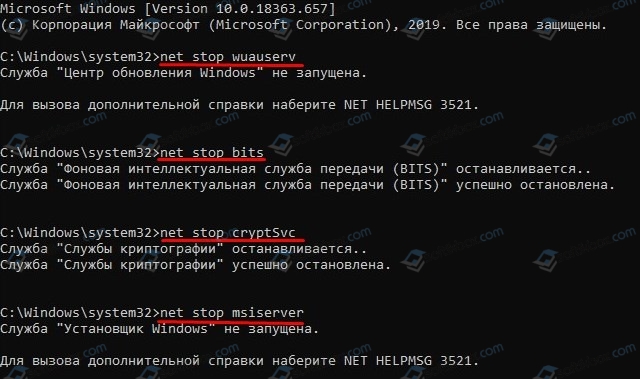
Чтобы выполнить сброс компонентов WU, стоит запустить командную строку с правами Администратора и по очереди ввести такие команды:
- net stop wuauserv
- net stop cryptSvc
- net stop bits
- net stop msiserver
- ren C:\Windows\SoftwareDistribution SoftwareDistribution.old
- ren C:\Windows\System32\catroot2 Catroot2.old
- net start wuauserv
- net start cryptSvc
- net start bits
- net start msiserver
После перезагрузки ПК изменения вступят в силу. Ошибка 0x8024401c в Центре обновления Windows 10 должна исчезнуть.
Если данный способ не помог исправить ошибку, рекомендуем внести некоторые правки в системный реестр.
- Нужно нажать комбинацию клавиш Win+R и ввести regedit. Откроется окно системного реестра.
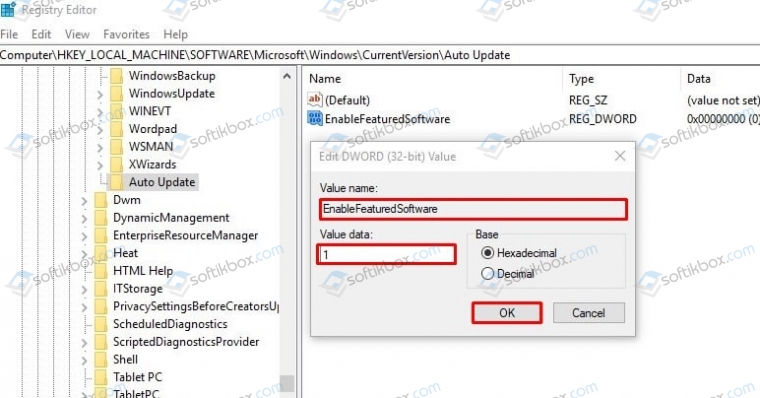
- Необходимо перейти по ветке: HKEY_LOCAL_MACHINE\SOFTWARE\Microsoft\Windows\CurrentVersion\WindowsUpdate\Auto Update.
- В окне справа находим параметр «EnableFeaturedSoftware». У него будет значение «0». Двойным кликом открываем параметр и задаем ему значение «1».
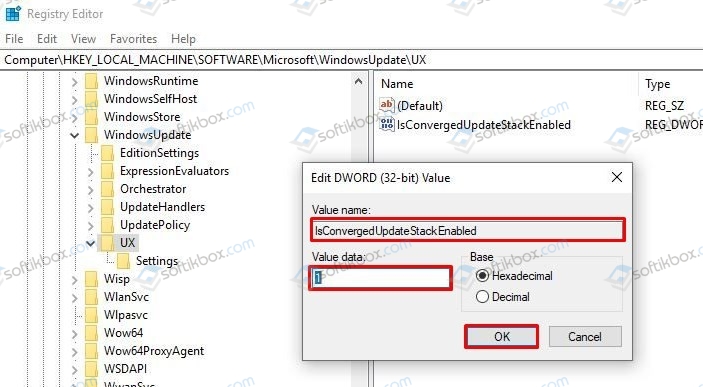
- Не закрываем реестр. Переходим по ветке HKEY_LOCAL_MACHINE\SOFTWARE\Microsoft\WindowsUpdate\UX. Дважды кликаем по параметру «IsConvergedUpdateStackEnabled» и задаем ему значение «0».
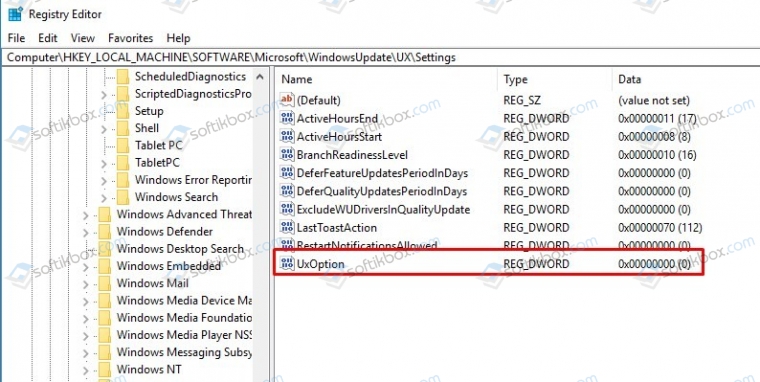
- Далее переходим еще по одному адресу в редакторе реестра HKEY_LOCAL_MACHINE\SOFTWARE\Microsoft\WindowsUpdate\UX\Settings. Дважды нажимаем на UxOption и задаем данному параметру значение «0».
- Чтобы избавиться от ошибки 0x8024401c, стоит внести правки еще в один параметр. Переходим по ветке HKEY_LOCAL_MACHINE\SOFTWARE\Policies\Microsoft\SystemCertificates. Здесь находим параметр «CopyFileBufferedSynchronousIo». Задаем этому параметру значение равно «1».
- Теперь перезагружаем систему, чтобы изменения вступили в силу.
ВАЖНО! В случаи, если какого-то или всех вышеперечисленных параметров нет в редакторе, стоит нажать на пустом месте в нужной ветке реестра и выбрать «Создать», «Параметр DWORD 32-бита» и задать ему идентичное название и значение, которые имеют вышеуказанные параметры.
Если у вас установлена Technical Preview, то нужно отредактировать параметр «UseWUServer» (задаем 0), который расположенный по адресу HKEY_LOCAL_MACHINE\SOFTWARE\Policies\Microsoft\Windows\WindowsUpdate\AU.
В случае, если исправить ошибку вышеописанными способами не удалось, стоит сбросить настройки DNS. Для этого нужно открыть консоль с правами Администратора и ввести по очереди такие команды:
- netsh winsock reset — сброс Winscock.
- ipconfig /flushdns — сброс DNS-кеша.
- netsh int ip reset resettcpip.txt — сброс TCP/IP.
- ipconfig /renew — обновление IP-адреса
Если и сброс параметров сети не помог избавиться от ошибки, то тогда откат системы должен помочь её решить.
Данная статья посвящена устранению ошибки 0x8024401c при поиске и загрузке обновлений с сервера WSUS. Проявлятся она может на клиентских машинах на Windows 10, Windows 2012 и 2016 server.
Сам текст ошибки выглядит следующим образом:
There were some problems installing updates, but we’ll try again later. If you keep seeing this and want to search the web or contact support for information, this may help: (0x8024401c)
Если посмотреть список кодов ошибок обновления Windows, то увидим, что ошибка 0x8024401C означает превышение таймаута ответа от клиента: WU_E_PT_HTTP_STATUS_REQUEST_TIMEOUT — HTTP status 408 — the server timed out waiting for the request.
Возникать она может, скажем, при слишком большом числе обращений к серверу, недостатке его ресурсов и в других подобных ситуациях.
Сначала проверим журнал ошибок, где скорее всего увидим что-то подобное:
2020-01-19 14:11:24:870  816 1244 WS WARNING: There was an error communicating with the endpoint at 'http://server-wsus:8530/ClientWebService/client.asmx'.
2020-01-19  14:11:24:870  816 1244 WS WARNING: There was an error receiving the HTTP reply.
2020-01-19  14:11:24:870  816 1244 WS WARNING: The operation did not complete within the time allotted.
2020-01-19  14:11:24:870  816 1244 WS WARNING: The operation timed out
Проверим доступность страницы http://server-wsus:8530/ClientWebService/client.asmx , на которую указывают логи. Если все в порядке и сама страница обновления доступна, идем дальше(иначе — разбираемся в причинах на самом WSUS-сервере или доступности его)
Перед выполнением каких-либо действий, убеждаемся что установлены необходимые обновления на WSUS-сервере, если требуется — устанавливаем вручную.
Предположим, WSUS-сервер работает на Windows server 2012(для 2016 действия будут, в общем-то, аналогичны) — проверяем базу знаний Microsoft, где есть соответствующая статья KB3159706 (Update enables ESD decryption provision in WSUS in Windows Server 2012 and Windows Server 2012 R2)
Согласно статье, необходимо установить обновление KB3159706, а также выполнить некоторые действия, иначе может перестать открываться консоль WSUS.
Выполняем:
1.
"C:\Program Files\Update Services\Tools\wsusutil.exe" postinstall /servicing
2.
Проверяем, установлен ли компонент.NET Framework 4.5 -> HTTP Activation
Get-WindowsFeature -Name NET-WCF-HTTP-Activation45
Если нет, устанавливаем вручную (через Add Roles and Features Wizard)
3.
В случае, если используется SSL на сервере WSUS, редактируем C:\Program Files\Update Services\WebServices\ClientWebService\Web.config согласно рекомендациям KB3159706, иначе пропускаем пункт
4.
Редактируем файл config ( C:\Program Files\Update Services\WebServices\ClientWebService\web.config ), заменив строку<httpRuntime maxRequestLength=»4096″ /> на <httpRuntime maxRequestLength=»204800″ executionTimeout=»7200″/>
5. Перезапускаем службу WSUS:
Get-Service -Name WsusService | Restart-Service -Verbose
6.
С помощью консоли IIS Manager вносим изменения в настройки пула WsusPool (Application Pools -> WsusPool -> Advanced settings)
- Private Memory Limit (KB) – ставим 0 ( убирается лимит на использование памяти рабочим процессов WSUS, значение может быть иным, если вы опасаетесь перегрузить сервер процессами WSUS)
- Queue Length — 25000 (увеличиваем длину очереди к пулу приложения, дефолтное значение — 10000)
- Limit Interval (minutes) — 15 (увеличиваем с 5 до 15 минут время для сброса счетчиков и выполнения CPU Throttling)
- Service Unavailable Response — TcpLevel (при старом значение HttpLevel клиенту возвращается ошибка HTTP 503, при значении TcpLevel соединение просто сбрасывается)
Затем в настройках WSUS Administration -> Advanced settings нужно изменить значение Connection Time-out со 180 до 320, увеличив время таймаута.
Перезапускаем IIS:
IISReset
Далее проверяем работу служб, и ждем следующего сеанса обновлений клиентов.
Аналогичным образом можно перенастраивать WSUS и в windows 2016, при обнаружении недостатков ресурсов.
- Remove From My Forums
-
Question
-
Followed this: https://docs.microsoft.com/en-us/windows-server/administration/windows-server-update-services/deploy/2-configure-wsus
and this
http://jackstromberg.com/2013/11/enabling-ssl-on-windows-server-update-services-wsus/ for setup SSL on WSUS.
Assigned/Bind a cert in IIS which was issued by our in house Microsoft Enterprise Root CA. Currently only one server to which I am trying to deploy updates/patches Server 2016. Our RootCA certificate is present in the Local Computer Trusted Root
CA Store on the test server 2016 and also in the same location on WSUS server.Client server 2016 is visible/reporting in the WSUS Unassigned Computers Group under Status «Not yet reported» but not moving to the WSUS Group I created for WSUS_TestServers. The GPO is setup correctly for client side
targeting.This is what I see in the windowslog file on the client/server 2016:
https://fqdn.local:8531/ClientWebService/client.asmx’.
2019/04/05 09:21:08.3073227 1364 1836 WebServices WS error: The server returned HTTP status code ‘500 (0x1F4)’ with text ‘System.ServiceModel.ServiceActivationException’.
2019/04/05 09:21:08.3073232 1364 1836 WebServices WS error: The server was unable to process the request.
2019/04/05 09:21:08.3073335 1364 1836 WebServices Web service call failed with hr = 8024401f.
2019/04/05 09:21:08.3073338 1364 1836 WebServices Current service auth scheme=0.
2019/04/05 09:21:08.3073341 1364 1836 WebServices Current Proxy auth scheme=0.
2019/04/05 09:21:08.3073422 1364 1836 ProtocolTalker PTError: 0x8024401f
2019/04/05 09:21:08.3073425 1364 1836 ProtocolTalker SyncUpdates_WithRecovery failed. 0x8024401f
2019/04/05 09:21:08.3073467 1364 1836 ProtocolTalker SyncUpdates round trips: 1
2019/04/05 09:21:08.3073471 1364 1836 ProtocolTalker Sync of Updates 0x8024401f
2019/04/05 09:21:08.3073530 1364 1836 ProtocolTalker SyncServerUpdatesInternal failed 0x8024401f
2019/04/05 09:21:08.3106381 1364 1836 Agent Failed to synchronize, error = 0x8024401F
2019/04/05 09:21:08.3244305 1364 1836 Agent Exit code = 0x8024401F
2019/04/05 09:21:08.3244314 1364 1836 Agent * END * Finding updates CallerId = UpdateOrchestrator Id = 1
2019/04/05 09:21:08.3327902 1364 1584 ComApi *RESUMED* Search ClientId = UpdateOrchestrator
2019/04/05 09:21:08.3334744 1364 1584 ComApi Updates found = 0
2019/04/05 09:21:08.3334751 1364 1584 ComApi Exit code = 0x00000000, Result code = 0x8024401F
2019/04/05 09:21:08.3334755 1364 1584 ComApi * END * Search ClientId = UpdateOrchestrator
2019/04/05 09:21:08.3340164 1364 7288 ComApi ISusInternal:: DisconnectCall failed, hr=8024000C
2019/04/05 09:28:39.2998832 1364 8100 Agent Refreshing global settings cache
2019/04/05 09:28:39.2998843 1364 8100 Agent WSUS server: https://fqdn.local:8531 (Unchanged)
2019/04/05 09:28:39.2998849 1364 8100 Agent WSUS status server: https://fqdn.local:8531 (Unchanged)
2019/04/05 09:28:39.2998852 1364 8100 Agent Alternate Download Server: NULL (Changed)
2019/04/05 09:28:39.2998855 1364 8100 Agent Fill Empty Content Urls: No (Unchanged)
2019/04/05 09:28:39.2998858 1364 8100 Agent Target group: WSUS_TestServers
(Unchanged)
2019/04/05 09:28:39.2998861 1364 8100 Agent Windows Update access disabled: No (Unchanged)
2019/04/05 09:29:08.3558987 1364 8128 Misc Got WSUS Client/Server URL: https://fqdn.local:8531/ClientWebService/client.asmx»»
2019/04/05 09:29:08.3559563 1364 8128 ProtocolTalker OK to reuse existing configuration——
Thank you
-
Edited by
Tuesday, April 9, 2019 5:43 PM
-
Edited by
Answers
-
Changed this from 1740 to 240 seems to have resolved the issue and all machines reported after I made this change. I will monitor this for now by adding more machines little by little

-
Marked as answer by
WildPacket
Wednesday, April 24, 2019 4:08 PM
-
Marked as answer by