by Kazim Ali Alvi
Kazim has always been fond of technology, be it scrolling through the settings on his iPhone, Android device, or Windows. And at times, unscrewing the device to take… read more
Updated on
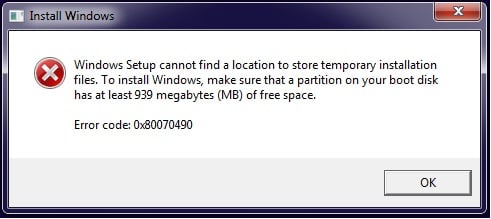
- Many users have been unable to upgrade to the latest iteration and receive the error code 0x80070490 when installing the Windows 11 update.
- It could be due to corrupt system files, issues with the Windows Update Components, or a conflicting third-party app.
- To fix the error, restart the computer, run the built-in troubleshooter, perform DISM and SFC scan, amongst other methods here.
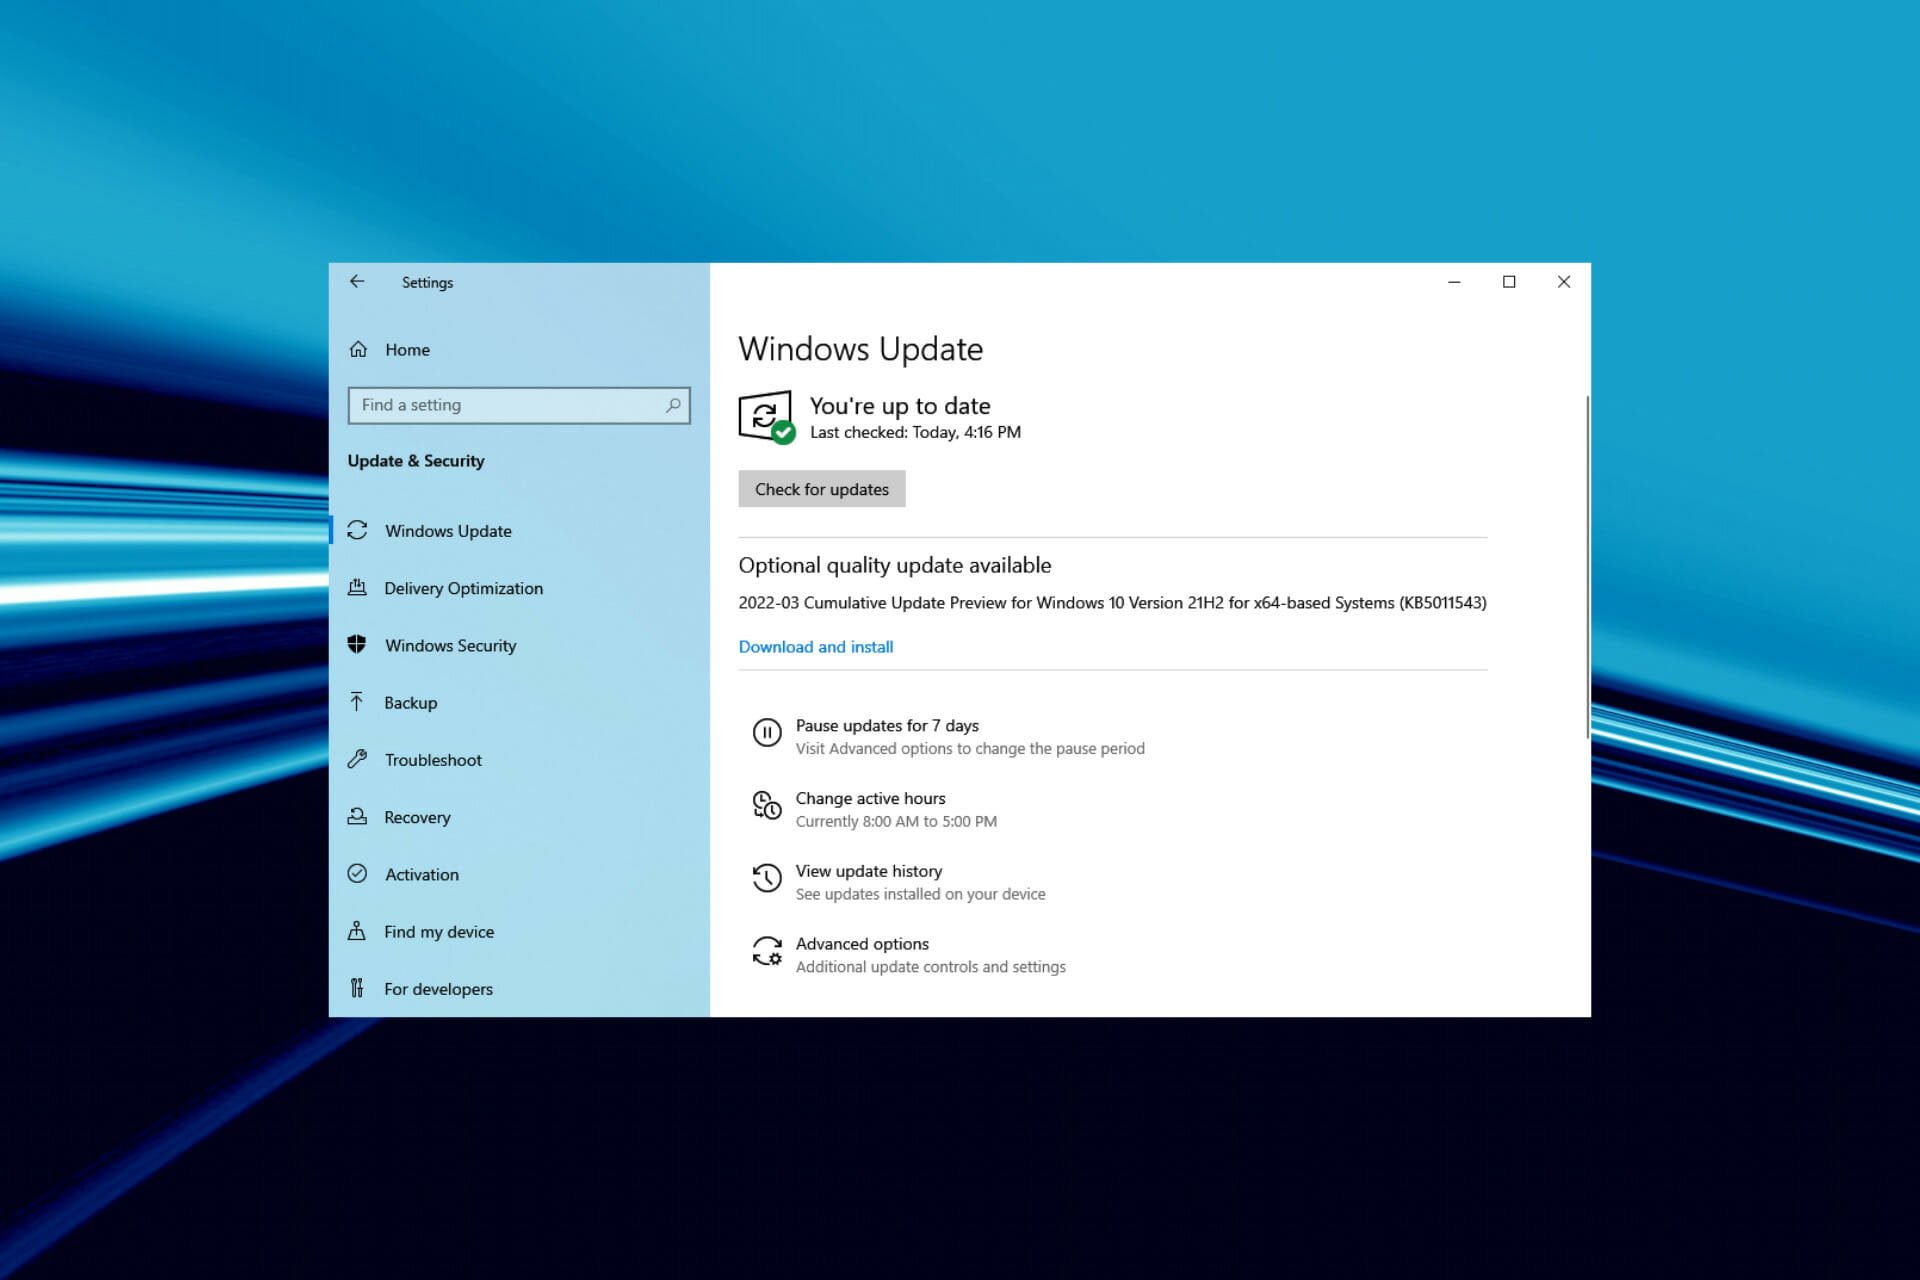
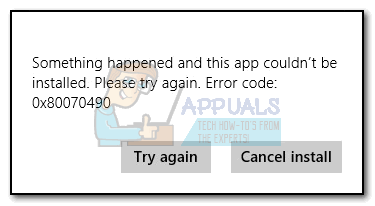
Though you shouldn’t normally come across any, many have reported encountering update errors. And with the option to upgrade to the latest iteration available via Windows Update, the error code 0x80070490 while installing Windows 11 can cause some trouble.
Unlike most update errors, this wouldn’t just prevent you from installing the latest version but basically upgrading to the latest iteration, i.e, Windows 11.
Though the error code 0x80070490 can also be encountered while installing apps in Windows 11, or even when running them, this guide will particularly focus on the update Windows 10 to 11 error 0x80070490 part.
Why do I see the error code 0x80070490 while installing Windows 11?
As is the case with other similar errors, this too can be caused by corrupt system files, third-party antiviruses preventing the upgrade, or a minor bug with the OS.
Other than that, it could also have to do with corrupt Windows Update Components, since these are critical for installing updates, and issues with them can lead to 0x80070490 error code while installing Windows 11.
Whatever the underlying cause in your case, the methods listed below should eliminate the error. Just follow them in the listed sequence for quick troubleshooting.
How can I fix the error code 0x80070490 when upgrading to Windows 11?
1. Use a dedicated repair tool
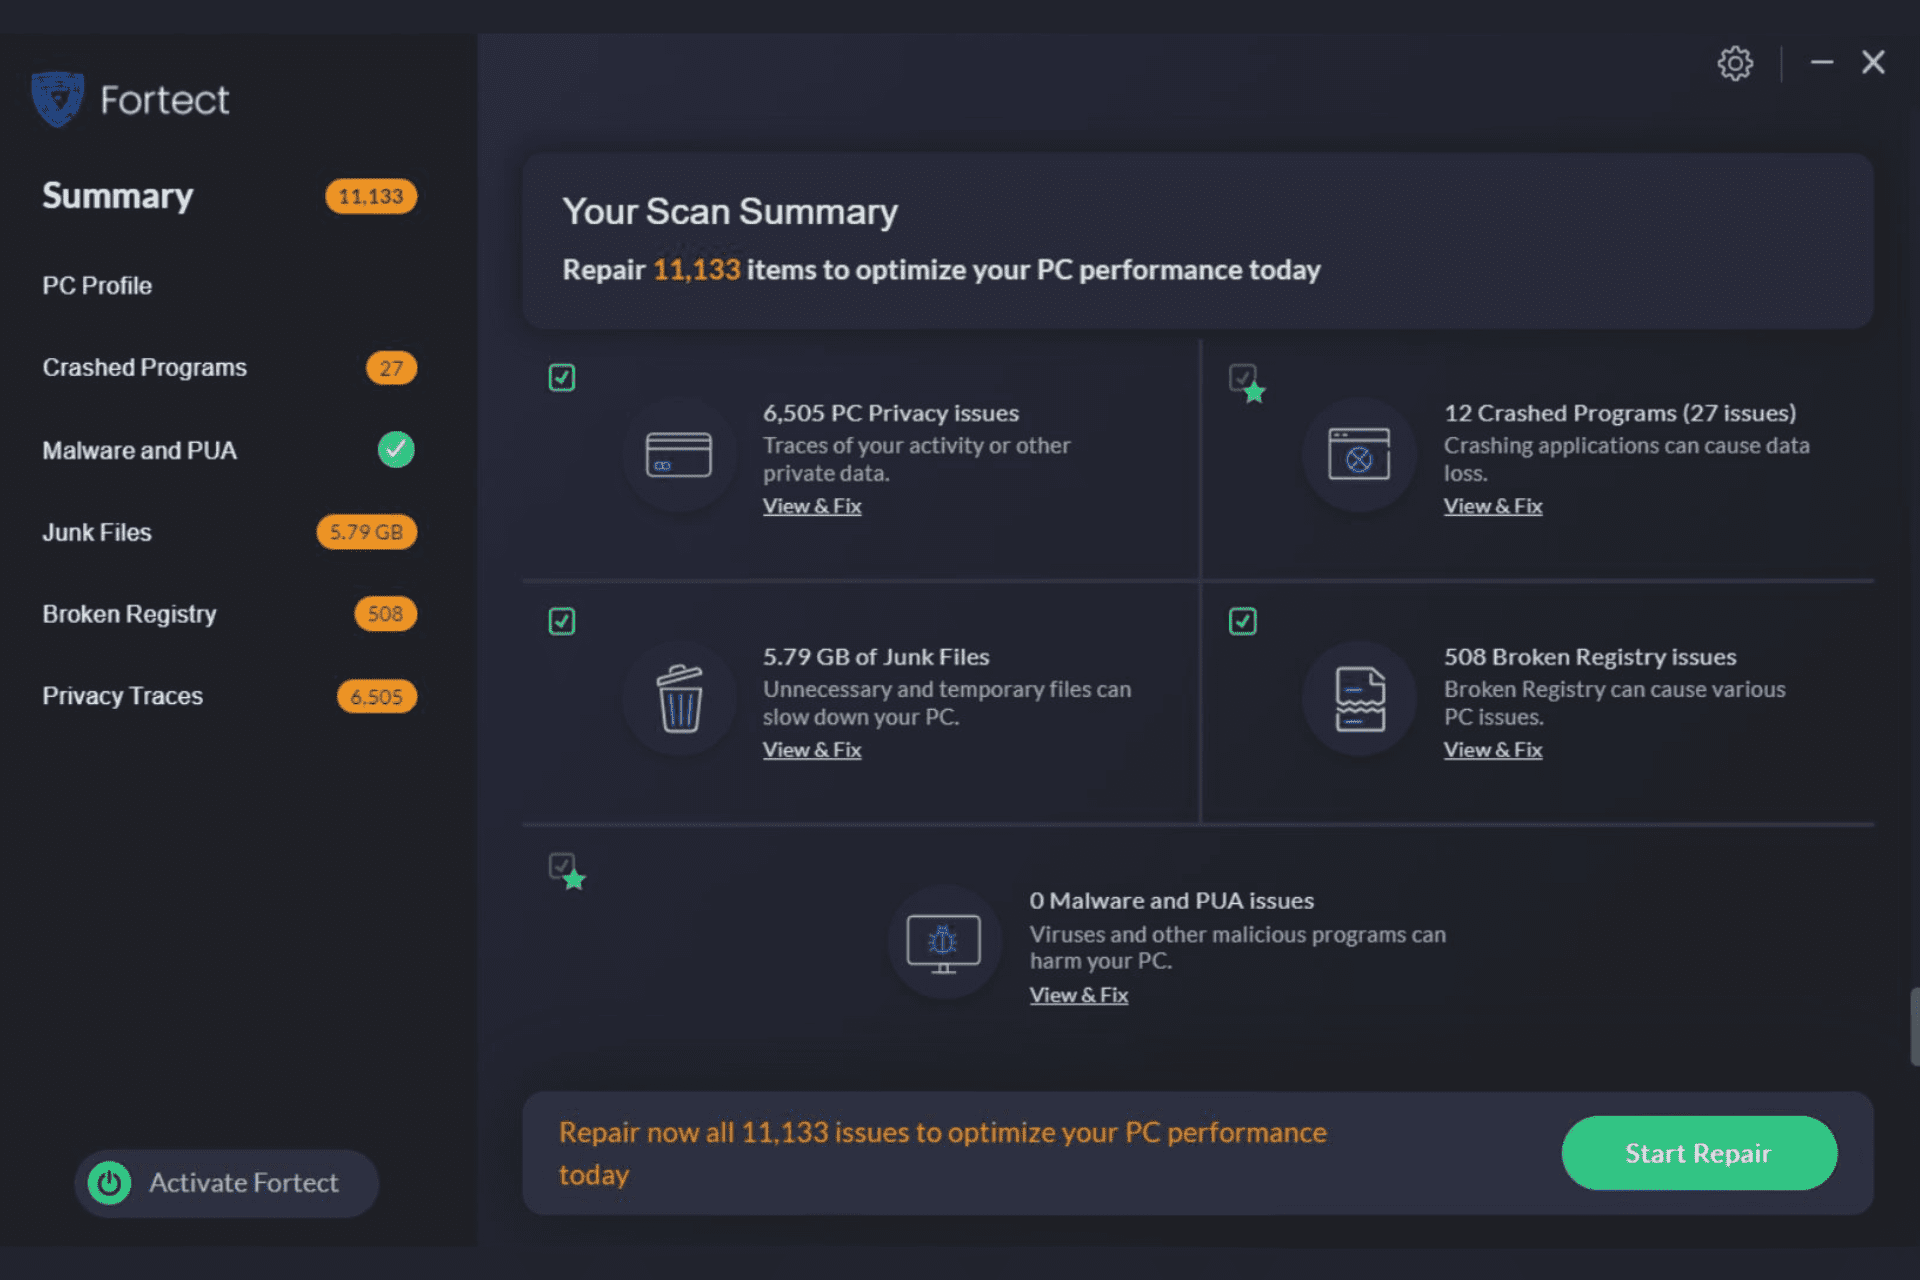
While you could go around manually troubleshooting the error, there is a simpler and quicker alternative, use a dedicated repair tool. We recommend Fortect since it’s one of the best and helps eliminates the maximum errors, including the ones with Windows Update.
Other than that, it also scans for malware infection and after removing it, repairs the damage caused by the malware. In case you are missing critical DLL files and unable to run a program, Fortect comes to your rescue by automatically replacing these.
Be it any issue with the PC, this tool is your full-time companion and will get you the best system performance coupled with the least errors.
⇒ Get Fortect
2. Restart the PC
- Go to the desktop, press Alt + F4 to launch the Shut Down Windows box and select Restart from the dropdown menu.

- Next, click on OK at the bottom to restart the computer.

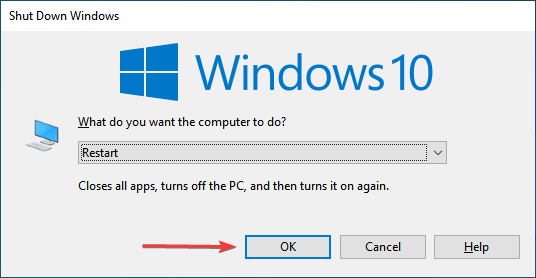
Most windows update errors including error code 0x80070490 when installing Windows 11 can be fixed with a simple restart. If it’s a minor bug, restarting the computer would reboot the OS and eliminate it right away.
2. Run Windows Update troubleshooter
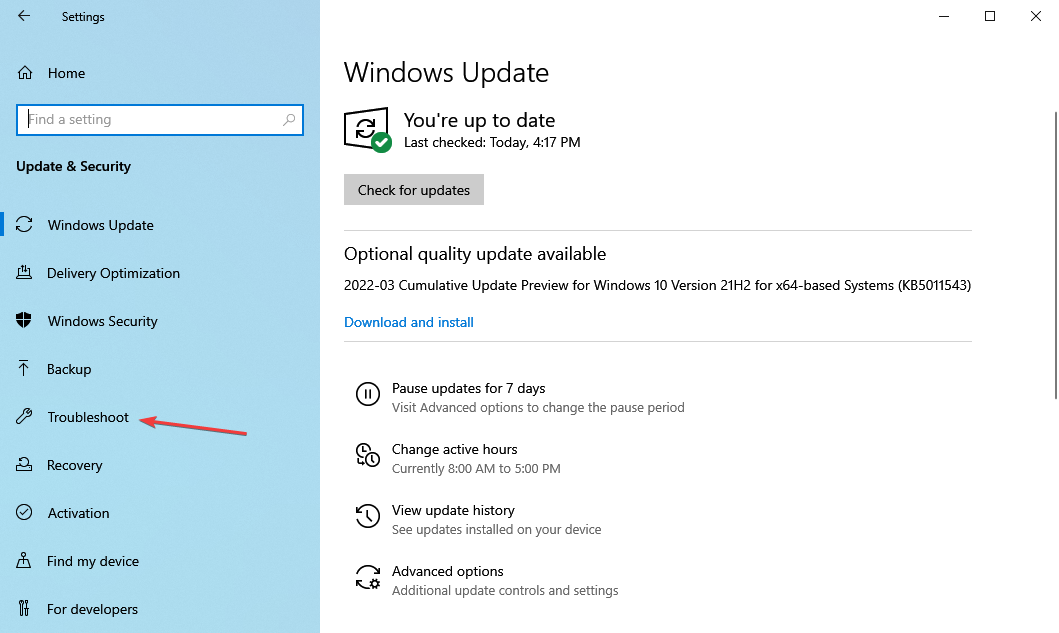
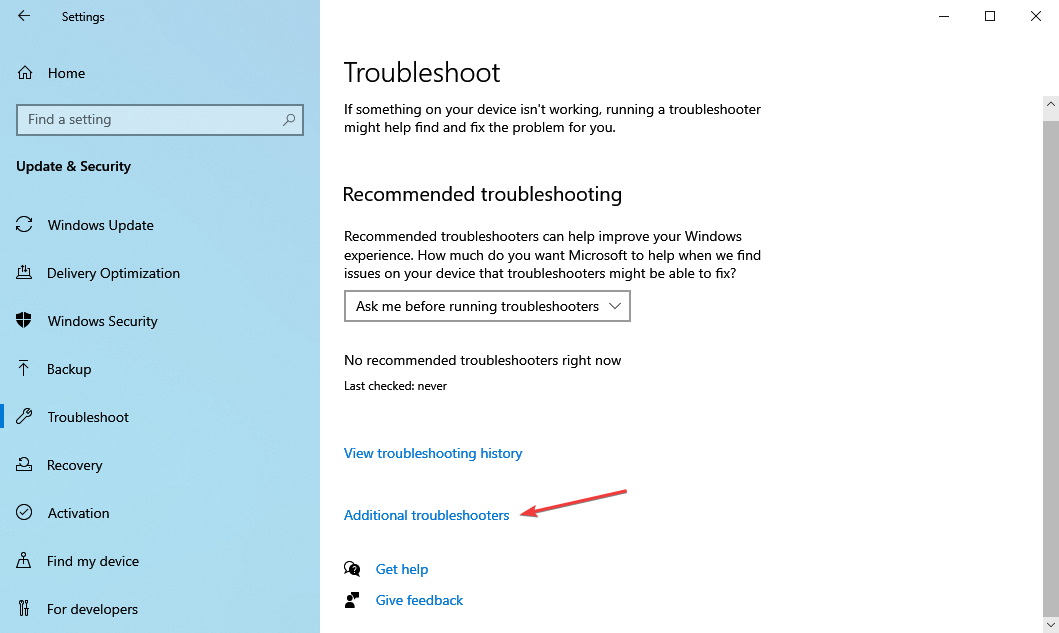
- Press Windows + I to launch the Settings app, and click on Update & Security from the various options listed here.

- Next, select Troubleshoot from the tabs listed in the navigation pane on the left.

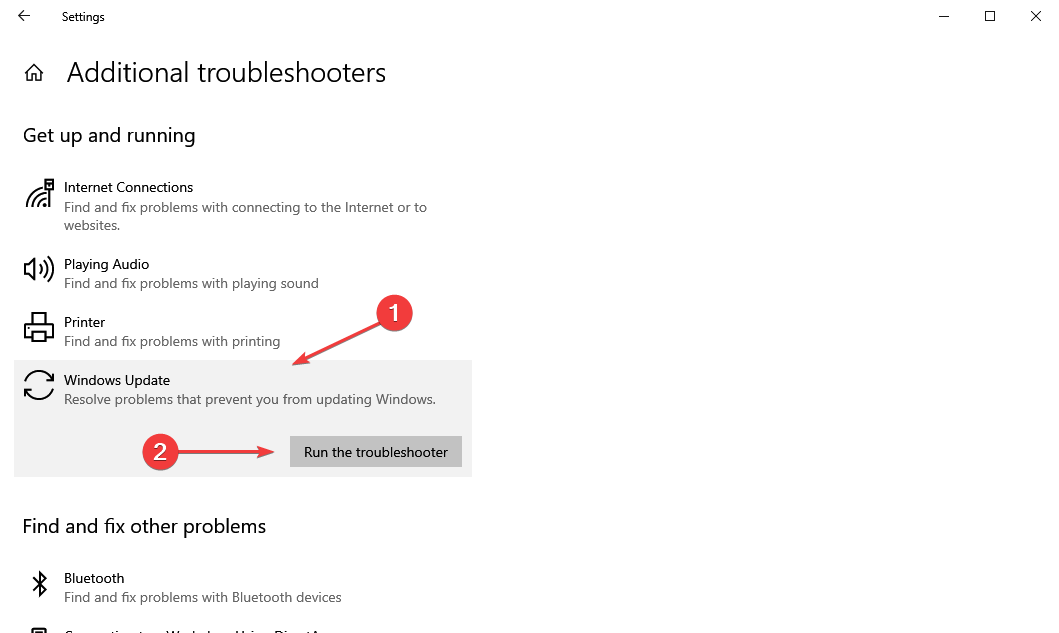
- Click on the Additional troubleshooters option on the right.
- Now, select the Windows Update entry here, and then click on the Run the troubleshooter button that appears under it.

Most errors can be simply fixed by running a dedicated built-in troubleshooter, be it with the OS or an external device. In this case, the Windows Update troubleshooter should come to your rescue.
If you still encounter the error code 0x80070490 while upgrading to Windows 11, head to the next method.
3. Verify that the critical services are running
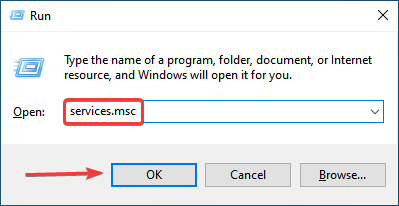
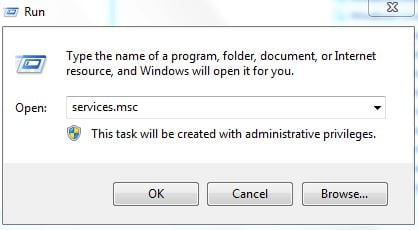
- Press Windows + R to launch the Run command, enter services.msc in the text field, and either click OK or hit Enter to launch the Services app.

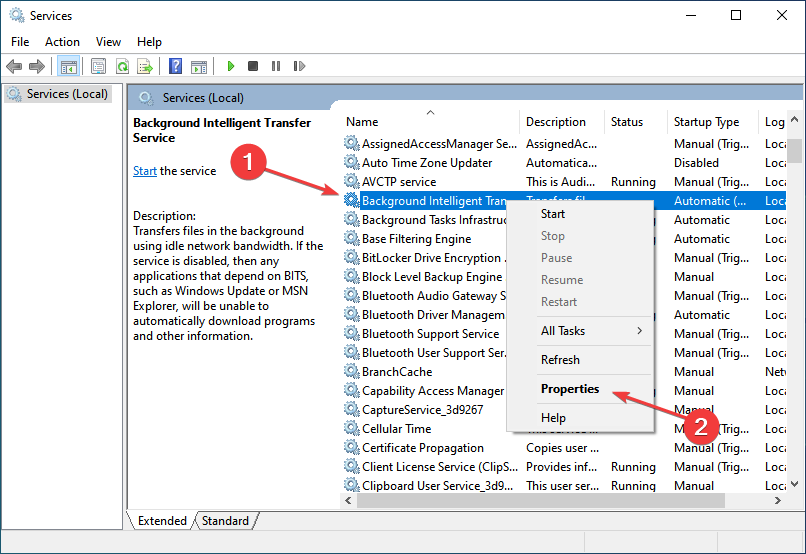
- Now, locate the Background Intelligent Transfer Service, right-click on it and select Properties from the context menu.

- Click on the Startup type dropdown menu, and select Automatic from the list options.

- Next, verify if the Service status says Running. In case it doesn’t click on the Start button and then on OK to save the changes.
- Repeat the same process with Cryptographic and Windows Update services.


After you are done making the changes, restart the computer for these to come into effect, and check if the error code 0x80070490 encountered while installing Windows 11 is fixed.
- How to Remove Edit With Clipchamp From Context Menu on Windows 11
- How to Convert Windows 11 Install.WIM to Install.ESD (or Backwards)
- Shortcuts Are Not Working in Chrome? 5 Ways to Fix Them
4. Perform DISM and SFC scan
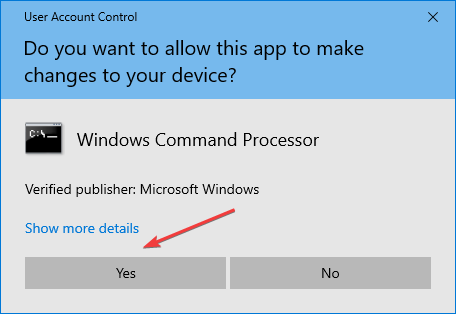
- Press Windows + R to launch the Run command, type cmd in the text field, press and hold Ctrl + Shift, and then either click OK or hit Enter to launch an elevated Command Prompt.
- Click Yes in the UAC (User Account Control) prompt that appears.

- Once here, paste the following command and hit Enter to run the DISM tool.
DISM.exe /Online /Cleanup-image /Restorehealth
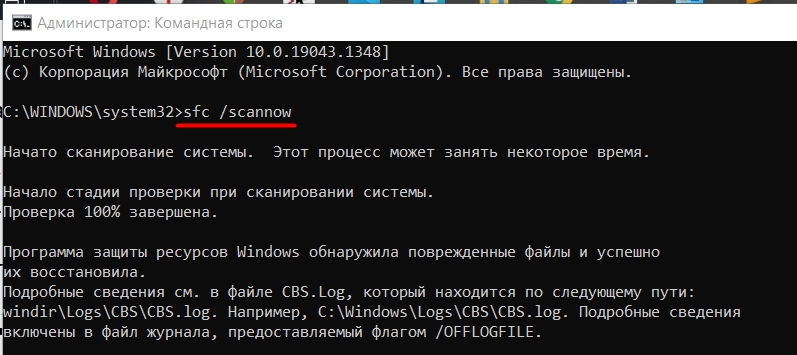
- Now, execute the following command to perform a SFC scan.
sfc /scannow - After running the two, restart the computer.


The DISM (Deployment Image Servicing and Management) tool looks for issues with the Windows Image and if required, makes changes to the Windows installation files to fix the error.
The SFC (System File Checker) scan is used to identify corrupt system files and if any are found, these are replaced with their cached copy stored on the system.
Once the two scans are run and the computer restarted, check if you still encounter the error code 0x80070490 while installing the Windows 11 update.
5. Uninstall third-party antivirus
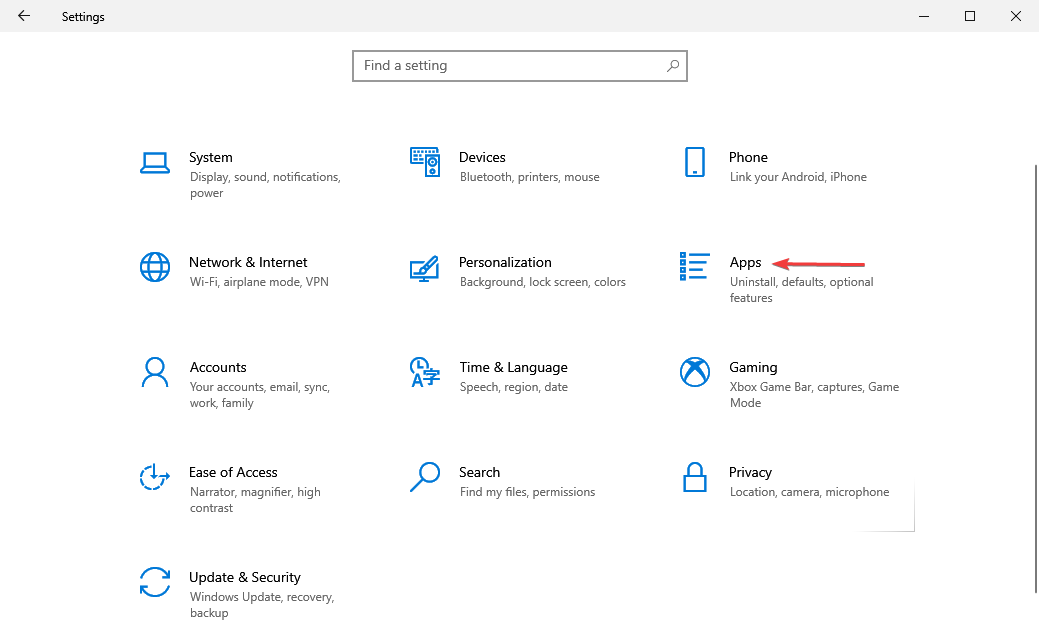
- Press Windows + I to launch Settings, and select Apps from the options listed here.

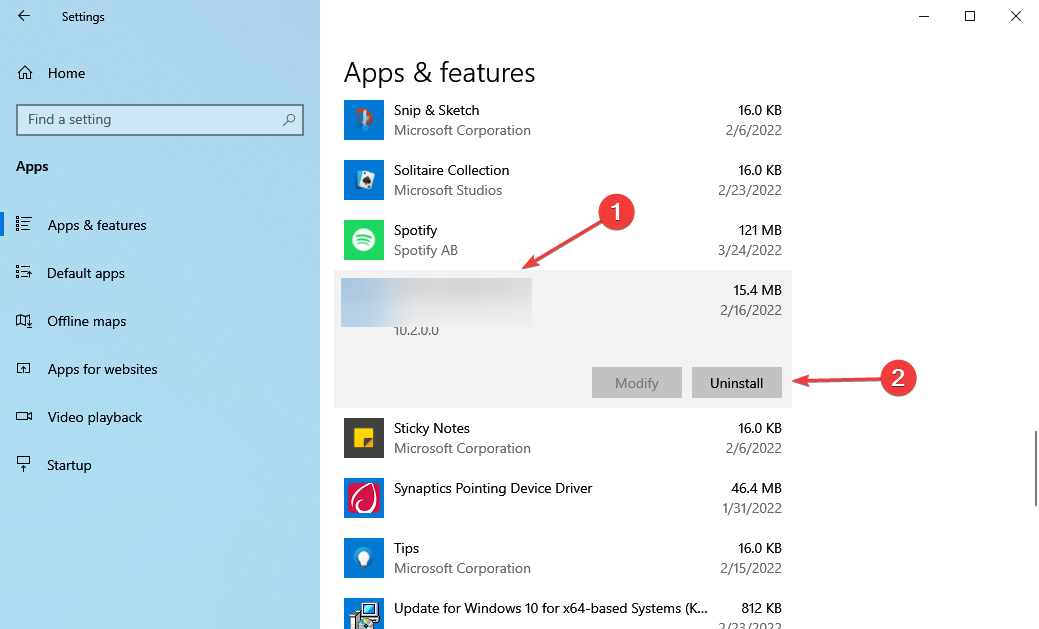
- Now, locate the third-party antivirus from the list on the right, select it, and then click on Uninstall.
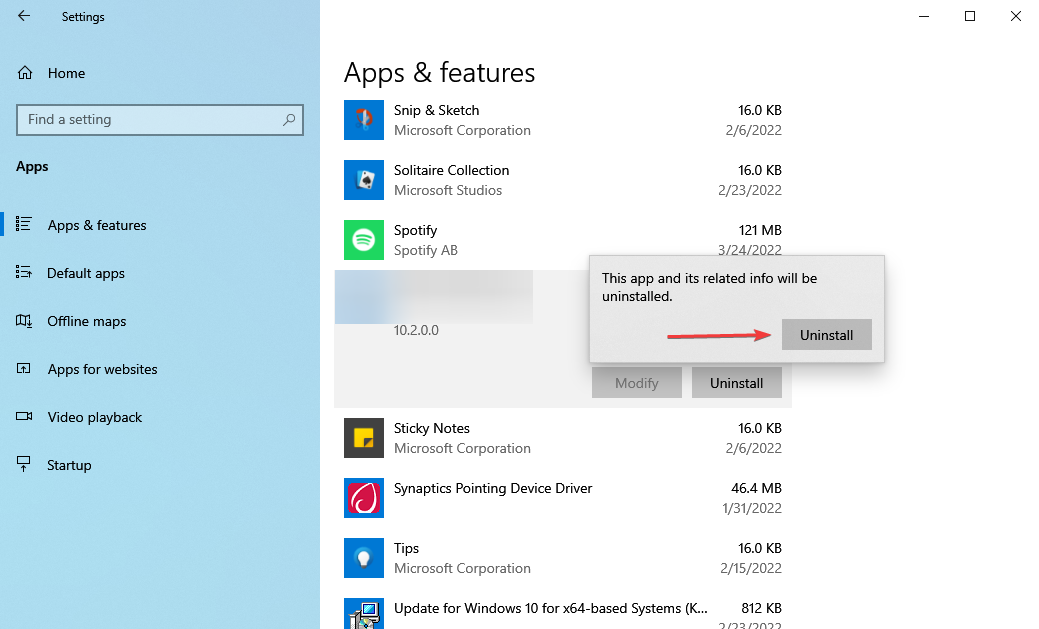
- Again, click Uninstall in the confirmation prompt that pops up.
Certain third-party antiviruses are known to block updates and might lead to the error code 0x80070490 when upgrading to Windows 11. If you have any of these installed, remove them and then try to install the Windows 11 update.
6. Reset Windows Update Components
- Press Windows + R to launch the Run command, enter cmd in the designated text field, hold the Ctrl + Shift keys, and then click on OK at the bottom.
- Click Yes in the UAC prompt that appears.
- Now, paste the following two commands and hit Enter to stop the BITS and Windows Update service.
net stop bitsnet stop wuauserv - Execute the following command to delete the qmgr*.dat files.
Del “%ALLUSERSPROFILE%Application DataMicrosoftNetworkDownloaderqmgr*.dat” - If this is the first attempt at resetting, you skip these three commands. However, if you tried it before, execute these three to rename some critical folders.
Ren %Systemroot%\SoftwareDistribution\DataStore DataStore.bakRen %Systemroot%\SoftwareDistribution\Download Download.bakRen %Systemroot%\System32\catroot2 catroot2.bak - The next step is to reset BITS and Windows Update service, execute the following commands for that.
sc.exe sdset bits D:(A;;CCLCSWRPWPDTLOCRRC;;;SY)(A;;CCDCLCSWRPWPDTLOCRSDRCWDWO;;;BA)(A;;CCLCSWLOCRRC;;;AU)(A;;CCLCSWRPWPDTLOCRRC;;;PU)sc.exe sdset wuauserv D:(A;;CCLCSWRPWPDTLOCRRC;;;SY)(A;;CCDCLCSWRPWPDTLOCRSDRCWDWO;;;BA)(A;;CCLCSWLOCRRC;;;AU)(A;;CCLCSWRPWPDTLOCRRC;;;PU) - Now, paste this and hit Enter.
cd /d %windir%\system32 - Next, execute the following commands individually to reregister some critical files.

regsvr32.exe atl.dll
regsvr32.exe urlmon.dll
regsvr32.exe mshtml.dll
regsvr32.exe shdocvw.dll
regsvr32.exe browseui.dll
regsvr32.exe jscript.dll
regsvr32.exe vbscript.dll
regsvr32.exe scrrun.dll
regsvr32.exe msxml.dll
regsvr32.exe msxml3.dll
regsvr32.exe msxml6.dll
regsvr32.exe actxprxy.dll
regsvr32.exe softpub.dll
regsvr32.exe wintrust.dll
regsvr32.exe dssenh.dll
regsvr32.exe rsaenh.dll
regsvr32.exe gpkcsp.dll
regsvr32.exe sccbase.dll
regsvr32.exe slbcsp.dll
regsvr32.exe cryptdlg.dll
regsvr32.exe oleaut32.dll
regsvr32.exe ole32.dll
regsvr32.exe shell32.dll
regsvr32.exe initpki.dll
regsvr32.exe wuapi.dll
regsvr32.exe wuaueng.dll
regsvr32.exe wuaueng1.dll
regsvr32.exe wucltui.dll
regsvr32.exe wups.dll
regsvr32.exe wups2.dll
regsvr32.exe wuweb.dll
regsvr32.exe qmgr.dll
regsvr32.exe qmgrprxy.dll
regsvr32.exe wucltux.dll
regsvr32.exe muweb.dll
regsvr32.exe wuwebv.dll
10. The penultimate step is to reset Winsock and executing the following command would do it.netsh winsock reset
11. Now, all you have to do is restart the BITS and Windows Update service that you stopped earlier. Execute the following commands for that.net start bits net start wuauserv
Issues with the Windows Update Components can often lead to the 0x80070490 error code when installing the update for Windows 11. Resetting the components should fix the problem.
If this method too doesn’t work, try the next one.
7. Manually install Windows 11
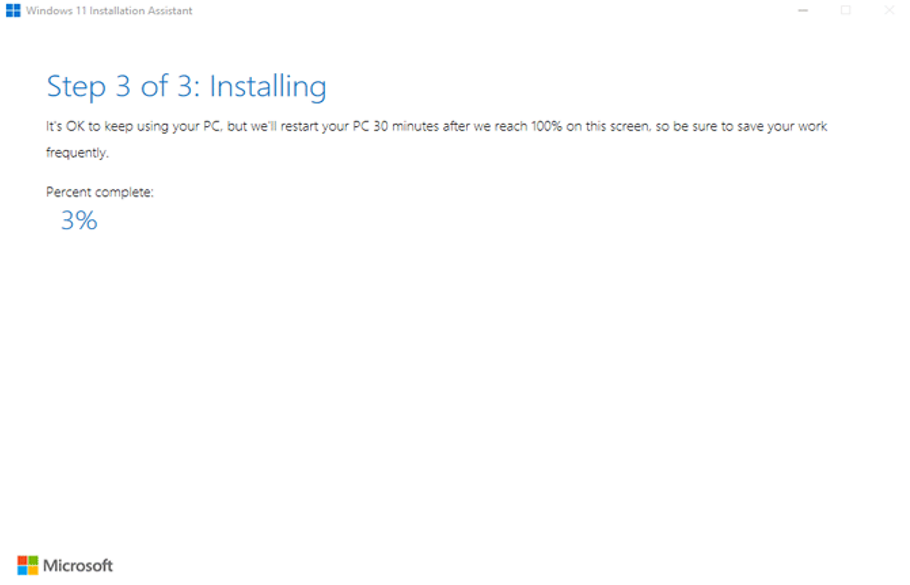
The last option with you, and one that should work for all, is to manually install the latest iteration. Here too, there are a couple of ways to make the upgrade. The simplest one is to upgrade to Windows 11 using the installation assistant.
Another option is to create a bootable USB drive for Windows 11 and then install the OS. You can also use the bootable USB to perform advanced troubleshooting in Windows 11, in case it doesn’t boot.
No matter what lead to the 0x80070490 error code while installing the Windows 11 update, you can always make the upgrade with the methods listed here.
Also, find out how to fix the 0x800f0989 error code, another error that is encountered when upgrading to Windows 11 from the previous iteration through Windows Update.
Tell us which fix worked and your first impression of Windows 11, in the comments section below.
![]()
Ошибка 0x80070490 возникает при установке Windows. Ее получение обычно означает, что у вашего BIOS’а возникли проблемы с жестким диском. Довольно часто она возникает из-за того, что ваш контроллер SATA работает не в режиме AHCI, а например в IDE. Или же эта проблема может возникать, когда вы используете System Center Configuration Manager от Microsoft для переустановки операционной системы Windows на своем устройстве.
Также довольно большое количество пользователей указали, что ошибка 0x80070490 может проявлять себя при включенном BitLocker. Но нужно понимать, что отключение этой функции не является решением проблемы.
Проблема довольно распространенная и ею страдает множество пользователей. Ошибка возникает практически на каждой версии Windows. К счастью, существует пара методов с помощью которых вы сможете разрешить эту неприятную ситуацию и вы сможете спокойно продолжить устанавливать или переустанавливать заготовленный Windows.
Прежде чем мы перейдем непосредственно к основным методам, вам нужно отключить от своего компьютера все внешние накопители или HDD. Возможно, что именно этот фактор и послужил замешательством BIOS.
Исправляем ошибку 0x80070490 при установке Windows
Метод №1 Выставить опцию загрузки на UEFI
В некоторых устройствах загрузка по умолчанию выполняется из под BIOS, что и может, собственно, вызывать ошибку 0x80070490 и, как следствие, невозможность установки Windows. Решение этой проблемы довольно простое и займет всего несколько минут.
- Перезагрузите ваш компьютер(помните, что нужно перезагружаться из под системы, а не аварийной перезагрузкой через системный блок).
- Перед полной загрузкой операционной системы, вы должны будете увидеть экран, внизу которого будет прописана комбинация клавиш для входа в BIOS. У каждого производителя она разная, но в большинстве случаев в BIOS можно войти с помощью Esc, F2, F12 или Backspace. Нажимать нужно быстро, до непосредственно загрузки операционной системы, иначе придется выполнять перезагрузку снова.
- Как только окажетесь внутри BIOS, посмотрите в самый низ или на правую сторону экрана. В этих местах будут указаны кнопки клавиатуры, с помощью которых вы сможете перемещаться по настройкам BIOS.
- Найдите в своем BIOS опции загрузки(BOOT Configurations) и войдите туда. Заметка: BIOS, в большинстве своей, выполнен на английском языке.
- В настройках загрузки, вы должны найти опцию, в которой необходимо поменять значение с BIOS на UEFI.
- С помощью инструкций по навигации по BIOS, сохраните внесенные изменения и выйдите из BIOS.
После этих недолгих манипуляций, ошибка 0x80070490 должна будет исчезнуть. Но если этого не произошло, то переходите к следующему, последнему методу.
Метод №2 Переключение драйвера контроллера на AHCI
- Используя пример предыдущего пункта, снова войдите в BIOS.
- Внутри BIOS вы должны будете найти опцию, которая в большинстве случаев называется как SATA Configuration.
- В этой опции вы должны выставить режим AHCI.
- Затем выйдите из BIOS и не забудьте сохранить внесенные изменения.
Большая вероятность появления ошибки 0x80070490 именно из-за того, что SATA работал в IDE режиме, а не в AHCI.
The error 0x80070490 is a status code signaling a corrupted file or process in the System Component Store or in Component-Based Servicing (CBS). The two services have the responsibility of running and overseeing all Windows-related update operations. Any damage or corruption within their files might render the Windows Update component inoperable.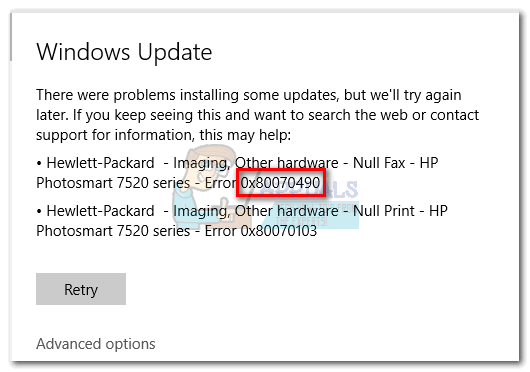
Error 0x80070490 is mostly encountered when applying a system update via WU (Windows Update) or when updating an app downloaded from the Microsoft Store. The issue is also known to appear when upgrading from Windows 7 and Windows 8.1 to Windows 10. Some users have reported seeing the error 0x80070490 when trying to purchase an application or game from the Microsoft Store.
The causes that might trigger the 0x80070490 are multiple, but here’s a quick list of the most common culprits:
- 3rd-party Antivirus is creating a conflict that is preventing the update from installing.
- Corrupted files in Component-Based Servicing (CBS) or in System Component Store.
- Some services required by WU are manually disabled.
- Corruption within the Registry files.
Now that we know the causes, let’s get to the fixing part. Below you have a collection of methods that users found effective in fixing the 0x80070490 error. Please follow each method in order until you encounter a fix that works for your situation. Let’s begin.
Note: If you have not received this error in relation to Windows Updates, you can still follow the methods below as they might fix the issue. But keep in mind that the sole aim of this guide is dedicated to solving the error 0x80070490 in relation to Windows Updates and failing updates from apps downloaded via the Microsoft Store. The error code 0x80070490 can also be encountered on Xbox consoles, but the methods below will obviously not work on the gaming console.
Method 1: Disabling 3rd party antivirus suites
Before you start troubleshooting with the methods below, it’s important to crosscheck for a software conflict. WU (Windows Update) is designed to work with the built-in security solution (Windows Defender). If you have a 3rd party antivirus suite installed, make sure the built-in solution is disabled in order to avoid software conflicts.
Note: If you don’t have an external antivirus, go straight to Method 2.
But even if Windows Defender is disabled, some external anti-malware suites aren’t quick to grant the necessary permissions for the updates to complete. To make sure this is not an issue caused by your antivirus, disable the real-time protection and the firewall from it. Then, restart your machine and attempt to apply the update again.
If the update completes successfully, you’ll need to reinstall your 3rd party antivirus or look for a better option. If you encounter the same 0x80070490 error, move down to Method 2.
Method 2: Repairing WU with the Windows Repair suite
Windows Repair is a freemium all-in-one repair tool that is known to fix a large majority of common windows problems, including problems associated with Windows Update. It’s compatible with every recent Windows version and will automate a lot of troubleshooting steps for you.
The repair strategy for WU works extremely well and can be deployed from the free version of Windows Repair. Here’s a quick guide on how to repair Windows Update services with Windows Repair:
- Download & Install Windows Repair from this link (here).
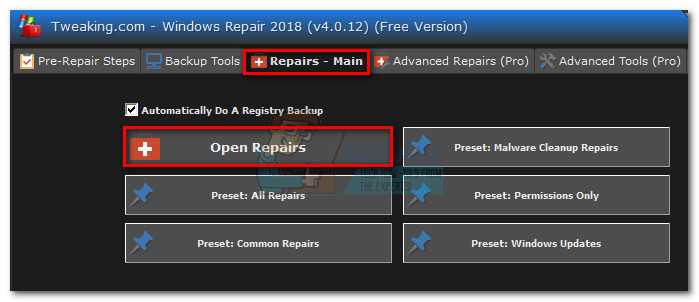
- Open Windows Repair, select the Repair – Main tab and click on Open Repairs.

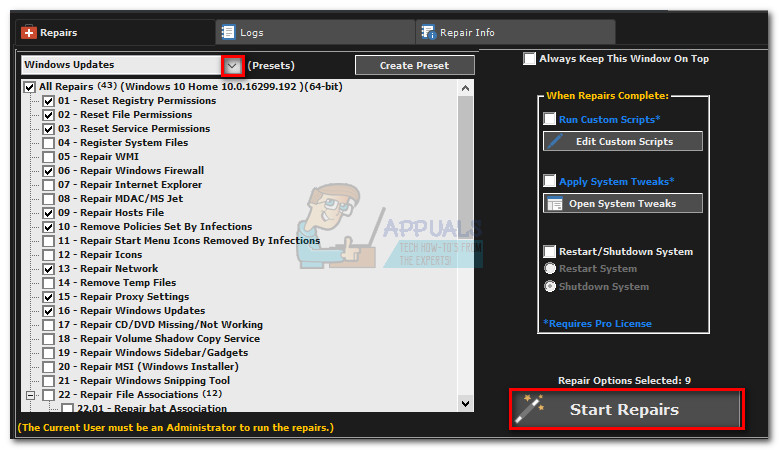
- In the Repairs window, use the drop-down menu under Repairs to select the Windows Updates preset. Once the repair strategies are selected, click the Start Repairs button and wait for the process to complete.

- Restart your computer and see if you see the same error message when you apply the Windows update. If you’re still seeing the 0x80070490 error, move down to Method 3.
Method 3: Run a System File Checker Scan
Fortunately, Windows has a solid built-in tool that is usually helpful in resolving corruption problems related to the 0x80070490 error. The System File Checker will perform a registry scan and attempt to repair any corrupt registry files. The System File Checker is accessible via the Command prompt, but the command will onl work if the user has administrative privileges. Here’s a quick guide on how to run a System File Checker scan:
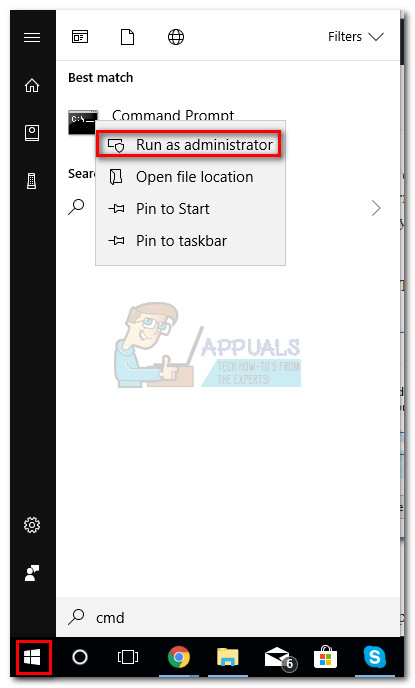
- Click the Start bar in the bottom left corner and search for “cmd“. Then, right-click on Command Prompt and select Run as administrator.

- In Command Prompt, type “sfc /scannow” and hit Enter. This will trigger a system-wide search that will scan for corrupted files. Sit tight and wait for the process to complete as it might take over 20 minutes.

- After System File Checker has finished scanning, check if it says that the CBS store is corrupted. If it is indeed corrupted, then paste the Dism command below and hit Enter:
Dism /Online /Cleanup-Image /RestoreHealth
Note: If you don’t see any mention of corruption in the CBS, it’s not necessary to run the Dism command as it will not yield any results. Instead, continue with the steps below. - When you see a indicated that the clean up is finished, you can close Command Prompt. Then, press Windows key + R to open a Run window. Type “services.msc” and hit Enter to open the Services window.

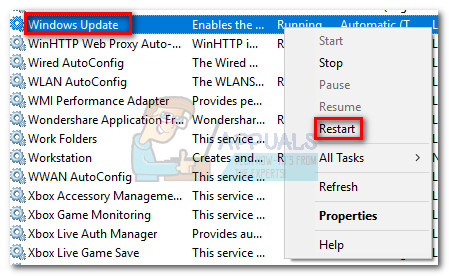
- In the Services window, locate the Windows Update entry, right-click on it and select Restart. Once the service is restarted, repeat the procedure with Windows Module Installer.

- Once you’ve restarted both services, try to update again and see if you still encounter the 0x80070490 error. If the error is still there, move to Method 4.

Method 4: Manually Resetting WU Components
If the methods above have been unsuccessful, we have one more procedure to try before going to the last resort (a system restore). Manually resetting the Windows Update Components is a quite lengthy process, but it’s usually successful in removing any undiscovered damaged files that are preventing updates from taking place.
This procedure involves manually disabling key WU services using Command Prompt. Afterwards, we’ll rename the SoftwareDistribution and Catroot2 folders in order to force Windows to recreate the necessary update components.
Note: The catroot2 and SoftwareDistibution folders are required by the Windows Update process. Whenever you update through Windows update, the catroot2 folder is responsible for storing signatures of the Windows Update package. Renaming the catroot2 folder will force Windows to create a new folder and remove any corrupted files from the updating process.
Finally, we’ll re-enable the update services and hope that the issue is dealt with. Here’s a quick guide through the whole thing:
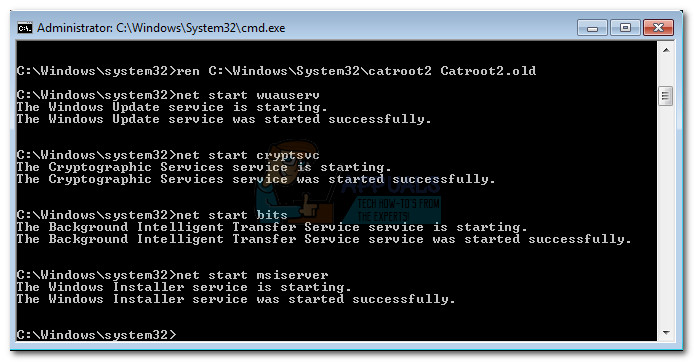
- Click the Start bar in the bottom left corner and search for “cmd“. Then, right-click on Command Prompt and select Run as administrator.
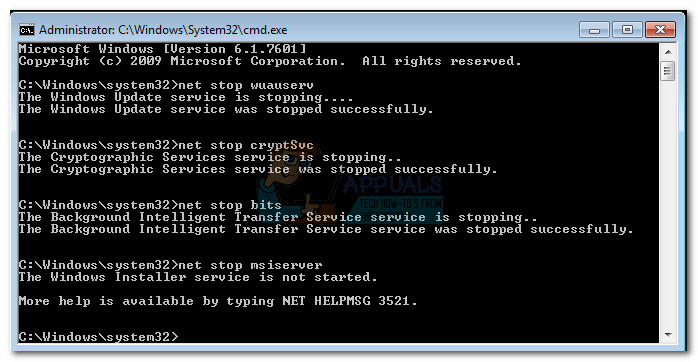
- In the elevated Command Prompt, we’re going to stop the BITS, Cryptographic, MSI Installer and Windows Update services one by one. TO do this, type (or paste) the commands below into Command prompt and press Enter after each one:
net stop wuauserv
net stop cryptSvc
net stop bits
net stop msiserver

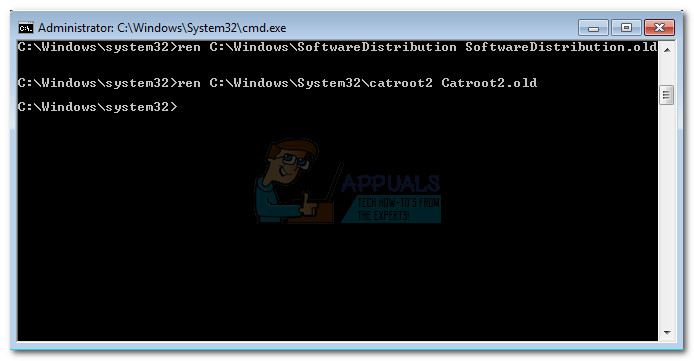
- With the services disabled, let’s rename the Catroo2 and SoftwareDistribution folders. The quickest way to do it is also via the Command Prompt. Paste the following commands into your elevated Command Prompt window and press Enter after each one:
ren C:\Windows\SoftwareDistribution SoftwareDistribution.old
ren C:\Windows\System32\catroot2 Catroot2.old

- Now, it’s time to restart the services that we previously disabled. Type the following commands in Command Prompt and press Enter after each one:
net start wuauserv
net start cryptSvc
net start bits
net start msiserver

- That’s it. Close Command Prompt, restart your machine and try to perform the update again. If it’s failing with the same 0x80070490 error, move down to the final method.
Method 5: Doing a System restore
If none of the methods above have managed to eliminate the 0x80070490 error, let’s try restoring Windows to a previous version, from when Windows Update was functioning properly.
System Restore is a recovery tool that allows you to reverse certain changes that were made to your operating system. Think of it as an “undo” feature for the most important parts of Windows. If the program in question was previously functioning properly the steps below should eliminate any registry errors and other OS changes that might have caused the 0xe06d7363 error.
Here’s a quick guide to doing a system restore to a previous point:
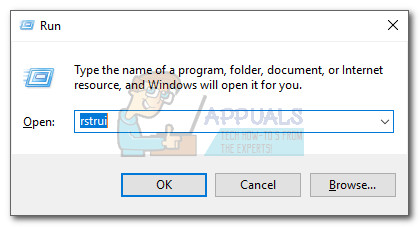
- Press Windows key + R to open a Run command. Type rstrui and hit Enter to open System Restore.

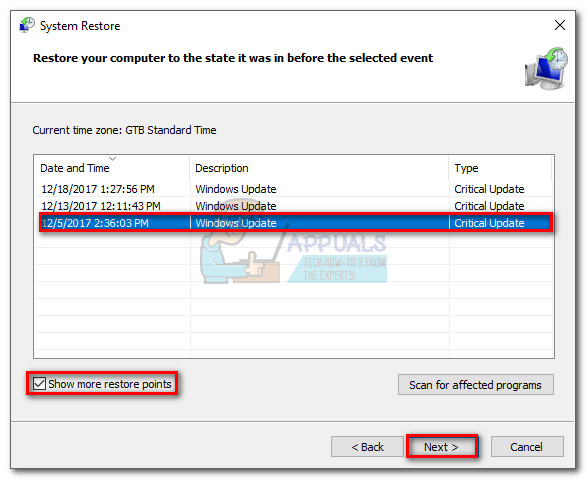
- Hit Next in the first window and then check the box next to Show more restore points. Select a restore point prior to when the application started malfunctioning and click the Next button.

- Hit Finish and then click Yes at the next prompt to start the restore process. When the restore is complete, your PC will automatically restart. Upon the reboot, your OS will be restored to the previously selected version and the error 0xe06d7363 should be removed.


Kevin Arrows
Kevin Arrows is a highly experienced and knowledgeable technology specialist with over a decade of industry experience. He holds a Microsoft Certified Technology Specialist (MCTS) certification and has a deep passion for staying up-to-date on the latest tech developments. Kevin has written extensively on a wide range of tech-related topics, showcasing his expertise and knowledge in areas such as software development, cybersecurity, and cloud computing. His contributions to the tech field have been widely recognized and respected by his peers, and he is highly regarded for his ability to explain complex technical concepts in a clear and concise manner.
Всем привет! И у нас очередная рубрика по решению проблем с компьютером. Сегодня мы постараемся победить ошибку под номером 0x80070490. Сама проблема возникает на всех операционных системах семейства Windows (10, 11, 7 и 8). Чаще всего она появляется при открытии или запросе встроенной программы «Почта и Календарь».
Также вы можете её лицезреть при обновлении системы. То есть вы скачали обновление, пытаетесь его установить, но вылезает ошибка. Опять же, ошибка, скорее всего, связана именно с почтовым клиентом винды или календарем. В статье мы рассмотрим несколько способов решить проблему. Поехали!
Содержание
- Способ 1: Проверка системных файлов
- Способ 2: Устранение неполадок
- Способ 3: Переустановка почты
- Способ 4: Установка NET Framework
- Способ 5: Дополнительные советы
- Задать вопрос автору статьи
Способ 1: Проверка системных файлов
Итак, как же нам исправить ошибку 0x80070490 на Windows? Дабы не ходить далеко, начнем с самого простого варианта – с помощью функциональной команды мы попробуем проверить все системные файлы. Если они будут повреждены, то система автоматом восстановит их из специальной резервной копии. Запускаем командную строку с правами администратора. Далее используем команду:
sfc /scannow
Ждем пока процедура закончится. Если это не помогло, пробуем другую функцию:
dism /Online /Cleanup-Image /RestoreHealth
Способ 2: Устранение неполадок
Мы можем попробовать запустить системную функцию устранения неполадок.
- «Пуск» – «Параметры».

- Переходим в «Обновление и безопасность».
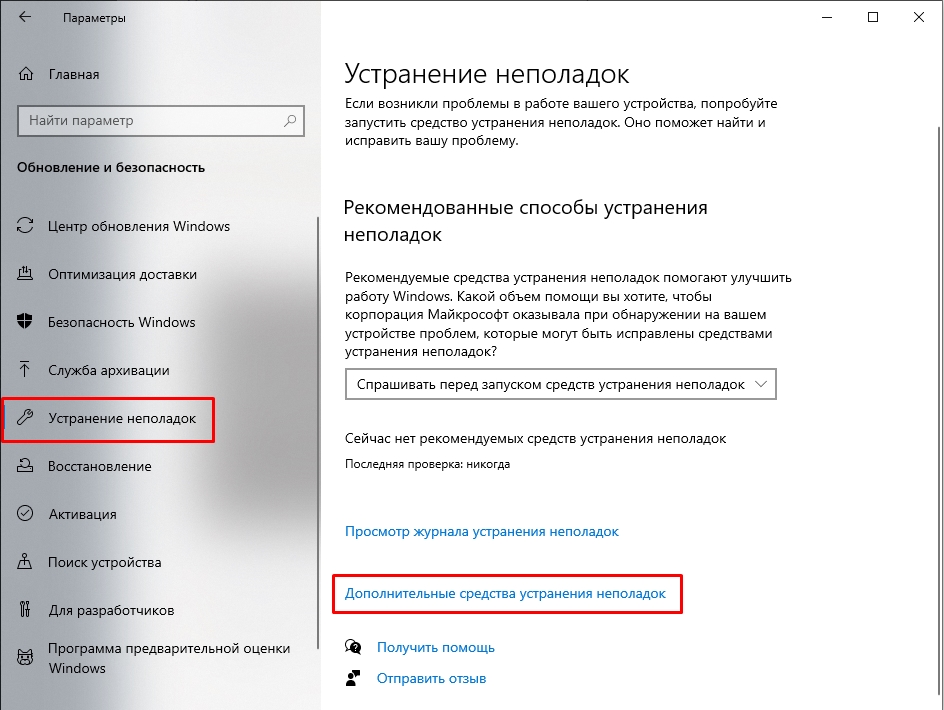
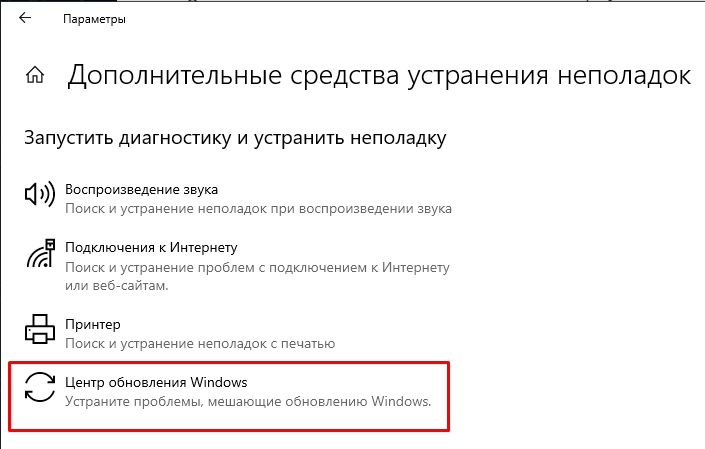
- Переходим в раздел «Устранение неполадок» и кликаем по ссылке «Дополнительные средства устранения неполадок».
- Сама программа «Почта», которая и вызывает проблему, находится в «Магазине Windows» – поэтому найдите чуть ниже «Приложения из Магазина Windows», нажмите по этому пункту и действуйте согласно инструкциям на экране.
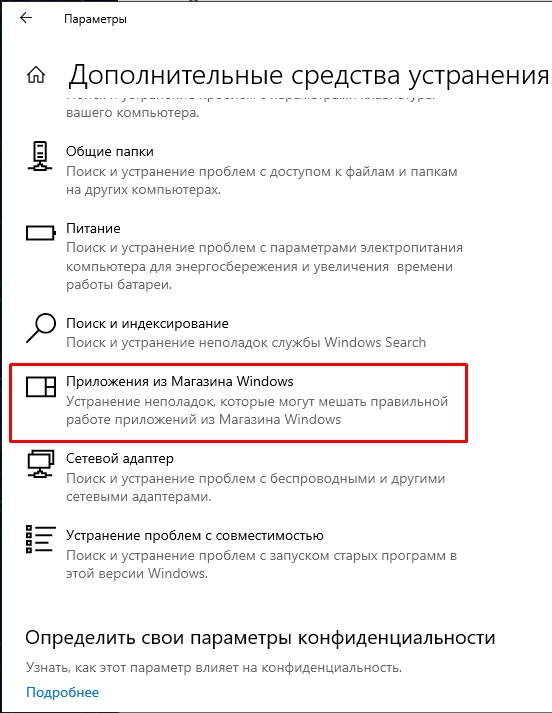
- После этого запускаем устранение неполадок для «Центра обновления Windows».
Способ 3: Переустановка почты
Попробуем удалить и повторно установить приложение «Почта и календарь».
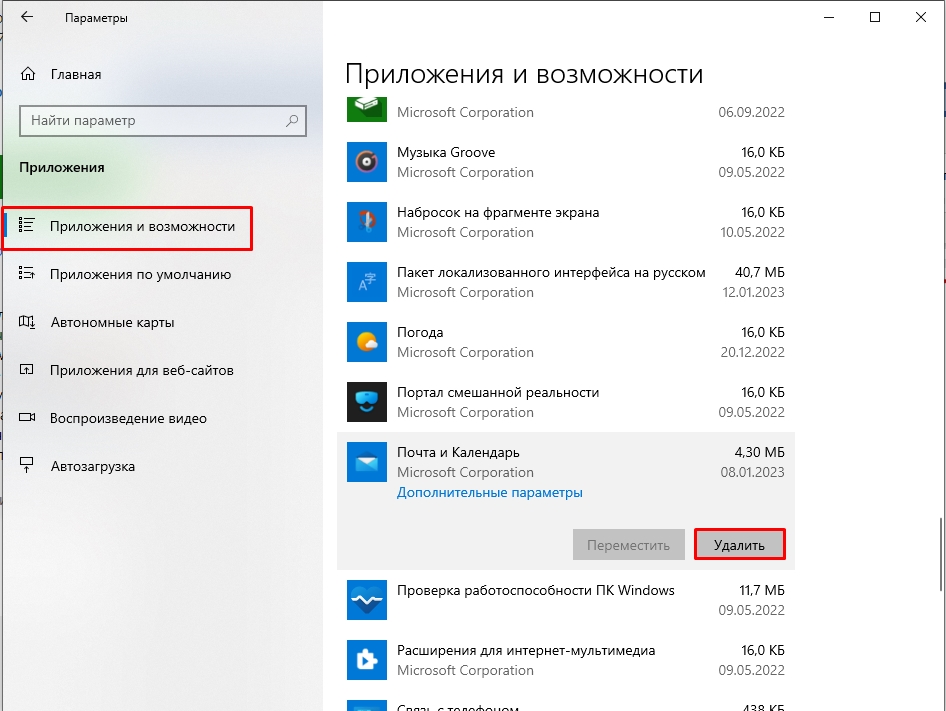
- «Пуск» – «Параметры» – «Приложения».
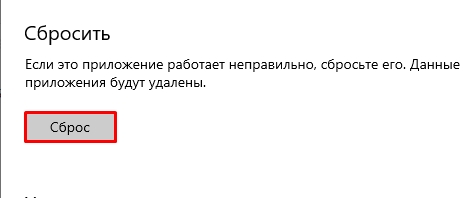
- В списке найдите «Почта и календарь». Пока не нажимайте на кнопку «Удалить». Сначала заходим в «Дополнительные параметры».
- Листаем вниз и жмем по кнопке «Сброс». После этого система переустановит приложение.
- Если это не помогло – удаляем его.
- Открываем «Microsoft Store».
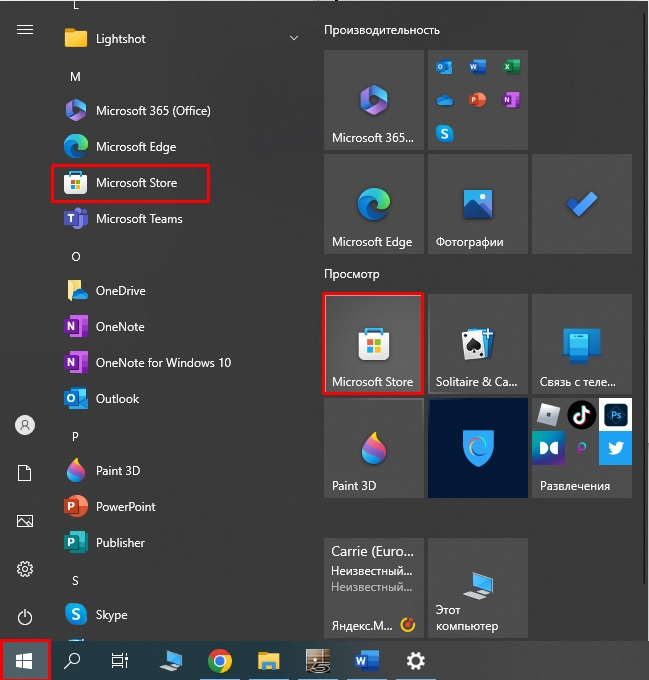
- Находим по названию «Почта и Календарь» и устанавливаем.

Если это не помогло, можно попробовать более жесткие меры.
- Включаем учетную запись супер-администратора и заходим из-под неё.
- Запускаем PowerShell с правами администратора.
- Вводим команду:
get-appxpackage -allusers *communi* | remove-appxpackage
- Жмем:
+ R
- Вводим:
%localappdata%\Comms
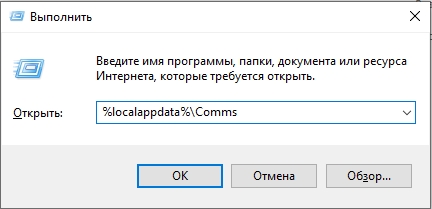
- Вам нужно удалить папку, в которой вы находитесь – для этого в проводнике перейдите на шаг назад.
- Если какой-то файл в папке не даёт удалить папку, перезагрузитесь и еще раз попробуйте удалить папку.
- Заходим в «Microsoft Store» и устанавливаем «Почту и Календарь».
Способ 4: Установка NET Framework
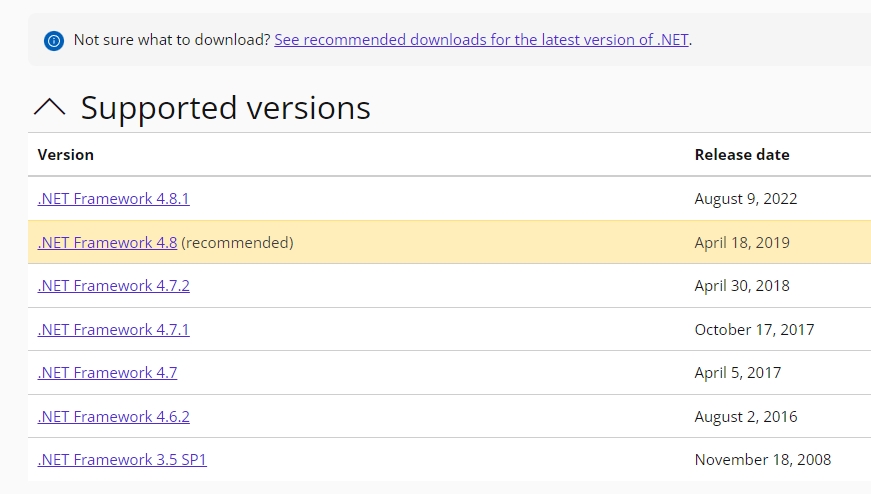
Все приложения, в том числе и встроенные в ОС, работают с пакетами NET Framework. Возможно есть проблема именно с ними. Поэтому ошибка и вылезает. Переходим на официальный сайт. А теперь вам нужно скачать ВСЕ пакеты и установить их к себе на комп.
Способ 5: Дополнительные советы
Если ни один из вариантов не помог, а ошибка осталась, то я подготовил для вас ряд советов и инструкций, которые должны помочь.
- Попробуйте проверить систему антивирусной программой.
- Если проблема появилась внезапно, но раньше её не было – выполните откат системы.
- Если ошибка вылезает при обновлении – почитайте рекомендации отсюда. Возможно, потребуется напрямую удалить файлы обновления.
- Если вы используете стороннюю сборку, непонятно кем собранную – выполняем чистую установки Виндовс с официального образа.
На этом все, дорогие друзья портала WiFiGiD. Если у вас еще остались какие-то вопросы – пишите в комментариях. Всем добра!
С ошибкой обновления Windows 0x80070490 – так официального она называется – сталкиваются те пользователи, которые пытаются обновить свой компьютер до последней версии Windows. В этой статье мы рассмотрим, как исправить ошибку с кодом 0x80070490 и вернуть компьютер в рабочее состояние.
Причины возникновения ошибки
К сожалению, сам инструмент Центра обновлений, с помощью которого можно установить на своем компьютере последнюю версию Windows 10, часто имеет проблемы с работой. Могут возникнуть проблемы с подключением к базе Microsoft, загрузкой данных или подготовкой отдельных пакетов для установки на нашем ПК. Ошибка с кодом 0x80070490, которая часто появляется при установке с центра обновлений Windows, возникает вследствие повреждений компонентов менеджера пакетов Component-Based Servicing (CBS).
В результате ошибки 0x80070490 в центре обновлений Виндовс, установщик не может завершить обновление системы. Проблема касается как самой последней версии операционной системы Microsoft — Windows 10, так и более поздних, включая Windows 8.1/ 7/ Vista.
Чтобы исправить ошибку с загрузкой и установкой из центра обновлений Windows воспользуемся инструментом System File Checker, задача которого направлена на восстановление поврежденных системных файлов.
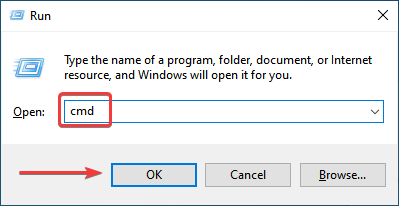
Для начала загрузим командную строку, введением в поле поиска команды cmd или щелчком правой кнопкой мыши на кнопку Пуск (Windows 10) и выбора соответствующего пункта. Запомните, что командная строка должна быть запущена от имени администратора.
В консоли командной строки введите sfc/scannow и подтвердите её выполнение нажатием на Enter.
Сканирование компьютера не займёт много времени. По завершению сканирования закройте окно командной строки, и перезапустите компьютер. После этого, работа Центра обновлений должна быть восстановлена, а ошибка с кодом 0x80070490 исчезнуть.
Как исправить ошибку 0x80070490 — DISM
Тем не менее, если ошибка с кодом 0x80070490 продолжает проявлять себя и центр обновлений не работает должным образом, можно использовать средство именуемое, как система обслуживания образов развертывания и управления ими (DISM). Она также запускается из командной строки в режиме администратора.
Введите в окне командной строки следующую команду:
DISM.exe /Online /Cleanup-image /Restorehealth
Здесь также нужно будет подождать некоторое время, пока инструмент не завершит свою работу. Для правильной его работы требуется подключение к Интернету. Может случиться так, что во время работы DISM обнаружит новые ошибки в центре обновлений. Тогда нужно будет использовать для восстановления инсталляционный диск Windows.
Заключение
Если вышеуказанные способы не принести результата на вашем компьютере и проблемы с установкой будут проявлять себя дальше, единственное правильное решение – переустановить операционную систему. Конечно, лучше переустановить ОС с «нуля», т. е. сделать чистую установку, но перед этим сохраните данные на другом накопителе или локальном (не системном) диске.
Если вам известны другие способы исправить ошибку с кодом 0x80070490, отпишитесь в своих комментариях.