Symptoms
When you try to install Windows 7 Service Pack 1 (SP1) or Windows Server 2008 R2 Service Pack 1 (SP1) on a computer that has more than 10 language packs installed, the computer stops responding at a black screen. Additionally, you receive an «0xC000009A» error message.
Cause
This issue occurs because the number of open registry key handles for subkeys that have the same name is limited to 65,535 in the registry. Each language pack that is installed on the computer increases the number of open registry key handles.
More Information
You must install this update to resolve this issue before you install Windows 7 SP1 or Windows Server 2008 R2 SP1.
Update information
How to obtain this update
The following files are available for download from the Microsoft Download Center:
|
Operating system |
Update |
|---|---|
|
All supported x86-based versions of Windows 7 |
|
|
All supported x64-based versions of Windows 7 |
|
|
All supported x64-based versions of Windows Server 2008 R2 |
|

For more information about how to download Microsoft support files, click the following article number to view the article in the Microsoft Knowledge Base:
119591 How to obtain Microsoft support files from online services
Microsoft scanned this file for viruses. Microsoft used the most current virus-detection software that was available on the date that the file was posted. The file is stored on security-enhanced servers that help prevent any unauthorized changes to the file.
Prerequisites
To apply this update, you must be running one of the following operating systems:
-
Windows 7
-
Windows 7 Service Pack 1 (SP1)
-
Windows Server 2008 R2
-
Windows Server 2008 R2 Service Pack 1 (SP1)
For more information about how to obtain a Windows 7 or a Windows Server 2008 R2 service pack, click the following article number to view the article in the Microsoft Knowledge Base:
976932 Information about Service Pack 1 for Windows 7 and for Windows Server 2008 R2
Registry information
To use the update in this package, you do not have to make any changes to the registry.
Restart requirement
You must restart the computer after you apply this update.
Update replacement information
This update does not replace a previously released update.
File information
The global version of this update installs files that have the attributes that are listed in the following tables. The dates and the times for these files are listed in Coordinated Universal Time (UTC). The dates and the times for these files on your local computer are displayed in your local time together with your current daylight saving time (DST) bias. Additionally, the dates and the times may change when you perform certain operations on the files.
Windows 7 and Windows Server 2008 R2 file information notes
-
The files that apply to a specific product, milestone (RTM, SPn), and service branch (LDR, GDR) can be identified by examining the file version numbers as shown in the following table:
Version
Product
Milestone
Service branch
6.1.760
0.16xxxWindows 7 and Windows Server 2008 R2
RTM
GDR
6.1.760
0.20xxxWindows 7 and Windows Server 2008 R2
RTM
LDR
6.1.760
1.17xxxWindows 7 and Windows Server 2008 R2
SP1
GDR
6.1.760
1.21xxxWindows 7 and Windows Server 2008 R2
SP1
LDR
-
GDR service branches contain only those fixes that are widely released to address widespread, extremely important issues. LDR service branches contain hotfixes in addition to widely released fixes.
-
The MANIFEST files (.manifest) and the MUM files (.mum) that are installed for each environment are listed separately in the «Additional file information for Windows Server 2008 R2 and for Windows 7» section. MUM and MANIFEST files, and the associated security catalog (.cat) files, are extremely important to maintain the state of the updated components. The security catalog files, for which the attributes are not listed, are signed with a Microsoft digital signature.
For all supported x86-based versions of Windows 7
|
File name |
File version |
File size |
Date |
Time |
Platform |
|---|---|---|---|---|---|
|
Ntkrnlpa.exe |
6.1.7600.16792 |
3,957,632 |
09-Apr-2011 |
06:13 |
x86 |
|
Ntoskrnl.exe |
6.1.7600.16792 |
3,901,824 |
09-Apr-2011 |
06:13 |
x86 |
|
Ntkrnlpa.exe |
6.1.7600.20941 |
3,967,360 |
09-Apr-2011 |
06:21 |
x86 |
|
Ntoskrnl.exe |
6.1.7600.20941 |
3,911,552 |
09-Apr-2011 |
06:21 |
x86 |
|
Ntkrnlpa.exe |
6.1.7601.17592 |
3,967,872 |
09-Apr-2011 |
06:02 |
x86 |
|
Ntoskrnl.exe |
6.1.7601.17592 |
3,912,576 |
09-Apr-2011 |
06:02 |
x86 |
|
Ntkrnlpa.exe |
6.1.7601.21701 |
3,967,872 |
09-Apr-2011 |
06:01 |
x86 |
|
Ntoskrnl.exe |
6.1.7601.21701 |
3,912,576 |
09-Apr-2011 |
06:01 |
x86 |
For all supported x64-based versions of Windows 7 and of Windows Server 2008 R2
|
File name |
File version |
File size |
Date |
Time |
Platform |
|---|---|---|---|---|---|
|
Ntoskrnl.exe |
6.1.7600.16792 |
5,509,504 |
09-Apr-2011 |
06:45 |
x64 |
|
Ntoskrnl.exe |
6.1.7600.20941 |
5,475,712 |
09-Apr-2011 |
06:54 |
x64 |
|
Ntoskrnl.exe |
6.1.7601.17592 |
5,562,240 |
09-Apr-2011 |
07:02 |
x64 |
|
Ntoskrnl.exe |
6.1.7601.21701 |
5,562,240 |
09-Apr-2011 |
06:50 |
x64 |
|
Ntkrnlpa.exe |
6.1.7600.16792 |
3,957,632 |
09-Apr-2011 |
06:13 |
x86 |
|
Ntoskrnl.exe |
6.1.7600.16792 |
3,901,824 |
09-Apr-2011 |
06:13 |
x86 |
|
Ntkrnlpa.exe |
6.1.7600.20941 |
3,967,360 |
09-Apr-2011 |
06:21 |
x86 |
|
Ntoskrnl.exe |
6.1.7600.20941 |
3,911,552 |
09-Apr-2011 |
06:21 |
x86 |
|
Ntkrnlpa.exe |
6.1.7601.17592 |
3,967,872 |
09-Apr-2011 |
06:02 |
x86 |
|
Ntoskrnl.exe |
6.1.7601.17592 |
3,912,576 |
09-Apr-2011 |
06:02 |
x86 |
|
Ntkrnlpa.exe |
6.1.7601.21701 |
3,967,872 |
09-Apr-2011 |
06:01 |
x86 |
|
Ntoskrnl.exe |
6.1.7601.21701 |
3,912,576 |
09-Apr-2011 |
06:01 |
x86 |
For all supported IA-64-based versions of Windows Server 2008 R2
|
File name |
File version |
File size |
Date |
Time |
Platform |
|---|---|---|---|---|---|
|
Ntoskrnl.exe |
6.1.7600.16792 |
11,176,832 |
09-Apr-2011 |
05:55 |
IA-64 |
|
Ntoskrnl.exe |
6.1.7600.20941 |
11,132,800 |
09-Apr-2011 |
05:48 |
IA-64 |
|
Ntoskrnl.exe |
6.1.7601.17592 |
11,118,464 |
09-Apr-2011 |
05:43 |
IA-64 |
|
Ntoskrnl.exe |
6.1.7601.21701 |
11,118,976 |
09-Apr-2011 |
05:53 |
IA-64 |
|
Ntkrnlpa.exe |
6.1.7600.16792 |
3,957,632 |
09-Apr-2011 |
06:13 |
x86 |
|
Ntoskrnl.exe |
6.1.7600.16792 |
3,901,824 |
09-Apr-2011 |
06:13 |
x86 |
|
Ntkrnlpa.exe |
6.1.7600.20941 |
3,967,360 |
09-Apr-2011 |
06:21 |
x86 |
|
Ntoskrnl.exe |
6.1.7600.20941 |
3,911,552 |
09-Apr-2011 |
06:21 |
x86 |
|
Ntkrnlpa.exe |
6.1.7601.17592 |
3,967,872 |
09-Apr-2011 |
06:02 |
x86 |
|
Ntoskrnl.exe |
6.1.7601.17592 |
3,912,576 |
09-Apr-2011 |
06:02 |
x86 |
|
Ntkrnlpa.exe |
6.1.7601.21701 |
3,967,872 |
09-Apr-2011 |
06:01 |
x86 |
|
Ntoskrnl.exe |
6.1.7601.21701 |
3,912,576 |
09-Apr-2011 |
06:01 |
x86 |
For more information about software update terminology, click the following article number to view the article in the Microsoft Knowledge Base:
824684 Description of the standard terminology that is used to describe Microsoft software updates
For more information about how to recover from this issue or how to work around this issue, visit the following Microsoft website:
Why am I receiving «Error 0xC000009A» after installing Windows 7 Service Pack 1 (SP1)?You can also use the lpksetup.exe /u language command to uninstall language packs.
Notelanguage is a placeholder for the code of the language pack that you want to uninstall.
For example, assume that you want to uninstall the Japanese and the Spanish language packs. To do this, open a command prompt, type the following command, and then press Enter:
lpksetup.exe /u ja-JP es-ESFor more information about Lpksetup command-line options, visit the following Microsoft TechNet website:
General information about Lpksetup command-line options
Additional file information
Additional file information for Windows 7 and for Windows Server 2008 R2
Additional files for all supported x86-based versions of Windows 7
|
File name |
Update.mum |
|
File version |
Not applicable |
|
File size |
2,773 |
|
Date (UTC) |
11-Apr-2011 |
|
Time (UTC) |
13:49 |
|
Platform |
Not applicable |
|
File name |
X86_0053f68e9696ee496b9d8aae2387b375_31bf3856ad364e35_6.1.7601.21701_none_e26192a8fe3164c8.manifest |
|
File version |
Not applicable |
|
File size |
697 |
|
Date (UTC) |
11-Apr-2011 |
|
Time (UTC) |
13:49 |
|
Platform |
Not applicable |
|
File name |
X86_8c8bbeb9982681b918a5e7a6c085cdee_31bf3856ad364e35_6.1.7601.17592_none_2cf148cc3bc9f605.manifest |
|
File version |
Not applicable |
|
File size |
697 |
|
Date (UTC) |
11-Apr-2011 |
|
Time (UTC) |
13:49 |
|
Platform |
Not applicable |
|
File name |
X86_b92ba4e955b8fa2d9f7bbe0a6cb8c902_31bf3856ad364e35_6.1.7600.20941_none_040291c6c35b4b21.manifest |
|
File version |
Not applicable |
|
File size |
717 |
|
Date (UTC) |
11-Apr-2011 |
|
Time (UTC) |
13:49 |
|
Platform |
Not applicable |
|
File name |
X86_e552cdc647ff1839d0fe779770be9639_31bf3856ad364e35_6.1.7600.16691_none_328fb89470173739.manifest |
|
File version |
Not applicable |
|
File size |
717 |
|
Date (UTC) |
11-Apr-2011 |
|
Time (UTC) |
13:49 |
|
Platform |
Not applicable |
|
File name |
X86_f758dd02463f6771de5e55ceb7bee97d_31bf3856ad364e35_6.1.7600.20941_none_f4f8aeb442cf74d7.manifest |
|
File version |
Not applicable |
|
File size |
697 |
|
Date (UTC) |
11-Apr-2011 |
|
Time (UTC) |
13:49 |
|
Platform |
Not applicable |
|
File name |
X86_ff0a18659158697573bd075e95f3f0b0_31bf3856ad364e35_6.1.7600.16792_none_2228836ebfbca8ff.manifest |
|
File version |
Not applicable |
|
File size |
697 |
|
Date (UTC) |
11-Apr-2011 |
|
Time (UTC) |
13:49 |
|
Platform |
Not applicable |
|
File name |
X86_microsoft-windows-os-kernel_31bf3856ad364e35_6.1.7600.16792_none_6bf8ee9215816c61.manifest |
|
File version |
Not applicable |
|
File size |
16,151 |
|
Date (UTC) |
09-Apr-2011 |
|
Time (UTC) |
06:41 |
|
Platform |
Not applicable |
|
File name |
X86_microsoft-windows-os-kernel_31bf3856ad364e35_6.1.7600.20941_none_6cb79c952e776446.manifest |
|
File version |
Not applicable |
|
File size |
16,151 |
|
Date (UTC) |
09-Apr-2011 |
|
Time (UTC) |
06:55 |
|
Platform |
Not applicable |
|
File name |
X86_microsoft-windows-os-kernel_31bf3856ad364e35_6.1.7601.17592_none_6ddf4b9812a7d84d.manifest |
|
File version |
Not applicable |
|
File size |
16,151 |
|
Date (UTC) |
09-Apr-2011 |
|
Time (UTC) |
06:34 |
|
Platform |
Not applicable |
|
File name |
X86_microsoft-windows-os-kernel_31bf3856ad364e35_6.1.7601.21701_none_6ec9394b2b7d606e.manifest |
|
File version |
Not applicable |
|
File size |
16,151 |
|
Date (UTC) |
09-Apr-2011 |
|
Time (UTC) |
06:29 |
|
Platform |
Not applicable |
|
File name |
X86_microsoft-windows-r..gistry-trustedtypes_31bf3856ad364e35_6.1.7600.16691_none_83c584548fc7607d.manifest |
|
File version |
Not applicable |
|
File size |
8,047 |
|
Date (UTC) |
20-Oct-2010 |
|
Time (UTC) |
05:25 |
|
Platform |
Not applicable |
|
File name |
X86_microsoft-windows-r..gistry-trustedtypes_31bf3856ad364e35_6.1.7600.20941_none_84853487a8bc6ee0.manifest |
|
File version |
Not applicable |
|
File size |
8,047 |
|
Date (UTC) |
09-Apr-2011 |
|
Time (UTC) |
06:44 |
|
Platform |
Not applicable |
Additional files for all supported x64-based versions of Windows 7 and of Windows Server 2008 R2
|
File name |
Amd64_0053f68e9696ee496b9d8aae2387b375_31bf3856ad364e35_6.1.7601.21701_none_3e802e2cb68ed5fe.manifest |
|
File version |
Not applicable |
|
File size |
699 |
|
Date (UTC) |
11-Apr-2011 |
|
Time (UTC) |
13:49 |
|
Platform |
Not applicable |
|
File name |
Amd64_052500861a4ead6eeb791aa2f07c6239_31bf3856ad364e35_6.1.7600.16792_none_84e1bc730484b1ff.manifest |
|
File version |
Not applicable |
|
File size |
1,042 |
|
Date (UTC) |
11-Apr-2011 |
|
Time (UTC) |
13:49 |
|
Platform |
Not applicable |
|
File name |
Amd64_0f1b439f56953006999a6249c1b8db0b_31bf3856ad364e35_6.1.7600.20941_none_630773e4c7318c8f.manifest |
|
File version |
Not applicable |
|
File size |
721 |
|
Date (UTC) |
11-Apr-2011 |
|
Time (UTC) |
13:49 |
|
Platform |
Not applicable |
|
File name |
Amd64_3552926e9edd357496372b851f68e1bb_31bf3856ad364e35_6.1.7600.16691_none_9a7046efb6fa0929.manifest |
|
File version |
Not applicable |
|
File size |
721 |
|
Date (UTC) |
11-Apr-2011 |
|
Time (UTC) |
13:49 |
|
Platform |
Not applicable |
|
File name |
Amd64_35939478847cfe491bc2faed130b4353_31bf3856ad364e35_6.1.7601.21701_none_87ec9139d5f34bf6.manifest |
|
File version |
Not applicable |
|
File size |
701 |
|
Date (UTC) |
11-Apr-2011 |
|
Time (UTC) |
13:49 |
|
Platform |
Not applicable |
|
File name |
Amd64_36c4e4b28058976187716ce13a026a96_31bf3856ad364e35_6.1.7600.20941_none_1ee21fa4a37d34e8.manifest |
|
File version |
Not applicable |
|
File size |
1,042 |
|
Date (UTC) |
11-Apr-2011 |
|
Time (UTC) |
13:49 |
|
Platform |
Not applicable |
|
File name |
Amd64_4ffa4b09ad612e64b4dcc330d1e17534_31bf3856ad364e35_6.1.7601.21701_none_3d8087e8da450346.manifest |
|
File version |
Not applicable |
|
File size |
1,042 |
|
Date (UTC) |
11-Apr-2011 |
|
Time (UTC) |
13:49 |
|
Platform |
Not applicable |
|
File name |
Amd64_518a14c4028d51771fbbbbb16604dd48_31bf3856ad364e35_6.1.7600.16792_none_5bc1a74c175c28b1.manifest |
|
File version |
Not applicable |
|
File size |
701 |
|
Date (UTC) |
11-Apr-2011 |
|
Time (UTC) |
13:49 |
|
Platform |
Not applicable |
|
File name |
Amd64_66e1e0527260fc568d7759995e83db6f_31bf3856ad364e35_6.1.7601.17592_none_27aaae7dad36295e.manifest |
|
File version |
Not applicable |
|
File size |
701 |
|
Date (UTC) |
11-Apr-2011 |
|
Time (UTC) |
13:49 |
|
Platform |
Not applicable |
|
File name |
Amd64_8c8bbeb9982681b918a5e7a6c085cdee_31bf3856ad364e35_6.1.7601.17592_none_890fe44ff427673b.manifest |
|
File version |
Not applicable |
|
File size |
699 |
|
Date (UTC) |
11-Apr-2011 |
|
Time (UTC) |
13:49 |
|
Platform |
Not applicable |
|
File name |
Amd64_99e3ca8aec02c9a96c70fc28671ef084_31bf3856ad364e35_6.1.7600.20941_none_18d39e0adda9d764.manifest |
|
File version |
Not applicable |
|
File size |
701 |
|
Date (UTC) |
11-Apr-2011 |
|
Time (UTC) |
13:49 |
|
Platform |
Not applicable |
|
File name |
Amd64_c0eb30eecf7e27f0a097a7751a0b4b7c_31bf3856ad364e35_6.1.7601.17592_none_cb0a63e7123a7f26.manifest |
|
File version |
Not applicable |
|
File size |
1,042 |
|
Date (UTC) |
11-Apr-2011 |
|
Time (UTC) |
13:49 |
|
Platform |
Not applicable |
|
File name |
Amd64_f758dd02463f6771de5e55ceb7bee97d_31bf3856ad364e35_6.1.7600.20941_none_51174a37fb2ce60d.manifest |
|
File version |
Not applicable |
|
File size |
699 |
|
Date (UTC) |
11-Apr-2011 |
|
Time (UTC) |
13:49 |
|
Platform |
Not applicable |
|
File name |
Amd64_ff0a18659158697573bd075e95f3f0b0_31bf3856ad364e35_6.1.7600.16792_none_7e471ef2781a1a35.manifest |
|
File version |
Not applicable |
|
File size |
699 |
|
Date (UTC) |
11-Apr-2011 |
|
Time (UTC) |
13:49 |
|
Platform |
Not applicable |
|
File name |
Amd64_microsoft-windows-os-kernel_31bf3856ad364e35_6.1.7600.16792_none_c8178a15cddedd97.manifest |
|
File version |
Not applicable |
|
File size |
15,291 |
|
Date (UTC) |
09-Apr-2011 |
|
Time (UTC) |
07:39 |
|
Platform |
Not applicable |
|
File name |
Amd64_microsoft-windows-os-kernel_31bf3856ad364e35_6.1.7600.20941_none_c8d63818e6d4d57c.manifest |
|
File version |
Not applicable |
|
File size |
15,291 |
|
Date (UTC) |
09-Apr-2011 |
|
Time (UTC) |
07:54 |
|
Platform |
Not applicable |
|
File name |
Amd64_microsoft-windows-os-kernel_31bf3856ad364e35_6.1.7601.17592_none_c9fde71bcb054983.manifest |
|
File version |
Not applicable |
|
File size |
15,291 |
|
Date (UTC) |
09-Apr-2011 |
|
Time (UTC) |
07:33 |
|
Platform |
Not applicable |
|
File name |
Amd64_microsoft-windows-os-kernel_31bf3856ad364e35_6.1.7601.21701_none_cae7d4cee3dad1a4.manifest |
|
File version |
Not applicable |
|
File size |
15,291 |
|
Date (UTC) |
09-Apr-2011 |
|
Time (UTC) |
07:21 |
|
Platform |
Not applicable |
|
File name |
Amd64_microsoft-windows-r..gistry-trustedtypes_31bf3856ad364e35_6.1.7600.16691_none_dfe41fd84824d1b3.manifest |
|
File version |
Not applicable |
|
File size |
8,049 |
|
Date (UTC) |
20-Oct-2010 |
|
Time (UTC) |
06:15 |
|
Platform |
Not applicable |
|
File name |
Amd64_microsoft-windows-r..gistry-trustedtypes_31bf3856ad364e35_6.1.7600.20941_none_e0a3d00b6119e016.manifest |
|
File version |
Not applicable |
|
File size |
8,049 |
|
Date (UTC) |
09-Apr-2011 |
|
Time (UTC) |
07:32 |
|
Platform |
Not applicable |
|
File name |
Update.mum |
|
File version |
Not applicable |
|
File size |
3,215 |
|
Date (UTC) |
11-Apr-2011 |
|
Time (UTC) |
13:49 |
|
Platform |
Not applicable |
|
File name |
X86_microsoft-windows-os-kernel_31bf3856ad364e35_6.1.7600.16792_none_6bf8ee9215816c61.manifest |
|
File version |
Not applicable |
|
File size |
16,151 |
|
Date (UTC) |
09-Apr-2011 |
|
Time (UTC) |
06:41 |
|
Platform |
Not applicable |
|
File name |
X86_microsoft-windows-os-kernel_31bf3856ad364e35_6.1.7600.20941_none_6cb79c952e776446.manifest |
|
File version |
Not applicable |
|
File size |
16,151 |
|
Date (UTC) |
09-Apr-2011 |
|
Time (UTC) |
06:55 |
|
Platform |
Not applicable |
|
File name |
X86_microsoft-windows-os-kernel_31bf3856ad364e35_6.1.7601.17592_none_6ddf4b9812a7d84d.manifest |
|
File version |
Not applicable |
|
File size |
16,151 |
|
Date (UTC) |
09-Apr-2011 |
|
Time (UTC) |
06:34 |
|
Platform |
Not applicable |
|
File name |
X86_microsoft-windows-os-kernel_31bf3856ad364e35_6.1.7601.21701_none_6ec9394b2b7d606e.manifest |
|
File version |
Not applicable |
|
File size |
16,151 |
|
Date (UTC) |
09-Apr-2011 |
|
Time (UTC) |
06:29 |
|
Platform |
Not applicable |
Additional files for all supported IA-64-based versions of Windows Server 2008 R2
|
File name |
Ia64_0053f68e9696ee496b9d8aae2387b375_31bf3856ad364e35_6.1.7601.21701_none_e263369efe2f6dc4.manifest |
|
File version |
Not applicable |
|
File size |
698 |
|
Date (UTC) |
11-Apr-2011 |
|
Time (UTC) |
13:49 |
|
Platform |
Not applicable |
|
File name |
Ia64_17ac62b6b1aea44af969af754a480eb0_31bf3856ad364e35_6.1.7601.17592_none_b677d56df2381760.manifest |
|
File version |
Not applicable |
|
File size |
699 |
|
Date (UTC) |
11-Apr-2011 |
|
Time (UTC) |
13:49 |
|
Platform |
Not applicable |
|
File name |
Ia64_1dd3ef4f753a38b5e7637a72d2f00ede_31bf3856ad364e35_6.1.7600.16691_none_5fa51369c24cf8c3.manifest |
|
File version |
Not applicable |
|
File size |
719 |
|
Date (UTC) |
11-Apr-2011 |
|
Time (UTC) |
13:49 |
|
Platform |
Not applicable |
|
File name |
Ia64_3ba8d7b40d9bcb8c819e8d3f14d6e427_31bf3856ad364e35_6.1.7600.20941_none_19687f7979fbdcfa.manifest |
|
File version |
Not applicable |
|
File size |
719 |
|
Date (UTC) |
11-Apr-2011 |
|
Time (UTC) |
13:49 |
|
Platform |
Not applicable |
|
File name |
Ia64_883caa387ff28f1d148b8b9331727819_31bf3856ad364e35_6.1.7600.20941_none_2f933269d05c054f.manifest |
|
File version |
Not applicable |
|
File size |
699 |
|
Date (UTC) |
11-Apr-2011 |
|
Time (UTC) |
13:49 |
|
Platform |
Not applicable |
|
File name |
Ia64_8c8bbeb9982681b918a5e7a6c085cdee_31bf3856ad364e35_6.1.7601.17592_none_2cf2ecc23bc7ff01.manifest |
|
File version |
Not applicable |
|
File size |
698 |
|
Date (UTC) |
11-Apr-2011 |
|
Time (UTC) |
13:49 |
|
Platform |
Not applicable |
|
File name |
Ia64_db1bf3dab66d940cff9a3aa97258384a_31bf3856ad364e35_6.1.7601.21701_none_ee7a22ccceb88fa6.manifest |
|
File version |
Not applicable |
|
File size |
699 |
|
Date (UTC) |
11-Apr-2011 |
|
Time (UTC) |
13:49 |
|
Platform |
Not applicable |
|
File name |
Ia64_f758dd02463f6771de5e55ceb7bee97d_31bf3856ad364e35_6.1.7600.20941_none_f4fa52aa42cd7dd3.manifest |
|
File version |
Not applicable |
|
File size |
698 |
|
Date (UTC) |
11-Apr-2011 |
|
Time (UTC) |
13:49 |
|
Platform |
Not applicable |
|
File name |
Ia64_fbfb2918b1a1117d8ef07ccecbfac745_31bf3856ad364e35_6.1.7600.16792_none_388c25508b8d26f6.manifest |
|
File version |
Not applicable |
|
File size |
699 |
|
Date (UTC) |
11-Apr-2011 |
|
Time (UTC) |
13:49 |
|
Platform |
Not applicable |
|
File name |
Ia64_ff0a18659158697573bd075e95f3f0b0_31bf3856ad364e35_6.1.7600.16792_none_222a2764bfbab1fb.manifest |
|
File version |
Not applicable |
|
File size |
698 |
|
Date (UTC) |
11-Apr-2011 |
|
Time (UTC) |
13:49 |
|
Platform |
Not applicable |
|
File name |
Ia64_microsoft-windows-os-kernel_31bf3856ad364e35_6.1.7600.16792_none_6bfa9288157f755d.manifest |
|
File version |
Not applicable |
|
File size |
15,289 |
|
Date (UTC) |
09-Apr-2011 |
|
Time (UTC) |
07:38 |
|
Platform |
Not applicable |
|
File name |
Ia64_microsoft-windows-os-kernel_31bf3856ad364e35_6.1.7600.20941_none_6cb9408b2e756d42.manifest |
|
File version |
Not applicable |
|
File size |
15,289 |
|
Date (UTC) |
09-Apr-2011 |
|
Time (UTC) |
07:45 |
|
Platform |
Not applicable |
|
File name |
Ia64_microsoft-windows-os-kernel_31bf3856ad364e35_6.1.7601.17592_none_6de0ef8e12a5e149.manifest |
|
File version |
Not applicable |
|
File size |
15,289 |
|
Date (UTC) |
09-Apr-2011 |
|
Time (UTC) |
07:28 |
|
Platform |
Not applicable |
|
File name |
Ia64_microsoft-windows-os-kernel_31bf3856ad364e35_6.1.7601.21701_none_6ecadd412b7b696a.manifest |
|
File version |
Not applicable |
|
File size |
15,289 |
|
Date (UTC) |
09-Apr-2011 |
|
Time (UTC) |
07:12 |
|
Platform |
Not applicable |
|
File name |
Ia64_microsoft-windows-r..gistry-trustedtypes_31bf3856ad364e35_6.1.7600.16691_none_83c7284a8fc56979.manifest |
|
File version |
Not applicable |
|
File size |
8,048 |
|
Date (UTC) |
20-Oct-2010 |
|
Time (UTC) |
06:14 |
|
Platform |
Not applicable |
|
File name |
Ia64_microsoft-windows-r..gistry-trustedtypes_31bf3856ad364e35_6.1.7600.20941_none_8486d87da8ba77dc.manifest |
|
File version |
Not applicable |
|
File size |
8,048 |
|
Date (UTC) |
09-Apr-2011 |
|
Time (UTC) |
07:38 |
|
Platform |
Not applicable |
|
File name |
Update.mum |
|
File version |
Not applicable |
|
File size |
2,170 |
|
Date (UTC) |
11-Apr-2011 |
|
Time (UTC) |
13:49 |
|
Platform |
Not applicable |
|
File name |
X86_microsoft-windows-os-kernel_31bf3856ad364e35_6.1.7600.16792_none_6bf8ee9215816c61.manifest |
|
File version |
Not applicable |
|
File size |
16,151 |
|
Date (UTC) |
09-Apr-2011 |
|
Time (UTC) |
06:41 |
|
Platform |
Not applicable |
|
File name |
X86_microsoft-windows-os-kernel_31bf3856ad364e35_6.1.7600.20941_none_6cb79c952e776446.manifest |
|
File version |
Not applicable |
|
File size |
16,151 |
|
Date (UTC) |
09-Apr-2011 |
|
Time (UTC) |
06:55 |
|
Platform |
Not applicable |
|
File name |
X86_microsoft-windows-os-kernel_31bf3856ad364e35_6.1.7601.17592_none_6ddf4b9812a7d84d.manifest |
|
File version |
Not applicable |
|
File size |
16,151 |
|
Date (UTC) |
09-Apr-2011 |
|
Time (UTC) |
06:34 |
|
Platform |
Not applicable |
|
File name |
X86_microsoft-windows-os-kernel_31bf3856ad364e35_6.1.7601.21701_none_6ec9394b2b7d606e.manifest |
|
File version |
Not applicable |
|
File size |
16,151 |
|
Date (UTC) |
09-Apr-2011 |
|
Time (UTC) |
06:29 |
|
Platform |
Not applicable |
Find out how our experts eliminated the problem
by Kazim Ali Alvi
Kazim has always been fond of technology, be it scrolling through the settings on his iPhone, Android device, or Windows. And at times, unscrewing the device to take… read more
Updated on
- The 0xc000009a error is encountered when launching applications and primarily affects games.
- The problem appears due to corrupt system files or an antivirus blocking the app from running.
- To fix things, run the app as administrator, check for disk issues, or uninstall recent Windows updates, amongst other solutions.
XINSTALL BY CLICKING THE DOWNLOAD FILE
To fix Windows PC system issues, you will need a dedicated tool
SPONSORED
Fortect is a tool that does not simply clean up your PC, but has a repository with several millions of Windows System files stored in their initial version. When your PC encounters a problem, Fortect will fix it for you, by replacing bad files with fresh versions. To fix your current PC issue, here are the steps you need to take:
- Download Fortect and install it on your PC.
- Start the tool’s scanning process to look for corrupt files that are the source of your problem
- Right-click on Start Repair so the tool could start the fixing algorythm
- Fortect has been downloaded by 0 readers this month, rated 4.4 on TrustPilot
Windows is a user-friendly OS, and has, of late, emerged as the primary choice for gaming on PCs, particularly due to a better gaming experience on Windows 11. But it’s not smooth sailing for everyone, and many users came across the 0xc000009a error.
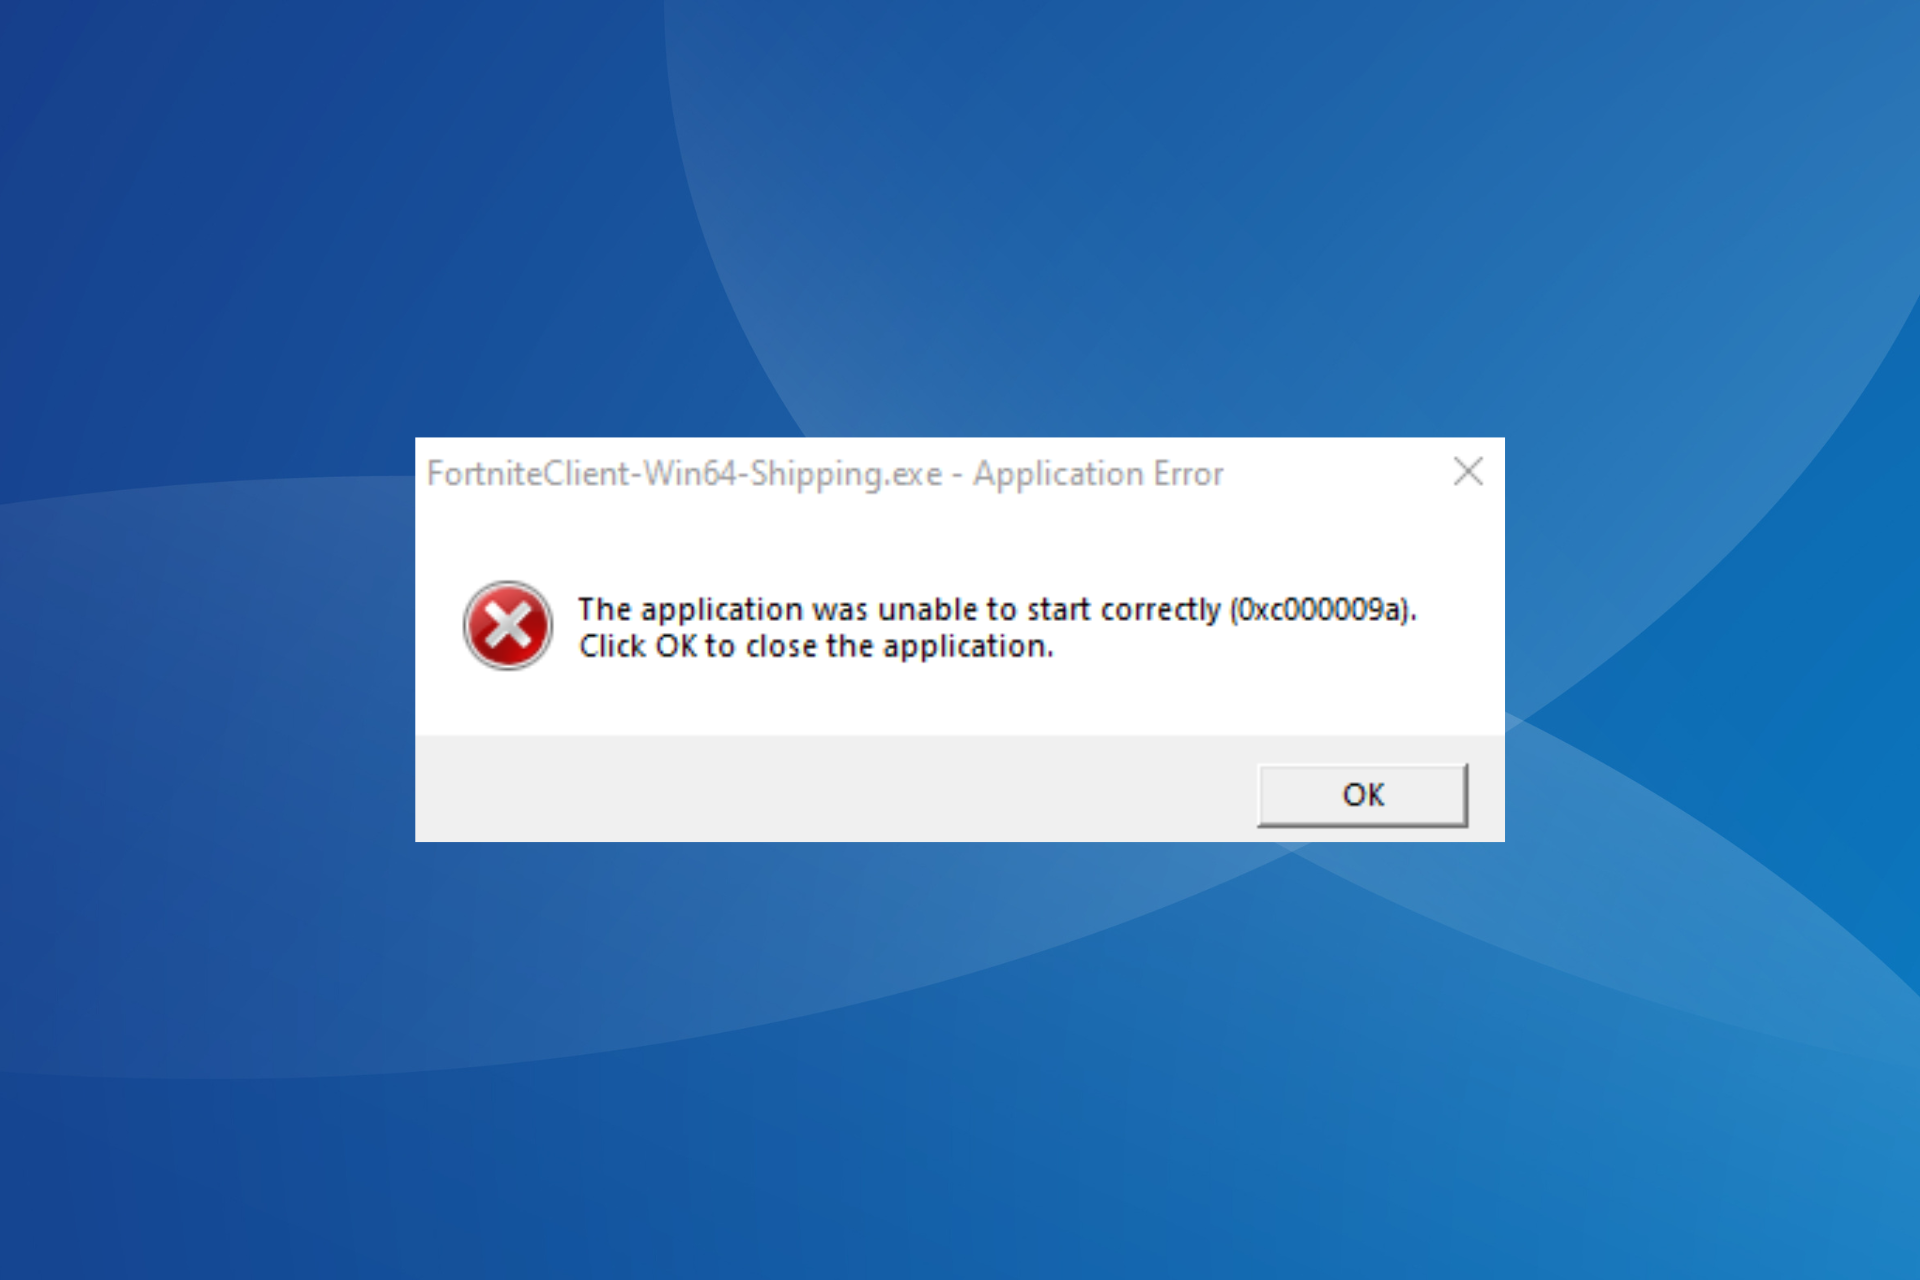
The message reads, Application error – The application was unable to start correctly (0xc000009a). Click OK to close the application. The error can appear for several apps, but Fortnite, Civilization 5, and Tarkov are the most affected. So, let’s find out all about it!

Tip
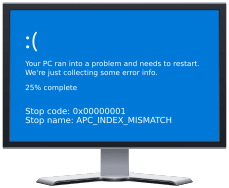
There is a 0xc000009a blue screen error that reads, Your PC/Device needs to be repaired. And in case you are here for that, go through our expert fixes for blue screen errors in Windows.
What is error 0xc00009a?
The error appears when launching a program and indicates Windows’ ability to do so. It can affect any app, given that there’s a problem somewhere down the line that triggers the error. And more often than not, the error can be easily fixed.
Here are a few reasons you are encountering 0xc000009a in Windows 11:
- Corrupt system files: When the system files are corrupt, you are likely to face issues running applications or even reconfiguring the settings, and Windows may keep crashing.
- Third-party apps leading to conflicts: For some users, it was a third-party app, usually an antivirus solution installed on the PC, that triggered the 0xc000009a Fortniteerror.
- Critical app files are missing: When the apps are crashing, you can’t ignore the possibility of an improper installation since that, too, could be an underlying cause.
How do I fix error 0xc00009a?
Before we head to the slightly complex solutions, try these quick tricks first:
- Restart the computer and then relaunch the program.
- Run the program as an administrator.
- Disable any third-party antivirus installed on the PC.
- Take ownership of the folder the game files are stored in.
- Check for any pending OS updates and install them. Similarly, update the game as well.
If none work, move to the fixes listed next.
1. Repair the corrupt system files
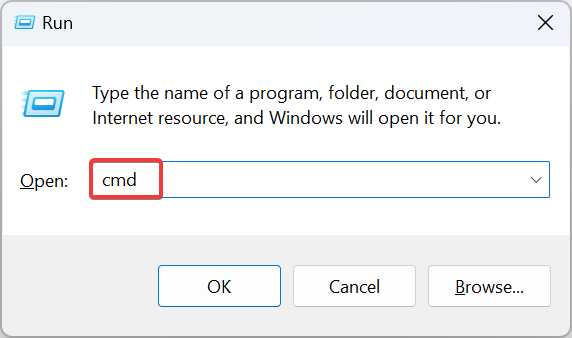
- Press Windows + R to open Run, type cmd, and hit Ctrl + Shift + Enter.

- Click Yes in the UAC prompt.
- Now, paste the following three commands individually and hit Enter after each for the DISM tool:
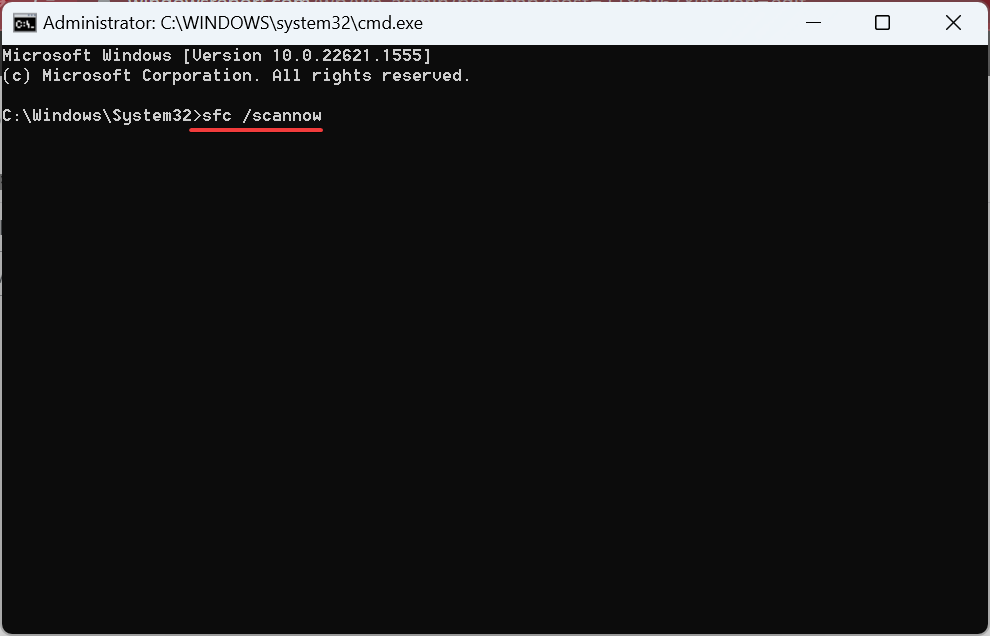
DISM /Online /Cleanup-Image /CheckHealthDISM /Online /Cleanup-Image /ScanHealthDISM /Online /Cleanup-Image /RestoreHealth - Once done, execute this command for the SFC scan:
sfc /scannow
- Finally, restart the computer for the changes to come into effect.
Corrupt system files are often the primary reason behind the 0xc000009a application error. And running the DISM tool and SFC scan will identify and repair/replace all such files within no time.
To make this process as easy as possible, we recommend you try a dependable repair tool that runs a more in-depth version of the DISM and SFC scan.
For instance, Fortect is a noteworthy option because it can find corrupted, malfunctioning, or missing system files and repair them by locating brand-new components as replacements from its frequently-revised database.
⇒ Get Fortect
2. Check for disk issues
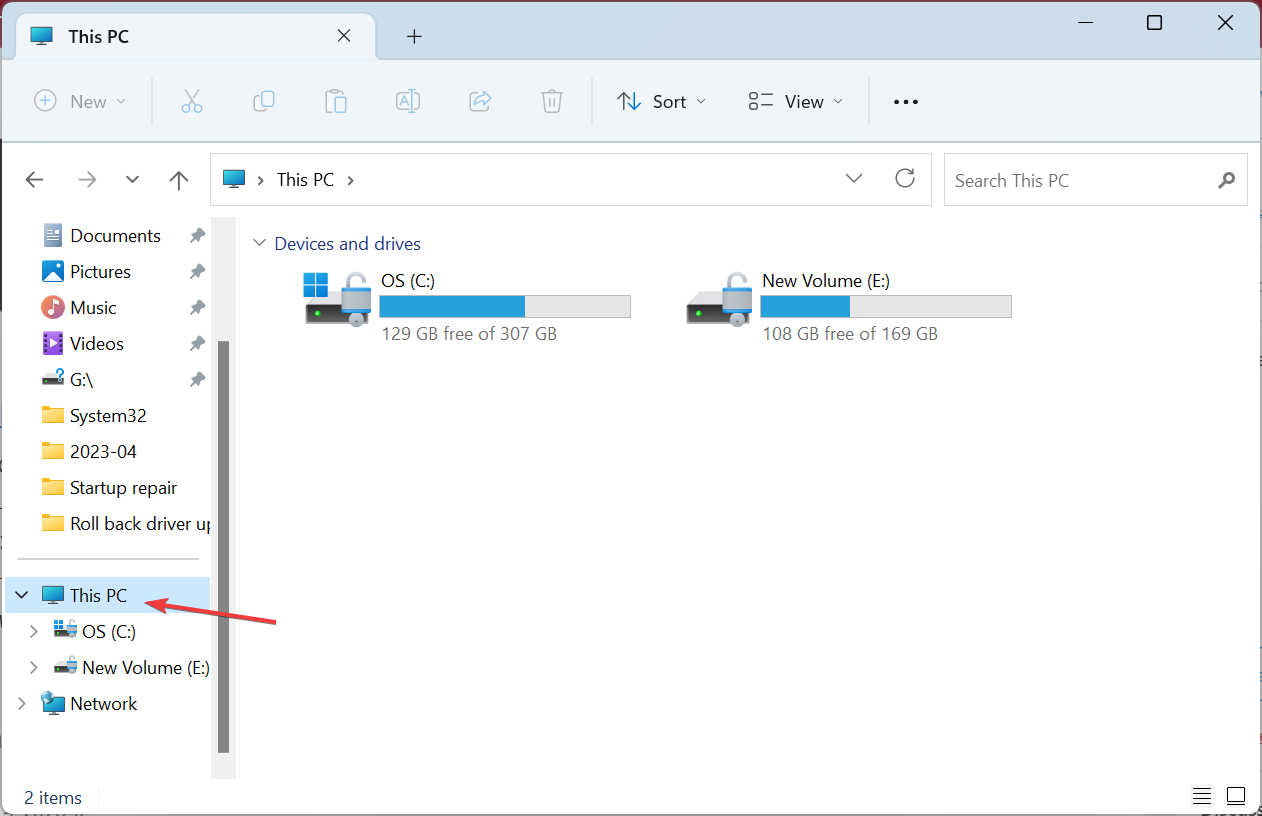
- Press Windows + E to open File Explorer, and go to This PC from the navigation pane.

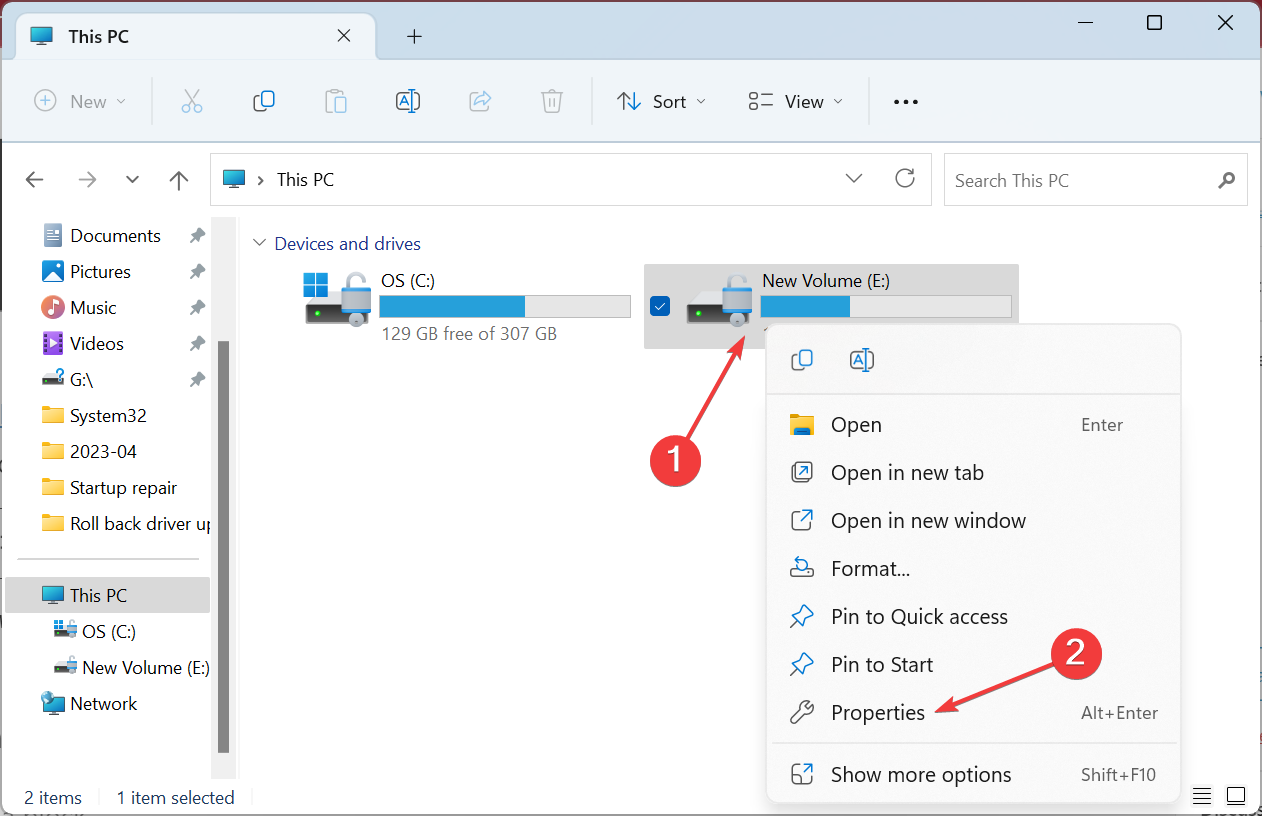
- Right-click on the drive where the app files are stored, and select Properties.
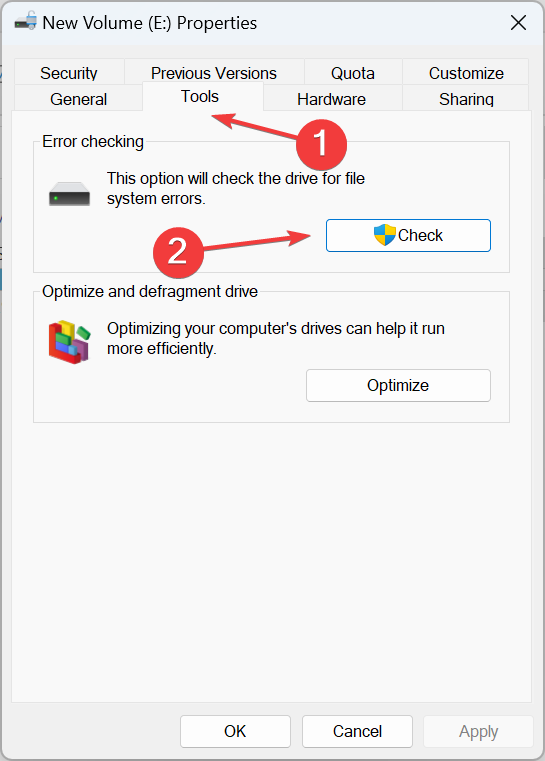
- Navigate to the Tools tab, and click the Check button under Error checking.

- Click on Scan drive to confirm and wait for the process to complete.

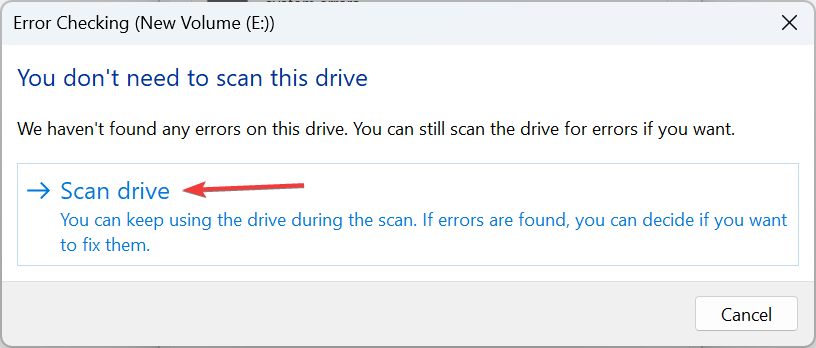
In many cases, users found issues with the disk to be responsible for 0xc000009a. And the best solution here is to repair the disk. Besides, if this doesn’t work, you can always use a dedicated disk repair tool to run extensive scans and eliminate the most complex problems.
3. Uninstall third-party apps
- Press Windows + R to open Run, type appwiz.cpl in the text field, and hit Enter.
- Select any recently installed app or one you believe might be triggering the error, and click Uninstall.

- Follow the on-screen instructions to complete the process.
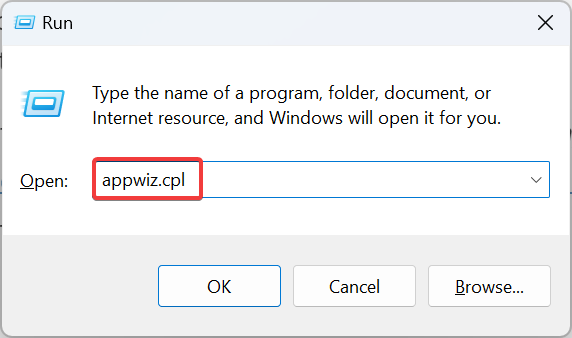
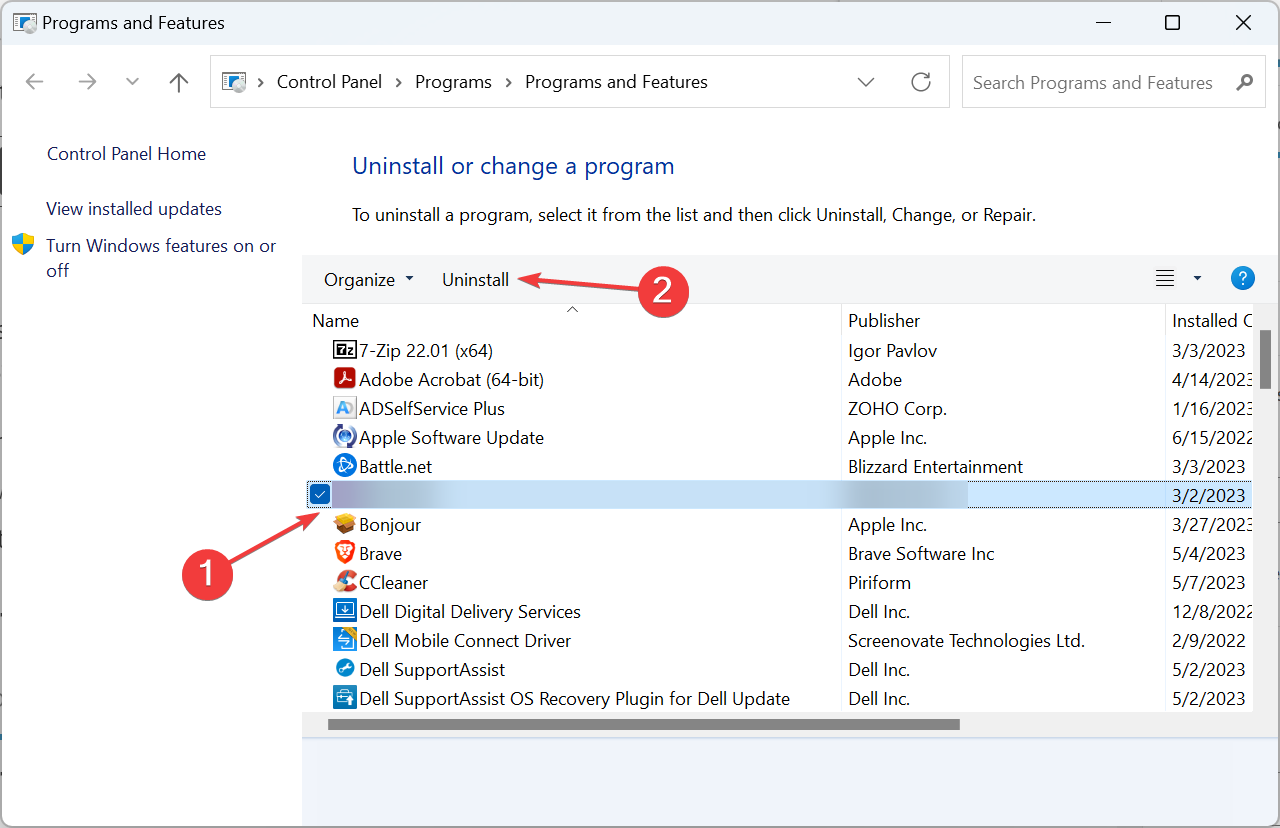
Often, it’s a third-party app that triggers error code 0xc000009a in Windows 10. Many found McAfee to be the underlying cause, so if you have the antivirus, uninstall the program and check whether the error disappears.
4. Check for RAM issues
When it comes to RAM issues, Microsoft offers the built-in Windows Memory Diagnostics tool to automatically identify and eliminate problems with the memory. Remember, it isn’t that effective, so you may need another memory tool.
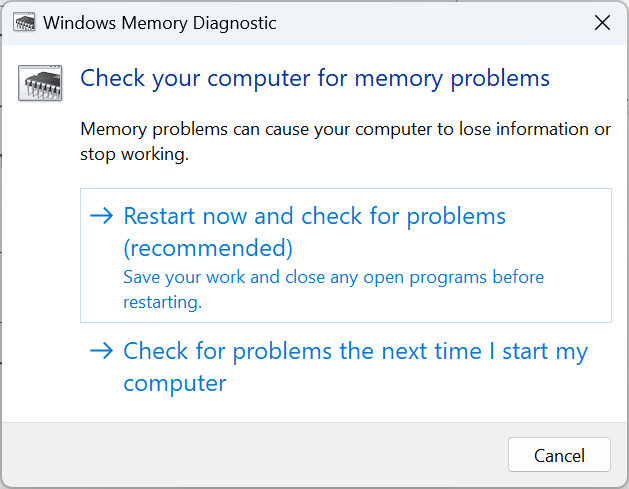
When things come down to it, we recommend Memtest86+, an open-source memory testing tool that runs extensive and deep scans on individual memory modules. It’s best to run Memtest86+ overnight, given it takes a few hours to complete the scans.
As a last resort, you can always replace the modules to verify whether these are the underlying cause behind 0xc000009a in BattleEye.
5. Reinstall the game
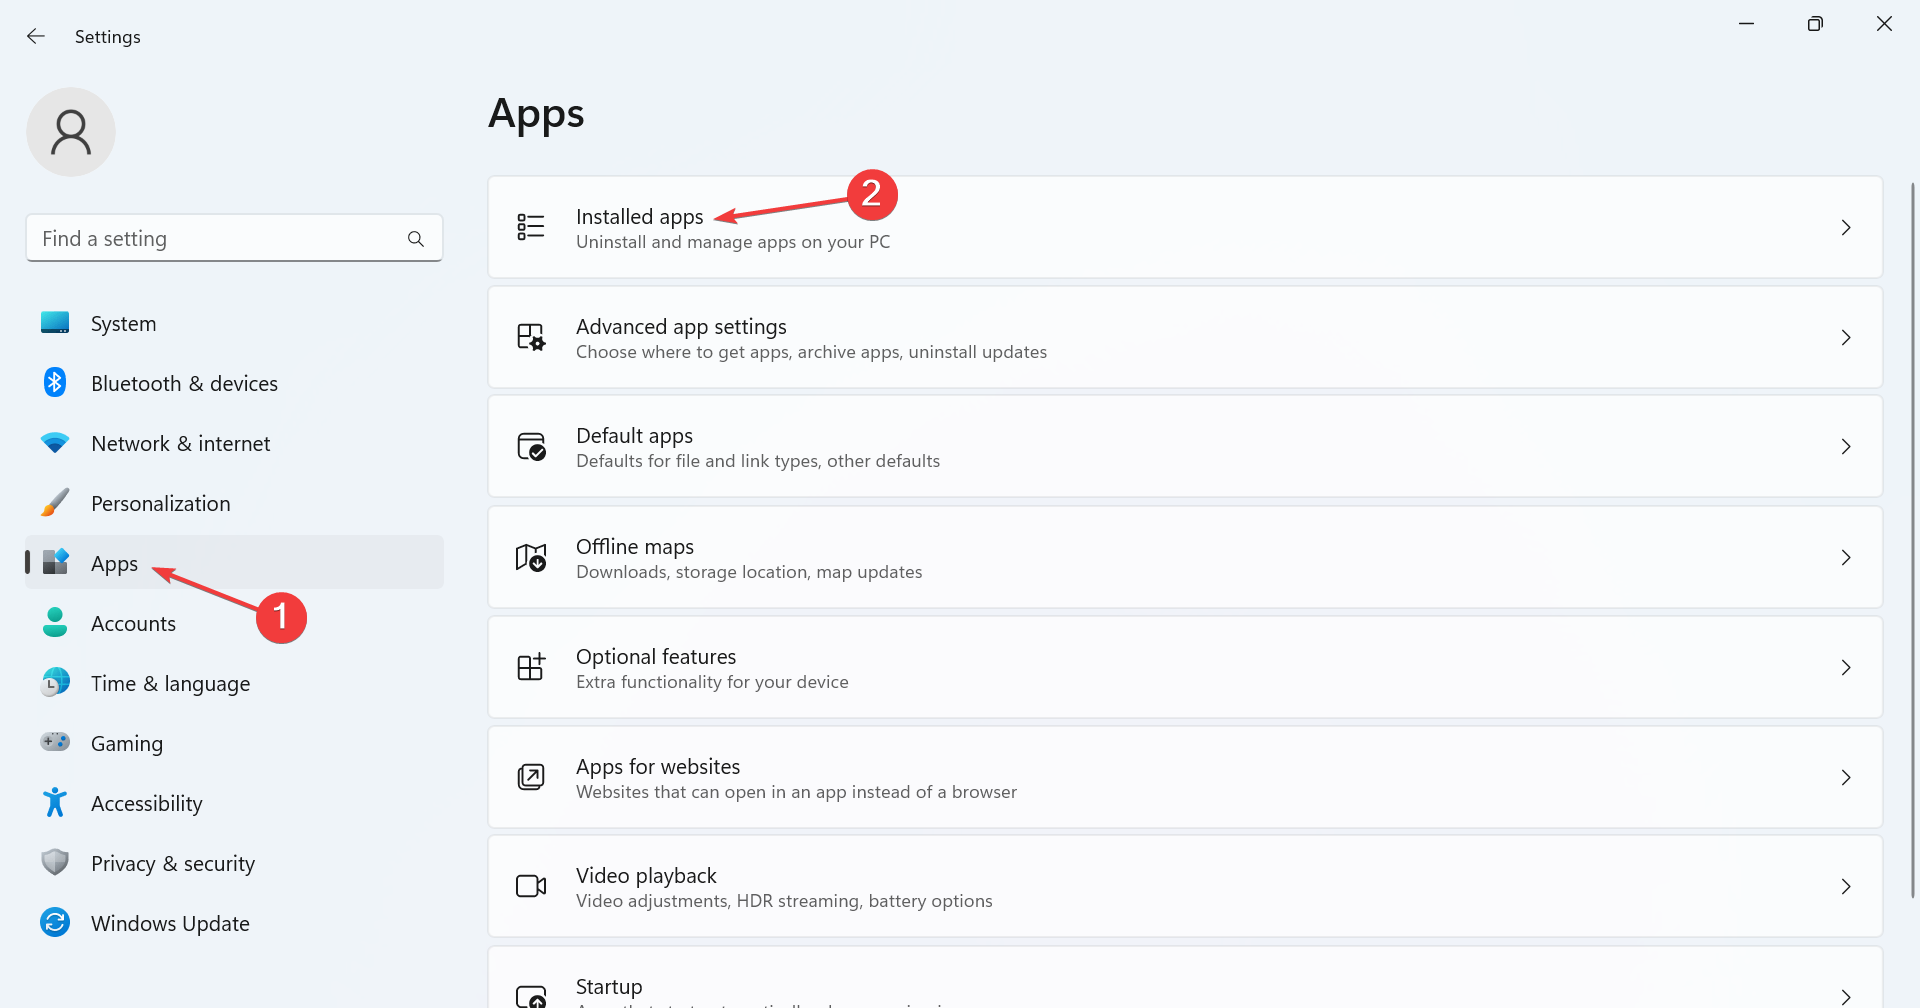
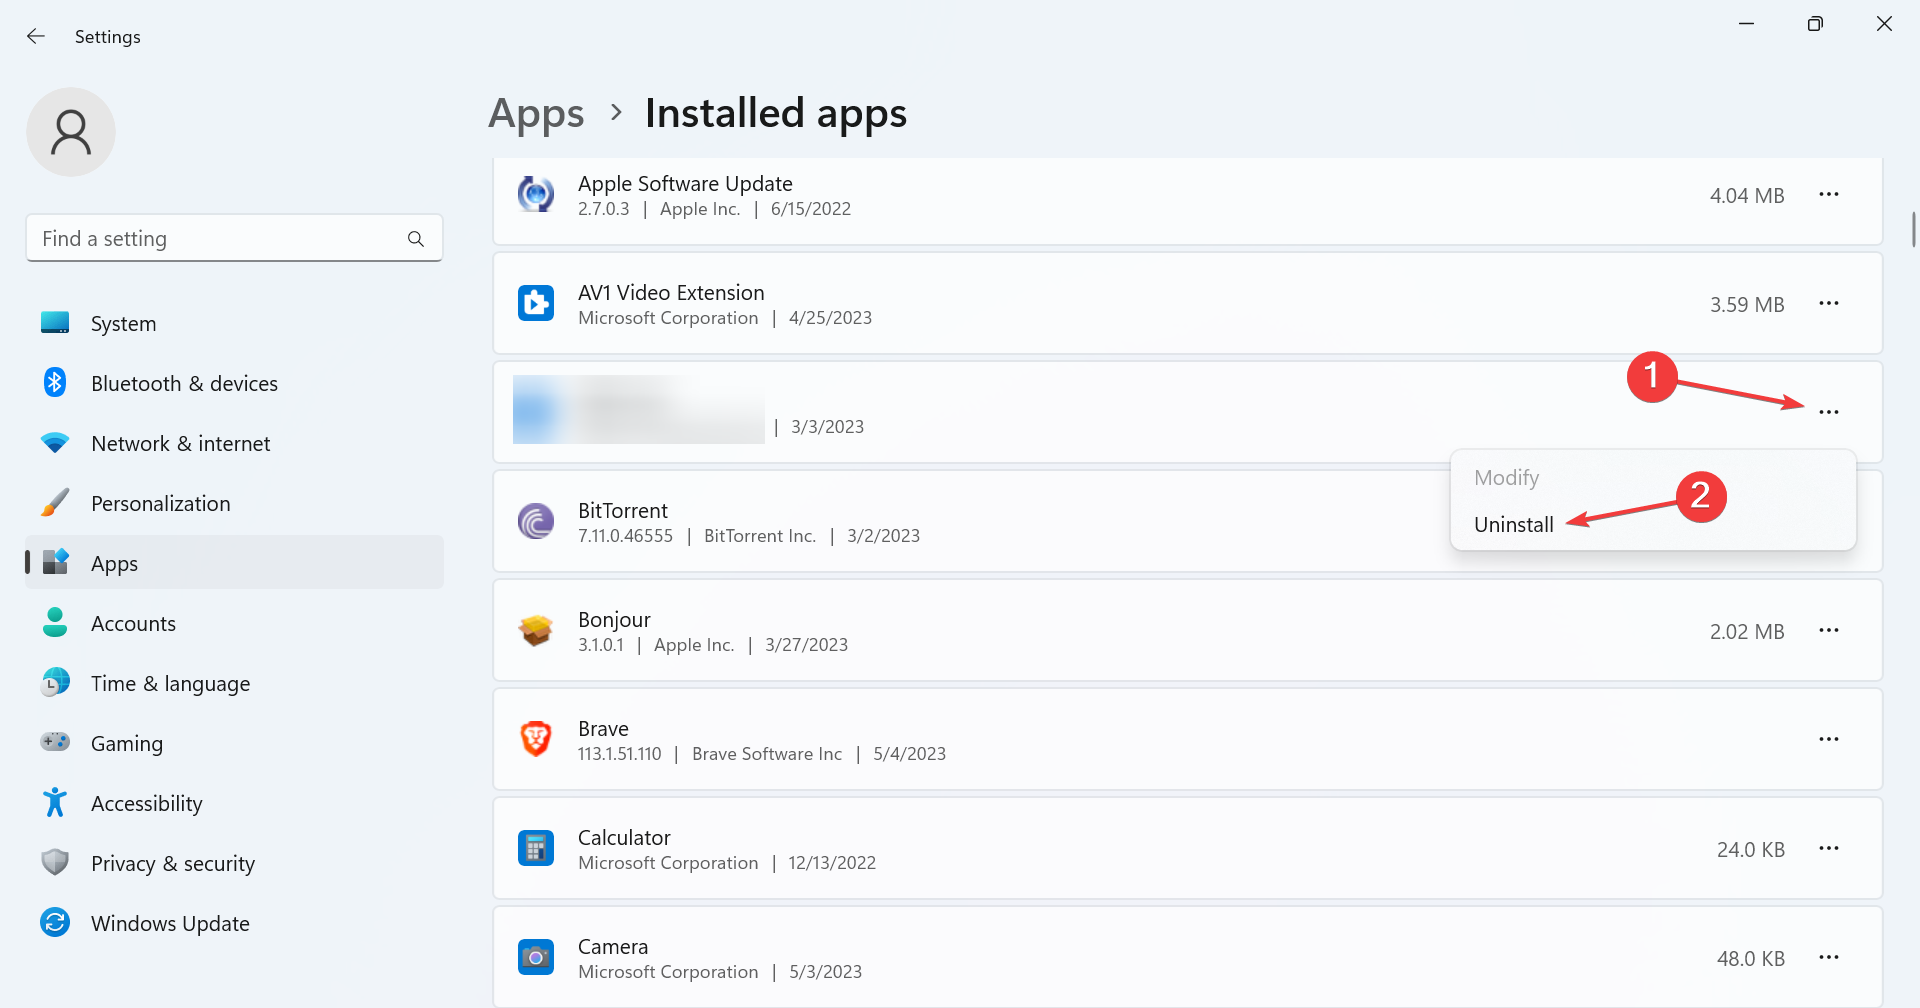
- Press Windows + I to open Settings, go to Apps from the navigation pane, and click on Installed apps.

- Locate the app throwing the error, click on the ellipsis next to it, and select Uninstall.
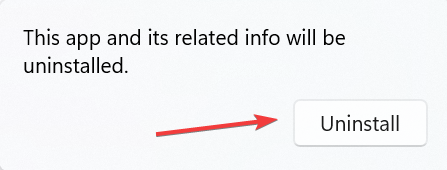
- Again, click Uninstall in the confirmation prompt.

- Once done, restart the computer for the changes to come into effect, and download the app from a reliable source, be it the official website or Microsoft Store.
- Shortcuts Are Not Working in Chrome? 5 Ways to Fix Them
- Fix: NAS Drive Not Showing in Windows 11
6. Uninstall recent Windows updates
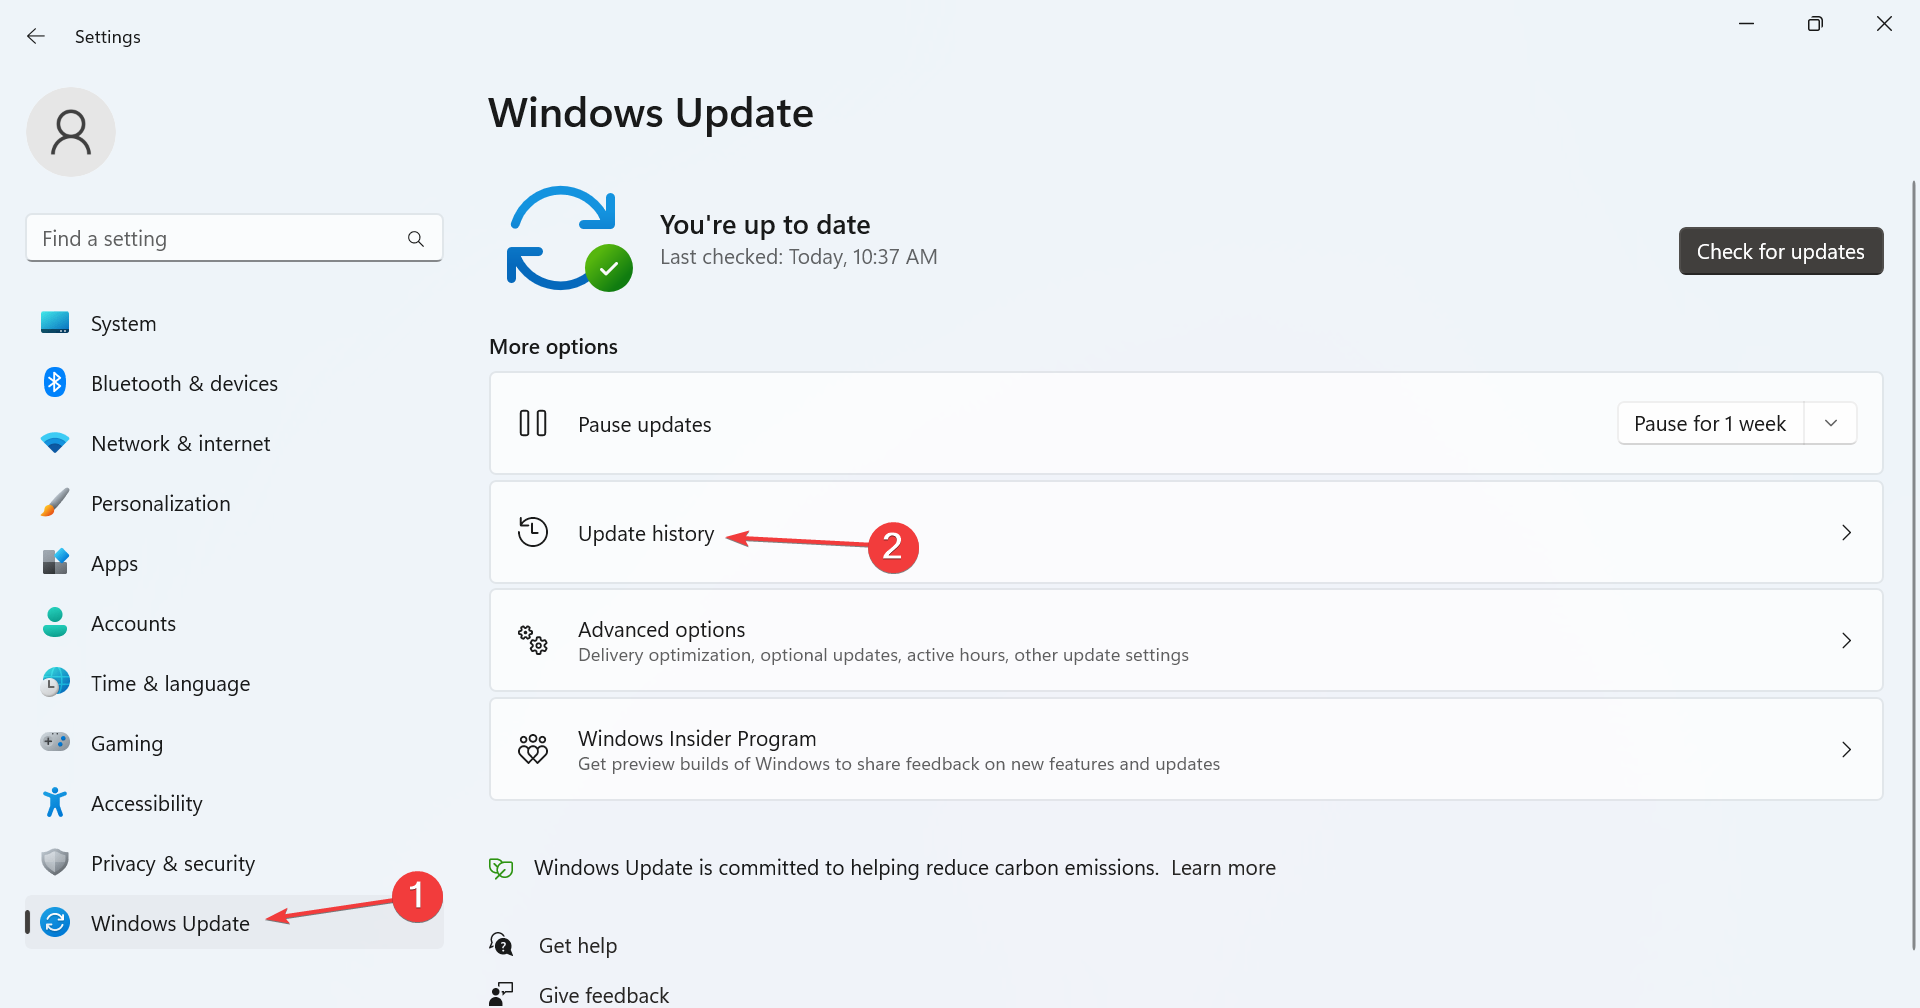
- Press Windows + I to open Settings, go to Windows Update, and click on Update history on the right.
- Scroll to the bottom, and click on Uninstall updates.
- Now, click Uninstall next to the recently installed update.
- Again, click Uninstall to confirm.

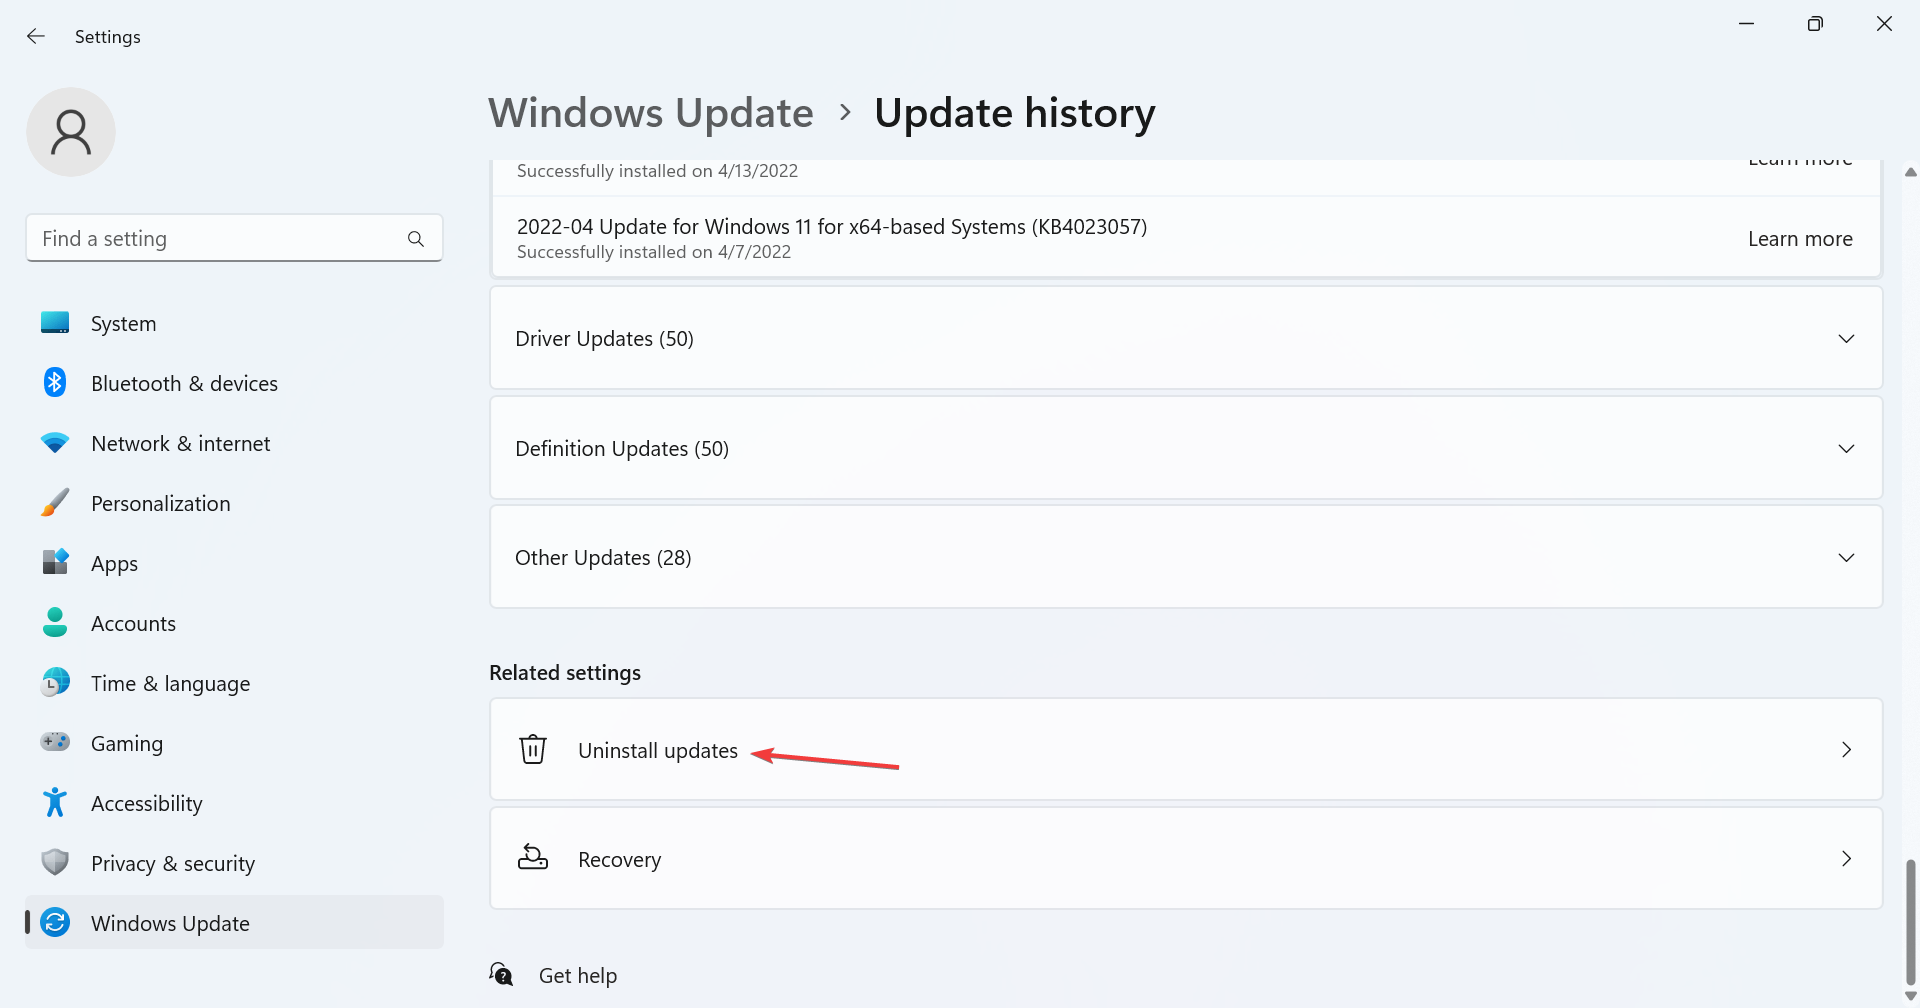

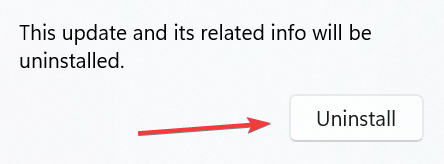
For some users, it was a recent OS update that changed things, and they got 0xc000009a in Tarkov, and even other applications. In this case, the most viable fix is to uninstall Windows updates. And until a new version is released, we recommend you block Windows updates.
7. Perform a system restore
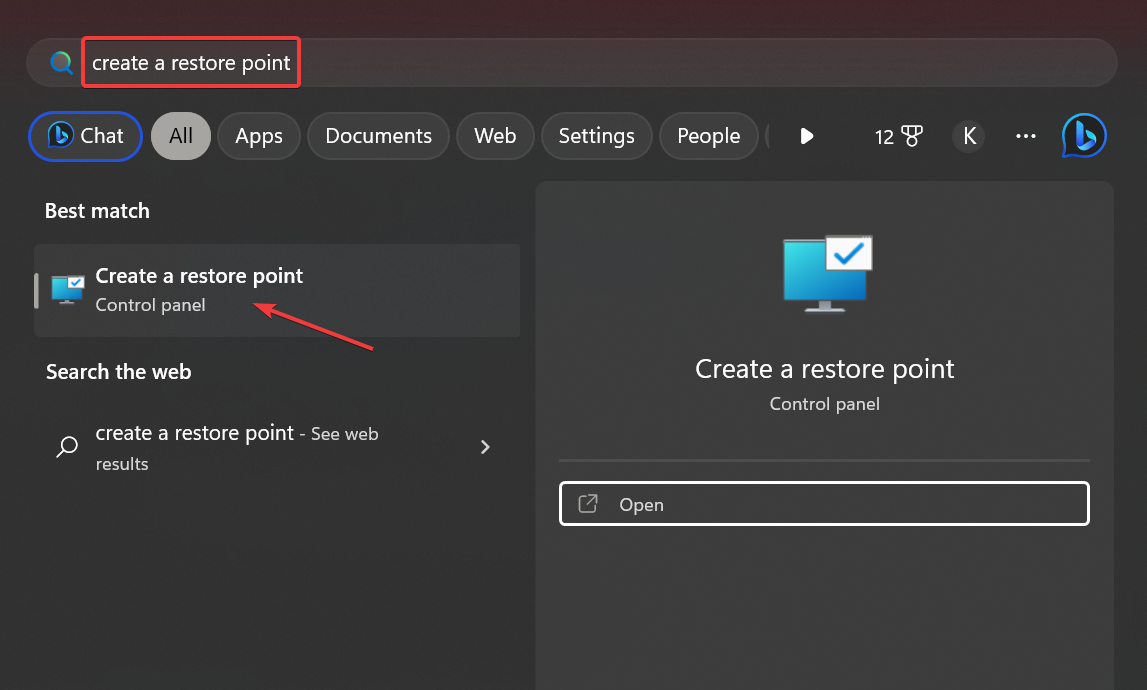
- Press Windows + S to open Search, type Create a restore point in the text field, and click on the relevant search result.

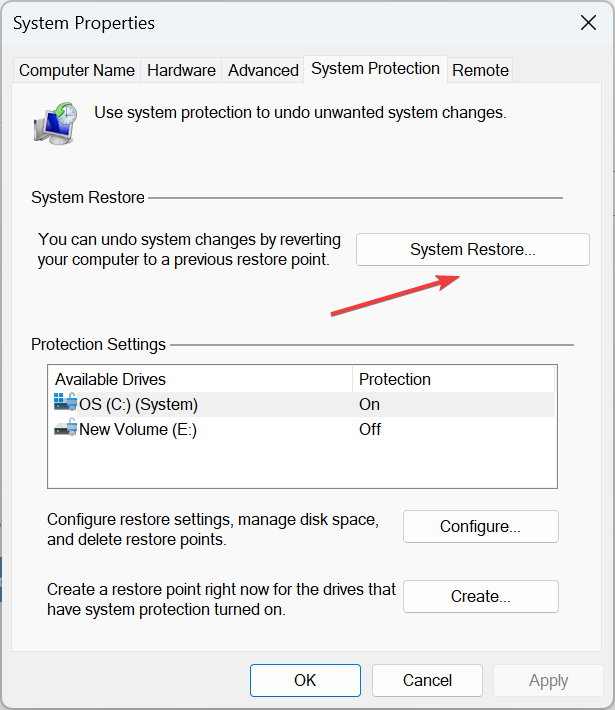
- Now, click on System Restore.

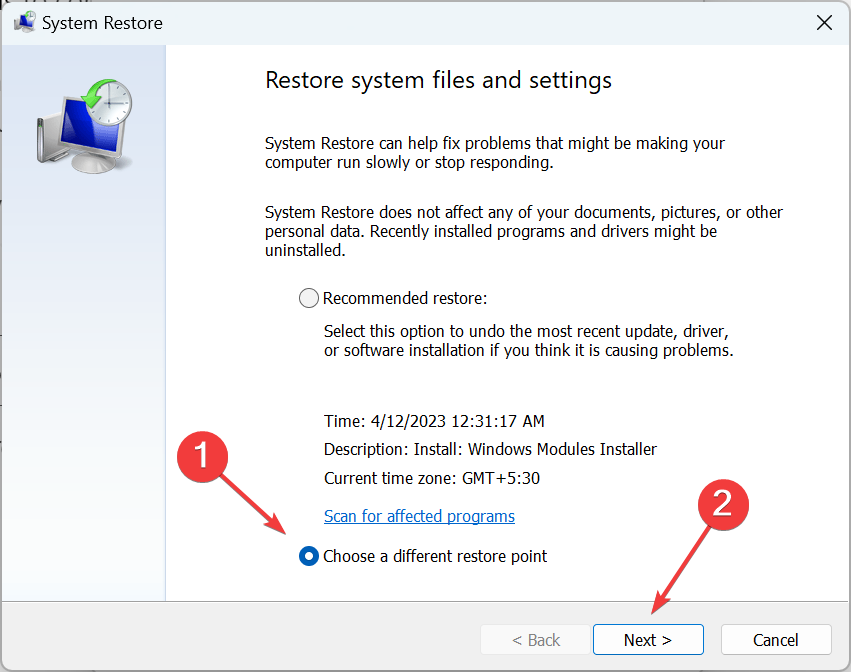
- Select Choose a different restore point and click on Next to proceed.

- Pick a restore point from the list, one created before the error first appeared, and click Next.
- Finally, verify the restore details and click on Finish to start the process.

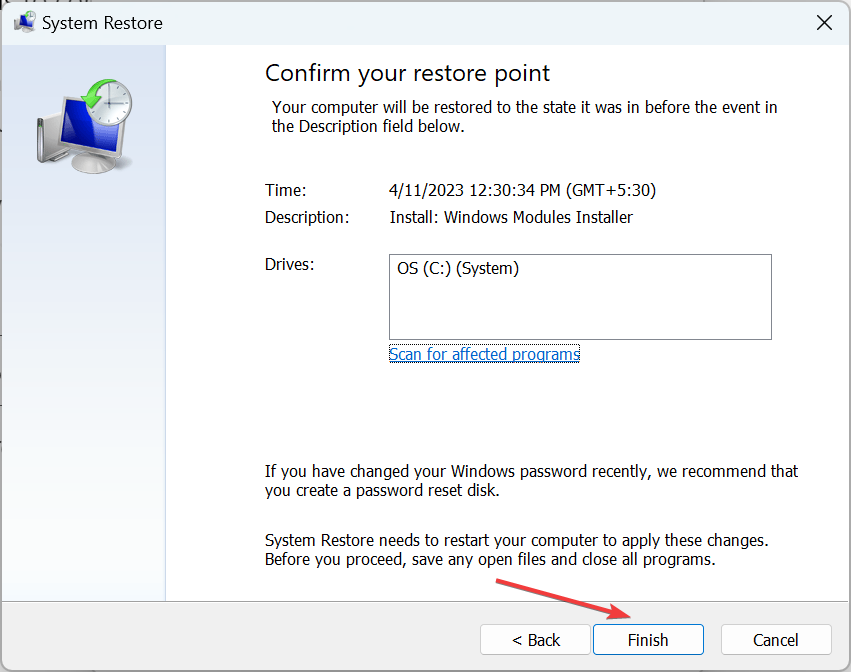
If the other solutions for 0xc000009a don’t work, you can always perform a system restore and revert your PC to a previous healthy state. Remember, you might lose some apps and configured settings, but the personal files remain unaffected. This is the reason experts recommend regularly creating restore points.
And once you have fixed the error, do not forget to check our quick tips to optimize the PC for gaming.
Tell us which fix worked for you in the comments section below.
![]()
26.07.2019
Просмотров: 11604
Во время копирования содержимого диска на Windows 7 и Windows 10 или во время запуска восстановления системы с помощью контрольной точки или установочного диска, пользователи могут столкнуться с синим экраном смерти 0x0000009A: SYSTEM_LICENSE_VIOLATION. Возникает он по различным причинам. Наиболее частыми среди них есть: повреждение реестра, неверно указанный ключ лицензии, повреждение драйверов, неполадки с жестким диском.
Читайте также: Способы исправления ошибки 0x00000012: TRAP CAUSE UNKNOWN на Windows 7
Методы решения ошибки 0x0000009A: SYSTEM_LICENSE_VIOLATION
Если на вашем ПК появилась ошибка 0x0000009A, то в первую очередь необходимо проанализировать файл малого дампа памяти с помощью программы BlueScreenView. Если проблема кроется в системном файле или драйвере, то программа укажет на него. В случае, если поврежден системный файл, то для его реанимации можно использовать командную строку с правами Администратора и ввести sfc /scannow.
Или же можно подключить к ПК установочную флешку или диск и выбрать «Восстановление системы». Windows подгрузит с образа нужный файл, заменив, таким образом, поврежденный объект.
Если же исправление системных файлов не помогло избавиться от неполадки, то стоит проверить состояние драйверов. Для этого нужно открыть Диспетчер устройств и проверить, нет ли возле какого-либо элемента значка с восклицательным знаком. Если таков имеется, то нужно нажать на элементе правой кнопкой мыши и выбрать «Свойства». Далее в новом окне нужно перейти во вкладку «Драйвер» и нажать на кнопки «Откатить» или «Обновить».
ВАЖНО! Если вы ранее устанавливали какие-то программы или игры, то стоит «Откатить» драйвера до раннего состояния. Если же ПО давно не обновлялось, то лучше, наоборот, обновить драйвер, предварительно загрузив его с официальной страницы производителя оборудования.
После обновления драйверов нужно перезагрузить систему.
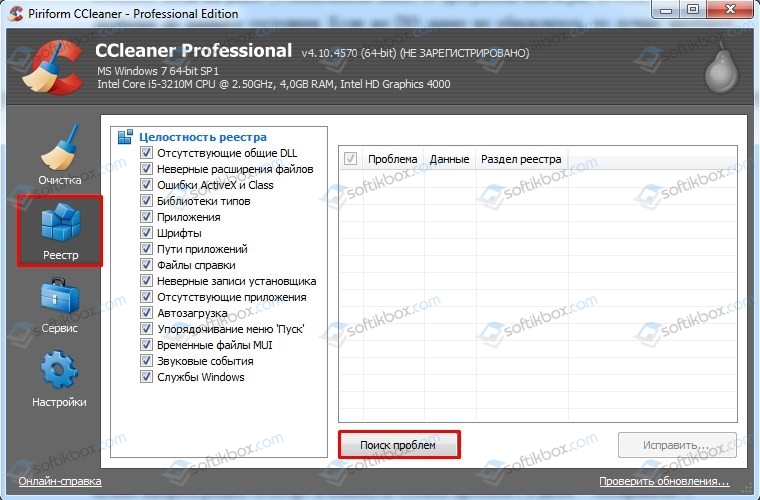
В случае, если проблема кроется в повреждении реестра, то вариантов её решения будет несколько.
- Бэкап (если ранее в настройках была включена опция создания резервной копии);
- Программное восстановление.
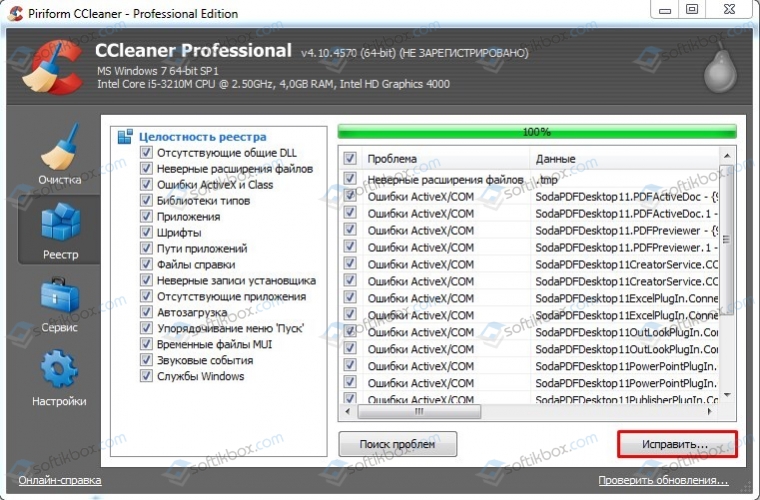
При проблемах с реестром внимание рекомендуем обратить на программу CCleaner. В ней нужно выбрать раздел «Реестр» и кликнуть «Поиск проблем», а далее – «Исправить».
Если восстановление реестра не дало результатов и синий экран смерти 0x0000009A SYSTEM_LICENSE_VIOLATION продолжает появляться, то стоит проверить на исправность жесткий диск. Для этого выполняем следующее:
- Открываем командную строку с правами Администратора и вводим chkdsk C: /f /r /x.

- Компьютер перезагрузится и начнется проверка накопителя на ошибки.
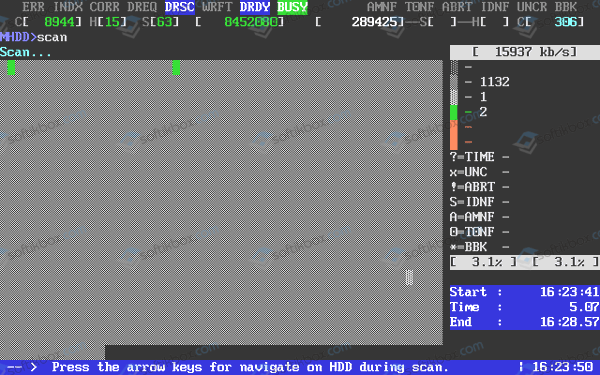
В случае, если стандартная утилита не помогла исправить BSOD, стоит скачать и запустить MHDD или Victoria HDD. Подойдет и другая программа для проверки жестких дисков. Программу нужно запустить на ПК и подождать, пока проверка не будет завершена.
Если с жестким диском все в порядке, то нужно проверить лицензию операционной системы. Если у вас пиратская сборка, то стоит переустановить её с использованием лицензионного ключа.
В случае, если исправить ошибку вышеуказанными методами не удалось, то стоит полностью продиагностировать ПК и переустановить Windows с форматированием логических разделов.
At times when you play a game on your system and open it, an error 0xc000009a occurs. This error may also occur even when you are trying to open an application. In this post, we are going to find out why this error 0xc000009a appear and how to fix it without visiting the computer repair center.
The error usually displays like this:
The application was unable to start correctly (0xc000009a)
It occurs primarily because of improper operations of an application due to its faulty component.
There are a few reasons why Error 0xc000009a may be prompted on screen:
- The anti-virus software deletes a file that it thinks is not secure.
- The anti-virus blocks memory access
- Presence of corrupted files in the bin of the application or game directory
- Malware threat to the system
- The system was not able to shut down normally.
- System registry issues
- Failed/ incomplete installation or uninstallation of a program or software
This error is encountered in most Windows operating systems. However, there are various methods available to fix this error.
Let us look at some of them:
Restore Quarantined items in Antivirus Software
- Open the antivirus you are using. Let us use McAfee for example.
- Click on the Settings icon and select Real-Time Scanning option
- In the real-time scanning window, click “Turn off“.
- Go to the Settings icon again. Select Quarantined items and click on it
- A list of items quarantined by the anti-virus will appear. Choose the file component of the application or game that is encountering the error 0x000009a.
- Click on Restore. Close the Quarantined items window. Error 0x000009a will be resolved.
- Now open the application or game that was encountering the error.
- When the game or application starts, go back to McAfee anti-virus window and click on the settings icon
- Go to Real-Time Scanning and turn it on.
Perform Disk Defragmentation
The steps for defragmentation may vary in different windows versions. Mentioned below are the steps for Windows 10 users:
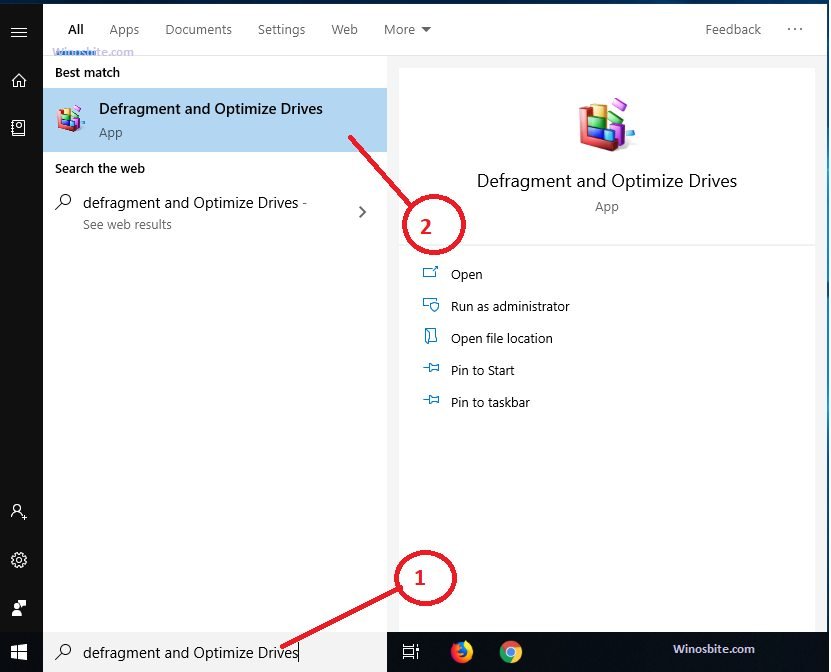
- Click on Start menu
- Type Defragment and Optimize Drives and click on it

- The Optimize Drive window opens. Now, choose the hard disk drive in which the application/game is installed, usually, it should be C drive.
- Click on Optimize. This will analyze, optimize and defragment the drive simultaneously. Do not defragment if the fragmentation is less than 10%.

- Once done, click on Close.

To Deactivate and Reactivate Hibernation
To delete Hiberfil.sys file and deactivate hibernation:
1) Click on Start menu
2) Type Command Prompt, right-click on it and click on Run as Administrator

3) Popup windows will open, click on Yes
4) Type powercfg.exe /hibernate off in command prompt window and press Enter

5) Now, type exit in the prompt and press Enter to exit from cmd window.

Now, to create a new Hiberfil.sys file and activate hibernation, follow the same process to launch the Command Prompt
1) Type powercfg.exe /hibernate on and press Enter

2). Now, type exit and hit Enter

Clean System Registry
Clean system dead/junk registry, for this, follow below steps:
1) Download third party registry cleaner like Ccleaner and Install on a system
2) Select the Registry from the left window panel
3) Click on Scan for Issues and let it find all dead and junk registry
4) Now, select Fix Selected issues
5) The selected issues will be automatically fixed. Restart your system. Error 0xc000009a will not persist now.
Scan PC using System File Checker ( SFC )
In start menu or via Windows button, search for cmd ( Command Prompt ) or press Windows + X
1) Click on Start menu and type CMD
2) Right-click on CMD and click on Run as an administrator
3) Type command line sfc/scannow in the prompt window and press Enter

4) Scanning and automatic system repair will begin. Wait for some time.
5) When done, close tab and restart the faulting application.
Scan for Corrupt Hard Drive
1) Click on Start and type CMD
2) Right-click on it and click on Run as administrator
3) A small pop-up window will appear, click on Yes. The cmd will now open.
4) Type command line chkdsk /f in the prompt window and press the Enter key

5) Automatic scanning of the hard disk will begin and error 0xc000009a will be resolved.
Skip to content
Как убрать SYSTEM_LICENSE_VIOLATION (0x0000009A)?
Как убрать « SYSTEM_LICENSE_VIOLATION» ( 0x0000009A)?
На компьютере или ноутбуке под управлением Windows появился «синий экран смерти»? После появления сообщения «
SYSTEM_LICENSE_VIOLATION» (
0x0000009A) система перезагружается? Ищите как исправить
0x0000009A: «
SYSTEM_LICENSE_VIOLATION»?
Как просмотреть информацию об ошибках, исправить ошибки в Windows 10, 8 или 7
Причины появления ошибки
- На жестком диске компьютера или ноутбука не достаточно места. Для правильной работы ОС Windows 10 на системном диске должно быть свободно 2 — 10 ГБ.
- На компьютер был установлен не совместимый BIOS или прошивка была повреждена.
- Установлены не совместимые с ОС драйвера устройств.
- Реестр Windows был поврежден или удален. Возможно в результате очистки были удалены системные ключи реестра.
- Ативирусное программное обеспечение или компьютерные вирусы могут заблокировать системные файлы или удалить важные ключи реестра.
- В результате ошибок в работе программы для резервного копирования.
- В результате обновления ОС Windows.
Актуально для ОС: Windows 10, Windows 8.1, Windows Server 2012, Windows 8, Windows Home Server 2011, Windows 7 (Seven), Windows Small Business Server, Windows Server 2008, Windows Home Server, Windows Vista, Windows XP, Windows 2000, Windows NT.
Вот несколько способов исправления ошибки «
SYSTEM_LICENSE_VIOLATION»:
Восстановите удаленные файлы
Часто появление BSoD ошибок приводит к утери важных файлов. Блокировка файлов компьютерными вирусами, ошибки в работе программ для резервного копирования, повреждение или перезапись системных файлов, ошибки файловой системы или наличие битых секторов диска – это не далеко полный список причин удаления данных.
Исправление соответствующих ошибок восстановит работоспособность устройства, но не всегда восстановит повреждённые или утерянные файлы. Не всегда имеется возможность устранить ту или иную ошибку без форматирования диска или чистой установки операционной системы, что также может повлечь за собой утерю файлов.
Загрузите бесплатно и просканируйте ваше устройство с помощью Hetman Partition Recovery. Ознакомьтесь с возможностями программы и пошаговой инструкцией.
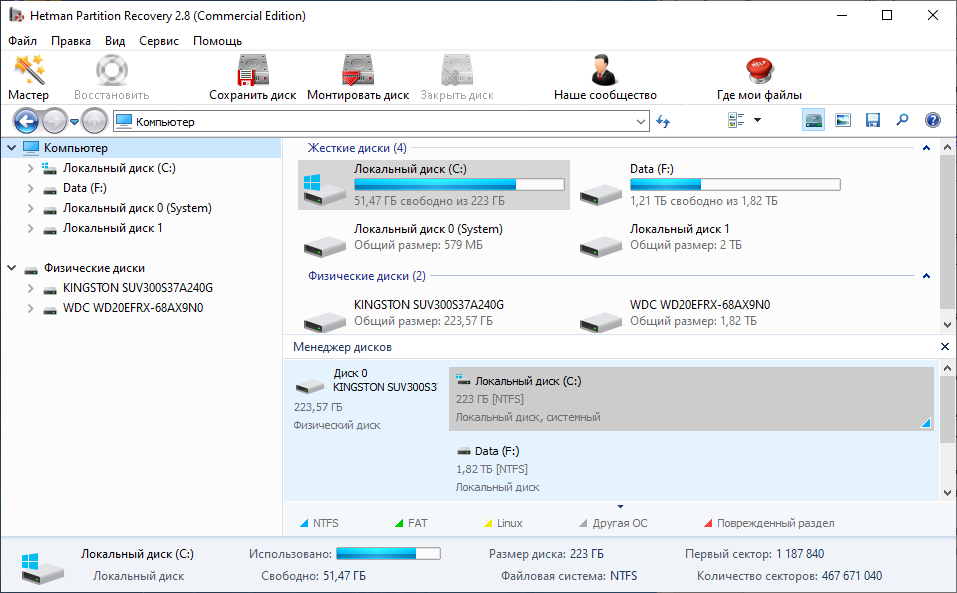
Программа для восстановления данных
Запустите компьютер в «безопасном режиме»
Если ошибка «SYSTEM_LICENSE_VIOLATION» (0x0000009A) возникает в момент загрузки Windows и блокирует любую возможность работы с системой, попробуйте включить компьютер в «безопасном режиме». Этот режим предназначен для диагностики операционной системы (далее ОС), но функционал Windows при этом сильно ограничен. «Безопасный режим» следует использовать только если работа с системой заблокирована.
Чтобы запустить безопасный режим сделайте следующее:
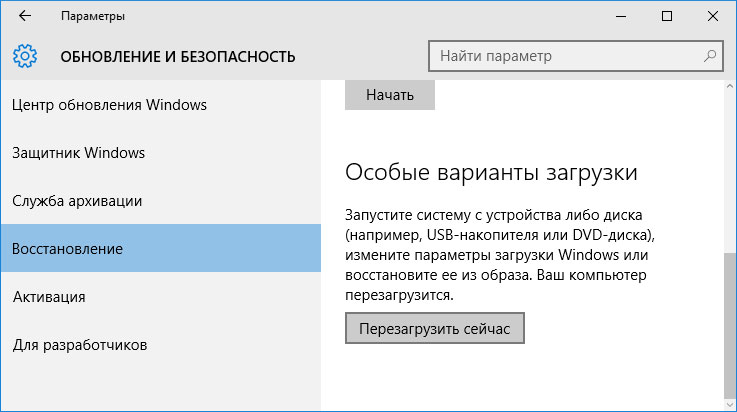
- Перейдите в меню Пуск и выберите Параметры.
- В открывшемся окне параметров перейдите в меню Обновление и Безопасность и выберите раздел Восстановление.
- В разделе Восстановление найдите Особые варианты загрузки и нажмите кнопку Перезагрузить сейчас.
- После этого Windows перезагрузится и предложит выбрать следующее действие. Выберите Поиск и устранение неисправностей.
- В меню Поиск и устранение неисправностей кликните на Дополнительные параметры, далее — Параметры загрузки.
- Далее Windows уведомит вас о том, что компьютер можно перезагрузить с использованием дополнительных параметров загрузки. Укажите — Включить безопасный режим. Нажмите Перезагрузить.
- После перезагрузки выберите Включить безопасный режим нажав клавишу F4.
Как загрузить Windows в безопасном режиме
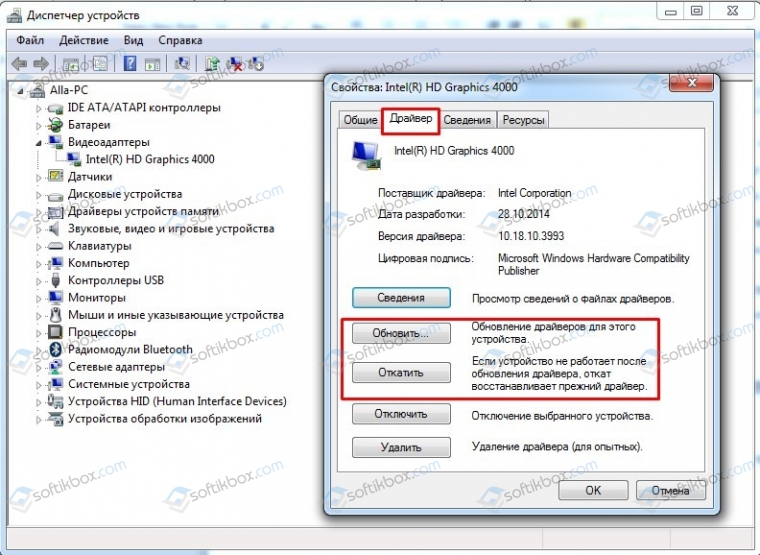
Обновите драйвер через Диспетчер устройств
Вы установили новое аппаратное обеспечение на компьютере? Возможно вы начали использовать новое USB-устройство с вашим компьютером. Это могло привести к ошибке «SYSTEM_LICENSE_VIOLATION». Если вы установили драйвер устройства используя диск, который поставляется вместе с ним, или использовали драйвер не c официального сайта Microsoft, то причина в нем. Вам придется обновить драйвер устройства, чтобы устранить эту проблему.
Вы можете сделать это вручную в диспетчере устройств Windows, для того выполните следующие инструкции:
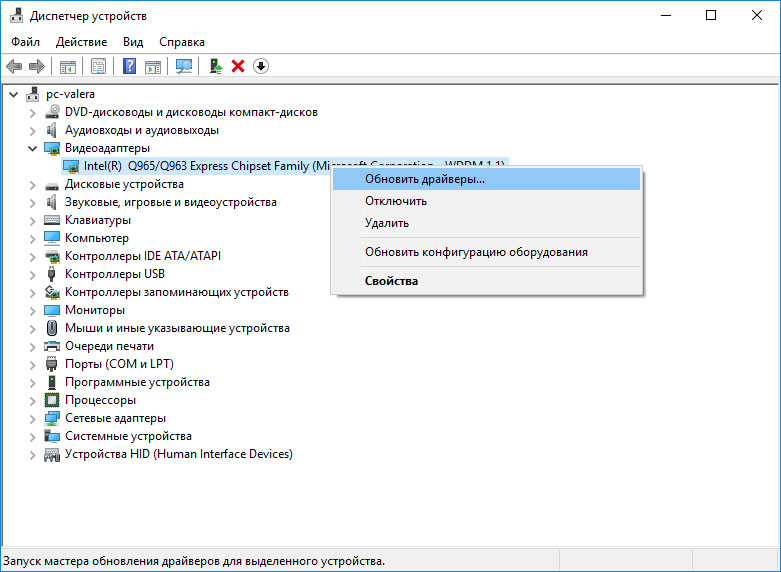
- Нажмите кнопку Windows, затем введите диспетчер устройств с клавиатуры.
- Выберите Диспетчер устройств из списка.
- Просмотрите список категорий устройств, нажмите на стрелочку рядом с категорией вашего нового устройства. Драйвер может быть отмечен желтым треугольником.
- Кликните правой кнопкой мыши на имя устройства и нажмите Обновить драйвер.
- Далее откроется окно Мастера обновления драйверов с двумя опциями:
- Автоматический поиск обновленных драйверов. Windows проверит наличие наиболее подходящего драйвера для этого устройства в автоматическом режиме.
- Выполнить поиск драйверов на этом компьютере. Используйте эту опцию, что бы самостоятельно указать ОС файлы драйвера.
Перезагрузите компьютер после установки драйвера.
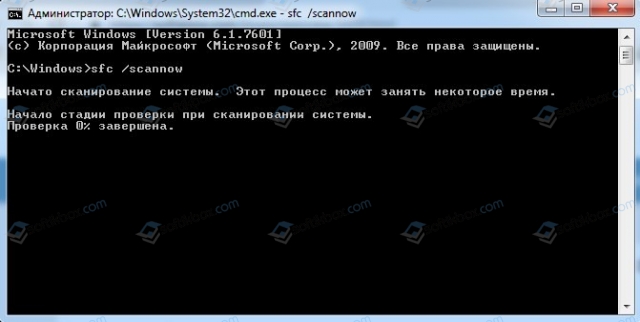
Используйте sfc /scannow для проверки всех файлов системы
Повреждение или перезапись системных файлов может привести к ошибке «SYSTEM_LICENSE_VIOLATION». Команда sfc находит поврежденные системные файлы Windows и заменяет их.
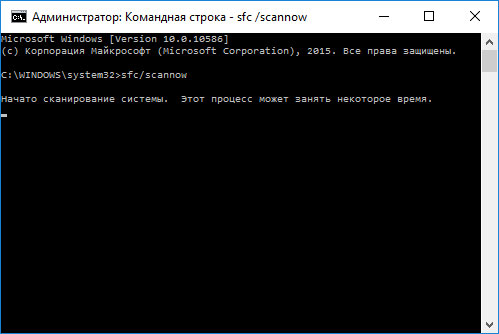
- Нажмите кнопку Windows, затем введите cmd с клавиатуры.
- Правой кнопкой мышки кликните на CMD и запустите от имени администратора.
- В окне командной строки введите sfc /scannow и нажмите Enter.
Этот процесс может занять несколько минут.
Как восстановить системные файлы Windows 10

Проверьте диск с Windows на наличие ошибок командой chkdsk c: /f
Возможно к синему экрану с «SYSTEM_LICENSE_VIOLATION» привела ошибка файловой системы или наличие битых секторов диска. Команда CHKDSK проверяет диск на наличие ошибок файловой системы и битых секторов. Использование параметра /f заставит программу автоматически исправлять найденные на диске ошибки, а параметр /r позволяет найти и «исправить» проблемные сектора диска. Для запуска следуйте инструкциям:
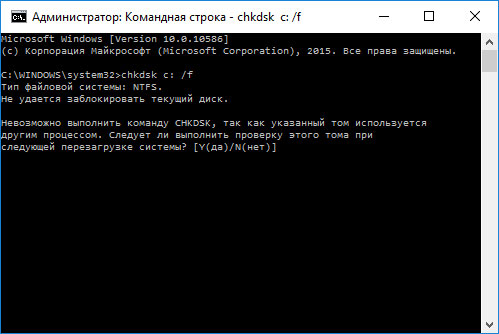
- Нажмите кнопку Windows, затем введите CMD с клавиатуры.
- Правой кнопкой мышки кликните на CMD и запустите от имени администратора.
- В окне командной строки введите chkdsk c: /f и нажмите Enter (используйте ту букву диска, на котором установлена ОС).
Дождитесь окончания процесса и перезагрузите компьютер.
Используйте режим совместимости со старой версией Windows
Отключите лишние программы из автозагрузки Windows
Программное обеспечение, вызывающее «SYSTEM_LICENSE_VIOLATION» (0x0000009A), может быть прописано в автозагрузку Windows и ошибка будет появляться сразу после запуска системы без вашего участия. Удалить программы из автозагрузки можно с помощью Диспетчера задач.

- Загрузитесь в Безопасном режиме.
- Кликните правой кнопкой мышки на Панели задач, затем на пункте Диспетчер задач.
- Перейдите на вкладку Автозагрузка.
- Чтобы убрать ту или иную программу из автозагрузки выберите её из списка и отключите, нажав кнопку Отключить в правом нижнем углу окна.
Обратитесь в поддержку Microsoft
Microsoft предлагает несколько решений удаления ошибки «голубого экрана». «SYSTEM_LICENSE_VIOLATION» (0x0000009A) можно убрать с помощью Центра обновления или обратившись в поддержку Windows.
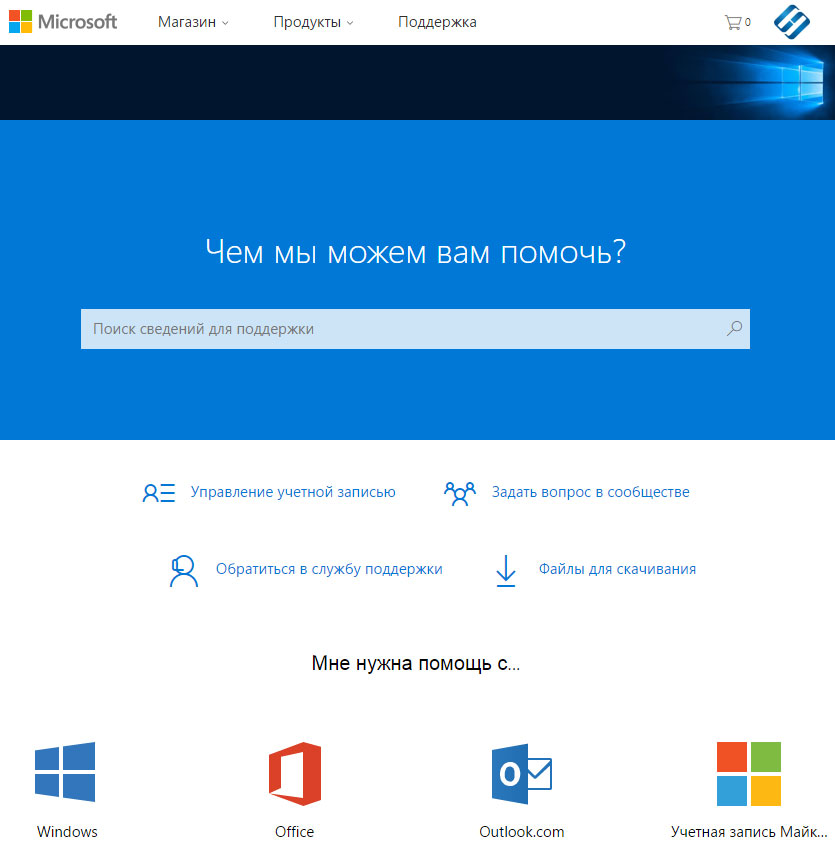
- Перейдите на сайт технической поддержки Microsoft.
- Введите код и сообщение об ошибке в поисковую строку и следуйте найденным рекомендациям.
- Если вы не найдете готового решения, то задайте вопрос в сообществе — возможно вам ответит сертифицированный системный администратор.
Установите последние обновления системы
С обновлениями Windows дополняет базу драйверов, исправляет ошибки и уязвимости в системе безопасности. Загрузите последние обновления, что бы избавиться от ошибки «SYSTEM_LICENSE_VIOLATION» (0x0000009A).
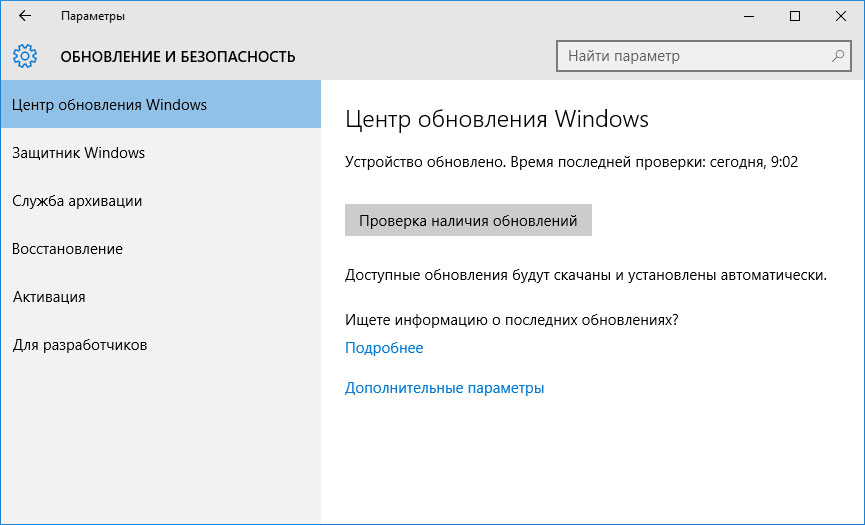
Запустить Центр обновления Windows можно следующим образом:
- Перейдите в меню Пуск и выберите Параметры.
- В окне Параметров перейдите в меню Обновление и Безопасность.
- Для установки последних обновлений Windows нажмите кнопку Проверка наличия обновлений и дождитесь окончания процесса их поиска и установки.
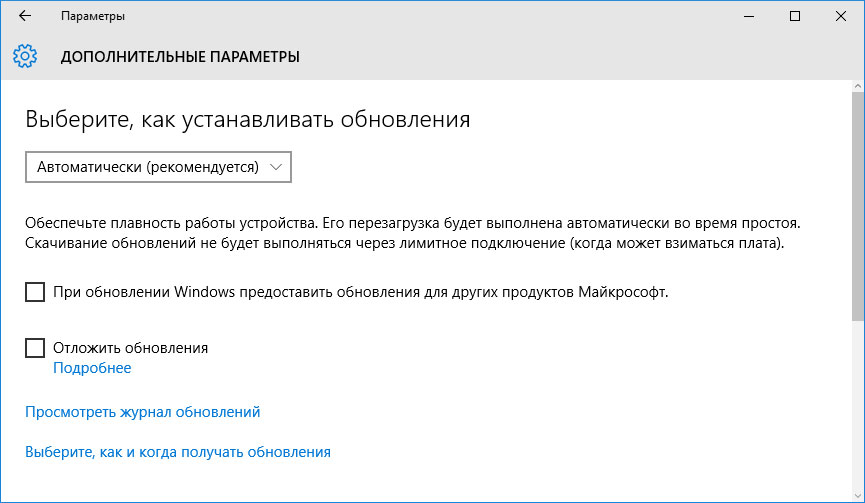
Рекомендуется настроить автоматическую загрузку и установку обновлений операционной системы с помощью меню Дополнительные параметры.
Чтобы включить автоматическое обновление системы необходимо запустить Центр обновления Windows:
- Перейдите в меню Пуск и выберите Параметры.
- В окне Параметров перейдите в меню Обновление и Безопасность и выберите подменю Центр обновления Windows. Для установки последних обновлений Windows нажмите кнопку Проверка наличия обновлений и дождитесь окончания процесса их поиска и установки.
- Перейдите в Дополнительные параметры и выберите, как устанавливать обновления — Автоматически.
Запустите проверку системы на вирусы
«Синий экран смерти» с ошибкой «SYSTEM_LICENSE_VIOLATION» 0x0000009A может вызывать компьютерный вирус, заразивший систему Windows.
Для проверки системы на наличие вирусов запустите установленную на компьютере антивирусную программу.
Современные антивирусы позволяют проверить как жесткие диски, так и оперативную память. Выполните полную проверку системы.
Выполните проверку оперативной памяти
Неполадки с памятью могут привести к ошибкам, потере информации или прекращению работы компьютера.
Прежде чем проверять оперативную память, отключите её из разъёма на материнской плате компьютера и повторно вставьте в него. Иногда ошибка SYSTEM_LICENSE_VIOLATION» вызвана неправильно или не плотно вставленной в разъём планкой оперативной памяти, или засорением контактов разъёма.
Если предложенные действия не привели к положительному результату, исправность оперативной памяти можно проверить средствами операционной системы, с помощью средства проверки памяти Windows.
Запустить средство проверки памяти Windows можно двумя способами:
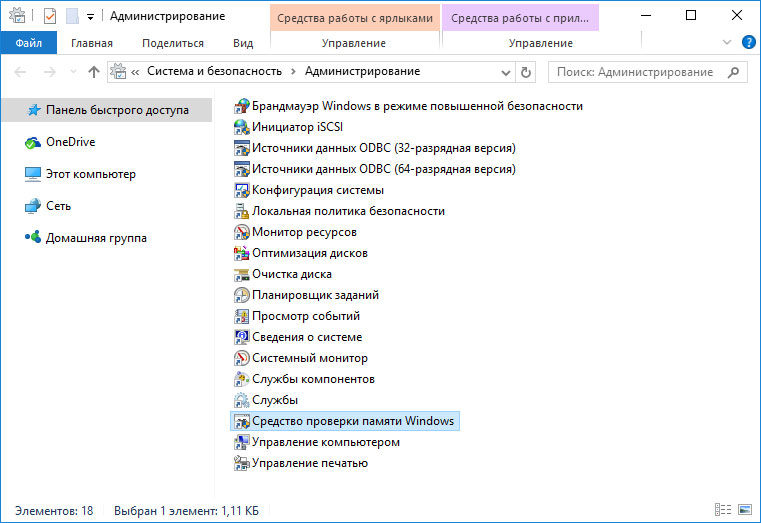
- С помощью Панели управления:

Перейдите в Панель управления / Система и безопасность / Администрирование. Запустите приложение Средство проверки памяти Windows.
- С помощью средства Выполнить:

Запустите средство Выполнить с помощью комбинации клавиш Windows + R. Наберите mdsched и нажмите Enter. После чего откроется средство проверки Windows.
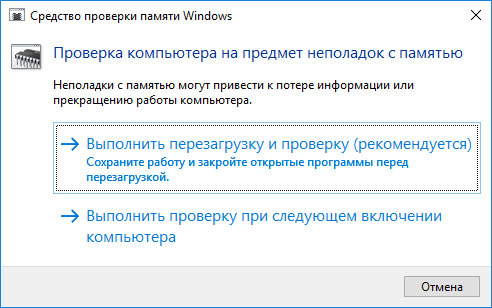
Для начала проверки выберите один из предлагаемых вариантов, проверка оперативной памяти в соответствии с которым будет запущена после перезагрузки компьютера.
Если в результате проверки будут определены ошибки, исправить которые не представляется возможным, то такую память необходимо заменить (замене подлежит модуль памяти с неполадками).
Выполните «чистую» установку Windows
Если не один из перечисленных методов не помог избавиться от SYSTEM_LICENSE_VIOLATION», попробуйте переустановить Windows. Для того чтобы выполнить чистую установку Windows необходимо создать установочный диск или другой носитель с которого планируется осуществление установки операционной системы.
Загрузите компьютер из установочного диска. Для этого может понадобиться изменить устройство загрузки в BIOS или UEFI для более современных компьютеров.
Следуя пунктам меню установщика укажите диск, на который вы хотите установить Windows. Для этого понадобится отформатировать его. Если вас не устраивает количество или размер локальных дисков, их можно полностью удалить и заново перераспределить.
Помните, что форматирование, удаление или перераспределения дисков удалит все файлы с жесткого диска.
После указания диска для установки Windows запуститься процесс копирования системных файлов и установки операционной системы. Во время установки от вас не потребуется дополнительных действий. В течении установки экран компьютера будет несколько раз гаснуть на непродолжительное время, и для завершения некоторых этапов установки компьютер будет самостоятельно перезагружаться.
В зависимости от версии Windows на одном из этапов от вас может понадобиться выбрать или внести базовые параметры персонализации, режим работы компьютера в сети, а также параметры учётной записи или создать новую.
После загрузки рабочего стола чистую установку Windows можно считать законченной.
Примечание. Прежде чем приступить к выполнению чистой установки Windows заранее побеспокойтесь о наличии драйверов ко всем установленным устройствам и сохранности ваших файлов. Загрузите и сохраните драйвера на отдельный носитель информации, а для важных данных создайте резервную копию.
Как сбросить Windows 10 к исходному состоянию
Как сбросить Windows 10, 8, 7 если компьютер не загружается